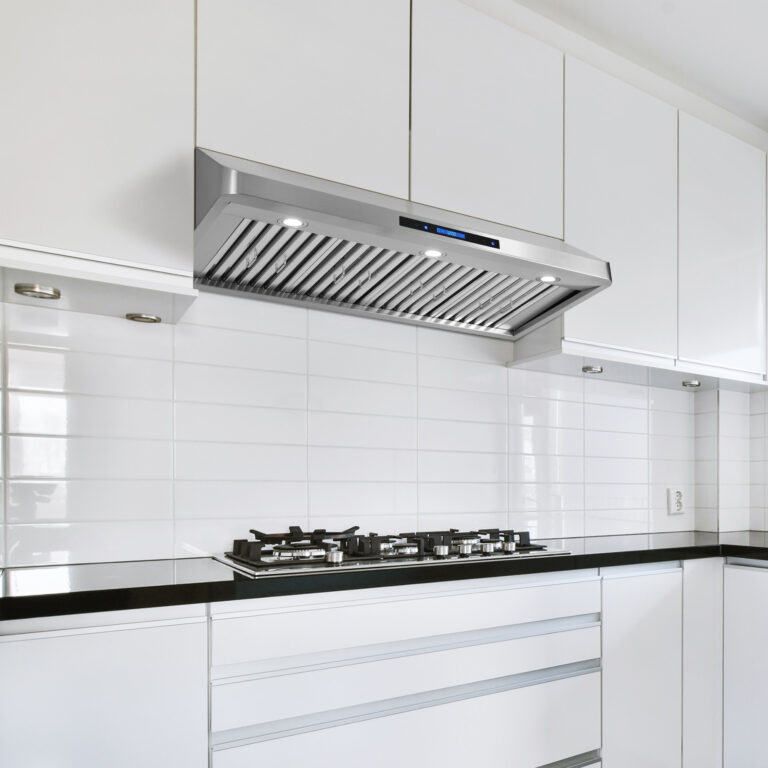
The Advantages and Benefits of the COS-QS48 48″ Stainless Steel Under Cabinet Range Hood
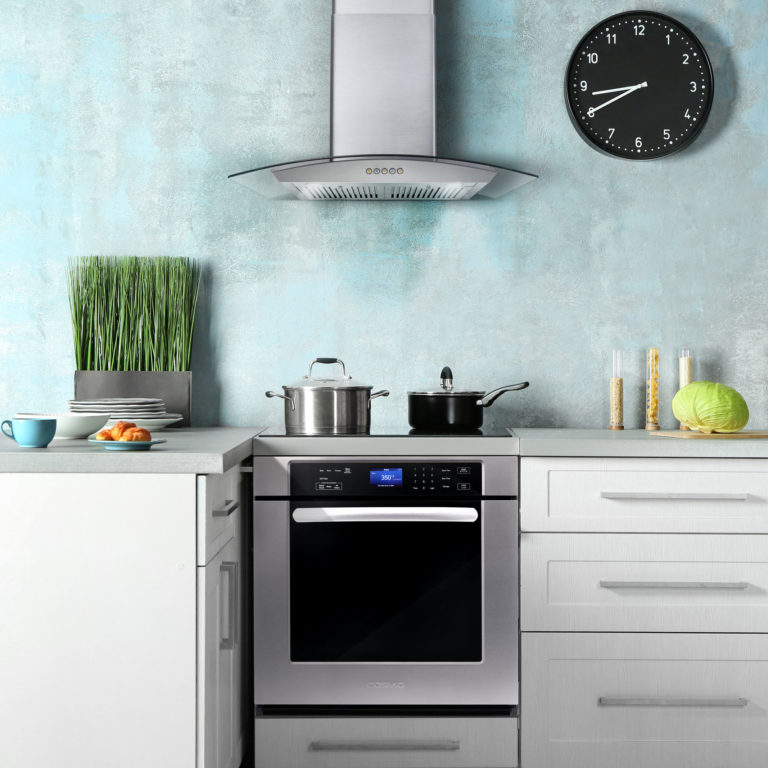
Range hood is an essential component of any well-equipped kitchen, especially in larger cooking spaces. The COS-QS48 48″ Stainless Steel Under Cabinet Range Hood with Remote and Digital Touch Controls by Cosmo Appliances is designed to deliver efficient performance and style. Let’s delve into the features and benefits that make this range hood an excellent choice for your kitchen. Efficient Suction and Airflow The COS-QS48 is equipped with high-performance dual motors that produce 500 CFM of suction. This airflow efficiently removes smoke, grease, and cooking odors, ensuring a clean and fresh kitchen environment. Whether you’re cooking on multiple burners or using high-heat settings, this range hood can handle it with ease. Premium Design and Durability Crafted from 430 grade 18 gauge stainless steel, the COS-QS48 boasts a premium brushed finish that not only looks sleek but is also easy to clean. Its pro-style industrial design with seamless corners fits perfectly under your kitchen cabinet, adding a touch of elegance to your cooking space. This range hood is built to withstand high temperatures, ensuring long-lasting durability. Quiet Operation Despite its suction capabilities, the COS-QS48 operates quietly, with noise levels as low as 40 dB on the lowest fan speed. This means you can maintain a peaceful kitchen environment even when the range hood is in use. User-Friendly Touchscreen and Remote Control The COS-QS48 features a touchscreen with a backlit LCD display, making it easy to operate. The touchscreen controls the 4-speed fan, bright white energy-efficient LEDs, and an auto-shutoff timer. For added convenience, this range hood comes with a wireless remote control, allowing you to adjust settings from anywhere in the kitchen. Bright and Energy-Efficient Lighting To ensure optimal visibility while cooking, the COS-QS48 is equipped with bright high lumen LED lights. These energy-saving lights illuminate your cooktop, making it easier to see what you’re preparing and enhancing your cooking experience. Durable and Easy-to-Clean Filters The range hood comes with Cosmo ARC FLOW permanent filters made of high-quality stainless steel. These filters effectively capture grease, keeping the air in your kitchen clean. They are also dishwasher-safe, making maintenance simple and convenient. Versatile Installation Options The COS-QS48 includes a 3-prong 120V power cord for easy installation and comes with flexible ducting. It can also be converted to ductless/recirculating operation with the purchase of a Carbon Filter Kit (CFK5), providing versatility to suit various kitchen setups. The COS-QS48 48″ Stainless Steel Under Cabinet Range Hood with Remote and Digital Touch Controls offers a perfect blend of efficiency, and style for larger kitchens. Its efficient suction, quiet operation, user-friendly controls, and durable construction make it a choice for those looking to enhance their cooking environment. Upgrade your kitchen with this range hood and enjoy a cleaner, more enjoyable cooking experience.