Year: 2021

How to Master Espresso Powder

If you’ve ever baked a chocolate or mocha-flavored cake, then you’ve probably seen a recipe call for espresso powder or instant espresso. This ingredient is a quick way to boost the flavor of the chocolate. You may also have seen espresso powder called for in dry spice rubs for meat, especially to grill. So what exactly is espresso powder? Here’s how to best utilize it, and what to do if you don’t have any on hand. Espresso is a very dark and concentrated instant coffee. It’s not just espresso beans that are grounded finely. These crystals will dissolve in liquid quickly. It’s also important to note that this isn’t technically made for a morning latte. Bakers primarily use it for flavoring cookies, cakes and more. An espresso powder is different from instant coffee in that it’s much more concentrated. Use this powder in your chocolate recipes to enhance flavor. A teaspoon won’t make them taste much like coffee. Using more than a teaspoon will start to bring out coffee flavors. If you ever find yourself without espresso powder, use instant espresso instead. Add 50% more than the amount of espresso powder a recipe usually calls for. Be mindful with instant espresso as it can taste harsh or sour if too much is used. Source: the Kitchn

How to Make the Best Homemade Breadcrumbs

Bread crumbs add texture, color and a crunch that immediately elevates any dish. You can sprinkle these on a dish to take a dinner from drab to delicious. While there are store-bought options out there, you can easily make your own. Breadcrumbs can come from any kind of bread or roll that can be going stale in the freezer. These breads are great to turn into crumbs. Sourdough French bread Rye Whole wheat or white sandwich bread Leftover hot dog and hamburger buns Use a food processor to quickly turn any bread into tiny bits. Tear the bread into smaller pieces and then pulse in the processor until the crumbs are coarse. If you have a thicker crust bread like French or sourdough you can also trim the crusts beforehand. Total time: 10 minsYield: 2 cups Ingredients: 4 slices bread, about 2 to 3 cups 2 tablespoons olive oil ¼ teaspoon dried thyme 1 pinch salt 1 pinch ground black pepper Directions: To make breadcrumbs quickly in a food processor, remove the crusts from the bread (if you want to), tear the bread into pieces, and pulse in a food processor until they form coarse crumbs. Pulse longer for finer crumbs.Freeze the crumbs for later or toast them to use within a few days. In a large skillet over medium-high heat, heat 2 tablespoons of olive oil. Add the bread crumbs (either fresh or frozen), thyme, salt, and ground black pepper. Cook, stirring constantly, for 5 to 6 minutes, or until the breadcrumbs are golden and crisp. Cool completely. Transfer to an airtight jar, and store on your countertop for up to a week. Source: Simply Recipes

Brownie in a Mug Recipe

Looking for one of the quickest desserts you can make? Brownie in a mug! Complete this recipe in just 5 minutes. Use a mug that is microwave safe, with no metal in the ceramic glaze. A regular 12 to 16 ounce mug will work best. Use a neutral oil or butter instead of an extra olive oil for a more mild oil taste. Prep time: 3 minsCook time: 2 minsTotal time: 5 minsServing: 1 serving Ingredients: 1/4 cup flour (30 g) 1/4 cup sugar (50 g) 2 tablespoons (13 g) cocoa (natural, unsweetened) Pinch of salt Tiny pinch of cinnamon 1/4 cup water (60 ml) 2 tablespoons (30 ml) melted butter, or neutral oil 1/8 teaspoon vanilla extract 1 small scoop of ice cream or 1 or 2 teaspoons heavy whipping cream to serve Directions: Add the dry ingredients to the mug and stir: Place flour, sugar, cocoa, salt, and cinnamon in a microwave safe ceramic mug. Stir with a fork or spoon to mix well and break up any clumps. Add the wet ingredients and stir: Add the butter or oil, water, and vanilla to the cup and stir until the mixture is smooth and there are no lumps. Zap in microwave: Place in microwave and heat on high until the mixture is cooked through, about a 1 minute and 40 seconds for a 1000 watt microwave, or 1 minute 10 seconds on a 1650 watt microwave. You may have to experiment and adjust the time for less or more powerful microwaves. If you don’t know the power level on your microwave, start with 60 seconds and increase until the brownie is done. It should still be moist when cooked through, not dry. Top with ice cream: Let cool for a minute and serve with a scoop of vanilla ice cream or a teaspoon or two of whipping cream poured over. Upgrading your microwave soon? Shop our entire catalog of Cosmo Appliances here. Source: Simply Recipes

Where to Start with Wood Flooring

Wood flooring is a highly versatile flooring that can work with virtually every interior style. But not all wood floorings are the same. The type, finish and species all play a critical role in not only the look, but how it will maintain over time. Solid vs. Engineered Solid wood floorboards are solid planks of hardwood. They’re common in older houses and can be sanded and restained many times. A drawback of hardwood is they may warp in humid environments. Engineered floorboards are made up of layers of wood veneer. These boards of tiny sheets of wood are more durable than solid wood and don’t warp. However, since these boards are made of thin layers, they usually cannot be refinished. These are a more permanent color decision while solid wood can be altered afterwards. Finish vs. Unfinished Floorboards can come in one of two ways, pre-finished or unfinished. A pre-finished floorboard will come with the stain already on them before installation. You won’t need to sand or stain them which will cut down on labor and time. They tend to be more expensive for this specific reason. An unfinished floorboard is sanded and stained on-site. You’ll have more control over the color and finish, while also cutting down on the price. However, they will require more labor and process for installation. Species Hardwood floors come in dozens of options, both new and reclaimed or salvaged from other building projects. Here’s a list of some of the most popular kinds. Oak. One of the most common floor types. Favored for its durability, wide grain and ability to stain in main different ways. Maple. A distinct grain pattern, finer than many other woods. These floors are more susceptible to rot from insects compared to other wood types. Cherry. An extremely durable wood, with a reddish hue and shiny texture. Bamboo. A lighter finish compared to other woods. Due to it being a woody grass, it’s more fragile than other hardwoods. Bamboo is a renewable resource. Pine. A wide variety in species due to the countless types of pines. It’s best to advise with an expert before selecting a specific type. Source: House Beautiful

The Easiest Chocolate Mousse Recipe

Chocolate mousse is an older dessert that can be intimidating with all its precise steps. Separating eggs, getting melted chocolate to the right temperature and careful folding can be overwhelming. However, there’s an easy two-ingredient version that anyone can do. It’s the perfect balance of creamy, rich and sweetness. Read more below on how to master this dessert. In the classic French version, a chocolate mousse uses egg whites for volume and egg yolks for creaminess. In this version, you’ll just need a simple ganache and whipped cream. Be sure to carefully whip the cream to medium peaks, otherwise you’ll end up with a grainy mousse. When folding the cream, be sure to do so gently into the chocolate in thirds. You can serve the chocolate mousse in small ramekins or even cocktail glasses. It’s perfect as a make-ahead dessert. Yield: Serves 4Prep time: 15 minutesCook time: 1 hour Ingredients: 1 1/2 cups cold heavy cream, divided 1 cup good-quality chocolate chips or coarsely chopped chocolate (6 ounces) Garnish options: grated chocolate or crunchy toppings, such as chopped nuts, toffee, or brittle Equipment: Measuring cups and spoons Chef’s knife and cutting board Large and medium mixing bowls Whisk Large spatula 4 serving dishes or ramekins Directions: Warm 1/2 cup cream and use it to melt the chocolate. Heat 1/2 cup of the cream in a microwave-safe bowl for 1 minute. Add 1 cup chocolate chips and stir to combine. Set the bowl aside for 5 minutes for the chocolate to melt. Whisk the chocolate and cream together. Whisk the chocolate and cream together until smooth. Set aside to cool while you whip the remaining cream. Beat the remaining cream to medium peaks. Place the remaining 1 cup cold cream in a medium bowl. Beat with an electric hand mixer or with a whisk by hand until soft peaks form. Transfer 1/2 cup to a small bowl and refrigerate for topping the finished mousse before serving. Continue whipping the remaining whipped cream until stiff peaks form. Fold the whipped cream into the chocolate in three additions. Fold the whipped cream into the cooled chocolate mixture with a large spatula in three additions. Work swiftly and gently and don’t stress if there are streaks of cream in the chocolate mousse. Portion the mousse and chill before serving. Divide the mixture between 4 ramekins or cocktail glasses. Refrigerate at least 1 hour and up to 4 before serving. Dollop with the reserved softly whipped cream and sprinkle with grated chocolate or chopped hazelnuts, if desired. Looking for your next kitchen upgrade? Check out our entire line of Cosmo Appliances including ranges, cooktops, ovens and more here.(link) Source: the Kitchn

What Oils to Use When Cooking

Oil has evolved over time. We have come a long way from shortening, margarine, lard and butter. Our pantries can have oils from all over the world. With all these choices, come more questions. Here’s a guide to cooking oils depending on different cooking methods. Smoke point. This is the temperature an oil will start to smoke. The smoke comes before burning. Not all oils behave the same when heated. Some oils are very stable and can heat to very high temperatures without issues, like avocado oil. Others, like walnut oil, will degrade quickly if heated too high. They will develop unhealthy compounds which shouldn’t be consumed. Unless you’re searing food, you typically don’t want the oil to be smoking hot for very long. Doing so can result in free radicals, which are not good for your body. When cooking with oils there’s some general guidelines you can follow. The higher the heat, the more stable your oil should be. In general, the lighter the color of the oil, the more neutral its flavor. Unrefined oils taste more like the thing they came from. Unfiltered oils are not lower in quality. They’re just not as good for high heat because they have tiny particles in them that will burn quickly. Searing. Use a refined neutral oil like canola oil, soy oil or vegetable oil. You’ll need the oil to smoke for a short period of time so you’ll need a highly stable kind. Sautéing. Use a flavorful or neutral oil like extra-virgin olive oil, avocado oil or grapeseed oil. You’ll want the skillet on medium to high heat, so a moderate to high smoke point oil is the way to go. Frying. Use a highly stable oil like peanut oil, avocado oil or vegetable oil. The temperature sometimes spikes between batches of food so you’ll need an oil with a higher smoke point. Source: Simply Recipes

How to Make Classic Irish Coffee

St. Patrick’s Day is here, but you can enjoy Irish coffee year round! The key to any Irish coffee is Irish whiskey. Look for a mid-range with a mild, sweet finish to counter the bitter coffee. A lightly whipped cream will give you a frothy cream collar on top. If you prefer a high pile of cream, you’ll need to whip it to medium-stiff peaks. Use an unsweetened whipped cream to keep the sweetness contained in the coffee. Yield: Makes 1 drink Ingredients: 6 ounces hot, freshly brewed coffee 1 teaspoon granulated sugar 1 teaspoon packed brown sugar 1 1/2 ounces Irish whiskey Freshly whipped cream Equipment: Heatproof glass or mug Directions: Preheat your mug, then fill with coffee. Pour hot water into a mug or heatproof glass to take the chill off. Pour out the water. This will also prevent your glass from cracking. Fill the mug about 3/4 full with the coffee. Add sweetener. Add the granulated and brown sugars and stir until fully dissolved. Add Irish whiskey. Add the whiskey and stir to incorporate. Top with whipped cream. If using lightly whipped cream, pour it slowly over a warm spoon onto the coffee, being careful not to break the coffee’s surface. This takes some practice. A more foolproof way to not break the surface is to whip the cream a bit more and dollop it gently on top. Drink while hot! Source: the Kitchn

The Perfect Lemon Tart Recipe

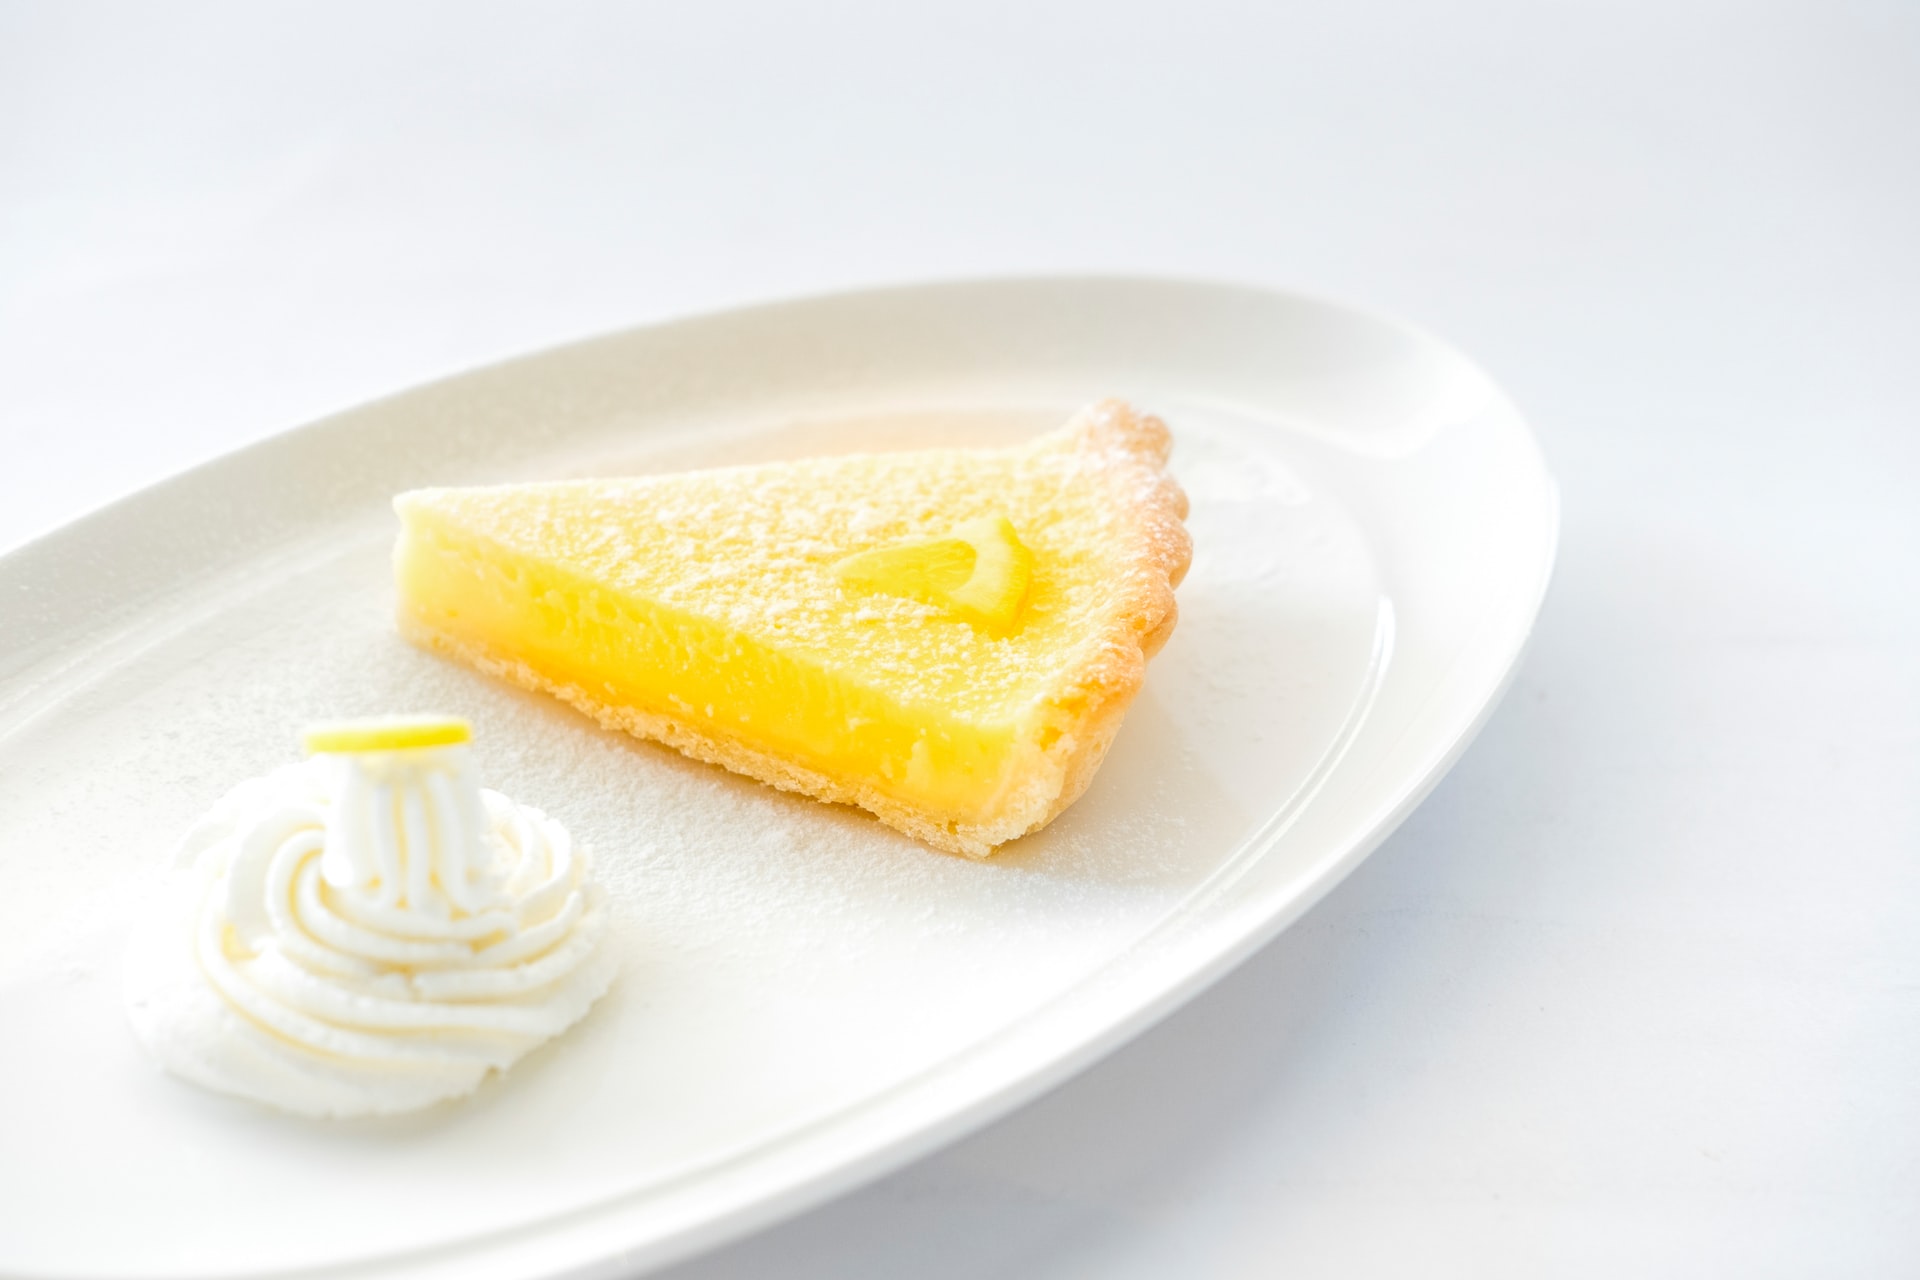
Prepare the ultimate dessert. A buttery crust and zingy lemon filling, it’s perfect for any upcoming holiday occasion. Make the zest, dough and tart a few days in advance. Learn more below. Prep time: 90 minsCook time: 25 minsTotal: 115 minsServings: 6 to 8 slices Ingredients: For the candied zest: 1 cup lemon zest, julienned 1 cup granulated sugar For the crust: 1 1/2 cups (200 g) flour 1/2 teaspoon salt 1/2 cup (50 g) powdered sugar 1/2 cup (1 stick, or 1/4 pound, 112 g) unsalted butter, softened at room temperature 1 large egg, beaten 1/4 teaspoon almond extract 1 teaspoon lemon zest For the lemon filling: 1/2 cup (1 stick) unsalted butter1/4 cup crème fraîche (can sub sour cream)2 large eggs3 large egg yolks3/4 cup fresh lemon juice3/4 cup (150 g) granulated sugar1 1/2 teaspoon lemon zest Directions: Place lemon zest in a saucepan and cover with water by 1/2 inch. Bring to a boil. Remove from heat, drain the water. Fill up with water again and repeat. Bring to a boil, remove from heat, then drain.Add water again, this time adding the sugar as well. Simmer for 30 minutes, drain. Spread the zest out on a sheet of parchment paper. Let dry overnight at room temperature (do not put in the refrigerator). (Tip: if you wrap the zest strands around a chopstick and let them dry wrapped, then the next day when you unwrap them, they’ll hold a curly form.)The next day toss the zest with a little more sugar. Whisk together the flour, salt, and powdered sugar in a bowl. Add the butter and either use your (clean) fingers, or use a pastry blender, to mix the butter into the flour until the dough forms flaky crumbs and lumps. Try to make sure that all of the flour is coated with some butter.With a wooden spoon, mix in the egg, 1/4 teaspoon almond extract, and 1 teaspoon of lemon zest. Continue to mix until the dough clumps. Shape into a ball, flatten into a disk, wrap in plastic, refrigerate at least an hour or up to 2 days in advance. Preheat oven to 350°F If the dough has chilled overnight, let it sit at temperature for at least 10-15 minutes before attempting to work with it. This allows the dough to relax enough to become somewhat pliable before rolling out.Roll out the dough by either sprinkling the dough and rolling surface with little flour, or you can roll the dough out between two sheets of parchment paper. Roll the dough out to a circle 2 inches wider in diameter than your tart pan (about a 12-inch round).Press the dough into the tart pan. Use your rolling pin to level the dough along the edges of the pan. Freeze for 30 minutes. Place aluminum foil over the foil and gently mold it to the dough in the pan. Add pie weights (dried beans, sugar, rice, or ceramic pie weights).Bake at 350°F for 20 minutes. Remove from oven, lift the sides of the aluminum foil to remove the pie weights, and let the crust cool. Melt butter and crème fraîche together over a double boiler, stirring to combine. (If you don’t have a double boiler, bring a couple inches of water to simmer in a saucepan, place a stainless steel or pyrex bowl on top of the saucepan, making sure the bottom of the bowl is not touching the simmering water.) Remove top pan from heat and set aside.In a second bowl over the double boiler, whisk the eggs and egg yolks just long enough to warm them. Remove from heat and beat in the butter mixture, then the lemon juice.Strain the mixture through a sieve into a clean bowl and place over the simmering water. Add the sugar and zest and whisk until warm to touch, about 4 minutes. Pour the lemon filling into the crust and bake at 350°F for 25 minutes or until set in the middle. Let cool on a rack. Chill in the refrigerator. When ready to serve, top the tart with candied lemon zest. Are you looking to bake pastries and meals with an upgraded luxury appliance? Click here to learn more about Cosmo Ranges and Ovens. Source: Simply Recipes

How to Caramelize Onions

A caramelized onion brings out a deep, rich, and sweet flavor. Slowly cooking them in a little olive oil is a great way to pull out all the flavor from the simplest of ingredients. As you slowly cook onions over time the natural sugars caramelize, making the best topping to steaks, onion soups or pizza. Learn how below. Prep time: 10 minsCook time: 45 minsTotal time: 55 minsYield: 2 cups Ingredients: Several medium or large onions, yellow, white, or red Extra virgin olive oil Butter (optional) Salt Sugar (optional) Balsamic vinegar (optional) Directions: Slice 1/2-inch off the stem ends of the onions and the roots off of the root end. Place the onions cut side down on the cutting board. Cut them in half through the root end. Peel back the peels from the onions.Lay the onions cut side down and make angled cuts into each onion, aimed at the center, cutting almost all the way, but not completely through the root end. Make the cuts to your desired level of thickness.The root end will help hold the onion together as you cut it, making it easier to cut. Then cut a V in the root end to cut out the tough root holding the slices together. Use a wide, thick-bottomed sauté pan for maximum pan contact with the onions. Coat the bottom of the pan with olive oil, or a mixture of olive oil and butter (about 1 teaspoon per onion). Heat the pan on medium high heat until the oil is shimmering. Add the onion slices and stir to coat the onions with the oil. Spread the onions out evenly over the pan and let cook, stirring occasionally.Depending on how strong your stovetop burner is you may need to reduce the heat to medium or medium low to prevent the onions from burning or drying out.After 10 minutes, sprinkle some salt over the onions, and if you want, you can add some sugar to help with the caramelization process. (about a teaspoon of sugar for 5 onions) One trick to keeping the onions from drying out as they cook is to add a little water to the pan. Let cook for 30 minutes to an hour more, stirring every few minutes. As soon as the onions start sticking to the pan, let them stick a little and brown, but stir them before they burn.The trick is to leave them alone enough to brown (if you stir them too often, they won’t brown), but not so long so that they burn. After the first 20 to 30 minutes you may want to lower the stove temperature a little, and add a little more oil, if you find the onions are about to burn.A metal spatula will help you scrape up the browned bits from the bottom of the pan as the caramelization proceeds. As the onions cook down, you may find you need to scrape the pan every minute, instead of every few minutes.Continue to cook and scrape, cook and scrape, until the onions are a rich, browned color. At the end of the cooking process you might want to add a little balsamic vinegar or wine to help deglaze the pan and bring some additional flavor to the onions.Store refrigerated for several days in an air-tight container. Source: Simply Recipes

Homemade Chicken Fingers Recipe

Make these crispy chicken fingers that you can bake immediately or freeze to bake later. Pair it with a delicious red pepper-basil dipping sauce for the perfect combination the whole family will love. Prepare these in a short amount of time for a weeknight meal. Total: 45 minActive: 25 minYield: 6 servings Ingredients: Chicken Fingers: 2 cups corn flake cereal 2 ounces whole-wheat Melba toast 1/3 cup finely grated Parmesan 1 tablespoon finely chopped fresh parsley, optional 1/2 teaspoon sweet paprika Kosher salt 2 large egg whites 2 pounds chicken tenders Red Pepper-Basil Dipping Sauce: 1/2 cup 2-percent Greek yogurt 2 tablespoons chopped fresh basil 2 tablespoons chopped roasted red pepper 1/2 teaspoon white wine vinegar 1 small clove garlic, grated Kosher salt Nonstick cooking spray Instructions: For the chicken fingers: Combine the cereal, melba toast, Parmesan, parsley if using, paprika and 1/2 teaspoon salt in a large resealable bag and, using the bottom of a skillet or rolling pin, crush into a coarse meal. Dump out into a shallow dish. Whisk the egg whites with 2 tablespoons water in another shallow dish. Dip the chicken tenders into the egg white, shake off the excess, and coat thoroughly in the coating. Bake immediately, or refrigerate up to 1 hour before baking. To freeze, arrange the breaded chicken tenders on a baking sheet and freeze until hard, 1 to 2 hours. Store in resealable freezer bags for up to 1 month. For the sauce: Combine the yogurt, basil, red pepper, 1 tablespoon water, vinegar, garlic and salt to taste in a small bowl; stir together. Wrap and refrigerate until ready to serve. Preheat the oven to 425 degrees F. Fit a rimmed baking sheet with a wire rack and spray with cooking spray. Generously spray the fresh or frozen chicken tenders all over with cooking spray. Arrange on the prepared rack and bake, flipping halfway through, until golden and crispy and cooked through, 15 to 20 minutes (if frozen, 20 to 25 minutes). Remove from the oven and season with salt. Serve with the dipping sauce. Source: Food Network