Cooking

Unlocking the Secret to Easy Jar Opening: The Rubber Band Hack

Struggling to open that stubborn jar lid? We’ve all been there – twisting, turning, and exerting all our strength to no avail. But fear not, because we’re about to let you in on a game-changing kitchen hack: the rubber band trick. By simply wrapping a rubber band around the lid of a stubborn jar, you can achieve extra traction and leverage, making it infinitely easier to open, even the most tightly sealed jars. The Rubber Band Hack: How It Works It’s a simple yet ingenious solution to a common kitchen dilemma. The rubber band creates friction between your hand and the lid, providing a secure grip and preventing your hand from slipping. This extra traction gives you the leverage you need to twist open even the most stubborn jars with minimal effort. How to Use the Rubber Band Hack 1. Select Your Rubber Band: Choose a rubber band that is wide and thick enough to provide a good grip. A standard-sized rubber band from your office supply drawer should do the trick. 2. Wrap the Rubber Band Around the Lid: Place the rubber band around the circumference of the jar lid, ensuring that it sits snugly against the lid’s surface. You may need to wrap the rubber band around the lid multiple times for maximum traction. 3. Twist Open with Ease: With the rubber band in place, grip the jar firmly with one hand and use your other hand to twist the lid open. The rubber band will provide the extra traction and leverage you need to loosen even the most stubborn lids effortlessly. The rubber band hack works by increasing the coefficient of friction between your hand and the jar lid. When you twist the lid, the rubber band grips the lid’s surface, preventing slippage and allowing you to exert more force without your hand sliding off. This extra traction makes it easier to break the seal and loosen the lid, even if it’s tightly sealed. With the rubber band hack in your arsenal, you’ll never have to struggle with stubborn jar lids again. Whether you’re opening a jar of pickles, pasta sauce, or peanut butter, this simple yet effective trick will save you time, effort, and frustration in the kitchen. So go ahead, give it a try, and prepare to be amazed at how much easier it is to open even the most tightly sealed jars with just a rubber band and a little leverage.

Waste Not, Want Not: Save Vegetable Scraps for Homemade Broth or Stock

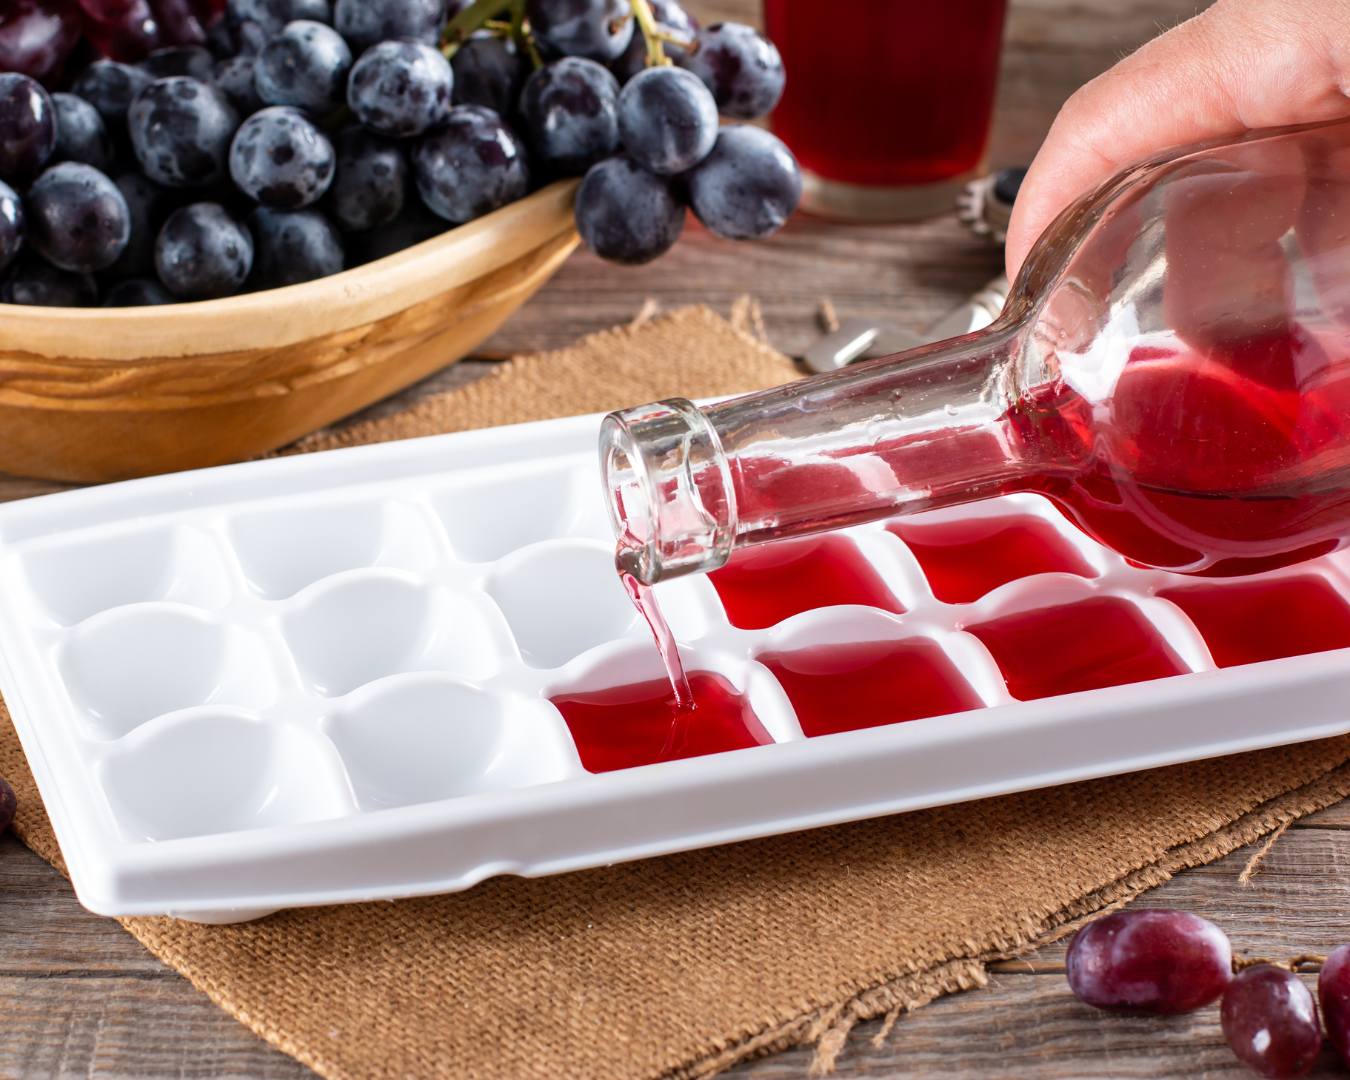
In a world that’s increasingly conscious of reducing waste and embracing sustainability, one of the simplest yet often overlooked practices is utilizing vegetable scraps to create homemade broth or stock. Beyond the environmental benefits, homemade broth is a flavorful base for soups, stews, sauces, and countless other recipes. Let’s delve into why saving vegetable scraps for broth-making is a culinary and eco-friendly win-win. Maximizing Flavor and Nutrition: Vegetable scraps, including onion skins, carrot ends, celery tops, and herb stems, may seem like kitchen waste, but they’re actually treasure troves of flavor and nutrients. These scraps are packed with vitamins, minerals, and aromatic compounds that can infuse your broth with rich, complex flavors. Cost-Effective and Budget-Friendly: Making broth from vegetable scraps is not only environmentally friendly but also economical. Instead of buying pre-packaged broth or stock, which can be costly and often contain additives and preservatives, you can repurpose ingredients you might have otherwise discarded, saving money while reducing waste. Customizable and Versatile: One of the beauties of homemade broth is its versatility. You have full control over the ingredients, allowing you to tailor the flavor profile to suit your preferences. Whether you prefer a classic vegetable broth, a hearty mushroom stock, or a savory herb-infused base, the possibilities are endless. Simple and Convenient: Making vegetable broth from scraps is remarkably simple and requires minimal effort. Collect vegetable scraps in a designated container or bag in the freezer until you have a sufficient amount. Then, simmer the scraps with water, aromatics like garlic and peppercorns, and optional seasonings for about an hour or more to extract maximum flavor. Reducing Food Waste: According to the Food and Agriculture Organization of the United Nations, approximately one-third of all food produced for human consumption is lost or wasted globally each year. By repurposing vegetable scraps for broth, you’re doing your part to combat food waste and minimize your environmental footprint. Health Benefits: Homemade vegetable broth is not only delicious but also nutritious. It’s low in calories and fat, making it a healthy alternative to store-bought broths that may contain added sodium and artificial ingredients. Plus, by using organic scraps, you can ensure your broth is free from pesticides and other harmful chemicals. Storage and Preservation: Once you’ve made a batch of homemade broth, you can store it in the refrigerator for up to a week or freeze it in convenient portions for later use. Freezing broth in ice cube trays or freezer bags allows you to thaw only the amount you need, reducing waste even further. Incorporating homemade vegetable broth into your culinary repertoire is a simple yet impactful way to reduce waste, save money, and elevate the flavor of your dishes. By embracing the practice of saving vegetable scraps, you not only contribute to a more sustainable food system but also gain the satisfaction of knowing that you’re making the most of every ingredient in your kitchen. So, next time you’re chopping vegetables, think twice before tossing those scraps—your next batch of flavorful broth awaits!

Freeze Ripe Bananas for Smoothies or Baking: A Handy Guide

Ripe bananas are a versatile and nutritious ingredient, perfect for smoothies, baking, and even snacking. However, they ripen quickly and can turn mushy if not used in time. Freezing ripe bananas is an excellent way to preserve them, reduce food waste, and always have them ready for your culinary needs. Here’s a step-by-step guide to freezing ripe bananas, along with tips on how to use them in smoothies and baking. Why Freeze Ripe Bananas? 1. Convenience Frozen bananas are a quick and easy addition to smoothies and baked goods. They eliminate the need for ice in smoothies, giving a creamy texture without diluting the flavor. 2. Reduce Waste Bananas can overripen quickly. Freezing them ensures you don’t have to throw them away, saving money and reducing food waste. 3. Nutritional Benefits Bananas are rich in potassium, vitamin C, and dietary fiber. Freezing them preserves these nutrients, making them a healthy addition to your diet. How to Freeze Ripe Bananas Step 1: Choose Ripe Bananas Select bananas that are fully ripe with brown spots. These are the sweetest and most flavorful. Step 2: Peel the Bananas Remove the peels, as they can be difficult to remove once frozen. Step 3: Slice or Mash Decide how you plan to use the bananas: Step 4: Arrange on a Baking Sheet Place banana slices or mounds of mashed banana on a parchment-lined baking sheet. Ensure they are in a single layer and not touching to prevent sticking. Step 5: Freeze Until Solid Place the baking sheet in the freezer for 2-3 hours or until the bananas are solid. Step 6: Transfer to a Storage Container Once frozen, transfer the banana pieces or mashed banana to a freezer-safe bag or container. Label with the date and type (sliced or mashed) for easy identification. Step 7: Store Properly Store the container in the freezer. Bananas can be kept frozen for up to 6 months. Using Frozen Bananas In Smoothies Frozen bananas add a creamy texture and natural sweetness to smoothies. Here’s a simple smoothie recipe: Ingredients: Instructions: In Baking Frozen bananas are excellent for baking banana bread, muffins, and pancakes. Here’s a basic banana bread recipe: Ingredients: Instructions: Tips for Freezing Bananas By freezing ripe bananas, you can enjoy their delicious flavor and nutritional benefits anytime. Whether you’re blending a quick smoothie or baking a batch of banana bread, frozen bananas are a convenient and versatile ingredient to have on hand.

Setting Up a Family Cookbook or Recipe Exchange: A Heartwarming Tradition

Food has a unique way of bringing people together, especially within families. From grandma’s secret apple pie recipe to dad’s famous barbecue sauce, the culinary creations passed down through generations are treasures worth preserving. Setting up a family cookbook or recipe exchange is a wonderful way to celebrate these traditions, share beloved recipes, and create a lasting legacy. Here’s a guide to get you started on this heartwarming project. Why Create a Family Cookbook or Recipe Exchange? 1. Preserve Family Heritage Recipes often tell the story of a family’s heritage and culture. Preserving them ensures that future generations can enjoy and appreciate these culinary traditions. 2. Strengthen Family Bonds Sharing recipes and cooking together can strengthen family connections. It’s an opportunity to gather, reminisce, and create new memories. 3. Share Culinary Skills Everyone has their own cooking tips and tricks. A family cookbook or recipe exchange allows members to share their expertise and learn from each other. 4. Create a Legacy A well-crafted family cookbook can become a cherished heirloom, passed down through generations, keeping the family’s culinary traditions alive. Steps to Create a Family Cookbook Step 1: Gather Recipes Start by collecting recipes from family members. Reach out to relatives and ask them to contribute their favorite dishes, along with any special stories or memories associated with them. Tips for Gathering Recipes: Step 2: Organize the Recipes Organize the recipes into categories for easy navigation. Common categories include: Step 3: Design the Cookbook Decide on the format and design of your cookbook. You can choose to create a physical book or a digital version. Physical Cookbook: Digital Cookbook: Step 4: Add Personal Touches Make your cookbook special by adding personal touches: Step 5: Print and Distribute Once the cookbook is complete, print copies for family members or share the digital version. Consider having a family gathering to celebrate the launch of the cookbook. Setting Up a Recipe Exchange Step 1: Choose a Platform Decide how you want to facilitate the recipe exchange. Options include: Step 2: Set Guidelines Establish guidelines for the exchange to ensure consistency and participation. Step 3: Encourage Participation Motivate family members to participate by: Step 4: Maintain Engagement Keep the recipe exchange active and engaging by: Creating a family cookbook or setting up a recipe exchange is a rewarding project that celebrates family traditions, fosters connections, and preserves culinary heritage. Whether you opt for a beautifully printed cookbook or a dynamic recipe exchange, the result will be a treasured collection of family favorites that can be enjoyed for generations to come.

How to Grill Like a Pro: Tips for Success on the BBQ

Grilling is more than just a cooking method – it’s an art form that brings friends and family together, creating unforgettable memories over delicious, smoky flavors. Whether you’re a seasoned griller or just starting out, these tips will help you master the BBQ and impress everyone at your next cookout. Start with a Clean Grill A clean grill is essential for great grilling. Before you start, make sure to clean the grates with a wire brush to remove any residue from previous cooking sessions. This prevents sticking and ensures even cooking. Preheat Your Grill Preheating your grill is crucial. It helps to create those beautiful sear marks and ensures that your food cooks evenly. Aim to preheat for at least 15 minutes before adding any food. Oil the Grates To prevent sticking, oil your grill grates before cooking. Use a paper towel soaked in oil and, using tongs, rub it over the grates. This creates a non-stick surface, making it easier to flip your food. Use the Right Tools Invest in good quality grilling tools such as long-handled tongs, spatulas, and a meat thermometer. These tools not only make grilling easier but also help you cook food to the perfect temperature safely. Control the Heat Different foods require different grilling techniques. Use direct heat for quick-cooking items like steaks, burgers, and vegetables, and indirect heat for slower-cooking items like ribs, roasts, and whole chickens. This method allows you to cook food evenly without burning the exterior. Don’t Overcrowd the Grill Give your food enough space to cook properly. Overcrowding the grill can lead to uneven cooking and can also cause flare-ups. Cook in batches if necessary to ensure everything is perfectly grilled. Use a Meat Thermometer To achieve the perfect doneness, use a meat thermometer. It takes the guesswork out of grilling and ensures your meat is cooked to the right temperature. Here’s a quick guide: Let It Rest Allow your meat to rest for a few minutes after grilling. This lets the juices redistribute, resulting in a juicier and more flavorful bite. Tent your meat with aluminum foil and let it rest for 5-10 minutes. Experiment with Marinades and Rubs Marinades and rubs are great ways to add flavor to your grilled foods. Marinate your meat for at least 30 minutes before grilling, or use a dry rub to create a flavorful crust. Experiment with different combinations of herbs, spices, and liquids to find your favorite flavors. Practice Patience Grilling is a skill that improves with practice. Don’t be afraid to experiment with different techniques and recipes. Over time, you’ll learn the nuances of your grill and develop a knack for knowing when your food is perfectly cooked. Bonus Tips for BBQ Success Grilling like a pro is all about preparation, technique, and a willingness to experiment. With these tips in your grilling arsenal, you’re well on your way to BBQ success. So fire up the grill, invite some friends over, and enjoy the delicious rewards of your efforts.

Baking Hack: Mess-Free Batters with Ziploc Bags

Baking is a beloved pastime for many, but it often comes with its fair share of messes—especially when it comes to dispensing batter. Traditional pouring methods can lead to drips, spills, and uneven distribution, leaving behind a kitchen in need of serious cleanup. But fear not, there’s a simple solution that can revolutionize the way you bake: Ziploc bags. By filling a Ziploc bag with pancake or cake batter and snipping off a corner, you can effortlessly squeeze out perfect portions with minimal mess. Explore how this clever baking hack can streamline your baking process and leave you with delicious treats and a clean kitchen. The Ziploc Bag Method: The Ziploc bag method is as simple as it sounds. Start by preparing your batter according to your favorite recipe. Once your batter is ready, spoon it into a sturdy Ziploc bag, squeezing out any excess air before sealing it shut. Next, carefully snip off one of the bottom corners of the bag with scissors, creating a small opening for the batter to flow through. For pancakes, squeeze the batter directly onto a hot griddle in circular motions, creating perfectly round pancakes every time. For muffins or cupcakes, squeeze the batter directly into muffin tins, filling each cup to the desired level. The controlled flow of batter from the Ziploc bag ensures even distribution and precise portions, resulting in beautifully uniform baked goods. Benefits of Using Ziploc Bags: The Ziploc bag method offers several benefits beyond just mess-free baking. Firstly, it eliminates the need for additional utensils like measuring cups or ladles, reducing the number of dishes to clean up afterward. Secondly, it allows for greater precision and control, especially when filling intricate molds or shaping delicate pastries. Additionally, Ziploc bags are easy to store and transport, making them ideal for on-the-go baking or outdoor cooking adventures. Tips for Success: While the Ziploc bag method is simple, there are a few tips to keep in mind to ensure success. Use sturdy freezer-grade Ziploc bags to prevent leaks or tears during squeezing. When snipping the corner of the bag, start with a small opening and gradually increase the size as needed to control the flow of batter. And finally, practice makes perfect—experiment with different techniques and adjustments until you find what works best for you. Say goodbye to messy pouring methods and hello to effortless baking with the Ziploc bag method. Whether you’re whipping up a batch of pancakes for breakfast or baking a batch of muffins for a special occasion, this clever baking hack will streamline your process and leave you with delicious treats and a clean kitchen. So next time you reach for the mixing bowl, don’t forget the Ziploc bags—they just might become your new favorite kitchen tool.

Keep Ginger Fresh Longer by Storing It in the Freezer

Ginger is a versatile ingredient that adds a delightful zing to both savory and sweet dishes. However, it can spoil quickly if not stored properly. To keep ginger fresh for longer and make it more convenient to use, try storing it in the freezer. Here’s how to do it, along with the benefits of this simple hack. Why Store Ginger in the Freezer? 1. Extended Shelf Life: Fresh ginger can start to wilt and dry out within a week when stored at room temperature or in the refrigerator. Freezing ginger extends its shelf life for several months, ensuring you always have fresh ginger on hand. 2. Easy to Grate: Frozen ginger is much easier to grate than fresh. The fibrous texture of ginger becomes more manageable when it’s frozen, allowing you to grate it finely without the strings getting in the way. 3. Convenient Portions: Freezing ginger makes it easy to portion out exactly what you need for a recipe. You can freeze it in various forms to suit your cooking style, from whole pieces to pre-grated portions. How to Freeze Ginger 1. Freeze Whole Ginger: Simply place the whole, unpeeled ginger root in a freezer-safe bag or container. When you need some ginger, take it out of the freezer and grate the amount you need directly from the frozen piece. Return the remaining ginger to the freezer for future use. 2. Freeze Sliced or Chopped Ginger: Peel and slice or chop the ginger into desired sizes. Spread the pieces out on a baking sheet lined with parchment paper and freeze until solid. Transfer the frozen ginger pieces to a freezer-safe bag or container. This method allows you to grab pre-portioned pieces of ginger as needed. 3. Freeze Grated Ginger: Grate the ginger and place it in small mounds or portions on a baking sheet lined with parchment paper. Freeze until solid, then transfer the portions to a freezer-safe bag or container. This is perfect for adding a quick burst of flavor to your dishes without any prep work. 4. Use Ice Cube Trays: Grate or finely chop the ginger and place it into the compartments of an ice cube tray. Add a small amount of water to each compartment to cover the ginger. Freeze until solid, then pop the ginger cubes out and store them in a freezer-safe bag or container. This method is ideal for adding ginger to teas, soups, and stews. Tips for Using Frozen Ginger By freezing ginger, you ensure it stays fresh and flavorful, ready to enhance your favorite recipes. This simple storage hack not only reduces waste but also makes it easier to incorporate this healthy and aromatic root into your cooking. Give it a try and enjoy the convenience and extended freshness of frozen ginger!

Cooking for Heart Health: Delicious Recipes and Tips for a Healthy Heart

Cardiovascular disease remains one of the leading causes of death globally, making it crucial to adopt a heart-healthy diet. A diet rich in specific nutrients can significantly reduce the risk of heart disease. Here, we’ll explore the importance of a heart-healthy diet, share recipes that promote heart health, and highlight ingredients known to support cardiovascular well-being. The Importance of a Heart-Healthy Diet A heart-healthy diet is vital for preventing cardiovascular disease. It helps lower cholesterol levels, reduce blood pressure, maintain a healthy weight, and prevent the buildup of plaque in the arteries. Key components of such a diet include: Heart-Healthy Recipes 1. Salmon and Spinach Salad Ingredients: Instructions: 2. Walnut and Herb-Crusted Chicken Ingredients: Instructions: 3. Mediterranean Quinoa Salad Ingredients: Instructions: Tips for Reducing Sodium and Saturated Fat Adopting a heart-healthy diet is a powerful step in preventing cardiovascular disease. By incorporating nutrient-rich foods like leafy greens, fatty fish, nuts, and olive oil, you can promote heart health and enjoy delicious, satisfying meals. Use these recipes and tips to create a healthier lifestyle for you and your family, ensuring a heart-friendly diet that doesn’t compromise on flavor.

Ingredient Spotlights: Exploring the Health Benefits of Common Cooking Ingredients

In the world of cooking, ingredients are more than just components of a recipe—they are nutritional powerhouses that fuel our bodies and support our overall health and well-being. Shine a spotlight on a variety of common cooking ingredients, exploring their health benefits and highlighting the important role they play in creating a balanced and nutritious diet. Leafy Greens Leafy greens such as spinach, kale, and Swiss chard are packed with vitamins, minerals, and antioxidants that support immune function, eye health, and bone strength. Incorporate leafy greens into your meals for an extra dose of fiber, which aids in digestion and promotes heart health. Lean Proteins Lean proteins like chicken breast, turkey, tofu, and fish are essential for building and repairing tissues, maintaining muscle mass, and supporting a healthy metabolism. Opt for lean proteins over fatty cuts of meat to reduce saturated fat intake and promote weight management. Whole Grains Whole grains such as brown rice, quinoa, oats, and barley are rich in fiber, vitamins, and minerals that help regulate blood sugar levels, promote digestive health, and reduce the risk of chronic diseases. Swap refined grains for whole grains in your meals to increase nutrient intake and promote long-term health. Colorful Vegetables Colorful vegetables like bell peppers, carrots, tomatoes, and sweet potatoes are loaded with antioxidants and phytonutrients that protect against inflammation, oxidative stress, and chronic diseases. Aim to fill half your plate with colorful vegetables to maximize nutrient intake and support overall health and vitality. Healthy Fats Healthy fats found in avocados, nuts, seeds, and olive oil provide essential fatty acids that support brain health, reduce inflammation, and promote heart health. Incorporate healthy fats into your meals in moderation to enhance flavor and increase satiety without compromising health. Fresh Herbs and Spices Fresh herbs and spices such as basil, cilantro, turmeric, and cinnamon not only add flavor and aroma to dishes but also boast a wide range of health benefits. Experiment with different herbs and spices in your cooking to enhance the nutritional value of your meals and support overall well-being. By incorporating a variety of nutrient-rich ingredients into your cooking, you can create delicious and wholesome meals that nourish your body and support your health goals. Whether you’re enjoying a colorful salad packed with leafy greens and vegetables or savoring a hearty bowl of whole grain pasta topped with lean protein and fresh herbs, each ingredient plays a vital role in promoting optimal health and vitality. So, embrace the diversity of ingredients available to you and let your meals be a celebration of flavor, nutrition, and well-being.

Prevent Slipping While Cooking: The Simple Trick of Using a Damp Paper Towel Under Your Cutting Board

Cooking in the kitchen involves a variety of tasks, from chopping vegetables to slicing meats. However, one common challenge that many home chefs face is keeping their cutting board stable and secure while working. A slipping cutting board can not only be frustrating but also dangerous, potentially leading to accidents and injuries. Fortunately, there’s a simple and effective solution to this problem: using a damp paper towel under your cutting board. Explore why this trick works and how you can implement it in your kitchen. Why Does It Work? The primary reason why placing a damp paper towel under a cutting board helps prevent slipping is friction. When you dampen a paper towel and place it between the cutting board and the countertop, it creates a slight adhesive effect. This helps to grip the surface underneath the cutting board, reducing the likelihood of it sliding around while you’re chopping, slicing, or dicing ingredients. Additionally, the moisture from the paper towel creates a small barrier between the cutting board and the countertop, further enhancing stability. How to Use a Damp Paper Towel: Using a damp paper towel to prevent slipping is a straightforward process. Here’s a step-by-step guide: Additional Tips: Cooking should be an enjoyable and safe experience, and preventing a cutting board from slipping is an important aspect of kitchen safety. By using a damp paper towel under your cutting board, you can create a more stable and secure working surface, reducing the risk of accidents and injuries. This simple yet effective trick is easy to implement and can make a significant difference in your cooking routine. Try it out during your next meal preparation and experience the benefits firsthand!