Mastering the Art of Presentation: How to Create a Beautifully Plated Dish
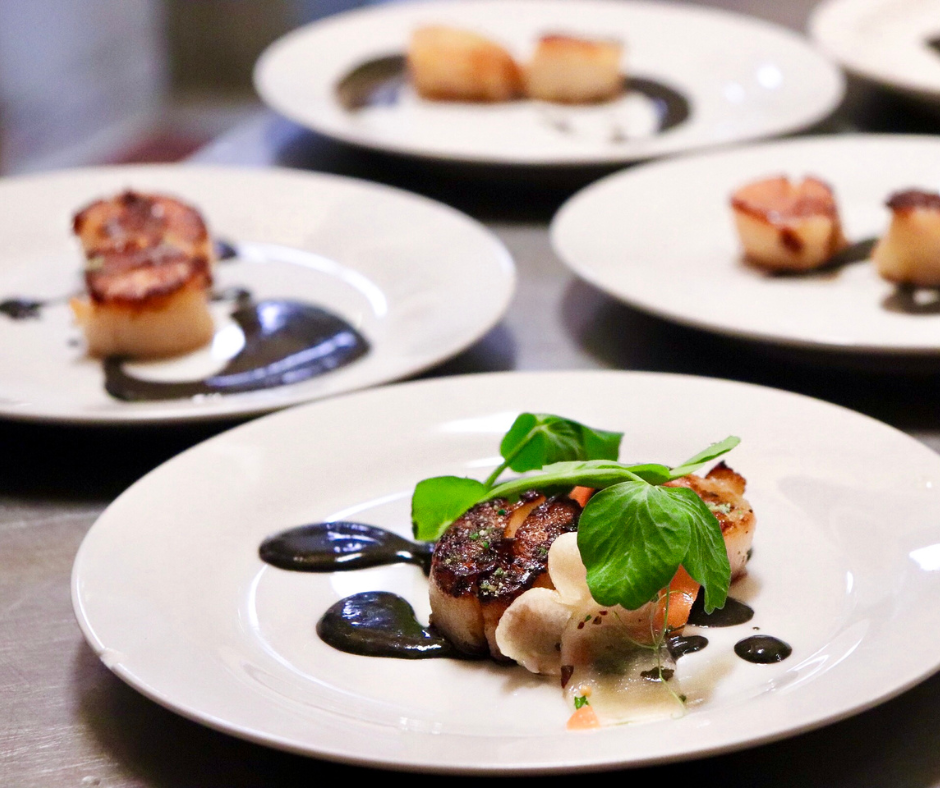
They say we eat with our eyes first, and nowhere is this more evident than in the world of culinary arts. The presentation of a dish is often just as important as its taste, captivating diners and elevating their dining experience to new heights. Whether you’re a home cook looking to impress guests or a professional chef striving for culinary perfection, mastering the art of plating is essential. Explore some expert tips and tricks for creating beautifully plated dishes that are sure to dazzle the senses. Start with a Clean Canvas: Just like a painter begins with a blank canvas, a beautifully plated dish starts with a clean plate. Choose the appropriate size and shape of plate for your dish, ensuring that it provides the perfect backdrop for your culinary masterpiece. Avoid overcrowding the plate, leaving plenty of negative space to allow each element of the dish to shine. Consider Color and Contrast: A visually striking dish often features a vibrant array of colors and textures. Consider the color wheel when selecting ingredients, aiming for a balance of hues that complement each other. Experiment with contrasting colors and textures to create visual interest, such as pairing creamy mashed potatoes with crispy fried shallots or bright green asparagus with rich hollandaise sauce. Embrace Height and Dimension: Add dimension to your dish by varying the height and placement of its components. Use garnishes like microgreens, edible flowers, or citrus zest to add height and visual appeal. Stack or layer ingredients strategically to create depth, drawing the eye to different elements of the dish. Pay Attention to Plate Placement: The placement of each component on the plate is crucial to creating a visually appealing presentation. Use the rule of thirds as a guide, arranging elements off-center and in asymmetrical patterns for a more dynamic composition. Consider the natural flow of the dish and arrange ingredients in a way that enhances the overall aesthetic. Get Creative with Garnishes: Garnishes are the finishing touch that can take a dish from ordinary to extraordinary. Experiment with different garnishes to add flavor, texture, and visual appeal. Fresh herbs, citrus zest, edible flowers, and flavored oils are just a few options to consider. Just remember to keep garnishes cohesive with the flavors of the dish and avoid overpowering the main components. Practice Precision and Attention to Detail: Attention to detail is key when it comes to plating a dish. Take the time to carefully arrange each component with precision, paying attention to symmetry, spacing, and presentation. Use tools like tweezers or offset spatulas for delicate placement, ensuring that every element is thoughtfully considered. Let Your Creativity Shine: Above all, don’t be afraid to let your creativity shine when plating a dish. Experiment with different techniques, styles, and presentations to find what works best for you and your culinary vision. Whether you’re aiming for elegant simplicity or avant-garde flair, let your personality and passion for cooking shine through in every plate. By following these expert tips and tricks, you can elevate your plating game and create beautifully plated dishes that are as stunning to behold as they are delicious to eat. With a keen eye for detail, a touch of creativity, and a whole lot of passion, you’ll be well on your way to mastering the art of presentation in the kitchen. Happy plating!