Month: April 2021

Air Fryer Potato Chips

Enjoy a quick snack with your air fryer. Chips are left crispy and crunchy thanks to the heated air circulation. You can enjoy these chips with your favorite seasoning as you toss it in the air fryer. No more runs to the store for a bag of chips! Ingredients: Russet potato Water Olive oil spray Seasonings (optional) Directions: Slice the potato into thin slices. (use a mandoline for even slices) Soak the slices in water for 20 minutes to remove the starch. Rinse and repeat. Coat pan and chips with olive oil. Cook at 375 degrees F for 20 minutes. Shake the basket every 5 minutes. Season and shake the chips with your favorite seasoning.

Kitchen Renovation Ideas That Pay Off

Thinking of renovating your kitchen in the near future? You should also consider the possible positive contribution this could have on your home’s value. Not every redesign or renovation is a profitable one. To maximize the financial return, keep to the basics and avoid trends. A high-cost kitchen remodel doesn’t always automatically translate to high returns. Here are a few of the projects that pay off. Kitchen Paint Picking the perfect color makes for a lively, pleasant space. It’s one project that is relatively inexpensive with a great return value. Keep it timeless with a traditional all-white kitchen color scheme. You can also go in the opposite direction with a chic black kitchen. A Feng shui-inspired kitchen keeps colors cool, relaxed and neutral. Upgrade Cabinetry The last thing you want your cabinets to be is dated. To attract the maximum value from your kitchen, you should put cabinets at the top of the list. You don’t necessarily need to tear everything out and buy new cabinetry, rather update it with a fresh new paint color. There are also several low-cost projects such as handcrafted wood cabinet pulls that can drive up their value. Cabinet refacing is also great to visually alter the prominent areas of doors and drawer fronts. Add a New Backsplash A kitchen’s backsplash is an ideal investment, since the investment is low while the visual impact is high. Most backsplashes are DIY projects and with a glass or metal tile, you’ll be sure to attract attention. There are less expensive alternatives such as wallpaper, tile decals, or laminate flooring planks that can be completed in a day or two. Hang New Pendant Lights Lighting is often ignored, but can bring two benefits in one. It helps to illuminate your kitchen while also bringing in a new centerpiece to the design. Pendant lighting is bright and center, and can add much needed personality to the space. If you’re going with pendant lighting you should always go big and bold. Be sure to scale these to fit your space to not overwhelm the rest of your kitchen. Source: the Spruce

Crunchy Moist & Chewy Twix Air Fryer Cookies Video Recipe

Add Twix into a new cookie dough recipe! These are extremely easy to make and only take 10 minutes to bake. Skip the hassle of baking in an oven, and bake these in an air fryer instead. Ingredients: Twix Cookie dough Non-stick cooking spray Directions: Chop a Twix into small pieces Roll several pieces into the cookie dough. Spray non-stick spray in air fryer. Bake at 340 degrees F for 8-10 minutes. Let cool for 5 minutes and then serve.

How to Grow Parsley

Parsley is a versatile herb that can be incorporated into many different dishes and cooking styles. It’s great to tie into a variety of dishes to enhance flavor such as a vegetable omelet, tabbouleh salad or a chimichurri sauce. Parsley is also packed with nutrients such as vitamin C. Planting Parsley Like other herbs, parsley can perform well in a container. If you plant it indoors, keep the pot near a warm and sunny window. If the parsley is outside in a garden, it’s best to plant it around rose bushes. How to Cultivate Soil: Plant parsley in moist, well-turned soil. Incorporate rich compost early in the growing season, just as you’re planting the parsley. Sun: The parsley does well in both full-sun and part-sun environments. If the parsley is indoors, be sure to grow it near a sunny window. Water: Parsley is pretty adaptable and is relatively drought-tolerant. Try to grow it in moist soil for the best results. Spacing: Plant parsley 9” apart whether it’s a seed or a small plant. Companion Planting: Plant it next to tomatoes, corn and asparagus. If you plant parsley next to rose, it can enhance the health and aroma of your roses. How to Harvest Parsley is a biennial plant, meaning you’ll want to harvest parsley for its leaves the first year. Choose stalks furthest out from the plant’s center. You’ll want to leave the inner stalks and leaves so it can keep growing. The second year, the leaves will be less flavor-intense. You can use them, or let the parsley bloom. In the fall of the second year, harvest the parsley’s root. It’s actually the most flavorful portion of the plant. Try shaving the root over salads for a crunch and intense flavor. Source: the Kitchn

Crunchy Moist Air Fryer M&M Cookies Video Recipe

Add your favorite M&M’s into a new cookie dough recipe! These are extremely easy to make and only take 10 minutes to bake. Serve these along with your favorite desserts. Skip the hassle of baking in an oven, and bake these in an air fryer instead. Ingredients: M&M’s Cookie dough Non-stick cooking spray Directions: Roll several M&M’s into small cookie dough pieces. Spray non-stick spray in air fryer. Bake at 350 degrees F for 10 minutes.

Chinese Orange Chicken Recipe

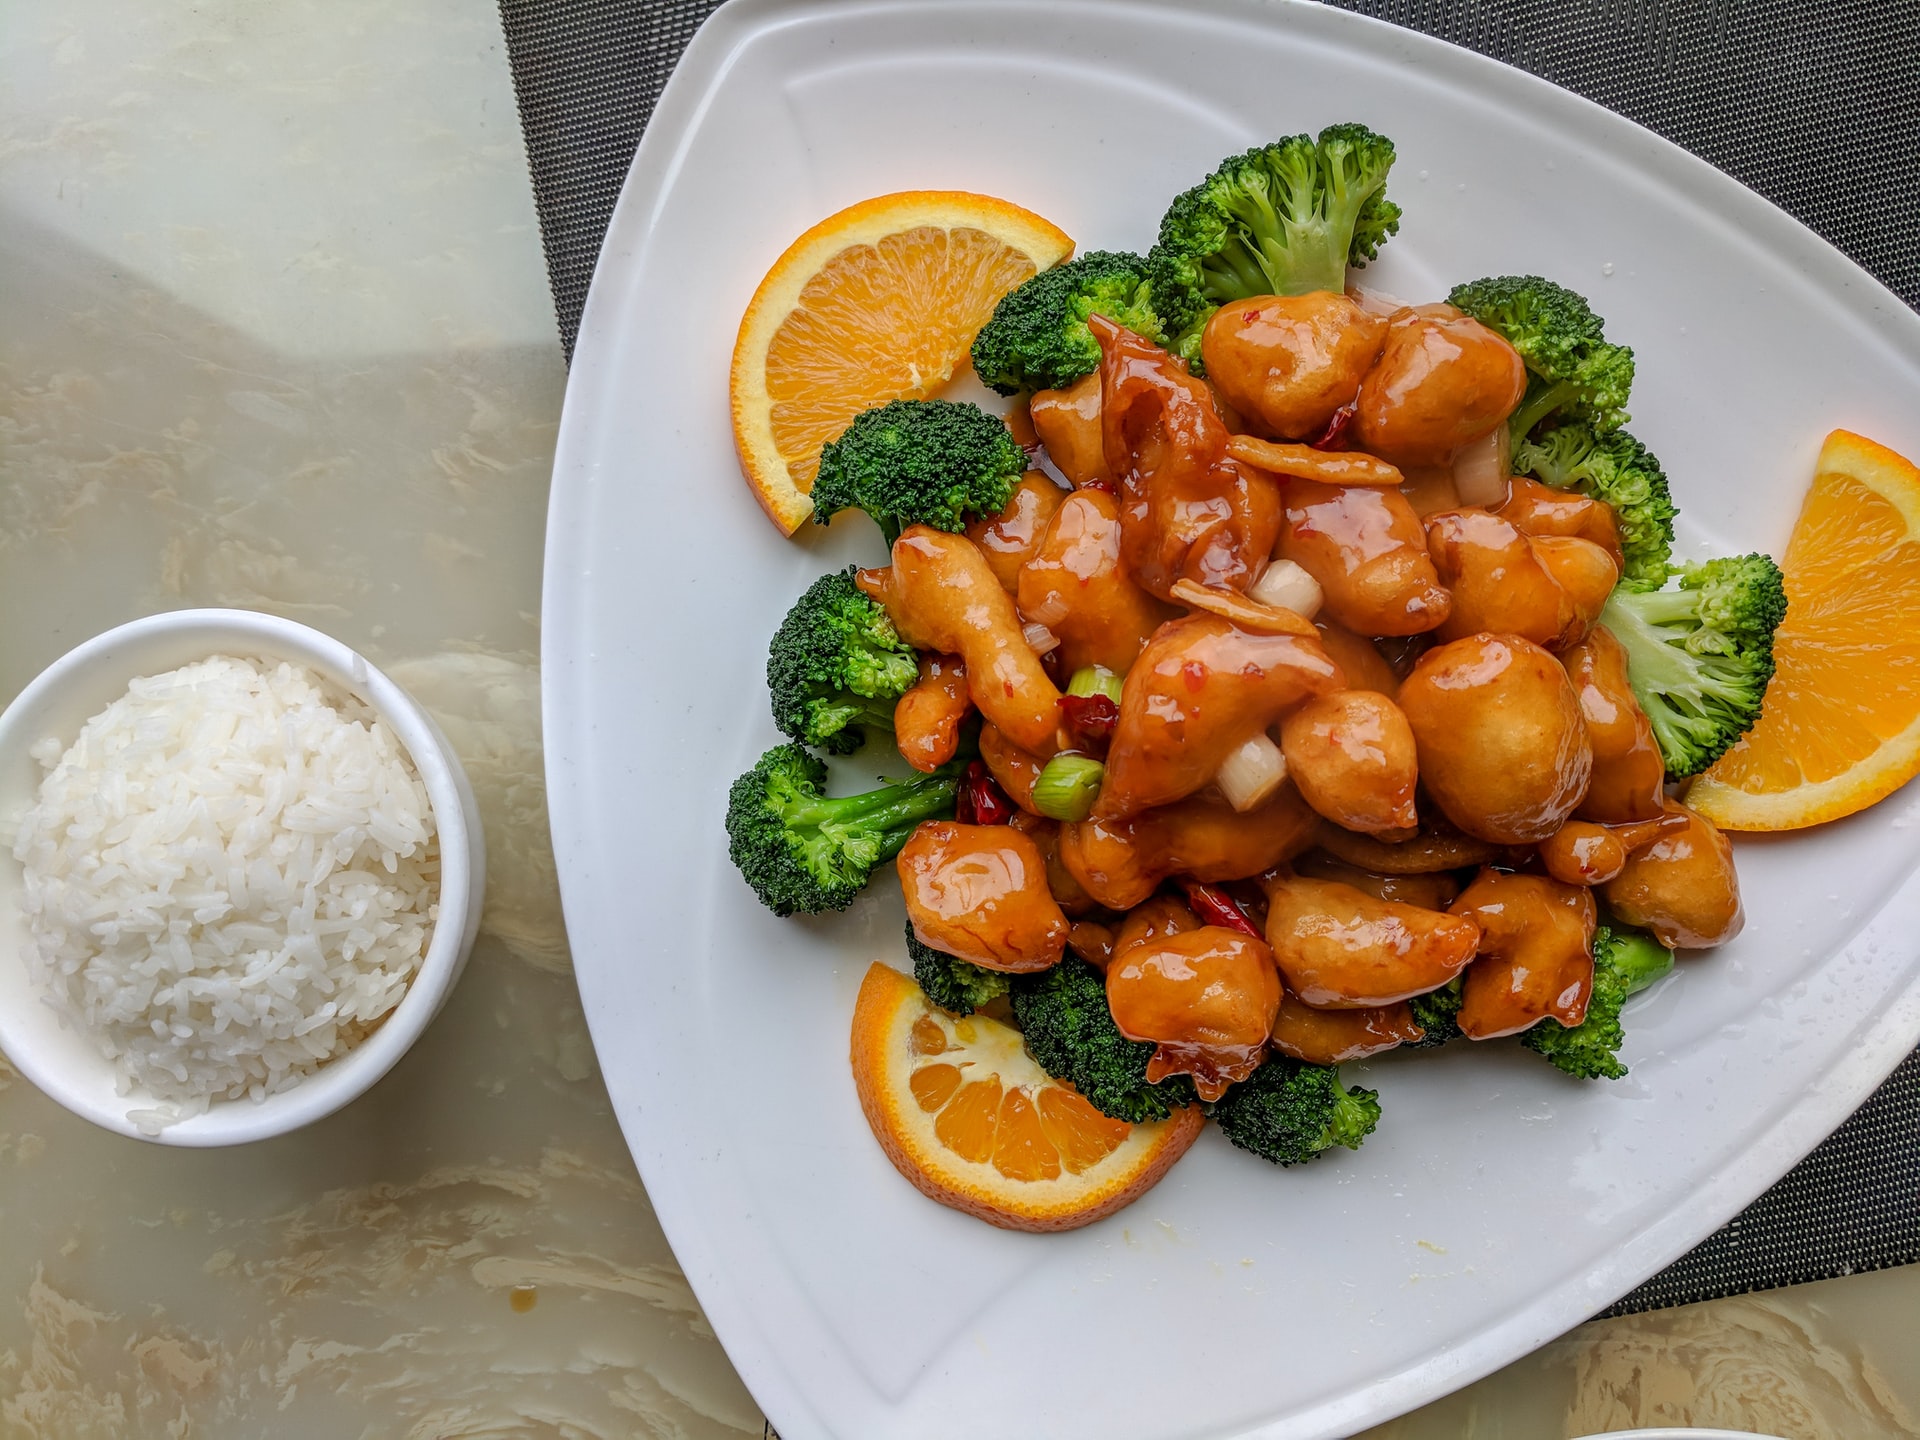
This meal is packed with sweet citrus flavors, sesame seeds and scallions. It’s a breeze to make, and all you need is a large skillet. Be sure to add the orange zest in the sauce for the final touch. You can also use chicken wings for this recipe! Just deep fry them until they’re cooked through, before tossing them in the sauce. Pair this dish with white rice and big pinches of fresh scallion along sesame seeds. Prep time: 20 mins Cook time: 15 mins Total time: 35 mins Servings: 4 servings Ingredients: For the orange sauce: Zest from 1 orange 1/4 cup orange juice 1/4 cup soy sauce 1/4 cup water 1/3 cup rice vinegar 1 tablespoon cornstarch 1 tablespoon sesame oil 1/2 cup sugar For the chicken: 1 1/2 pounds boneless skinless chicken thighs 2 large eggs 1 teaspoon salt 1/4 teaspoon black pepper 1/2 cup cornstarch 1/2 cup all-purpose flour 2 cups vegetable oil, for frying 2 cloves garlic, chopped 1 large shallot, chopped To garnish and serve: Sliced scallions, garnish Sesame seeds, garnish Cooked white rice, to serve Directions: Make the orange sauce: Whisk together sauce ingredients in a medium bowl. Set aside. Prep the chicken: Cut chicken into about 1-inch cubes. Whisk eggs with salt and black pepper in a bowl and add chicken. Stir together. In a separate bowl, whisk together flour and cornstarch. Remove chicken from eggs with a slotted spoon or tongs, letting excess egg drain off, then transfer to cornstarch mixture and coat well. Fry the chicken: Add oil to a large 10- to 12-inch skillet. Heat over medium-high heat until it reaches 350F. If you don’t have a thermometer, you can also test the temperature by sprinkling in some flour and it should fizzle immediately. Once oil is hot, fry the chicken in two batches. The oil might not completely cover the chicken—that’s okay. Cook for 3-4 minutes. Flip the chicken pieces and cook until the chicken is cooked through, about 3 to 4 more minutes. Total cook time is about 6-8 minutes. Remove fried chicken cubes and transfer to a plate lined with paper towels, so the chicken can drain. Repeat until all the chicken is cooked. Simmer the chicken in the sauce: Once chicken is done, pour out hot oil and wipe pan clean. Add a fresh tablespoon of oil along with chopped garlic and shallot. Cook for a minute and then add the sauce. Simmer the sauce until it starts to thicken. Once the sauce is lightly bubbling, add fried chicken and toss together to coat. The sauce should continue to thicken and stick to the chicken. Let simmer for a minute or two more. Serve orange chicken over cooked white rice, garnished with sesame seeds and fresh scallions. Source: Simply Recipes

Homemade Nutella Recipe

You don’t need to run the store next time you’re out of Nutella. All you need is five ingredients, a food processor and about half an hour. Nutella is the perfect spread for toast or wrapped into a warm crepe. This recipe will make 2 cups that last for 2 weeks. Learn how below. Total time: 25 minsYield: 2 cups Ingredients: 1 c. hazelnuts Kosher salt 3 1/2 oz. dark chocolate, chopped 1 c. sweetened condensed milk 2 tbsp. light corn syrup Directions: Heat oven to 375°F. Place hazelnuts on a rimmed baking sheet and roast 10 minutes, shaking once or twice. Wrap hot hazelnuts in kitchen towel and roll vigorously to remove most of peel; cool completely. In a food processor, process hazelnuts and 1/2 teaspoon salt until mostly smooth and runny, about 8 minutes, stopping and scraping the side of the bowl occasionally. In a medium bowl, microwave chocolate in 20-second intervals, stirring after each until melted, then stir in condensed milk and corn syrup. Add chocolate mixture to pureed hazelnuts; pulse until just combined. Store in airtight container at room temp up to 2 weeks. Source: Good Housekeeping

How to Clean a Coffee Grinder

Most coffee enthusiasts will agree that the perfect cup starts with freshly grounded roasted coffee beans. Grinding the beans at home will provide the most flavor, however it will leave behind oils and grounds that need to be cleaned. An electric grinder will often come in one of two ways, with a blade or flat serrated disks known as a burr grinder. Whatever the type may be, it should be cleaned out to prevent any oil build-up which can spoil the flavor of your coffee. If you’re using your grinder every day, it’s best to clean out your grinder weekly. What You’ll Need: 1 Microfiber towel 1 Sink or large bowl 1 Stiff-bristled bottle brush 1 Non-abrasive sponge 1/4 cup Uncooked rice 1 Dishwashing liquid 1 Coffee grinder cleaning tablets (optional) How to Clean a Blade Coffee Grinder: Pour one-fourth cup of dry, uncooked rice or the recommended amount of the grinder cleaning tablets into the hopper of the blade grinder. Turn on the grinder and run it until all of the rice or tablets are reduced to a fine powder. Once the rice is pulverized, turn off the grinder and unplug it from the wall outlet. Dump the pulverized rice into a trash can. Give the grinder a few taps on the side of the can to help loosen any rice powder that is trapped in the hopper. Dampen a lint-free microfiber towel and wipe down the interior of the hopper. Take extra care around the blades. Dampen the towel to remove any fingerprints or grime from the exterior of the grinder. How to Clean a Burr Coffee Grinder: Since most burr grinders have a large hopper to store coffee beans, cleaning should be done when the hopper is empty. Remove the hopper and wash it, the lid, and any removable sealing gaskets by hand in a sink of hot, soapy water. Rinse well with hot water and dry with a microfiber cloth. If possible, turn on the grinder and let it run for a few seconds to pulverize any remaining bits of beans caught in the burr blades. Immediately unplug the grinder. Following the owner’s manual, remove any parts (except the burr) that come in contact with the coffee beans like the bin that catches the coffee grounds. Hand wash the components in a sink of hot, soapy water using a non-abrasive sponge, rinse with hot water, and dry with a microfiber towel. Remove the flat burr disks or the conical burr. This may require a screwdriver. Use a stiff bottle brush to loosen and remove the coffee grounds that are stuck to the burr surfaces. Use a dry microfiber cloth to wipe down the burrs and absorb any oils. Once every component is clean and thoroughly dry, reassemble the coffee grinder and it is ready to use. Source: The Spruce