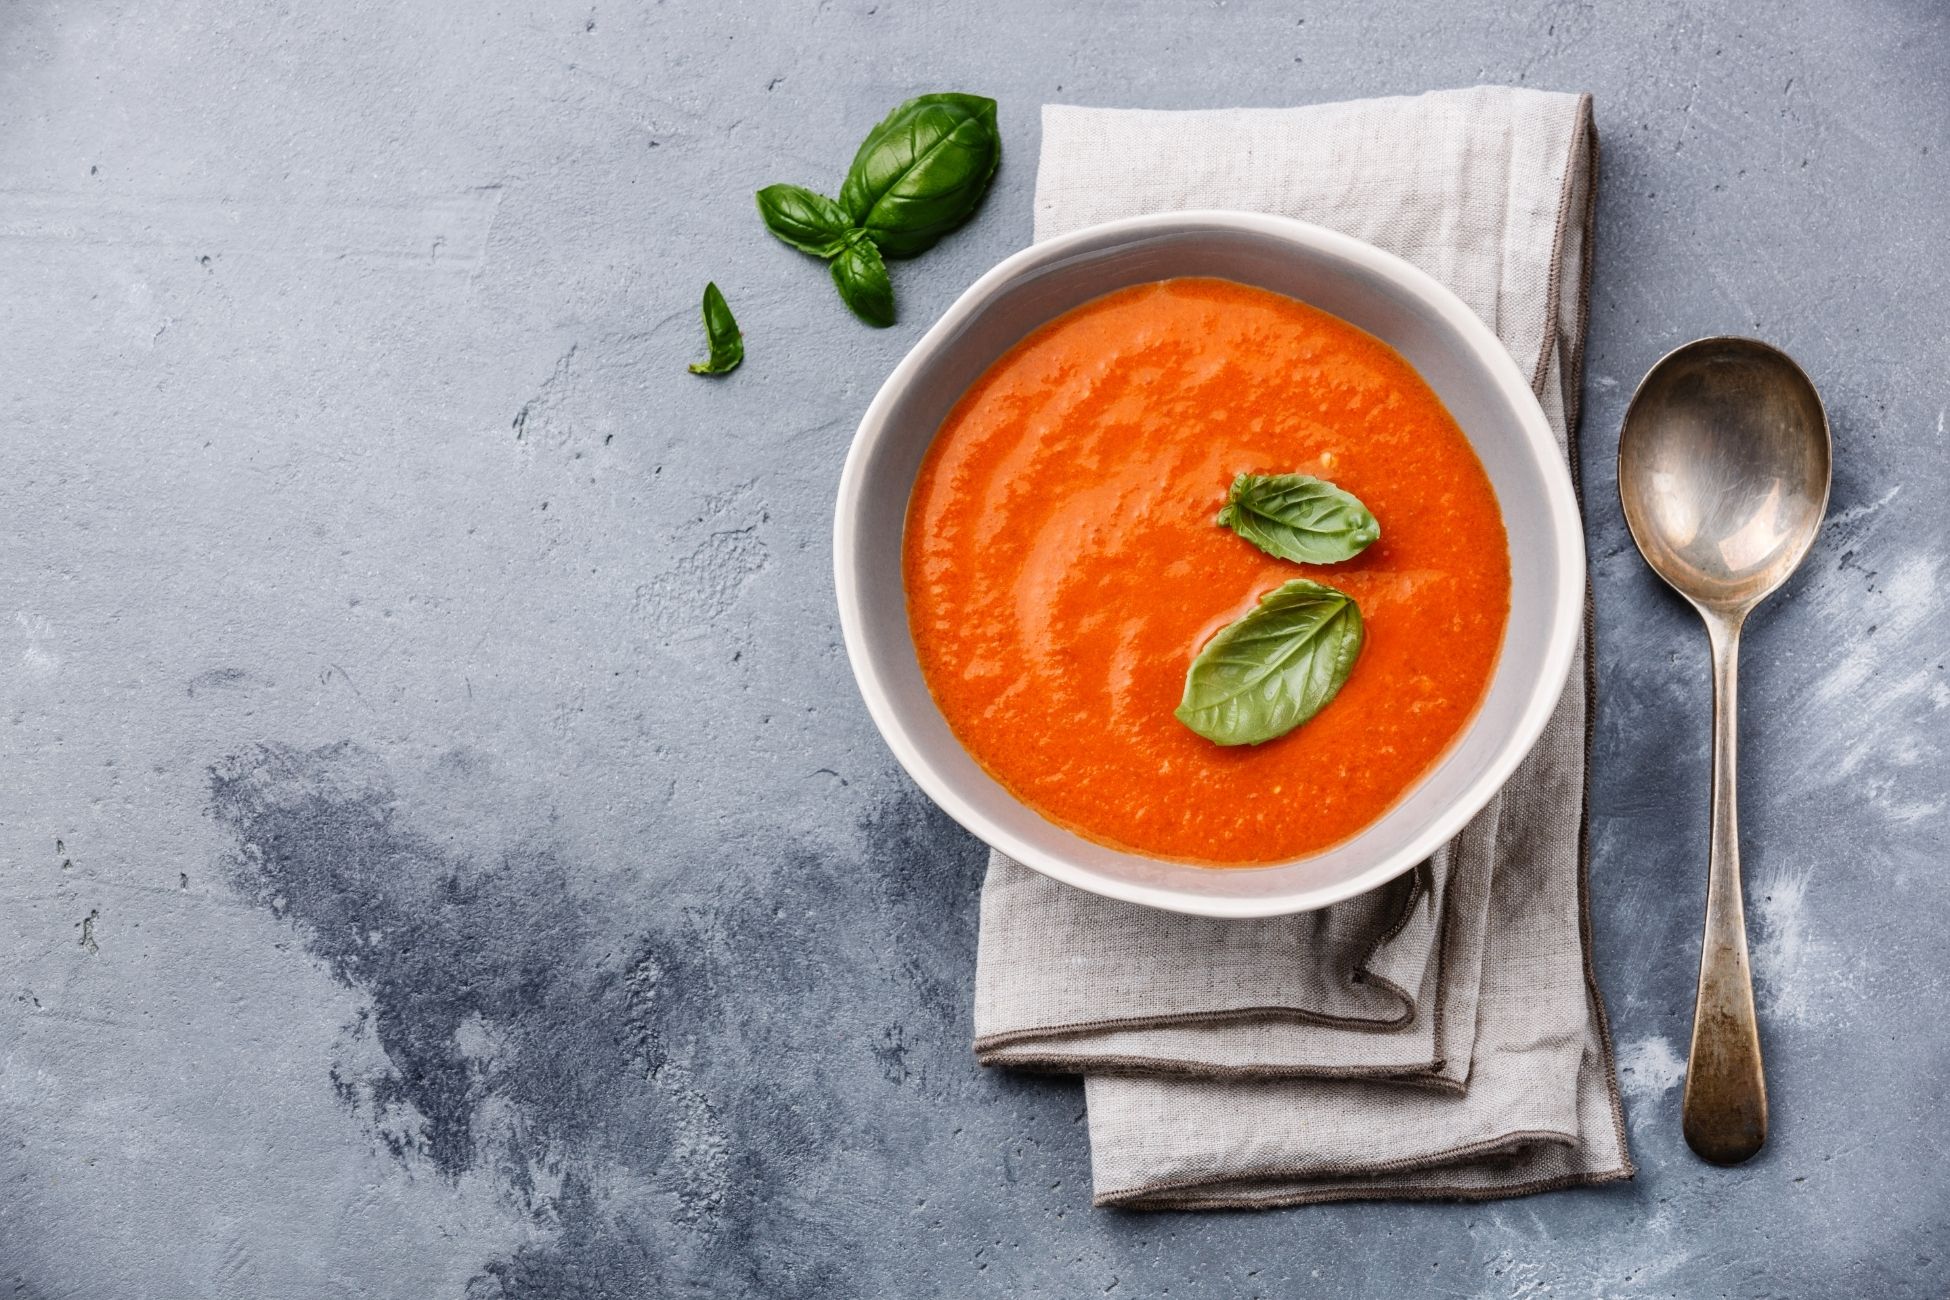
Year: 2021

Gazpacho Recipe

Perfect for the hot summer days ahead, gazpacho is made of ripe summer tomatoes blended with other ingredients such as cucumber, shallots, and garlic. Traditionally, a few slices of old bread are blended for a thicker and more substantial soup. Serve on its own or as a start to a meal. Ingredients: 1 1/2 to 2 pounds ripe tomatoes 2 thick slices day-old bread 1 medium cucumber 1 shallot 1-to 2 cloves garlic 2 tablespoons sherry vinegar 1/4 cup extra-virgin olive oil Salt and pepper Directions: Prepare the ingredients. Quarter the tomatoes and remove the stem. Tear the bread into large chunks. Peel and roughly chop the cucumber, shallots, and garlic. Roughly chop or measure any extra ingredients being added. Set aside some of these vegetables for garnishing the finished gazpacho. Combine the tomatoes and bread. Put all the bread into the bowl of a food processor or blender. Squeeze the tomato quarters over the bread then add them to the bowl. Let this sit for about 20 minutes to give the bread time to absorb the tomato juices and soften. If you prefer a thinner gazpacho, omit the bread and continue to the next step. Make the gazpacho. Pulse the tomatoes and bread until they form a rough porridge. Add the cucumber, shallots, garlic, vinegar, and a half teaspoon of salt. If you are using any other extra ingredients, add them in this step. Process continuously until the ingredients are liquified. A food processor will make gazpacho with more texture; a blender or immersion blender will make the gazpacho smoother. Blend in the olive oil. With the blender running, stream in the olive oil. This helps it emulsify more evenly into the soup. Taste and adjust the seasonings. Taste the soup. Add salt or vinegar to taste. If you’d like it thinner, blend in a little water. Chill the soup. Transfer the soup to a storage container and refrigerate until chilled. This soup often tastes better the second day after the flavors have had time to settle with each other. Serve the soup garnished with reserved vegetables. Source: the Kitchn

How to Store Yeast

There’s nothing worse than dedicating your time and effort to baking bread only to have it ruined by an old, inactive yeast. If you’re looking to stock up on yeast but unsure of how long it’ll last, here’s how to store it so you can count on it the next time you need to make dough. How Long Yeast Lasts Dry yeast that is sealed and unopened will last about 2 years. Chilling extends its life which is why it’s best to store in a refrigerator or freezer. You should always check the best-before-date on the bag before purchasing it in the store. An opened active and instant dry yeast will last four months in the refrigerator and up to six months in the freezer. A fresh yeast, also known as compressed yeast, will last up to two weeks in the refrigerator and should not be frozen. How to Store Open Yeast Keep it Airtight. Air will shorten the lifespan of yeast. If the yeast is in an open envelope, fold down the top and seal with tape, a paper clip or rubber band. If it’s in a bag, press as much air as possible out of the bag, then seal with tape or rubber band. You can also transfer the yeast to a glass jar with a tight-fitting lid. Label the yeast before storing with the date it was opened or the use-by-date. Source: Simply Recipes

Graham Cracker Cinnamon French Toast Recipe

Try something new with this air fried graham cracker cinnamon french toast. Prepare a delicious breakfast meal in under 10 minutes. Be sure to top with your choice of syrup or cream cheese frosting. Ingredients: Brioche Bread 2 Tbsp Milk 1 Tbsp Vanilla 2 Eggs Graham Crackers Cinnamon Brown Sugar Syrup Cream cheese frosting Directions: Cut brioche bread into strips about ½” each. Mix milk, vanilla and eggs in a bowl. Crush graham crackers, cinnamon and brown sugar for coating Dip bread strips in egg mix and then coat with cinnamon mix Cook at 340°F for 7-8 minutes Top with syrup or cream cheese frosting

Brewing a Better Cup of Coffee

If you’re trying to cut back on running to your typical coffee shop, we’ve got you covered on how to up your coffee brewing game. Whether it’s finding and storing beans, finding the right brewing method or how to add an extra boost of flavor, here’s what you should know to make a better cup of coffee. Learning What Kind of Coffee You Need We all have differing coffee tastes, what tastes good for one person might not be appealing to another. The trick is knowing how to find the best coffee based on your needs and how to properly store it when you get home. If you want complete control, buy whole beans. You’ll be able to grind and brew to your liking. If you want something quick and simple, try a pre-ground coffee instead. When buying whole beans, ask when the beans were roasted. You’ll want to know how fresh the beans are and the best method to brew them. Let your brewing method dictate the grind of the beans, as it’ll affect the final favor of your coffee. You should always store beans in an airtight container, preferably in a cool and dark place like a pantry or cupboard. Choosing a Brewing Method There are many options for brewing coffee. It all comes down to what method works best for you and the type of coffee you like. Here are a few examples. Aeropress. If you’re into gadgets and only planning to brew a cup or two at a time, the Aerporess could be the tool for you. It’s relatively inexpensive and easy to use. The trick is nailing the water temperature. French Press. It’s an easy and inexpensive way to brew a few cups of coffee. Don’t forget to transfer the coffee to a carafe after, or you run the risk of the coffee becoming bitter. Cold Brew. The better alternative to dropping ice cubes in a glass of hot coffee. These grounds are steeped overnight in cold water for an easy coffee fix. Latte. You actually don’t need a fancy espresso machine to enjoy a latte at home. All you need is an extra-strong cup of espresso blend and frothed milk made in a microwave. Upgrading Your Coffee Don’t stop after your coffee is brewed. There are many ways to upgrade your coffee further such as milk, cream or sweetener. Frothed milk is a fast and fancy way to take your coffee to the next level. All you need is milk, a clean jam jar and a microwave. You can also add some flavor with pantry staples like spices, a pat of butter, coconut milk or even ice cream. Don’t stop with just the ordinary cream and sugar! Source: the Kitchn

Air Fryer Coconut Shrimp Recipe

Try out this new recipe for dinner tonight! Coconut shrimp come out great in an air fryer thanks to the healthier frying method. If you’re all out of serrano chiles you can easily substitute with 2 teaspoons of crushed red pepper. Pair these with a homemade spicy honey-lime dip for the perfect mouthwatering combo. Ingredients: ½ cup all-purpose flour 1 ½ teaspoons ground black pepper 2 large eggs ⅔ cup unsweetened flaked coconut ⅓ cup panko bread crumbs 12 ounces uncooked medium shrimp, peeled and deveined cooking spray ½ teaspoon kosher salt, divided ¼ cup honey ¼ cup lime juice 1 serrano chile, thinly sliced 2 teaspoons chopped fresh cilantro Directions: Stir together flour and pepper in a shallow dish. Lightly beat eggs in a second shallow dish. Stir together coconut and panko in a third shallow dish. Hold each shrimp by the tail, dredge in flour mixture, and shake off excess. Then dip floured shrimp in egg, and allow any excess to drip off. Finally, dredge in coconut mixture, pressing to adhere. Place on a plate. Coat shrimp well with cooking spray. Preheat air fryer to 400 degrees F (200 degrees C). Place 1/2 the shrimp in the air fryer and cook about 3 minutes. Turn shrimp over and continue cooking until golden, about 3 minutes more. Season with 1/4 teaspoon salt. Repeat with remaining shrimp. Meanwhile, whisk together honey, lime juice, and serrano chile in small bowl for the dip. Sprinkle fried shrimp with cilantro and serve with dip. Source: All Recipes

What Not to Do With Soap

Dish soap is great for many purposes beyond cleaning dishes. It cuts through grease and leaves things squeaky-clean. However, there are a few things you should never do with dish soap. Here are a few. Mix with Bleach. Cleansers are powerful on their own, but can be toxic when combined. Never mix your dish soap with bleach, ammonia or any cleanser. Wash Cast Iron. While you can technically wash your cast iron with soap, you generally shouldn’t. If you are going to do it, you shouldn’t be doing it too often. Instead opt for oil and salt. Put it in the Dishwasher. It may be tempting to put dish soap in a dishwasher when you run out of dishwasher detergent, but don’t! They both clean dishes, but the formulas are completely different. The dish soap can harm your dishwasher or leave you with a bubbly mess. Put it in the Washing Machine. The same rule applies, dish soap is not formulated to work in a washing machine. It can lead to more suds than your machine can handle. Wash Your Car. Your car’s paint is strong, but dish soap can actually weaken it. A harsh cleaner can strip away the finish leaving it vulnerable to chips and dullness. Use a specialized car clean instead. Wash Your Face. Generally you should cut down on the contact with dish soap. Gloves are a great choice for washing dishes. Dish soap should definitely not go on your face. Source: the Kitchn

Blueberry Pie Recipe

As blueberries come into season, there’s nothing better than baking them into a delicious blueberry pie. Blueberries are full of health benefits such as neutralizing free radicals and protecting against degenerative brain diseases. They freeze well and can be easily made into a pie. If you have the option, find locally sourced berries for optimal freshness. Store the pie by loosely covering and storing it on a counter for 3 to 4 days. After 4 days, store it covered in the refrigerator for an additional 3 days. Prep time: 60 minsCook time: 60 minsTotal time: 2 hrsServings: 8 servings Ingredients: Crust: Pastry crust dough Filling ingredients: 6 cups (about 2 1/4 pounds ) fresh or frozen blueberries, rinsed and stems removed (if using frozen, defrost and drain first) 1 teaspoon finely grated lemon zest 1 tablespoon lemon juice 1/4 cup (about 30g) cornstarch, all-purpose flour, or quick-cooking tapioca 1/2 cup sugar (100g) 1/2 teaspoon cinnamon Egg wash ingredients: 1 egg 1 tablespoon milk Directions: Prepare the bottom crust: Remove a dough disc from the refrigerator and let sit for 5 to 10 minutes to take the chill off.Place it on a lightly floured clean, flat surface. Roll it out into a circle about 13 inches wide.Place the rolled out dough on a 9-inch pie pan. Trim the edges to 1/2 inch over the edge of the plan. Place in the refrigerator to chill. Make the blueberry filling: Pull the second disc of dough from the refrigerator so it can come to temp while you make the filling.Place the blueberries, sugar, cornstarch (or flour or quick tapioca), cinnamon, lemon zest, and lemon juice in a large bowl. Gently stir them so that all of the blueberries are coated with some sugar and flour. Fill the bottom crust: Remove the bottom crust from the refrigerator and place the sugar coated berries into the pan. Roll out the second dough disc: Use a rolling pin to roll the dough to the same size and thickness as the first. Place on top of the berry filling.Tuck the top dough over and under the edge of the bottom dough, and crimp the edges with your fingers.Place in refrigerator while you make the egg wash. Preheat the oven: Place the baking rack in the middle of the oven and preheat to 425°F. Brush the pie with the egg wash: Whisk egg and milk together to make an egg wash. Brush the top crust with egg wash. Score the pie on the top with several cuts (so steam can escape while cooking). Bake the pie: Place the pie on the middle rack of the oven with a foil or Silpat lined baking pan positioned on the lower rack to catch any filling that may bubble over.Bake for 20 minutes at 425°. Reduce heat to 350°F and bake for 30 to 40 minutes more or until juices are bubbling and have thickened. Cool the pie, then serve: Transfer to a wire rack to cool. Let cool completely before serving. Source: Simply Recipes

Air Fried Mango Fries

Try something new with these air fried mango fries. All you need is some flour, cinnamon and of course mangoes. You can substitute the cinnamon with tajin if you prefer a more spicy snack. These can be quickly prepared in an air fryer in as little as 15 minutes. Serve these as an appetizer to tonight’s dinner or a snack to enjoy for a weekend night in. Ingredients: Mango Flour Cinnamon or Tajin Non-stick Cooking Spray Directions: Peel and slice mango into fry-sized bites Coat fries in a bowl of flour Spray cooking spray on the air fryer pan. Load the fries. Cook at 350°F for 15 minutes or until golden brown. Flip as needed Sprinkle with cinnamon or tajin

Scallion Pancakes Recipe

These thin, round pancakes are crispy on the outside and chewy on the inside. They’re surprisingly easy to cook at home. You’ll only need four basic ingredients: flour, hot water, scallions and salt. The pancakes can be served on their own, or along a soy sauce and vinegar based dipping sauce. Serve these immediately from the griddle while they’re still warm and crispy. Prep time: 25 mins Cook time: 25 mins Resting time: 30 mins Total time: 80 mins Servings: 4 to 6 servings Ingredients: For the scallion pancakes: 2 cups all-purpose flour 1 teaspoon salt 1/2 teaspoon garlic powder, optional 3/4 cup hot (just boiling) water, plus a few more tablespoons, if necessary 1/4 cup canola oil 3 to 4 scallions, thinly sliced For the dipping sauce: 2 tablespoons soy sauce 2 1/2 tablespoons rice vinegar 1/2 teaspoon toasted sesame oil Pinch red pepper flakes, optional Directions: Mix the dough: Add flour, salt and garlic powder to a medium bowl. Stir to combine. Add 3/4 cup of hot water to the flour and stir with a wooden spoon. Continue stirring until all the water has been absorbed by the flour. Don’t worry if the dough has not formed completely yet. Knead the dough: Knead all the bits of dough together with your hands inside the bowl. If your dough is still very dry, add a splash of hot water, about 1 to 2 tablespoons, until it comes together and all the flour is absorbed. Continue kneading the dough for about 2 more minutes. The dough will feel moist but it should not stick to your hands too much. Rest the dough: Shape the dough into a round ball. Cover the bowl with plastic wrap and let the dough rest for 30 minutes. Roll out the pancakes: Sprinkle flour on top of a work surface. Divide the dough into 4 pieces of equal size. Work with one piece at a time, leaving the remaining pieces in the bowl. Shape piece of dough into a small ball. Use a rolling pin to roll out the dough into a thin circle, about 7 to 8 inches in diameter. Add the scallions: Brush a thin layer of canola oil on top of the dough, making sure not to miss the edges. Sprinkle sliced scallions all over the dough. Roll and flatten the pancake: Starting on one end, roll the circle of dough into a log. Take one end of the rolled up dough and curl it toward the center, like a snail’s shell. Tuck the end of the dough underneath the spiral. Use the palm of your hand to flatten the dough into a thick circle. Roll it out again with your rolling pin. Try to roll it out as thinly as possible. A few slices of scallions may pop out during the process, and that’s perfectly normal. Transfer rolled out scallion pancake to a plate. Repeat steps 4 through 6 with the remaining dough pieces. Cook the pancakes: Heat about 2 teaspoons of canola oil in a small nonstick or cast iron skillet over medium heat. Place one of the pancakes in the middle of the pan and pan fry each side for about 2 to 3 minutes, until golden brown. Transfer to a plate and repeat with the 3 remaining scallion pancakes, adding more oil to the pan as needed. Prepare the dipping sauce: Mix all the sauce ingredients in a small bowl. Adjust the seasonings to your liking, adding more soy sauce or vinegar, if you like. Add any leftover scallions to the dipping sauce, and add a pinch of red pepper flakes if you would like a bit of spice. Serve the hot pancakes: Cut the scallion pancakes into small wedges and serve while hot with the dipping sauce. (The pancakes are still good when cooled, but will no longer be crispy.) Source: Simply Recipes

How to Pasteurize Eggs

For popular recipes such as mayonnaise, hollandaise and royal icing, raw and partially cooked eggs are a necessity. However, raw or partially-cooked chicken eggs can carry salmonella bacteria. You can still enjoy these recipes with peace of mind after pasteurizing eggs. The process of pasteurization brings eggs to a temperature that kills dangerous pathogens. How to Pasteurize Eggs on the Stove Start with room temperature eggs: Starting with eggs that aren’t cold ensures you pasteurize the entire egg, rather than just the parts closest to the shell. Use fresh eggs with no cracks and let them come to room temperature. Cover the eggs with 1 inch of water: Fill a small saucepan with cool water and gently put the eggs in the pan. Make sure they are covered by 1 inch of water. Heat the water slowly to 140° F and hold for 3.5 minutes: Put the pan on medium heat. Let the water slowly come to 140° F. Check the temperature of the water with an instant-read or candy thermometer. Hold that 140° temperature for 3.5 minutes for large eggs or 5 minutes for extra-large eggs (eggs between 64 and 70 grams).Keep an eye on the temperature this whole time, adjusting the burner or moving the pan as needed to maintain the correct temperature. Transfer eggs to a bowl of ice water to cool: Use a slotted spoon and gently transfer the eggs to a bowl of ice water to cool them down. Your eggs are now pasteurized! Mark and refrigerate: Use a permanent marker to mark your eggs so you know they’re pasteurized. Use them right away or refrigerate for up to 1 week. How to Pasteurize Just Egg Whites or Yolks Bring water to a boil and separate the eggs: Bring a large pan saucepan of water to a boil. While you wait, crack as many room-temperature eggs as you need into a heatproof bowl. If you only need to pasteurize egg yolks, you can do just the yolks. Conversely, if you only need to do the whites, just do the whites. Add water to the bowl of eggs: Add 2 tablespoons of tap water for each whole egg used, or for each single yolk or egg white.For example, if you used egg whites from two eggs, add four tablespoons of water to the bowl of egg whites. If your recipe calls for liquid such as milk, stock, or lemon juice, you may use that instead of water. Set the bowl over the pot of simmering water and scrape for 2-3 minutes: Set the bowl on top of the saucepan of simmering water and turn off the heat. Use a silicone spatula to constantly scrape the sides and bottom of the bowl. Don’t beat in air; this constant motion is to keep the eggs from scrambling and to maintain a constant temperature.Do this for 2-3 minutes, or until the water in the pan has cooled to lukewarm. Use immediately. Source: Simply Recipes