Year: 2021

Making the Perfect Flan Every Time

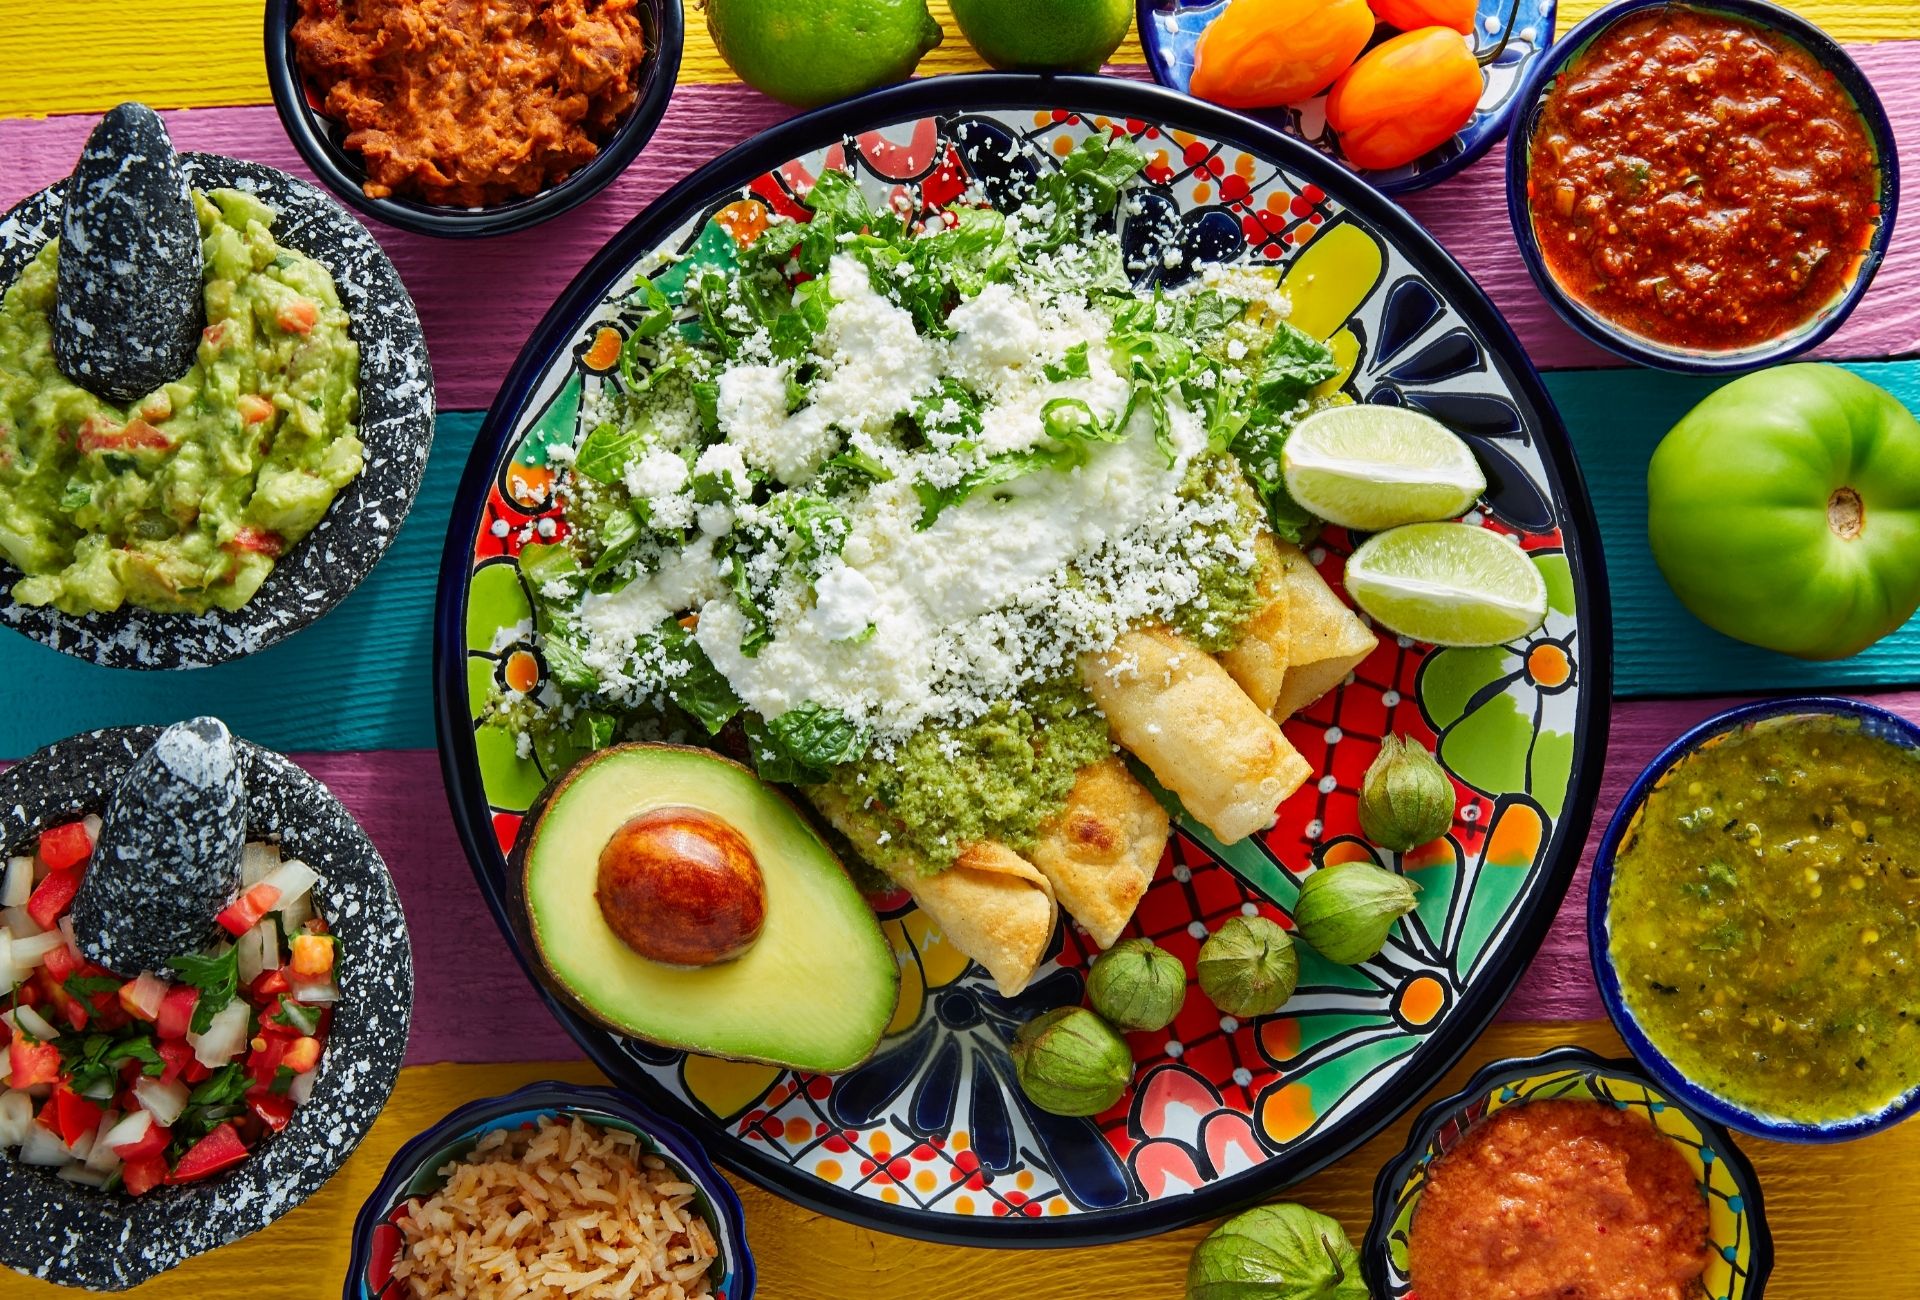
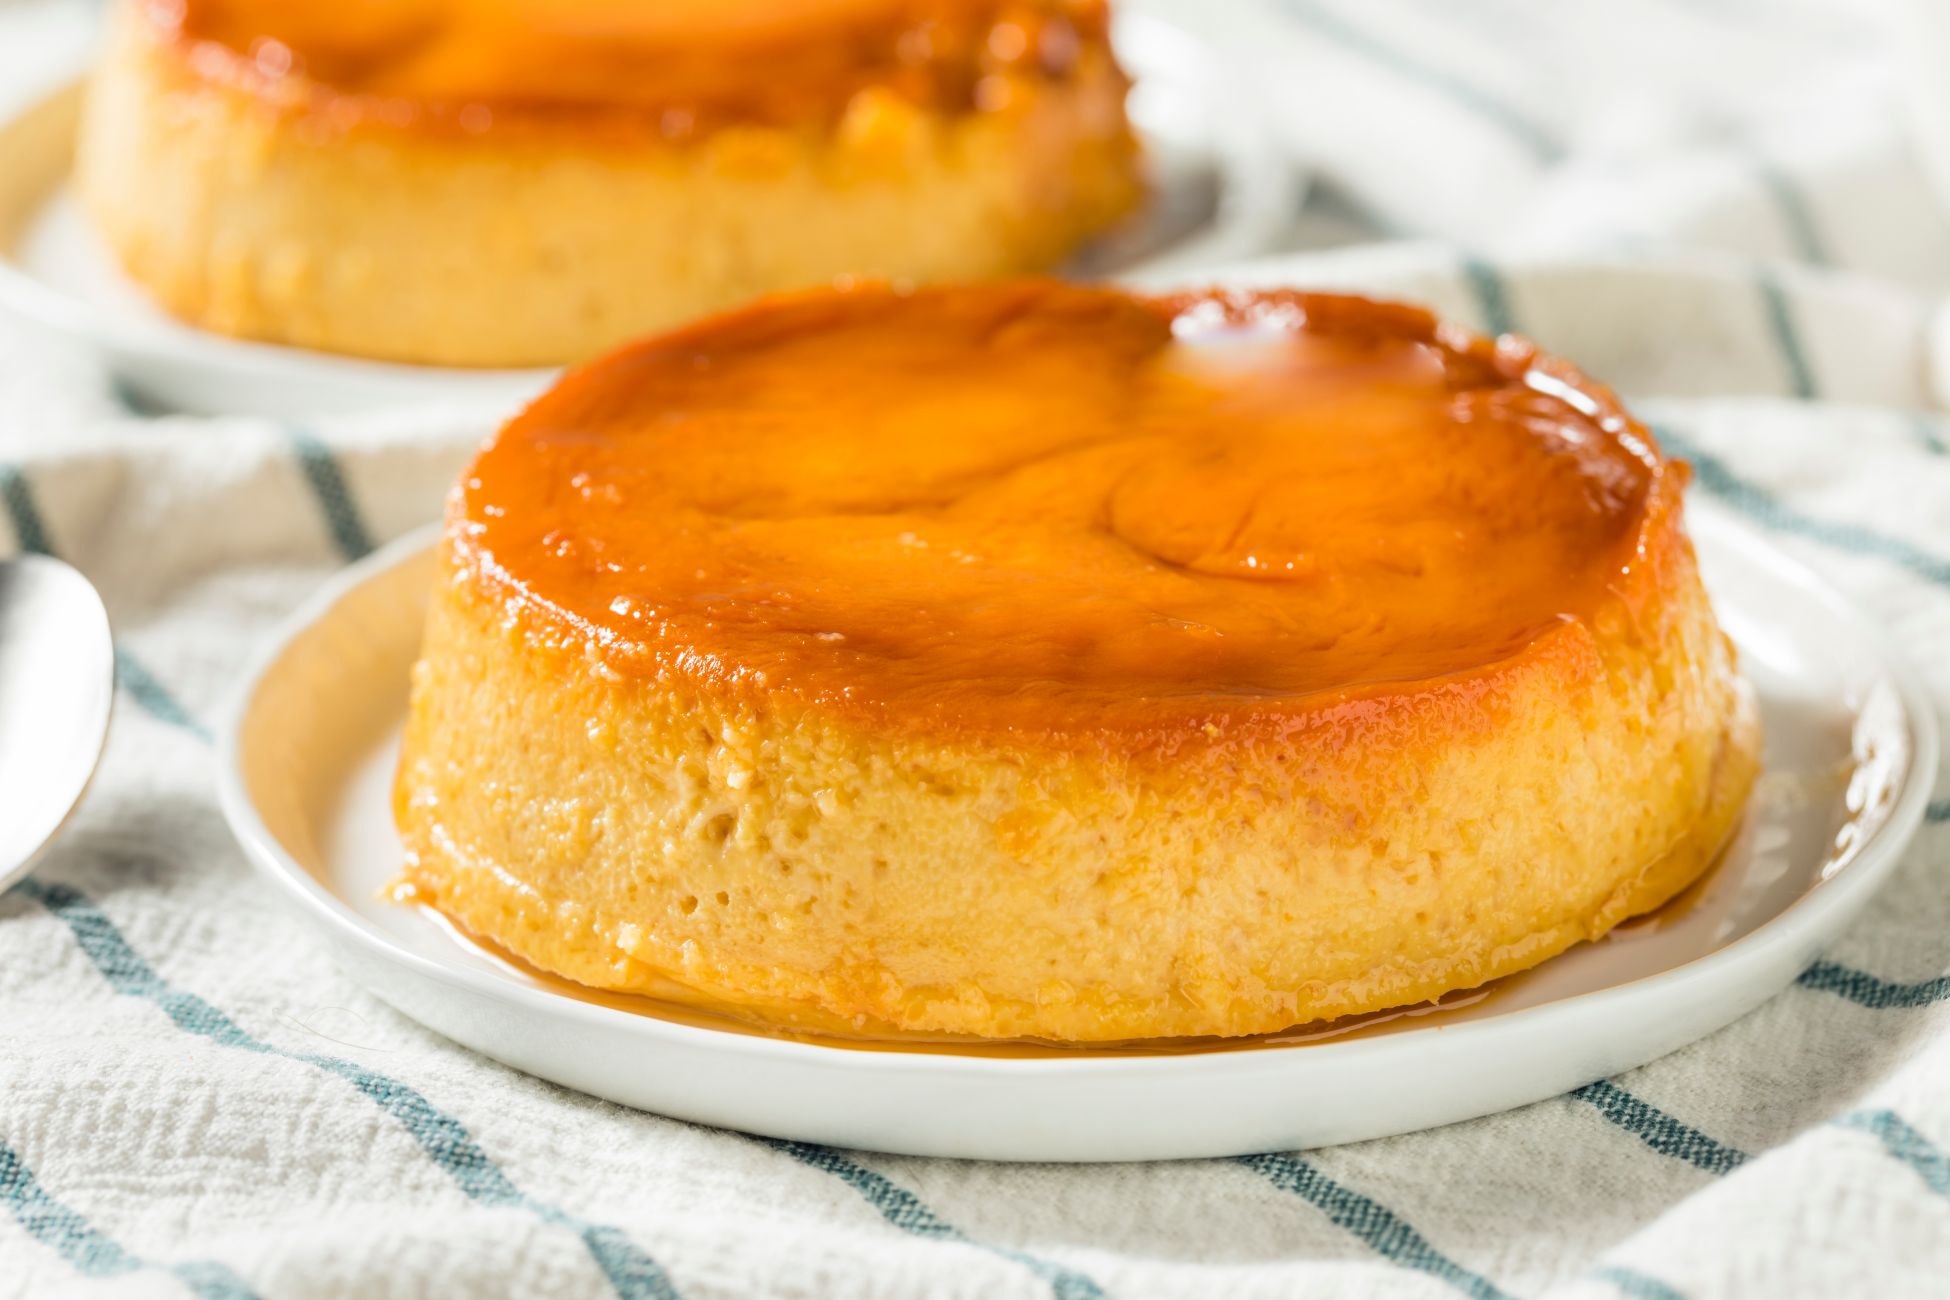
Flan is a custard-based dessert topped with a layer of caramel sauce. The creamy, silk texture is achieved with the help of a water bath when baked. It should be chilled and then inverted onto a plate before serving. The great thing about flan is it only requires a few panty ingredients, making it easily achievable. Watch the caramel sauce carefully to prevent it from burning. Ingredients: 1 cup granulated sugar ¼ cup water 1 (14-ounce) can sweetened condensed milk 1 cup heavy cream 5 large eggs 2 large egg yolks 2 teaspoons vanilla extract Directions: Heat the oven to 350°F. Arrange a rack in the middle of the oven and heat the oven to 350°F. Start the caramel sauce. Place 1 cup granulated sugar and 1/4 cup water in a small saucepan over high heat. Bring to a boil and gently swirl the pan to incorporate the sugar (avoid stirring, which can cause crystallization and result in the caramel seizing). Cook the caramel sauce. Once the mixture boils, gently swirl the pan, then reduce heat to medium and cook, swirling the pan occasionally, until the syrup turns a dark caramel color, 12 to 14 minutes. Pour the caramel into the pan. Carefully pour the caramel into an 8-inch round cake pan, swirling the pan to coat the bottom. Transfer to roasting pan. Place the pan in a large roasting pan. Prepare the flan. Place 1 can sweetened condensed milk, 1 cup heavy cream, 5 large eggs, 2 large egg yolks, and 2 teaspoons vanilla extract in a blender and blend until smooth. Pour into cake pan. Pour the flan mixture over the caramel in the cake pan. Create water bath. Place the roasting pan onto the oven rack, then carefully fill the roasting pan halfway with warm water to create a water bath, being careful not to splash any water into the flan. Bake the flan. Bake until a toothpick inserted into the center comes out clean, 50 to 60 minutes. Cool the flan. Carefully remove the roasting pan from the oven, remove the cake pan to a wire rack, and let cool at least 30 minutes. Chill the flan. Cover the pan with plastic wrap. Refrigerate at least 3 hours or overnight. Release the flan. When ready to serve, carefully run a sharp knife or small offset spatula around the cake pan to loosen the flan. Invert a larger plate over the cake pan and flip over to release the flan. Source: the Kitchn

Frittata Recipe

A healthy and satisfying weeknight meal, this frittata is made with potatoes, onions, red peppers, spinach and ground turmeric. It’s a quick and easy meal, loaded with flavor. Be sure to slice the potatoes down their length for a better shape. Add the turmeric as you’re heating the oil to let it infuse with the oil. Prep time: 15 minsCook time: 25 minsTotal time: 40 minsServings: 4 to 6 servings Ingredients: 6 large eggs 1/4 cup (60ml) milk 2 1/2 tablespoon olive oil 3/4 teaspoon ground turmeric 1/2 cup diced red onions 2 cloves garlic, minced 8 ounces (225g) fingerling potatoes, thinly sliced down their length 1 medium red pepper, seeded and diced 1 scallion, thinly sliced 1 cup baby spinach Freshly ground black pepper Directions: Preheat oven to 400F In a small bowl, whisk eggs and milk together. Set aside. Cook the onions and garlic: Heat olive oil in a 10-inch oven-safe skillet or pan over medium heat. Add the turmeric and stir so that turmeric dissolves into the oil.Add diced onions and cook, stirring occasionally, until they start to soften, about 2 minutes. Add minced garlic and stir for 30 seconds. Cook the potatoes and other vegetables: Add the potatoes and a generous pinch of salt and cook, stirring occasionally, until some of the slices start to brown, 5 to 6 minutes.Add the red pepper and cook until they start to soften, about 2 minutes. Add scallions and spinach leaves and cook until the leaves start to wilt, stirring occasionally. Pour egg mixture into the skillet and reduce heat to medium-low. Cook until the eggs start to set on the bottom, about 2 to 3 minutes. Place skillet in the oven and bake for 8 to 9 minutes, until the center is setRemove skillet from oven with oven mitts. Let frittata cool for 5 minutes before serving. Cut into wedges and season with more salt and some ground pepper, if desired.Frittata will keep refrigerated for 5 days. Leftovers can be eaten chilled or briefly warmed in the microwave. Source: Simply Recipes

Brioche Bread Air Fried Pizza

Bake the perfect pizza cups right in your air fryer. You can quickly prepare these on Brioche bread for an easy meal. Sprinkle Italian seasoning over top for the finishing touch of flavor. Ingredients: Brioche bread Pizza Mozzarella cheese Pepperoni Italian seasoning Directions: Add pizza sauce to one slice of brioche bread (pre-toast if desired) Top with mozzarella cheese and pepperoni Sprinkle Italian seasoning Bake at 350 degrees F for 5 to 6 minutes

Cleaning Silicone Cooking Utensils

Even after cleaning silicone utensils with a dishwasher, you may notice a white film lingering behind. Although these are technically clean, it can be off-putting to think it doesn’t look clean visually. This is a combination of soap scum and hard water. The film can still appear if you’re washing the utensils by hand. It can also interfere with nonstick cooking properties. To clean these silicone utensils you’ll need hydrogen peroxide and baking soda. The hydrogen peroxide will also remove any stubborn stains left behind. How to clean: Give your utensils a soak: Soak your affected utensils in hydrogen peroxide for 24 hours. Scrub them with a paste: Make a paste with baking soda and water and apply it all around the utensils. Wash: Wash the utensils with soap and water. Source: the Kitchn

Blackberry Cobbler Recipe

Cobbler is a delicious dessert that can use up any of your leftover blackberries. It’s made with a biscuit-like topping and fruit. Prepare this before dinner and pop it in the oven as you eat to have it ready for dessert. Top with whipped cream or a side of vanilla ice cream. It’s easier and faster than pie! Prep time: 35 minsCook time: 30 minsTotal time: 65 minsServings: 9 servings Ingredients: For the berry mixture: 4 cups blackberries, rinsed clean 1/2 cup white granulated sugar (less or more to taste, depends on how sweet the berries are and how sweet you would like your cobbler to be) 1 teaspoon lemon zest 1 tablespoon lemon juice 1/4 teaspoon cinnamon 1 1/2 tablespoons cornstarch (or instant tapioca) For the cobbler topping: 1 cup all purpose flour 3 tablespoons sugar 1 1/2 teaspoon baking powder 1/4 teaspoon salt 4 tablespoons unsalted butter 1/4 cup milk 1 large egg, lightly beaten Directions: Make the berry mixture: Put the blackberries, sugar, lemon zest and juice, cinnamon and cornstarch in a 9×9 baking dish. Stir to combine everything and make sure that the berries are all evenly coated with sugar.Let sit for 30 minutes for the berries to macerate so that the sugar dissolves and the berries release their juices. Preheat your oven to 350°F: Make biscuit dough topping: Vigorously whisk together the flour, 3 tablespoons of the sugar, baking powder, and salt in a medium bowl. Cut the butter into the flour mixture with your fingers or a fork until the topping mixture resembles coarse crumbs.Make a well in the center and stir in the milk and beaten egg until the dough is just moistened. Top the cobbler: Scoop up the dough in large spoonfuls, and drop over the berries in the baking dish like cobblestones. Bake: Bake for 30 minutes at 350°F, or until the berry mixture is bubbly and the topping is nicely browned.Great served with whipped cream or vanilla ice cream. Source: Simply Recipes

Cream Cheese Garlic Bread

Who said air fryer recipes had to be simple snacks? Even quick snacks can still pack flavor! This cream cheese garlic bread recipe balances the mozzarella cheese with just the right seasonings. Prepare it in your air fryer for minimal mess. Ingredients: Cream cheese Butter Italian seasoning Garlic salt Brioche bread Mozzarella cheese Non-stick cooking spray Directions: Mix 3 parts cream cheese 1 part butter Mix in Italian seasoning and garlic salt Spread mix over Brioche bread Sprinkle mozzarella on top Bake at 340 degrees F for 7 minutes

Salsa Verde Chicken Enchiladas

Enchiladas are a versatile dish that you can enjoy for a movie night, weeknight dinner, or even for breakfast with leftovers. This recipe includes a bright and tangy tomatillo salsa verde sauce. You can prep them beforehand and just bake them right before you need them. The tomatillo flavor holds up against the shredded dark meat’s deeper flavor. Prep time: 30 mins Cook time: 10 mins Total time: 40 mins Servings: 4 to 6 servings Ingredients: For the chicken: 1 1/3 pounds skinless chicken thighs, boneless or bone-in (1 3/4 lbs if bone-in) 2 cloves garlic, halved 1/4 medium onion 2 teaspoons sea salt For the tomatillo salsa: 1 1/2 lbs tomatillos, papery husks removed, rinsed 2 serrano chili peppers, top cut off to expose interior and to remove stems 2 cloves garlic 1/2 cup chopped white or yellow onion 1/2 cup chopped cilantro, stems included 1 tablespoon fresh lime juice 1 teaspoon sea salt For the enchiladas: 1 tablespoon extra virgin olive oil, corn oil, or peanut oil 12 corn tortillas (use sturdy yellow corn tortillas) 1/4 cup sour cream 1/2 cup crumbled Mexican cotija or queso fresco cheese 1/3 cup chopped red onion for garnish 1/2 cup chopped fresh cilantro, including stems for garnish Directions: Poach chicken thighs: Put chicken thighs in a medium-sized saucepan and just cover with water. Add the halved garlic, 1/4 of an onion, and 2 teaspoons of salt to the water. Bring to a simmer, reduce the heat to very low to maintain the heat at just below a simmer, and cook, covered, for 10 to 15 minutes, or until the chicken is just barely cooked through. Remove chicken thighs to a separate bowl and let cool enough to touch. Cook the tomatillos: While the chicken is cooking, put the tomatillos and serrano chili peppers in a separate sauce pan and cover them with water. Bring to a boil, reduce to a simmer. Simmer until the tomatillos are cooked, and have changed color, but are not mushy, about 5 minutes. Remove from heat. Make the salsa verde: Use a slotted spoon to transfer tomatillos and serrano chilis to a blender. Add 1/4 cup of the tomatillo cooking liquid to the blender, as well as 2 cloves of garlic, a half cup of chopped onion, 1 tablespoon of lime juice, and about 1/2 cup of chopped cilantro. Add one teaspoon of salt. Purée until blended, 15 to 30 seconds. Taste for heat. If not spicy enough add another chili pepper (it doesn’t have to be cooked). Add more salt to taste if necessary. You should have about 3 cups of salsa. Shred chicken meat, toss with salsa verde: Remove the cooked chicken meat from the bones (if using bone-in thighs). Shred the meat with a fork or knife. Put the chicken in a bowl and add 1/2 cup of the tomatillo sauce to the chicken. Taste the chicken; if it needs salt, add a little. Soften the tortillas: Heat a tablespoon of oil in a frying pan on medium-high heat. Add a tortilla to the pan and let it sizzle for 10 seconds or so. Use a metal spatula to flip it to the other side. Let it sizzle for a few seconds. Place another tortilla on top of this one (to soak up the excess oil) and flip again. You can keep going, stacking corn tortillas on top of the tortillas that appear to have excess oil. This way the new tortillas absorb some of the excess fat from the other tortillas. When the tortillas are heated through, remove them to a plate lined with paper towel. Add a more oil to the pan as needed, and continue to heat through and soften all of the tortillas. Roll up tortillas with chicken: Preheat the oven to 250°F. Scoop a spoonful of chicken into the center of the tortilla and roll up the tortilla. Place the rolled tortilla seam side down in a casserole dish and repeat with all of the tortillas. Cover with foil and warm in oven: Cover the rolled tortillas with foil and keep warm in a 250°F for 10 minutes. Heat salsa and smother the rolled tortillas with it: Place the remaining tomatillo salsa in a small saucepan and heat on medium high heat until simmering. Remove warmed rolled tortillas from the oven and smother with the salsa. Let some of the sauce go between the rolled up tortillas so that it gets to the bottom of the pan. Add sour cream and garnishes: Top with crumbled cotija cheese, chopped red onion, and chopped fresh cilantro. Thin the sour cream with a tablespoon of water and drizzle all over the top of the enchiladas. (Don’t skip the sour cream! It’s essential to balance the sharp acidity of the salsa verde.) Serve immediately. Source: Simply Recipes

Incorporating Brass Into Your Kitchen

Metals tend to come in trend every year for décor. Previous years had resurgences of copper and then rose gold. Recently brass has made its way into design trends as a response to the maximalist movement. Typically an antique metal, brass was most previously common in the 20th century in many collections. Today, brass can add a sleek finish to a kitchen and pops against an all white or neutral background. Here are a few ways you can incorporate brass into your kitchen. Hardware. Any well-designed kitchen needs to take lighting into consideration. Pendant lights above a sink or bar is a great way to add a focal point to a kitchen. Light fixtures come in all shapes and sizes these days, including brass. Brass stands out against white or gray hues bringing in all the attention. They also can match perfectly with cabinet hardware. Faucets. A faucet is no longer just a basic need in a kitchen, it’s also a design element! They come in unique shapes, finishes and metal options. Try a faucet with sophisticated curves and vintage knobs for an eye-catching accent to a marble countertop. An all white kitchen with brass fixtures will highlight a faucet even more. Bar Stools. Kitchen bar stools are a perfect opportunity to add personality and character. You can pick stools that go with the rest of your design or go in the opposite direction to create a striking contrast. Brass stools can add an antique feel to a modern kitchen for a one of a kind kitchen. Match the stools with a light fixture or cabinet pulls to bring it all together. Source: the Spruce

Air Fried Fresh Tortilla Chips

Fresh out of chips? Prepare a batch right in your air fryer with just three ingredients! These chips are fresher and can be as healthy as you want with the amount of salt. Periodically check on them for the desired crunch. Ingredients: Tortillas Salt Non-stick cooking spray Directions: Cut a stack of tortillas in 1/8th pieces Evenly spray with cooking oil Sprinkle with salt Load into bin without overlapping the chips Bake at 350 degrees F for 5 to 7 minutes. Check at the 3 minute mark

The Ultimate Avocado Guide

If you’re looking to master how to pick avocados, keep them fresh and add them to your favorite recipes, you’ve come to the right place. Avocados are a fruit with creamy, buttery innards that can elevate any dish. Although usually used for savory foods, avocados can still be used in sweeter things such as salads or even chocolate puddings. Picking Avocados When shopping for avocados, gently press them to check their firmness. You’ll want the avocado to be firm but still yield slightly. Avoid avocados with large brown spots or squishy sections. You can also pull back the stem cap as this will be a clear indicator of what’s expected inside. If the avocado is green under the stem cap, you have a ripe avocado. On the other hand, if you find brown then it’s overripe and you can expect to find more brown inside the avocado. Storing Avocados An unripe avocado can be stored on the countertop to move along the process. However, once ripe they should be moved to the fridge to keep them at their ripeness as long as possible. If the avocados are already cut the browning process will happen very quickly. You can spray vegetable oil on the cut half or put an onion in the container to preserve them longer. Avocado Seasons You can usually find avocados year-long in a grocery store. Avocados are in season basically all year in Mexico, which are then imported. California’s avocados are only in season from February to September. Have leftover avocados? Throw them in a smoothie or integrate them in a plain yogurt. You can also add them to scrambled eggs. If you’re looking for the best tools to get your avocado recipes the best they can be, check out Cosmo Ranges, Ovens and Cooktops here! Source: the Kitchn