Author : Cosmo

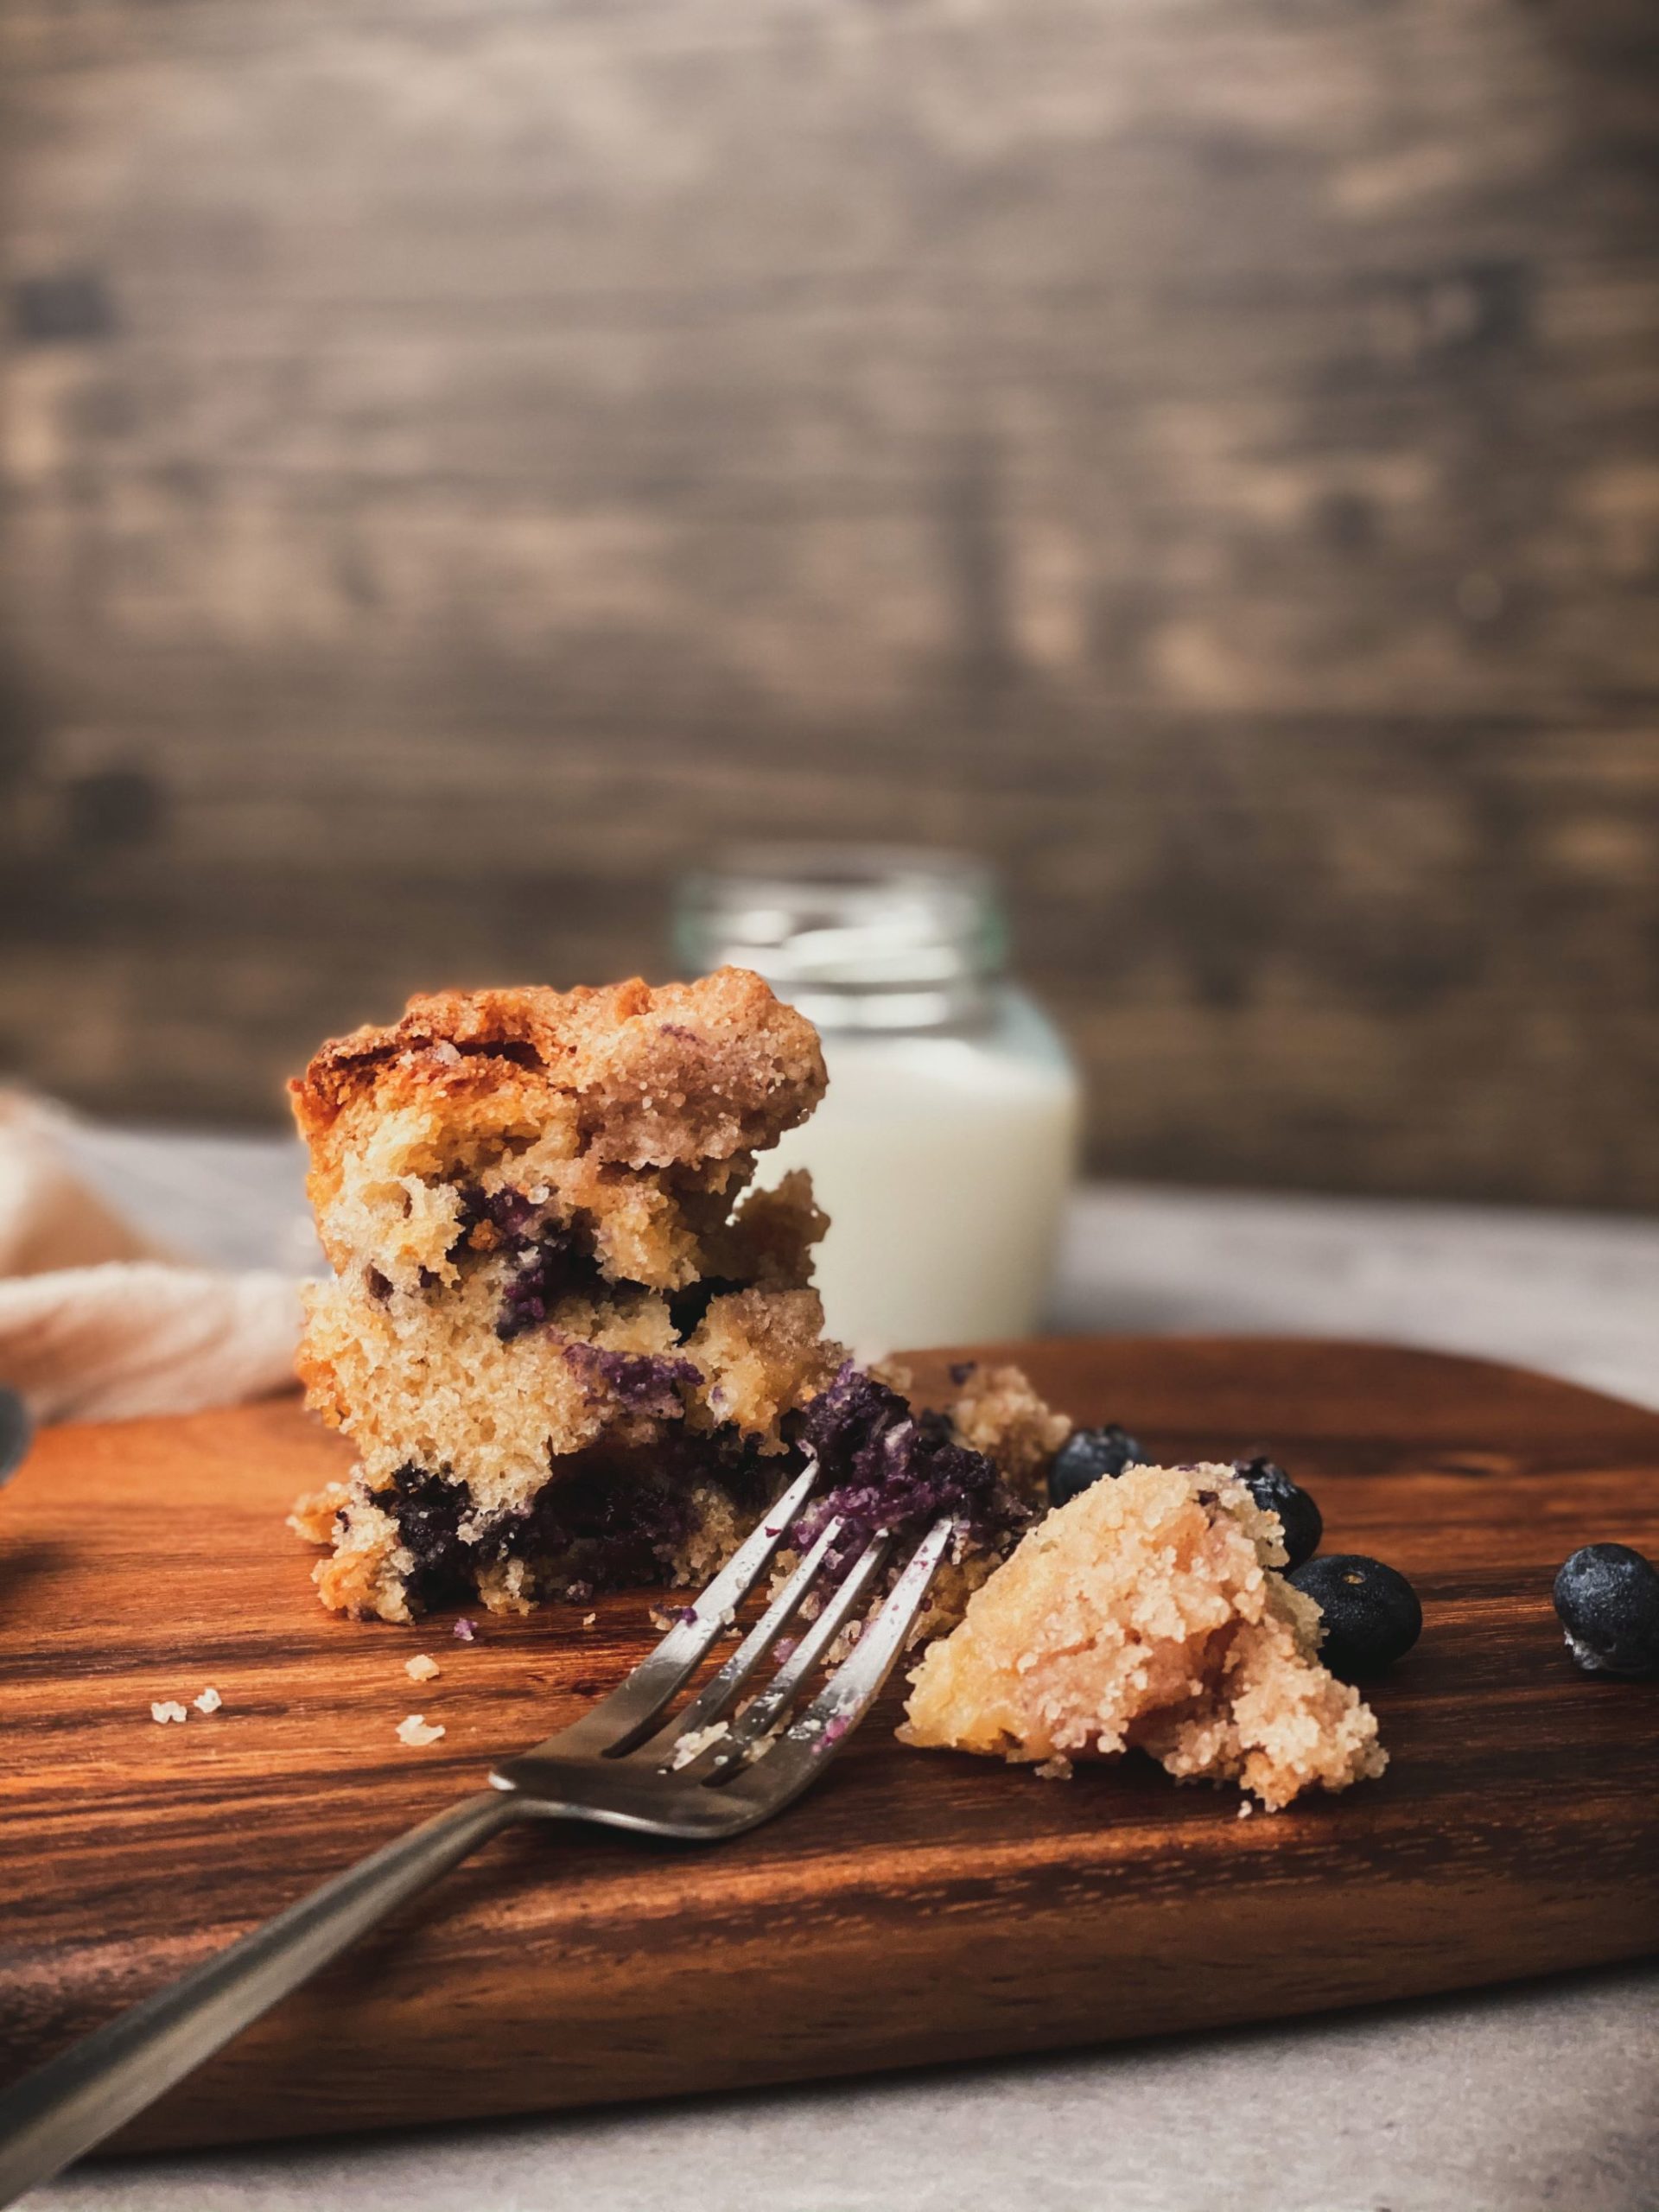
Blueberry Breakfast Cake Recipe

It’s never the wrong time to enjoy cake, even breakfast time. Try this blueberry cake recipe with the same flavor of a great blueberry muffin. Enjoy it with a morning coffee or tea. Time: 2 hr 25 min Active: 40 min Yield: 6 to 8 servings Ingredients: Melted unsalted butter, for buttering the pan 3/4 cup granulated sugar 1/2 cup old-fashioned rolled oats 1 teaspoon baking powder 1/2 teaspoon kosher salt 1/4 teaspoon baking soda 1 1/2 cups plus 1 tablespoon all-purpose flour (see Cook’s Note) 1/2 cup vegetable oil 1/2 cup plain yogurt 1 teaspoon pure vanilla extract 2 large eggs 1 1/4 cups blueberries, plus more for topping Frosting and Filling: 1/2 cup plain yogurt One 8-ounce package cream cheese, at room temperature 1 teaspoon pure vanilla extract 1/2 cup confectioners’ sugar 1/4 cup blueberry preserves, for topping Directions: For the cake: Preheat the oven to 350 degrees F. Butter a 7-by-3-inch round cake pan. Whisk together the sugar, oats, baking powder, salt, baking soda and 1 1/2 cups flour in a large bowl and set aside. Toss the blueberries with the remaining 1 tablespoon flour in a small bowl. Whisk together the oil, yogurt, vanilla and eggs in a medium bowl. Fold the oil mixture into the sugar mixture until just combined. Then gently fold in the floured blueberries. Pour the batter into the prepared cake pan and bake until a toothpick inserted in the center comes out clean, 55 minutes to 1 hour 5 minutes. Cool in the pan on a rack for 30 minutes. Unmold the cake and cool completely on the rack, about 30 minutes more. For the frosting: Meanwhile, beat the yogurt and cream cheese in a large bowl with an electric mixer on medium-high speed until smooth. Beat in the vanilla. Then slowly add the sugar, while beating, until completely combined. Refrigerate until ready to use. Slice the cooled cake in half horizontally to make 2 rounds. Put 1 cake round on a cake stand or round serving platter. Evenly spread half the frosting over the top of the cake, spreading all the way to the edge. Dollop half the blueberry preserves in several small drops all over the frosting layer. Top with the remaining cake round and spread the remaining frosting over the top. The sides of the cake will be unfrosted. Dollop the remaining blueberry preserves in the center of the cake. Sprinkle blueberries on top of the preserves. The cake can be served right away or made the night before and refrigerated. Sources: Food Network

Teriyaki Chicken Breast Recipe

Learn how to make a quick dinner option with this teriyaki chicken recipe. Try your hand at a homemade teriyaki sauce for a healthier choice with great flavor. Cook time: 30 minutesYield: Serves 4 Ingredients: 3/4 cup soy sauce* (or mix tamari** and water in equal proportions to make 3/4 cup) 3/4 cup sake 3/4 cup mirin 4 Tbsp sugar A 1-inch piece of ginger, grated fine 4 skinless, boneless chicken breasts, about 1 1/4 to 1 1/2 pounds total (set out for 30 minutes to come to room temp) 2-3 Tbsp sesame seeds Directions: Gently simmer chicken in sauce made with sake, mirin, soy sauce, sugar, ginger: Mix the grated ginger, sugar, soy sauce, sake and mirin in a pot and bring to a boil. Add the chicken breasts, return to a simmer, then lower the heat to the lowest possible setting (warm if you can), on your smallest burner, and cover.The idea is to cook the chicken as gently as possible, below a simmer. Cook for 20 minutes.If you are working with somewhat large chicken breasts, you may need to cook them longer, or cut them in half before cooking. Toast sesame seeds: While the chicken is poaching, toast the sesame seeds in a dry pan until they begin to brown. Move to a small bowl and set aside. Set aside chicken, cover with foil: Remove the chicken breasts from the teriyaki sauce, set on a plate and wrap with foil. Reduce sauce: Bring the sauce back to a boil and boil vigorously until the sauce is reduced to a syrup, about 8-10 minutes. Keep an eye on the sauce, stirring it occasionally. Slice chicken, cover with sauce, sprinkle with sesame seeds and serve: To serve, slice the chicken breasts, cover with the teriyaki sauce and sprinkle sesame seeds on them. Serve with plain white rice. Sources: Simply Recipes

The COS-C106SIX-PT Oven’s New Look

New year new oven. Our 24” wall oven has gotten a visual upgrade for the new year. It’s the same oven you loved with a new modern look. Take a look at all the features you can have with your next kitchen upgrade. Previous Next Features Spacious 2.5 cu. ft. capacity single electric wall oven delivers plenty of space in a compact size Single electric wall oven has 8 oven functions: Defrost, Turbo True European Convection, lower heater, upper and lower heater, upper and lower heater convection, full grill, double grill, double grill convection Integrated touch controls make cleaning the oven exterior easy; surface wipes clean with a soft cloth Turbo True European Convection for fast cooking and even heating Single electric wall oven with 2 racks can be configured between 5 positions for multi-rack cooking Modern cabinet pull style stainless steel handle Child safety control lockout built-in to our single electric wall oven Cavity cooling system dissipates heat from the outer surfaces of the unit, including the oven door Single electric wall oven has a ventilated steam outlet Triple layer glass door with removable inner panel features safe cool-to-touch glass Extra-large oven window with dual lights to easily monitor the progress of your cooking Complimentary drip pan included for your convenience Check it out here!

Seared Ahi Tuna Recipe

Create a delicious plate of freshness and flavor with this recipe. Ahi tuna also known as yellowfin tuna can be prepared with a side of white rice, shoyu, radish sprouts and nori. When shopping for your tuna the freshness and quality of the fish makes a big difference. Look for a higher grade tuna. Prep time: 5 minutesCook time: 5 minutesMarinating time: 1 hourYield: 2 servings Ingredients: 2 (6-8 ounce) ahi tuna steaks (3/4 of an inch thick) For the marinade: 2 tablespoons dark sesame oil 2 tablespoons soy sauce (or 2 teaspoons of wheat-free tamari for gluten-free option) 1 tablespoon of grated fresh ginger 1 clove garlic, minced 1 green onion (scallion) thinly sliced (a few slices reserved for garnish) 1 teaspoon lime juice Directions: Marinate the tuna steaks: Mix the marinade ingredients together and coat the tuna steaks with the marinade, cover tightly, and refrigerate for at least an hour. Sear the tuna: Heat a non-stick skillet over medium high to high heat. When the pan is hot, remove the tuna steaks from the marinade and sear them for a minute to a minute and a half on each side ( even a little longer if you want the tuna less rare than pictured.) Slice and serve: Remove from pan and slice into 1/4-inch thick slices. Sprinkle with a few green onion slices. Serve plain, with white rice, or over lettuce or thinly sliced cabbage or fennel. Sources: Simply Recipes

How to Clean a Scorched Pan

Pans are bound to be neglected at times. Leaving something in for too long leaves food burned and your pan scorched. While there are popular store-bought cleaners, try these other easy solutions if you ever find yourself short on money or time. Vinegar & Baking Soda Vinegar is a great multi-purpose cleaner that can save your pans. Pour a small layer of equal parts water and white vinegar on the bottom of the pan. Next, heat the solution on the stovetop until it comes to a boil. Once it boils for a minute, remove and drain it down the sink. Add a tablespoon of baking soda to the empty pan. Finally use a scouring pad to massage the baking soda and combat any burn marks. Rinse clean. Salt Coarse Kosher salt is another solution to scorch marks on pans. Pair it with a dish detergent and hot water. Massage it into the pan with the juicy core of a cut lemon. Cream of Tartar Try using cream of tartar as an abrasive substitute for baking soda. Mix a tablespoon of it in a cup of water and bring it to a boil on a scorched pan. Let the water cool and then scrub the pan to combat any marks. Dryer Sheet Take soap, water and add a dryer sheet into a mix on the burnt pan. Allow it to sit for an hour. The sheet will loosen the burnt food and leave you with a shiny pan. Alka Seltzer Add 1-2 tablets to hot water in your pan and allow it to sit. The solution will take action against any stubborn burns. Sources: HGTV

An Easy Hummus Recipe

There’s nothing else quite like homemade hummus. Try this easy recipe to enjoy all the flavor in about just five minutes! Ingredients: ½ cup of tahini (roasted, not raw) ¼ cup extra virgin olive oil (plus more for garnishing) 2 garlic cloves, mashed and roughly chopped 2 15-oz cans of chickpeas (garbanzo beans), drained ¼ cup freshly squeezed lemon juice ½ cup water ½ teaspoon of salt Garnishes: A sprinkling of paprika, a swirl of olive oil, toasted pine nuts, and/or chopped parsley Directions: Process tahini and olive oil: In a food processor, combine the tahini and olive oil and pulse until smooth. Blend the oil and tahini first when making hummus. Blending the oil and tahini first helps it blend into the chickpeas better Add remaining ingredients, process until smooth: Then add the garlic, garbanzo beans, lemon juice, 1/2 cup water and 1/2 teaspoon of salt. Process until smooth. The longer you process in the food processor, the smoother the hummus will be. Add more salt or lemon juice to taste. Add the chickpeas to the blender Blend the chickpeas, tahini, and olive oil until the hummus is creamy Serve: Spoon into serving dish, swirl a little olive oil over the top and sprinkle with garnishes—a little paprika, toasted pine nuts, or chopped fresh parsley. Serve with crackers, raw dip vegetables such as carrots or celery, or with toasted pita bread. To toast pita bread, cut the pita bread into triangles, brush with olive oil and toast for 10 minutes in a 375°F oven, turning them over half-way through the cooking. Source: Simply Recipes

Sheet Pan Pizza with Roasted Cauliflower and Greens Recipe

Try this delicious new pizza recipe that can be prepared on a sheet pan. Combine cauliflower and other greens for a large and unique pizza everyone will love. Prep time: 35 minutes Cook time: 15 minutes Yield: 12 pieces Ingredients ½ large head cauliflower 6 tablespoons olive oil, divided ½ teaspoon salt ¼ teaspoon pepper 1 recipe (about 1 ½ pounds) dough 1 cup (2 ounces) grated Parmesan 12 ounces fresh mozzarella, torn into pieces 2 tablespoons drained green peppercorns in brine, or drained capers 3 handfuls baby greens such as arugula, kale or spinach 1 tablespoon balsamic vinegar Equipment: 2 (13 x 18) rimmed baking sheets Directions: Preheat the oven to 450ºF. Place a rack in the lowest position. Prepare the cauliflower: Trim away the outer leaves and cut the cauliflower in half. Cut one half into slices about 1/4-inch thick, and reserve the other half for another use (or roast it all now and save half for another meal.) Some smaller florets will fall away; this is fine. Spread the cauliflower slices and any florets that have fallen off on a rimmed baking sheet. Drizzle with 2 tablespoons of the oil. Using your hands, rub the oil into the cauliflower, coating both sides. Sprinkle with 1/2 teaspoon salt and 1/4 teaspoon pepper. Roast the cauliflower: Place the cauliflower on the lower rack of the oven. Roast for 20 minutes, or until tender. Let the cauliflower cool slightly on the pan and break or cut it into smaller pieces. At this point, the cauliflower can be kept refrigerated for up to 5 days. Stretch the dough onto the baking sheet: Wipe clean the baking sheet used to roast the cauliflower. Place the dough in the center of the baking sheet and drizzle with 2 tablespoons of the oil. Turn the dough to coat it well, spreading some of the oil over the baking sheet. Gradually stretch the dough until it reaches the edges of the baking sheet. If it springs back or is difficult to stretch, cover with plastic wrap and let rest for 10 minutes before continuing. Turn the oven to 500ºF. Top the pizza: Brush the top of the dough with 1 tablespoon of oil and sprinkle with the grated Parmesan. Top with the mozzarella, followed by the cauliflower. Sprinkle the peppercorns (or capers) evenly over the dough. Bake the pizza: Set the pan on lowest shelf of the oven and bake for 15 minutes, or until the cheese melts and the pizza is golden brown. Top with greens: In a bowl, toss the greens with the remaining tablespoon of the oil, the vinegar and salt and pepper. Top the cooked pizza with the greens; they will wilt slightly from the heat of the pizza. Cut into squares and serve hot. Sources: Simply Recipes

6 Ways to Reduce Food Waste

Wasting food is one of the fastest ways to lose money while also negatively impacting the environment. Before going out on your next grocery store run, read up on these 6 ways to help reduce food waste in your kitchen. Look at Your Fridge This may seem obvious, but take a look at your pantry and fridge before heading to the grocery store. Do a quick inventory count to see what you have and what you’re missing. This will help prevent purchasing unnecessary foods. You can also end up finding some ingredients that are easily turned into a meal, cutting back on the number of trips to the store. Make a List Meal prep can be an easy path to success. Planning out your meals for the week ensures your shopping list only has the ingredients you need. While you’re in the grocery store, don’t be tempted by advertisements or offers and only grab what you have on your list. Cut Back on Bulk Buying Buying in bulk may seem like a great deal, but it’s an easy way to overload your cart with things you don’t need. Even if a bag of avocados is a steal at a low price, you may not use them all up before they go bad. Buying in bulk is best for ingredients you are absolutely sure you’ll use up or will last a long time. Store Food Properly Food can go bad if it’s not properly stored to preserve freshness. Any extra fruits or veggies can be frozen or preserved to lengthen their flavor. You can freeze a loaf of bread and take out the slices a few hours before you need it. Make sure you store bananas, apples and tomatoes by themselves as these fruits emit natural gases that can spoil any produce around them. Wait to wash berries until you’re going to eat them to prevent mold. Organize Your Shelves Whenever you buy new food, bring all the older items in your pantry or fridge to the front. This will ensure older food won’t spoil and you can find ingredients that have gone bad. Cook Smarter If a recipe calls for half an onion, save the other half for a soup or stew. Save carrot tops and make a pesto instead of tossing them out. There’s great ways you can turn food you may think is waste into other delicious meals. Source: Good Housekeeping

Creamy Pumpkin Soup with Smoked Paprika Recipe

Try this delicious creamy pumpkin soup recipe that pairs perfectly with a crusty garlic bread. Look for sugar pumpkins or Japanese kabocha pumpkins to roast as normal store pumpkins aren’t always meant for cooking. Prep time: 15 mins Cook time: 45 mins Roasting pumpkin time: 1 hour Yield: Serves 8 Ingredients 4-5 pounds of cooking pumpkins, or 3 (15-ounce) cans of pumpkin purée 4 tablespoons butter 2 medium yellow onions, chopped, about 2 cups 3 garlic cloves, minced 2 to 3 teaspoons smoked paprika, more or less to taste 1/2 teaspoon ground cumin 1 pinch cayenne pepper 1 large tart green apple (Granny Smith) peeled, cored, chopped (about 2 cups) 4 cups chicken broth (or vegetable broth for vegetarian option, and gluten-free broth for gluten-free version) 1 cup water 1 teaspoon fresh thyme or 1/2 teaspoon dried thyme 1/4 teaspoon ground sage 1 cup milk 1/2 cup cream Salt and freshly ground pepper, to taste Handful of toasted pepitas (shelled pumpkin seeds) for garnish Directions Roast the squash: Preheat the oven to 350°F. Cut your pumpkin(s) in half, and scoop out the seeds and stringy stuff (an ice cream scoop works well for this purpose). Lay the halves face down on a foil or silicone lined baking sheet and bake until soft, about 45 min to an hour. Cool, remove the peel, scoop out the flesh. You’ll need 6 cups roasted pumpkin for this recipe; freeze whatever you don’t use for future use. Cook the onions with the seasonings: Melt butter in a 4-quart saucepan over medium-high heat. Add the onions and cook, stirring often, until softened, about 4 minutes. Add the garlic and cook a minute more. Add smoked paprika, ground cumin, and cayenne and stir for a minute more. Add the remaining ingredients and simmer: Add the chopped apple, pumpkin, broth, water, thyme, and ground sage. Mix well with a wooden spoon. Season with a little salt and pepper. Bring to a boil, then reduce heat to medium-low, partially cover, and simmer for 20 minutes or until the apples are cooked through. Purée the soup: Working in batches, transfer soup to a blender or a food processor. Cover tightly and blend until smooth. Alternatively, use an immersion blender to purée. If you want extra smooth soup, pass the purée through a food mill, after it’s been through the blender. Stir in the milk and cream: Return the soup to the saucepan over low heat. Slowly add the milk and cream, stirring to incorporate. Taste and add additional salt or other seasonings if needed. Serve! Sprinkle with toasted pepitas (shelled pumpkin seeds) and a little more smoked paprika to serve. This soup can be made a day ahead. Leftovers will keep refrigerated for about a week, or frozen for up to three months. Source: Simply Recipes

An Easy Weeknight Chicken Ramen Recipe

You can never go wrong with a bowl of ramen. Try this recipe to cut down on some cook time while still enjoying all the flavor of a great ramen. It’s also a perfect meal for the colder season. Prep Time: 15 minsCook Time: 15 minsYield: 4 servings Ingredients For the broth: 2 tablespoons toasted sesame oil 4 scallions, thinly sliced, including some of the green part 1 clove garlic, minced 1 small carrot, peeled and thinly sliced 4 ounces button, cremini, or shiitake mushrooms, thinly sliced 1 1/2 cups thinly shredded Napa cabbage, spinach, kale, or other greens 1-inch piece fresh ginger, minced 6 cups low-sodium chicken broth, store-bought or homemade 1 tablespoon brown sugar, optional Lime wedges, optional For the soup: 4 large eggs 20 ounces fresh ramen noodles, or 12 ounces dried noodles 2 medium cooked chicken breast halves, sliced For the garnish: Soy sauce Sriracha or other hot sauce Handful fresh cilantro, leaves removed from stems Lime wedges Directions: Make the broth: In a large saucepan over medium heat, heat the oil. Add the scallions, garlic, carrot, mushrooms, and cabbage. Cook, stirring often, for 3 minutes, or until the vegetables soften.Stir in the ginger and brown sugar (if using) and cook for 30 seconds. Finally add the chicken broth and bring to a simmer. Simmer for 10 minutes. Cook the eggs: While the broth is simmering, bring a pot of water to a boil. Set a bowl of cold ice water nearby.Use a slotted spoon to gently lower the eggs, still in the shell, into the water. Simmer for 7 minutes for eggs that are soft and a little runny in the center, or 9 minutes for hard-boiled eggs.Transfer the eggs to the bowl of cold water and set aside until ready to serve. Cook the noodles: Return the pot of water to a boil. Add the noodles and cook for 3 minutes, or according to the package directions, until tender. Drain in a colander. Assemble the soup: Divide the noodles among 4 large bowls. Ladle the broth and vegetables over the noodles.Remove the eggs from the ice water. Tap the shells with a spoon to crack and then peel off the shells. Pat the eggs dry and cut them in half.Top each bowl with the egg halves and the sliced chicken. Serve with soy sauce, hot sauce, cilantro leaves and lime wedges. Source: Simply Recipes