How-To

How to Install Cabinet Hardware

A new set of cabinet hardware is a quick and easy way to upgrade the look of your kitchen. Hardware is typically a low expense with little effort required. If you’d like knobs where none existed, it’ll take a little longer to locate and drill new holes. Here’s how to install new cabinet hardware. What You’ll Need: Ruler or tape measure Hammer Drill with 3/16-inch twist bit Straightedge Screwdriver Materials: Cabinet knobs Cardboard Finishing nail Instructions: Measure: Typically knobs are placed 2 ½ to 3 inches from the top or bottom of a door and centered across the width of the stile. Simply measure the width of the stile and divide by 2 to find the center. If your cabinets have slab doors without rails or stiles, you can plan on positioning the knobs 2 ½ to 3 inches from the bottom or top edge of the door, and an equal distance from the side edge of the door. Create a Template: Measuring each door one by one can take a long time, if you’re looking to speed up your workflow consider creating a cardboard template. Measure 2 ½ or 3 inches from one edge of a squared-off cardboard and from the adjacent edge, measure in half the width of the cabinet stile. Poke a finishing nail throughout the cardboard where the two measurements intersect. Remove the nail. Mark Locations: Take the template and place it flush with the side and the top or bottom edge of the door. Push the finishing nail through the hole and give it a tap with a hammer to mark the door. Using a nail instead of drilling through the template will preserve the template. If you were to drill through the template the hole will get larger and cause inaccuracies. Drill: Most knob screws require a 3/16-inch-diameter hole but it’s advised to test a hole in a scrap piece of wood to make sure of the size. Drill the hole at the marked point. Hold the door open as you drill to prevent accidentally drilling into the cabinet. Install the Knob: Knobs come with two different screws of different lengths. The shorter screw is meant for cabinet doors of standard thickness, while the longer screw is for “false front” drawers attached to drawer boxes. Insert the shorter screw through the drilled hole from the back and tighten to the knob while gripping it from the other side. Marking and Installing Knobs on Drawers: Knobs on drawers are typically installed in the center of the faces of drawers. You could take a similar approach with a template for the drawers but it might be easier to mark the center by finding the intersection of the diagonals. Place a straight edge across one set of opposing diagonal corners and make a light pencil mark near the center. Repeat the process with the other diagonal and mark where the two lines intersect. Drill and use the longer screw to install a knob. If you are using a handle-style pull you will need to measure horizontally from the marked center point to mark two holes for the handle. Source: The Spruce

How to Clean a Scorched Pan

Pans are bound to be neglected at times. Leaving something in for too long leaves food burned and your pan scorched. While there are popular store-bought cleaners, try these other easy solutions if you ever find yourself short on money or time. Vinegar & Baking Soda Vinegar is a great multi-purpose cleaner that can save your pans. Pour a small layer of equal parts water and white vinegar on the bottom of the pan. Next, heat the solution on the stovetop until it comes to a boil. Once it boils for a minute, remove and drain it down the sink. Add a tablespoon of baking soda to the empty pan. Finally use a scouring pad to massage the baking soda and combat any burn marks. Rinse clean. Salt Coarse Kosher salt is another solution to scorch marks on pans. Pair it with a dish detergent and hot water. Massage it into the pan with the juicy core of a cut lemon. Cream of Tartar Try using cream of tartar as an abrasive substitute for baking soda. Mix a tablespoon of it in a cup of water and bring it to a boil on a scorched pan. Let the water cool and then scrub the pan to combat any marks. Dryer Sheet Take soap, water and add a dryer sheet into a mix on the burnt pan. Allow it to sit for an hour. The sheet will loosen the burnt food and leave you with a shiny pan. Alka Seltzer Add 1-2 tablets to hot water in your pan and allow it to sit. The solution will take action against any stubborn burns. Sources: HGTV

The Grilling Mistakes You Should Avoid

Grilling may be a summer pastime, but it’s never the wrong time to brush on your skills. Be ready the next time the warm weather rolls around by correcting these mistakes you may not be aware you’re making. The Grill. Lighting a fire with lighter fluid may get everything blazing faster, but it’s better to start things slow. Build your fire with charcoal and newspaper until they’re fully gray. Give your grates time to heat up as you need these to be hot before you start laying anything down. If your grates aren’t hot enough you may end up steaming your steaks instead of building a crust on them. This will let all the juices escape. The Food. A common practice in restaurants is to allow grilling meats time to come up to room temperature. If you place meat onto a grill directly from the fridge you’ll get an uneven cooking process. The outside will char while the inside will be more rare than it should be. When planning out your cooking process, consider cutting back on the amount of foods on your grill. Take those burgers, hot dogs or kabobs in smaller batches to prevent overcooking some and undercooking others. This will also help avoid cross-contamination. Grilling. If you are looking to char your meats with direct heat, it should only be for a moment. You want to cook around the open flame. Once you have everything on your grill it’s best to leave it alone until you see a crust. Putting pressure on meat with tongs or a spatula disrupts the meat without need. After you’ve gotten everything grilled, let it sit on a pan for about 10 minutes before slicing into it. This will allow any juices inside to redistribute properly. Sources: House Beautiful

How to Get the Most Out of Your Broiler

Broilers are like upside-down grills inside your oven. You can expose your foods to very high heat to effectively cook, like on a grill. Broilers are best used for thin cuts of meat, vegetables or foods that are fairly tender. Here’s everything you need to know for the best results from your broiler. First, it’s important to understand where the broiler is located inside your oven. Usually it’s the same element inside that is used for baking and roasting. Often the broiler is located at the top, meaning you’ll have to place your oven rack at the highest position possible, typically three to four inches away from the broiler. The broiler can also be located at the bottom of the oven or in another compartment underneath. You would need to place your food closer to this side, but there may be more limitations on how you broil with it. Preheat. You’ll need to test your broiler a few times to see what settings would be ideal. Treat it similar to a grill in that you should turn it on for about five minutes before cooking to give it time to heat up. Take a look to see how the broiler behaves, your broiler may have a rod with flames coming out either side. In this scenario placing food directly underneath the line would cook food evenly. Time. Broiling is meant to be done fairly quickly, usually in five or ten minutes. Anything longer can take your nice sear to a burn. You’ll only be really cooking the outer surfaces, so pick foods that are quick to cook like vegetables or thin cuts of meat. If your food isn’t cooked enough at the end, you can put it in the oven to finish. On the other hand, you can cook with the oven first and then broil at the end to give a nice crust or sear to the surface. Pans. Grated broiling pans may allow greater airflow, but aren’t always necessary when using a broiler. You can achieve a similar effect by periodically flipping your food as it cooks. Try using a preheated cast iron skillet or even heavy duty sheet pans as an alternative. Sources: The Kitchnn

Tips on Organizing Your Pantry

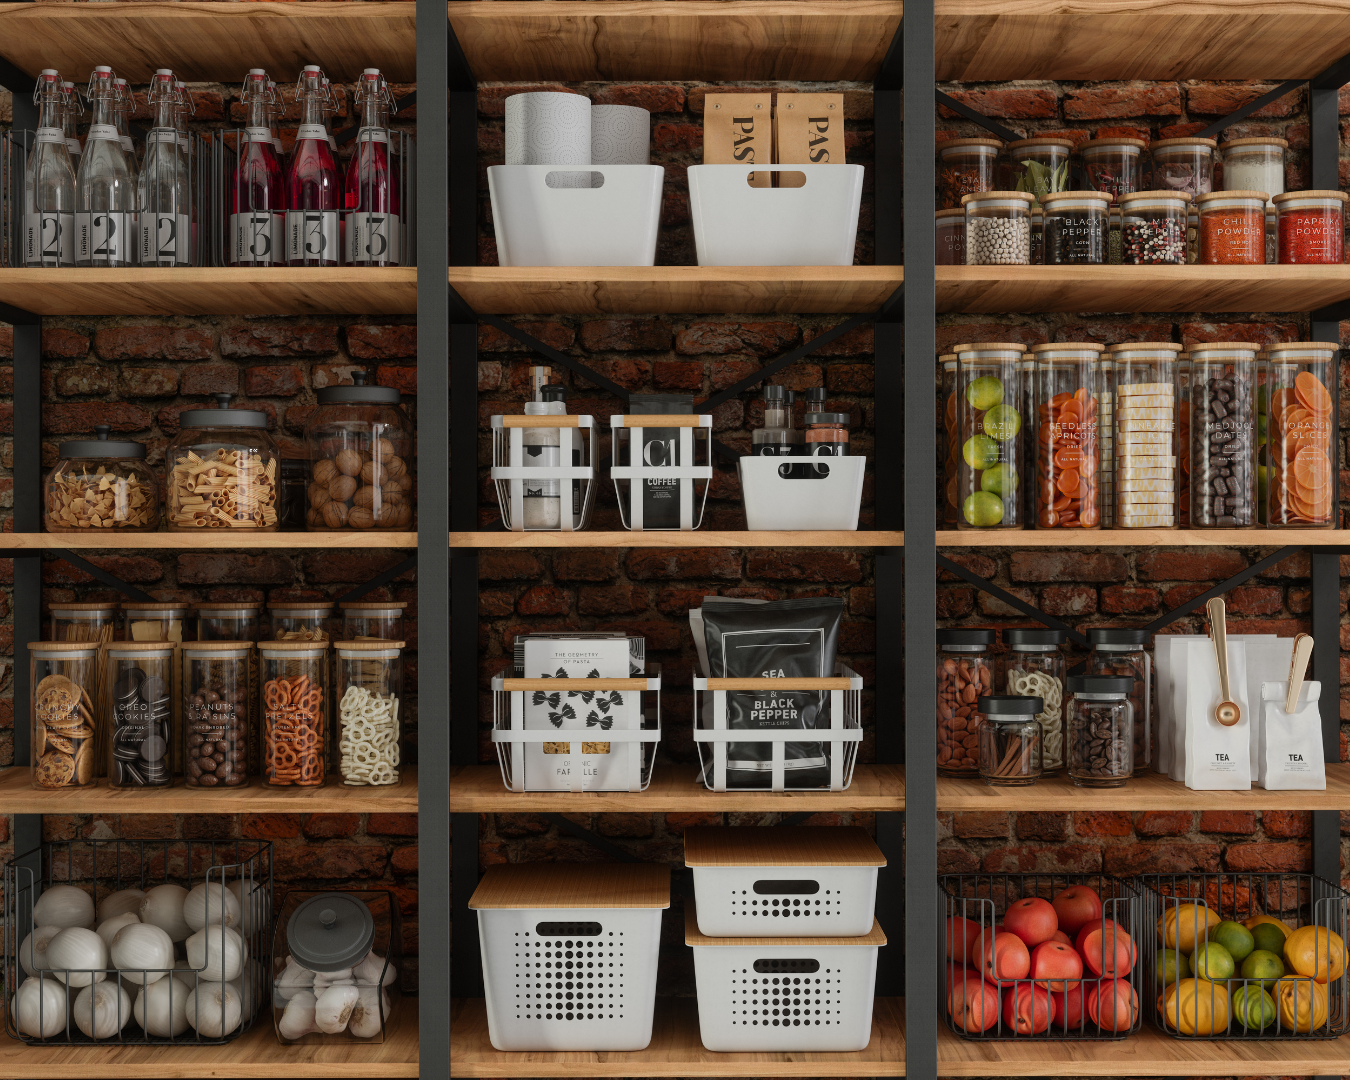
You may have already heard the common pantry organizing tricks such as placing similar ingredients together or using clear containers for dry goods. Here are some more tips you may be missing when it comes to building that well-ordered pantry you’ve always dreamed of. New Methods for Organizing A common way of organizing your pantry is the “like with like” approach. While placing similar ingredients together may be a good starting point, there may be better solutions for your kitchen. First, consider the frequency of use. Are there some spices you use more than others? Place those in an easily accessible spot. Do you have a morning routine that always revolves around coffee? Consider a coffee station with all your essentials. Another organization method you should consider is the “first in, first out” system. This method is similar to most grocery stores. If you have multiples of one item such as beverages or boxes of cereal, place them in a way that the older items will be used first. You will ultimately prevent wasting any food. Storing Foods in Jars A recent trend that is visually pleasing to look as is placing dry goods in matching glass storage jars. This process is known as decanting. Decanting typically involves moving liquid ingredients from one jar to another, but decanting for your pantry involves moving dry foods into another storage container. The process helps reduce clutter in your pantry while also providing a visual on what you have available. When doing this, be sure you are using jars appropriate to the ingredient. Is this something you will have to pour or scoop later on? If so, be sure you have a wide enough mouth on the jar that you can scoop out of if necessary. Take some time to label these ingredients with not only the name of the ingredient but with their expiration date. You will be losing the original container after all. You can use some washi tape and a permanent marker, no need for all the fancy labels. Achieving the perfect pantry takes time and is an ongoing process. A pantry will always differ depending on the needs of the kitchen. Check up with your pantry a few times a year to see what can be improved or thrown out. Sources: Organized Home

Ways You’re Ruining Your Nonstick Pans

Nonstick pans are great for every day cooking and the nonstick feature makes for an easy clean up. However, when used incorrectly these pans can be damaged and ruined completely. Here are some of the ways you may be ruining yours. Cooking Spray. Using cooking spray on nonstick pans is a big problem. The spray will build up on the pans over time and it’s near impossible to remove. Stick to using oils or butter to coat the pan. Heating Before Oil. Although cooks may advise to heat your pan before using oil, doing so on nonstick pans is a hazard. This technique is best for anything but nonstick pans. If you heat up a nonstick pan alone you risk releasing harmful toxins. Add your oil or cooking fats as soon as you start heating the pan. The Dishwasher. Nonstick pans are not meant to be washed in the dishwasher, even if the label says dishwasher-safe. It may be safe to do so, but the hot water and harsh detergents will wear them down over time. It’s best to wash these pans by hand. Try using baking soda and water instead to scrub away any residue. High Heat. Exposing your nonstick pans to extreme heats will damage the coating. It also can release harmful toxins found in the pan. If you’re looking to cook some foods with high heat, such as searing meat, use a cast-iron skillet instead. Avoid putting nonstick pans in an oven at all costs. Metal Utensils. These utensils can scratch your pan. Stick to silicone or wooden utensils to make your cookware last longer. Sources: House Beautiful

How to Clean Brass

Before starting, check if your brass is solid or brass-plated. You can test this by using a magnet. If your magnet sticks, your item is brass-plated. It’s important to note this since scrubbing brass-plated items can remove the plating. Clean these items with hot, soapy water instead and dry properly. Cleaning Brass First, check how tarnished your brass is. If it’s only lightly tarnished you can use hot water with soap for sufficient results. Use a toothbrush to get in small crevices. If the brass is heavily tarnished you can use commercial cleaners but use these sparingly as they are abrasive and can scratch the surface with frequent use. Natural Cleaners You can clean brass naturally and more gently with common ingredients. Check out these ingredients below. Ketchup and Tomato Juice. The mild acid in tomatoes removes tarnish and dirt from brass. Use a soft cloth and rub the ketchup into your brass item. Rinse with warm water after and dry properly. You can also soak items in tomato juice if they are small enough. Place them in the juice for 5 minutes or longer depending how dirty they are, then rinse and dry thoroughly. Lemon Juice. Another mild acid is found in lemon juice which can effectively clean brass. If your items are lightly tarnished, cut a lemon in half and sprinkle with table salt. Rub the lemon over the brass surface then wipe with a soft cloth and buff until it shines. If your item has a heavier tarnish, create a paste with two parts cream of tartar to one part lemon juice. Apply the paste and let sit for at least 30 minutes. Be sure to rinse with warm water, and buff with a dry cloth after. You can prevent your brass from tarnishing by applying a thin coat of mineral oil. Avoid touching it as much as possible as your hands’ natural oils will increase tarnishing. Sources: HGTV

How to Personalize Your Kitchen

Plants may seem like just a decorative piece in a kitchen, but if growing the right ones, they can offer tastier meals and fresher cocktails. Consider adding low maintenance herbs to brighten up your kitchen space. Here’s some tips on how to start your plant collection. Pots. Plant pots can add the most character to a plant and speak to your style. Choose pots with interesting colors and shapes. Combine earthy clay pots and soothing natural sandstone for a dynamic look to your kitchen. You can also add a modern flair with classic black and white ceramic. Variety. Add a few different herbs to your kitchen that vary shape and texture. This can also make cooking easier with less runs to the grocery store. Try rosemary for an even more delicious roast chicken, or oregano for your favorite tomato sauce recipes. If you have cocktails in mind, consider easy growing mint for the most refreshing drinks. Space. If you’re short on counter space try out some hanging garden options. There are many pots on the market that will easily match your taste. It’s important to have your plants in a sunny spot in your kitchen, make sure you have a window spot that offers lots of natural light. Did you learn something new? Sound off in the comments. If you’re looking for more from Cosmo be sure to follow us on Facebook and Instagram. Sources: Apartment Therapy

4 Ways to Reduce Stress

Stress is natural, and can actually be beneficial providing alertness in intense or dangerous situations. However, prolonged and chronic stress can cause negative effects on your health like anxiety, fatigue, headaches and depression. When dealing with stress it’s important to identify any causes that can be eliminated. If the stress is due to uncertainty there are ways to manage it. Exercise. Physical activities such as jogging or cycling that increase heart rate, release endorphins. Endorphins are hormones naturally produced in the brain that alleviate pain and reduce stress. Exercising also decreases other hormones which cause stress, like cortisol and adrenaline. Find an exercise that naturally interests you, so it doesn’t feel like a chore. Relaxation Techniques. In a state of stress, people tend to restrict their breath since their heart is racing. Breathing techniques can help slow down heart rate. Try inhaling 4 seconds, holding for 7 seconds and exhaling for 8 seconds. Other meditation techniques, like yoga, aid to lower cortisol levels, which is the stress hormone. Sleep. Functioning with a lack of proper rest makes it harder to function. The stress hormone, cortisol stimulates your body making it more alert and more difficult to fall asleep. Getting a sleep schedule in order improves your circadian rhythm, the body’s “internal clock”. This will put your body in sync to fall asleep easier at a usual time. Establish your sleep routine and avoid any distractions such as phones. These devices make it harder to fall asleep. You can also try a bedtime ritual like reading a book or enjoying a warm bath before bed to calm your body. Diet. Key nutrients and proper nutrition can also reduce stress. Look for foods with Vitamin C to lower blood pressure. Some examples are broccoli or cauliflower. Foods with complex carbohydrates increase the production of serotonin to elevate your mood and happiness. Whole grains, fruits and vegetables all contain complex carbohydrates. Magnesium also helps to alleviate headaches and fatigue. Some foods containing magnesium are spinach, salmon and soybeans. When trying out any of these techniques it’s important to understand what works best for you. Everyone manages stress differently. Finding what works for you is a process of trial and error. Sources: Insider

Tips on Lighting Your Kitchen

Let there be light! Kitchen lighting often comes as an afterthought or disregarded completely. Well balanced kitchen lighting brings both functionality and aesthetic to a home. While there may be a plethora of different lights you can buy such as pendants, strip lights or recessed lighting, it’s important to understand the function of light and the role it plays in any room. It’s easier to think of light in layers. Light, like anything else in the kitchen, should have a purpose. Ambient – Ambient lighting will be the main source of lighting. It should be applied in an even layer to the entire room. An example would be natural sunlight. This can be accomplished with various kinds of lights as long as it’s filling the space. Task – The lighting that illuminates cooktops or surfaces you will need to use when preparing meals, as the name implies. It can be the lights you need to look through a pantry or read labels. Accent – Accent lighting emphasizes various places in the kitchen such as cabinets or counters. It should be the cherry on top that adds depth and dimension. Did you know color plays an important role too? According to Jeff Dross, director of education and industry trends at Kichler Lighting, you should look out for three qualities when picking lights for energy efficiency. Color Temperature. Look for lights that are in between 2700 to 3000 Kelvin. This will closely resemble incandescent lamping which would perfectly fit in any residential environment. CRI Rating. This stands for Color Rendering Index, and determines the way the light is interpreted. Low CRI can result in lights looking gray. Jeff recommends your lights have at least 80 CRI to see better color renders. Energy Star. Lights should have this certification to ensure the bulb has gone through longevity testing and has a minimum 80 CRI. What kind of lights do you have in your kitchen and is there any way you can add more? We’d love to see your design and style! Follow us on Facebook and Instagram, tag us and join our Cosmo community. Sources: YLighting , HGTV