Homemade Cheeseburgers: Juicy Burger with Melted American Cheese
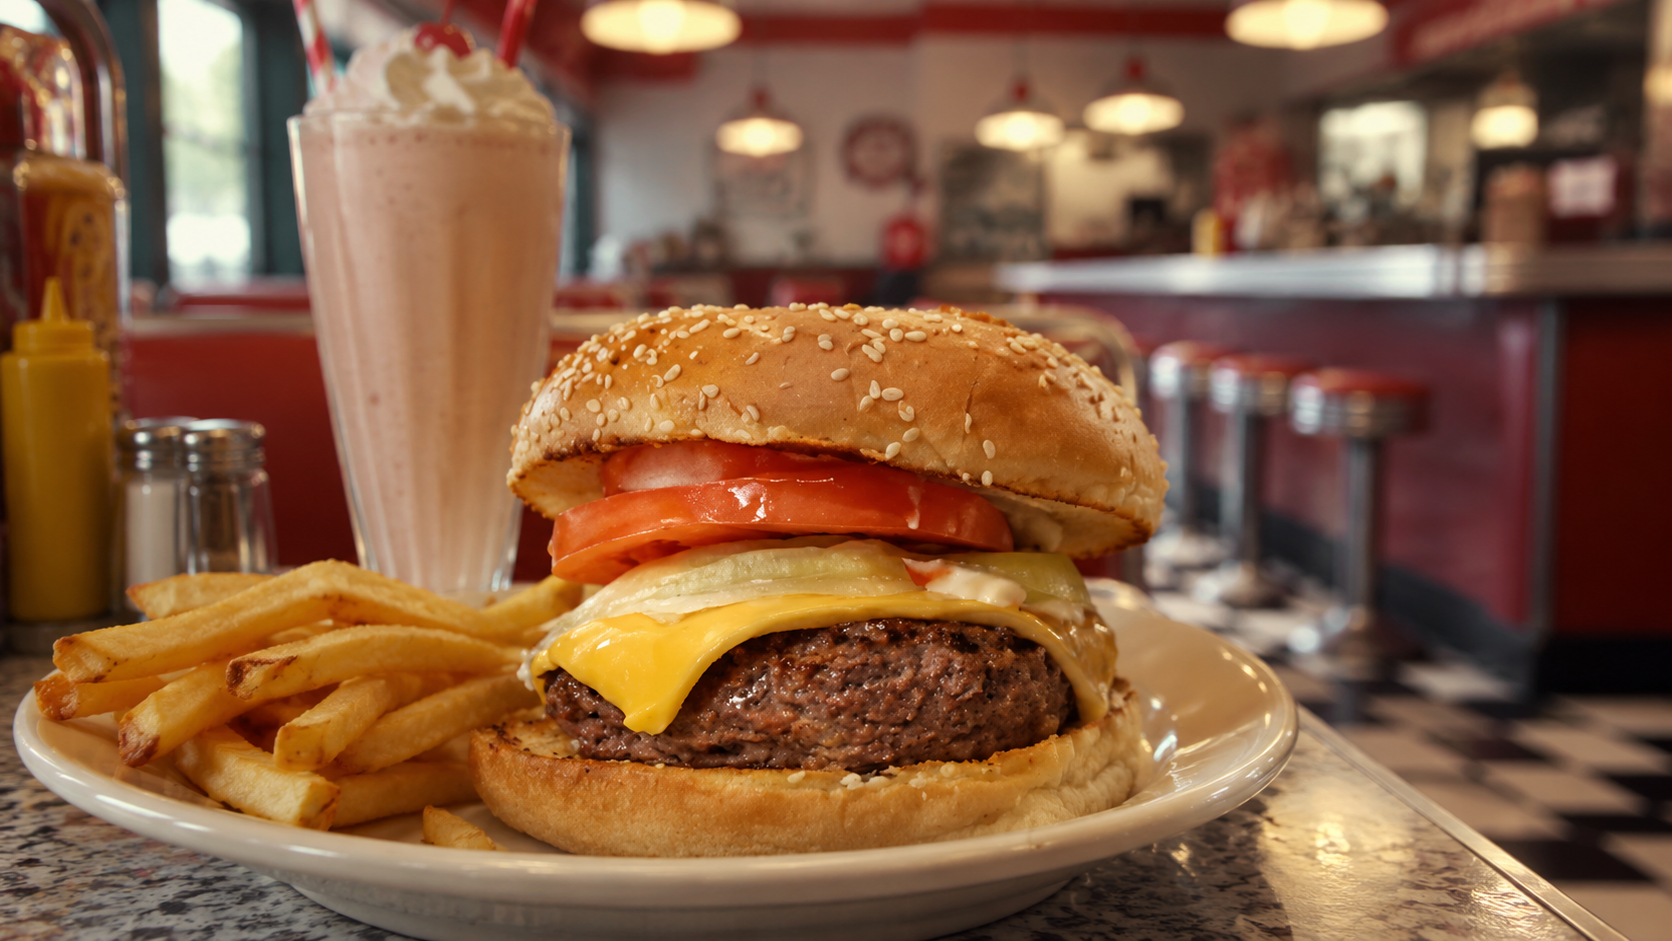
Homemade cheeseburgers start with properly seasoned beef and end with toasted buns. The difference between a flat tasteless patty and a juicy flavorful burger comes down to fat content, seasoning mixed into the meat, and not overcooking. Ground beef at 70/30 fat ratio keeps patties juicy through cooking. Leaner beef loses moisture faster leaving dry burgers. The fat renders during cooking keeping the interior moist while the exterior browns. Here’s how to make juicy cheeseburgers at home with seasoned patties, melted American cheese, and toasted buns. What You’ll Need Ingredients: Equipment: Step-by-Step Instructions Step 1: Prep the Aromatics Finely mince the onion and add to a small bowl. The finer the mince the better it distributes through the meat without creating large onion chunks in the patty. Add garlic paste to the minced onion and mix together. Set aside. This mixture goes directly into the beef. Step 2: Prep the Toppings Slice tomatoes into rounds. Separate lettuce leaves. Slice onion into thin rings or half-moons depending on preference. Place all sliced toppings in a bowl and set aside. Having toppings ready before cooking means everything moves quickly once burgers come off the heat. Step 3: Season and Mix the Beef Add ground beef to a large mixing bowl. Break it up slightly to allow even seasoning distribution. Add the garlic paste and minced onion mixture from earlier. Add salt, black pepper, onion powder, garlic powder, and a small amount of butter. Mix everything thoroughly until all seasonings distribute evenly through the beef. The butter adds richness and helps keep the patty moist during cooking. Don’t overmix. Working the beef too long creates dense tough patties. Mix until just combined and stop. Step 4: Form the Patties Divide the seasoned beef into evenly sized portions. The number of patties depends on preferred size — two larger patties or three to four smaller ones from one pound. Form each portion into a round patty slightly wider than your bun. Patties shrink during cooking so starting wider prevents the finished burger from being smaller than the bun. Press a slight indent in the center of each patty with your thumb. This prevents the patty from puffing up into a dome shape during cooking. Place formed patties on a baking sheet and set aside. Step 5: Preheat the Skillet Place skillet over medium-high heat. Allow it to preheat for about 5 minutes. A properly preheated skillet creates a good sear on the patty exterior. Cold or lukewarm skillets steam the meat instead of browning it. Lightly grease the skillet with cooking spray just before adding patties. Step 6: Cook the Patties Place patties onto the hot skillet. Cook for 5 minutes without moving them. Resist pressing down on patties with the spatula. Pressing squeezes out juices creating drier burgers. Flip patties and cook for another 5 minutes. Adjust time based on preferred doneness — less time for pink center, full 5 minutes for well done. Internal temperature guidelines: 130-135°F for medium-rare, 145°F for medium, 160°F for well done. Step 7: Add the Cheese Place one slice of American cheese on top of each patty immediately after the final flip or in the last minute of cooking. Let cheese melt from the residual heat of the patty. American cheese melts quickly and evenly making it ideal for burgers. If the cheese isn’t melting fast enough, cover the skillet briefly with a lid to trap steam and accelerate melting. Step 8: Toast the Buns While patties finish cooking or rest briefly, place buns cut-side down onto the skillet. Toast until golden brown. The toasting adds texture and prevents the bun from going soggy from burger juices. Watch carefully — buns toast quickly on a hot skillet. Remove from heat as soon as they reach golden color. Step 9: Assemble and Serve Bottom bun first. Place the cheesy patty directly on the bottom bun while still hot. Layer lettuce, tomato slices, and onion on top of the patty. Add mayo to the top bun and ketchup to the bottom or wherever you prefer. Place top bun on and serve immediately while everything is hot and the cheese is still melted. Why Fat Content Matters 70/30 ground beef (70% lean, 30% fat) is the sweet spot for juicy burgers. The fat renders during cooking keeping the interior moist and adding flavor. 80/20 works as well but produces slightly leaner results. 90/10 or leaner beef creates dry burgers lacking flavor — the fat is doing most of the work. The fat also helps form the patty and keeps it together during cooking. Very lean beef tends to crumble more easily. Getting the Patty Right Uniform thickness ensures even cooking. Patties thicker in the middle take longer to cook through while the edges overcook. The thumb indent in the center is worth doing every time. Without it, the center of the patty swells during cooking creating an uneven burger that’s hard to stack toppings on. Season generously. The seasoning gets diluted through the entire pound of beef so what seems like too much in the bowl becomes just right in the finished patty. Skillet vs. Grill Skillet cooking captures juices and fat creating a flavorful crust from fond building in the pan. The enclosed cooking environment keeps more moisture in the patty. Grill cooking adds smoke flavor and creates char marks. The open flame allows fat to drip away producing slightly leaner results with different flavor profile. Both methods work well. Skillet cooking is more controllable and works year-round regardless of weather. Cheese Choices American cheese melts better than most alternatives. It’s specifically formulated to melt smoothly and evenly making it the default choice for classic cheeseburgers. Cheddar adds sharper flavor but melts less smoothly, sometimes breaking or becoming oily. If using cheddar, choose a younger variety which melts better than aged. Swiss provides milder nutty flavor. Provolone melts well with mild flavor. Pepper jack adds heat. For the classic cheeseburger experience, American cheese is hard to beat on