cosmo appliances

The Kitchen Nobody Sees Is the One Doing the Work

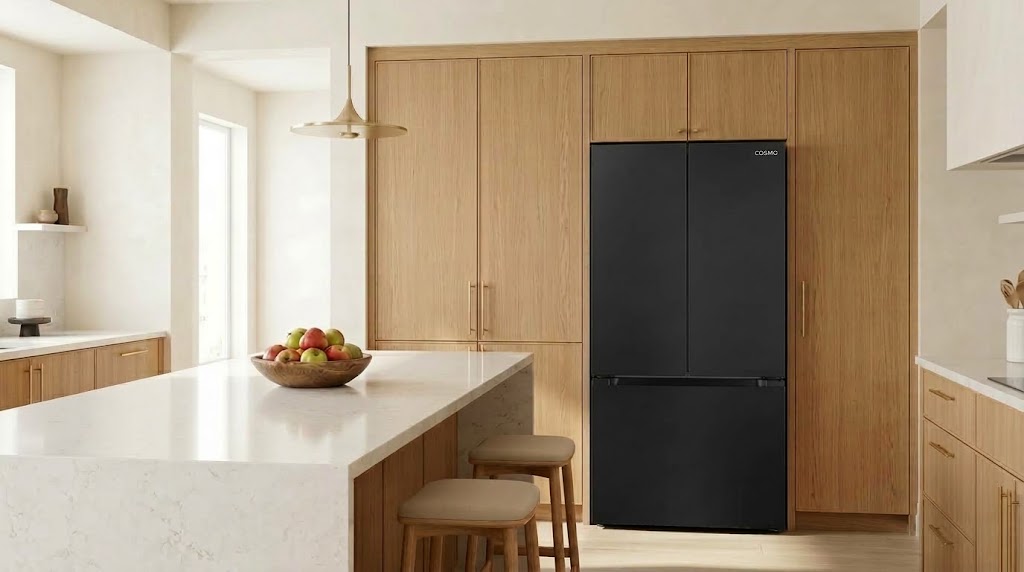
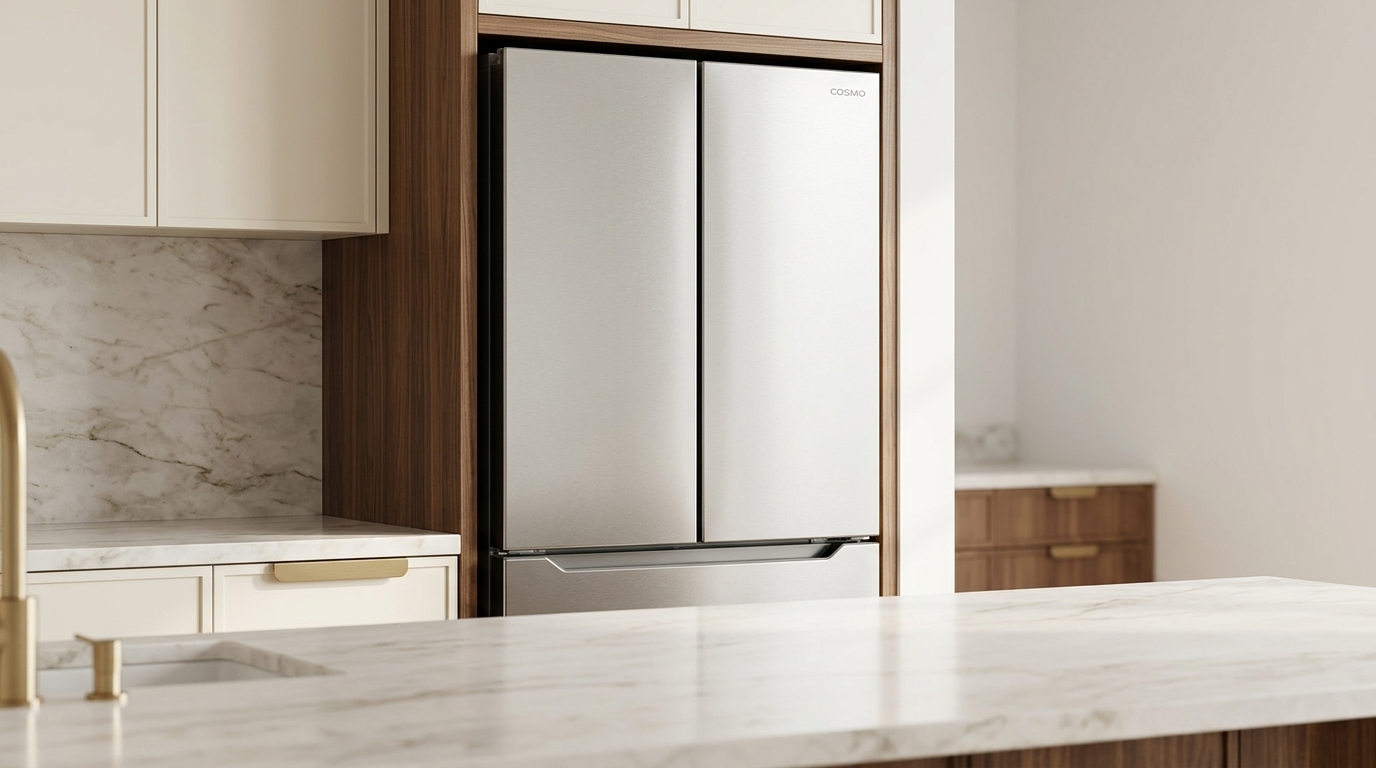
Walk into a kitchen designed in the last year or two, and there is a decent chance the kitchen you are standing in is not actually the one doing most of the work. Behind a door, tucked past the pantry, or hidden along a hallway to the dining room, a growing number of homes now have a second, smaller kitchen whose entire job is to stay out of sight: a scullery, or its slightly more polished cousin, the butler’s pantry. It is one of the more interesting shifts happening in American home design right now, and it says less about luxury than it does about a very ordinary problem that open-concept kitchens created for themselves. A Kitchen Built to Be Looked At Has a Problem Open-concept living solved a lot of things. It also created an issue nobody quite anticipated: the kitchen became the room everyone sees, all the time, which means it also has to look presentable, all the time. A kitchen that opens directly into the living and dining space cannot hide a sink full of prep dishes, a counter covered in delivery boxes, or the small appliance graveyard that accumulates behind every stand mixer and air fryer. For a kitchen that used to be a closed-off, purely functional room, that is a new and fairly constant kind of pressure. The data backs up how real this has become. The American Institute of Architects’ Home Design Trends Survey has documented a clear rise in homeowner demand for what it categorizes as secondary culinary spaces, separate kitchen facilities, prep and storage areas, and what architects have started calling “messy kitchens” or sculleries, with meaningful increases reported in the square footage households are now dedicating to them. That is a notable shift for a feature that, a decade ago, mostly showed up in homes large enough to have a dedicated staff kitchen. It has since moved into a much broader range of new builds and renovations, driven by a much more universal complaint: an open kitchen only works if the mess has somewhere else to go. Two Different Rooms, Two Different Jobs It is worth being specific about what these spaces actually are, because “butler’s pantry” and “scullery” get used almost interchangeably in a lot of design coverage despite doing genuinely different jobs. A butler’s pantry, historically and still today, tends to sit between the kitchen and the dining room and functions as a staging and serving zone: beverage service, coffee capability, glass-front cabinetry for the pieces a household actually wants to show off, and enough counter space to plate a meal before it goes out to guests. A scullery, sometimes called a prep kitchen or, more bluntly, a messy kitchen, is the working half of the equation: a secondary sink, real ventilation, a dishwasher, and, increasingly, its own refrigeration, built specifically to contain the noise, the odor, and the visible clutter of actual cooking and cleanup. Most households building or renovating with this trend in mind end up somewhere in between, a single secondary room that borrows a bit from each category, but the underlying logic is consistent either way: the show kitchen stays composed, and the space behind it absorbs everything that would otherwise make that impossible. Why Refrigeration Is the Piece That Gets Underestimated Of everything that goes into a scullery or working pantry, refrigeration is the piece households tend to plan for last and need most. A dedicated prep sink is an obvious, visible feature. A second refrigerator or freezer, by contrast, sounds like overkill right up until a household is hosting a holiday weekend, stocking a freezer full of make-ahead sides, or simply trying to keep a week of real grocery shopping from crowding into unusable chaos in a refrigerator that also has to look tidy every time the door opens in front of guests. This is exactly the gap a second, working-grade refrigerator is built to close. Overflow beverages, backup produce, a tray of something prepped a day ahead, and the sheer volume of food a household accumulates around a gathering all have somewhere to go that is not the refrigerator everyone can see into from the dining table. It is a genuinely practical solution to a problem that is, at its core, about volume and visibility at the same time. Cosmo’s COS-FDR225RHSS, a 22.5 cubic foot four-door French door refrigerator in counter-depth stainless steel, is well suited to exactly this second-kitchen role. Its French door layout, a wide-opening top section split across two doors rather than one, handles the oversized platters, sheet pans, and serving trays that a scullery or working pantry is specifically meant to store ahead of a gathering, rather than forcing a household to awkwardly angle them into a single-door layout. At 15.9 cubic feet of refrigerator space plus 6.6 cubic feet of freezer capacity across two fully extendable slide-out freezer drawers, it has enough real capacity to function as genuine overflow storage rather than a token backup unit. The details matter for a working space specifically. Four spill-proof, adjustable glass shelves and adjustable door bins make it easy to organize backup groceries, make-ahead trays, and beverages without turning the unit into a jumble the way an undersized secondary fridge often does. A single automatic ice maker with a removable 12-cube tray takes one recurring hosting task off a household’s list entirely, useful in a scullery specifically because it means the show kitchen’s refrigerator never has to be the one supplying ice all afternoon. A soft-close door mechanism and a door-ajar alarm keep a secondary space that sees less regular attention from running inefficiently, and a fingerprint and spot-resistant stainless steel finish holds up in a room that, unlike the front kitchen, is not getting wiped down after every use. An ENERGY STAR rating at 588 kWh annually also matters more here than it might elsewhere, since a second full-size refrigerator is, by definition, added household energy use, and an efficient one keeps that cost from becoming a real

Why the Beverage Station Has Become the Kitchen Feature American Homeowners Want Most in 2026

For most of the last two decades, the wine rack lived wherever there was leftover space, on top of the refrigerator, tucked into a builder-grade cabinet insert, hanging from the ceiling over an island. It was a nice-to-have, rarely a planned feature, and almost never something a homeowner designed a renovation around. That has changed. Walk through any kitchen showroom or scroll through a renovation gallery in 2026 and a new fixture keeps showing up in the plans: a dedicated beverage station, a purpose-built zone with its own cooling, its own storage, and its own place in the layout, sitting right alongside the pantry and the range as one of the features homeowners are specifically requesting rather than squeezing in afterward. The shift is not a small one, and the data behind it explains why appliance makers, including Cosmo, are paying close attention. The Numbers Behind the Shift The 2026 U.S. Houzz Kitchen Trends Study put real numbers behind what designers have been describing anecdotally for the past couple of renovation cycles. Seventy-six percent of homeowners undertaking a kitchen project have incorporated, or plan to incorporate, at least one built-in feature beyond the standard cabinetry and appliances. Pantry cabinets top that list at 47 percent, which makes sense given how much storage a modern kitchen is expected to absorb. But close behind, beverage stations came in at 24 percent, a striking number for a feature that barely registered as its own category in kitchen planning a decade ago. Built-in wine fridges pulled another 17 percent on their own, tied with built-in seating, meaning that once beverage-specific storage and built-in seating are counted together, dedicated drink space is competing directly with some of the most established kitchen must-haves. That is not a fringe number. A quarter of homeowners planning a renovation are now asking their designer or contractor specifically for a place to store, chill, and serve drinks, separate from the refrigerator, separate from a generic cabinet. It is worth sitting with why that request has become so common, because the reasons trace back to a few real, measurable shifts in how Americans actually use their kitchens. Why a Dedicated Beverage Zone Makes Sense Now The most obvious driver is the return of home entertaining as a routine part of American life rather than an occasional event. Coverage of 2026 bar and cocktail trends has pointed repeatedly to a home entertaining resurgence, driven in part by a generation that spent formative years hosting at home during a period when going out was not an option, and never fully went back to treating a night out as the default. Hosting a few friends for drinks on a Friday, rather than meeting them somewhere, has become a normal, recurring plan rather than a special occasion, and a kitchen built for that reality needs somewhere for the bottles, the glassware, and the ice to live that is not a chaotic scramble through three different cabinets and the refrigerator door. The second driver is less obvious but just as important: American drinking habits have diversified in a way that a single refrigerator shelf cannot accommodate. The same bar and cocktail trend coverage tracking 2026 has documented continued growth in the non-alcoholic and low-alcohol category, sitting alongside, not replacing, the wine, beer, and spirits already common in most households. A household hosting today is often stocking wine for some guests, craft beer or seltzer for others, a full non-alcoholic lineup for anyone opting out entirely, and mixers for cocktails on top of all of it. That is a genuinely wider range of beverages than a kitchen was designed to store a generation ago, and cramming all of it into a standard refrigerator crowds out the food storage the refrigerator is actually supposed to handle. A dedicated beverage station solves a real logistics problem, not just an aesthetic one. There is also a straightforward practical case that has nothing to do with entertaining at all. Wine, in particular, does not store well in a standard kitchen refrigerator. A refrigerator built to keep food cold runs colder than wine wants, cycles its temperature more than wine tolerates well, and exposes bottles to the light and vibration every time the door opens, all of which affect how a bottle ages and tastes over time. Homeowners who have started building even a modest wine collection, rather than buying a bottle the day they plan to drink it, run into that problem quickly, and a dedicated cooler solves it in a way a refrigerator shelf simply cannot. What Homeowners Are Actually Asking For Design coverage of the beverage station trend has been consistent about what makes one work well, and it comes down to a few specific things: a home for the appliance itself, usually a built-in wine or beverage cooler rather than a freestanding unit sitting on a counter, real storage nearby for glassware and bar tools, and enough counter space to actually make a drink without displacing whatever else is happening in the kitchen. This has made beverage stations a particularly good fit for the broken-plan and zoned layouts gaining ground in American kitchen design more broadly, where a kitchen retains an open feel while carving out small, purpose-built areas for specific tasks. A beverage station tucked into an island end cap or a run of cabinetry near the dining area lets a household entertain without funneling every guest through the working part of the kitchen to get a drink. That is where the appliance choice actually matters. A beverage station built around a generic mini-fridge or a countertop cooler tends to disappoint quickly, either because it does not hold enough to matter or because it does not actually protect what is stored inside it the way a proper wine cooler does. Homeowners who have gone through the trouble of designing a dedicated space for this are, understandably, looking for a cooler built specifically for the job. This is also where the beverage station trend overlaps with a

Quiet Enough to Stay Open: Why Kitchen Noise Is Reshaping the Open-Concept Floor Plan

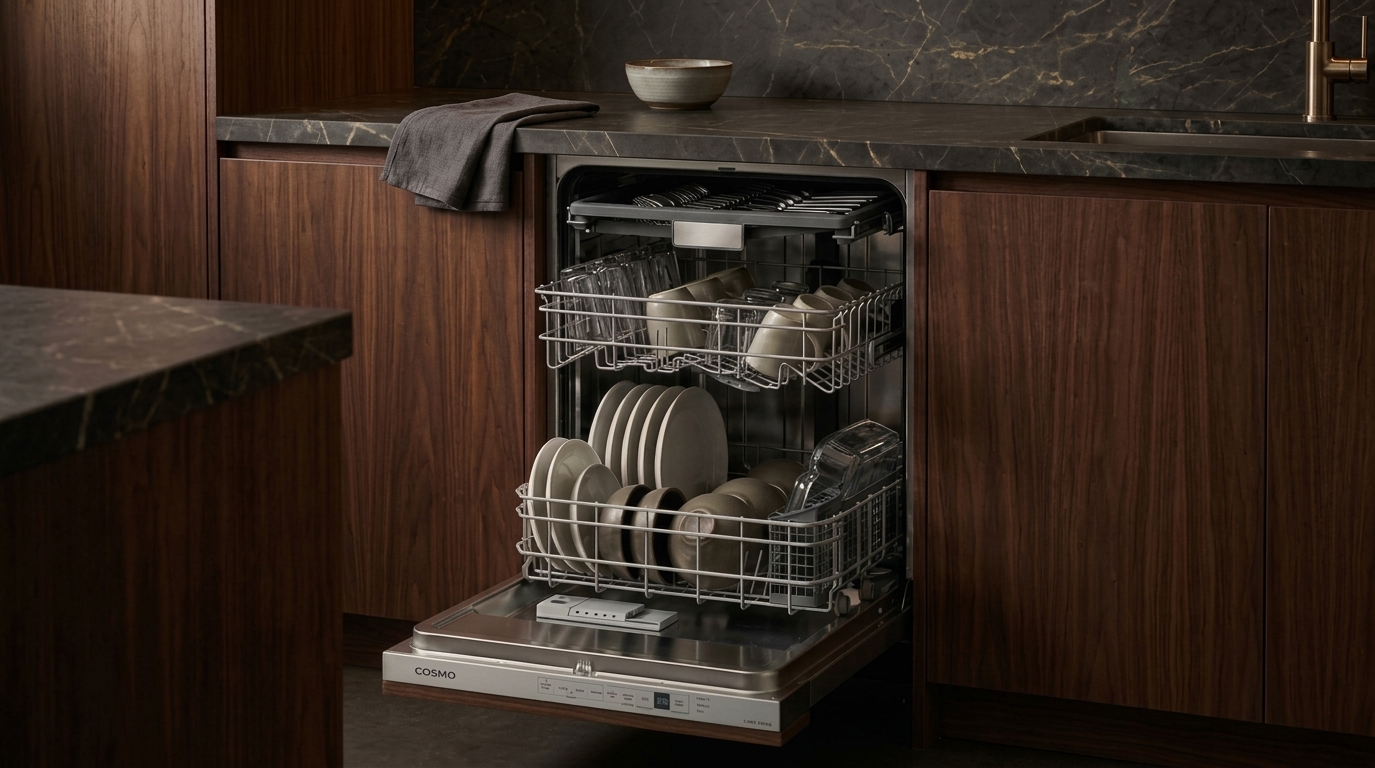
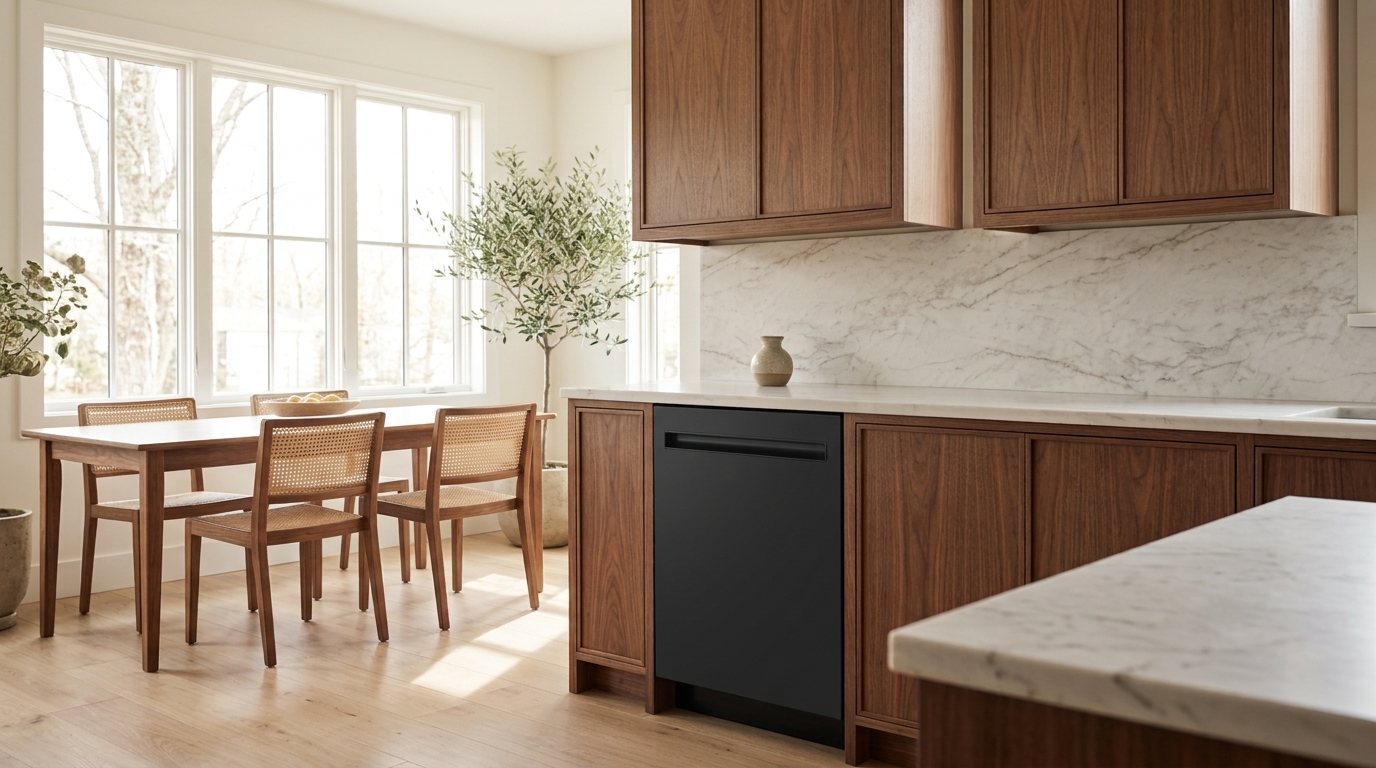
Open-concept living defined American home design for the better part of two decades. Knock down the wall between the kitchen and the living room, and suddenly a house feels bigger, brighter, more social, more resellable. That logic held for a long time, and it is still true in a lot of ways. But a quieter shift has been building underneath it, one that has less to do with square footage and more to do with sound. Homeowners who fought to open up their floor plans are now, in growing numbers, asking how to close parts of them back down, and the reason showing up again and again in surveys and design coverage is not clutter or cooking smells, though those matter too. It is noise. A kitchen with no walls around it shares every sound it makes with every other room attached to it, and for a growing number of households, that has become the actual cost of an open floor plan rather than a minor tradeoff. The Open Floor Plan Is Getting Reconsidered Design coverage throughout 2026 has repeatedly pointed to the same pattern: a move away from fully open layouts and toward what designers are calling “broken-plan” living, spaces with soft boundaries, partial walls, sliding panels, or strategically placed cabinetry that let a home flex between fully open and meaningfully separated depending on what is happening in it. The reasoning behind the shift is consistent across the coverage. Hybrid work has put more people in the house during the day, often on calls or trying to concentrate in a room that used to be empty until dinner. Blenders, clanging pans, delivery drop-offs, running dishwashers, all of it now competes directly with a work call happening twenty feet away with nothing but air between the two spaces. As one recent piece on the trend put it plainly, open layouts share everything, and sound has turned out to be the thing households are least willing to keep sharing. This is not a wholesale rejection of open concept. Few homeowners are rebuilding walls that took a contractor a week to remove. What is actually happening is more targeted: a kitchen island might stay open to the dining area but gain a pocket door to the living room, or a working pantry might get walled off specifically to contain the noisiest parts of meal prep and cleanup. The goal is flexibility, an “open mode” for entertaining and an ability to close things down for daily life, rather than a full return to the closed-off kitchens of a previous generation. And within that shift, the appliances that run loudest and longest, especially the dishwasher, have become one of the more specific things homeowners are trying to solve for. Why the Dishwasher Is the Noise Problem Nobody Planned For Of everything running in a kitchen, the dishwasher has a specific problem the others do not: duration. A blender runs for thirty seconds. A stand mixer runs for a few minutes. A dishwasher runs for one to three hours, often starting right after dinner and running well into the part of the evening when a household is trying to wind down, watch something, or put kids to bed in a room that, in an open floor plan, is acoustically connected to the kitchen in a way it never used to be. In a fully enclosed kitchen from a generation ago, that noise was contained behind a door. In an open-concept home, it is background noise for the entire downstairs, for as long as the cycle runs. This is exactly why decibel rating has become a real, researched purchase criterion for dishwashers in a way it rarely was a decade ago, when a dishwasher’s noise level was an afterthought behind price and capacity. The rule of thumb that has emerged among appliance reviewers in 2026 is that anything at or under roughly 44 decibels counts as genuinely quiet for a modern home, quiet enough to run during a dinner party without anyone noticing, while the 45 to 50 decibel range still reads as soft background noise, closer to a quiet conversation than a disruption, noticeable if a room goes silent but not loud enough to compete with a television or a conversation at the table. The difference between a 37 decibel dishwasher and a 45 decibel one, in practical terms, is smaller than the marketing around it suggests. Both disappear once you leave the room. What actually matters is clearing that rough 45 decibel threshold in the first place, the point at which a dishwasher stops being a disruption and starts being something a household simply stops noticing. Where the COS-DIS6502 Fits Cosmo’s COS-DIS6502, a 24-inch built-in dishwasher with a tall tub design, was engineered around exactly that threshold. It runs at 45 decibels, roughly the sound of light rain against a window, a level made possible by pre-installed noise-insulating pads built into the unit rather than added as an aftermarket fix. In an open kitchen sharing space with a living room or a dining area, that is the difference between a dishwasher a household plans meals and conversations around and one that simply runs in the background while the rest of the house goes about its evening. The noise engineering is not the only thing doing that work. The COS-DIS6502’s hidden top control panel keeps the interface concealed when the door is closed, which matters for an open kitchen in the same way the sound insulation does: a visible, blinking control panel facing into a living room reads as noise even when the unit itself is silent, while a flush, controls-hidden door front disappears into the cabinetry the same way the sound does. Inside, a Smart Wash System automatically detects a partial or full load and adjusts the cycle accordingly, which means the dishwasher is not running a longer, louder cycle than a given load actually requires. Three racks, including a top rack with two inches of height adjustment and a dedicated silverware basket,

Beating the Heat: How to Keep Your Refrigerator Running Efficiently During August Heatwaves

August has a way of turning kitchens into the hottest room in the house. Between the afternoon sun pouring through the windows and the oven getting less use in favor of quick, cool meals, one appliance quietly works harder than almost anything else in the home during a heatwave: the refrigerator. It runs around the clock in every season, but when the ambient temperature climbs into the 90s, the compressor has to work overtime just to hold a steady 37°F. Understanding why that happens, and what can be done about it, is the difference between a fridge that sails through summer and one that struggles, runs up the electric bill, or lets food spoil early. Why Heatwaves Put Extra Strain on Your Fridge A refrigerator does not create cold so much as it removes heat, pulling warmth out of the interior and releasing it into the surrounding room through the condenser coils. That process depends on a meaningful temperature difference between the inside of the unit and the air around it. When a kitchen climbs from a comfortable 72°F to a stuffy 85°F or more, that gap narrows, and the compressor has to run longer and more often to move the same amount of heat. The result is a refrigerator that cycles almost constantly, uses more electricity, and, if conditions are severe enough, may still struggle to keep the interior as cold as it should. This is compounded by the fact that summer is often when refrigerators are asked to do the most work. Warm-weather grocery habits mean more cold drinks, more produce, more ice for entertaining, and more trips to the door as everyone reaches for something cool. Every open door lets warm, humid air rush in, and the compressor has to counteract that before it can rest again. Signs Your Refrigerator Is Working Too Hard A refrigerator under heat stress usually gives some warning before food actually spoils. It helps to know what to watch for so small issues can be addressed before they become expensive ones. Give the Coils Room to Breathe Every refrigerator relies on its condenser coils to release the heat it pulls from inside the cabinet, and those coils need open air around them to do that job well. A unit pushed flush against the wall, or boxed in by cabinetry with no ventilation gap, cannot shed heat efficiently no matter how well it was engineered. Leaving a few inches of clearance on the sides and back, and vacuuming dust and pet hair off the coils every few months, keeps that heat exchange working the way it was designed to. Placement matters just as much as clearance. Direct sunlight through a nearby window, or standing next to a stove or dishwasher that generates its own heat, forces the refrigerator to fight a losing battle against its immediate surroundings. A shaded, well-ventilated spot away from other heat-generating appliances gives the compressor the best possible conditions to work in, heatwave or not. Check the Door Seals The rubber gasket running around the refrigerator and freezer doors is one of the most overlooked parts of the entire appliance, and one of the most important during hot weather. A worn, cracked, or loose seal lets cold air leak out and warm, humid air seep in continuously, forcing the compressor to run far more than it should. A simple test is to close the door on a piece of paper or a dollar bill; if it slides out easily, the seal has likely lost its grip and should be cleaned, and replaced if cleaning does not solve the problem. Keep It Stocked, But Not Crowded A refrigerator that is reasonably full actually holds its temperature more efficiently than an empty one, because the mass of cold food and drinks helps absorb the warm air that rushes in every time the door opens. During a heatwave, keeping a few extra bottles of water in otherwise empty spots can genuinely help the unit recover faster after each opening. The line to watch is overcrowding. Packing shelves so tightly that air cannot circulate around the contents forces the compressor to work harder to reach every corner, which defeats the purpose. Leaving a little breathing room between items, especially near the vents, keeps cold air moving evenly throughout the cabinet. Dial In the Right Temperature It is tempting to turn the dial to its coldest setting during a heatwave, but that usually just means the compressor runs longer without meaningfully improving food safety. The recommended range for the refrigerator compartment is 35°F to 38°F, and 0°F to 5°F for the freezer, and a simple appliance thermometer is the most reliable way to confirm the unit is actually holding those numbers rather than trusting the dial alone. Refrigerators with digital touch controls make this considerably easier to manage, since a precise, readable setpoint takes the guesswork out of finding the right balance between food safety and energy use. Be Deliberate About Opening the Door Every time the refrigerator door opens, warm kitchen air rushes in and cold air spills out onto the floor, and the compressor has to work to recover that lost cold. During a heatwave, when the air rushing in is both hotter and more humid than usual, that recovery takes longer. Deciding what is needed before opening the door, rather than standing with it open while scanning the shelves, and making sure the door is fully closed and sealed each time, adds up to a meaningful difference in how hard the compressor has to work over the course of a hot day. Where Design Makes a Real Difference Some of the burden of a heatwave can be engineered out of the equation before the appliance ever reaches the kitchen. Counter-depth French door refrigerators, for instance, are built to sit closer to cabinetry while still leaving room for airflow at the back and sides, which helps with the ventilation concerns mentioned earlier without requiring a deep, freestanding footprint. Tighter door seals

Pressed, Packed, and Perfect: A Toast to National Panini Day

Once a year, on August 11th, a modest but beloved culinary tradition gets its moment in the spotlight. National Panini Day honors the pressed, grilled sandwich that has become a staple on lunch menus, coffee shop counters, and home kitchens alike. It is a day that invites us to slow down, appreciate craftsmanship in something as simple as bread and filling, and recreate that signature crisp, golden crust at home. But behind the crunch of the crust and the pull of melted cheese lies a story that spans centuries, crosses continents, and reflects the evolution of how people eat on the go without sacrificing quality or flavor. A Sandwich Rooted in Italian Tradition The word “panini” is the plural of “panino,” Italian for “small bread roll.” In casual English, it describes a pressed sandwich, though purists note the linguistic error. The sandwich’s origins date back to the sixteenth century, with Italian cookbooks referencing pressed bread-based dishes. However, the modern panini emerged in the twentieth century, particularly in Italy’s Lombardy region, especially Milan, during the 1970s and 1980s. Office workers needed a quick, tasty lunch option, and the panino, filled with cured meats, cheeses, and vegetables, pressed and warmed, filled that gap. It offered speed without feeling like fast food, spreading from Milanese cafes to global menus. By the 1980s and 1990s, the panini reached the United States, embraced by coffee shops and delis. The electric panini press allowed restaurants and home cooks to recreate its signature crisp exterior and gooey interior without traditional methods. How National Panini Day Came to Be National Panini Day, observed annually on August 11th, is part of National Panini Month, which spans the month of August. Established in 2008 by Sargento Foods, an American cheese company known for promoting creative cheese use in cooking, the month celebrates cheese’s role in paninis. National Panini Day, first observed on August 11, 2016, was created by John-Bryan Hopkins, the food enthusiast behind Foodimentary. Unlike National Panini Month, which provided a full month of recognition, National Panini Day offers a more focused celebration, similar to how many broader food months have a signature day. While seemingly lighthearted, such days serve a purpose for the food industry and consumers. They encourage experimentation in restaurants, grocery stores, and homes, foster social sharing and community engagement, and provide an accessible entry point for learning about the history and craftsmanship of foods. What Makes a Panini a Panini A panini is defined by its method, not a strict recipe. Two slices of bread or a split roll are filled with ingredients and pressed under steady heat until golden and crispy, while the interior warms and the cheese melts. This distinguishes it from cold sandwiches or grilled cheeses, which lack the ridged press marks and even heat distribution. Bread choice is crucial. Ciabatta, focaccia, baguette, and rustic Italian loaves are popular choices. They must be sturdy enough to hold up to pressing without becoming soggy, yet tender enough to bite through easily. Fillings range from traditional Italian combinations to modern interpretations. A classic Milanese-style panini might include prosciutto, mozzarella, arugula, and olive oil. Other popular combinations include mortadella with provolone, roasted vegetables with fontina, or turkey with brie and cranberry. The unifying thread is a cheese that melts beautifully, as that gooey, stretchy quality is often what people imagine when they picture a well-made panini. The Rise of the Panini Press, and What Has Replaced It The panini press, a tool responsible for its widespread popularity, revolutionized the process of making paninis. In its traditional Italian form, pressing was done with simple equipment like a heavy pan, a brick wrapped in foil, or a specialized cast-iron press. These tools relied on direct contact and weight to flatten the sandwich and transfer heat evenly, creating the signature ridged crust that remains a visual hallmark of the panini today. The modern electric panini press, available to home cooks since the 1990s, transformed sandwiches from specialty items to mainstream menu staples. Countertop air fryers, with circulating hot air and top-mounted grill elements, can crisp bread and melt cheese as effectively as dedicated presses, offering the added convenience of handling fries, vegetables, and other meals. In our own test kitchen, a batch of paninis came out of a Cosmo air fryer with the same golden crust and melted center as one made on a traditional press, just with a bit less cleanup afterward. It is a quiet, practical shift, less about replacing tradition and more about finding it a new home in kitchens where counter space and versatility both matter. Today, tools for making a great panini range from simple stovetop setups to elaborate commercial-grade presses used in cafes and restaurants. What unites them is the same basic principle: even heat, applied with a bit of pressure, turns an ordinary sandwich into something worth celebrating. Panini Around the World Paninis, with their Italian roots, have spread globally, leading to regional adaptations. In the US, they often feature hearty fillings like grilled chicken with pesto and mozzarella or roast beef with caramelized onions and provolone, catering to a culture that values substantial lunches. In France, similar sandwiches may include brie, fig jam, or Dijon mustard, blending Italian technique with French flavors. In Latin America, a related tradition exists, notably the Cuban sandwich, which shares the pressing method but has a distinct filling of roast pork, ham, Swiss cheese, pickles, and mustard on Cuban bread. While not technically a panini in the strict Italian sense, its shared technique highlights how pressing a filled sandwich for improved texture and flavor has emerged independently across different cultures. This global patchwork of pressed sandwich traditions underscores the universal appeal of a warm, crisp, melty sandwich, even if the specific ingredients and names vary. Celebrating National Panini Day at Home For those looking to mark the occasion, National Panini Day offers plenty of ways to participate, regardless of culinary skill level. The simplest approach is to visit a local cafe or deli and

Why Stainless Steel Is the Gold Standard for Kitchen Appliances

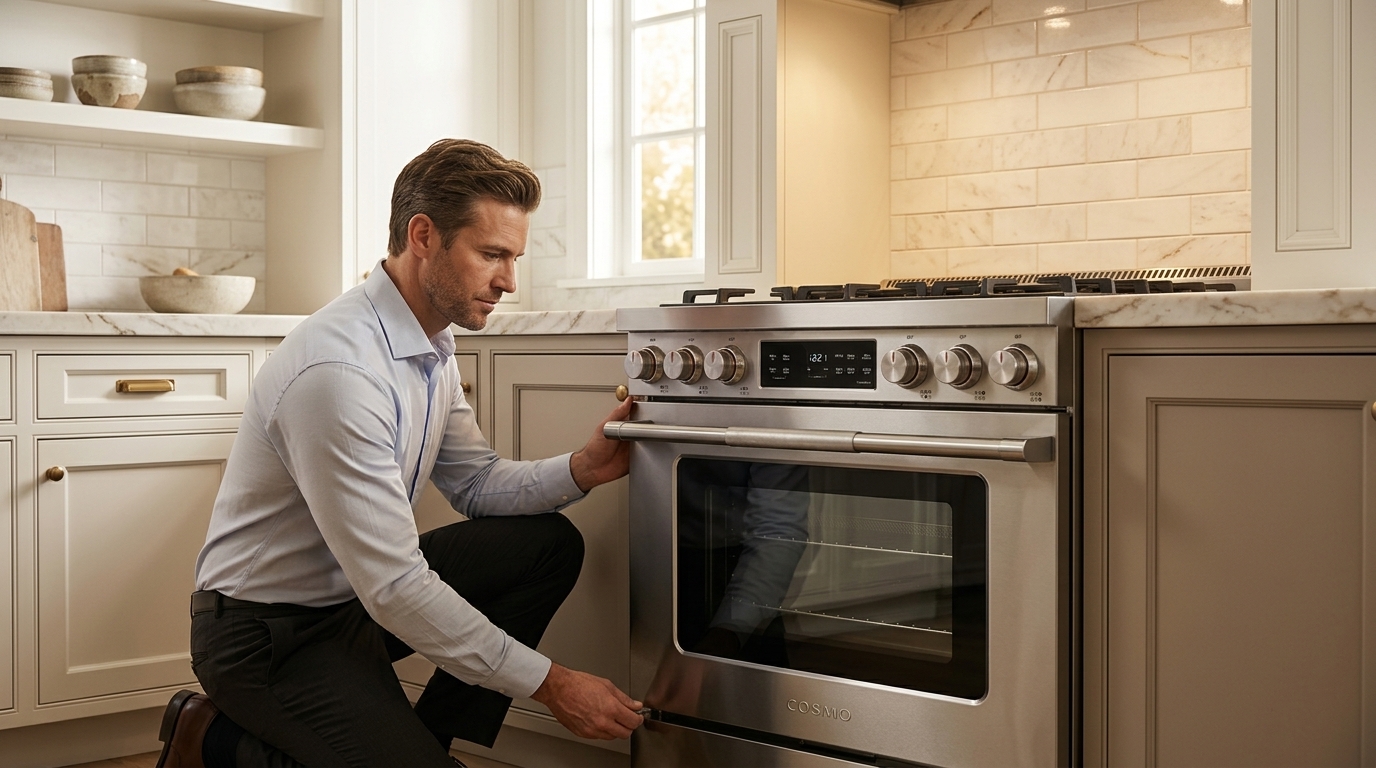
Step into any professional kitchen, and one material sets the standard for everything around it. It is not the flooring underfoot or the finish on the walls. It is stainless steel, present across countertops, hoods, and ranges, engineered to perform under pressure for decades at a time. That same material has since made its way from commercial kitchens into homes across the country, and the reasons are not difficult to see. Stainless steel has become the gold standard for kitchen appliances through a rare combination of durability, hygiene, and enduring design that no alternative material has been able to replicate. To illustrate what that standard looks like in practice, this piece features the Cosmo COS-GRP486G, a 48 inch professional style gas range built around the very qualities that make stainless steel the material of choice for serious cooking. An Accidental Discovery That Changed the Kitchen Forever Stainless steel was never meant for cooking. Its story begins in 1913, when English metallurgist Harry Brearley was searching for a steel alloy that could resist erosion inside gun barrels. While testing combinations of iron and chromium in a Sheffield laboratory, he noticed that a sample containing roughly 12.8 percent chromium refused to rust, even after weeks of exposure. He had accidentally discovered what the world now knows as stainless steel. Cutlery and surgical instruments adopted the material within a few years, since the same corrosion resistance that protected gun barrels also resisted tarnish and withstood repeated sterilization. The real turning point for kitchens came in 1934, when the ocean liner SS Queen Mary launched with the first fully stainless steel kitchen ever built, designed to withstand constant moisture and the demands of feeding thousands of passengers. Restaurants, hotels, and hospitals followed soon after, and by the postwar boom of the 1950s and 1960s, stainless steel had moved from professional kitchens into American homes. Nearly a century later, that same chromium bearing steel remains the material of choice for serious kitchen appliances, including the range that anchors this article. The Silent Bodyguard of Every Serious Kitchen Three qualities explain why this material has earned such widespread trust: it resists corrosion, it upholds the highest standards of hygiene, and it withstands extreme heat without compromise. That chromium in stainless steel creates a super thin protective layer that heals itself if it gets scratched, which is why a range can sit next to boiling pots and acidic sauces for years and still look pristine. It’s also nonporous, meaning liquids, oils, and odors don’t soak into it, so bacteria have nowhere to hide and cleanup is quick. It holds its shape through the wild temperature swings a kitchen appliance deals with every day, unlike plastic or painted finishes that can warp or crack after a while. That’s also why the grade of steel actually matters. The Cosmo COS-GRP486G uses industrial 304 grade stainless steel, which is the gold standard for tough kitchen environments thanks to its higher chromium and nickel content. Beyond protection, the metal earns its keep in quieter ways. It distributes heat evenly, which prevents scorched spots and inconsistent results. It holds up over decades rather than years, which helps stainless steel appliances retain resale value. Its neutral, brushed finish suits nearly any kitchen style without competing with cabinetry or countertops, something visible on the COS-GRP486G in its fingerprint resistant exterior, heavy duty metal knobs, and matching stainless steel door handle. And because the material does not off gas or degrade under heat, it supports the kind of safety engineering built into the range, including auto reignition burners that relight automatically if extinguished by a draft or spill. Where the Metal Meets the Meal In a well engineered range, stainless steel is integrated into nearly every stage of cooking, and the COS-GRP486G shows exactly how. Its 48 inch cooktop is fitted with eight sealed Italian made burners, ranging from two 20,000 BTU power burners to two 6,000 BTU simmer burners, all set into a stainless surface that resists staining from boil overs, oil splatter, and acidic sauces and wipes clean rather than baking spills into the material. Behind the cooktop, a dual oven configuration serves the needs of a serious home cook. The primary 3.5 cubic foot oven uses a convection fan to eliminate cold spots, aided by how evenly stainless steel distributes heat inside the cavity, while a secondary 2 cubic foot oven allows two dishes to cook independently, useful when a roast and a side need different treatment at once. Six special oven functions round out the precision. A dedicated griddle attachment adds controlled, direct contact heat for pancakes or seared proteins, and the heavy duty cast iron grates rest on the stainless surface and lift out easily for a deep clean. A removable backsplash even lets the same range install as freestanding or slide in, depending on kitchen layout, a flexibility only possible because the surrounding stainless housing looks finished either way. Everyday care matches this practicality. A damp cloth and mild dish soap handle routine grease, and a stainless steel cleaner wiped along the grain lifts tougher, baked on spots without scratching, a forgiving standard that painted or enamel finishes cannot match. A Standard That Never Went Out of Style From a Sheffield laboratory in 1913 to the deck of the SS Queen Mary in 1934, and into American homes by the mid twentieth century, stainless steel earned its place in the kitchen through performance, not trend. It resists corrosion, discourages bacteria, distributes heat evenly, and withstands decades of use without losing its function or its finish. Those same qualities make a range like the Cosmo COS-GRP486G capable of professional level cooking in a home setting. For cooks who want the reliability of a commercial kitchen without leaving their own, stainless steel remains, more than a century after its invention, the clearest signal of an appliance built to last.

Homemade Cheeseburgers: Juicy Burger with Melted American Cheese

Homemade cheeseburgers start with properly seasoned beef and end with toasted buns. The difference between a flat tasteless patty and a juicy flavorful burger comes down to fat content, seasoning mixed into the meat, and not overcooking. Ground beef at 70/30 fat ratio keeps patties juicy through cooking. Leaner beef loses moisture faster leaving dry burgers. The fat renders during cooking keeping the interior moist while the exterior browns. Here’s how to make juicy cheeseburgers at home with seasoned patties, melted American cheese, and toasted buns. What You’ll Need Ingredients: Equipment: Step-by-Step Instructions Step 1: Prep the Aromatics Finely mince the onion and add to a small bowl. The finer the mince the better it distributes through the meat without creating large onion chunks in the patty. Add garlic paste to the minced onion and mix together. Set aside. This mixture goes directly into the beef. Step 2: Prep the Toppings Slice tomatoes into rounds. Separate lettuce leaves. Slice onion into thin rings or half-moons depending on preference. Place all sliced toppings in a bowl and set aside. Having toppings ready before cooking means everything moves quickly once burgers come off the heat. Step 3: Season and Mix the Beef Add ground beef to a large mixing bowl. Break it up slightly to allow even seasoning distribution. Add the garlic paste and minced onion mixture from earlier. Add salt, black pepper, onion powder, garlic powder, and a small amount of butter. Mix everything thoroughly until all seasonings distribute evenly through the beef. The butter adds richness and helps keep the patty moist during cooking. Don’t overmix. Working the beef too long creates dense tough patties. Mix until just combined and stop. Step 4: Form the Patties Divide the seasoned beef into evenly sized portions. The number of patties depends on preferred size — two larger patties or three to four smaller ones from one pound. Form each portion into a round patty slightly wider than your bun. Patties shrink during cooking so starting wider prevents the finished burger from being smaller than the bun. Press a slight indent in the center of each patty with your thumb. This prevents the patty from puffing up into a dome shape during cooking. Place formed patties on a baking sheet and set aside. Step 5: Preheat the Skillet Place skillet over medium-high heat. Allow it to preheat for about 5 minutes. A properly preheated skillet creates a good sear on the patty exterior. Cold or lukewarm skillets steam the meat instead of browning it. Lightly grease the skillet with cooking spray just before adding patties. Step 6: Cook the Patties Place patties onto the hot skillet. Cook for 5 minutes without moving them. Resist pressing down on patties with the spatula. Pressing squeezes out juices creating drier burgers. Flip patties and cook for another 5 minutes. Adjust time based on preferred doneness — less time for pink center, full 5 minutes for well done. Internal temperature guidelines: 130-135°F for medium-rare, 145°F for medium, 160°F for well done. Step 7: Add the Cheese Place one slice of American cheese on top of each patty immediately after the final flip or in the last minute of cooking. Let cheese melt from the residual heat of the patty. American cheese melts quickly and evenly making it ideal for burgers. If the cheese isn’t melting fast enough, cover the skillet briefly with a lid to trap steam and accelerate melting. Step 8: Toast the Buns While patties finish cooking or rest briefly, place buns cut-side down onto the skillet. Toast until golden brown. The toasting adds texture and prevents the bun from going soggy from burger juices. Watch carefully — buns toast quickly on a hot skillet. Remove from heat as soon as they reach golden color. Step 9: Assemble and Serve Bottom bun first. Place the cheesy patty directly on the bottom bun while still hot. Layer lettuce, tomato slices, and onion on top of the patty. Add mayo to the top bun and ketchup to the bottom or wherever you prefer. Place top bun on and serve immediately while everything is hot and the cheese is still melted. Why Fat Content Matters 70/30 ground beef (70% lean, 30% fat) is the sweet spot for juicy burgers. The fat renders during cooking keeping the interior moist and adding flavor. 80/20 works as well but produces slightly leaner results. 90/10 or leaner beef creates dry burgers lacking flavor — the fat is doing most of the work. The fat also helps form the patty and keeps it together during cooking. Very lean beef tends to crumble more easily. Getting the Patty Right Uniform thickness ensures even cooking. Patties thicker in the middle take longer to cook through while the edges overcook. The thumb indent in the center is worth doing every time. Without it, the center of the patty swells during cooking creating an uneven burger that’s hard to stack toppings on. Season generously. The seasoning gets diluted through the entire pound of beef so what seems like too much in the bowl becomes just right in the finished patty. Skillet vs. Grill Skillet cooking captures juices and fat creating a flavorful crust from fond building in the pan. The enclosed cooking environment keeps more moisture in the patty. Grill cooking adds smoke flavor and creates char marks. The open flame allows fat to drip away producing slightly leaner results with different flavor profile. Both methods work well. Skillet cooking is more controllable and works year-round regardless of weather. Cheese Choices American cheese melts better than most alternatives. It’s specifically formulated to melt smoothly and evenly making it the default choice for classic cheeseburgers. Cheddar adds sharper flavor but melts less smoothly, sometimes breaking or becoming oily. If using cheddar, choose a younger variety which melts better than aged. Swiss provides milder nutty flavor. Provolone melts well with mild flavor. Pepper jack adds heat. For the classic cheeseburger experience, American cheese is hard to beat on

Air Fryer French Fries: Crispy Homemade Fries

Homemade french fries in the air fryer deliver crispy exteriors and fluffy interiors without deep frying oil. Soaking removes excess starch creating better texture while seasoning adds flavor beyond basic salt. Traditional deep-fried potatoes require hot oil and careful temperature management. Air fryer fries use circulating hot air producing similar crispness with significantly less oil and simpler preparation. Here’s how to make crispy french fries in your air fryer using potato prep techniques that improve texture and seasoning combinations that add flavor depth. What You’ll Need Ingredients: Equipment: Step-by-Step Instructions Step 1: Prepare the Potatoes Rinse the potatoes under cold water. This removes surface dirt and makes peeling easier. Peel all four potatoes using a vegetable peeler or paring knife. Rinsing before peeling prevents dirt from transferring to the peeled surface. Place peeled potatoes on cutting board. Slice each potato lengthwise into 1/4-inch thick strips. Consistent thickness ensures even cooking. Cut strips to similar lengths when possible. Uniform sizing creates fries that finish cooking simultaneously. Step 2: Soak to Remove Starch Place sliced potatoes in large bowl. Cover completely with cold water. Soak for 15 minutes. This step removes excess surface starch that prevents crisping. The starch creates gummy texture if not removed. The water will turn cloudy as starch releases. This cloudiness confirms the soaking is working. After 15 minutes, drain water completely. Remove potato strips from bowl. Step 3: Dry Thoroughly Place drained potato strips on cutting board. Pat completely dry using paper towels. Thorough drying is critical for crispness. Wet potatoes steam rather than crisp in the air fryer. Remove all visible moisture. Let strips air dry for a few minutes if still damp after patting. Completely dry potatoes produce the crispiest results. Step 4: Season the Fries Place dried potato strips in clean mixing bowl. Drizzle with olive oil. Use enough to lightly coat all strips when mixed. Toss potatoes with oil until evenly coated. Each strip should have thin oil coating without pooling in the bowl. Add salt, black pepper, onion powder, garlic powder, and paprika to the bowl. Toss again mixing seasonings thoroughly with oiled potatoes. The oil helps seasonings stick to potato surfaces. Dry seasonings on wet potatoes slide off during cooking. Mix until seasonings distribute evenly across all fries. Each fry should show visible seasoning coverage. Step 5: Preheat the Air Fryer Set air fryer to 400°F. Preheat for 5 minutes. Preheating ensures consistent cooking temperature from the start. Cold air fryers take longer to crisp the exterior. While air fryer preheats, arrange seasoned fries on baking sheet or in air fryer basket. Spread them in single layer with space between each fry. Crowding creates steaming instead of crisping. Air circulation around each fry is essential for texture. Step 6: Air Fry the Potatoes Place fries in preheated air fryer. Set timer for 20 minutes at 400°F. At the 10-minute mark, open air fryer. Shake basket or toss fries gently with tongs to redistribute them. This mid-cooking shake ensures even browning on all sides. Fries touching the basket brown faster than those on top. Return basket to air fryer and continue cooking the remaining 10 minutes. Check at 18 minutes if your air fryer runs hot. Fries are done when golden brown and crispy on edges. Step 7: Rest and Serve Remove cooked fries from air fryer. Let rest 2-3 minutes before serving. Resting allows steam to escape and exterior to crisp further. Fries fresh from the fryer are too hot to eat immediately anyway. Sprinkle with lemon pepper seasoning after cooking if desired. The citrus brightness complements the savory seasonings. Step 8: Plate and Enjoy Add your favorite dipping sauce to serving plate. Ketchup, aioli, ranch, or special sauce all work. Arrange hot fries on plate. Serve immediately while crispy and hot. Why Soaking Matters Soaking potatoes in cold water removes surface starch that interferes with crisping. Excess starch creates gummy exterior texture instead of crispy coating. The starch also causes fries to stick together during cooking. Removing it helps fries cook individually rather than clumping. Fifteen minutes provides adequate soaking time. Longer soaking doesn’t improve results significantly. Skip soaking only if time doesn’t allow. Unsoaked fries still cook but won’t achieve the same crispness level. Potato Variety Selection Russet potatoes work best for fries. Their high starch content and low moisture create fluffy interiors with crispy exteriors. Yukon gold potatoes provide slightly creamier texture with good crisping. They contain more moisture than russets but still produce quality fries. Red potatoes and fingerlings don’t fry as well. Their waxy texture and high moisture create softer fries without the ideal crispy-fluffy contrast. Russets remain the gold standard for homemade fries. Their texture and starch content are optimal for air frying. Seasoning Variations The base seasoning blend uses onion powder, garlic powder, paprika, salt, and pepper. This combination provides savory depth beyond plain salt. Adjust ratios based on preference. More paprika adds smokiness. Extra garlic powder increases savory punch. Try different spice combinations: Cajun seasoning for heat, Italian herbs for aromatic flavor, or ranch seasoning powder for tangy taste. Add parmesan cheese after cooking for cheesy fries. Grated cheese added during cooking burns in the high heat. Fresh herbs work as finishing touch. Chopped parsley or chives added after cooking provide fresh flavor without burning. Achieving Maximum Crispness Several factors affect fry crispness: thorough drying after soaking, adequate oil coating, proper spacing in basket, and mid-cooking shake. Don’t skip the drying step. Wet potatoes create steam preventing crispy exterior formation. Use enough oil to coat but not drench. Too little oil produces dry fries. Too much makes them greasy. Single layer spacing is non-negotiable. Stacked fries steam each other preventing browning and crisping. The 10-minute shake redistributes fries ensuring all surfaces get air fryer basket contact for even browning. Serving Suggestions Classic pairing: serve fries with burgers, sandwiches, or as appetizer with multiple dipping sauces. Make loaded fries by topping with cheese, bacon bits, and sour cream after cooking. Return to air

Air Fryer Egg Roll Burrito: The Crispy Breakfast Wrap

Egg roll wrappers replace flour tortillas creating crispy exterior that holds beans, eggs, and cheese without getting soggy. Air frying produces golden edges without deep frying oil. Here’s how to make egg roll burritos in your air fryer combining breakfast burrito flavors with egg roll texture. What You’ll Need Ingredients: Equipment: Step-by-Step Instructions Step 1: Cook the Eggs Crack 2-3 eggs into a small oven-safe bowl or ramekin that fits in your air fryer basket. Do not scramble—leave eggs whole or lightly mix if you prefer scrambled texture. Place the bowl in your air fryer and cook at 360°F for 3 minutes. The eggs will set but remain slightly soft. Add shredded cheese on top of the partially-cooked eggs. Return to air fryer and cook for another 3 minutes at 360°F until eggs are fully set and cheese melts. Remove bowl from air fryer and let cool slightly before handling. The eggs should be firm enough to layer into egg roll wrapper. Step 2: Prepare Your Filling Warm your beans if using canned refried or black beans. Room temperature or warm beans spread easier than cold beans. Have shredded cheese ready for layering. You’ll use cheese both inside the egg roll and on top before final cooking. Cut or break cooked eggs into manageable pieces that fit within egg roll wrapper dimensions. Step 3: Assemble the Egg Roll Burrito Lay one egg roll wrapper on clean surface positioned like a diamond (corner pointing toward you). Spread a layer of beans across the center of the wrapper leaving edges clear for sealing. Add cooked egg pieces on top of beans. Sprinkle shredded cheese over the eggs and beans. Fold the bottom corner up over the filling. Fold the side corners inward. Roll tightly toward the top corner creating sealed cylinder. Use water on your finger to moisten the final corner helping it seal closed. Press firmly. Step 4: Oil and Top Brush or spray the assembled egg roll with cooking oil. This creates golden crispy exterior during air frying. Sprinkle additional shredded cheese on top of the oiled egg roll. The cheese will melt and crisp during cooking creating cheesy crust. Step 5: Air Fry Place the assembled egg roll in your air fryer basket seam-side down. This helps seal stay closed during cooking. Air fry at 360°F for 5 minutes. Check at 4 minutes if your air fryer runs hot. The egg roll is done when wrapper turns golden brown and crispy and cheese on top melts and browns slightly. Flip halfway through cooking if you want even browning on all sides, though seam-down cooking typically produces good results without flipping. Step 6: Cool and Serve Remove egg roll from air fryer and let cool for 1-2 minutes before handling. The filling will be very hot immediately after cooking. Slice in half if desired to show the layered interior, or serve whole. Serve with salsa, sour cream, hot sauce, or guacamole for dipping. Why Egg Roll Wrappers Work Egg roll wrappers create crispy texture that flour tortillas can’t match. The thin wrapper crisps completely in the air fryer producing crunchy exterior. Structural integrity from egg roll wrapper holds filling better than tortillas. The sealed edges prevent filling from leaking during cooking. Lower carb option compared to large flour tortillas. Egg roll wrappers contain less total carbohydrate than burrito-size tortillas. Portion control from smaller wrapper size. Egg roll format naturally creates single-serving portions rather than oversized burritos. Filling Variations Add cooked breakfast sausage or bacon for meat protein. Crumbled cooked meat layers with beans and eggs. Include sautéed peppers and onions for vegetables. Pre-cook vegetables before adding to prevent excess moisture. Swap beans for hash browns or potato filling. Cooked diced potatoes provide different texture and flavor. Use scrambled eggs instead of whole cooked eggs. Scrambled eggs distribute more evenly throughout filling. Add jalapeños or hot sauce to filling for spice. Mix hot sauce with beans before layering. Assembly Tips Don’t overfill egg rolls or they won’t seal properly. Use modest portions of each filling component leaving room for folding. Keep wrapper edges dry when filling. Wet edges from bean moisture prevent proper sealing. Roll tightly to prevent air pockets. Loose rolling creates gaps where filling can leak. Seal well with water on final corner. Moisture activates wrapper’s ability to stick to itself. Air Fryer Timing Adjustments Different air fryer models require timing adjustments based on power and heating patterns. Check at 4 minutes for first batch. If wrapper browns too quickly before interior heats through, reduce temperature to 340°F. Larger egg rolls need 6-7 minutes. Thicker rolls with more filling require longer cooking time. Smaller egg rolls finish in 4 minutes. Less filling cooks faster. Make-Ahead Strategy Assemble egg rolls in advance and refrigerate until ready to cook. Wrapped egg rolls hold in refrigerator for several hours before air frying. Cook eggs ahead and refrigerate. Cold cooked eggs layer into wrappers easily during assembly. Prepare filling components the night before. Pre-cooked beans and eggs speed morning assembly. Freeze assembled uncooked egg rolls. Air fry from frozen adding 2-3 minutes to cooking time. Serving Suggestions Serve egg roll burritos with Mexican breakfast sides: salsa, sour cream, guacamole, or pico de gallo for dipping. Pair with fresh fruit for balanced breakfast. The crispy egg rolls contrast with fresh fruit texture. Make multiple egg rolls for meal prep. Cook several at once and reheat throughout the week. Cut into smaller pieces for breakfast appetizers. Sliced egg rolls work as party food. Watch the Video Tutorial Air fryer egg roll burritos transform breakfast burrito flavors into crispy handheld format without deep frying. Layer beans, air-fried eggs, and cheese into egg roll wrappers, seal them up, brush with oil, top with more cheese, and air fry until golden and crunchy. The egg roll wrapper creates texture that flour tortillas can’t match while the air fryer handles the crisping without messy oil. Five minutes from assembled to crispy breakfast ready to eat.

The COS-WOMCR302SS Wall Oven and Microwave Combo: 30-Inch Dual Cooking Solution

Wall oven and microwave combinations represent space-efficient cooking solutions prioritizing vertical installation, dual cooking capacity, and convection technology in both units. The COS-WOMCR302SS from Cosmo’s Regal Collection delivers 30-inch built-in functionality through stacked oven and microwave configuration, incorporating 4.8 cubic feet lower electric oven with versatile cooking functions, 1.6 cubic feet upper microwave oven with convection capabilities, Turbo True European Convection in upper microwave using fan-assisted heating for even cooking, air fry function in both ovens enabling oil-reduced frying, 10 power levels in microwave with automatic presets for melt/soften/popcorn/beverage, ceramic tray and turntable in microwave supporting various cooking methods, air fry basket included for healthier frying, lower oven cooking functions including bake/broil/convection bake/convection roast/keep warm/pizza/proof, smooth-gliding oven racks with multiple positions providing easy dish access, built-in temperature probe in lower oven measuring internal food temperature for precision cooking, digital display with intuitive touch controls managing settings across both units, self-cleaning feature in lower oven simplifying maintenance, interior oven lighting in both ovens monitoring cooking progress, triple layer oven glass and cool-to-touch handles ensuring safety, heat-dissipating ventilation system managing temperature, premium stainless steel finish creating contemporary appearance, and 240V electrical requirement with 4-wire connection. This wall oven-microwave combination serves households wanting dual cooking capacity with convection technology in vertical space-saving format. The combination of convection-enabled microwave, substantial lower oven capacity, and air fry functionality in both units addresses cooking versatility and space efficiency affecting kitchen design and meal preparation. 30-Inch Wall Oven and Microwave Configuration The stacked vertical design positions microwave above main oven creating complete cooking solution in single 30-inch cabinet opening, maximizing vertical space while maintaining standard width installation. Standard 30-inch width matches common wall oven cabinet dimensions making installation straightforward in typical kitchen layouts. The width represents industry-standard built-in appliance size. Vertical stacking positions microwave at convenient eye level with main oven below at comfortable working height. The configuration eliminates separate microwave countertop space requirements. Built-in installation integrates both appliances flush with cabinetry creating seamless kitchen appearance. The installation eliminates freestanding appliance look. Cabinet opening requirements (specific dimensions not mentioned but standard 30-inch wall oven-microwave combos typically require specific height/width/depth cutouts) need verification before purchase ensuring proper fit. Electrical requirements of 240V with 4-wire connection demand dedicated circuit. Professional installation recommended ensuring proper electrical hookup and code compliance. The 30-inch wall oven-microwave configuration provides dual cooking capacity in vertical format fitting standard cabinet openings while creating integrated kitchen aesthetic. 4.8 Cubic Feet Lower Electric Oven Substantial main oven capacity accommodates large roasts, multiple baking sheets, or family-size portions through generous interior volume and multiple rack positions. Capacity measurement of 4.8 cubic feet represents significant oven space in 30-inch wall oven format. The volume handles holiday cooking, batch baking, and substantial meal preparation. Multiple rack positions (specific number not mentioned but proportional to capacity) allow varied food heights and simultaneous use of multiple racks for batch cooking. Smooth-gliding oven racks extend fully providing easy access to dishes without awkward reaching into hot oven. The gliding mechanism prevents rack tipping when pulled forward. Seven cooking functions provide operational versatility: bake for standard cooking, broil for high-heat top-down cooking, convection bake for even baking with fan assistance, convection roast for meats, keep warm maintaining serving temperature, pizza mode optimizing crust cooking, and proof function creating warm environment for bread dough rising. The 4.8 cubic feet lower oven provides substantial cooking capacity with versatile functions handling varied cooking needs from daily meals to special occasion cooking. 1.6 Cubic Feet Upper Microwave with Convection Generous microwave capacity combined with convection cooking capability creates versatile upper oven handling both microwave cooking and convection baking in single unit. Microwave capacity of 1.6 cubic feet exceeds typical countertop microwave sizes. The volume accommodates large dinner plates, casserole dishes, and family-size portions. Convection mode in microwave adds fan-assisted heating enabling baking and roasting beyond standard microwave reheating. The dual functionality replaces separate convection oven needs. Turbo True European Convection uses fan-assisted circular heating element distributing heat evenly throughout microwave cavity. The technology produces consistent cooking without hot and cold spots. Ceramic tray and turntable rotate food during cooking ensuring even microwave energy distribution. The rotating platform prevents cold spots common in stationary microwave cooking. Included air fry basket transforms microwave into air fryer creating crispy results with minimal oil. The basket allows healthier frying using convection heat circulation. The 1.6 cubic feet microwave with convection provides versatile upper cooking unit handling microwave tasks plus convection baking and air frying. Air Fry Function in Both Ovens Dual air fry capability in both upper microwave and lower oven enables oil-reduced frying using circulating hot air creating crispy exteriors without deep frying. Air fry technology uses high-speed air circulation cooking food with minimal oil compared to traditional deep frying. The method produces crispy texture similar to frying using only air movement and heat. Having air fry in both ovens allows cooking different items simultaneously. Fry chicken in lower oven while air frying vegetables in upper microwave during same timeframe. Lower oven air fry accommodates larger quantities and bigger items. Upper microwave air fry suits smaller portions and quicker cooking. Health benefits from air frying include reduced oil consumption compared to deep frying while maintaining crispy texture and browning. The cooking method reduces fat and calorie content. Included air fry basket in upper microwave provides dedicated accessory for air frying. The basket elevates food allowing air circulation around all surfaces. The air fry function in both ovens provides flexible healthy cooking options accommodating various portion sizes and simultaneous air fry cooking. 10 Power Levels and Automatic Presets Microwave versatility through multiple power settings and programmed presets simplifies common cooking tasks from gentle defrosting to full-power heating. Ten power levels provide precise microwave cooking control. Different foods require different power levels—delicate reheating uses lower power while boiling water uses full power. Automatic presets for melt, soften, popcorn, and beverage eliminate guesswork for common tasks. Press preset button and microwave automatically sets power level and timing. Melt preset gently heats butter or