Month: August 2021

Bouillabaisse Recipe

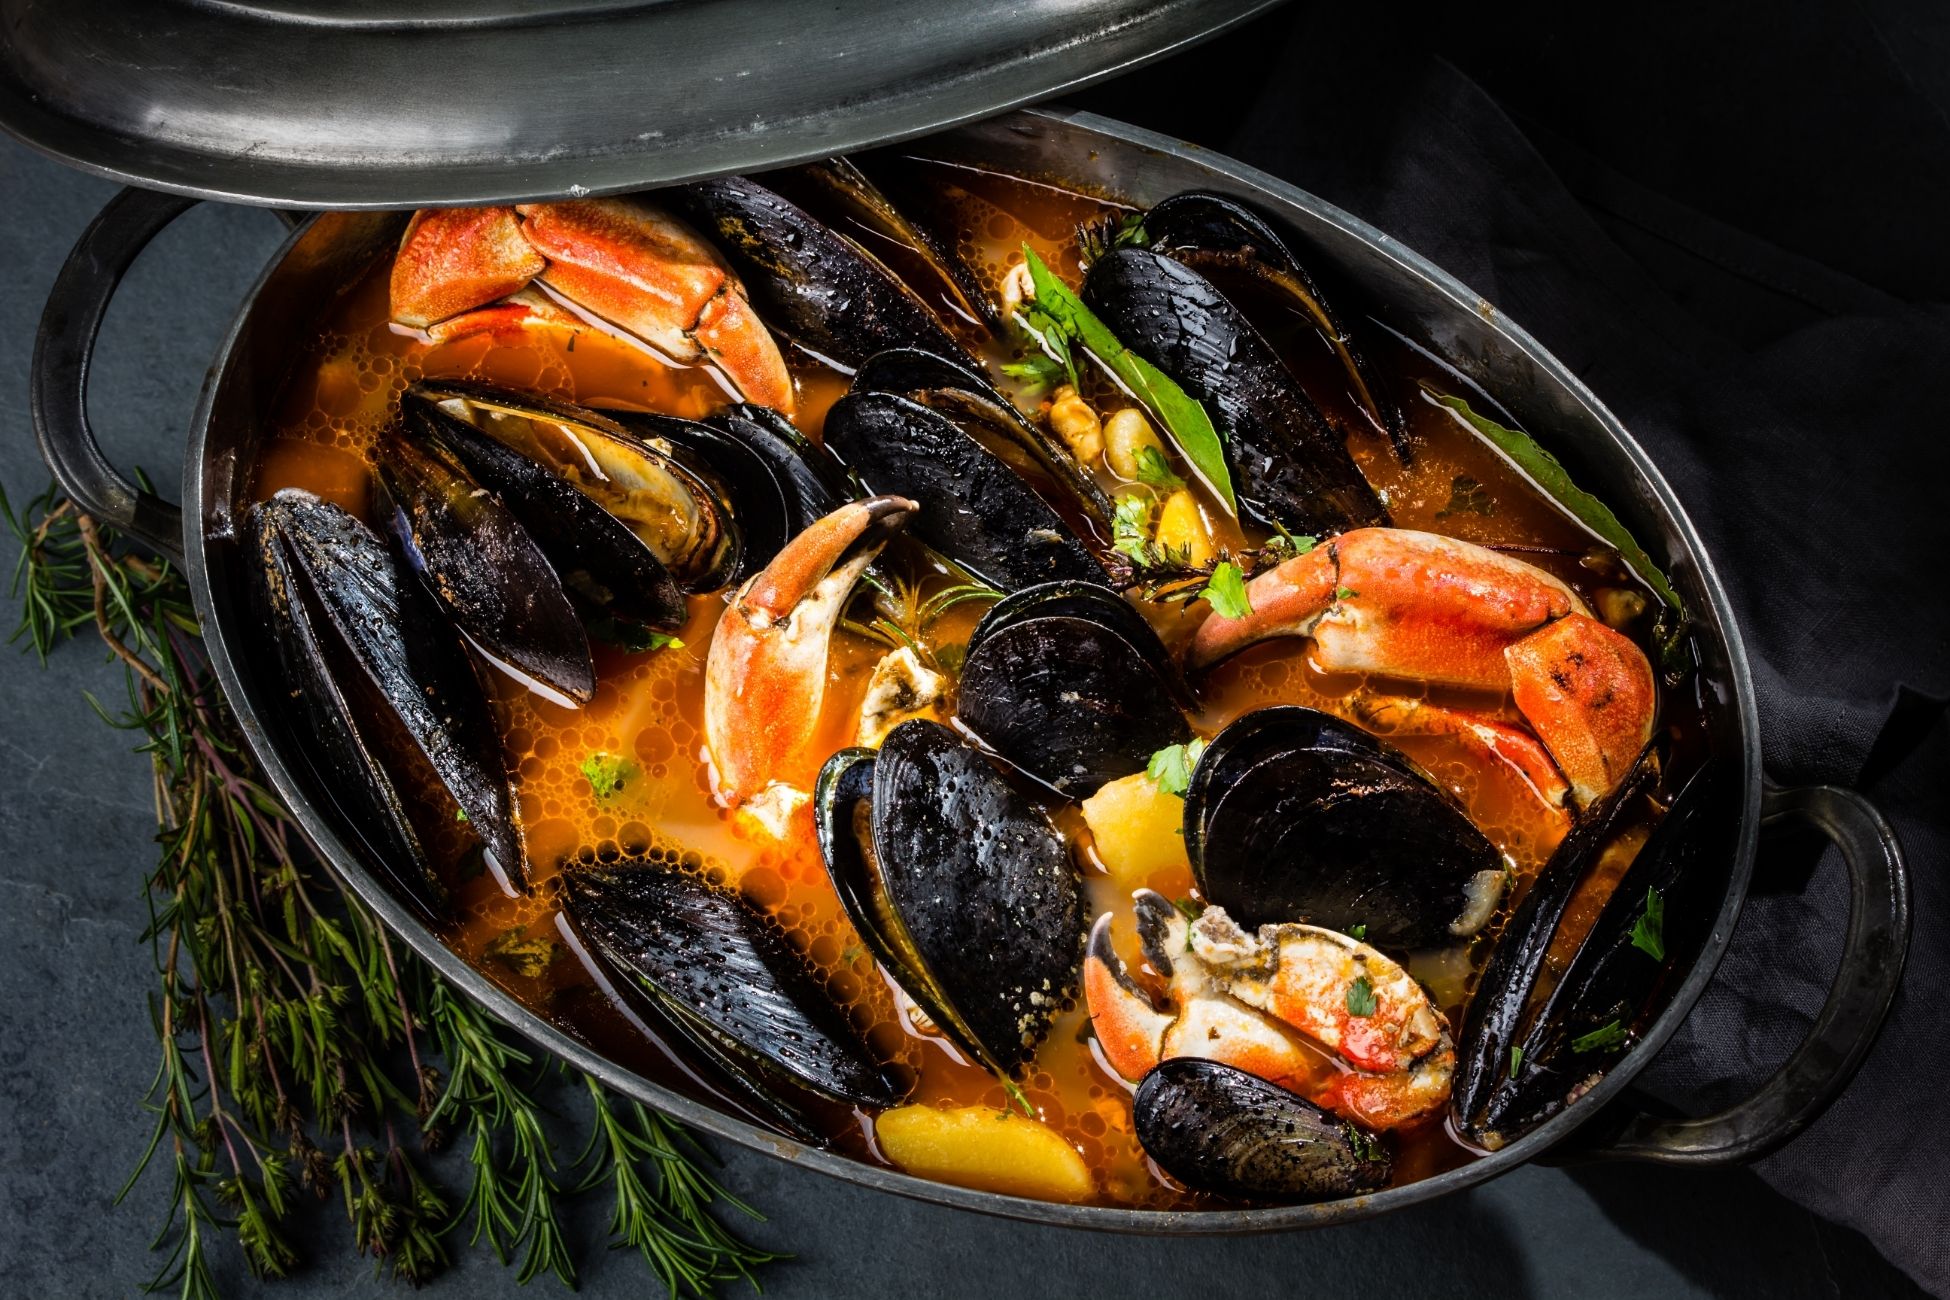
This classic French seafood soup consists of varieties of fish, mussels, squid and crab. There are plenty of variations of bouillabaisse, but the most important thing is that there is a variety of fish. The distinctive flavors of the broth include saffron which gives an orange color, orange zest and fennel. Prep time: 20 mins Cook time: 60 mins Total time: 80 mins Servings: 6 servings Ingredients Sauce Rouille: 1 tablespoon hot fish stock or clam broth 2 cloves garlic, peeled 1 small red hot pepper 1/2 teaspoon salt 1/4 cup soft white bread, pulled into bits 1/2 cup olive oil Bouillabaisse: 3 pounds of at least 3 different kinds of fish fillets (such as sea bass, red mullet, haddock, halibut, cod, conger, or red porgy), cut into 2-inch pieces 1 pound mussels or clams 1 pound squid or crab 1/4 cup extra virgin olive oil 1 cup onions, thinly sliced 2 leeks, white and light green parts only, thinly sliced 1/4 fennel bulb, thinly sliced, or 1 teaspoon fennel seeds 2 cloves garlic, crushed 3 large tomatoes, roughly chopped 1 bay leaf 3 sprigs fresh thyme 1/2 teaspoon saffron threads 2 teaspoons salt 1 long, wide strip orange zest 1 cup clam juice or fish stock 1/4 teaspoon freshly ground black pepper Sliced rustic French bread, plain or toasted Directions Make the sauce rouille: Put the hot fish stock or clam broth into the bottom of a blender. Add the garlic and red hot pepper, salt and bread. Blend until very smooth. With the blender still running, add olive oil slowly and stop the blending as soon as the oil disappears. Set aside. Cook the onions, leeks, and fennel: Heat 1/4 cup of olive oil in a large (6-8 quart) pot on medium high heat. When the oil is hot, add the onions, leeks, and fennel. Stir to coat the vegetables with the olive oil. Cook on medium heat until softened but not browned, about 10-15 minutes. Add the garlic, tomatoes, salt, and aromatics: Add the crushed garlic, chopped tomatoes, bay leaf, thyme, saffron, salt, and orange zest. Cook until the tomatoes are soft and broken down, about 10 more minutes. Add the fish: Bring 2 cups of water to a boil. Lay the fish pieces over the vegetable mixture and pour over with 2 cups of boiling water. Add clam juice or fish stock. Bring everything to a boil, reduce to a simmer, and cook, uncovered, for about 5 minutes. Add the shellfish: Add the mussels, squid, and/or crab, pushing aside the fish so that the shellfish is now covered in liquid, and simmer for 10 minutes more, uncovered. Add freshly ground black pepper, and more salt to taste. Remove the bay leaves, thyme sprigs, and orange zest from the broth. Serve with bread and rouille: To serve, remove the fish and shellfish to a platter to keep warm. Place a thick slice of crusty French bread (plain or lightly toasted) in each bowl and put a dollop of the rouille sauce on top of the bread. Ladle the soup broth over the bread, and then portion out fish and shellfish onto the bowls. Source: Simply Recipes

Air Fried Ham & Cheese Biscuits Recipe

Prepare a quick and simple breakfast with this ham and cheese biscuit recipe! It has all the basics you’d expect plus a few extras such as Italian seasoning and egg wash. The air fryer toasts the outside perfectly while melting the cheese inside to just the right consistency. Serve these on their own for a quick bite or along your other favorite breakfast sides. Ingredients: Pillsbury Dough Biscuits Ham Cheese Eggs Olive Oil Italian Seasoning Directions: Split pillsbury dough biscuits and layer ham and cheese Press the edges and use egg wash or olive oil to coat the biscuits Season with Italian seasoning Bake at 370°F for 6 minutes

Grilled Marinated Flank Steak Recipe

Grilled marinated flank steak is melt-in-your-mouth delicious. The marinade made with soy sauce, honey and garlic pairs perfectly with the extra delicious cut. Flank steak is lean, but somewhat tough. It’s best cooked medium rare and thinly sliced at an angle across the grain of the meat. If you don’t have a grill you can use a large cast iron frying pan as well. Prep time: 10 minsCook time: 20 minsMarinating: 2 hrsTotal time: 2 hrs 30 minsServings: 6 servings Ingredients: 1/3 cup extra virgin olive oil 2 cloves garlic, minced 2 tablespoons red wine vinegar 1/3 cup soy sauce 1/4 cup honey 1/2 teaspoon freshly ground black pepper 2 pounds flank steak Directions: Marinate the steak: Combine the marinade ingredients in a large non-reactive bowl.Place steak in the bowl and turn so that it is completely coated with the marinade. (You can also place the steak and marinade in a freezer bag and place it in a bowl.)Chill and marinate for at least 2 hours and up to overnight. Prepare your grill for high, direct heat with one part of the grill for lower, indirect heat: The grill is hot enough when you hold your hand about an inch over the hot side and you can only hold it there for about a second. Grill the steak: Remove the steak from the marinade and gently shake off the excess marinade from the steak (but make sure there is still a coating of it, you’ll want the oil on it to help keep the steak from sticking to the grill).If you want, sprinkle generously on all sides with coarse salt and freshly ground pepper. The salt and pepper will help form a savory crust on the steak.Place steak on the hot side of the grill. Grill for a minute or two on each side to get a good sear, then move the steak to the cooler side of the grill, cover and cook a few minutes more until done to your liking.How do you know when the steak is done? One way to tell is to poke it with your fingertips. While the steak is still raw, test it with your fingers; it will be quite squishy. That’s what a very rare steak feels like. Touch the tip of your nose and that’s what a very well done steak feels like.Otherwise use a good meat thermometer. Pull the steak off the grill at 120 to 125°F for rare, 130-140°F for medium rare, and 145°F for medium. Rest the steak: When the steak has cooked to your preferred level of doneness, remove from the grill and place on a cutting board. Cover with aluminum foil to hold in the heat while the steak rests for 10 to 15 minutes. Slice across the grain: Notice the direction of the muscle fibers of the steak; this is called the grain of the meat. Flank steak is a very lean cut that will be tough and chewy unless you cut it in a way that breaks up the muscle fibers.So, cut the steak across the grain of the meat, at a steep diagonal, so that the slices are wide. It’s easiest to use a long serrated bread knife for this, but any long sharp knife will do.If you want, you can take the excess marinade and bring it to a boil, simmer for several minutes, and serve with the flank steak. Great also with salsa or horseradish sauce. Source: Simply Recipes

How to Make Soft Pretzels

A soft pretzel is made with a simple dough almost nearly identical to sandwich bread. These pretzels aren’t hard to make, it just takes a leap of faith when placing the pretzels in a vat of simmering water before baking. You’ll want to utilize the boiling step to gelatinize the outside of the pretzel, preventing it from fully rising during baking and giving the pretzels their signature chewy crust and taste. Ingredients 1 cup warm water 2 teaspoons active dry yeast 2 1/2 to 3 cups all-purpose flour 1 tablespoon granulated sugar 1 1/2 teaspoons salt 1/4 cup baking soda 1 tablespoon barley malt syrup, rice syrup, or dark brown sugar 1 large egg, whisked with 2 tablespoons warm water Coarse sea salt or pretzel salt Directions: Make the pretzel dough: Combine the warm water and yeast in the bowl of a stand mixer (or a medium-sized bowl, if kneading by hand). Let stand a few minutes, then stir to dissolve the yeast. Add 2 1/2 cups of the flour, sugar, and salt. Stir with a stiff spatula to form a floury, shaggy dough. Knead the dough: Knead the dough with a stand mixer fitted with a dough hook attachment on low speed for 5 minutes. If the dough is very sticky after 1 minute, add flour a tablespoon at a time until it forms a ball. Alternatively, knead the dough against the counter for 5 to 7 minutes. The dough has finished kneading when it is soft, slightly tacky, and holds a ball-shape. Let the dough rise: Clean out the bowl, film it with oil, and return the dough to the bowl. Cover and let rise somewhere warm until the dough is doubled in bulk, about 1 hour.→ Make Ahead Tip: At this point, the pretzel dough can be refrigerated for up to three days or frozen for three months. Thaw frozen dough in the refrigerator before using. Refrigerated dough can be shaped into pretzels while still cold, but allow some extra time for the pretzels to puff up before dipping and baking. Divide the dough: Turn the dough out onto a lightly floured work surface. Use a bench scraper to divide the dough into 8 equal pieces. Shape the pretzels: Working with one piece of dough a time, roll the dough into a long, skinny rope against the counter using the palms of your hands. Aim for a rope about 20 inches long. If it shrinks back on you, set it aside, roll another piece of dough, and come back to it after it’s rested a few minutes.Lift the ends of the rope toward the top of your work surface and cross them. Cross them one more time to make a twist, then fold the twist back down over the bottom loop to form a pretzel shape.Set the pretzel on a parchment-lined baking sheet and continue shaping the rest of the pretzels. When all the pretzels are shaped, cover them loosely and set them aside to rise until puffy, 20 to 30 minutes. Preheat the oven to 450°F. Place a rack in the middle-bottom position. Prepare the water bath: When the pretzels are starting to look puffy, measure 8 cups of water into a large, wide pot and set over high heat. Make sure the pot has high sides because the water will foam, nearly doubling in volume, when you add the baking soda.Bring the water to a rapid simmer, then add the baking soda and the barley malt syrup. The baking soda will make the water foam up the sides of the pot. Stir to dissolve the baking soda and syrup, then reduce the heat to medium to maintain a simmer. Boil the pretzels: Lower 2 to 3 pretzels into the water bath — as many as will fit without crowding. Simmer for 30 seconds, then use a slotted spoon to flip the pretzels over. Simmer for another 30 seconds, then scoop the pretzels out of the water and return them to the baking sheet. While in the water bath, the pretzels will puff and take on a doughy, puckered appearance. Repeat with the remaining pretzels. Brush with egg and sprinkle with salt: Once all the pretzels have been dipped in the water bath, brush them with the egg and water mixture and sprinkle them with salt. Bake the pretzels: Bake the pretzels until they are deep brown and glossy, 12 to 15 minutes. Cool and eat! Transfer the pretzels to a cooling rack and let sit until cool enough to handle. Pretzels are best when eaten fresh and hot, but will still be good for up to a day later. Store them in a paper bag at room temperature. Source: the Kitchn

Cutting Fruits and Vegetables 101

Cutting fruits and vegetables is all in the grip. There are 4 tips for safer and smarter chopping you can follow. Making sure the cutting board won’t slip Using the “claw grip” method when cutting Stabilizing your food Keeping your knives sharp Keep Your Cutting Board From Slipping You first want to make sure your cutting board isn’t moving around while you’re using it. Chopping on an unstable surface could potentially lead to accidents. Some boards come with rubber feet on the bottom which are great for stabilizing the board. If yours doesn’t, use a damp kitchen towel or a rubber mat underneath the cutting board. The Claw Grip Protect your finger while also stabilizing your ingredient with the “claw grip”. This method takes your non-dominant hand’s fingers to form a claw. Press your fingertips and a bit of your fingernails into the food itself to hold it stable. It also protects your fingers in case the knife slips. As you move down the food and the pieces get smaller, it’s important to curl and tuck your fingertips under as you grip the food. This will also help grip your ingredient as it continues to shrink. Put the Cut Side Down You want to create a flat surface to secure your food. Doing so will prevent any rocking or slipping while cutting. For example, if you are cutting an onion you want to prevent it from rolling around on the table. Cut the onion in half and place the cut side down before chopping it into pieces. Combining this method with the claw grip will ensure you can safely and securely cut any fruit or vegetable. Keep Knives Sharp If you’re struggling to cut through a potato, it may be time to sharpen your knife. A knife should easily cut through ingredients without damaging them. A dull knife can be more dangerous than a sharp one since it requires more pressure which could cause you to lose your grip. You can take your knife to be professionally sharpened at least once every six months or more depending on use. Source: Simply Recipes

Egg Cup Omelette Recipe

Make breakfast simple! This egg cup omelette has everything you need such as cheese, veggies and choice of meat. Don’t fuss with cleaning pans afterwards. Conveniently prepare this in an air fryer in about 10 minutes. Serve the egg cup omelette on its own or along your other favorite breakfast sides. Ingredients: 2 Eggs Chopped Veggies Chopped Meat Cheese 1 Tsp butter 1 Tsp Cream Cheese Directions: Mix 2 eggs and your choice of chopped veggies and meats Add a handful of cheese and the butter and cream cheese Mix then pour in a pan Cook at 375°F for 10 to 12 minutes

How to Make Powdered Sugar

We all know the pain of making a batch of cinnamon rolls and turning around to find you’re out of powdered sugar. Without extra time to run to the store, missing out on this key ingredient could spill disaster for many recipes. However, there’s a solution if you have white sugar and a food processor or blender around. Powdered sugar is white cane sugar that has been pulverized to a fine powder. You can achieve the same result with a bit of cornstarch and just a few minutes of time. Prep time: 2 minsTotal: 10 minsTotal time: 12 minsServings: 16 servingsYield: 2 cups Ingredients 2 cups granulated white sugar 2 tablespoons cornstarch Directions Combine the sugar and cornstarch: Combine the sugar and cornstarch in a blender jar or bowl of a food processor. Pulverize the sugar: Turn the machine on to high speed and run 3 to 5 minutes. The time will depend on your blender or food processor; some high speed blenders will take as few as 3 minutes. Stop the machine every few minutes to scrape down the sides to make sure all the sugar gets evenly pulverized. Check the texture of the sugar: The sugar is done when it feels fine and powdery when you rub it between your fingers; if it’s still gritty, keep processing. Use right away or store for later: The powdered sugar may be hot from the friction of the machine. If it is, let it cool before putting in an airtight container or zip top bag. Like regular powdered sugar, it will keep indefinitely. Source: Simply Recipes

Ginger Beef Stir Fry Recipe

Looking for a quick dinner idea? Beef stir fry is easy and packed with flavor. The honey soy marinade comes together with julienned ginger for a tasty meal. The trick to a good stir-fry is using a very hot, and relatively stick-free pan. Cooking on high heat allows you to get a good sear on the meat and vegetables without overcooking them. Prep time: 15 minsCook time: 10 minsMarinating: 30 minsTotal time: 55 minsServings: 4 to 6 servings Ingredients: Marinade: 2 tablespoons unseasoned rice vinegar 5 tablespoons soy sauce (use gluten-free soy sauce if cooking gluten-free) 1 tablespoon honey 1 tablespoon peeled, grated fresh ginger 1 teaspoon chili pepper flakes 1 teaspoon ground cumin Beef and stir-fry: 1 1 1/4 to 1 1/2 pound top sirloin steak 1 tablespoon cornstarch 2 tablespoons vegetable oil (preferably peanut) 1 tablespoon dark toasted sesame oil, optional 3 to 4 green onions, cut on a diagonal, 1/2-inch apart, including the greens 2 cloves garlic, thinly sliced 2 to 3 hot chilies, preferably red serranos, seeded, sliced 1-inch knob of ginger, peeled, cut lengthwise into matchstick shapes 1/2 cup loosely packed, chopped cilantro Directions: Chill steak, slice into strips: Chill the steak in the freezer for 30 minutes before you slice it, this will make it easier to cut in thin slices. Slice the steak first crosswise in 1/2-inch thick slices. The cut each slice lengthwise into strips. Marinate the beef: In a medium bowl, whisk together the marinade ingredients; the soy sauce, vinegar, grated ginger, honey, red chile flakes, and cumin. Mix the beef in with the marinade to coat and let it sit for at least 30 minutes, and up to 4 hours, in the fridge. Make cornstarch slurry: In a small bowl, mix the cornstarch with 2 tablespoons of cold water to make a slurry. Brown the beef strips: Heat the oil in a wok (vegetable oil plus dark sesame oil if using), or a large sauté pan, over high heat until it is nearly smoking. As the oil is heating up, pat the beef dry and separate it into small batches no larger than what can fit into the palm of your hand. Working in batches, sauté beef until just brown outside but rare inside, no more than 1 minute. Transfer beef to a bowl. Stir fry chilies, garlic, ginger: When all of the beef is cooked, put the chilies and garlic into the pan and stir-fry 30-45 seconds. Add the julienned ginger and cook for 30-45 seconds more. Add beef, cornstarch slurry, scallions: Add the beef back to the pan. Add the cornstarch slurry. Add the scallions and mix everything together. Cook for 1 minute. Remove from heat, stir in cilantro: Turn the heat off and mix in the cilantro. Serve at once with steamed white rice. Source: Simply Recipes

Crispy Grilled Cheese Chips Recipe

Prepare a quick and simple snack with this air fryer recipe! Crispy grilled cheese chips have everything you love, from a crunchy exterior to all the right seasonings and cheese inside for a highly versatile dish. Serve these on their own or as a side to your dinner. Ingredients: Brioche Bread Butter Cheese Garlic Salt Italian Seasoning Non-stick Cooking Spray Directions: Flatten bread and sandwich them with choice of cheese and garlic salt Cut into triangles. Butter and sprinkle with Italian seasoning Spray air fryer pan with non-stick spray and load chips Cook at 350°F for 10 to 12 minutes. Flip and cook for another 3 minutes

Peach Cobbler Recipe

Peach cobbler is a summer favorite. It’s super easy to make with just fresh peaches and a simple cobbler topping. Use ripe, sweet and flavorful yellow peaches. The peach cobbler will only be as good as the peaches you use. You’ll want to serve this with a scoop of vanilla ice cream for the final touch. Prep time: 40 minsCook time: 50 minsTotal time: 90 minsServings: 8 servings Ingredients: Peach filling: 4 pounds ripe yellow peaches (about 12 medium-sized peaches), peeled, pitted, and sliced into 1/2 inch thick wedges 1 cup sugar, divided 2/3 cup and 1/3 cup 1/2 cup instant tapioca (grind in a food processor for better texture) 1 teaspoon lemon zest 1 1/2 tablespoons lemon juice 2 teaspoons vanilla extract Cobbler topping: 2 cups all-purpose flour 1 1/4 teaspoons baking powder 1/2 teaspoon ground nutmeg 3/4 cup (6-ounces) butter, cut into 1/2 inch chunks 2/3 cup heavy cream Directions: Make the filling: Place the peaches, 2/3 cup of the sugar, instant tapioca, lemon juice, lemon zest, and vanilla in a large bowl and stir to evenly coat the peach slice with everything.Let sit for 30 minutes for the peaches to macerate and the tapioca to soften, stirring occasionally. Preheat oven to 350°F Make cobbler topping: In a separate bowl, vigorously whisk together the flour, 1/3 cup of sugar, baking powder, and nutmeg.Cut the butter into the flour with your fingers or a fork until the mixture has the texture of a coarse meal. Add the cream and stir with a fork until the dough mixture just comes together. Assemble the cobbler: Butter a 2 1/2 to 3 quart casserole baking dish. Spread the sliced peaches out in an even layer. Crumble the dough mixture over the peaches. Bake: Bake at 350°F until the peaches are bubbly and the topping is well browned, about 50-60 minutes. Cool and serve: Let cool 10 minutes before serving. Serve with vanilla ice cream or whipped cream. Source: Simply Recipes