Month: November 2022

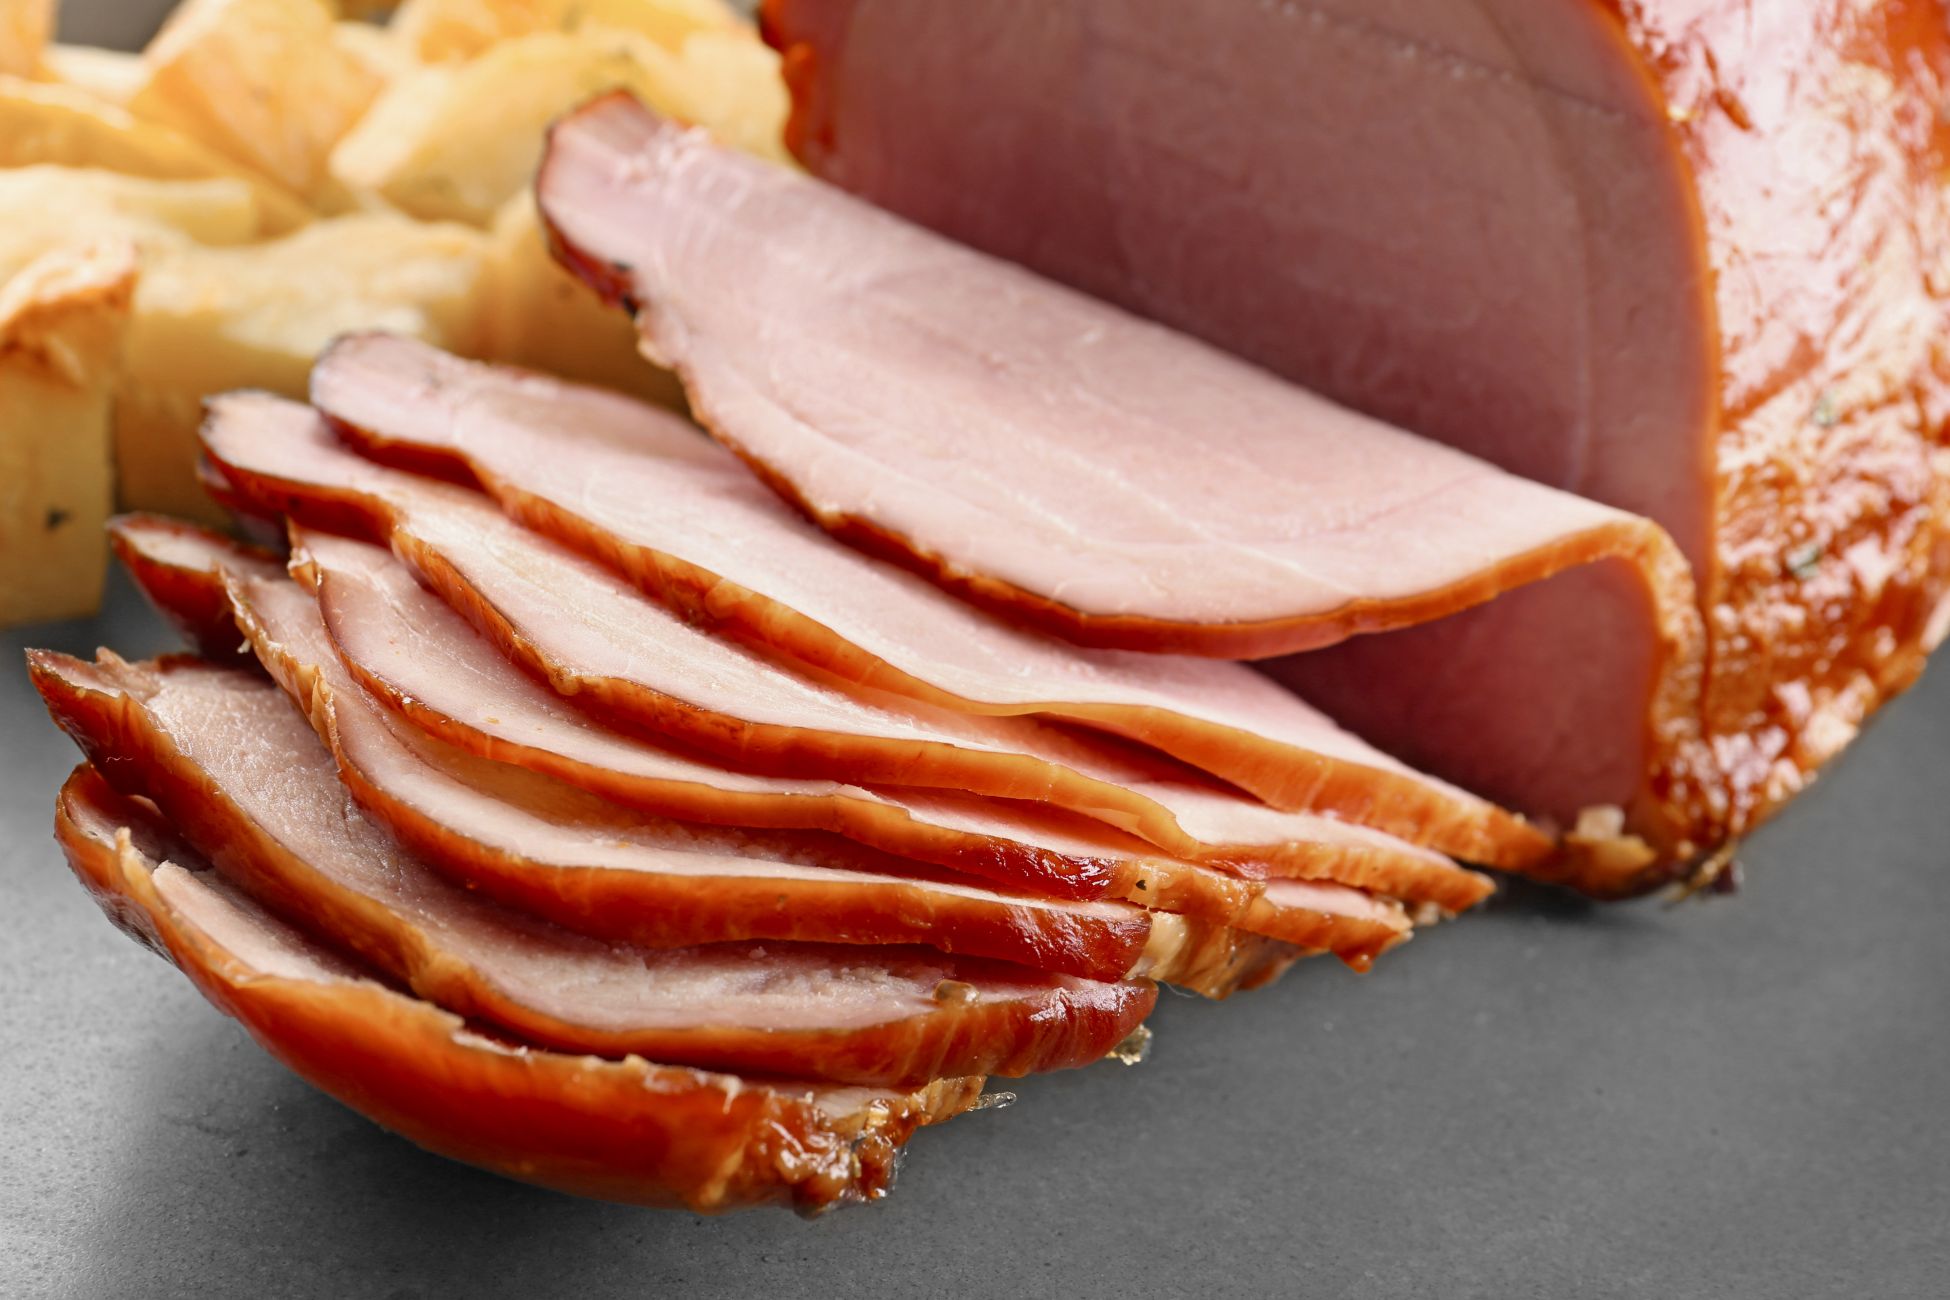
Glazed Baked Ham Recipe

A holiday classic. A baked ham is an easy dish to prepare while staying economical. Hams often go on sale the week before holidays bringing the cost down even more. For this recipe, look for an un-sliced bone-in half ham, preferably from the shank end. It’s enough to feed at least a dozen people. Prep time: 20 minsCook time: 90 minsTotal time: 110 minsServings: 12 servings Ingredients For the ham: 1 (9 to 11-pound) fully cooked (ready-to-eat) bone-in ham For the Sweet Hot Honey Mustard Glaze: 3 tablespoons sweet hot honey mustard, or brown mustard with honey 2 tablespoons brown sugar About 50 cloves For the Honey Thyme Glaze: 3 tablespoons unsalted butter, melted 2 tablespoons fresh thyme, or 2 teaspoons dry 1/4 cup cider vinegar 1/4 cup honey 1 tablespoon brown sugar 1 teaspoon Worcestershire sauce Directions Let the ham come close to room temp: Remove the ham from the refrigerator (still wrapped) a couple of hours before you intend to cook it so that it can get closer to room temperature. This will help it warm more evenly. Preheat the oven: Preheat the oven to 325°F. Score the skin and fat (if using an unsliced ham): Place the ham, fattier side up, in a foil-lined roasting pan.Score a diamond pattern in the fat with a sharp knife, about 1/4-inch to 1/2-inch deep, and the parallel lines about 1 1/2-inches apart. (You won’t need to do this if you’re using a spiral cut ham.)Do not score the meat itself, just the fat and any skin. You can score the fat as deeply as to where the fat meets the meat. If you want, you can first cut off any skin that might still be on the ham, but it isn’t necessary. Insert the cloves (if using): If using cloves (with the Sweet Honey Mustard Glaze), you can either put them in before applying the glaze or after. They look better if applied after, but it is easier to see the lines in the ham as a guide for placement if you put them in first.Place the cloves in the center of the diamonds to form a nice pattern around the top and sides of the ham (or along the edges of some of the precut slices if using spiral cut). Some people put the cloves in the intersection points of the scores. Do as you wish. You just want a nice pattern. Prepare the glaze: If using the sweet honey mustard glaze: Mix the mustard with the brown sugar in a small bowl.If using the honey thyme glaze: Mix thyme in with the hot melted butter and let sit for a few minutes. In a small saucepan on high heat, let the cider vinegar reduce down from 1/4 cup to 1 tablespoon, and remove from heat. Whisk in the butter and thyme. Add the honey, brown sugar, and Worcestershire sauce. Apply the glaze: Using a pastry brush, brush whichever glaze you are using over the ham. Only use about third of it (reserve the rest for later in cooking). Try to work the glaze into the scored lines. Bake the ham: Place ham in oven. (If using a spiral cut ham, first wrap tightly in aluminum foil so that the ham doesn’t dry out while cooking.)Cook for 1 to 1 1/2 hours (check after 1 hour, will take longer if the ham is not at room temp to begin with), or about 10 minutes per pound, until the internal temperature of the ham is 110° to 120° with a meat thermometer. (Note that the ham is already cooked when you buy it, all you are trying to do is heat it up for eating.)If using a non-spiral cut ham, baste the ham with the glaze a couple of times during the cooking. If you check on the ham and think that the glaze is at risk of getting too browned (like on the way to burnt), you can cover with a piece of foil. Baste and broil: When the ham has reached the desired temperature, baste again. (If using a spiral cut ham, open up the foil to expose the ham before basting.)Regardless of which ham you’re using, place it under the broiler for few minutes to get some nice browning on the top. Take the pan out of the oven and brush the ham all over with pan juices. Cover with aluminum foil and let rest for 15 minutes before serving. Slice: To slice a bone-in ham, cut around the bone first. Then use a long, sharp knife to slice off pieces around the bone.Another way to slice the ham is to make first a slice on wide end to get a flat lying surface. Then stand the ham upright on the wide end and make slices down the side, working around the bone. Source: Simply Recipes

Gas vs. Electric Stove: Sustainability, Cost, and Maintenance Debunked | Redfin

Check out the recent Redfin article we were featured in: Gas vs. Electric Stove: Sustainability, Cost, and Maintenance Debunked If you’re in the market for a new stove, choosing a replacement can be challenging. Along with size, brand, and aesthetic, an important decision is deciding which fuel source you want it to use. Both have their advantages and disadvantages, especially when it comes to sustainability and price. As climate change worsens, gas appliances are coming under increased scrutiny, leading some cities like Boston and San Francisco to begin phasing them out. Because of this, choosing the right stove for your situation is more critical than ever. Read on to learn more. Read the full article here: Gas vs. Electric Stove: Sustainability, Cost, and Maintenance Debunked | Redfin

Crispy Shrimp and Chive Dumplings Recipe

An easy appetizer for an upcoming party! Homemade dumplings are made simple with wonton wrappers instead of making the dough from scratch. The pan fry and steaming process can be done in just under 10 minutes. Serve along with a soy dipping sauce or sweet chili sauce. Prep time: 40 minsCook time: 25 minsTotal time: 65 minsServings: 10 servingsYield: 30 dumplings Ingredients 1 pound raw shrimp 1/2 cup chives 2 teaspoons ginger 2 teaspoons minced garlic 2 teaspoons cornstarch 1 teaspoon soy sauce 1 teaspoon sesame oil 1/2 teaspoon kosher salt 1/2 teaspoon granulated sugar 1/4 teaspoon black pepper 3 wrapper, wonton wonton wrappers 2 tablespoons vegetable oil 1/2 cup water Soy sauce or chili sauce, or dumpling sauce, for dipping Directions Prepare the shrimp: Chop the shrimp until it turns into a chunky paste. Make the filling: In a medium bowl, combine chopped shrimp, chives, ginger, garlic, cornstarch, soy sauce, sesame oil, salt, sugar, and pepper. Cover and refrigerate until ready to fill. Prepare the wrappers: If you purchased square wonton wrappers, use a 3 1/2-inch round cutter to cut out a circle shape. Keep the wrappers covered with a damp paper towel or plastic wrap to prevent them from drying out. Shape the dumplings: Lightly brush the edges of 1 wrapper with water. Add about 2 teaspoons of filling to center the wrapper (do not overfill). Fold the dough into a half moon shape, remove any air, and press the edges together. Brush the outer edge of the dumpling with water. Starting on one side then working to the other, create about 5 to 6 small pleats along the edges of the dumpling. Make sure to press the pleats to ensure that it is sealed well. Repeat with the remaining wrappers and filling. Pan-fry the dumplings: Heat a large nonstick pan over medium-high heat. Add 1 tablespoon of the oil. Carefully add 15 dumplings to the pan. Fry until the bottoms are golden brown, about 1 to 2 minutes. Steam the dumplings: Reduce the heat to medium-low. Very carefully, pour in 1/4 cup water into the side of the pan. Immediately cover, allowing dumplings to steam until the water evaporates, about 3 minutes. Remove the lid and turn up the heat to medium. Fry until bottoms are brown and crisp, about 1 to 2 minutes. Repeat with the remaining dumplings, adding the remaining 1 tablespoon of oil for browning and then 1/4 cup water for steaming. Serve: Serve the dumplings hot, with your favorite dipping sauce like soy sauce, sweet and sour, or spicy chili. Store in an airtight container in the refrigerator for up to 3 days. Source: Simply Recipes

Vegan Pumpkin Pie Recipe

An alternative that everyone can enjoy. Vegan pumpkin pie is nearly indistinguishable from traditional pumpkin pie and is super easy to make with a blender. Instead of eggs and heavy cream, this recipe calls for silken tofu. It bakes into a smooth filling and is easier to make than the usual way. Prep Time: 20 minsCook Time: 60 minsIn-Oven Cool Time: 30 minsTotal Time: 110 minsServings: 8 servingsYield: 1 (9-inch) pie Ingredients 1 homemade vegan pie crust or 1 premade vegan pie shell (see recipe note) 1 (15-ounce) can pumpkin purée (or 2 cups homemade pumpkin purée) 1 (12.3-ounce) shelf-stable package firm silken tofu 3/4 cup organic light brown sugar 1/4 cup plain, unsweetened nondairy milk 2 teaspoons ground cinnamon 1 teaspoon ground ginger 1/4 teaspoon ground nutmeg 1/4 teaspoon ground cloves 1/4 teaspoon salt Directions Line the pie dish: If using a homemade crust, roll it out and line a 9-inch pie dish. Stick the dish in the freezer while you work on the filling. If using a store-bought frozen crust, just keep it in the fridge or freezer until it’s time to bake the pie. Preheat the oven to 425°F. Position a rack in the bottom third of the oven. Make the filling: Combine the pumpkin, tofu, sugar, nondairy milk, spices, and salt in a blender or food processor. Blend or process until smooth, stopping to scrape down the sides as needed. Fill the pie shell and bake at a high temp: Pour the filling into the chilled pie crust. Tap the dish against the counter gently to coax out any air bubbles. Smooth the top with a metal spatula, if needed.Set on the rack in the lower third of the oven and bake at 425°F for 15 minutes. Lower the oven temperature and continue baking: After 15 minutes, lower the temperature to 350°F. Bake the pie another 45 minutes, until the top of the filling gets a matte look and the filling jiggles all as one unit (like a Jell-O mold) when you nudge the pie dish. Turn off the oven and let the pie cool in the oven with the door cracked open for 30 minutes. This helps minimize cracking. Cool, then serve: Set the pie on a wire rack to continue cooling for at least 2 hours before serving. The pie may crack as it cools, but don’t worry about it. Beads of liquid may appear on the top of the filling. If that bothers you, simply lay a paper towel over the filling to very gently blot them away. Serve with the vegan whipped topping of your choice, such as coconut whipped cream. Source: Simply Recipes

Things That Make Your Kitchen Feel Smaller

A kitchen may appear smaller than it actually is. Whether it’s an optical illusion or poor space management, a kitchens’ design can transform the feel of the space. Here are a few tricks to avoid common mistakes and what to do instead. Islands That Are Too Big. Giant islands, seating up to 10 people may feel like a solution to accommodate larger groups, but building bigger means sacrificing on walkway space. Kitchen islands aren’t ideal for every kitchen space and can negatively impact the functionality of a kitchen. Movable butcher block islands are a great alternative to tuck away when not in use. Too Many Small Appliances Out on Counters. While appliances like air fryers, rice cookers and espresso makers are necessary, they don’t need to be out on display at all times. These tools take up a lot of countertop space and can make your kitchen feel crowded. Instead, try placing all your appliances in a clean, organized workspace like an appliance garage. Poor Lighting. One of the biggest offenders here is dim or soft lighting. Swapping out bulbs for brighter options or replacing lighting fixtures entirely is the first step to creating the illusion of more space. Light fixture scale also plays an important role. Larger pendant lighting can actually make a kitchen feel larger. Too Much Cabinetry. While storage can be a top priority in a kitchen, there is such a thing as too much. Too many upper cabinets can make a kitchen feel cramped and heavy. Try breaking up the solid cabinets with a mix of open shelving and cabinets with glass doors. Tiny Compartment Sinks. Consider upgrading to a large, single-basin sink to make your kitchen feel more expansive. These sinks will help emphasize the width of your countertops better than tiny compartment alternatives. Source: the Kitchn

Sheet Pan Fried Rice Recipe

A one-dish fried rice saves time with plenty of flavor. Tofu prepared in the oven is chewy and savory, bringing it all together with the tahini-based sauce. Look for extra-firm, water packed tofu as it won’t crumble when tossed with the tamari or soy sauce. You can swap out the broccoli and carrots for combinations of cauliflower, cabbage or asparagus. Prep time: 20 minsCook time: 35 minsTotal time: 55 minsServings: 4 to 6 servings Ingredients 1 cup long-grain white rice 1 1/2 cups plus 2 tablespoons water, divided 1 cup mild kimchi, drained and chopped, plus 2 tablespoons juice 1/4 cup tahini 2 1/2 tablespoons tamari or soy sauce, divided 1 tablespoon gochujang paste 1 tablespoon rice vinegar 1 tablespoon sugar 1 clove garlic, pressed 3 tablespoons avocado or canola oil, divided 1 block extra firm tofu, drained 4 cups broccoli florets 1 large carrot, thinly sliced 2 teaspoons toasted sesame oil Directions Cook the rice: Bring 1 1/2 cups water to a boil in a small pot, then add the rice. Return to a boil, cover, and reduce the heat to low. Cook until the water is absorbed and the rice is tender, about 15 minutes or according to the package instructions. Take off the heat and let stand, covered, for 5 minutes. Set aside to cool until ready to use. Preheat the oven to 425°F. Prepare the kimchi: Use a fork to move the kimchi from the jar to a measuring cup, then place a small strainer over a small bowl and drain the kimchi, pressing it down. Measure the kimchi juice and add more from the jar, if needed, to make 2 tablespoons. Roughly chop the kimchi and set both aside. Make the drizzle: In a cup or bowl, combine the tahini, 1 tablespoon of tamari or soy sauce, gochujang, rice vinegar, sugar, garlic, and the reserved 2 tablespoons of kimchi juice. Stir with a fork or small whisk until smooth. Stir in 2 tablespoons of water to make it pourable and set aside. Roast the tofu: Spread 1 large rimmed sheet pan with 1 tablespoon of oil. Cut the tofu into 1/2-inch cubes and pile on the oiled pan. Drizzle with 1 tablespoon of tamari or soy sauce and toss gently to coat, then spread the cubes out on the pan in a single layer. Bake the tofu for 15 minutes, then toss and bake for 10 minutes longer, until browned and crisp. Roast the vegetables: Meanwhile, combine the cooled, cooked rice, broccoli, carrot, and kimchi in a large bowl. Drizzle with sesame oil and the remaining 1/2 tablespoon tamari or soy sauce and toss to mix. Spread the remaining 2 tablespoons of oil on a second large rimmed sheet pan, then spread the rice and vegetable mixture evenly on the pan.Bake until the vegetables are crisp-tender and the rice is a little browned around the edges of the pan, about 20 minutes. Drizzle and serve: Combine the hot rice mixture and baked tofu in a large serving bowl and stir to mix. Drizzle with the tahini and gochujang mixture. Serve hot.Any leftovers can be stored in the refrigerator, tightly covered, for up to 4 days.To reheat, microwave on high for 2 to 3 minutes. You can also put the leftover fried rice in a small, oven-safe dish, sprinkle with a few drops of water, cover, and place in a 300°F oven until heated through. Source: Simply Recipes