Home

Pool Snacks That Actually Work in the Heat: No Melting, No Mess

Anyone who has tried to eat cheese and crackers beside a pool in 90°F heat knows the problem. The cheese softens within minutes, the crackers absorb ambient humidity and lose their snap, and by the time the second person has served themselves the whole situation has become an unappetizing warm mess that nobody wants to touch. Chips go stale. Chocolate melts. Dips separate. Ice cream is a race against physics that you always lose. Pool snacking has specific constraints that indoor entertaining doesn’t — heat that accelerates every form of food degradation, humidity that attacks textures, direct sunlight that raises surface temperatures above ambient air, and the practical reality that people are wet, moving between water and food constantly, and don’t want to deal with plates, utensils, or anything that requires careful handling while dripping. The snacks that actually work in this environment are designed around these constraints rather than ignoring them. This isn’t about health food or sophisticated entertaining. It’s about finding the foods that hold up structurally and flavor-wise in genuine summer heat, that can be eaten with one hand or directly from a vessel without drama, and that survive the window between being set out and actually being consumed without becoming something you’d rather not eat. The categories that work in the pool environment are more specific than most people assume — and they’re genuinely satisfying once you know what they are. The Rules That Pool Snacks Need to Follow Before the specific foods, the framework that separates pool-viable snacks from ones that fail in the environment. Heat Stability Above Everything Else: Anything containing chocolate, whipped cream, soft cheese, or mayonnaise-based components exposed directly to sun will fail within 20-30 minutes at typical summer pool temperatures. These aren’t borderline cases — they’re predictable failures. Heat-stable snacks are either dry and shelf-stable, naturally cold enough to have a long warm-up window, or preserved by acidity or salt rather than refrigeration. Structural Integrity When Wet: Pool snacking happens with damp or fully wet hands. Crackers that crumble when touched, delicate chips that shatter, and anything requiring two-hand coordination to eat without spilling are poor pool snack choices regardless of flavor. Foods that can be picked up with wet fingers, bitten cleanly, and eaten without consequence work. Foods that require careful handling don’t. No Plate Dependence: Ideal pool snacks eat directly from the container, the skewer, or the hand without requiring a plate to catch components. Foods that fall apart into multiple pieces, require a fork, or create crumbs that scatter into pool furniture don’t suit the environment. Finger foods, skewered items, and anything in its own natural container are the formats that work. Flavor That Holds at Temperature: Some foods taste best cold and become disappointing as they warm. Others are designed for room temperature or warm serving and aren’t compromised by ambient heat. Understanding which category your snack falls into determines whether it’s a pool-appropriate choice or one that will disappoint guests 30 minutes after being set out. Skewered Foods: The Definitive Pool Snack Format Skewers solve most pool snack problems simultaneously — they provide a dry handle that keeps wet hands away from food, they create portion control that makes serving from a communal tray easy and hygienic, and they keep food off surfaces that attract insects and collect debris. Caprese Skewers: Cherry tomatoes, fresh mozzarella ciliegine, and fresh basil leaves threaded onto short bamboo skewers. Drizzle with good olive oil and a pinch of flaky salt before serving. These hold up well in heat longer than a plated caprese because the individual components stay distinct rather than sitting in accumulated liquid. The mozzarella will soften slightly after 45 minutes but remains completely edible — the serving window is generous. Keep them in a cooler until 15-20 minutes before serving. Watermelon and Feta Skewers: Cubed watermelon with small cubes of firm feta alternating on short skewers, finished with a few mint leaves and a crack of black pepper. The sweet-salty-herby combination is one of the most refreshing possible pool snack flavor profiles, and watermelon’s high water content means it stays cool longer than other fruits after coming out of the cooler. Feta’s salt content makes it more heat-stable than fresh cheeses. Antipasto Skewers: Salami folded in quarters, pitted olives, marinated artichoke hearts, sun-dried tomatoes, and cubes of provolone on full-length skewers. All of these components are naturally shelf-stable or salt-preserved, meaning heat affects them much less than fresh dairy or mayo-based items. These hold up at pool temperatures for 45-60 minutes without quality degradation — one of the more forgiving pool snack formats available. Grilled Shrimp Skewers: Pre-grilled shrimp on skewers served at room temperature with a dipping sauce on the side. Cook shrimp with garlic, olive oil, lemon, and paprika, thread on skewers, grill until just done, and refrigerate until serving. Room temperature shrimp on skewers is a completely appropriate serving temperature — shrimp doesn’t need to be hot to be good, and the grill seasoning holds up as it warms. Serve with a small cup of cocktail sauce or spicy aioli per person rather than a shared dip. Fruit Skewers with Tajín: Cubed melon, pineapple, and mango on skewers dusted with Tajín — the chili-lime salt that has become the definitive fruit seasoning for outdoor eating. Tajín is specifically good for pool snacking because the salt and acid slow fruit from becoming watery and the heat-compatible flavors don’t suffer as fruit warms slightly. Prepare from a cooler and these hold a good eating window of 30-40 minutes before becoming too warm. Cold Items That Have Long Warm-Up Windows Not everything needs to stay cold — but some items can come out of the cooler and hold acceptable quality for long enough that they’re genuinely practical for pool service. Frozen Grapes: Wash grapes, pat dry, and freeze on a sheet pan before transferring to a freezer bag. Serve directly from frozen in a bowl or cup. Frozen grapes function as both a snack and a

Wine Cooler vs. Regular Refrigerator for Summer Entertaining: Which One Actually Serves Your Guests Better

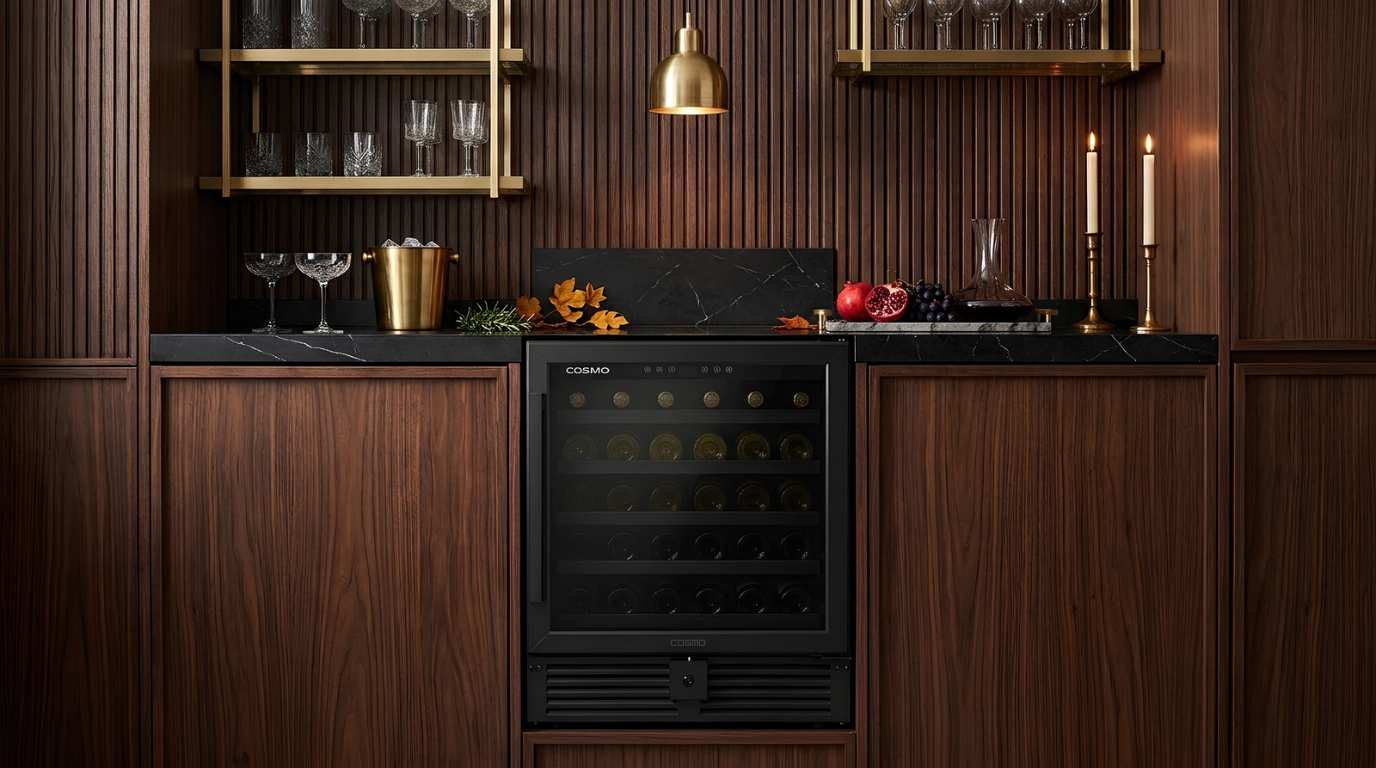
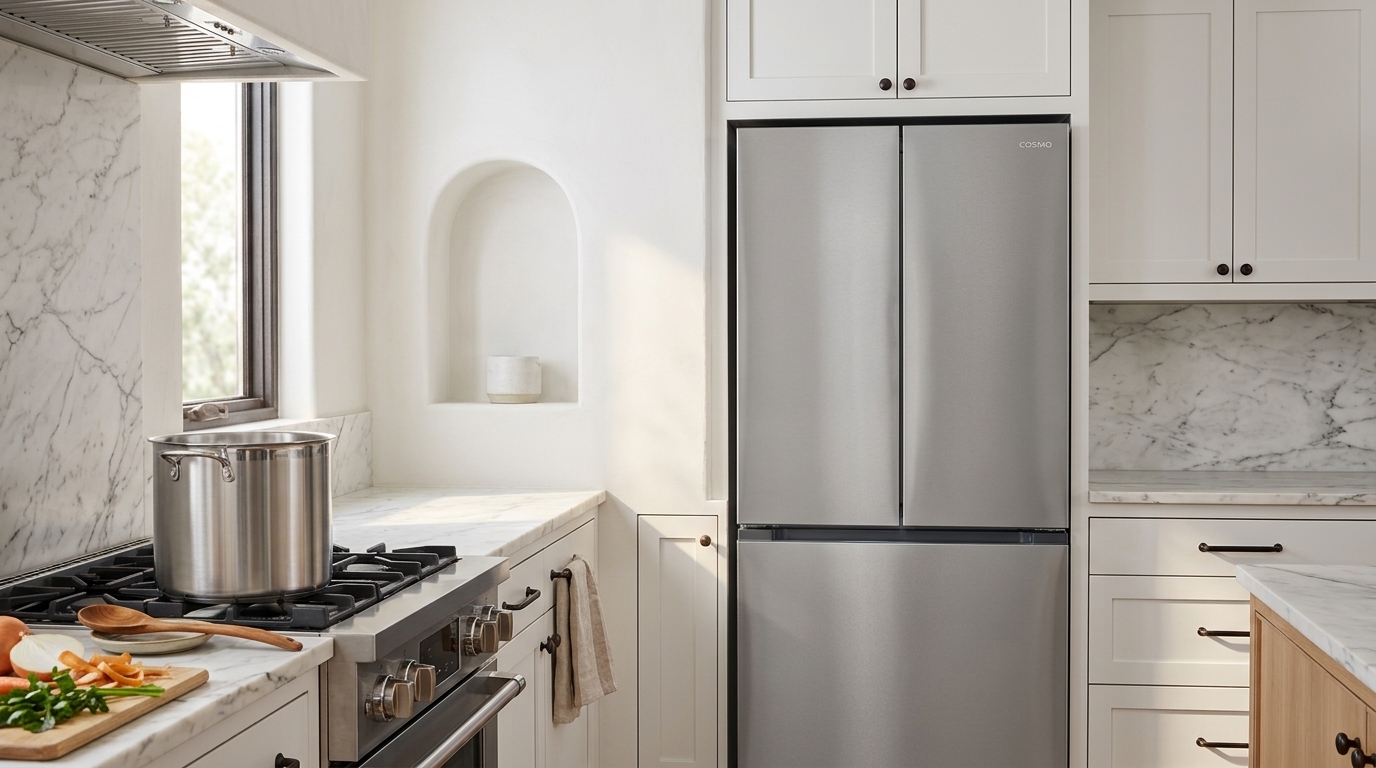
Summer entertaining creates a specific set of demands that the rest of the year’s hosting doesn’t quite replicate. Guests arrive expecting cold drinks immediately. Wine consumption increases when the weather is hot and gatherings run long. The refrigerator that handles a household’s weekly food storage is suddenly also being asked to chill a case of white wine, keep rosé at serving temperature through a four-hour afternoon party, and produce ice for cocktails while simultaneously storing the potato salad, the marinated chicken waiting to go on the grill, and the dessert that needs to stay cold until serving. Something in that equation usually suffers. The question of whether a dedicated wine cooler makes sense for summer entertaining isn’t purely about wine enthusiasm or kitchen aesthetics — it’s a practical question about whether your cold storage setup can actually handle what summer hosting demands, and whether the right tool for chilling wine is the same tool that’s keeping your raw chicken food-safe. Those two functions have genuinely different requirements, and understanding the gap between them explains why the answer isn’t simply “put the wine in the fridge like everything else.” What Your Refrigerator Is Actually Designed to Do A standard kitchen refrigerator is engineered for food safety — maintaining temperatures cold enough to slow bacterial growth across a wide range of perishable foods. The FDA recommends refrigerator temperatures at or below 40°F for food safety, and most household refrigerators run between 35-38°F to stay safely within this range with some margin for temperature variation from door openings. This temperature is too cold for wine storage and significantly too cold for wine serving. Red wines served at refrigerator temperature — 35-38°F — taste muted, tannic, and closed because cold temperatures suppress the volatilization of aromatic compounds that give wine its flavor complexity. White wines at these temperatures are drinkable but past the point where their fruit character and acid balance are most expressive. Sparkling wines do reasonably well since they’re typically served very cold, but even they show better at 42-48°F than at 35°F. Beyond temperature, refrigerators create additional wine-unfriendly conditions. The compressor cycling that maintains food-safe temperatures creates vibration that disturbs wine sediment and, over extended storage, accelerates chemical reactions that degrade wine quality. Refrigerators dehumidify aggressively to prevent food spoilage — exactly the wrong condition for wine corks that need moderate humidity to stay properly sealed against air intrusion. Strong food odors in a refrigerator transfer to wine through cork over time, particularly for wines stored more than a few days. None of this means wine in the refrigerator is ruined — people store and serve wine from household refrigerators constantly with acceptable results. But “acceptable” and “optimal” are different standards, and understanding what’s actually happening to wine in a standard refrigerator helps frame what a dedicated wine cooler is actually solving. What Wine Actually Needs Wine storage and wine serving temperature requirements differ from food refrigeration requirements in specific ways that determine what equipment serves wine best. Storage Temperature: Long-term wine storage — anything beyond a few weeks — performs best between 55-65°F depending on wine type. Reds generally store toward the warmer end of this range, whites and sparkling wines toward the cooler end. This range is warm enough to allow gradual aging and flavor development but cool enough to prevent the heat damage that accelerates undesirable chemical changes. Standard refrigerators run 15-25°F colder than this range. Serving Temperature by Wine Type: Different wines have specific serving temperature ranges where they taste best — a detail that matters more in summer entertaining where guests are drinking wine rather than cooking with it. Red wines: 60-65°F for lighter styles like Pinot Noir and Beaujolais, 65-68°F for fuller-bodied reds like Cabernet Sauvignon and Syrah. These temperatures are actually warmer than many people realize — a red wine pulled from a 68°F room temperature environment in summer is too warm, but a red pulled from a standard refrigerator and allowed to warm slightly for 20-30 minutes is often close. White wines: 45-55°F depending on style. Crisp, light whites like Pinot Grigio and Sauvignon Blanc serve well at 45-48°F. Fuller, more complex whites like white Burgundy or aged Chenin Blanc show better at 50-55°F. These temperatures are achievable from a standard refrigerator but require timing — pulling white wine too early means it warms past its window before guests can finish the bottle. Rosé: 48-54°F — cold enough to be refreshing in summer heat but warm enough to show its fruit character. A rosé at 35°F from the back of the refrigerator needs 20-30 minutes on the counter before it reaches this range. Sparkling wines: 40-50°F — the category that comes closest to refrigerator temperatures, which is why Champagne and Prosecco pulled directly from a household refrigerator is generally fine. Temperature Stability: Perhaps more important than the specific temperature is temperature consistency. Wine quality degrades faster from repeated temperature fluctuations than from storage at a slightly suboptimal but consistent temperature. A refrigerator that cycles from 35°F to 42°F multiple times daily due to door openings stresses wine differently than a dedicated wine cooler designed for minimal temperature variation. What a Dedicated Wine Cooler Does Differently A wine cooler isn’t simply a refrigerator set to a different temperature — it’s an appliance engineered specifically for the conditions wine needs, differing from standard refrigerators in several meaningful ways. Temperature Range Designed for Wine: Wine coolers typically maintain temperatures between 40-65°F — the range that covers wine serving and short-to-medium-term storage. The Cosmo COS-24BIWCS, for example, maintains temperatures across the range appropriate for both red and white wine storage, allowing you to optimize for whichever type dominates your collection. This is temperature calibrated for wine rather than for food safety. Temperature Stability: Wine cooler compressor and thermostat systems are designed to minimize temperature fluctuation rather than simply maintaining a target average. The narrower temperature swings in a purpose-built wine cooler stress wine less than the wider cycling of a food refrigerator managing door openings, new

How to Cook Without Heating Up Your Kitchen This Summer | Beat the Heat in the Kitchen

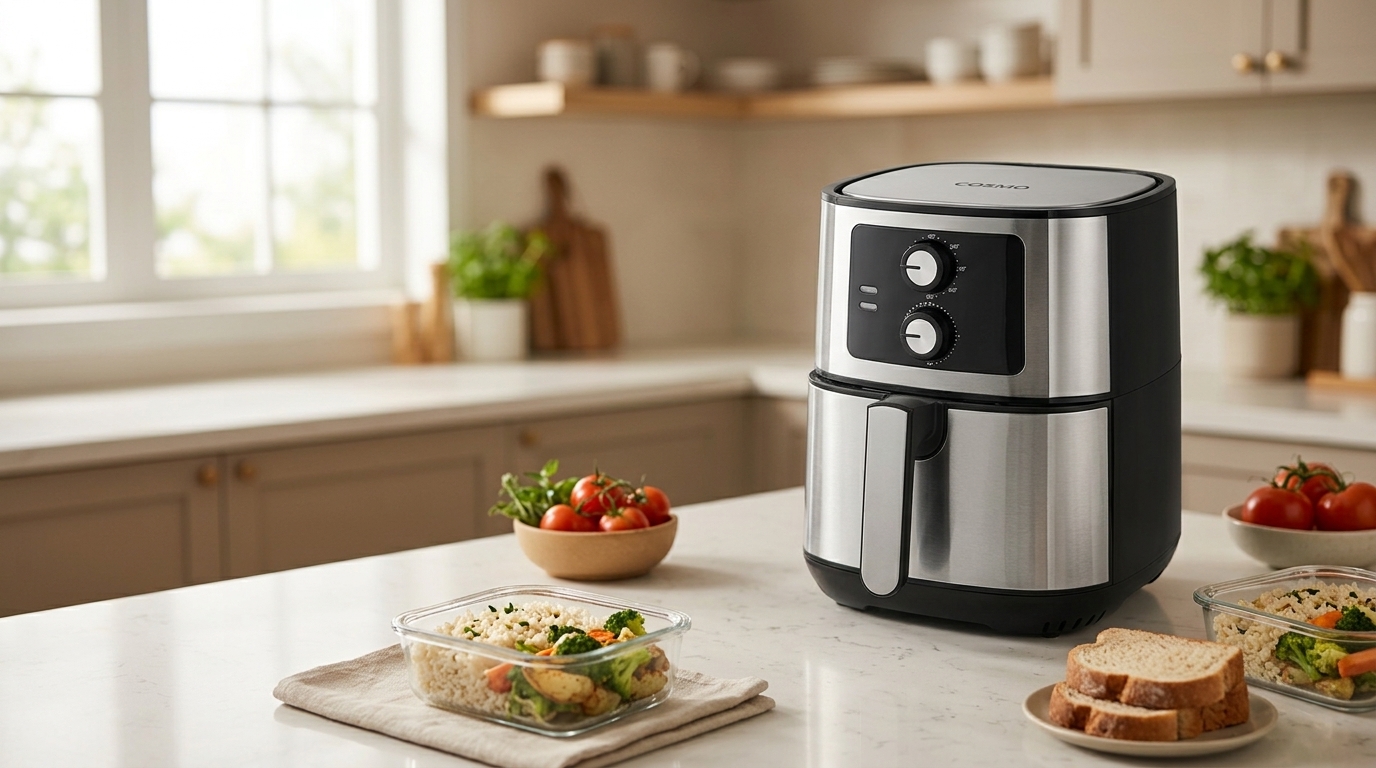
There’s a specific misery to cooking dinner in a kitchen that’s already 80°F before the oven turns on. The range hood runs, the fans run, the air conditioner works harder, and by the time the food is ready the cook is overheated and the kitchen is genuinely uncomfortable. In summer, and particularly during the kind of extended heat events that have become more frequent across both Europe and North America, conventional indoor cooking creates a feedback loop where the act of preparing food makes the environment worse for everyone in it. The good news is that modern cooking equipment and a small amount of menu planning make it entirely possible to feed a household well throughout summer without ever turning the oven on, without running high-output gas burners that dump combustion heat into the kitchen air, and without the hours of indoor stovetop cooking that conventional weeknight dinner approaches require. The strategies aren’t complicated, but they require thinking about summer cooking differently than the rest of the year — prioritizing techniques and equipment that generate minimal heat indoors rather than simply defaulting to whatever you’d normally make. Why Your Kitchen Gets So Hot When You Cook Understanding what actually generates heat during cooking helps you make targeted decisions about what to change rather than vague attempts to cook “lighter.” The Oven Is the Biggest Offender: A conventional oven running at 375°F for an hour isn’t just heating the food inside it — it’s radiating heat into the surrounding kitchen throughout that entire period through the door glass, the door seals, and the oven body itself. Oven cavity temperatures of 375°F with even modest insulation limitations mean the oven exterior and surrounding cabinetry run meaningfully above room temperature, contributing steady heat to the kitchen environment throughout the cooking process and often for 30-45 minutes after the oven shuts off as residual heat dissipates. Gas Burners and Combustion Heat: Gas cooking is approximately 40% efficient at transferring heat to food — the remaining 60% of the energy goes into the surrounding air as waste heat from combustion. On a hot summer day, running multiple gas burners for an extended cooking session contributes a substantial amount of heat to the kitchen environment. This is one of the reasons professional kitchens in hot climates run aggressive ventilation — the heat load from gas cooking in an enclosed space is genuinely significant. Steam and Humidity: Boiling water, simmering soups, and cooking pasta all release steam into the kitchen air. This added humidity makes the same temperature feel more uncomfortable, and in homes without air conditioning or with undersized units, the additional moisture load compounds heat discomfort significantly. Appliance Waste Heat: Even refrigerators, dishwashers running their drying cycles, and other kitchen appliances contribute background heat to the kitchen environment. This background load matters most in already-hot conditions where every additional heat source pushes the room temperature higher. Strategy One: Move Cooking Outside The most complete solution to kitchen heat is removing cooking from the kitchen entirely. This is more practical than it sounds for most households with outdoor space. The Grill as Primary Cooker: A backyard or balcony grill running at full temperature generates all its heat outdoors where it disperses naturally into open air rather than accumulating in an enclosed kitchen. Everything you’d normally cook on a stovetop or in an oven can be adapted for grill cooking — proteins obviously, but also vegetables, bread, pizza, fruit, and even some baked goods. The grill handles high-heat searing, slow indirect roasting, and everything in between without contributing a single degree to the indoor temperature. Extending the Grill’s Menu Range: Most people think of grills primarily for burgers and steaks, which underutilizes what outdoor grilling can handle. Whole chickens cooked indirect take an hour and a half without any oven involvement. Grilled pizza — dough directly on grill grates over medium heat — cooks in 8-10 minutes and produces a char that conventional ovens can’t replicate. Grilled corn, zucchini, eggplant, bell peppers, peaches, and stone fruits all take minutes and require no indoor cooking. Fish fillets, shrimp skewers, and shellfish on the grill cook faster than most indoor methods. Expanding your grill repertoire beyond the obvious protein-centric menu genuinely transforms it into a complete cooking system rather than a supplement to indoor cooking. The Side Burner Opportunity: Many gas grills include a side burner — a single outdoor gas burner positioned beside the main grill cooking surface. This burner handles pasta boiling, sauce making, corn on the cob, and any stovetop task that would otherwise require running indoor burners in a hot kitchen. Moving these tasks outdoors eliminates both the stovetop heat and the steam that indoor boiling generates. Portable Induction as Outdoor Station: A portable single-burner induction cooktop taken to a covered patio or outdoor table creates a compact outdoor cooking station that handles stovetop work with zero combustion heat and minimal radiated heat compared to gas. Induction converts approximately 85-90% of consumed energy into cooking heat with very little waste into the surrounding environment, making it one of the cooler-running stovetop options regardless of where it’s used. Strategy Two: Embrace the Air Fryer The air fryer is genuinely the most useful summer appliance in most kitchens — not because it produces some categorically different result from the oven, but because it accomplishes similar things in a fraction of the time and generates a fraction of the heat. Why Air Fryers Run Cooler Than Ovens: A standard oven heats a 5+ cubic foot cavity and maintains that temperature for the entire cooking period, continuously generating heat whether the food needs it or not. An air fryer heats a compact cavity of 2-6 quarts, reaches temperature much faster, and completes most cooking tasks in less time than equivalent oven cooking. The total heat generated into the kitchen environment is dramatically lower — both because the cavity is smaller and because the cooking duration is shorter. What the Air Fryer Handles Well in Summer: Chicken pieces and

Thanksgiving Cooking Without the Stress: How to Actually Enjoy the Day

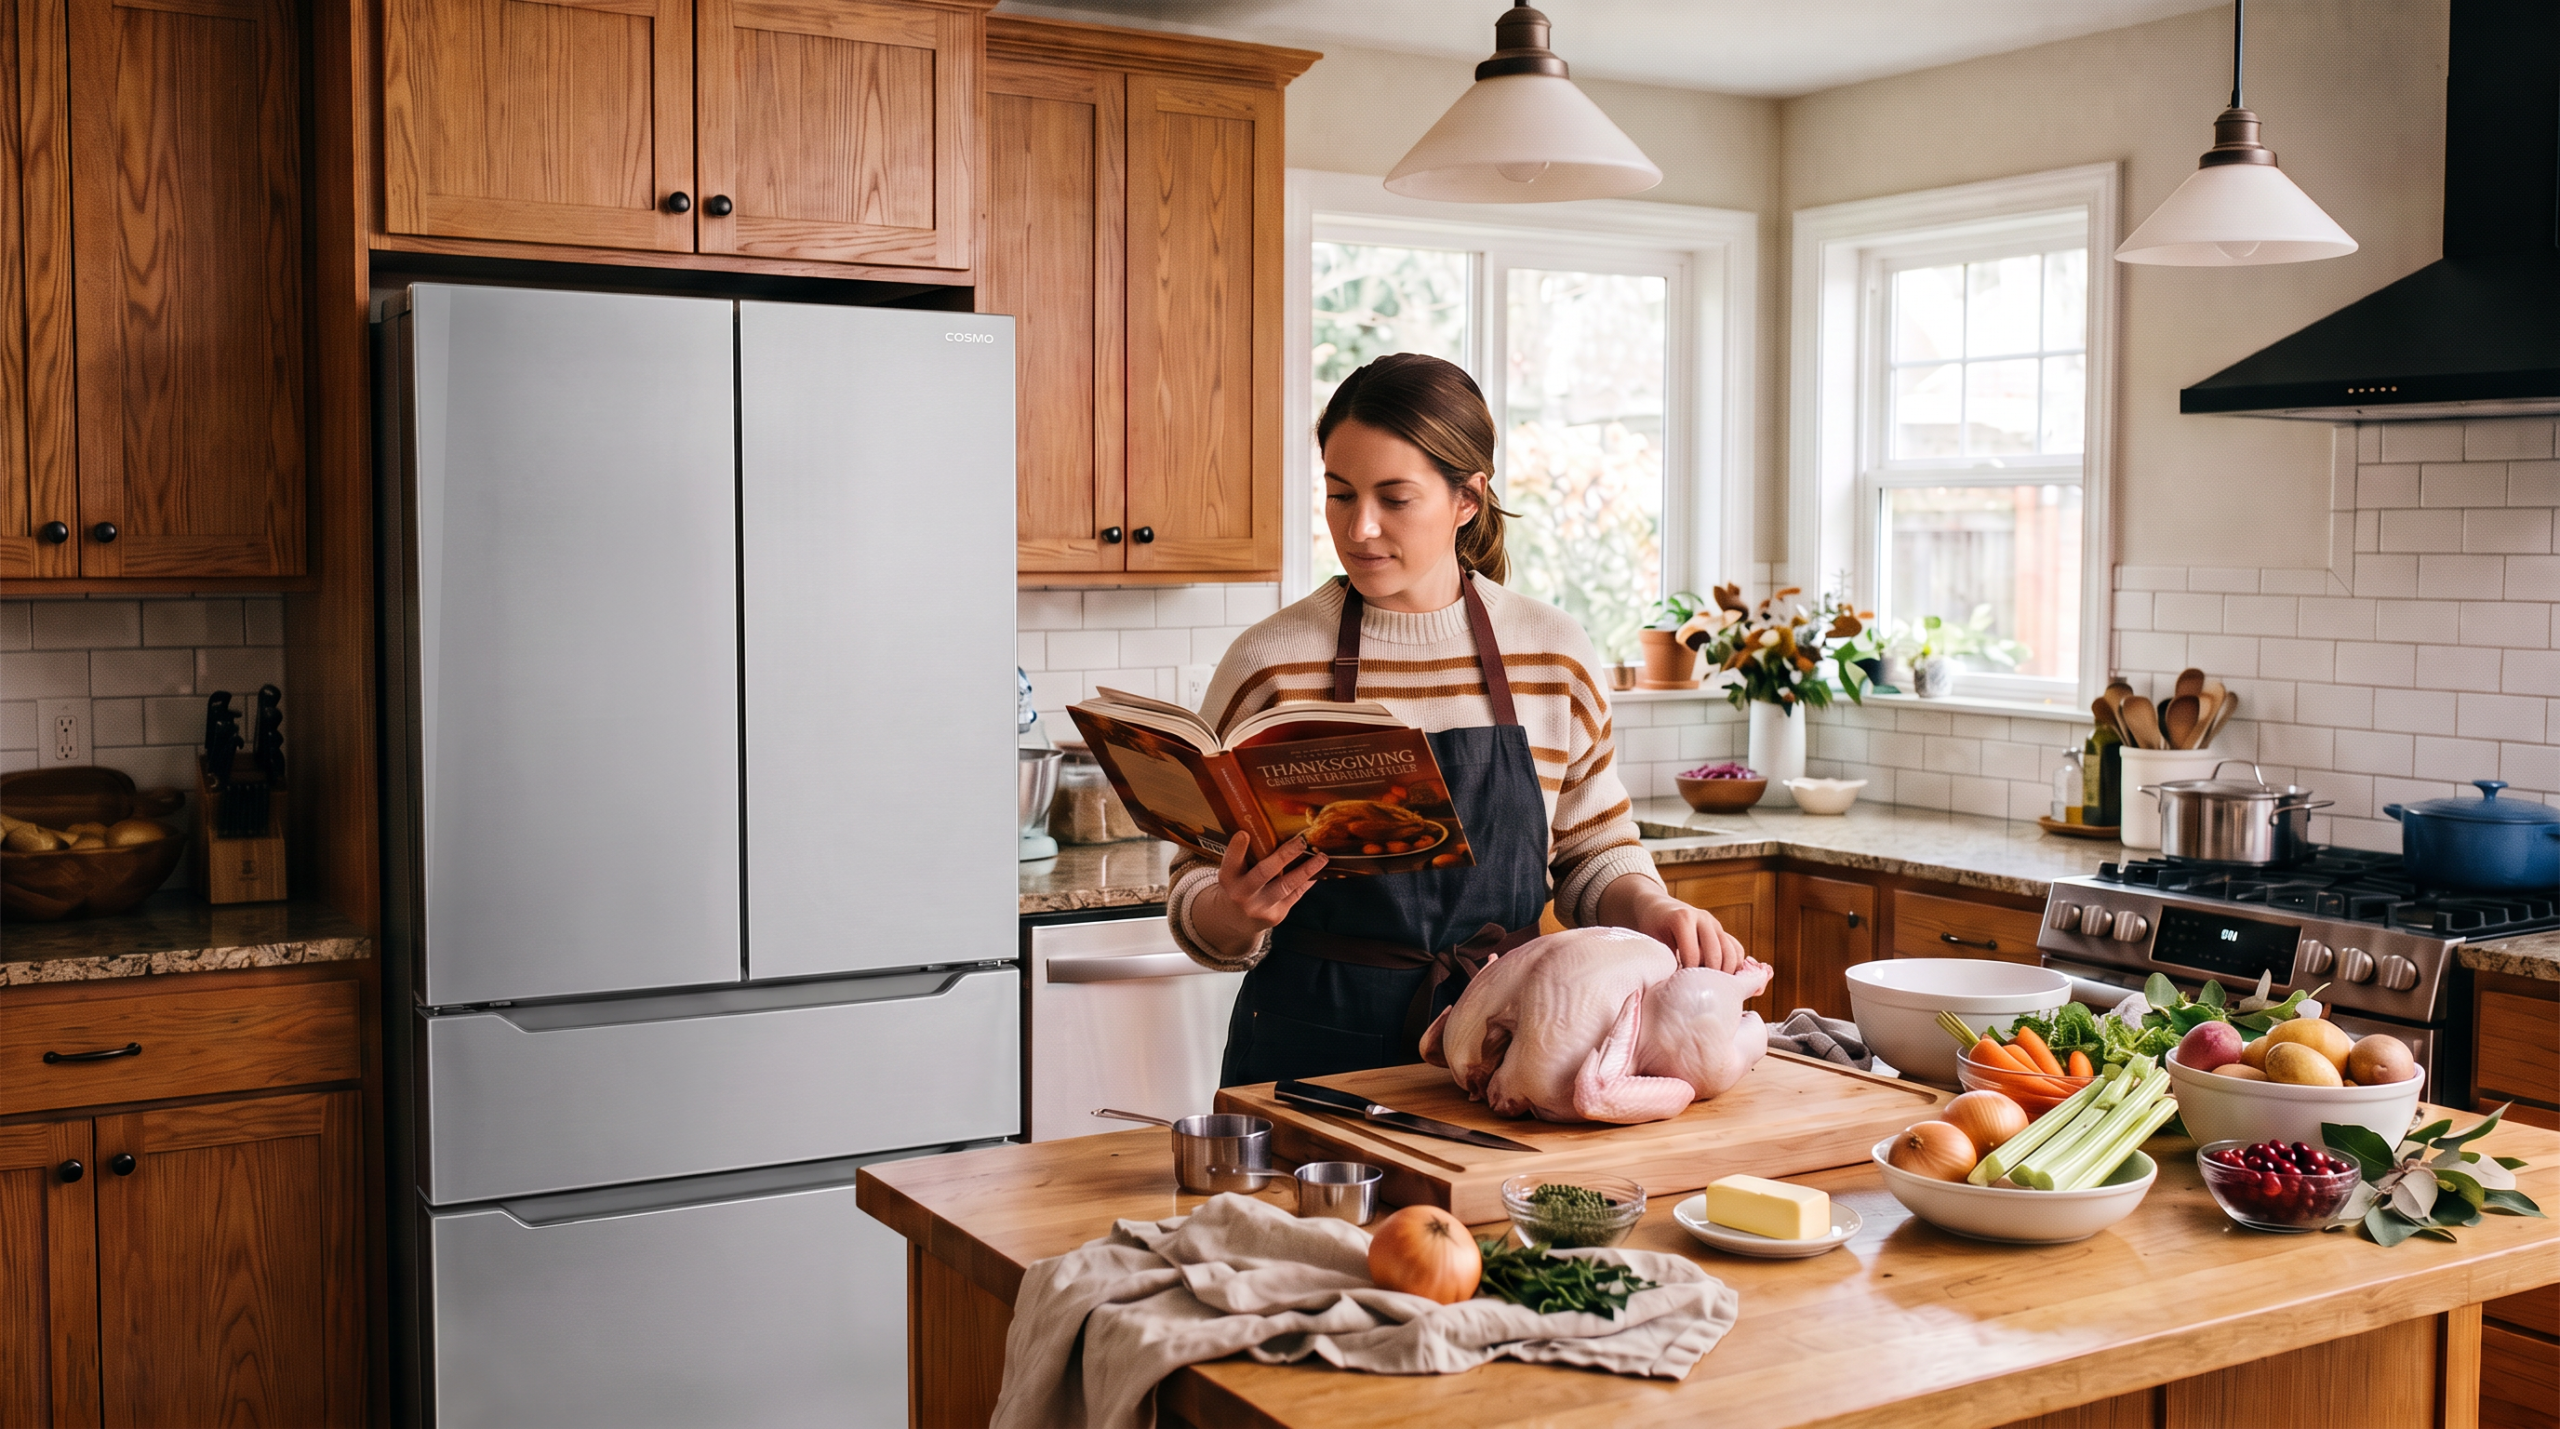
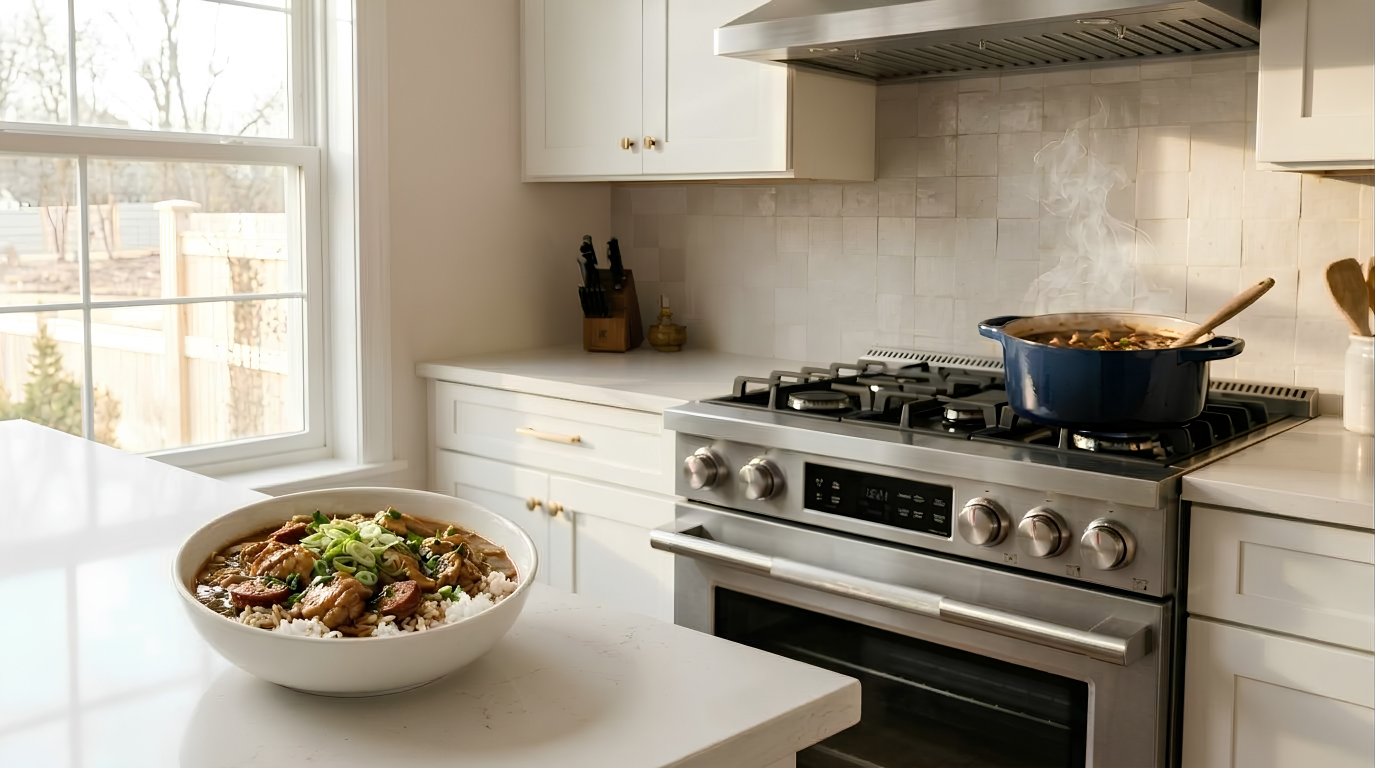
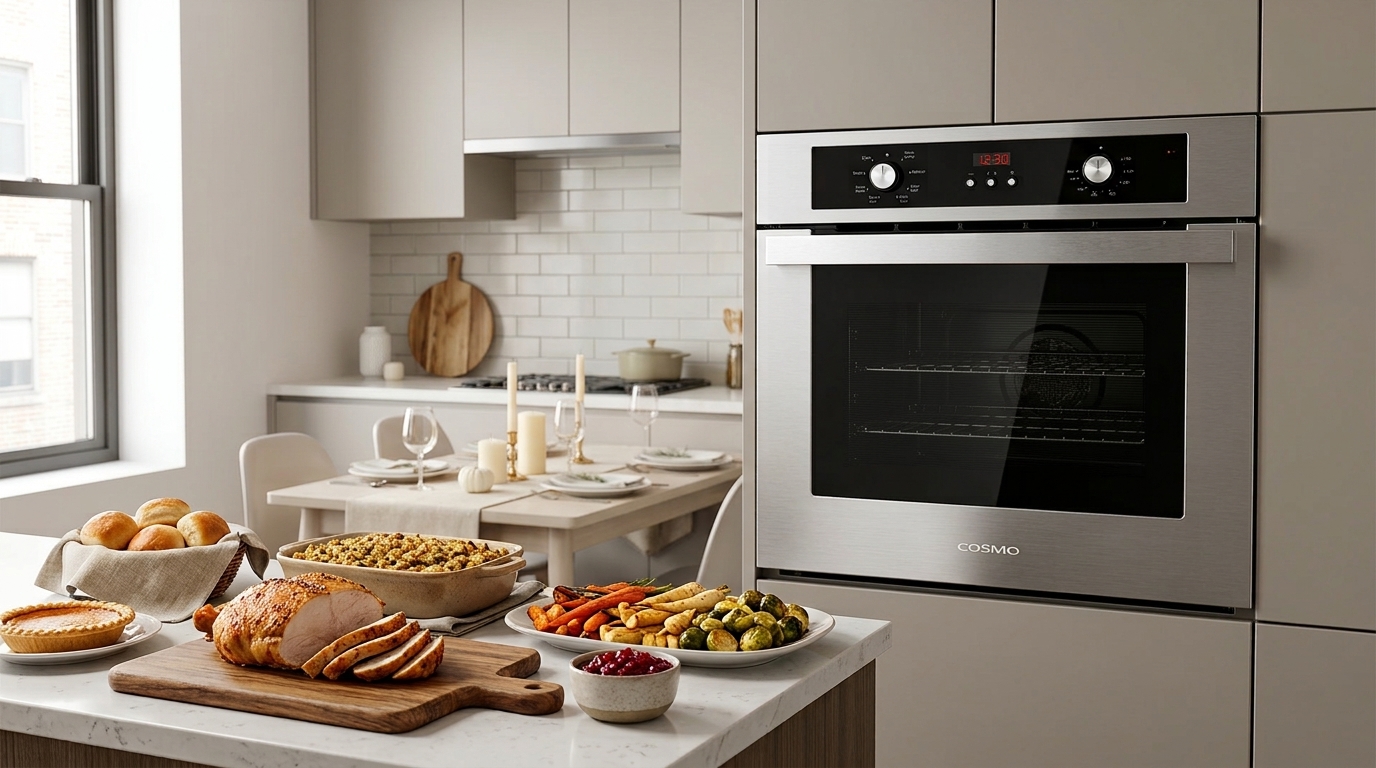
Perfect! Let me create a Thanksgiving-themed non-product blog post that will be posted on Thanksgiving Day itself. Thanksgiving Cooking Without the Stress: How to Actually Enjoy the Day Thanksgiving has earned a reputation as the most stressful cooking day of the year, but it doesn’t have to be. The key to enjoying Thanksgiving lies not in cooking everything from scratch or creating an Instagram-worthy spread, but in planning realistically, letting go of unnecessary expectations, and focusing on what actually matters – sharing a meal with people you care about. This guide strips away the stress and shows you how to approach Thanksgiving cooking in ways that actually work for real kitchens and real people. The cultural pressure around Thanksgiving creates impossible standards that set home cooks up for failure. Magazine spreads featuring twenty dishes, Pinterest-perfect table settings, and cooking timelines that assume you’re a professional chef working in a commercial kitchen all contribute to the anxiety that surrounds this holiday. The reality is that successful Thanksgiving cooking comes from realistic planning, strategic shortcuts, and knowing which traditions actually matter to your family versus which ones you’re maintaining out of obligation. Start With Realistic Expectations The first step toward stress-free Thanksgiving happens before you even write your menu – it involves honest assessment of your actual cooking skills, available time, kitchen capacity, and the preferences of people who’ll actually be eating this meal. Your kitchen has physical limitations that no amount of determination can overcome. One oven can only hold so many dishes at specific temperatures. Your stovetop has a fixed number of burners. Your refrigerator has finite space. Successful Thanksgiving planning acknowledges these constraints and works within them rather than pretending they don’t exist. Cooking skill levels vary enormously, and there’s no shame in being honest about yours. If you’ve never roasted a turkey before, Thanksgiving isn’t the ideal time to wing it with twelve people coming for dinner. Either practice beforehand, choose a simpler main dish, or delegate the turkey to someone with more experience. Time available for cooking matters more than most people admit. If you work Wednesday and have family arriving Thursday morning, you simply cannot prepare fifteen dishes from scratch. Either scale back the menu, prep more earlier in the week, or incorporate quality prepared items without guilt. Family preferences often differ dramatically from Pinterest-perfect Thanksgiving spreads. Your relatives might prefer simple roasted turkey and classic sides over elaborate recipes with artisan ingredients. Ask what people actually want rather than assuming they expect gourmet everything. The number of dishes needed decreases as you focus on quality over quantity. Six well-executed dishes that people actually eat beat twelve mediocre options where half goes uneaten. More isn’t better when it creates stress that prevents you from enjoying your own dinner. Plan Your Menu Around Your Kitchen’s Capacity Smart menu planning considers your kitchen’s physical limitations rather than ignoring them and hoping everything works out through sheer determination. Oven temperature requirements create real conflicts that require planning. If your turkey needs 325°F but your side dishes require 375°F, you need strategies for managing this mismatch. Finish sides before the turkey, use stovetop alternatives, or time dishes to use the oven sequentially rather than simultaneously. Available oven space limits how many dishes can cook at once. A standard oven holds maybe two sheet pans or one turkey with one casserole dish. Plan your cooking schedule around this reality rather than assuming everything will magically fit. Stovetop burner allocation matters when you’re trying to keep mashed potatoes warm while making gravy and reheating green beans. Count your burners and assign them specific jobs in your cooking timeline to prevent last-minute burner shortages. Refrigerator space for prep and storage becomes critical in the days before Thanksgiving. Make room by using coolers for drinks, clearing out unnecessary items, and being strategic about when you prep various ingredients. Counter space for cooling, resting, and staging dishes often gets overlooked until you’re trying to find somewhere to set a hot roasting pan. Clear and assign counter areas for specific purposes before you start cooking. The cooking schedule should account for resting time, reheating needs, and last-minute assembly rather than assuming everything will be ready simultaneously and stay hot perfectly. Build in buffer time for the inevitable delays and complications. Master the Make-Ahead Strategy The difference between stressed and relaxed Thanksgiving cooking often comes down to how much you accomplish before Thursday morning. Dishes that improve with time represent your best make-ahead candidates. Cranberry sauce, dinner rolls, pie crusts, and even some desserts actually taste better when made a day or two ahead, eliminating last-minute work while improving results. Prep work that doesn’t compromise quality saves enormous time on Thanksgiving day. Chopping vegetables, measuring ingredients, making stock, and preparing casserole bases the day before means Thursday cooking involves assembly more than starting from scratch. Strategic freezer use extends your make-ahead window beyond just the day before. Pie dough, cookie dough, bread, and even some casseroles freeze successfully, letting you spread work over weeks rather than days. Room temperature items eliminate refrigerator crowding while being perfectly safe. Pies, rolls, some desserts, and certain sides don’t require refrigeration, freeing up precious cold storage for items that actually need it. Knowing what can’t be made ahead prevents disappointing results. Turkey needs to cook the day of, mashed potatoes don’t hold well overnight, and some dishes lose quality when reheated. Focus make-ahead efforts on foods that actually benefit from it. The pre-prep reduces Thanksgiving day to mainly cooking the turkey, finishing a few dishes, and reheating – manageable tasks that let you actually enjoy the morning rather than frantically prepping in a disaster zone kitchen. Simplify Your Turkey Approach Turkey intimidates many cooks unnecessarily, but it’s actually one of the more straightforward parts of Thanksgiving when you strip away the complicated techniques and focus on basics that work. Turkey size matters more than most people consider. Bigger isn’t better when it barely fits your oven, takes forever to cook,

How Different Cooking Styles Need Completely Different Kitchen Setups

Not everyone cooks the same way, yet most kitchens are designed as if all cooking happens identically. The truth is that a baker needs a fundamentally different kitchen than someone who primarily grills, and a meal prep enthusiast requires different features than someone who cooks elaborate dinners from scratch every night. Understanding your actual cooking style and designing your kitchen to support it makes a dramatic difference in how much you enjoy cooking and how efficiently your kitchen functions. The mistake many homeowners make is creating kitchens based on what looks good in magazines or what real estate agents say sells homes, rather than building kitchens that actually support how they cook and live. Your kitchen should work for your specific cooking habits, not against them. When your kitchen setup matches your cooking style, meal preparation becomes easier, faster, and more enjoyable. The Scratch Cooker: From-Ingredients-Up Cooking Scratch cooks who prepare most meals from basic ingredients need kitchens optimized for ingredient storage, prep work, and cooking versatility. These cooks spend significant time in the kitchen transforming raw ingredients into finished dishes through various cooking techniques. Counter Space Requirements: Scratch cooking demands extensive prep space for chopping vegetables, measuring ingredients, and staging components before cooking begins. At least 36 inches of continuous counter space near the main prep sink allows comfortable work without crowding. Additional landing areas near the stove provide space for hot pots and finished dishes. Storage Priorities: Pantry organization becomes crucial for storing the wide variety of ingredients scratch cooking requires. Deep drawers for pots and pans, organized spice storage, and dedicated spaces for mixing bowls, measuring tools, and prep equipment keep everything accessible. Pull-out pantry shelves make ingredient inventory visible and prevent forgotten items hiding in deep cabinets. Appliance Focus: Multiple burners with varying heat outputs handle simultaneous cooking of different components. A quality oven with accurate temperature control ensures baking and roasting success. Stand mixers, food processors, and other prep appliances need convenient storage or permanent counter positions since they’re used frequently. Sink Considerations: Large, deep prep sinks accommodate washing vegetables, draining pasta, and cleaning multiple pots and pans. A second smaller sink for quick tasks like washing hands or rinsing produce improves workflow without interrupting main sink use. Workflow Organization: Scratch cooks benefit most from classic work triangle layouts that minimize walking between refrigerator, sink, and stove. Logical tool placement near where they’re used reduces wasted motion during the extensive prep work scratch cooking requires. The Meal Prepper: Batch Cooking for the Week Meal preppers cook large quantities once or twice weekly, then portion and store foods for quick reheating throughout the week. This cooking style requires specific features that support efficient batch production and extensive food storage. Refrigerator and Freezer Capacity: Meal prep demands significantly more cold storage than daily cooking. Large refrigerators with adjustable shelving accommodate multiple prepared meals in storage containers. Additional freezer space allows longer-term storage of batch-cooked items, with organization systems that keep different meals separated and labeled. Counter Space for Assembly: Extended counter areas support the assembly-line approach meal preppers use for portioning foods into containers. Clear zones for cooling hot foods, assembling meals, and labeling containers streamline the batch preparation process. Large Format Cooking Equipment: Oversized pots for cooking large batches of grains, proteins, or soups become essential tools. Sheet pans for roasting multiple servings of vegetables simultaneously, and large slow cookers or instant pots for hands-off batch cooking save time during prep sessions. Storage Container Organization: Dedicated cabinet or drawer space for meal prep containers, lids, and labels keeps the organizational system functional. Easy access to containers during batch cooking sessions prevents workflow interruptions while searching for the right sizes. Easy-Clean Surfaces: Meal prep creates more mess than typical cooking since you’re making multiple meals at once. Surfaces that wipe clean easily and flooring that handles spills without staining reduce cleanup time after intensive cooking sessions. Ventilation Needs: Cooking large quantities generates more heat, steam, and cooking odors than preparing single meals. Powerful ventilation prevents the kitchen from becoming uncomfortable during extended cooking sessions while protecting your home from moisture and grease accumulation. The Quick Cook: Speed and Convenience Focus Quick cooks prioritize getting meals on the table fast, often relying on convenience foods, pre-prepped ingredients, and cooking methods that minimize active time. Their kitchens should support efficient, minimal-fuss meal preparation. Microwave Positioning: The microwave becomes a primary cooking tool rather than just a reheating device. Positioning it at a convenient height with adequate counter space nearby for setting hot dishes supports frequent use throughout meal preparation. Minimal Prep Space: Quick cooks need less extensive counter space since they’re not doing elaborate prep work. However, the prep space they do have should be highly efficient with everything needed within arm’s reach. Storage for Convenience Foods: Pantry organization that accommodates boxed meals, canned goods, and other convenience items becomes more important than storage for bulk ingredients. Easy visibility prevents duplicate purchases while ensuring quick access during hurried meal prep. Compact Appliance Collection: Rather than extensive cookware collections, quick cooks benefit from a few versatile, easy-clean pieces that handle multiple tasks. Non-stick cookware that cleans quickly, multi-purpose pots, and basic utensils meet most needs without cluttering limited storage. Easy Cleanup Systems: Dishwasher capacity and easy-clean surfaces matter enormously to quick cooks who don’t want cleanup to take longer than cooking. Simple surfaces, minimal decorative elements that collect dust, and efficient dishwasher loading layouts reduce the burden of post-meal cleanup. Grab-and-Go Storage: Refrigerator organization that keeps frequently grabbed items at eye level and in easy-reach locations speeds up meal assembly. Clear containers for leftovers and prepared snacks support quick meal decisions. The Baker: Precision and Space for Sweet and Savory Baking Bakers require fundamentally different kitchen setups than stovetop-focused cooks, with priorities that center around oven performance, ingredient organization, and adequate work surfaces for rolling, shaping, and decorating. Oven Quality and Capacity: Oven performance becomes the single most important appliance consideration for serious bakers. Accurate temperature control, even heat

How to Set Up Your Kitchen for Stress-Free Entertaining: Make Hosting a Joy, Not a Chore

Entertaining at home should be enjoyable, not stressful. Yet many hosts spend the entire party stuck in the kitchen, frantically cooking, cleaning, and managing chaos while guests mingle without them. The secret to stress-free entertaining isn’t just good recipes or perfect timing – it’s setting up your kitchen to support hosting rather than fighting against it. A well-organized, thoughtfully arranged kitchen allows you to prepare impressive meals, serve guests gracefully, and actually enjoy your own parties. With strategic planning and smart setup choices, you can transform your kitchen from a source of hosting anxiety into your greatest entertaining asset. The best part? Most of these changes require no renovation, just rethinking how you use and organize your existing space. Understanding the Entertaining Kitchen Mindset Successful entertaining kitchens function differently than everyday cooking spaces. Your daily kitchen setup prioritizes efficiency for one or two cooks preparing routine meals. An entertaining kitchen needs to accommodate multiple dishes cooking simultaneously, provide easy access for guests, and allow the host to remain socially engaged while managing food preparation. The key difference lies in workflow and accessibility. During parties, you need clear counters for serving platters, easy access to glassware and beverages, and cooking systems that don’t require constant attention. Your kitchen should allow guests to help themselves to drinks without navigating your prep area, while keeping cooking activities organized and manageable. Flexibility becomes crucial when entertaining. You might need to switch from appetizer prep to main course cooking to dessert plating all while keeping drinks flowing and maintaining conversation. Rigid, single-purpose setups create bottlenecks and stress, while flexible arrangements adapt to changing party needs throughout the evening. Visual appeal matters more during entertaining than daily cooking. Guests often gather in kitchens, making appearance and organization more important. Cluttered counters, overflowing trash, and chaotic prep areas create stress for hosts and discomfort for guests, while clean, organized spaces feel welcoming and relaxed. Creating Dedicated Entertaining Zones Successful entertaining kitchens divide space into distinct zones that serve specific functions without interfering with each other. These zones allow multiple activities to happen simultaneously while keeping the kitchen organized and the host in control. The Beverage Station represents one of the most valuable entertaining zones you can create. Designate a specific area away from cooking zones where guests can access drinks independently. Include a small table, cart, or section of counter with space for ice bucket, glasses, wine, mixers, and other beverages. This setup removes the constant interruption of “can I get you a drink” while keeping guests out of your cooking workflow. Stock the beverage station with everything needed for self-service: wine opener, bottle opener, cocktail napkins, and a small trash receptacle for bottle caps and citrus peels. Position this zone near the refrigerator if possible for easy access to cold drinks, but far enough from cooking areas that guests don’t interfere with meal preparation. The Prep Zone should be your primary workspace, equipped with cutting boards, knives, mixing bowls, and other tools needed for food preparation. This area needs good lighting, ample counter space, and proximity to the sink for washing produce and cleaning as you work. Keep this zone clear of decorative items or non-essential tools during parties to maximize usable workspace. The Cooking Zone centers around your range and oven, with pot holders, cooking utensils, and spices within arm’s reach. During parties, this becomes your command center where you manage multiple dishes simultaneously. Keep a timer visible and accessible, and maintain clear counter space nearby for hot items coming out of the oven or off the stovetop. The Serving Zone should be positioned for easy guest access without crossing into cooking areas. A section of counter, kitchen island, or nearby buffet works perfectly for holding serving platters, utensils, and dishes ready for guests. This zone transitions food from cooking to consumption while keeping serving activities separate from ongoing food preparation. The Cleanup Zone near the sink should include space for dirty dishes, trash, and recycling. During parties, this area prevents clutter from spreading across the kitchen while keeping cleanup manageable and out of sight. A designated landing spot for dirty dishes prevents them from piling up in the prep or cooking zones. Strategic Counter Space Management Clear counter space becomes precious during entertaining, and strategic management makes the difference between stressed chaos and smooth hosting. Before guests arrive, clear all counters of everyday items like appliance cords, mail, decorative objects, and anything not essential to the party. Create designated landing zones for specific tasks rather than treating all counter space as general-purpose. One area becomes the plating station where you assemble dishes before serving. Another section holds serving platters waiting to go out. A third area stages appetizers and snacks. This organization prevents the random scattering of items that creates visual chaos and workflow confusion. Utilize vertical space to maximize counter efficiency. Wall-mounted magnetic strips hold knives out of the way. Hanging racks store frequently used utensils. Tiered serving stands display appetizers while using minimal counter footprint. These vertical solutions keep counters clear while maintaining easy access to needed items. Temporary surface solutions expand workspace when needed. Rolling carts provide mobile prep or serving surfaces that tuck away when not needed. Folding tables set up near the kitchen hold beverages or desserts. Cutting boards over the sink create additional prep space during busy cooking periods. These flexible solutions adapt your kitchen capacity to party size without permanent changes. Smart Storage for Entertaining Essentials Keeping entertaining items organized and accessible reduces stress when party time arrives. Designate specific storage areas for items used primarily when hosting, grouping them logically for easy retrieval and return. Glassware Storage should include everyday glasses plus party-specific options like wine glasses, champagne flutes, and cocktail glasses. If cabinet space is limited, store seasonal or specialty glasses in bins on higher shelves, bringing them down only when needed. Keeping a variety of glass types on hand prevents last-minute scrambling when guests prefer wine over beer or vice versa. Serving Platters

Why Restaurant Kitchens Are Set Up Completely Different Than Home Kitchens

Walk into any restaurant kitchen and you’ll immediately notice it looks nothing like the kitchen in your home. The layout, equipment, workflow, and even the basic philosophy behind the design are fundamentally different. Understanding these differences helps explain why trying to replicate a restaurant kitchen at home often creates more problems than it solves, and why home kitchens need their own unique approach to design and functionality. Restaurant kitchens are built around completely different priorities than home kitchens. They’re designed for speed, volume, and multiple cooks working simultaneously under intense pressure. Home kitchens, on the other hand, need to balance cooking functionality with family life, entertaining, and often serving as the heart of the home. These different priorities create dramatically different spaces. The Fundamental Philosophy Difference Restaurant kitchens exist for one purpose: producing food as quickly and efficiently as possible for paying customers. Every design decision flows from this single goal. There’s no consideration for aesthetics, comfort, or creating a welcoming space because those factors don’t contribute to getting food out faster. Home kitchens serve multiple purposes beyond cooking. They’re gathering spaces for families, homework stations for kids, entertainment areas for guests, and often the most-used room in the house. This multi-purpose nature means home kitchen design must balance many competing priorities that restaurants never consider. The commercial kitchen mentality focuses on pure efficiency and durability. If it doesn’t make cooking faster or last longer under heavy use, it doesn’t belong in a restaurant kitchen. Comfort, appearance, and personal preference take a distant back seat to functionality. Home kitchen design must account for the reality that most people aren’t cooking eight hours straight every day. The space needs to work well for occasional cooking while remaining pleasant for all the other activities that happen there. This fundamental difference affects every design choice. Regulatory requirements shape restaurant kitchens in ways that don’t apply to homes. Health codes dictate specific materials, spacing, ventilation, and equipment that home kitchens never need to worry about. These regulations exist to protect public health but create requirements that would be excessive in residential settings. The Work Triangle vs. The Assembly Line Home kitchens typically follow the work triangle concept, positioning the sink, stove, and refrigerator in a triangular arrangement that minimizes walking while cooking. This design works well for one or two cooks preparing family meals where the same person handles multiple tasks. Restaurant kitchens use station-based layouts where different cooks handle specific tasks at dedicated workstations. The sauté cook stays at the range, the grill cook at the grill, and the prep cook at the prep station. Food moves between stations rather than cooks moving around the kitchen. The assembly line approach in restaurants means each station is optimized for its specific function. The grill area has everything needed for grilling within arm’s reach, while the pasta station has pots, colanders, and ingredients organized for maximum efficiency. This specialization would be wasteful in homes where one person does all these tasks. Linear workflow in commercial kitchens moves food from prep areas through cooking stations to plating areas in a logical sequence. Home kitchens don’t need this level of workflow optimization because the volume and pace are completely different. Multiple simultaneous users in restaurants require wide aisles and clear traffic patterns that prevent cooks from colliding during rush periods. Home kitchens rarely need this much space since family cooking involves fewer people moving at slower speeds. Equipment That Makes No Sense at Home Commercial ranges pump out heat levels that home cooking rarely requires. A restaurant range might have burners producing 25,000-30,000 BTUs or more because speed matters when you’re cooking dozens of orders per hour. Home cooking rarely benefits from this extreme heat, and the additional cost, ventilation requirements, and energy consumption don’t make sense for typical residential use. Reach-in refrigerators and freezers in restaurants prioritize accessibility over energy efficiency. Commercial units are designed to be opened hundreds of times per day without losing much temperature, but they consume far more energy than home refrigerators. The trade-off makes sense for restaurants but not for homes. Commercial dishwashers complete cycles in 90 seconds to 2 minutes, compared to the hour or more that home dishwashers take. This speed comes at the cost of extremely hot water, special detergents, and maintenance requirements that make no sense for washing dinner dishes once a day. Prep tables with built-in cold storage keep ingredients at safe temperatures during prep work, crucial when prepping large quantities over hours. Home cooks preparing dinner for a family don’t need refrigerated work surfaces and would waste the energy they consume. Specialized equipment like commercial mixers, food processors, and slicers handle volumes that would take hours by hand but represent overkill for home cooking quantities. The space they occupy and their maintenance requirements make them impractical for residential use. Material Choices Driven by Different Needs Stainless steel dominates restaurant kitchens because it’s durable, easy to sanitize, and meets health code requirements. The cold, industrial appearance doesn’t matter in commercial settings where customers never see the kitchen. Home kitchens can use warmer materials like wood, stone, and decorative finishes that create more inviting spaces. Sealed concrete or commercial tile floors in restaurants handle heavy traffic, frequent washing, and spills without damage. These surfaces feel hard and cold underfoot but provide durability and ease of cleaning that restaurant use demands. Home kitchens can use softer, warmer flooring that’s more comfortable for standing and more forgiving when dishes get dropped. Commercial-grade materials resist damage from heat, impacts, and harsh cleaning chemicals that restaurant use involves. Home materials can prioritize appearance and comfort over extreme durability since residential use is much gentler. Seamless surfaces and coved corners in commercial kitchens prevent bacteria growth and meet health codes but create an institutional appearance that most homeowners find unappealing. Home kitchens can use decorative trim and traditional joinery that would be unacceptable in commercial settings. Ventilation Requirements Are Completely Different Restaurant ventilation systems must handle massive amounts of heat, smoke,

The Psychology of Kitchen Layouts: Why Some Kitchens Feel Right and Others Don’t

Walk into some kitchens and you immediately feel at ease. Everything makes sense, movement feels natural, and cooking seems effortless. Other kitchens feel awkward from the moment you step inside, even when they look beautiful in photos. The difference isn’t always obvious, but it’s deeply psychological. Our brains process spatial relationships, movement patterns, and visual cues in ways that create either comfort or stress, often without us consciously realizing why. Understanding the psychological principles behind kitchen layouts helps explain why certain designs work while others create constant frustration. These principles go deeper than simple functionality or aesthetics. They tap into how our brains process space, predict movement, and respond to our environment. When kitchens align with these psychological patterns, they feel intuitive and comfortable. When they don’t, even expensive renovations can leave homeowners feeling dissatisfied without understanding why. The Territory Effect: Why Kitchen Boundaries Matter Humans are territorial creatures, and kitchens that ignore this fundamental psychology create constant low-level stress. When kitchen layouts fail to define clear territories for different activities, our brains struggle to process the space efficiently. This confusion manifests as a vague feeling that something is “off” even when we can’t identify the specific problem. Clear visual boundaries between prep, cooking, and cleanup zones help our brains categorize and navigate space more efficiently. These boundaries don’t need to be walls – changes in flooring, lighting, or counter height can define territories just as effectively. The key is creating enough definition that our brains can quickly categorize different areas and their purposes. Overlapping territories create cognitive friction. When the cleanup zone interferes with the cooking zone, or prep space encroaches on traffic paths, our brains must constantly reassess and recategorize the space. This mental work happens subconsciously but accumulates into fatigue and frustration over time. Personal space considerations affect how kitchens feel when multiple people use them. Layouts that force people too close together during cooking trigger discomfort even among family members. The right amount of space between work zones allows comfortable simultaneous use without triggering territorial stress responses. The concept of “defendable space” applies even in kitchens. When cooking, we subconsciously claim territory around our work area. Kitchens that respect this psychological need by providing adequate buffer zones feel more comfortable than those that force constant territorial negotiation. Predictability and the Anxiety of Uncertainty Our brains crave predictability. Kitchens that violate expected patterns create cognitive dissonance that registers as discomfort even when we can’t articulate why. This expectation violation happens when storage, appliances, or workflows don’t match our mental models of how kitchens should function. Counter height consistency matters more than most people realize. When counter heights vary without clear purpose, our brains must constantly recalibrate expectations for each work surface. This recalibration creates mental friction that accumulates into fatigue. Intentional height variations for specific purposes feel fine, but random inconsistency creates stress. Appliance placement follows unconscious expectations built from years of kitchen experience. Refrigerators near kitchen entrances feel natural because we expect to unload groceries without walking through the kitchen. Stoves away from entries feel safer. Violating these expectations creates discomfort even when the layout technically functions. Visual rhythm creates predictability that our brains find calming. Cabinets with consistent spacing, symmetrical arrangements, or clear patterns feel more comfortable than random configurations. This doesn’t mean kitchens must be rigidly symmetrical, but establishing and maintaining visual patterns helps our brains process the space more easily. Storage predictability reduces decision fatigue. When similar items live in consistent locations following logical patterns, our brains can predict where things are without conscious thought. Kitchens with random storage organization force constant decision-making that depletes mental energy. The Sight Line Problem: Visual Processing and Comfort What you can and cannot see from various positions in your kitchen profoundly affects how the space feels. Our brains continuously scan our environment for potential problems or information, and kitchen layouts that obstruct important sight lines create subconscious stress. The ability to monitor cooking while doing other tasks feels essential to most people. Layouts that hide the stove from prep areas or cleanup zones create anxiety about burning food or missing important cooking moments. This monitoring need is deeply psychological and affects comfort levels significantly. Visual clutter in sight lines creates cognitive load that exhausts mental resources. When opening the kitchen door reveals piles of dishes, cluttered counters, or storage chaos, our brains must process and categorize all that visual information. Layouts that naturally hide utilitarian messes from primary sight lines feel calmer and more organized. Entryway views matter enormously for first impressions and daily comfort. What you see when entering the kitchen sets the tone for the entire space. Kitchens that present attractive, organized views upon entry feel more welcoming than those that immediately confront you with sinks full of dishes or cluttered counters. Natural light sight lines affect mood and energy levels. Kitchens where you can see outside while working feel more pleasant and energizing. Layouts that position primary work areas away from windows or block natural light with tall cabinets create spaces that feel closed off and oppressive. The ability to see family members and activities in adjacent spaces drives much of open-concept kitchen popularity. This visual connection satisfies deep psychological needs for connection and awareness while maintaining the ability to multitask across different activities. Movement Patterns and Physical Comfort How our bodies move through kitchen spaces affects comfort in ways we rarely consciously notice. Layouts that require awkward movements, excessive steps, or uncomfortable reaching create physical stress that translates into psychological dissatisfaction with the space. Natural walking paths follow curved or diagonal lines rather than rigid right angles. Kitchens that force sharp turns or awkward pivots feel less comfortable than those allowing smooth, natural movement patterns. This preference for curved movement is deeply ingrained in how humans naturally navigate space. The distance between frequently used items directly affects how tired we feel after cooking. Excessive walking between refrigerator, prep area, stove, and sink accumulates into real fatigue. Our brains track this effort

Understanding Kitchen Appliance Energy Ratings: What They Really Mean for Your Bills

Kitchen appliances account for a significant portion of household energy consumption, with refrigerators, ovens, dishwashers, and other devices running constantly or frequently throughout the day. Understanding energy ratings and what they actually mean for your utility bills can help you make smarter purchasing decisions that save money over the appliance’s lifetime while reducing your environmental impact. The difference between an efficient and inefficient appliance can add up to hundreds of dollars over several years. Energy ratings aren’t just marketing buzzwords – they’re standardized measurements that provide genuine insight into how much electricity or gas an appliance will consume during normal use. Learning to interpret these ratings, understand what affects energy consumption, and calculate real-world costs empowers you to choose appliances that balance upfront price with long-term operating expenses. Decoding ENERGY STAR Certification The ENERGY STAR label represents the most recognizable energy efficiency certification in North America, but understanding what it actually guarantees helps you appreciate its value beyond just being a marketing symbol. ENERGY STAR certified appliances meet strict energy efficiency guidelines set by the U.S. Environmental Protection Agency and the Department of Energy. These standards are regularly updated to reflect technological improvements and ensure that certified products represent significant efficiency advantages over standard models. Efficiency thresholds vary by appliance type, with each category having specific performance requirements. A refrigerator must be at least 15% more efficient than the minimum federal standard, while dishwashers must meet specific water and energy consumption limits per load. Third-party verification ensures that ENERGY STAR claims are legitimate rather than manufacturer self-assessments. Independent testing laboratories verify performance before products can display the certification, providing consumer confidence in the ratings. Annual energy cost estimates on ENERGY STAR labels help you understand real-world operating expenses rather than just technical efficiency percentages. These estimates are based on typical usage patterns and national average energy rates. Comparative context shows how specific models compare to similar appliances, helping you understand whether you’re looking at a minimally compliant or exceptionally efficient option within the certified category. Environmental impact information sometimes accompanies ENERGY STAR ratings, showing greenhouse gas emission reductions and environmental benefits alongside financial savings to appeal to environmentally conscious consumers. Understanding EnergyGuide Labels The yellow and black EnergyGuide labels required on many appliances provide standardized information that allows direct comparison between models, but knowing how to read these labels correctly ensures you’re making informed decisions. Estimated yearly operating cost appears prominently on these labels, calculated using national average energy rates. This figure provides a baseline for comparison, though your actual costs will vary based on local utility rates and usage patterns. Energy consumption measurements show kilowatt-hours per year for electric appliances or therms per year for gas appliances. These technical measurements allow you to calculate precise operating costs using your specific utility rates. Cost range comparisons display where the specific model falls on a scale from most efficient to least efficient among similar models. This visual representation quickly shows whether you’re considering a high, medium, or low-efficiency option. Model-specific information includes capacity, features, and other factors that affect energy consumption, helping you understand why certain models use more or less energy than comparable appliances. Calculation methodology details explain the testing conditions and usage assumptions underlying the estimates, though these are often in small print. Understanding these assumptions helps you adjust estimates for your actual usage patterns. Federal minimum standards are referenced on the labels, showing the least efficient model allowed by law. This context helps you understand how much better than minimum your potential purchase performs. Calculating Real-World Energy Costs Label estimates provide useful baselines, but calculating actual costs based on your specific situation and usage patterns gives you more accurate long-term expense projections for better decision-making. Local utility rates significantly affect operating costs, potentially making estimates on labels substantially inaccurate for your situation. Check your utility bills to find your actual cost per kilowatt-hour or therm, which can vary from $0.08 to $0.30 per kWh depending on location. Usage patterns influence actual consumption, with heavy users spending significantly more than label estimates while light users may spend less. Consider your family’s actual cooking frequency, dishwasher loads per week, and other usage factors. Seasonal variations affect costs for appliances like refrigerators that work harder in hot weather or ovens that contribute to cooling costs in summer but reduce heating costs in winter. These factors can significantly impact annual expenses. Time-of-use rates in some areas charge different prices for electricity used during peak versus off-peak hours. If your utility uses this pricing structure, running appliances during off-peak times can substantially reduce costs. Calculation formulas for precise cost estimation multiply the appliance’s kWh or therm rating by your local utility rate and estimated annual usage. For example, an appliance using 500 kWh annually with rates of $0.12 per kWh costs $60 yearly to operate. Comparison across models helps quantify savings from choosing more efficient options. If Model A costs $60 annually while Model B costs $90, the $30 annual savings over a 15-year lifespan totals $450 in operating cost differences. Major Kitchen Appliance Energy Consumption Different kitchen appliances vary dramatically in their energy consumption and potential savings from efficiency improvements, helping you prioritize which appliances deserve closest attention when considering efficiency. Refrigerators and freezers run continuously, making them typically the highest energy consumers in kitchens. Modern ENERGY STAR refrigerators use about 300-600 kWh annually compared to 1000-1500 kWh for older models, creating substantial savings potential. Dishwashers consume both electricity for operation and energy to heat water, with modern efficient models using 270-300 kWh annually versus 500+ kWh for older models. Water heating represents the majority of dishwasher energy use. Electric ranges and ovens vary widely in consumption based on cooking frequency and methods. Convection ovens typically use 20-30% less energy than conventional ovens for the same cooking tasks due to faster, more even heating. Gas ranges offer different efficiency considerations, with energy costs depending on natural gas or propane prices in your area. Gas cooking is often more economical than electric,

Kitchen Layout Mistakes That Cost You Time and Money: Avoid These Common Design Pitfalls

A well-designed kitchen layout can make daily cooking feel effortless, while poor layout choices create frustration that compounds every time you prepare a meal. Many homeowners focus so heavily on choosing beautiful finishes and appliances that they overlook fundamental layout principles that determine how well their kitchen actually functions. Understanding common layout mistakes before you renovate can save thousands of dollars in corrections while ensuring your new kitchen serves your family efficiently for decades to come. The most expensive kitchen renovation mistakes are often layout-related because fixing them requires moving plumbing, electrical systems, and sometimes even walls after construction is complete. These structural changes cost far more than getting the layout right initially, making it crucial to understand functional design principles before finalizing your kitchen plans. Ignoring the Kitchen Work Triangle The work triangle connecting your sink, stove, and refrigerator forms the foundation of kitchen efficiency, yet many renovations disrupt this crucial relationship in favor of aesthetics or space constraints that ultimately make cooking more difficult and time-consuming. Oversized islands placed in the middle of the work triangle force you to walk around obstacles repeatedly during meal preparation. While large islands provide valuable storage and workspace, positioning them poorly can double the walking distance between your three most-used areas. Too-small triangles create crowded conditions where multiple people can’t work comfortably, while too-large triangles waste energy with excessive walking between basic functions. The ideal triangle has sides measuring 4-9 feet each, with a total perimeter of 12-26 feet. Blocked sight lines between work areas prevent you from monitoring multiple cooking tasks simultaneously. Being able to see your stovetop while working at the sink or accessing the refrigerator improves safety and cooking coordination. Traffic interference occurs when the main kitchen walkway cuts through the work triangle, forcing cooking activities to compete with foot traffic. Family members passing through shouldn’t disrupt the cook’s workflow between essential areas. Appliance door conflicts happen when refrigerator doors, dishwashers, or oven doors interfere with each other or block access to work triangle components. Planning door swings prevents daily frustration and potential safety hazards. Poor Counter Space Planning Inadequate or poorly positioned counter space creates bottlenecks that slow down meal preparation while potentially creating safety hazards when you lack adequate space for hot items or food preparation activities. Insufficient landing space next to appliances forces you to carry hot pots and pans farther than necessary. Every cooking appliance needs at least 15 inches of counter space on one side for safely placing hot items immediately after cooking. No prep space near the sink makes food washing and preparation awkward while creating water drips across longer distances. At least 24 inches of counter space adjacent to the sink provides adequate room for food preparation and dish staging. Interrupted counter runs broken by appliances or corners reduce usable workspace significantly. Continuous counter spans of at least 36 inches provide adequate space for meal preparation activities that require spreading out ingredients and tools. Wrong counter heights can cause fatigue and discomfort during extended cooking sessions. Standard 36-inch height works for most people, but taller or shorter family members may benefit from varied counter heights in different areas. Inadequate clearance behind work areas prevents comfortable movement and can create safety hazards when carrying hot items. Allow at least 42 inches between facing counters or appliances for comfortable movement. Corner dead zones waste valuable real estate while creating awkward storage that’s difficult to access. Smart corner solutions like lazy Susans or pull-out systems make these areas functional rather than wasted space. Ventilation and Lighting Oversights Poor ventilation and inadequate lighting affect both cooking safety and comfort while potentially creating long-term problems with air quality, grease buildup, and cooking accuracy. Undersized range hoods fail to capture cooking byproducts effectively, allowing grease and odors to spread throughout your home. Range hoods should be at least as wide as your cooktop, with higher CFM ratings for powerful gas ranges or island installations. Poor vent hood placement too high above the cooking surface reduces capture efficiency dramatically. Electric cooktops need hoods 20-24 inches above, while gas ranges require 24-30 inches for optimal performance without safety hazards. Inadequate task lighting creates safety hazards while making food preparation more difficult and less accurate. Under-cabinet lighting, pendant lights over islands, and focused lighting in prep areas are essential for safe, efficient cooking. Insufficient general lighting makes kitchens feel gloomy while hampering cooking tasks that require good visibility. Combine ambient lighting with task lighting for kitchens that function well at all times of day. Natural light blocking by poorly positioned upper cabinets or appliances reduces the pleasant, energy-efficient illumination that windows provide. Plan cabinet and appliance placement to maximize rather than obstruct natural light sources. Single lighting source creates harsh shadows and uneven illumination that interferes with cooking tasks. Layer different types of lighting for optimal functionality and ambiance. Storage and Organization Failures Poor storage planning creates daily frustration while forcing you to waste time searching for items or making multiple trips to gather cooking supplies scattered throughout the kitchen. Inadequate pantry storage forces overflow into random cabinets throughout the kitchen, making inventory management difficult while creating inefficient food storage that leads to waste and expired items. Poor cabinet organization wastes space while making frequently used items difficult to access. Deep cabinets without pull-out shelves hide items in the back, while inadequate drawer space forces awkward storage of utensils and tools. Insufficient storage near cooking areas requires trips across the kitchen for basic cooking tools and ingredients. Spices, oils, utensils, and basic tools should be stored within arm’s reach of primary cooking areas. No designated storage for specialty items like baking equipment, small appliances, or entertaining pieces leads to countertop clutter or inefficient storage in inappropriate locations. Inaccessible upper cabinets waste valuable storage space while creating safety hazards when items are stored too high for safe retrieval. Plan upper cabinet heights and contents based on user reach and frequency of access. Inadequate drawer space forces poor organization of utensils, tools,