Appliances 101

Your Air Fryer Is the Most Useful Appliance You Own in Summer | Here’s Why

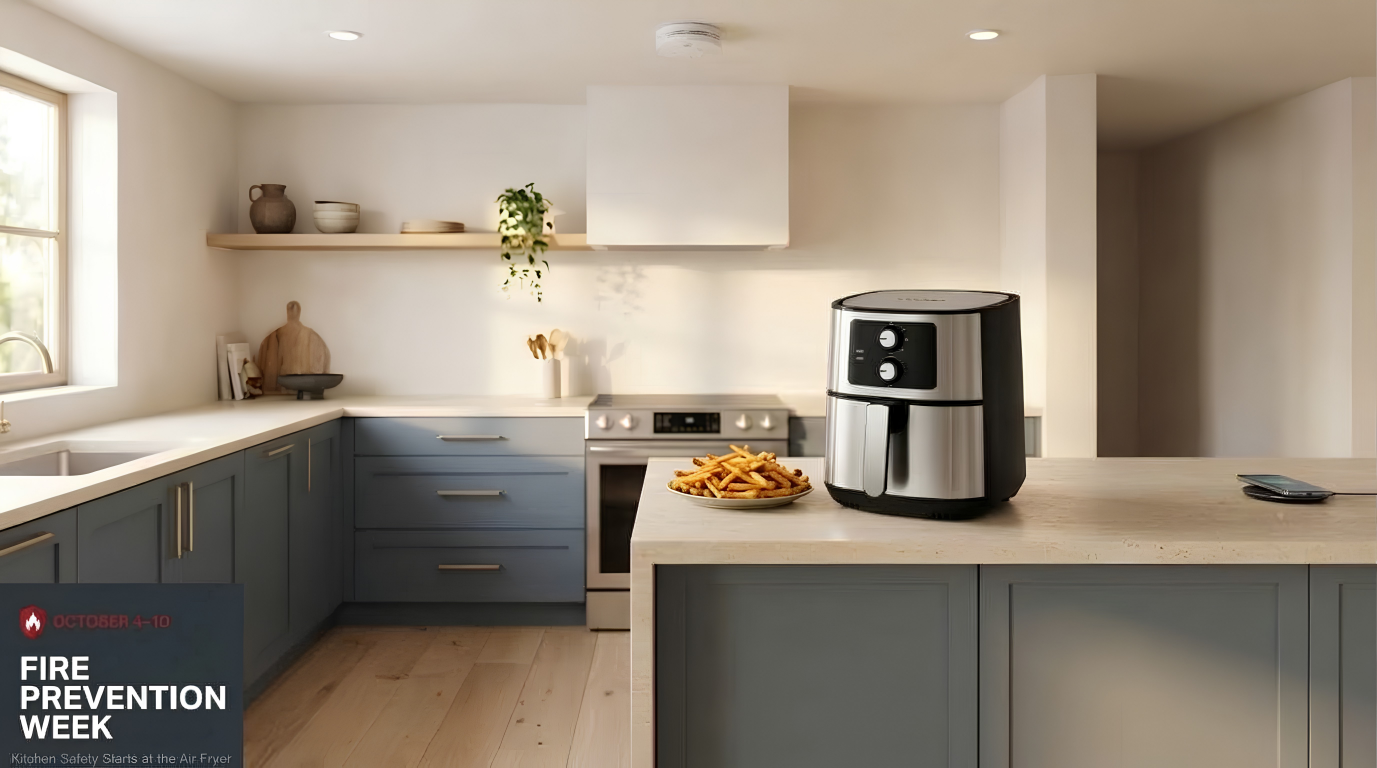
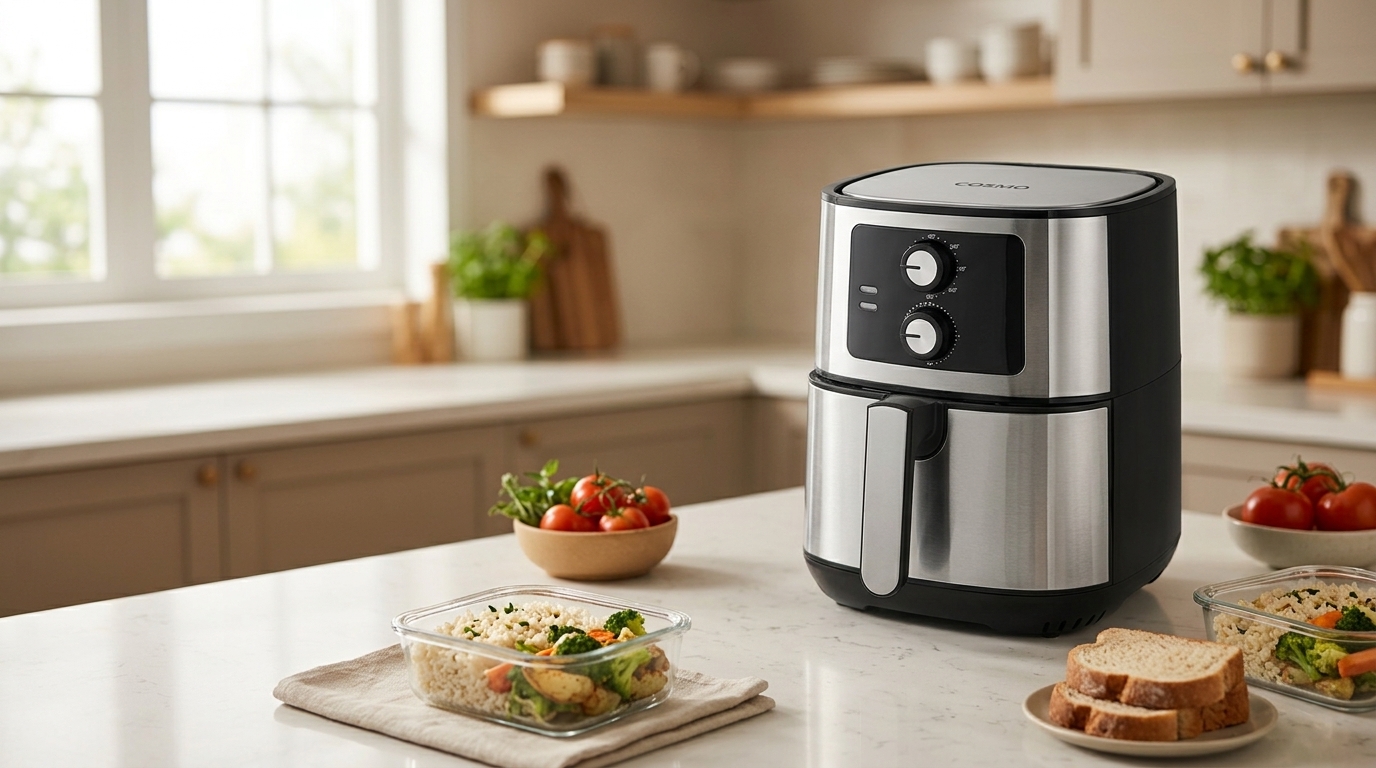
Most kitchen appliances have a season where they shine and a season where they fade into the background. The stand mixer comes out heavily in November and December for holiday baking and sits largely unused from March through October. The slow cooker earns its keep during cold months when braised short ribs and chili seem like obvious dinner choices and retreats to a cabinet shelf when summer arrives. The air fryer is different — it’s genuinely useful year-round, but summer is specifically when it becomes the most important appliance in your kitchen, the one you’d choose to keep if forced to give up everything else. This isn’t a general endorsement of air fryers as a category. It’s a specific argument about why summer creates conditions where the air fryer’s particular combination of capabilities — speed, heat efficiency, versatility, and minimal cleanup — addresses problems that summer cooking creates more acutely than any other season. Understanding why summer and air fryers are specifically well-matched helps you actually use the appliance to its potential rather than treating it as a specialty gadget for frozen foods and chicken wings. The Heat Problem Summer Creates in Your Kitchen Every argument for the air fryer in summer starts here, because this is the foundational problem the appliance solves better than anything else. What Your Oven Does to Your Home in Summer: A standard oven running at 375°F for 45 minutes isn’t just cooking food — it’s radiating heat into the surrounding kitchen through the door glass, the door seals, and the oven body throughout the entire cooking period. After the oven shuts off, it continues radiating heat as the cavity cools. In a home where the air conditioner is already working against 90°F outdoor temperatures, the oven’s heat contribution forces the cooling system to work harder, increases electricity consumption, and makes the kitchen itself genuinely uncomfortable during cooking. The Efficiency Gap: Gas ovens convert approximately 40% of their consumed energy into cooking heat. Traditional electric ovens do somewhat better at 65-70%. The remainder becomes waste heat distributed into your kitchen. An oven that runs for an hour in summer is doing something you don’t want — adding significant heat to a space you’re paying to keep cool. What the Air Fryer Does Instead: Air fryers heat a compact cavity of 2-6 quarts rather than a 5+ cubic foot oven. They reach cooking temperature in 3-5 minutes rather than the 10-15 minute preheat conventional ovens require. They complete most cooking tasks in 8-20 minutes rather than 25-45 minutes for oven equivalents. The total heat generated into your kitchen environment during an air fryer cooking session is dramatically lower — both because the heated cavity is smaller and because the cooking duration is significantly shorter. For a household trying to maintain comfortable indoor temperatures during a summer heat event, this difference is immediately felt rather than theoretically appreciated. The Numbers: Consider a chicken breast. Oven method: 10-15 minutes preheat plus 25-30 minutes cooking. Total time with oven actively heating: 35-45 minutes. Air fryer method: 3-5 minutes to temperature plus 15-18 minutes cooking. Total time: 18-23 minutes. The air fryer produces less than half the kitchen heat for the same result. Multiplied across every dinner preparation for a summer that runs from June through September, this efficiency difference affects both your electricity bill and your daily comfort in the kitchen in ways that accumulate meaningfully. Speed Changes What’s Practical for Summer Cooking Beyond the heat argument, speed is the second reason summer specifically benefits from air fryer cooking. Summer cooking has different time dynamics than the rest of the year, and the air fryer’s speed profile aligns with those dynamics unusually well. Summer Evening Cooking Context: Summer evenings are when people most want to be outside — on the patio, by the pool, at a neighbor’s yard, watching the kids play until the light fades. Coming inside to manage a 45-minute oven dinner competes with everything that makes summer evenings worth having. A cooking method that handles dinner in 15-20 minutes of mostly unattended operation fits the summer evening lifestyle in a way that extended oven cooking doesn’t. The After-Activity Cooking Problem: Summer days fill with activities that push dinner later than usual — afternoons at the beach, evening bike rides, extended pool sessions, outdoor socializing that runs longer than planned. Arriving home at 7pm hungry and tired, nobody wants to discover that dinner requires an hour of active kitchen time. Air fryer cooking handles the “we’re home later than expected and hungry now” scenario better than almost any other cooking method. Chicken thighs in 22 minutes. Salmon in 12 minutes. Roasted vegetables in 15 minutes. These timelines work when you’re already hungry and the alternative is waiting. Entertaining Without Kitchen Captivity: Summer hosting often involves guests present while you’re still preparing food — outdoor parties, casual backyard gatherings, impromptu dinner invitations accepted at 4pm for a 6pm dinner. The air fryer’s speed and minimal attention requirement means you can run cooking batches without disappearing into the kitchen for extended periods. Set the air fryer, go back to your guests, return when the timer sounds. The appliance manages itself in a way that oven cooking doesn’t. The Summer Food Inventory Aligns Perfectly with Air Fryer Strengths Summer’s characteristic foods — the things people actually want to eat when temperatures are high — happen to be exactly the foods that air fryers handle best. Proteins That Dominate Summer Eating: Chicken in every form — wings, thighs, breasts, tenders — is peak air fryer territory. The circulating hot air produces crispy skin and juicy interiors that rival deep frying for texture without the oil management. Shrimp in 6-8 minutes. Salmon fillets in 10-12 minutes. Fish tacos built from air-fried fish. Chicken sandwiches with a genuinely crispy exterior. These are summer’s most common protein preparations, and they’re all in the air fryer’s strongest territory. Summer Vegetables: The air fryer produces roasted vegetables with better caramelization and texture than oven roasting

What Is Cosmo Appliances and Who Makes Them?

If you’ve been researching kitchen appliances recently, you’ve probably come across Cosmo Appliances and found yourself asking a reasonable question: who exactly is behind this brand, and where does it actually fit in the appliance market? The kitchen appliance space is crowded with brands operating at wildly different price points and quality levels, and Cosmo’s positioning, premium-looking stainless steel appliances with pro-style aesthetics at mid-range prices, can make it hard to place without some context. This is a company worth understanding before you buy, and the story behind it explains both what Cosmo is genuinely good at and how it delivers the cooking performance and design quality its customers are looking for. The Brand Origin: Who’s Behind Cosmo Cosmo Appliances was founded with a straightforward belief: that serious cooking equipment shouldn’t require a luxury budget to access. The brand was built around a simple idea: households that cook regularly and care about their kitchens deserve high-performing options beyond standard market offerings—without paying premium prices. That belief shapes every product decision Cosmo makes. Burner quality, oven engineering, construction materials, filtration systems, each reflects a deliberate choice about what the product needs to be rather than what it needs to look like. The goal isn’t to impress in a showroom. It’s to perform in a real kitchen used by real people every day. Cosmo is headquartered in Chino, California, with a team focused on developing appliances that deliver on their promises across years of daily use. The products are designed for people who take cooking seriously, not as a hobby requiring professional credentials, but as a daily part of life that deserves equipment worth using. What “Pro-Style” Actually Means and How Cosmo Delivers It “Pro-style” is a term that gets applied loosely across the appliance industry, sometimes to products that genuinely deliver professional cooking performance, and sometimes to products that are primarily imitating the aesthetic of serious cooking equipment without delivering any of its underlying substance. Understanding what the term actually means in Cosmo’s context helps you evaluate what you’re getting rather than just reading a marketing label. The term originally described appliances built with direct influence from professional cooking environments, commercial-grade burner technology, heavy-duty construction materials, larger cooking capacities, and performance specifications designed to handle demanding, high-volume cooking use. These characteristics define what serious cooking equipment looks and feels like, and they’re the standard against which any pro-style claim should be measured. Cosmo’s pro-style positioning reflects genuine product decisions rather than aesthetic choices alone. Several specific details make this concrete. Italian-Made Gas Burners: Multiple Cosmo gas ranges and cooktops feature Italian-made burners sourced from manufacturers with long histories supplying quality residential and commercial cooking equipment. Italian gas burner manufacturing has a well-established reputation for precision and performance in the cooking appliance industry. This sourcing decision reflects a commitment to burner quality that goes beyond simply specifying high BTU numbers on a spec sheet. The difference shows up in flame consistency, low-end simmer stability, and the kind of cooking control that becomes apparent through regular daily use. Turbo True European Convection: Cosmo’s oven lineup includes Turbo True European Convection systems, a specific engineering approach where a dedicated circular heating element surrounds the convection fan rather than simply adding a fan to an existing oven cavity. This distinction matters because the circular element heats air as the fan circulates it, producing more uniform temperature distribution throughout the oven from front to back and corner to corner. The result is more consistent baking and roasting results across all rack positions, an improvement that becomes particularly relevant for multi-rack baking, larger roasts, and any technique where temperature consistency affects the outcome. Construction Quality That Holds Up: Cosmo uses 18 and 20-gauge stainless steel construction across its range hood lineup, 430-grade stainless steel finishes across multiple product categories, and heavy-duty cast iron grates on gas ranges and cooktops. These aren’t interchangeable specifications, thicker gauge steel resists denting and damage during daily use, 430-grade stainless maintains its appearance through the cleaning and handling that kitchen appliances experience continuously, and cast iron grates provide the thermal mass and durability that serious stovetop cooking demands. These material choices reflect how long Cosmo expects its products to perform rather than how good they look at first glance. ARC-FLOW Permanent Filters: Cosmo’s range hoods feature ARC-FLOW permanent stainless steel baffle filters that capture grease through a multi-stage design rather than relying on disposable mesh alternatives that require regular replacement. These filters clean in the dishwasher and have unlimited service life, a design decision that reduces ongoing maintenance cost while delivering consistently effective filtration throughout the hood’s lifespan. Across the product lineup, these specific details add up to a coherent picture of what pro-style means in Cosmo’s context, not aesthetic imitation, but meaningful engineering and component decisions that affect how the products cook, how they hold up, and how they serve the people using them. How Cosmo Sits in the Market The kitchen appliance market operates across meaningfully different tiers, and knowing where a brand sits within that landscape helps you understand what you’re actually buying and whether it matches what you’re looking for. At the entry level, appliances are engineered primarily around price, minimum viable components, basic functionality, and construction that works adequately when new but tends to show its limitations over time through performance and durability. These products serve a purpose for certain situations, but they aren’t built with serious cooking in mind. At the other end of the market sits ultra-premium equipment carrying price tags that reflect extraordinary engineering alongside significant brand investment. These appliances represent genuine excellence, but they’re priced in a way that makes them inaccessible for most households regardless of how seriously those households take their kitchens. Cosmo occupies the space between these two ends deliberately. It’s the tier where serious cooking performance becomes accessible, where Italian-made burners, genuine convection engineering, quality stainless construction, and thoughtfully designed product suites are available to households that cook regularly and care about the result, without requiring an exceptional

Wine Cooler vs. Regular Refrigerator for Summer Entertaining: Which One Actually Serves Your Guests Better

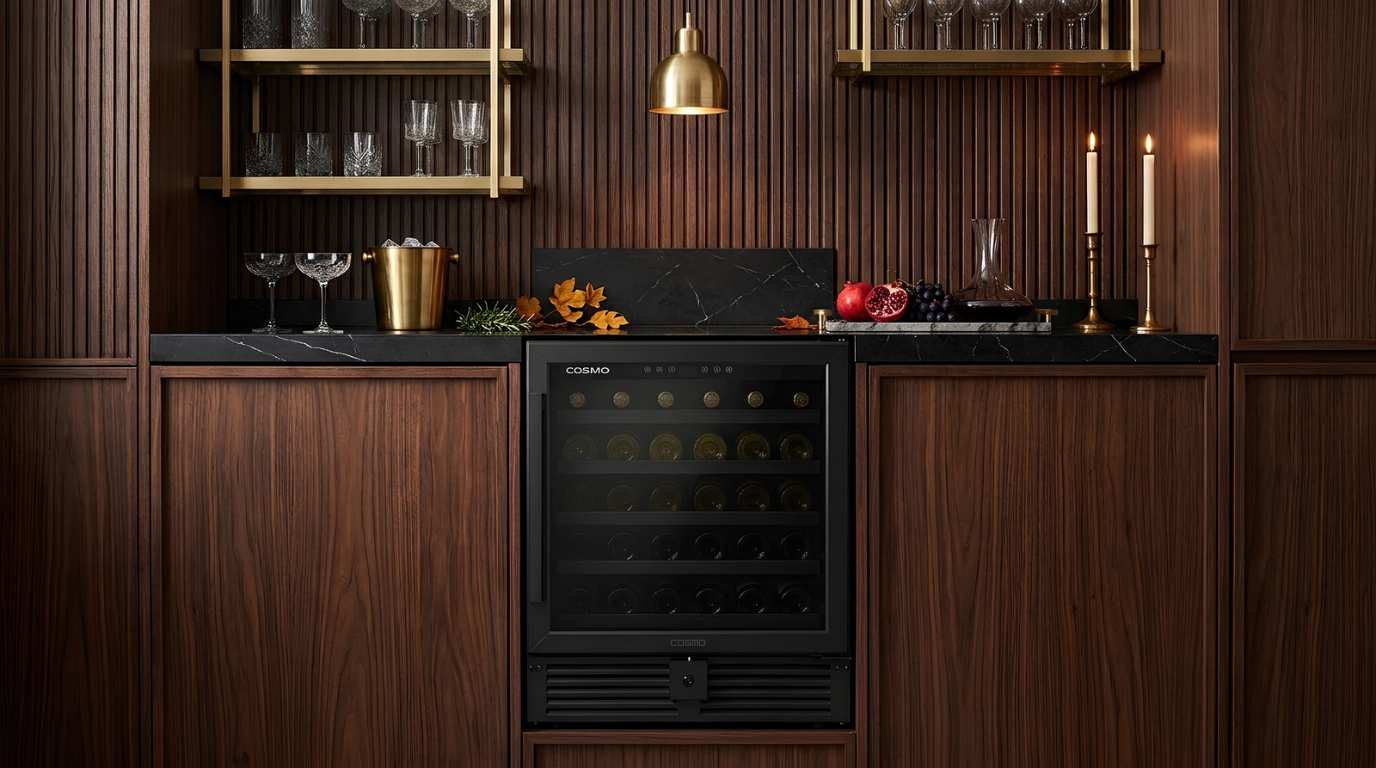
Summer entertaining creates a specific set of demands that the rest of the year’s hosting doesn’t quite replicate. Guests arrive expecting cold drinks immediately. Wine consumption increases when the weather is hot and gatherings run long. The refrigerator that handles a household’s weekly food storage is suddenly also being asked to chill a case of white wine, keep rosé at serving temperature through a four-hour afternoon party, and produce ice for cocktails while simultaneously storing the potato salad, the marinated chicken waiting to go on the grill, and the dessert that needs to stay cold until serving. Something in that equation usually suffers. The question of whether a dedicated wine cooler makes sense for summer entertaining isn’t purely about wine enthusiasm or kitchen aesthetics — it’s a practical question about whether your cold storage setup can actually handle what summer hosting demands, and whether the right tool for chilling wine is the same tool that’s keeping your raw chicken food-safe. Those two functions have genuinely different requirements, and understanding the gap between them explains why the answer isn’t simply “put the wine in the fridge like everything else.” What Your Refrigerator Is Actually Designed to Do A standard kitchen refrigerator is engineered for food safety — maintaining temperatures cold enough to slow bacterial growth across a wide range of perishable foods. The FDA recommends refrigerator temperatures at or below 40°F for food safety, and most household refrigerators run between 35-38°F to stay safely within this range with some margin for temperature variation from door openings. This temperature is too cold for wine storage and significantly too cold for wine serving. Red wines served at refrigerator temperature — 35-38°F — taste muted, tannic, and closed because cold temperatures suppress the volatilization of aromatic compounds that give wine its flavor complexity. White wines at these temperatures are drinkable but past the point where their fruit character and acid balance are most expressive. Sparkling wines do reasonably well since they’re typically served very cold, but even they show better at 42-48°F than at 35°F. Beyond temperature, refrigerators create additional wine-unfriendly conditions. The compressor cycling that maintains food-safe temperatures creates vibration that disturbs wine sediment and, over extended storage, accelerates chemical reactions that degrade wine quality. Refrigerators dehumidify aggressively to prevent food spoilage — exactly the wrong condition for wine corks that need moderate humidity to stay properly sealed against air intrusion. Strong food odors in a refrigerator transfer to wine through cork over time, particularly for wines stored more than a few days. None of this means wine in the refrigerator is ruined — people store and serve wine from household refrigerators constantly with acceptable results. But “acceptable” and “optimal” are different standards, and understanding what’s actually happening to wine in a standard refrigerator helps frame what a dedicated wine cooler is actually solving. What Wine Actually Needs Wine storage and wine serving temperature requirements differ from food refrigeration requirements in specific ways that determine what equipment serves wine best. Storage Temperature: Long-term wine storage — anything beyond a few weeks — performs best between 55-65°F depending on wine type. Reds generally store toward the warmer end of this range, whites and sparkling wines toward the cooler end. This range is warm enough to allow gradual aging and flavor development but cool enough to prevent the heat damage that accelerates undesirable chemical changes. Standard refrigerators run 15-25°F colder than this range. Serving Temperature by Wine Type: Different wines have specific serving temperature ranges where they taste best — a detail that matters more in summer entertaining where guests are drinking wine rather than cooking with it. Red wines: 60-65°F for lighter styles like Pinot Noir and Beaujolais, 65-68°F for fuller-bodied reds like Cabernet Sauvignon and Syrah. These temperatures are actually warmer than many people realize — a red wine pulled from a 68°F room temperature environment in summer is too warm, but a red pulled from a standard refrigerator and allowed to warm slightly for 20-30 minutes is often close. White wines: 45-55°F depending on style. Crisp, light whites like Pinot Grigio and Sauvignon Blanc serve well at 45-48°F. Fuller, more complex whites like white Burgundy or aged Chenin Blanc show better at 50-55°F. These temperatures are achievable from a standard refrigerator but require timing — pulling white wine too early means it warms past its window before guests can finish the bottle. Rosé: 48-54°F — cold enough to be refreshing in summer heat but warm enough to show its fruit character. A rosé at 35°F from the back of the refrigerator needs 20-30 minutes on the counter before it reaches this range. Sparkling wines: 40-50°F — the category that comes closest to refrigerator temperatures, which is why Champagne and Prosecco pulled directly from a household refrigerator is generally fine. Temperature Stability: Perhaps more important than the specific temperature is temperature consistency. Wine quality degrades faster from repeated temperature fluctuations than from storage at a slightly suboptimal but consistent temperature. A refrigerator that cycles from 35°F to 42°F multiple times daily due to door openings stresses wine differently than a dedicated wine cooler designed for minimal temperature variation. What a Dedicated Wine Cooler Does Differently A wine cooler isn’t simply a refrigerator set to a different temperature — it’s an appliance engineered specifically for the conditions wine needs, differing from standard refrigerators in several meaningful ways. Temperature Range Designed for Wine: Wine coolers typically maintain temperatures between 40-65°F — the range that covers wine serving and short-to-medium-term storage. The Cosmo COS-24BIWCS, for example, maintains temperatures across the range appropriate for both red and white wine storage, allowing you to optimize for whichever type dominates your collection. This is temperature calibrated for wine rather than for food safety. Temperature Stability: Wine cooler compressor and thermostat systems are designed to minimize temperature fluctuation rather than simply maintaining a target average. The narrower temperature swings in a purpose-built wine cooler stress wine less than the wider cycling of a food refrigerator managing door openings, new

What Nobody Tells You About Buying Kitchen Appliances During a Renovation

Kitchen renovations expose a specific category of mistake that people who’ve never done one before don’t anticipate and people who have done one before wish someone had warned them about. These aren’t mistakes about tile selection or cabinet finishes — they’re appliance mistakes, and they’re particularly costly because appliances are expensive, often non-returnable once installed, and sometimes reveal their problems only after surrounding cabinetry, countertops, and flooring are already completed and paid for. The challenge isn’t that appliance buying is complicated in isolation. Buying a refrigerator for an existing kitchen is straightforward. The challenge is that renovation appliance buying happens simultaneously with dozens of other decisions, under time pressure from contractors, with lead times that don’t always cooperate with construction schedules, and with information that’s incomplete until too late to change course. Understanding where these decisions go wrong helps you sequence them correctly and avoid the specific traps that renovation projects create. Order of Operations Matters More Than Most People Realize The single most consequential mistake in renovation appliance buying is treating appliance selection as something you can do after other decisions are finalized. It needs to happen first, or at minimum simultaneously, because appliances determine requirements that everything else must accommodate. Appliances Drive Cabinet Dimensions: Built-in appliances — dishwashers, wall ovens, refrigerators, wine coolers, microwave drawers — have precise cutout dimensions that cabinets must match exactly. If you finalize cabinet orders before confirming appliance dimensions, you risk cutouts that don’t fit. A wall oven that’s a half-inch taller than the cabinet opening means either returning the oven, modifying the cabinet (expensive and sometimes impossible), or living with a gap that looks unfinished. Appliances Drive Utility Rough-In Locations: Where gas lines, electrical circuits, and water connections end up in your walls and floors must match where your chosen appliances need them. Rough-in work happens early in renovation — before drywall, before cabinets, often before tile. If you haven’t selected appliances when rough-in happens, contractors make educated guesses about utility locations. These guesses are sometimes wrong in ways that create expensive corrections later. Countertop Cutouts: Drop-in cooktops require counter cutouts made after countertop installation. The cutout dimensions come from the cooktop specifications. Ordering countertops before confirming cooktop selection and dimensions creates situations where installers cut openings that don’t match what arrives weeks later. Lead Times Compound: Some appliances have lead times of 8-16 weeks or longer, particularly high-end models or anything on backorder. If you select appliances late in the renovation process, construction may complete before appliances arrive, leaving you with a finished kitchen you can’t use. Or contractors return for a second trip to do appliance installation, adding cost and scheduling complexity. The Showroom Problem Appliance showrooms are designed to sell appliances under conditions that don’t reflect how those appliances will look or work in your actual kitchen. Understanding this gap protects you from decisions that look good in the showroom but feel wrong at home. Display Appliances Stand Alone: Showroom appliances sit on display pedestals or in demonstration kitchen vignettes with generous surrounding space. Your kitchen has different dimensions, different cabinet heights, different counter depths, and different sight lines. An appliance that looks appropriately sized in a showroom may look massive or oddly small in your actual space. Finishes Look Different in Context: Stainless steel, matte black, and other finishes look different under showroom lighting than under the natural light and specific fixture types in your kitchen. A finish that appears warm and refined under showroom spotlights might look cold or flat under your actual lighting conditions. If possible, bring photos of your kitchen — ideally with the lighting on — when evaluating finishes in showrooms. You Can’t Hear Operational Noise: Showrooms are loud environments with multiple appliances running, background music, and ambient conversation. The dishwasher that seems quiet in the showroom might be noticeably loud in your open-plan kitchen that connects to your living room. Noise specifications exist for exactly this reason — use them rather than relying on showroom impressions. Door and Drawer Swing in Your Space: Refrigerator doors, dishwasher doors, and oven drawers all require clearance to open fully. In a showroom, these open without obstruction. In your kitchen, a refrigerator positioned near a wall or perpendicular cabinet might have its door blocked before it reaches full open, preventing access to shelves or drawer compartments. Measuring for Appliances Is More Involved Than It Seems Appliance measurements that seem straightforward in theory reveal complications in actual kitchens that aren’t always obvious until something doesn’t fit. Height Variations Matter: Standard counter height is 36 inches, and most appliances are designed around this. But actual counter heights in older homes sometimes vary. Custom kitchen designs sometimes deviate from standard heights for ergonomic or aesthetic reasons. Appliances designed for standard height installations may sit slightly proud or recessed in non-standard situations. Depth Includes Handles and Hinges: Refrigerator and dishwasher depth specifications typically measure the appliance body only, not handles and door hinges that extend beyond it. An appliance specified at 30 inches deep might actually extend 33-34 inches into the room once handles are included. In tight kitchen layouts where every inch of aisle width matters, this discrepancy affects traffic flow in ways that become daily annoyances. Diagonal Delivery Clearance: Large appliances — refrigerators especially — often can’t travel in a straight line from the delivery truck to their installation position. They need to be tilted diagonally to navigate doorways, hallways, and turns. The diagonal measurement of a refrigerator (corner to corner) determines whether it can physically reach its intended location. People occasionally receive appliances they can’t install because the delivery path doesn’t accommodate diagonal clearance. Opening Widths: Measure every doorway, hallway, and turn between the building entrance and the appliance’s final position. Standard interior doorways are 32-36 inches wide. A 36-inch wide refrigerator won’t pass through a 32-inch doorway without removing the doors — both the doorway door and sometimes the refrigerator doors as well. Know this before delivery day. Ventilation Clearances: Built-in and integrated appliances specify minimum

Kitchen Sounds That Mean Something’s Wrong (And When to Actually Worry)

Kitchens make noise – appliances hum, water runs, equipment operates – but distinguishing between normal operational sounds and warning signals of impending problems saves money through early intervention while preventing the anxiety of worrying about every unfamiliar noise. Some sounds demand immediate attention before minor issues become expensive failures, while others represent normal operation that you can safely ignore despite being noticeable or even annoying. Understanding which category each sound falls into helps you respond appropriately without either ignoring genuine problems or paying for unnecessary service calls. The challenge lies in recognizing patterns that indicate developing problems versus sounds that simply reflect how appliances work. Age, installation quality, and usage patterns all affect what’s normal for your specific equipment, making it difficult to apply universal rules. However, certain sound characteristics – sudden changes, increasing intensity, rhythmic patterns, or sounds accompanied by performance changes – reliably indicate issues worth investigating regardless of the specific appliance involved. Refrigerator Sounds: Normal Hums vs. Problem Indicators Refrigerators run constantly and make various sounds during normal operation, but certain noises signal problems that need attention before they become refrigerator-ending failures. Normal sounds include gentle humming from the compressor running, occasional clicking as the compressor cycles on and off, water flowing through ice makers or water lines, and fans moving air for circulation. These operational noises vary in volume but remain relatively consistent over time. Warning sounds that need attention include loud buzzing or vibrating that suggests a failing compressor working harder than it should, gurgling or hissing that might indicate refrigerant leaks, loud clicking repeated frequently rather than just during cycling, or knocking sounds that suggest loose components or failing fan motors. Compressor sounds that increase in volume or duration over weeks or months indicate the compressor is struggling and may be approaching failure. This progressive deterioration gives you time to plan for repair or replacement rather than facing sudden failure. Fan motor problems create scraping, grinding, or loud whooshing sounds that differ from the normal quiet air movement. These sounds often worsen when doors open because temperature changes trigger more aggressive fan operation. Ice maker sounds vary dramatically between normal and problematic. Normal ice makers make substantial noise during harvest cycles – motorized sounds, ice dropping, and water refilling. Problematic ice makers create grinding sounds during harvest (ice stuck or jammed), continuous running water (fill valve stuck open), or complete silence when they should be making ice (mechanical failure). Defrost cycle sounds include dripping water and occasional pops as components expand and contract with temperature changes. These periodic sounds are normal even though they might be concerning if you don’t recognize what’s happening. Dishwasher Sounds: Cleaning Noise vs. Mechanical Problems Dishwashers make substantial noise during operation, but certain sounds indicate problems rather than just aggressive cleaning action. Normal operation includes water rushing during fill and spray cycles, the hum of circulation pumps moving water, swishing sounds as spray arms rotate, and occasional bumping as dishes shift during washing. Modern dishwashers also make grinding sounds from food disposal mechanisms that pulverize debris. Problem indicators include loud grinding or squealing from failing pump motors or damaged spray arms hitting dishes, excessive vibration that suggests installation problems or unbalanced loads, no water sound during cycles when spray should be active (clogged spray arms or failed pump), or clicking without water flow (failing pump or inlet valve). Spray arm problems create knocking sounds as damaged or clogged arms spin unevenly or hit dishes. This rhythmic knocking differs from occasional dish movement and worsens as spray arms degrade. Pump bearing failure creates escalating grinding or squealing that starts subtle but increases over weeks until the pump fails completely. Early intervention when sounds first appear prevents complete failure that might damage other components. Motor strain from clogs or blockages produces labored humming different from normal pump operation. The motor sounds like it’s working hard but water flow is reduced or absent, indicating restrictions in the system. Inlet valve clicking without water flow suggests valve failure or water supply problems. The valve attempts to open but either can’t or opens but no water flows, creating clicking without the expected rushing water sound. Range Hood Sounds: Airflow Noise vs. Motor Issues Range hoods generate substantial noise from moving air, but certain sounds indicate motor or mechanical problems rather than just aggressive ventilation. Normal sounds include the whoosh of air moving through the hood and ductwork, increasing noise at higher fan speeds, and occasional vibration at maximum speed from the volume of air movement. Well-designed hoods minimize but don’t eliminate operational noise. Problem sounds include grinding or squealing from failing motor bearings, excessive vibration at all speeds suggesting loose mounting or unbalanced fan blades, rattling from loose components or damaged ductwork, or significantly increased noise after years of quieter operation. Motor bearing failure starts with subtle squealing or grinding at high speeds but eventually affects all speeds as bearings deteriorate. The sound progressively worsens until the motor fails or seizes. Fan blade problems create rhythmic wobbling sounds or clicking as damaged or unbalanced blades rotate. Blade damage from improper cleaning or impact creates imbalance that stresses motors. Loose mounting allows the entire hood to vibrate excessively during operation, creating buzzing against cabinets or rattling sounds that worsen at high speeds. Proper tightening eliminates these sounds. Ductwork rattling comes from loose connections or unsecured duct sections that vibrate from airflow. These sounds are annoying but don’t indicate hood failure – they’re installation or ductwork issues. Filter saturation creates reduced airflow and labored motor sounds as the system works harder to move air through grease-clogged filters. The motor sounds strained rather than smoothly moving air. Garbage Disposal Sounds: Normal Grinding vs. Jams Garbage disposals make aggressive sounds during normal operation, but certain noises clearly indicate jams, damage, or items that shouldn’t be in the disposal. Normal operation produces loud grinding as food waste gets pulverized, water rushing through the disposal, and the hum of the motor spinning. These sounds are substantial but consistent during

When to Repair vs. Replace Kitchen Appliances: Making Smart Decisions About Your Kitchen Equipment

Kitchen appliances eventually fail. Range burners stop lighting, dishwashers start leaking, refrigerators quit cooling, and ovens heat inconsistently. When appliances malfunction, you face a decision: pay for repairs or replace the unit entirely. This choice affects your budget immediately and influences kitchen functionality for years. The decision isn’t always obvious because repair costs, appliance age, energy efficiency changes, and replacement prices all factor into what makes financial sense. Understanding when repair makes sense versus when replacement is smarter helps you avoid wasting money on fixing appliances that will fail again soon while also preventing unnecessary replacement of equipment that could serve reliably for years more with simple fixes. The repair-versus-replace decision requires evaluating several factors simultaneously rather than applying simple rules. Appliance age matters, but a ten-year-old refrigerator might justify repair while a seven-year-old dishwasher doesn’t, depending on what’s broken and repair costs. The specific failure type influences the decision – some problems signal imminent complete failure while others are isolated issues. Repair cost as a percentage of replacement cost provides useful guidance, but this ratio alone doesn’t account for how much longer the appliance will function after repair. Energy efficiency improvements in newer models sometimes justify replacement even when repairs are relatively inexpensive. Making smart decisions requires understanding these factors and how they interact rather than following rigid formulas. The 50% Rule and Its Limitations The commonly cited 50% rule suggests replacing appliances when repair costs exceed half the replacement price. While this guideline provides a starting point, it oversimplifies complex decisions. The rule captures important economic reality – spending 60% of replacement cost to repair an aging appliance rarely makes sense when you could get a new unit with warranty for just 40% more. This principle is sound for straightforward cases. However, the rule ignores appliance age and remaining useful life. A two-year-old refrigerator might justify a repair costing 60% of replacement because you’re likely getting 10+ more years. That same repair cost on a 12-year-old refrigerator makes less sense because you’re probably getting only a few more years before another major component fails. The calculation also depends on accurate replacement cost assessment. Cheap replacement options might suggest not repairing, but if you’d actually buy a higher-quality replacement, the 50% threshold changes significantly. Compare repair costs to what you’d actually spend on replacement, not the cheapest available option. Energy efficiency improvements complicate the calculation further. An expensive repair on an old, inefficient refrigerator might cost less upfront than replacement but more over time through higher electricity bills. The 50% rule doesn’t account for operating cost differences. Warranty coverage on repairs versus new appliances matters. A $400 repair might come with a 90-day parts warranty, while a $900 replacement includes a full warranty. The replacement provides more protection for the additional cost. Use the 50% rule as initial screening rather than definitive answer. If repair costs are under 30% of replacement, repair usually makes sense. Over 70%, replacement is typically smarter. Between 30-70%, other factors become decisive. Age and Expected Remaining Life Appliance age fundamentally affects repair decisions because it indicates how much useful life remains even after successful repairs. Typical appliance lifespans provide context for age-based decisions. Refrigerators average 10-15 years, dishwashers 8-12 years, ranges 13-15 years, microwaves 8-10 years. These averages help gauge whether an appliance is early, middle, or late in its expected service life. Early-life repairs (within first 3-5 years) usually justify fixing unless the problem indicates fundamental design flaws. You’re repairing an appliance that should provide many more years of service. Manufacturing defects sometimes appear early, but most appliances work reliably through early years if they survive initial break-in. Mid-life repairs require more careful evaluation. An eight-year-old dishwasher might have 4-6 years of remaining life if repaired successfully, making repair reasonable for moderate costs. The appliance has proven reliable enough to reach middle age, suggesting decent quality. Late-life repairs on appliances approaching or exceeding typical lifespan rarely make sense unless costs are minimal. A 14-year-old refrigerator, even if repaired successfully, likely faces other component failures soon. You’re putting money into an appliance nearing the end regardless of this specific repair. Multiple previous repairs accelerate the replacement decision timeline. An appliance requiring its third significant repair in two years is telling you something about its overall condition. Each repair buys less time before the next failure. The age consideration interacts with repair cost. A $300 repair on a three-year-old appliance is smarter than the same repair on a twelve-year-old unit, even though the repair cost is identical. Nature and Severity of the Problem What specifically has failed significantly influences whether repair makes sense because some problems indicate broader deterioration. Compressor failure in refrigerators represents major mechanical breakdown. While compressors can be replaced, this failure often signals that the appliance has experienced conditions or manufacturing issues that will cause other components to fail. Compressor replacement costs are high and remaining life expectancy after repair is uncertain. Control board failures are increasingly common in modern appliances with extensive electronics. These repairs can be expensive, but if the mechanical components remain sound, successful control board replacement often provides years more service. The appliance’s mechanical parts are what determine longevity – electronics are just the brain controlling them. Leaking issues in dishwashers and washing machines vary in seriousness. Small seal failures are straightforward fixes with good prognosis. Tub cracks or major structural leaks indicate problems that may not be economically repairable and suggest replacing rather than attempting major reconstruction. Burner ignition problems on gas ranges are typically simple, inexpensive fixes. These failures don’t indicate broader deterioration – often just dirty igniters or simple component wear. Repairing makes sense at almost any appliance age. Oven heating element failures are straightforward replacements on electric ranges. These are wear items expected to fail occasionally. Replace elements without considering broader appliance replacement unless other problems exist concurrently. Door seal failures and hinge problems are minor repairs that rarely justify replacement. These components wear from use but don’t indicate appliance core deterioration. Multiple

Kitchen Upgrades That Actually Matter (and the Ones That Don’t)

Kitchen renovation advice tends toward either extreme budget constraints or luxury indulgence, leaving most homeowners wondering which improvements actually enhance daily cooking and living versus which ones look impressive but contribute little to function. The gap between marketed kitchen features and genuinely useful upgrades creates confusion when you’re trying to spend money wisely on improvements that will serve you for years. Understanding which kitchen changes deliver real value—through better workflow, reduced frustration, or improved cooking capability—helps you invest in upgrades that matter rather than trendy features that sound appealing but don’t change how your kitchen actually works. The challenge is separating marketing narratives from lived experience. Some upgrades that seem practical turn out frustrating, while others that appear unnecessary prove invaluable once you experience them. The difference often comes down to how you actually use your kitchen rather than how you imagine using it or how magazines suggest you should use it. Upgrades Worth Every Dollar Adequate and Well-Placed Lighting Kitchen lighting ranks among the most impactful upgrades because insufficient or poorly positioned lighting makes every kitchen task more difficult and less safe. Most kitchens rely too heavily on a single overhead fixture that casts shadows exactly where you’re working. Under-cabinet lighting transforms food preparation by illuminating countertops where you actually work. The difference between chopping vegetables in shadow versus in direct light affects both safety and efficiency dramatically. LED strip lights installed under wall cabinets cost relatively little but change how your kitchen functions every single day. Task lighting over the sink makes dishwashing and food prep at the sink far easier. A pendant or recessed light positioned directly over the sink area eliminates the shadows created when your body blocks overhead lighting. Overhead lighting should be layered rather than relying on a single central fixture. Multiple recessed lights, a pendant over the island, or track lighting that can be directed creates even illumination without harsh shadows. Dimmer switches add flexibility by allowing bright light when needed for detailed tasks and softer lighting for casual kitchen use or entertaining. The ability to adjust lighting intensity makes the kitchen more comfortable throughout the day. The lighting upgrade provides value every single time you use your kitchen. Unlike features you use occasionally, lighting affects every meal, every cleanup, every kitchen task. Better Faucet and Sink Configuration The faucet and sink get used constantly, making quality improvements here worthwhile investments that reduce daily frustration and improve kitchen workflow. Pull-down or pull-out faucet sprayers provide flexibility that standard faucets don’t offer. Rinsing large pots, washing vegetables, cleaning the sink itself—all become easier when you can direct water flow exactly where needed. Higher faucet clearance accommodates large pots under the spout without awkward tilting. If you’ve ever struggled to fill a tall stockpot or water pitcher under a low faucet, adequate clearance eliminates that constant annoyance. Quality faucet construction means the faucet continues working smoothly for years without developing drips, loose handles, or spray pattern problems. Cheap faucets fail within a few years while quality faucets last decades. Deeper sinks hold more dishes and large cookware without overflowing onto the counter. An extra two or three inches of depth makes a surprising difference in sink utility. Single-basin versus divided sinks depends on your actual usage. If you regularly need to soak large sheet pans or roasting pans, a single large basin serves you better than a divided sink where nothing fits properly. The sink and faucet upgrade improves kitchen function multiple times daily. These aren’t glamorous improvements, but they affect your kitchen experience constantly. Functional Storage Solutions Basic cabinets with empty space and fixed shelves waste storage capacity and create frustration when you need specific items buried in back corners. Thoughtful storage upgrades make the kitchen far more functional. Pull-out shelves in lower cabinets bring items from the back within reach without crawling on the floor and moving everything else. The ability to pull out the entire shelf transforms how you access pots, pans, and small appliances. Deep drawer dividers for utensils, tools, and gadgets prevent the tangled mess that develops in standard drawers. Organized storage means finding what you need immediately rather than digging through chaos. Pull-out trash and recycling bins hide waste containers while keeping them easily accessible. Built-in waste solutions eliminate floor clutter from freestanding bins while making disposal convenient during cooking. Vertical storage for baking sheets, cutting boards, and trays utilizes cabinet space efficiently instead of stacking these items horizontally where you need to remove six things to reach the one you want. Corner cabinet solutions like lazy Susans or pull-out systems make corner spaces usable rather than letting them become black holes where items disappear forever. Drawer organizers for spices keep bottles visible and accessible rather than crowded on shelves where you can’t see what you have. Being able to find spices quickly improves cooking flow. Storage improvements reduce daily frustration and make cooking more enjoyable by ensuring everything has a logical place where you can find and access it easily. Quality Ventilation Proper range hood ventilation removes smoke, steam, grease, and cooking odors before they permeate your home. Inadequate ventilation means cooking smells linger for hours and grease accumulates on surfaces throughout the kitchen. Adequate CFM (cubic feet per minute) for your cooking style ensures the hood can actually clear the air. Undersized hoods run constantly without effectively removing cooking byproducts. Ducted ventilation to the outside works dramatically better than recirculating hoods with charcoal filters. Truly removing air from the kitchen eliminates odors rather than just filtering and returning them. Proper hood sizing covers the cooktop width completely. A 30-inch hood over a 36-inch cooktop cannot capture all the smoke and steam from the outer burners. Quiet operation at usable fan speeds makes the difference between actually using your hood versus avoiding it because the noise is unbearable. Good hoods provide strong ventilation without sounding like jet engines. The ventilation upgrade pays dividends during any cooking that generates smoke, steam, or strong odors. If you cook regularly,

The Real Cost of Cheap Kitchen Appliances: What Actually Breaks and When

Budget kitchen appliances promise significant savings compared to premium brands, with identical-looking stainless steel finishes and similar feature lists at half the price. The temptation to save thousands across a full kitchen suite is strong, particularly when renovations already strain budgets. However, understanding what differentiates cheap appliances from quality options helps you make informed tradeoffs rather than discovering expensive mistakes after installation. The gap isn’t primarily about features or aesthetics – it’s about component quality, engineering decisions, and longevity that only become apparent through years of use. The appliance industry operates across multiple tiers, from true budget brands sold primarily online to mid-range options available at big box stores to premium brands carried by specialty dealers. Each tier makes different engineering and manufacturing choices that fundamentally affect reliability and lifespan. Knowing where manufacturers cut costs helps you identify which compromises matter for your usage patterns and which represent acceptable tradeoffs for the savings achieved. Where Cost-Cutting Actually Happens Manufacturers reduce prices through specific engineering and materials decisions that aren’t obvious from spec sheets or showroom appearances. Compressor Quality in Refrigerators: The compressor represents a refrigerator’s heart, running constantly to maintain temperatures. Premium brands use compressors designed for 15-20 years of continuous operation with substantial safety margins. Budget brands often specify compressors engineered for 7-10 year lifespans with minimal tolerances. Both work identically when new, but the budget compressor faces higher failure rates as it ages, particularly in hot climates or when installed in tight spaces with poor ventilation. Dishwasher Pump Construction: Quality dishwashers use stainless steel pump housings and impellers that resist corrosion from detergents and hard water. Budget models substitute plastic components that degrade over time, becoming brittle and eventually cracking. The dishwasher works fine for 3-5 years until plastic pump components fail, requiring repairs that often cost nearly as much as the original appliance. Range Burner Materials: Gas range burners in premium models use brass or heavy-gauge stainless steel that maintains precise tolerances through thousands of heating cycles. Budget ranges use thinner materials or aluminum alloys that warp with repeated heating, eventually causing uneven flames or gas leaks. The range cooks identically when new, but performance degrades noticeably after several years of regular use. Oven Insulation Thickness: Quality ranges include 2-3 inches of high-density insulation surrounding oven cavities. This insulation maintains consistent temperatures while keeping exterior surfaces cool. Budget models use 1 inch or less of lower-density insulation, causing heat loss that makes ovens work harder to maintain temperature while making cabinet surfaces warm enough to potentially damage finishes over time. Control Board Components: Modern appliances rely on electronic control boards managing functions previously handled mechanically. Premium brands use commercial-grade capacitors, relays, and circuit boards designed for humid, high-temperature environments. Budget brands use consumer-grade components that fail more frequently in the harsh conditions kitchen appliances face. Control board failures often require complete replacement at costs of several hundred dollars. Wire Gauge and Connections: Internal wiring quality affects reliability significantly but remains completely invisible to buyers. Heavier gauge wire with quality connectors maintains reliable electrical flow through years of thermal cycling. Minimum-spec wire with cheaper connectors develops resistance over time, creating heat that accelerates component failure. This cost-cutting appears nowhere in specifications but dramatically affects lifespan. The Three-Year Cliff Most Buyers Don’t Anticipate Understanding failure patterns helps you plan for appliance lifecycles rather than being surprised by unexpected replacements. Year One Performance: Essentially all appliances work properly during the first year regardless of quality tier. Manufacturing defects appear quickly and typically get covered under warranty. Budget and premium appliances perform identically during this honeymoon period, creating the false impression that they’re equivalent. Years Two Through Four: This period reveals the first meaningful differences. Budget appliance failure rates climb significantly as components designed for minimal lifespans begin wearing out. Seals harden, motors develop bearing noise, electronic controls start glitching. Many of these issues aren’t catastrophic failures but annoying problems that degrade user experience. Years Five Through Seven: Budget appliances face rapidly accelerating failure rates. Major components like compressors, pumps, and heating elements fail frequently. Repairs often cost 40-60% of replacement prices, creating difficult decisions about whether to repair or replace. Premium appliances remain mostly reliable during this period, though they’re beginning to show their age. Year Eight and Beyond: Few budget appliances remain functional past 8-10 years without multiple major repairs. Premium appliances commonly reach 12-15 years before requiring replacement, often longer with proper maintenance. This longevity difference means premium appliances cost less per year of service despite higher purchase prices. When Budget Appliances Make Sense Budget appliances aren’t universally bad choices. Specific situations justify accepting shorter lifespans for immediate savings. Rental Properties: Landlords replacing appliances in rental units face different calculus than homeowners. Tenants may damage appliances regardless of quality, and rapid turnover means appliances might get replaced during unit renovations before they fail naturally. Budget appliances that last 5-7 years serve rental properties adequately while preserving capital for other investments. Temporary Housing: People living somewhere temporarily – college apartments, short-term job assignments, starter homes they plan to sell within a few years – benefit from budget appliances. If you’ll move before the appliance fails, you’ve captured the full value of the lower purchase price without experiencing the shortened lifespan. Very Light Use: Second homes used occasionally, in-law suites occupied part-time, or vacation properties with seasonal use don’t stress appliances the way daily family cooking does. Operating hours matter more than calendar years for appliance longevity. Light use can extend budget appliance lifespans significantly. Constrained Budgets: Sometimes budgets simply don’t accommodate quality appliances across an entire kitchen. In these situations, prioritizing matters. Invest in quality for appliances you use most (typically range and refrigerator) while accepting budget options for less-critical items (like dishwashers if you rarely run them). The Repair Economics That Change Everything Understanding repair costs versus replacement costs helps you make rational decisions when appliances fail rather than emotional choices based on frustration. Service Call Minimums: Appliance repair companies typically charge $100-150 just to diagnose problems,

Kitchen Appliances That Break the Fastest (And Which Ones Actually Last)

Not all kitchen appliances are created equal when it comes to longevity, and understanding which categories tend to fail quickly versus which ones typically last for years helps you make smarter purchasing decisions and budget appropriately. Some appliances consistently last decades with minimal maintenance, while others seem designed to fail just after warranty expiration. The patterns aren’t random – specific design factors, component quality, and usage intensity create predictable reliability differences across appliance categories. The frustration of appliance failure goes beyond simple inconvenience and replacement cost. When appliances break prematurely, you lose time to repairs or shopping for replacements, deal with the hassle of installation, and often face the environmental impact of disposing of items that should have lasted far longer. Understanding reliability patterns across appliance types helps you set realistic expectations, budget for replacements, and make informed choices about which categories deserve investment in quality versus which ones might not justify premium pricing. Dishwashers: The Reliability Wild Card Dishwashers occupy a middle ground in appliance reliability, with lifespans varying dramatically based on quality, brand, and usage patterns that make them surprisingly unpredictable. Average lifespan expectations for dishwashers typically range from 7-12 years, though many fail earlier while some last significantly longer. This wide variation reflects real differences in build quality across price points and brands. Common failure points include door latches and seals that wear from repeated use, spray arms that clog or break, circulation pumps that fail, and control boards that malfunction. These components experience constant stress during operation, making them vulnerable to premature failure. Hard water accelerates dishwasher problems dramatically by creating mineral buildup that clogs spray arms, damages pumps, and reduces cleaning effectiveness. Homes with hard water see significantly shorter dishwasher lifespans unless they use water softeners or maintenance routines. Budget models typically fail faster than mid-range or premium options because of lower-quality pumps, cheaper door mechanisms, and less robust construction that doesn’t withstand daily use as well. The initial savings often disappear when you need replacement years earlier. Heavy use reduces lifespan more than occasional use. Families running dishwashers daily put far more stress on components than couples using them a few times weekly, creating reliability differences based on household size and cooking frequency. Maintenance significantly affects longevity. Regular filter cleaning, occasional spray arm inspection, and using appropriate detergents extend life, while neglecting maintenance accelerates failure. Refrigerators: Built-In Complexity Creates Problems Modern refrigerators pack increasingly complex features into appliances that run continuously, creating more potential failure points than simpler predecessors that often lasted 20+ years. Average lifespan has decreased as refrigerators gained features. Where basic models from decades past frequently hit 20-25 years, modern refrigerators typically last 10-15 years, with some premium models failing even earlier despite high prices. Ice makers and water dispensers represent the most common failure points in modern refrigerators. These features add mechanical complexity and water system components that frequently malfunction, sometimes multiple times during the refrigerator’s life. Compressor failure ends many refrigerators’ lives since replacement costs approach new appliance prices for all but the most expensive models. Compressors that once reliably ran for decades now sometimes fail within 5-10 years. French door and side-by-side models tend to have more problems than simple top-freezer refrigerators because of additional door mechanisms, more complex ice systems, and greater mechanical complexity overall. Smart features and electronic controls create new failure modes that didn’t exist in mechanically controlled refrigerators. Control boards, touchscreens, and connectivity features add cost and complexity while sometimes reducing rather than improving reliability. Budget refrigerators often use lower-quality compressors and cheaper components that result in shorter lifespans. The initial savings might not justify the earlier replacement and greater repair frequency. Ranges and Ovens: Generally Reliable Workhorses Ranges and ovens, particularly gas models, represent some of the most reliable kitchen appliances when you choose quality construction and avoid unnecessary complexity. Gas ranges consistently outlast electric ranges on average, often hitting 15-20 years with proper care. The simpler mechanical components and lack of complex electrical systems create fewer failure points. Electric ranges typically last 13-17 years, with failures often involving heating elements, control boards, or oven sensors. These electrical components eventually fail but generally provide years of reliable service first. Failure points in ranges include burner ignitors on gas models, heating elements on electric models, oven sensors, control panels, and door mechanisms. Most of these repairs are relatively affordable compared to replacing the entire appliance. Simple mechanical controls last longer than complex digital interfaces in ranges. Basic knobs and switches rarely fail, while touchscreens and elaborate control systems create additional failure modes. Self-cleaning features stress ovens through extreme temperatures that can damage components or warp oven cavities over time. Ranges without self-cleaning or those where the feature is rarely used often last longer. Quality indicators include heavy-gauge metal construction, sealed burners on gas ranges, solid door hinges, and substantial control knobs. These details suggest durability that justifies higher initial costs. Range Hoods: Simple Design Supports Longevity Range hoods represent one of the most reliable appliance categories because of their relatively simple mechanical design with few components that can fail. Average lifespan of 15-20 years is common for quality range hoods that receive basic maintenance. The simple fan and light mechanisms rarely fail when manufactured properly. Motor quality determines much of a range hood’s longevity. Quality motors run quietly and reliably for years, while cheap motors become noisy, vibrate excessively, and fail prematurely. Control switches occasionally fail but repair costs are minimal. Basic mechanical switches last longer than complex touch controls, though both generally provide years of service. Lighting components need replacement occasionally but this represents routine maintenance rather than system failure. LED lights last dramatically longer than older incandescent or halogen bulbs. Filter maintenance affects longevity indirectly by preventing grease buildup that can stress motors and create fire hazards. Regular cleaning extends range hood life while improving performance. Ductwork problems sometimes get blamed on range hoods when inadequate ducting reduces airflow and forces motors to work harder. Proper installation with appropriate ducting protects

What Professional Chefs Actually Have in Their Home Kitchens: The Surprising Truth

You might expect professional chefs to have elaborate home kitchens filled with commercial equipment, exotic gadgets, and every high-end appliance on the market. The reality is surprisingly different. Most chefs who spend 10-14 hours a day in restaurant kitchens want something completely different when they come home. Their home kitchens reveal what really matters for cooking great food versus what’s just marketing hype and unnecessary complexity. Understanding what chefs actually choose for their personal spaces provides valuable insights for anyone planning a kitchen renovation or wondering which upgrades truly matter. The gap between what chefs use professionally and what they keep at home tells you everything you need to know about what’s essential versus what’s just nice to have. The Equipment They Actually Skip Commercial ranges rarely make it into chefs’ home kitchens despite their professional familiarity with high-BTU cooking power. After working with powerful commercial equipment all day, most chefs appreciate residential ranges that heat up their homes less, cost less to operate, and require less maintenance. The extreme heat output that matters during restaurant rush periods provides little benefit when cooking dinner for four. Expensive knife sets stay at the restaurant while chefs bring home just a few essential blades. Despite working with extensive knife collections professionally, most chefs’ home knife blocks contain three to five knives they actually use regularly. The fancy 15-piece sets marketed to home cooks gather dust in chef’s homes just like they do in everyone else’s. Specialized gadgets and single-purpose tools that clutter home kitchens rarely appear in chefs’ personal spaces. They know from professional experience that versatile, well-made basics accomplish more than drawers full of specialized equipment. The garlic press, avocado slicer, and herb scissors that fill home kitchen drawers are notably absent from spaces belonging to people who actually cook for a living. Sous vide machines and molecular gastronomy equipment mostly stay at work. While chefs may use these techniques professionally, most prefer simpler cooking methods at home where speed, simplicity, and relaxation matter more than precision and technique. Stand mixers collect dust in many chef’s homes despite being considered essential by home bakers. Chefs who bake desserts professionally all day rarely want to bake at home, making expensive stand mixers poor investments for their personal kitchens. What They Absolutely Insist On Quality knives represent the one area where chefs spend serious money at home. Not full knife sets, but three or four exceptional knives that they maintain religiously. A great chef’s knife, a paring knife, a serrated bread knife, and maybe a boning knife handle virtually everything they cook at home. Good cutting boards in multiple sizes get more use than any other kitchen tool. Chefs know that proper cutting boards protect knife edges while providing stable, safe work surfaces. They typically keep several boards in different sizes for different tasks, replacing them regularly as they wear. Heavy-bottomed pots and pans matter far more than brand names or complete sets. Chefs invest in a few excellent pieces – usually a large sauté pan, a stockpot, and a couple of saucepans – rather than matching sets full of sizes they’ll never use. Cast iron, stainless steel, and sometimes carbon steel dominate their cookware collections. Proper ventilation ranks high on chefs’ priority lists after breathing restaurant kitchen air all day. They understand the importance of removing cooking smoke, steam, and odors effectively. A quality range hood that actually works matters more to them than granite countertops or fancy backsplashes. Comfortable flooring makes the list because chefs know from painful experience what standing for hours on hard surfaces does to feet, knees, and backs. Cork, cushioned vinyl, or even anti-fatigue mats appear in chefs’ home kitchens far more often than the tile or stone that designers push. The Surprising Simplicity Basic home appliances suffice for most chefs who want reliability over performance specs. Standard residential refrigerators, dishwashers, and ranges work fine for cooking family meals. The sub-zero refrigerators and high-end ranges that look impressive often stay at showrooms rather than coming home with people who know you don’t need them. Simple cooking techniques dominate at home even for people who execute complex dishes professionally. After spending all day on elaborate preparations and presentations, chefs often make pasta, roast chicken, or simple grilled proteins at home. The complexity they bring to work stays there. Takeout appears regularly in chefs’ lives despite their cooking skills. Being too tired to cook after a long restaurant shift is perfectly normal. Many chefs joke about living on cereal and takeout between shifts, saving home cooking for their days off. Minimal prep work happens in chef’s home kitchens compared to restaurants. Professional cooking involves extensive prep before service begins. At home, chefs embrace the convenience of pre-washed lettuce, rotisserie chicken, and other shortcuts that save time and energy. What They Prioritize Instead Good ingredients matter far more than equipment or techniques. Chefs would rather cook simple food with excellent ingredients than complex dishes with mediocre components. Their home cooking focuses on sourcing quality produce, meat, and pantry staples rather than acquiring expensive tools. Proper storage and organization receives more attention than fancy appliances. Chefs understand that well-organized kitchens function better regardless of equipment quality. Clear storage containers, logical pantry organization, and systematic placement of tools make cooking easier than any gadget could. Sharp knives and good maintenance habits trump expensive knife collections. Chefs keep their home knives sharp through regular honing and periodic professional sharpening. A sharp, well-maintained cheap knife outperforms an expensive dull one every time. Adequate counter space wins over additional appliances in chefs’ priority lists. They know from professional experience that having room to work matters more than having every possible tool. Clean, clear workspace beats cluttered counters full of appliances. Natural light and windows rate surprisingly high in chefs’ kitchen preferences. After working in windowless restaurant kitchens, having natural light and views while cooking at home becomes a real luxury that affects cooking enjoyment. The Reality of Chefs’ Cooking Habits at Home Quick, simple