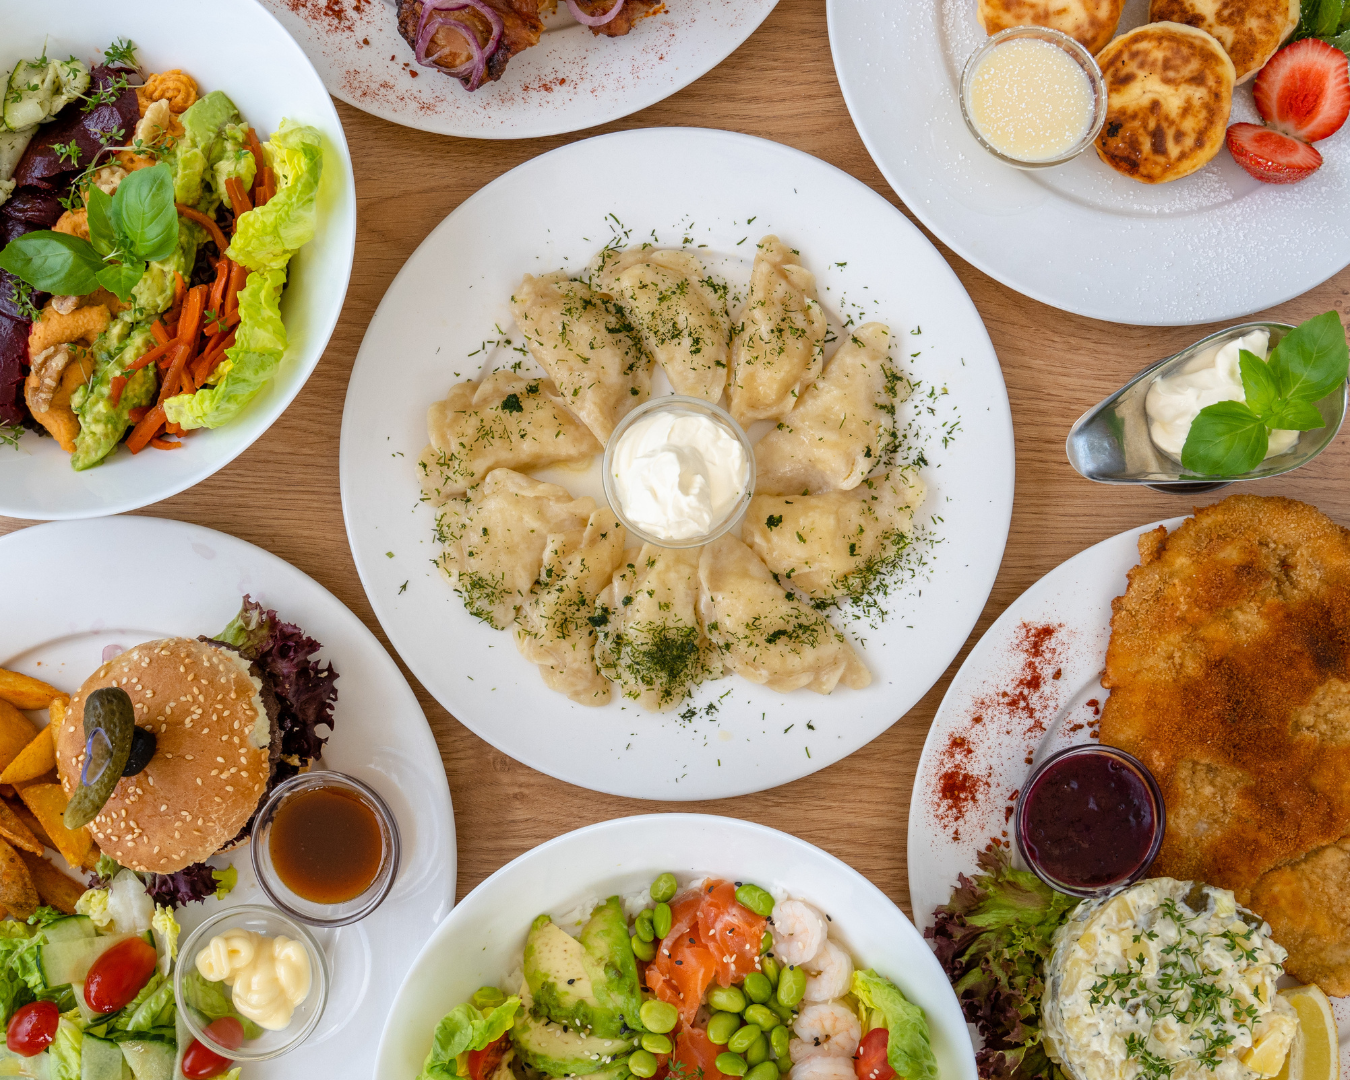
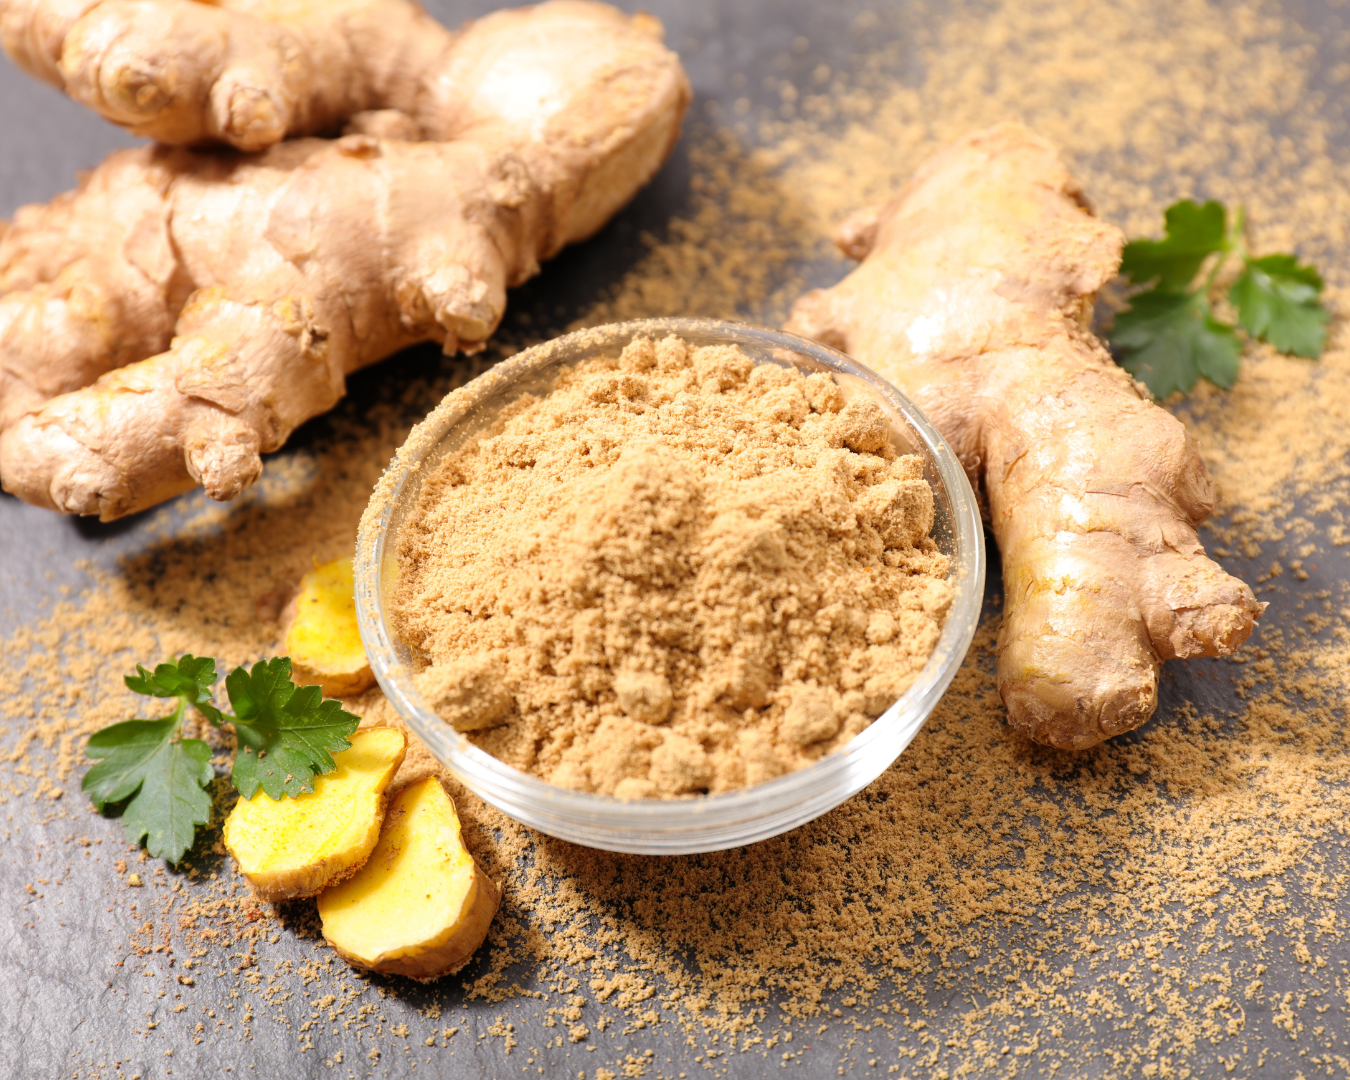
Kitchen

The Pros and Cons to Black Kitchen Appliances

Black stainless steel appliances have been on trend for quite some time now. It has a timeless appeal that holds up well with various different kitchens. Like any other trend, there are pros and cons for this kitchen design choice. Here’s what you should know before you invest in one. Pros Black is a universal color that works well with many different styles. It’s nearly trend-proof as it can be the prominent statement color or a background color. Black matches with all other shades and works especially well with warm and cool neutrals. It fits with gray, brown, white beige and navy. A black appliance is nearly smudge-proof thanks to its color. A matte sheen can hide most fingerprints and even smoke damage. A metallic-finish stainless steel requires special cleaners. Since black appliances are coated, they can be cleaned with warm water and a soft rag or non-abrasive cleaners. Cons Not all appliances are the same black. Different manufactures use different shades or sheens which can cause a clash in a kitchen. Two differing appliance shades can be more noticeable than a completely different color. A stainless steel appliance is a solid surface, meaning a scratch will reveal the same material underneath. Since black stainless steel is coated, a scratch will show the material underneath. This will be very obvious since the surface underneath will be a shiny steel. A lighter colored smudge or mark will easily show against the dark surface, meaning regular maintenance is necessary. Source: the Spruce

How to Clean a French Press

The French press is a popular choice for many coffee drinkers to perfect their cup of coffee. Brewing time can be adjusted to suit a person’s needs, while also eliminating paper filters, providing a more robust flavor. A French press places coffee grounds in the bottom of the glass and allows them to seep in hot water. Once it’s been brewed, the plunger is slowly pressed down and the metal filter traps the grounds. Just like drip coffee makers, a French press should be cleaned regularly. At the least, after every use to remove grounds and then a deeper clean once a week. Remaining coffee oils can turn your next cup rancid. Here’s how to clean yours. What You’ll Need: Sink or bucket Automatic dishwasher Microfiber cloths Wooden or plastic spatula Dishwashing liquid with a degreaser Distilled white vinegar Citric acid powder Hydrogen peroxide Dishwasher detergent Directions: Empty the Coffee Grounds: Most of the coffee grounds will be concentrated at the bottom of the carafe. Use a wooden or plastic spatula to loosen the grounds so they can be emptied easily. Do not use a metal utensil as that can leave scratches. Rinse Components With Hot Water: Rinse out the few remaining coffee grounds in the press with hot water. Leaving the filter and plunger connected, rinse them well with hot water. Add Dishwashing Liquid: Once the grounds are rinsed away, add a couple of drops of dishwashing liquid, preferably a brand that includes a degreaser. Add Hot Water: Fill the carafe half-full with hot water. Put the plunger/filter into the carafe and gently plunge it up and down about three times to help remove oils and residue. Empty and Rinse Well: Pour the soapy water down the sink and rinse each component well with hot water. Dry the French Press: Separate the components and allow them air-dry in a dish drainer. Or, use a lint-free microfiber cloth to dry each piece. How to Deep Clean: Empty Coffee Grounds and Rinse Well: Dispose of the coffee grounds and rinse the press well with hot water to remove all the loose grounds. Disassemble the Components: Unscrew the filter from the plunger. You may need to rinse the filter again to remove any remaining coffee grounds. Prepare a Cleaning Solution: In a sink, large bowl, or bucket, prepare one of these mixtures: Mix two cups of hot water, two teaspoons of dishwashing liquid, two teaspoons of citric acid powder, and two teaspoons of hydrogen peroxide. Mix one cup of distilled white vinegar and three cups of hot water. Soak the Filter and Plunger: Completely submerge the filter and plunger in one of the cleaning solutions and allow them to soak for at least four hours or overnight. Wash the Carafe and Lid: Add a few drops of dishwashing liquid and fill the carafe about half-full with hot water. Use a microfiber cloth to thoroughly wash the interior of the carafe.If you see white spots or deposits on the interior of the carafe, fill the carafe with three parts hot water and one part distilled white vinegar and allow the mixture to sit in the carafe overnight. Wash the lid in a bit of soapy water. Rinse Well and Dry: Once all of the components have completed the required soaking time or cleaning, rinse each one well with hot water. Allow the pieces to air-dry in a dish drainer or dry with a microfiber cloth. Source: the Spruce

Tips for Aluminum Foil

Aluminum foil has some common misconceptions about it. Firstly, it’s not actually made of tin, even though it’s frequently referenced as tinfoil. Most foil was made of aluminum at its debut, a lighter and less expensive material. Here’s what you should know about aluminum foil. Foil has a matte and shiny side, which is purely aesthetic from production. There’s one exception for non-stick foil, which is better for cheesy and doughy foods. Check the box to see which side has the coating. Aluminum foil is recyclable just like aluminum cans. If your local center accepts foil, be sure to rinse off any food and keep it flat, not crumpled in a ball. You can use foil to sharpen scissors. Fold a piece of foil in half twice to make four layers. Then snip the foil with a pair of scissors a few times to clean and hone the blades. Most of the time, boxes of foil have perforated tabs on both ends. You can push these toward the center to hold the roll in place as you rip off a piece. Heavy-duty foil is 50 percent thicker than standard foil. It’s less likely to tear or break, making it worth the higher price tag. Source: HGTV

Why You Shouldn’t Always Refrigerate Champagne

If you’ve just bought yourself a bottle of champagne and decide to leave it in the fridge before you enjoy it, you may actually be ruining it. You should only be sticking champagne or sparkling wine in a fridge if you plan on enjoying the bottle within three to four days. But if you won’t be drinking it for more than a few days, you’re better off skipping the refrigerator. If the bottle sits in a fridge for weeks, the cork can dry out due to the lack of humidity. When the cork dries out, it’ll loosen up and release the seal against the bottle. The champagne will oxidize faster, changing it’s aroma. Aroma refers to the tiny odorous compounds that can be smelled when sniffing a bottle. The aroma and taste work together to create a wine’s flavor, any changes here will also affect the impression of it. You’re better off storing bottles of champagne in a cool, dark place with a consistent temperature, such as a wine cellar. If you plan on enjoying the bottle, simply place it in a bucket filled with ice 15 to 20 minutes beforehand. Source: House Beautiful

Cleaning Your Silver

There’s no denying your silver jewelry, dishes and cutlery will naturally tarnish over time. No matter how well you take care of your silver, it’ll always require upkeep to maintain its original shine. Polishing is abrasive, so it’s best to limit the cleaning to a minimum, anywhere from two to six times a year. If you have a silver polish, you’ll start by putting a small amount on a clean cloth and dampen if necessary. Rub and polish in an up-and-down motion, not circular to avoid fine scratches. Turn the cloth frequently as you don’t want to deposit the tarnish back onto the item. Rinse in warm water and buff with a clean, dry cloth. If you’re out of the silver polish you can also try these homemade cleaners If the silver is dull and not yet discolored, mix a few drops of mild dish soap with warm water and dip in a soft cloth. Rub then rinse in cool water and buff until dry. For heavily tarnished silver, mix a paste of three parts baking soda to one part water. Wet the silver and apply the cleaner with a soft, lint-free cloth. Work it into the smaller crevices, turning the cloth as it gets gray. Rinse and buff dry. Source: Good Housekeeping

Kitchen Renovation Ideas That Pay Off

Thinking of renovating your kitchen in the near future? You should also consider the possible positive contribution this could have on your home’s value. Not every redesign or renovation is a profitable one. To maximize the financial return, keep to the basics and avoid trends. A high-cost kitchen remodel doesn’t always automatically translate to high returns. Here are a few of the projects that pay off. Kitchen Paint Picking the perfect color makes for a lively, pleasant space. It’s one project that is relatively inexpensive with a great return value. Keep it timeless with a traditional all-white kitchen color scheme. You can also go in the opposite direction with a chic black kitchen. A Feng shui-inspired kitchen keeps colors cool, relaxed and neutral. Upgrade Cabinetry The last thing you want your cabinets to be is dated. To attract the maximum value from your kitchen, you should put cabinets at the top of the list. You don’t necessarily need to tear everything out and buy new cabinetry, rather update it with a fresh new paint color. There are also several low-cost projects such as handcrafted wood cabinet pulls that can drive up their value. Cabinet refacing is also great to visually alter the prominent areas of doors and drawer fronts. Add a New Backsplash A kitchen’s backsplash is an ideal investment, since the investment is low while the visual impact is high. Most backsplashes are DIY projects and with a glass or metal tile, you’ll be sure to attract attention. There are less expensive alternatives such as wallpaper, tile decals, or laminate flooring planks that can be completed in a day or two. Hang New Pendant Lights Lighting is often ignored, but can bring two benefits in one. It helps to illuminate your kitchen while also bringing in a new centerpiece to the design. Pendant lighting is bright and center, and can add much needed personality to the space. If you’re going with pendant lighting you should always go big and bold. Be sure to scale these to fit your space to not overwhelm the rest of your kitchen. Source: the Spruce

How to Grow Parsley

Parsley is a versatile herb that can be incorporated into many different dishes and cooking styles. It’s great to tie into a variety of dishes to enhance flavor such as a vegetable omelet, tabbouleh salad or a chimichurri sauce. Parsley is also packed with nutrients such as vitamin C. Planting Parsley Like other herbs, parsley can perform well in a container. If you plant it indoors, keep the pot near a warm and sunny window. If the parsley is outside in a garden, it’s best to plant it around rose bushes. How to Cultivate Soil: Plant parsley in moist, well-turned soil. Incorporate rich compost early in the growing season, just as you’re planting the parsley. Sun: The parsley does well in both full-sun and part-sun environments. If the parsley is indoors, be sure to grow it near a sunny window. Water: Parsley is pretty adaptable and is relatively drought-tolerant. Try to grow it in moist soil for the best results. Spacing: Plant parsley 9” apart whether it’s a seed or a small plant. Companion Planting: Plant it next to tomatoes, corn and asparagus. If you plant parsley next to rose, it can enhance the health and aroma of your roses. How to Harvest Parsley is a biennial plant, meaning you’ll want to harvest parsley for its leaves the first year. Choose stalks furthest out from the plant’s center. You’ll want to leave the inner stalks and leaves so it can keep growing. The second year, the leaves will be less flavor-intense. You can use them, or let the parsley bloom. In the fall of the second year, harvest the parsley’s root. It’s actually the most flavorful portion of the plant. Try shaving the root over salads for a crunch and intense flavor. Source: the Kitchn

How to Clean a Coffee Grinder

Most coffee enthusiasts will agree that the perfect cup starts with freshly grounded roasted coffee beans. Grinding the beans at home will provide the most flavor, however it will leave behind oils and grounds that need to be cleaned. An electric grinder will often come in one of two ways, with a blade or flat serrated disks known as a burr grinder. Whatever the type may be, it should be cleaned out to prevent any oil build-up which can spoil the flavor of your coffee. If you’re using your grinder every day, it’s best to clean out your grinder weekly. What You’ll Need: 1 Microfiber towel 1 Sink or large bowl 1 Stiff-bristled bottle brush 1 Non-abrasive sponge 1/4 cup Uncooked rice 1 Dishwashing liquid 1 Coffee grinder cleaning tablets (optional) How to Clean a Blade Coffee Grinder: Pour one-fourth cup of dry, uncooked rice or the recommended amount of the grinder cleaning tablets into the hopper of the blade grinder. Turn on the grinder and run it until all of the rice or tablets are reduced to a fine powder. Once the rice is pulverized, turn off the grinder and unplug it from the wall outlet. Dump the pulverized rice into a trash can. Give the grinder a few taps on the side of the can to help loosen any rice powder that is trapped in the hopper. Dampen a lint-free microfiber towel and wipe down the interior of the hopper. Take extra care around the blades. Dampen the towel to remove any fingerprints or grime from the exterior of the grinder. How to Clean a Burr Coffee Grinder: Since most burr grinders have a large hopper to store coffee beans, cleaning should be done when the hopper is empty. Remove the hopper and wash it, the lid, and any removable sealing gaskets by hand in a sink of hot, soapy water. Rinse well with hot water and dry with a microfiber cloth. If possible, turn on the grinder and let it run for a few seconds to pulverize any remaining bits of beans caught in the burr blades. Immediately unplug the grinder. Following the owner’s manual, remove any parts (except the burr) that come in contact with the coffee beans like the bin that catches the coffee grounds. Hand wash the components in a sink of hot, soapy water using a non-abrasive sponge, rinse with hot water, and dry with a microfiber towel. Remove the flat burr disks or the conical burr. This may require a screwdriver. Use a stiff bottle brush to loosen and remove the coffee grounds that are stuck to the burr surfaces. Use a dry microfiber cloth to wipe down the burrs and absorb any oils. Once every component is clean and thoroughly dry, reassemble the coffee grinder and it is ready to use. Source: The Spruce

Amateur Painting Mistakes to Fix

A paint job brings a spark back to a space and is one of the most affordable DIY-friendly projects. Painting is relatively simple, but without the proper patience and precision you could be left with a botched job. Here’s a breakdown of all the common amateur painter mistakes. Inconsistent Coverage. Primer can alleviate many headaches down the line. It will ensure the paint has a good foundation. A primer will help the paint adhere to the surface better and improve durability. Without it, you can be left with a splotchy or streaky wall. If you need to fix a splotchy wall, let it completely dry overnight and apply another coat of paint afterwards. Paint Splatters. Even if you perfect a paint job, protecting your space is imperative. A professional will cover anything in a room to prevent accidental splatters. This includes dropping cloths on the floor, plastic over furniture and taping off trim. If paint drips, a damp cloth usually does the trick to pull the paint off wood floors. If it’s already dried you can try to gentry scrape it up, then use a damp cloth to wipe any excess. Solvents are available for really stubborn spots. Be sure to check the label to ensure it won’t damage the floor. Sloppy Edges. If you end up with wavering cut lines on a paint trim, chances are you didn’t use painter’s tape. Apply painter’s tape on areas you don’t want the paint to go. This will minimize mess and provide crisp paint lines. Removing the tape is just as important. Remove it within a few hours or you increase your chances of pulling away sections of dried paint. Incorrect Finishes. A paint finish is almost as important as the color itself. Each sheen is suited for different situations and rooms. Eggshell paints offer a soft look with minimal glossiness that is a nice middle ground for durability and luster. A flat paint on the other hand, offers virtually no gloss and is great for hiding surface imperfections underneath. You can use this type of sheen for an old door. Cracking Paint. An issue most common in kitchens and bathrooms, this issue occurs due to there being something on the surface such as grease or cleaning residue. Pre-paint cleaners can help prevent this from happening. You can also prepare walls by lighting sanding prior to priming and painting. Planning a kitchen renovation soon? Shop our extensive catalog of kitchen appliances for your next upgrade here. Source: the Kitchn

Indoor Plants 101

If you’re looking to give your interior space an instant update, look no further than a houseplant. They’ve been gaining popularity over the past few years and are great in kitchens, bathrooms or living rooms. Research shows that being surrounded by plants offers benefits including improved mental health, better sleep and boosting feelings of connection. If you’re worried about losing a plant because the one you bought last year died in ten minutes, don’t worry! Follow this guide to find everything you should know before buying. Plants come in many different types and luckily there’s plenty for beginners. Looking for a low maintenance and striking plant? Try the snake plant. If you’re looking for a splashy plant that doesn’t require a lot, go with the monstera deliciosa. Always read the plant tag for care tips so you’ll be better prepared for the maintenance. How to Purchase You may be asking yourself, where should I be purchasing plants, in person or online? Both are great options. An in person experience with a nursery gives you a physical and tangible feel for the available plants. But there are also many reliable online retailers. They do a great job at packaging plants for shipment and offering unique and unusual varieties. If you’re browsing in person look for plants that appear healthy, no droopiness, yellow or brown leaves, and no sticky or cottony masses. These can be signs of pests. If you know a specific plant you want, be sure to look for it by its botanical name to ensure you get just what you’re looking for. Pets Unfortunately, many plants can make your pets sick. An English Ivy can cause your pet aches and vomiting, while lilies can be deadly, especially to cats. Always check the ASPCA toxic plants list to learn which plants you should keep away from your pets. Remember, any plant if ingested in large enough quantities can cause gastrointestinal upset. Keep an eye on your pets to see if they like to nibble on plants and always call your vet as soon as possible if you suspect they may have eaten something potentially toxic. Maintenance Besides giving it the right kind of light, watering correctly is the next most important thing for your houseplants. Overwatering is the most common reason for houseplants dying. Use a finger and press into the soil to feel for dampness. If the soil clings it’s probably wet enough and you shouldn’t water it again. If the soil pulls away from the sides of the pot or the plant is wilted, it’s time to water. It’ll take time to find the right balance but try to stay closer to dry to be safe. Insufficient light will cause plants to drop leaves, stretch toward the light or die altogether. Even if you want a specific plant, if there’s not enough light for it you’d be better off picking a plant that tolerates low light. Analyze your space to see how much light a specific area gets. You can also use your phone’s compass if you’re unsure of the direction. In general south-facing windows get the most intense light, while east-facing windows receive bright morning light and indirect light for the rest of the day. West-facing windows will get the setting sun so bright light plants will do well here. North windows get the least amount of light so they’re best for low light plants. Source: House Beautiful