Year: 2021

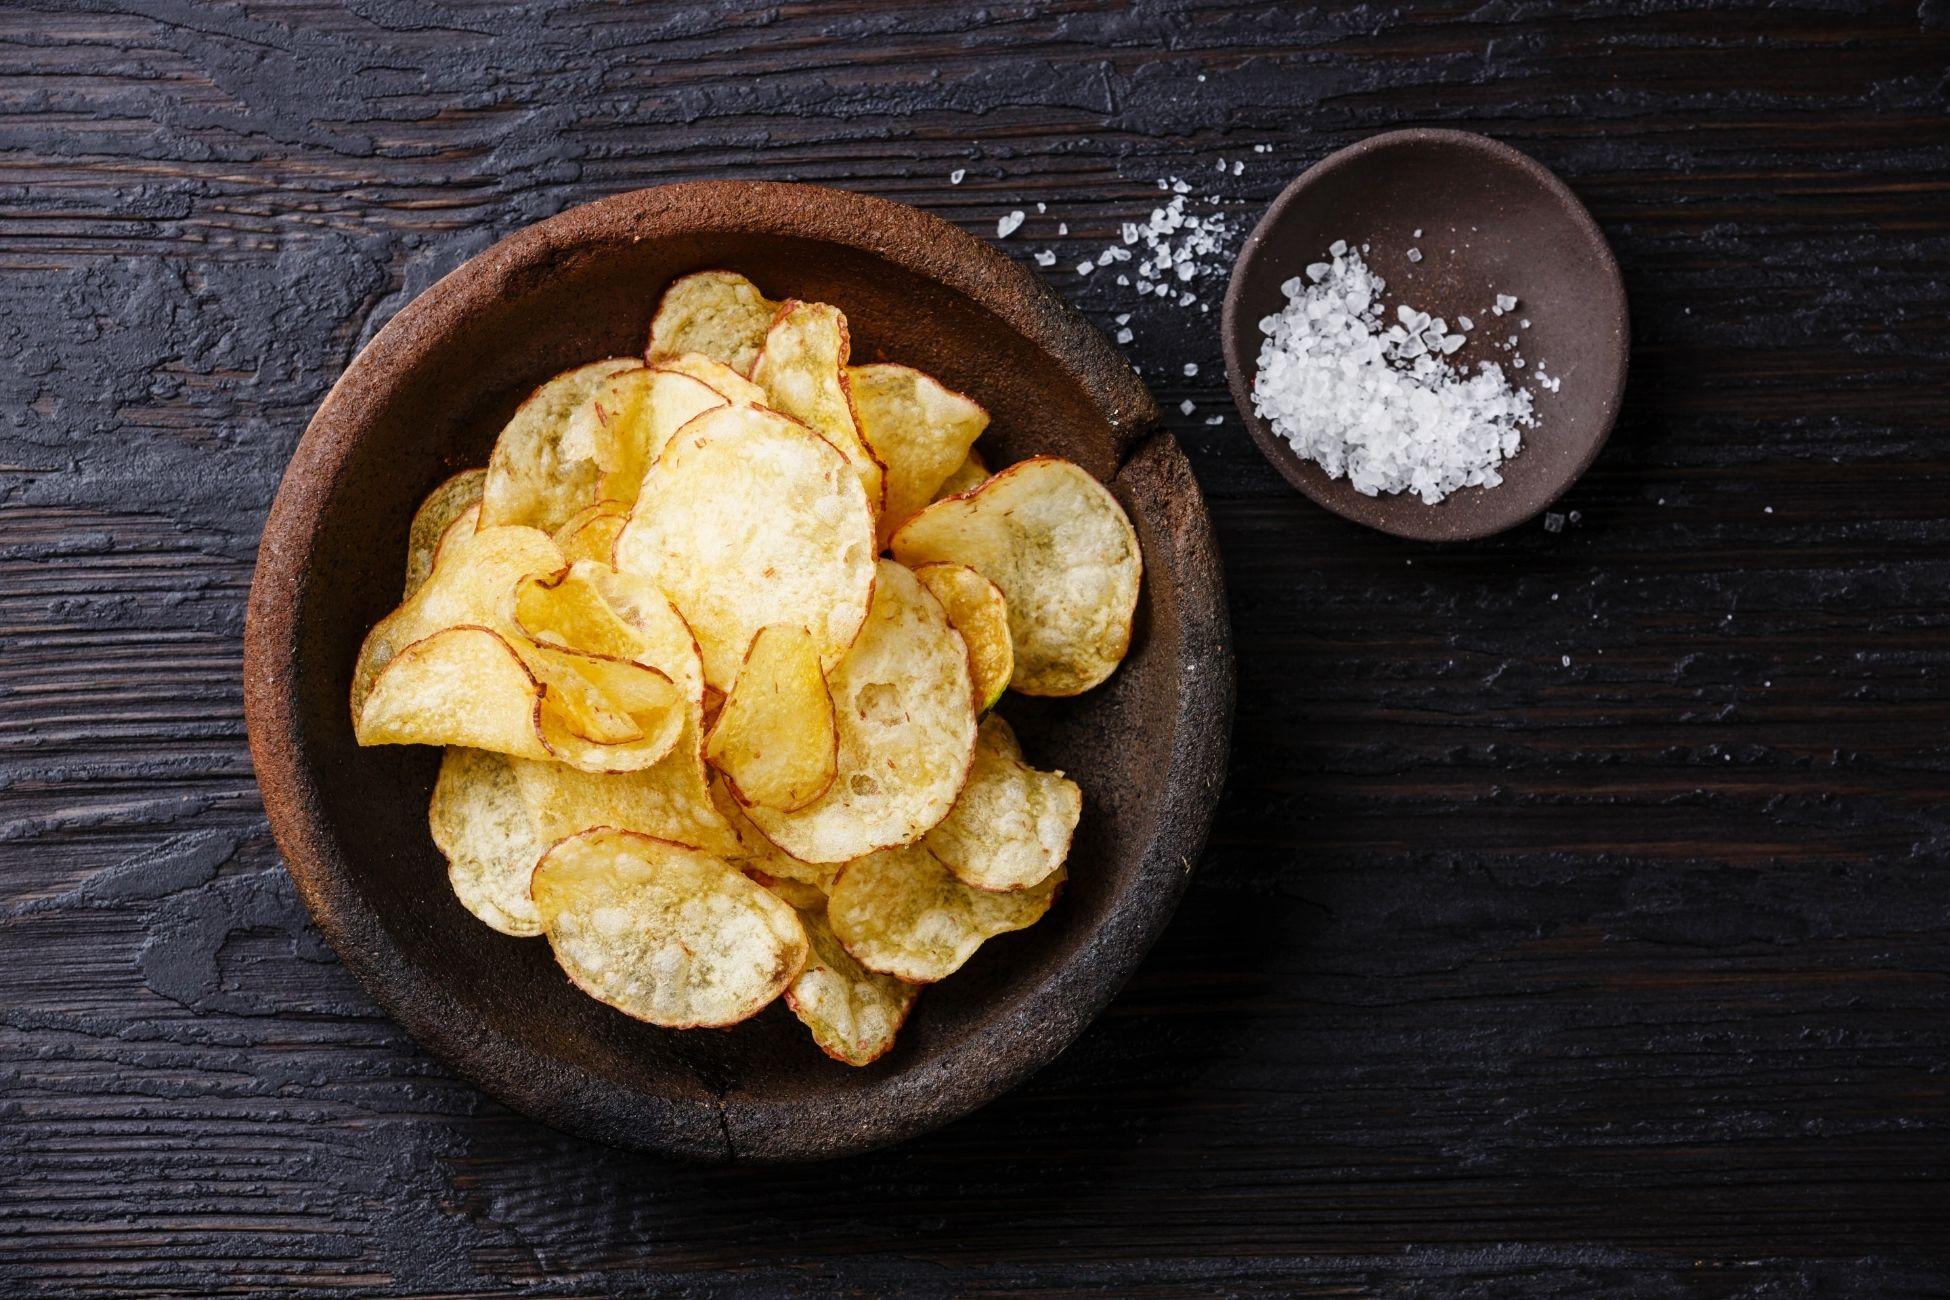
Homemade Potato Chips Recipe

It’s easy to fry your own potato chips at home! You can experiment with flavor combinations to suit your taste much better than store bought chips would. Utilize a mandoline to slice the potatoes into perfectly thin, even slices. It’ll also help to ensure the chips all cook at the same rate. Be sure to keep the chips crispy by sealing them in an airtight container, which locks out any outside moisture. Yield: Serves 6Prep time: 15 minutesCook time: 20 minutes Ingredients: 3 medium russet potatoes (1 to 2 pounds total) 1 to 2 quarts vegetable oil, for deep-frying Fine salt Directions: Scrub 3 russet potatoes. Use a mandoline or sharp knife to slice the potatoes crosswise into 1/16-inch-thick rounds. Place in a large bowl and add several ice cubes and water to cover. Give the potatoes a quick stir to separate any slices that are stuck together. Refrigerate for at least 1 hour and up to 2 hours. Fill a Dutch oven, deep fryer, or other heavy-bottomed large pot with 2 to 3 inches vegetable oil. Heat over medium heat until 325°F. Meanwhile, dry the potato slices. Drain the potatoes and return to the bowl. Add enough cold water to cover, then stir to release any lingering starch. Drain again. Working in batches, place the potato slices in a single layer on a clean kitchen towel. Roll up the slices in the towel to dry them, then transfer to a clean, dry bowl. Carefully add about a third of the slices to the oil. Fry, stirring gently and often with a spider skimmer or slotted spoon, until golden-brown, about 5 minutes. Meanwhile, line a rimmed baking sheet with paper towels. Transfer the chips with a spider or slotted spoon to the prepared baking sheet. Sprinkle with a few pinches of fine salt. Gently toss the chips so the paper towel can absorb the excess oil, then spread out into a single layer to cool to room temperature. The chips will be crispy but will crisp up even more as they cool. Repeat frying the remaining potato slices in two more batches, keeping the oil at a temperature of 325°F. Source: the Kitchn

Air Fryer Apple Fries Recipe

Who said healthier snacks had to be boring? Apple fries are great for their sweet delicious flavor and quick preparation. These fries can be cooked in just about 3 minutes! Satisfy your sweet tooth with cinnamon, sugar and other common pantry ingredients. Ingredients: Apple Corn Starch Cinnamon Brown Sugar Powdered Sugar Butter Olive Oil Non-stick cooking spray Directions: Peel and chop apple into french fry shapes Mix fries with ⅛ cup of corn starch, cinnamon, butter and olive oil Spray air fryer pan with non-stick spray and load fries Air fry at 400°F for 3 minutes In another bowl mix 2 tbsp. cinnamon, ⅓ cup brown sugar and ⅛ cup powdered sugar Mix fries with mix and serve

Teriyaki Chicken Lettuce Wraps

For the weekday nights when you want something to come together quickly with little work required, this lettuce wrap recipe is your answer. Teriyaki chicken lettuce wraps consist of ground chicken, veggies and of course teriyaki sauce. Feel free to experiment with whatever you have on hand. Butter lettuce is called for in this recipe, but any kind of lettuce works. These are great as a party appetizer, just serve the chicken filling in one bowl, and the lettuce and extra teriyaki sauce on a platter nearby. Prep time: 10 minsCook time: 25 minsTotal time: 35 minsServings: 4 servings Ingredients: For the teriyaki sauce: 1/4 cup (60 ml) low-sodium soy sauce (or tamari, for gluten-free) 3 tablespoons water, divided 2 tablespoons mirin 2 tablespoons honey 2 medium cloves garlic, minced 1 teaspoon grated fresh ginger 1 teaspoon cornstarch For the chicken filling: 2 tablespoon olive oil, divided 1/2 cup diced red onions (1/4 of a large red onion, or 1/3 of a small one) 1 pound (450 g) ground chicken Kosher salt 1 medium zucchini, diced 1 medium red bell pepper, seeded and diced 1 scallion, thinly sliced 1/2 teaspoon sesame oil For serving: 1 head butter lettuce, leaves separated and rinsed Roasted peanuts, chopped Chopped cilantro Thinly sliced scallions Directions: Prepare the teriyaki sauce: Combine the soy sauce, 2 tablespoons of the water, mirin, honey, minced garlic, and grated ginger in a saucepan. Bring everything to boil over medium heat.Dissolve the cornstarch with the remaining tablespoon of water and add to the teriyaki sauce. Reduce heat to medium-low, and let the sauce simmer until it starts to thicken, about 30 seconds to a minute.Turn off the heat and allow the sauce to cool. The sauce will thicken a little more as it cools. You should have about 1/2 to 3/4 cup of sauce. Cook the chicken: Heat 1 tablespoon of olive oil in a sauté pan over high heat. Add half of the diced red onions and cook until they start to soften, about 2 minutes. Add ground chicken and a pinch of kosher salt. Using your spatula, break up chicken into smaller pieces. Stir occasionally until the chicken is cooked through, 5 to 7 minutes. Transfer the chicken to a clean plate. Cook the vegetables: Quickly wipe down the pan and heat another tablespoon of olive oil over medium heat. Add the remaining diced red onions and cook until they soften, about 2 minutes. Add the zucchini and red pepper, and cook, stirring occasionally, until the peppers start to soften, 3 to 4 minutes. Stir the sliced scallions and cooked chicken into the pan with the cooked vegetables. Add the teriyaki sauce: Drizzle 6 tablespoons of the prepared teriyaki sauce and 1/2 teaspoon sesame oil into the pan and stir. Save the rest of the teriyaki sauce for drizzling over wraps. Turn off heat, taste, and adjust seasonings if needed. To serve: Place several spoonfuls of filling onto a lettuce leaf. Top with chopped peanuts, cilantro, scallions, and an extra drizzle of teriyaki sauce, if desired. Leftover teriyaki sauce will keep for about a week in the refrigerator. Source: Simply Recipes

The Dirtiest Places in Your Kitchen

Kitchens have obvious messes like dishes or sticky floors, but there are many places you may be forgetting to clean. Places of high traffic such as counters, shelves and handles can be hotspots that should be regularly maintained. Here’s a few places that are often the dirtiest in a kitchen, and how you can keep them clean. Knobs, Handles and Touch Pads. Every appliance in your kitchen will have some sort of control panel or handle that is touched every time it’s used. These places are used after raw food is prepared or before hands are washed, leaving behind bacteria. Bacteria can lead to digestive upset and make your family sick. Use disinfectant wipes or spray-on disinfectant with a clean cloth or paper towel on pulls, handles or controls panels after food preparation and daily use. Sink. Even though sinks have water running through, there are likely microbes on the surface or around crevices where the sink joins the counter. The kitchen sink should be disinfected after meal preparation, washing dishes or at least once per day. Don’t forget to clean the handles and counters near the sink where splatters can land. Refrigerator. Harmful bacteria can still grow inside cold temperatures. Fruits and vegetables will stay fresh longer if they’re not washed before storing in your refrigerator. These are often covered in bacteria or pesticides. Even though they’re washed before food preparation, the crisper drawers in your fridge have bacteria left behind. Raw meats and poultry can leak fluids which accumulate in drawers and along shelf edges. Remove drawers and shelves monthly to wash with a mild detergent and hot or warm water. Wipe away any spills with a disinfecting wipe between thorough cleanings. Salt and Pepper Shakers. Often overlooked, salt and pepper shakes are used in various stages of food preparation. Give them a careful wipe with a disinfecting wipe after every meal and thoroughly each week. Source: the Spruce

Flourless Soy Sauce Brownies Recipe

Brownies are a reliable source of comfort, but it can be tinkered with further to produce a new and different kind of indulgence. This recipe is gluten-free and includes an unexpected ingredient, soy sauce. The soy sauce might seem unusual but makes sense since chocolate tastes better with a pinch of salt. It brings out the natural sweetness of the chocolate and masks any bitterness. Prepare these brownies for a deep, caramel flavor that accentuates the intensity of chocolate. You can leave these in the fridge overnight to allow them to firm up a bit before cutting. Prep time: 15 minsCook time: 25 minsChilling time: 24 hrsTotal time: 24 hrs 40 minsServings: 12 to 16 servingsYield: 12 to 16 brownies Ingredients: 1 stick (8 tablespoons) unsalted butter 1 cup semisweet or dark chocolate bits 1 cup almond meal 3 tablespoons cocoa powder 1/2 teaspoon baking powder 3 large eggs 1 cup brown sugar 2 teaspoons vanilla extract 3 to 4 teaspoons tamari or gluten-free soy sauce Directions: Preheat the oven and prep baking pan: Preheat the oven to 350°F. Grease and line a 9-inch square baking pan. Melt the butter and chocolate over a double boiler: Place the butter and chocolate in a large glass bowl (one that is completely dry and clean) and set over a saucepan of simmering water (do not let the base of the bowl touch the water).Leave until melted, then whisk until smooth. Remove from the heat and allow to cool for 5 minutes. Combine the dry ingredients: In another bowl, whisk together the almond meal, cocoa powder and baking powder. Combine the wet ingredients: In a third bowl, whisk together the eggs, brown sugar, vanilla extract and soy sauce. Combine the egg and chocolate and fold in dry ingredients: Slowly whisk the egg mixture into the cooled chocolate mixture until well combined. Fold in the dry ingredients. Add batter into prepared pan, bake: Pour the batter into the prepared pan and bake for 25 minutes. Remove and allow to cool completely in the pan (leave it in the fridge overnight to make it easier to handle). Cut, serve or store: Cut into 12–16 pieces (depending on how big you like them). Store in an airtight container in the fridge for up to 1 week. Source: Simply Recipes

How to Prepare a Cheese Board

While there is no rule book on how to put a cheese board together, there are a few guidelines you can follow on how to prepare an interesting and flavorful selection of cheeses for your next course. Utilize this as an elegant appetizer or a cleansing palate in between courses. The choice is yours on how sophisticated you’d like the plate to be. Selecting Cheeses Any cheese plate should have diversity in terms of style, selection, appearance and flavor. Some prefer to differentiate cheeses by hardness and texture. For example, offering a blue, a hard cheese and a soft cheese. The hardness or softness is determined by the amount of moisture present. A hard cheese is generally more gritty, sharp and salty like a Pecorino. A semi-hard cheese will be somewhat smooth with small granular texture such as classic cheddar and gouda. A semi-soft cheese is higher in moisture which keeps them soft and pliable such as mozzarella. Finally, a soft cheese is anything spreadable like brie. These cheeses are practically paste and often sold in cups. Storing Cheese Limit storing cheese as much as possible. Purchase them at their peak ripeness and eat them the day you buy them. Since most of us don’t have access to cheese caves with optimal conditions, store cheese in a vegetable drawer in a fridge. There is typically more moisture there. Wrap hard and semi-hard cheese in wax paper or plastic wrap. Be careful not to store these for long periods of time as the plastic can lead to spoilage. A semi-soft cheese can be wrapped in butcher or wax paper, leaving the rind open so the cheese can breathe. You may need to store blue cheese or other “smelly” cheese in a separate container as the mold can spread to other cheeses. Serving the Cheese Set the cheese out early to allow it to come to room temperature. Harder cheese should be pre-cut beforehand to make it easier to enjoy. Add a few compliments to the plate such as flatbreads, toasts, crackers or rye. You can also add dried and fresh fruits like apricots, plums, pears and dates. Nuts are also popular options for their meaty and woody flavors to contrast the aromas of hard and blue cheeses. There is no standard for how a cheese plate should be developed. Let it reflect your tastes and the event its accompanying. Source: Simply Recipes

Air Fryer Bread Pudding Recipe

Try something new for tonight’s dessert! Bread pudding is surprisingly easy and quick to make in an air fryer. Add in the chocolate chips and cinnamon to elevate the sweetness in this delicious snack! You can refrigerate the bread pudding to enjoy at any time of the day. Ingredients: Bread Chocolate Chips 1 Eggs ⅓ Cup of Milk or Heavy Cream ¼ Tsp Vanilla 1 Tbsp. Sugar Cinnamon (optional) Non-stick cooking spray Directions: Coat air fryer pan with non-stick cooking spray Add bread pieces and chocolate chips For every 3 bread slices mix egg, milk or heavy cream, vanilla, sugar and cinnamon Add mix to bread and let soak for 5 minutes Air fry at 350°F for 10-12 minutes

Kitchen Items That Could Be Making You Sick

The kitchen is often called the heart of the home. However, there are dangers lurking that can make you sick. Some of these can lead to digestive upset, but others can be more lethal to those with compromised immune systems. Take a look around your kitchen to see if any of these items could be the culprit. Food Handling. How you handle food in the kitchen is a crucial health hazard. If handled incorrectly bacteria can multiply rapidly, leading to foodborne illnesses. Foods should be brought to the proper temperature needed to kill bacteria. Leftovers should be stored at the correct temperatures and never left on the counter for extended periods of time. All fresh produce should be washed before eating or used in recipes. Cross contamination between raw and cooked foods can be as simple as using the same plate. It’s best to keep these separated as much as possible, and never wash raw meat in the sink. Wash your hands frequently when moving through various cooking steps. Kitchen Towels. Fabric towels are essential in a kitchen and a great way to cut back on the use of paper towels. However, the danger comes if you are not washing them frequently leading to cross-contamination. Use separate towels for cleaning, food preparation and hand washing. Wash these towels in hot water after use. Cutting Boards. A cutting board makes food preparation easier and protects kitchen countertops. Using separate cutting boards for meats, fruits and vegetables is a necessity, otherwise cross-contamination can lead to severe health consequences. Wooden cutting boards should be washed after every use with hot, soapy water. Never place these in a dishwasher because they can be damaged. Sponges. Due to their porous structure, sponges are great at absorbing spills but also providing a perfect environment for bacteria to thrive. Sponges should be washed in hot, soap water and placed in a spot with proper air circulation to dry. If a sponge has a peculiar smell after cleaning, discard it instead. These odors can be signs of bacterial growth. Source: the Spruce

Broccoli Cheddar Bites Recipe

If you’re looking to incorporate broccoli into a meal, you can never go wrong pairing it with cheddar cheese. Broccoli cheddar bites are great for snacks at brunch or a kid-friendly lunch or party. This recipe combines broccoli, cheddar, torn bread, onions, eggs and mayo into mini muffins until toasty brown. Easily make these ahead and chill or freeze, then reheat when needed. Prep time: 15 minsCook time: 30 minsTotal time: 45 minsServings: 24 bites Ingredients: 1 large bunch of broccoli florets 2 eggs, lightly beaten 1/2 cup, packed, torn fresh bread (no crust) 1/4 cup grated onion 1/4 cup mayonnaise 1 cup (4 ounces, 114 g), packed, grated sharp cheddar cheese 1 1/2 teaspoons lemon zest 1/2 teaspoon kosher salt 1/4 teaspoon freshly ground black pepper Directions: Steam and chop the broccoli: Place 1 inch of water in a pot with a steamer basket. Bring to a boil. Add the broccoli florets. Steam the broccoli florets for 5 minutes, until just tender. Rinse with cold water to stop the cooking.Finely chop the steamed broccoli florets. You should have 2 to 2 1/2 cups. Make filling: Place the beaten eggs and the torn bread in a large bowl. Mix until the bread is completely moistened.Add the grated onion, mayonnaise, cheese, lemon zest, salt and pepper. Stir in the minced broccoli. Distribute broccoli mixture in mini muffin pan wells: Preheat oven to 350°F. Coat the wells of 2 mini muffin pans (1 dozen wells each) with olive oil (so the bites don’t stick). Distribute the broccoli mixture in the muffin wells. Bake: Bake at 350°F for 25 minutes until cooked through and lightly browned on top.If you don’t have mini muffin pans, you can cook the bites freeform. Just grease a baking sheet and spoon large dollops of the mixture onto the pan. Baking time is the same. Source: Simply Recipes

French Toast Grilled Cheese Recipe

Prepare these for tomorrow’s breakfast! All you need is some basic ingredients commonly found in your pantry. The cheese is the secret ingredient, making the French toast into a grilled cheese combo! Serve these solo or along your other breakfast favorites like bacon and eggs. Ingredients: 2 Tbsps. Milk 1 Tbsp. Vanilla 2 Eggs Brioche Bread Cinnamon Non-stick cooking spray Mozzarella cheese Directions: Mix milk, vanilla and eggs in a bowl Coat one side of 2 pieces of bread with mix and then sprinkle cinnamon Spray cooking spray on the air fryer pan. Load the bread. Cook at 340°F for 7-8 minutes Coat the other side. Then sandwich the toasted pieces with mozzarella cheese. Air fry again at 340°F for 7-8 minutes