Author : Cosmo

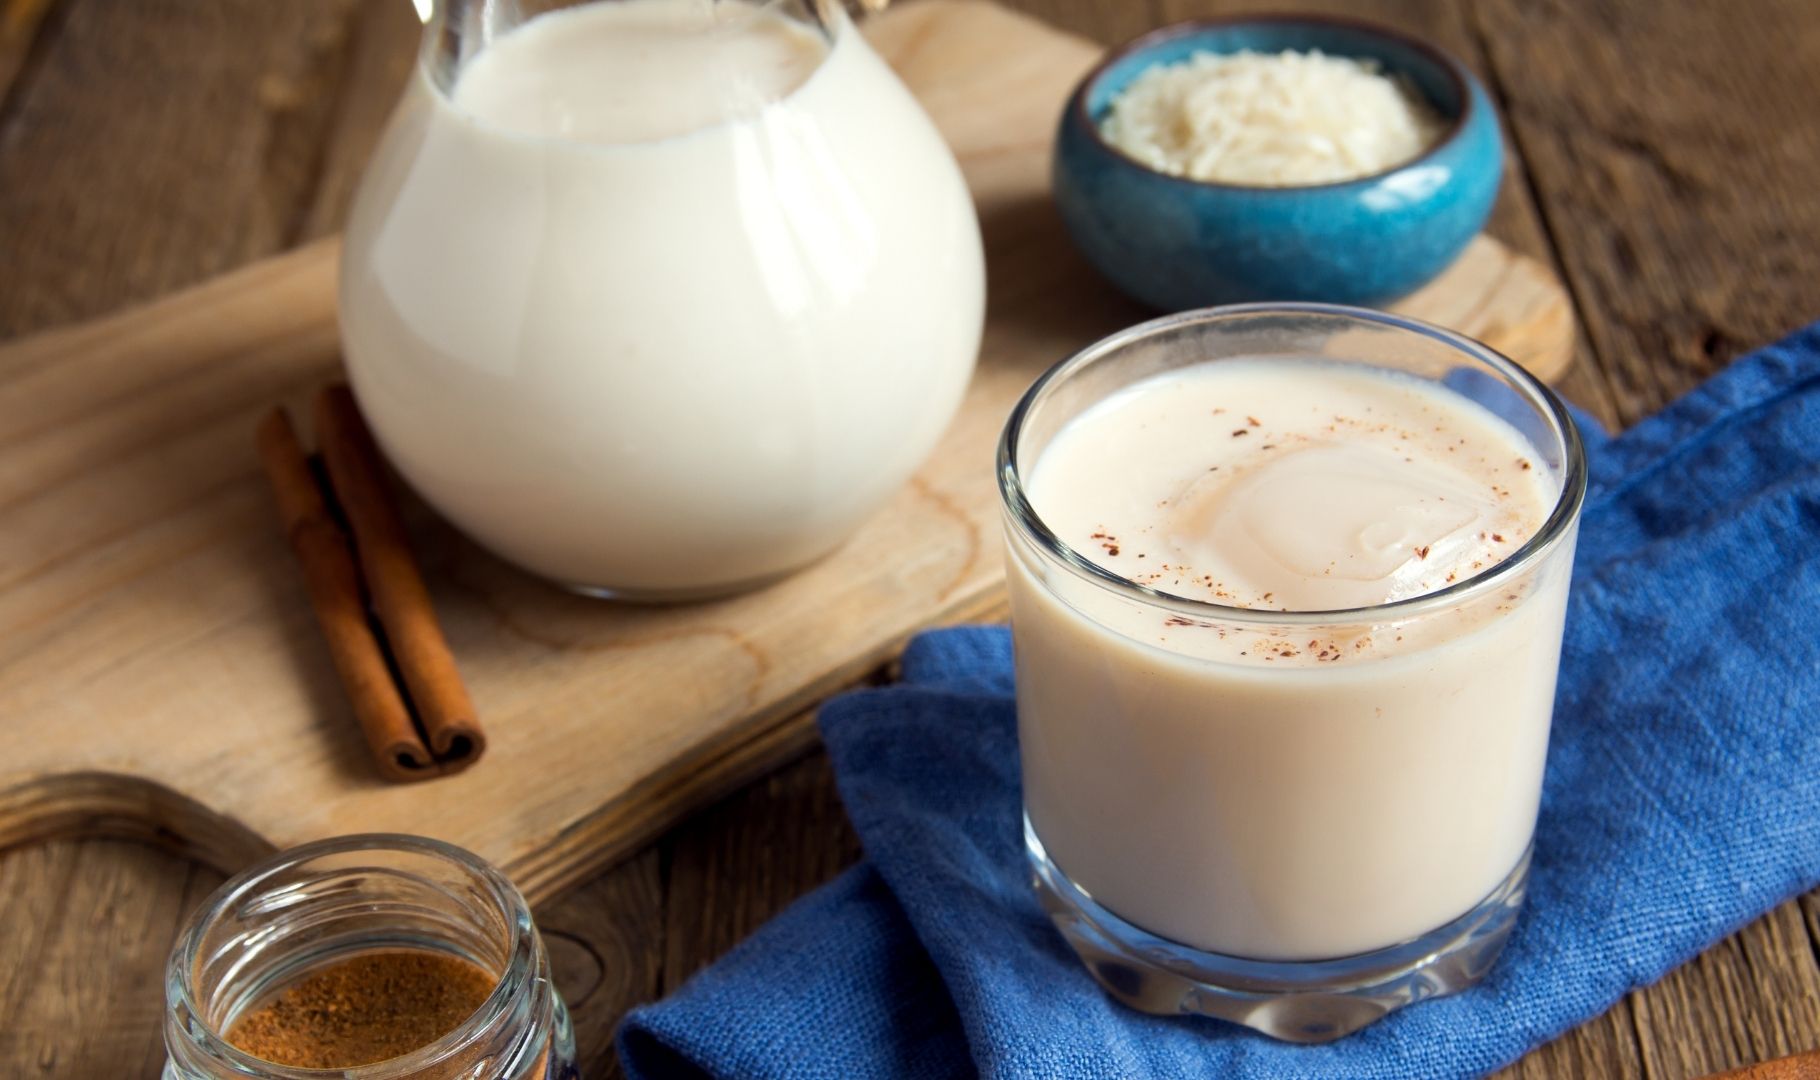
Homemade Horchata Recipe

Horchata is a classic agua fresca (fresh water) drink made of rice, cinnamon and vanilla. The sweetness isn’t overpowering like other flavored milks and should leave you craving more! It’s always served cold and over ice, to help water it down. Stir before serving to ensure the milk and cinnamon are blended into each other. Prep time: 10 minsCook time: 10 minsInfusion: 3 hrsTotal time: 3 hrs 20 minsServings: 8 Servings Ingredients: 6 cups water, divided 1 3-inch cinnamon stick or 1 teaspoon ground cinnamon 1 1/2 cups long-grain white rice 1 (14 ounce) can sweetened condensed milk 1 teaspoon vanilla extract Directions: Steep the cinnamon in water: You can skip this step if you’re using ground cinnamon. In a small pot, cover the cinnamon stick with 1 cup of water. Bring the water to a boil over medium-high heat. Once the water comes to a rolling boil, turn the stove off and let the cinnamon stick steep for 10 minutes. Rinse the rice: While the cinnamon is steeping, give the rice a quick rinse under cold water. This will remove excess starch from the surface of the grains. Strain off any excess water before adding the rice to your blender. Blend the rice and cinnamon together: Pour the steeped cinnamon water, along with the cinnamon stick (or add the ground cinnamon), into the blender with the rice and the remaining 5 cups of water. Blend just until the grains of rice begin to break up, or about 1 minute. Transfer the rice water to a container: Pour most of the mixture into a large bowl. Swish around the remaining rice water in the blender carafe to try and remove any rice that may remain after the first pour. Add it to the container with the rest of the rice water. Try to retrieve as much of the rice as possible from the blender. Do not add fresh water to try and remove any remaining rice. It will dilute the flavor of your drink. Soak the rice: Allow the rice mixture to soak for at least 3 hours at room temperature. Stir the Horchata periodically throughout the soak time. You can stir it on the hour, but that’s not a hard and fast rule. Strain the horchata: Set a fine-mesh strainer over a large bowl. Place a layer of cheesecloth or a thin tea towel over the strainer. Pour the rice mixture through the lined strainer. Squeeze out any excess liquid from the rice then discard the solids. Sweeten the horchata: Transfer the strained rice liquid to a serving pitcher. Add the sweetened condensed milk and vanilla extract into the pitcher and whisk vigorously to break up the thick milk. Chill and serve: The horchata can now be served over ice. Try chilling until very cold before pouring it over ice and enjoying. Drink as it is or add spiced rum! Source: Simply Recipes

Lemon Yogurt Cake Recipe

A bright lemon Bundt cake with a sweet-tart glaze and ultra-moist crumb will be sure to bring a bit of sun to even the gloomiest days. Yogurt cake is perfect for a tender, sweet cake with a lighter and fluffier texture. Lemon is one of the most popular ingredients to add in. Serve this along your favorite cup of tea and enjoy. Make this for an upcoming special occasion like Mother’s Day! Prep time: 10 minsCook time: 45 minsTotal time: 55 minsServings: 12 to 16 servings Ingredients: For the cake: 1 cup vegetable oil, canola oil, or olive oil, plus more for coating the pan 3 cups (384 grams) all-purpose flour, divided 1 1/2 cups (300 grams) granulated sugar 1/4 cup finely grated lemon zest (from about 4 medium lemons) 4 large eggs 2 cups (452 grams) plain whole-milk yogurt (regular or Greek) 1 1/2 teaspoons vanilla extract 1 tablespoon plus 1 teaspoon baking powder 1 teaspoon kosher salt For the glaze: 1 cup powdered sugar 1 1/2 tablespoons freshly squeezed lemon juice 1 tablespoon freshly grated lemon zest (optional) Directions: Arrange oven rack, preheat the oven, prepare Bundt pan: Arrange a rack in the middle of the oven. Preheat the oven to 350°F.Generously coat a 12-cup Bundt pan with olive oil. Dust with 2 tablespoons of the flour and tap out any excess; set aside. Mix sugar and lemon zest together: Place the sugar and lemon zest in a large bowl and rub together with your fingertips until the sugar is moist and the mixture is fragrant, about 30 seconds. Add wet ingredients to the sugar: Crack the eggs into the bowl with the sugar and lemon zest and whisk vigorously until pale yellow and frothy, about 1 minute. Whisk in the yogurt, olive oil, and vanilla extract. Add the dry ingredients: To the bowl with the wet ingredients, whisk in the baking powder and kosher salt. Add the flour and stir with a rubber spatula until just combined and all the flour is incorporated. (A few small lumps in the batter are fine, be sure to not overmix.) Transfer to prepared pan and bake: Transfer the batter to the prepared pan and use a spatula to spread it out evenly. Bake until the cake is lightly browned and a cake tester inserted into the center comes out clean with just a few crumbs, about 45 minutes. Cool the cake and release from Bundt pan: Cool on a wire rack for 15 minutes. Carefully flip it out of the pan onto a wire rack. Cool completely before glazing. Make the glaze, drizzle and serve: Whisk together the powdered sugar and lemon juice in a medium bowl until smooth. Drizzle the glaze over the cooled cake and sprinkle the top with lemon zest, if desired.Let stand for at least 10 minutes to allow the glaze to set before slicing and serving. Source: Simply Recipes

How to Remove Red Wine Stains

Wine stains are tricky to remove from clothing, but even more so from carpet. If you drop wine at a time you’re not able to treat it right away, blot as much as possible right away. Avoid rubbing the stain. You’ll then want to tackle it with a baking soda paste. You can wait a few hours, but don’t wait until the next day before attempting to remove the stain. Time will make it much more difficult. What You’ll Need: Water Baking soda Salt (Optional) Stain remover or carpet stain remover (Optional) Oxygen-based cleaner (Optional) Dishwashing liquid (Optional) Paper towels or white cloths Vacuum cleaner (Optional) Removing Stains from Carpet: Blot the Stain Immediately: Use a clean white cloth to blot up as much of the red wine as you can right away. Alternate parts of the cloth to always blot using a fresh spot. Add Water to the Stained Area: Pour a small amount of cool water onto the red wine stain on the carpet and continue blotting. The water dilutes the red wine, which makes it easier to blot up. Do not pour too much water at a time and switch out the blotting cloth for a dry one as you work. Continue blotting until no more stain can be removed using this method. Make a Baking Soda Paste: Mix a paste with a three-to-one ratio of baking soda to water. Apply the paste directly to the carpet stain and wait for it to dry completely before vacuuming up the dried paste.Apply a Carpet Stain Remover: If any stain remains, apply a carpet stain remover according to the manufacturer’s instructions. Typically, the process is to wait until the cleaning product dries and then vacuum. If you’re removing stains from white carpet you can use a hydrogen peroxide solution instead. Mix one part clear hand dishwashing liquid with two parts hydrogen peroxide in place of using a commercial carpet stain remover. Sponge the solution and allow it to work for several minutes. Blot with a clean cloth and clean the area with plain water to remove any soapy residue. Source: the Spruce

The Best Ways To Fry an Egg

How you choose to fry an egg depends on how you like to enjoy them. You may be looking for lacy, bronzed edges or the whites just set. Here are five techniques to help you get the style you like best. Crispy Edges: For an egg with golden edges, you’ll need to place the egg in a pool of olive oil. The egg will cook in the oil, which you use to baste over the white until just set. Be sure to have the pan hot, but not smoking, to get the best crunch. Water-Basted: These eggs will call for adding a little hot water to the pan. If you baste the eggs with water, you’ll end up with soft, tender edges rather than crispy ones. It should feel just like an over-easy egg. Heavy Cream: One of the most decadent ways to enjoy an egg is frying it with heavy cream. As the ingredients cook, the cream will simmer and break into milk and butter solids. This will result in an intensely flavored egg with caramelized edges and a runny yolk. Butter-Basted: A classic technique, butter basting will give you an egg that isn’t too crispy or too tender. Cook it on a medium heat in a nonstick pan. The egg should be gently covered in brown butter until just set. Consider this your everyday egg. Sheet Pan: You can skip the stove altogether with a quarter sheet pan. Preheat the well-oiled tray in a 450 degrees F oven for 15 minutes. Crack a dozen eggs into a large bowl and slide them gently onto the pan. After five minutes you’ll have a pan ready with diner-style eggs. Source: the Kitchn

Spicy Tofu Stir Fry Recipe

Need a new dinner recipe? You can cook all the ingredients in one pan! Prepare this dish with cubes of extra-firm tofu fried until the surface is crispy. It’s tossed with crunchy vegetables and a sweet, orange sauce. The inside remains soft while the outside is crispy and golden for the perfect contrasting texture. Prep time: 30 minsCook time: 20 minsTotal time: 50 minsServings: 4 servings Ingredients: 16 ounces extra-firm tofu, cut into 1/2-inch cubes 1/2 cup orange juice 1/3 cup vegetable broth 1/4 cup soy sauce 3 tablespoons honey 2 teaspoons rice vinegar 1/2 teaspoon garlic chili sauce, add more for a spicier sauce 1 tablespoon cornstarch 2 tablespoons water 4 teaspoons vegetable oil, divided 1 teaspoon sesame oil 4 ounces shiitake mushrooms, stems removed, 1/2-inch thick slices 2 cups sugar snap peas 1/2 large red bell pepper, 1/2-inch dice 1/2 large green bell pepper, 1/2-inch dice 1 tablespoon minced garlic 2 teaspoons minced ginger 1 tablespoon green onion, thinly sliced kosher salt, to taste black pepper, to taste Directions: Prepare the baking sheets: Line a large baking sheet with paper towels, have another baking sheet ready and a weight like a jar of sugar or flour. Press the tofu: Drain tofu and dry with paper towels. Arrange the tofu in a single layer on the baking sheet lined with paper towels. Cover with additional paper towels. Place a second sheet pan on top. Place a heavy can or jar on the pan to lightly press out the excess moisture from the tofu. Leave it for about 10 minutes. Dry the tofu: After pressing, use dry paper towels to gently pat each piece of tofu dry to remove as much residual moisture as possible. Set the pieces aside on dry paper towels. Make the sauce: In a medium-sized bowl whisk together orange juice, vegetable broth, soy sauce, honey, rice vinegar, and garlic chili sauce. In a small bowl whisk together cornstarch and water, set aside. Fry the tofu: Heat a wok or 12-inch nonstick skillet over medium-high heat. Add 3 teaspoons vegetable oil and sesame oil and heat until shimmering but not smoking. Swirl the pan to coat with the oil.Working in two batches, add tofu to the pan in a single layer. Cook until golden brown, about 2 to 3 minutes. Flip over and cook the other side until golden browned, another 2 to 3 minutes. Transfer to a clean plate lined with a paper towel, then fry the remaining tofu. Stir-fry the vegetables: Add the remaining 1 teaspoon of vegetable oil to the pan. Add the mushrooms and sugar snap peas, stir-fry for 2 minutes. Add the diced bell peppers, cook for 1 minute. Add the garlic and ginger, stir-fry for 30 seconds. Cook the sauce: Add the sauce mixture to the pan, simmer for 30 seconds. Mix the cornstarch mixture, then gradually add to the pan, stir constantly until thickened, about 30 seconds. Add the tofu back to the pan: Turn off the heat and add the tofu back to the pan, stir to coat and warm through, about 1 minute. Season tofu stir-fry with salt, pepper, and garlic chili oil to taste. Serve tofu stir-fry with rice and garnish with green onions. Source: Simply Recipes

Air Fryer Banana Chips Recipe

Enjoy a quick healthy snack with your air fryer. The banana chips are left delicious and crispy thanks to the heated air circulation. You can enjoy these alone or along with other fruits. Ingredients: Banana Brown sugar Cinnamon Non-stick cooking spray Directions: Chop banana into thin slices. Coat each side with brown sugar and cinnamon. Coat air fryer pan with non-stick cooking spray and load bucket with slices. Set to 300 degrees F for 10 minutes. Flip and cook for an additional 10 minutes.

How to Clean a French Press

The French press is a popular choice for many coffee drinkers to perfect their cup of coffee. Brewing time can be adjusted to suit a person’s needs, while also eliminating paper filters, providing a more robust flavor. A French press places coffee grounds in the bottom of the glass and allows them to seep in hot water. Once it’s been brewed, the plunger is slowly pressed down and the metal filter traps the grounds. Just like drip coffee makers, a French press should be cleaned regularly. At the least, after every use to remove grounds and then a deeper clean once a week. Remaining coffee oils can turn your next cup rancid. Here’s how to clean yours. What You’ll Need: Sink or bucket Automatic dishwasher Microfiber cloths Wooden or plastic spatula Dishwashing liquid with a degreaser Distilled white vinegar Citric acid powder Hydrogen peroxide Dishwasher detergent Directions: Empty the Coffee Grounds: Most of the coffee grounds will be concentrated at the bottom of the carafe. Use a wooden or plastic spatula to loosen the grounds so they can be emptied easily. Do not use a metal utensil as that can leave scratches. Rinse Components With Hot Water: Rinse out the few remaining coffee grounds in the press with hot water. Leaving the filter and plunger connected, rinse them well with hot water. Add Dishwashing Liquid: Once the grounds are rinsed away, add a couple of drops of dishwashing liquid, preferably a brand that includes a degreaser. Add Hot Water: Fill the carafe half-full with hot water. Put the plunger/filter into the carafe and gently plunge it up and down about three times to help remove oils and residue. Empty and Rinse Well: Pour the soapy water down the sink and rinse each component well with hot water. Dry the French Press: Separate the components and allow them air-dry in a dish drainer. Or, use a lint-free microfiber cloth to dry each piece. How to Deep Clean: Empty Coffee Grounds and Rinse Well: Dispose of the coffee grounds and rinse the press well with hot water to remove all the loose grounds. Disassemble the Components: Unscrew the filter from the plunger. You may need to rinse the filter again to remove any remaining coffee grounds. Prepare a Cleaning Solution: In a sink, large bowl, or bucket, prepare one of these mixtures: Mix two cups of hot water, two teaspoons of dishwashing liquid, two teaspoons of citric acid powder, and two teaspoons of hydrogen peroxide. Mix one cup of distilled white vinegar and three cups of hot water. Soak the Filter and Plunger: Completely submerge the filter and plunger in one of the cleaning solutions and allow them to soak for at least four hours or overnight. Wash the Carafe and Lid: Add a few drops of dishwashing liquid and fill the carafe about half-full with hot water. Use a microfiber cloth to thoroughly wash the interior of the carafe.If you see white spots or deposits on the interior of the carafe, fill the carafe with three parts hot water and one part distilled white vinegar and allow the mixture to sit in the carafe overnight. Wash the lid in a bit of soapy water. Rinse Well and Dry: Once all of the components have completed the required soaking time or cleaning, rinse each one well with hot water. Allow the pieces to air-dry in a dish drainer or dry with a microfiber cloth. Source: the Spruce

Tips for Aluminum Foil

Aluminum foil has some common misconceptions about it. Firstly, it’s not actually made of tin, even though it’s frequently referenced as tinfoil. Most foil was made of aluminum at its debut, a lighter and less expensive material. Here’s what you should know about aluminum foil. Foil has a matte and shiny side, which is purely aesthetic from production. There’s one exception for non-stick foil, which is better for cheesy and doughy foods. Check the box to see which side has the coating. Aluminum foil is recyclable just like aluminum cans. If your local center accepts foil, be sure to rinse off any food and keep it flat, not crumpled in a ball. You can use foil to sharpen scissors. Fold a piece of foil in half twice to make four layers. Then snip the foil with a pair of scissors a few times to clean and hone the blades. Most of the time, boxes of foil have perforated tabs on both ends. You can push these toward the center to hold the roll in place as you rip off a piece. Heavy-duty foil is 50 percent thicker than standard foil. It’s less likely to tear or break, making it worth the higher price tag. Source: HGTV

New Product Alert: The Cosmo Microwave Drawer

We have a new product coming soon! This microwave drawer will save space in your kitchen by seamlessly integrating into your cabinetry. The top loading COS-12MWDSS provides a clutter-free counter-top with its built-in installation. Make every meal delicious with 11 power levels and 1000 watts of cooking power. Easily open and close the microwave with the touch of a button on the easily accessible control panel. Previous Next Features: 11 Power Levels Four automatic presets, including melt, soften, popcorn and beverage 1000 watts of power for precise control 1.2 cu. ft. capacity Easy-to-use touch screen control panel Defrosting rack included for added convenience Weight and timed defrost options to efficiently thaw food Equipped with Child Lock Function Electrical Requirements: 120V/ 60hZ Exterior dimensions (WxDxH) 23.8″ x 24.5″ x 15″ Learn more about the COS-12MWDSS here. Shop the rest of our appliances including range hoods, cooktops, ranges, ovens and more.

Easy Carrot Soup Recipe

This carrot soup recipe will be sure to please adults and kids alike. The naturally sweet veggie truly shines in a creamy soup. Carrots offer multiple health benefits, and are also a great base for a dish. They cook relatively fast and with just a few simple ingredients, turn into smooth, rich and slightly sweet soup. It’s also surprisingly fast to cook, in just 30 minutes! Read how below. Prep time: 5 minsCook time: 30 minsTotal time: 35 minsServings: 4 to 6 servings Ingredients: For the soup: 2 tablespoons unsalted butter 1 large white onion, chopped 2 pounds carrots, peeled and chopped 3 cloves garlic, chopped 1 teaspoon dried thyme 4 cups vegetable stock 1/2 teaspoon salt 1/2 teaspoon white pepper (optional) 4 tablespoons heavy cream, divided For garnish: Paprika Fresh chives, minced Cheesy Toast Dippers: 8 slices baguette, sliced 1/2-inch thick 2 tablespoons olive oil 1/2 cup parmesan cheese, finely grated Directions: Preheat the oven to 400°F for the Cheesy Toast Toppers Cook the veggies: In a large pot over medium heat, add butter and onions. Cook until onions turn translucent, 3 to 4 minutes, but don’t let them brown at all. Season with a pinch of salt.Add carrots, garlic, and dried thyme, and stir together. Cook for 30 seconds just until garlic becomes fragrant. Add the stock and simmer: Add stock and bring mixture to a simmer. Cover and simmer for 15 minutes until carrots are very tender. Meanwhile, make the cheesy toast dippers: Spread your baguette slices out on a baking sheet and drizzle them with olive oil. Then sprinkle generously with finely grated Parmesan cheese.Bake toasts at 400°F until edges are browned and Parmesan cheese is starting to turn a light tan color around the edges, about 10 to 12 minutes. Remove toasts and set aside. Finish the soup: When carrots are tender, use an immersion blender right in the pot to blend soup until smooth.If you don’t have an immersion blender, remove soup from heat and allow to cool until it isn’t steaming hot. Then you can blend in batches in a standard blender and return it to your pot. Return the blended soup to low heat and season with salt and white pepper (optional). Serve the soup: Ladle the soup into bowls and swirl in about a tablespoon of heavy cream into each bowl. Garnish the soup with a sprinkle of paprika and fresh minced chives. Plus, add a cheesy toast dipper!Leftover soup keeps well in the fridge for 5 days, or you can transfer it to a freezer-safe ziploc plastic bag or tupperware and freeze it for up to six months. Reheat soup gently over low heat on the stovetop.Don’t freeze the soup if you’ve added cream to it, because it will most likely separate. In theory, it would taste the same once it is reheated, but I prefer to stir in fresh cream and freeze the soup without the cream in it. Source: Simply Recipes