Month: April 2021

Air Fried Cheesy Potato Medallions Video Recipe

Ingredients: Small potatoes Butter Garlic salt Cheese Directions: Wash potatoes and microwave for 6 minutes. Flatten each potato with a spatula. Season with butter and garlic salt. Coat the air fryer pan with non-stick spray. Set the air fryer to 350 degrees F and cook for 8 minutes. Flip the potatoes and add cheese on top. Cook for another 5 minutes.

Happy Hour Cosmopolitan Drink Recipe

The Cosmopolitan is a bright and easy-to-make cocktail with a variety of light flavors such as lime, orange, lemon and cranberry. It’s a vodka daisy which is a sour, made with fresh citrus and a liqueur like curacoa. If you’re looking for a more traditional Cosmopolitan, be sure to grab a lemon-accented citron vodka. The citrus accents are key to this drink. For the cranberry juice you want to go with a 100% unsweetened version. Refrain from cranberry juice cocktail as these are often packed with sugar, making it difficult to balance in a drink. Total time: 5 minsServing: 1 serving Ingredients: 2 ounces Absolut Citron (citrus vodka) 3/4 ounce cranberry juice 3/4 ounce Cointreau 3/4 ounce lime juice 1/4 ounce simple syrup Directions: Shake: Add all ingredients to a cocktail shaker filled with ice, and shake until cold to the touch. Strain: Strain into a chilled martini glass. Enjoy!: Garnish with an orange twist. Source: Simply Recipes

Air Fried Baby Ruth Video Recipe

Ingredients: Baby Ruth Pillsbury grands or Crescent dough Non-stick spray Icing (optional) Directions: Cut Baby Ruth into small pieces. Place each piece inside the dough. Use dough amount as desired. Roll the dough to completely wrap around each piece. Coat the air fryer pan with non-stick spray. Set the air fryer to 350 degrees F and cook for 8 minutes. Top with icing.

How to Make Coconut Milk at Home

The exotic flavors in coconut milk can add a bold touch to many dishes such as soups, stews, curries and baked goods. It also works great in a smoothie or to sip on its own with a bit of cinnamon. But did you know you can easily prepare coconut milk at home with just two ingredients? Here’s how. Ingredients: 1 (8-ounce) package unsweetened shredded coconut 4 cups hot (near boiling) water Equipment: Measuring cup Blender Nut milk bag Medium bowl Mason jars (for storage) Instructions: Combine the coconut and hot water in a blender. Place the coconut in a blender. It may seem like a lot of coconut, but it is just enough to get the job done. Pour the water over the coconut. Allow the mixture to rest. Let the coconut and hot water sit in the blender for a few minutes to give the coconut time to soften before continuing onto the next step. Blend the mixture. Blend on high until the coconut is puréed and the mixture looks milky, 1 to 2 minutes. You will still have flecks of coconut in the mixture. Pour the mixture into a nut milk bag. Open the nut bag and arrange it inside a medium bowl. Pour the coconut mixture from the blender into the nut milk bag. Squeeze out the coconut milk. Cinch the nut milk bag shut. Take the bag in both hands and squeeze it out over the bowl. The finished milk should easily pass through the bag. Continue to squeeze and wring out your bag until you’ve extracted as much of the milk as possible. You can discard or compost the leftover coconut pulp in the nut bag; if you have a dehydrator, the pulp can be dried and used as coconut flour. Bottle the coconut milk. Transfer the coconut milk into a storage vessel of your choice, like large mason jars, swing top jars, or other air-tight container. This milk can be used right away. Source: the Kitchn

Air Fried Reese’s Peanut Butter Cups

Ingredients: Reese’s Peanut Butter Cups Pillsbury grands or Crescent dough Non-stick spray Cream cheese frosting (optional) Directions: Chop Reese’s Cups into quarters. Place each piece inside the dough. Use dough amount as desired. Roll the dough to completely wrap around each piece. Coat the air fryer pan with non-stick spray.  Set the air fryer to 350 degrees F and cook for 8 minutes. Top with cream cheese frosting.

Amateur Painting Mistakes to Fix

A paint job brings a spark back to a space and is one of the most affordable DIY-friendly projects. Painting is relatively simple, but without the proper patience and precision you could be left with a botched job. Here’s a breakdown of all the common amateur painter mistakes. Inconsistent Coverage. Primer can alleviate many headaches down the line. It will ensure the paint has a good foundation. A primer will help the paint adhere to the surface better and improve durability. Without it, you can be left with a splotchy or streaky wall. If you need to fix a splotchy wall, let it completely dry overnight and apply another coat of paint afterwards. Paint Splatters. Even if you perfect a paint job, protecting your space is imperative. A professional will cover anything in a room to prevent accidental splatters. This includes dropping cloths on the floor, plastic over furniture and taping off trim. If paint drips, a damp cloth usually does the trick to pull the paint off wood floors. If it’s already dried you can try to gentry scrape it up, then use a damp cloth to wipe any excess. Solvents are available for really stubborn spots. Be sure to check the label to ensure it won’t damage the floor. Sloppy Edges. If you end up with wavering cut lines on a paint trim, chances are you didn’t use painter’s tape. Apply painter’s tape on areas you don’t want the paint to go. This will minimize mess and provide crisp paint lines. Removing the tape is just as important. Remove it within a few hours or you increase your chances of pulling away sections of dried paint. Incorrect Finishes. A paint finish is almost as important as the color itself. Each sheen is suited for different situations and rooms. Eggshell paints offer a soft look with minimal glossiness that is a nice middle ground for durability and luster. A flat paint on the other hand, offers virtually no gloss and is great for hiding surface imperfections underneath. You can use this type of sheen for an old door. Cracking Paint. An issue most common in kitchens and bathrooms, this issue occurs due to there being something on the surface such as grease or cleaning residue. Pre-paint cleaners can help prevent this from happening. You can also prepare walls by lighting sanding prior to priming and painting. Planning a kitchen renovation soon? Shop our extensive catalog of kitchen appliances for your next upgrade here. Source: the Kitchn

Deep Fried Kit-Kat Video Recipe

Ingredients: Kit-Kat bar Pillsbury grands or Crescent dough Non-stick spray Powdered sugar (optional) Directions: Chop Kit-Kats in half. Place each piece inside the dough. Use dough amount as desired. Roll the dough to completely wrap around each piece of Kit-Kat. Coat the air fryer pan with non-stick spray. Set the air fryer to 350 degrees F and cook for 8 minutes. Serve with powdered sugar as desired.

Preparing Espresso Like A Pro

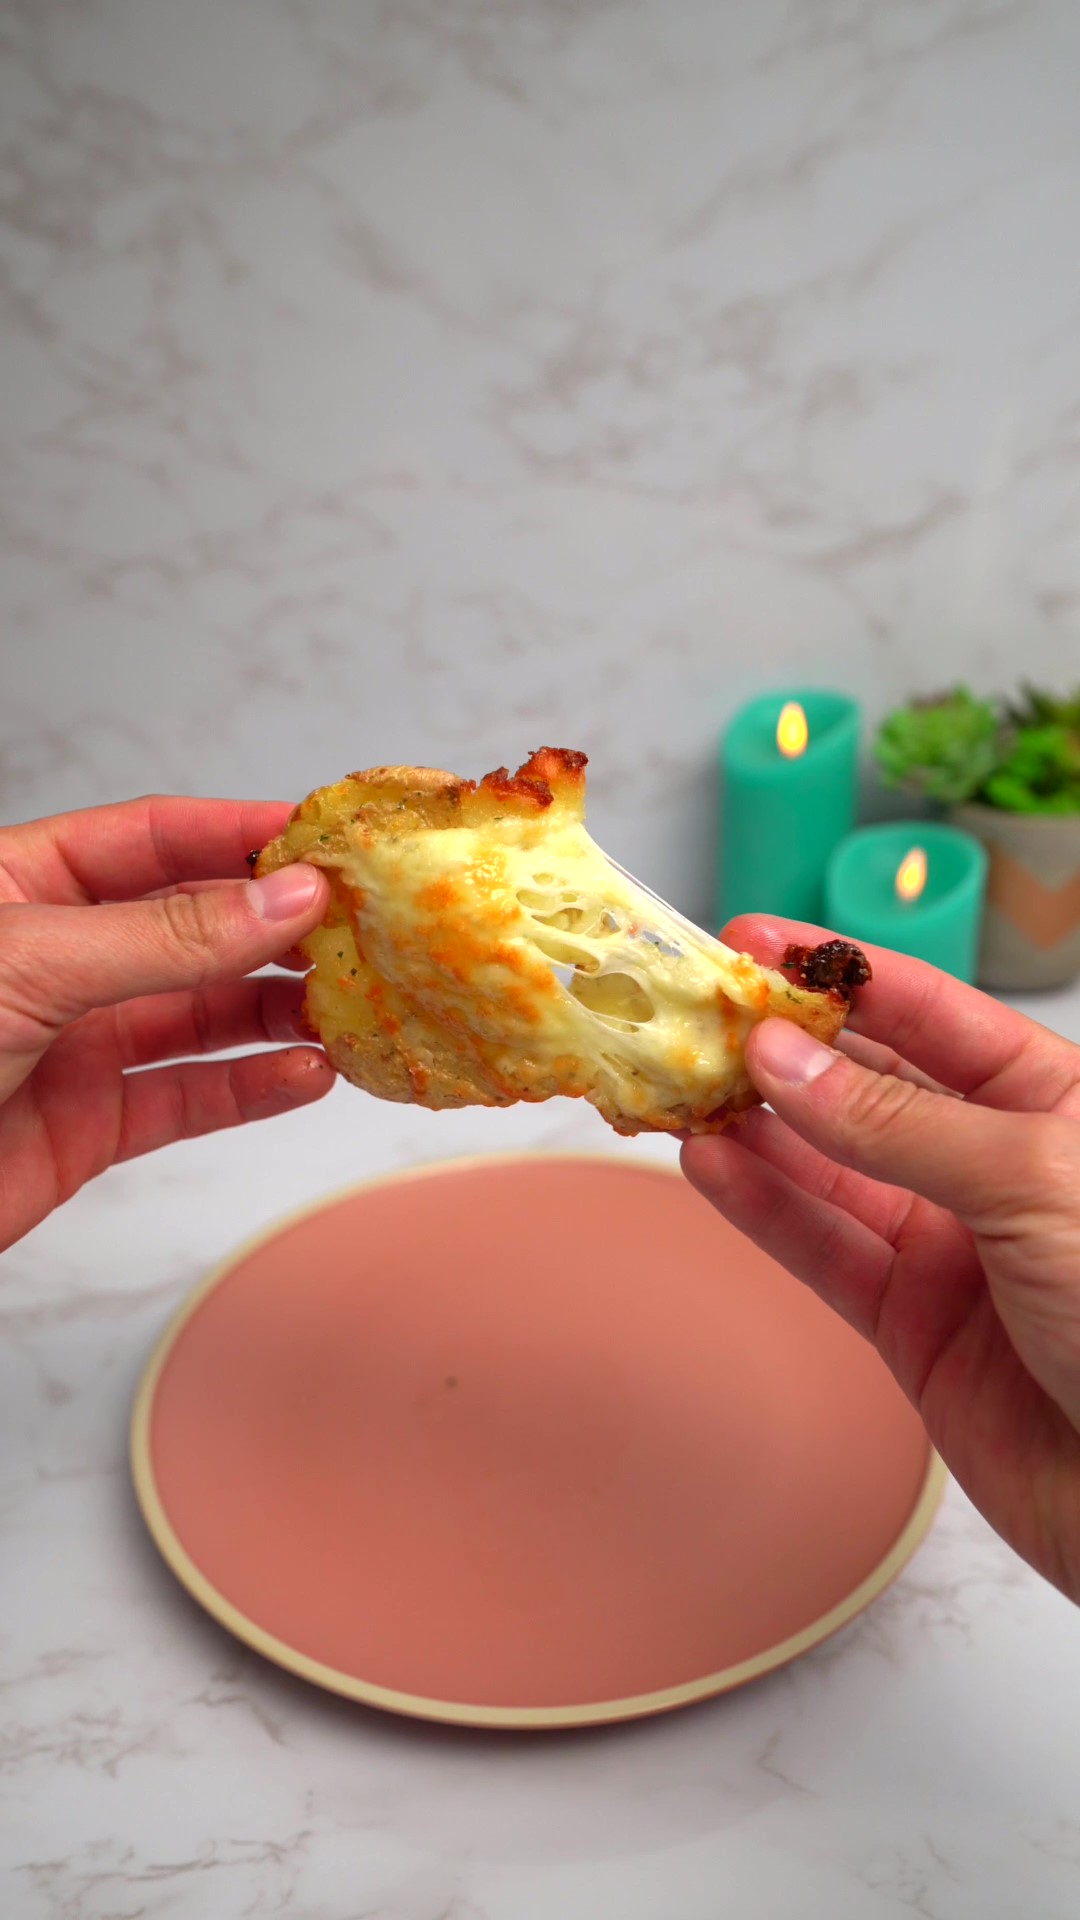
Espresso may seem intimidating, especially perfecting a shot. Contrary to popular belief you don’t need the fanciest manual machine. There are many options out there for making espresso, either with stovetop makers or automatic capsule methods. Regardless of your method, you should learn the basics of espresso and how to operate the machine of your choice. If you’re looking for an authentic Italian espresso, you’ll need an espresso machine. A manual machine where you can tamp and brew everything yourself generally offers a greater level of control. Here’s how you can prepare espresso with one of these machines. Grind and measure your beans. Using dark roast coffee beans and a quality grinder, grind enough beans to make one or two espresso shots. An average single espresso shot will require between 6 and 8 grams of coffee grounds, although this can be adjusted up or down. For a double shot, about 15 grams. Your grounds should be powdery and fine, so go ahead and use the finest setting on your grinder. If you want to be sure you measured correctly, you can weigh your grounds on a kitchen scale — just make sure to tare out the portafilter first. Distribute and tamp down your shot. Once you have an amount of grounds in your portafilter that you’re happy with, distribute the grounds evenly with a finger, place the portafilter on the countertop or other flat surface, and then use the tamper to tamp down on the grounds. You’ll then have a compact disk of espresso in the portafilter. Pull your shot. Before you start, run the machine briefly without a portafilter in place to clear the ground head. Then, lock the portafilter into the machine, position your demitasse glass or other vessel underneath, and start your shot. The espresso should be ready after 25 to 30 seconds, but it will take practice with your specific machine and lots of taste tests to achieve shots to your liking. (Some machines require you to time it manually, while others offer different settings.) The final product shouldn’t be too light or dark in color, shouldn’t taste too acidic or too bitter, and should have a fine layer of caramel-colored crema on top. Prepare milk if using and enjoy your espresso. If you’re trying to make a latte or other drink with milk, you’ll then need to steam your milk. If not, enjoy your espresso as is! Make sure to clean and dry the portafilter, as well as purge and wipe down the milk frothing wand, when you’re done. Source: Good Housekeeping

Delicious Air Fried Snickers Recipe

Looking to satisfy that sweet tooth? Use your Air Fryer to prepare these delicious fried snickers bites. The flaky grands pair perfectly with the Snickers bar inside. It’s a quick snack the whole family will love. Ingredients: Snickers bar Pillsbury grands or Crescent dough Non-stick spray Powdered sugar (optional) Directions: Cut the Snickers bar in small pieces about ½ inch each. Place each piece inside the dough. Use dough amount as desired. Roll the dough to completely wrap around each piece of Snickers. Coat the air fryer pan with non-stick spray. Set the air fryer to 350 degrees F and cook for 8 minutes. Serve with powdered sugar as desired.

Indoor Plants 101

If you’re looking to give your interior space an instant update, look no further than a houseplant. They’ve been gaining popularity over the past few years and are great in kitchens, bathrooms or living rooms. Research shows that being surrounded by plants offers benefits including improved mental health, better sleep and boosting feelings of connection. If you’re worried about losing a plant because the one you bought last year died in ten minutes, don’t worry! Follow this guide to find everything you should know before buying. Plants come in many different types and luckily there’s plenty for beginners. Looking for a low maintenance and striking plant? Try the snake plant. If you’re looking for a splashy plant that doesn’t require a lot, go with the monstera deliciosa. Always read the plant tag for care tips so you’ll be better prepared for the maintenance. How to Purchase You may be asking yourself, where should I be purchasing plants, in person or online? Both are great options. An in person experience with a nursery gives you a physical and tangible feel for the available plants. But there are also many reliable online retailers. They do a great job at packaging plants for shipment and offering unique and unusual varieties. If you’re browsing in person look for plants that appear healthy, no droopiness, yellow or brown leaves, and no sticky or cottony masses. These can be signs of pests. If you know a specific plant you want, be sure to look for it by its botanical name to ensure you get just what you’re looking for. Pets Unfortunately, many plants can make your pets sick. An English Ivy can cause your pet aches and vomiting, while lilies can be deadly, especially to cats. Always check the ASPCA toxic plants list to learn which plants you should keep away from your pets. Remember, any plant if ingested in large enough quantities can cause gastrointestinal upset. Keep an eye on your pets to see if they like to nibble on plants and always call your vet as soon as possible if you suspect they may have eaten something potentially toxic. Maintenance Besides giving it the right kind of light, watering correctly is the next most important thing for your houseplants. Overwatering is the most common reason for houseplants dying. Use a finger and press into the soil to feel for dampness. If the soil clings it’s probably wet enough and you shouldn’t water it again. If the soil pulls away from the sides of the pot or the plant is wilted, it’s time to water. It’ll take time to find the right balance but try to stay closer to dry to be safe. Insufficient light will cause plants to drop leaves, stretch toward the light or die altogether. Even if you want a specific plant, if there’s not enough light for it you’d be better off picking a plant that tolerates low light. Analyze your space to see how much light a specific area gets. You can also use your phone’s compass if you’re unsure of the direction. In general south-facing windows get the most intense light, while east-facing windows receive bright morning light and indirect light for the rest of the day. West-facing windows will get the setting sun so bright light plants will do well here. North windows get the least amount of light so they’re best for low light plants. Source: House Beautiful