Month: May 2021

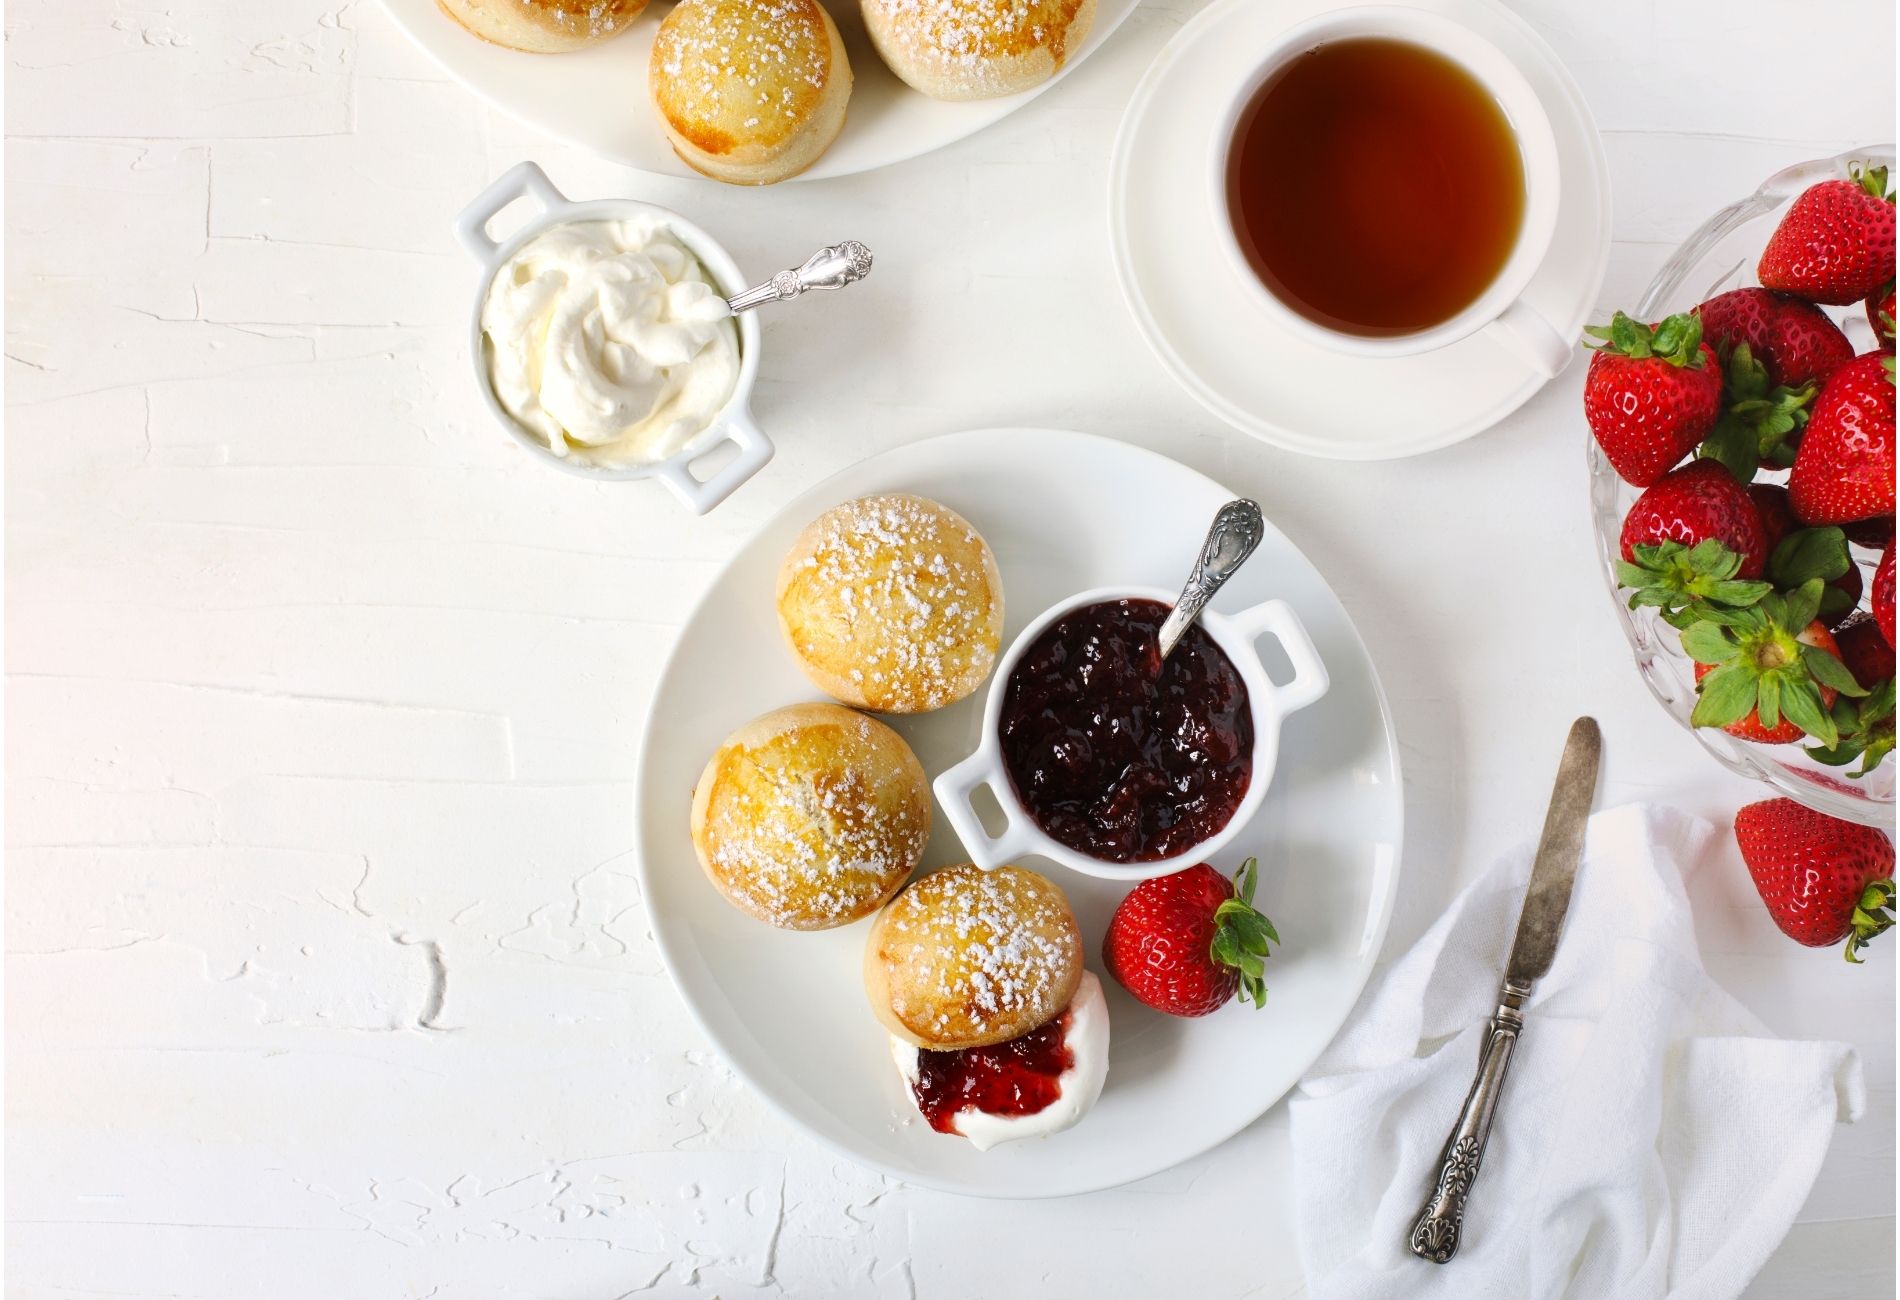
English Scones Recipe

Pair English scones with a cup of tea for the perfect afternoon. They are light, flakey and mildly sweet. Serve these with clotted cream and strawberry or raspberry jam. Prep time: 10 minsCook time: 20 minsFreezing time: 15 minsTotal time: 45 minsServings: 8 to 10 scones Ingredients: 2 cups (257 grams), all-purpose flour, plus more for dusting surface3 tablespoons (39 grams) granulated sugar1 tablespoon (15 grams) baking powder1/2 teaspoon (2 grams) kosher salt4 tablespoons unsalted butter, frozen2/3 cup plus 1 tablespoon whole milk, dividedClotted cream and jam, for serving (optional) Directions Line a baking sheet: Line a rimmed baking sheet with parchment paper. Combine the dry ingredients: In a large bowl, whisk together the flour, sugar, baking powder, and salt. Grate the butter: Place a box grater over the prepared baking sheet. Grate the butter on the large holes of a box grater. When you get down to a small nub of butter, chop that nub into a few small pieces. Add the butter to the dry ingredients: Use the parchment paper as a sling to transfer the butter to the dry ingredients in the large bowl.Then, return the parchment paper to the baking sheet. Use your fingers to toss the butter in the flour, breaking up any clumps, until evenly coated. Add milk and form rough dough ball: Drizzle about half of the whole milk over the butter-flour mixture. Use a fork or your hands to combine and lightly mix. The mixture will start to look sandy.Add the remaining half of the reserved milk 1 tablespoon at a time, as needed, continuing to combine with a fork or your hands, until a rough and lumpy, but cohesive, dough ball forms. You may not use all the remaining milk. Shape the dough: Turn the dough out onto a floured work surface and pat it into a rough 1-inch-thick circle about eight inches in diameter. Cut dough into scone rounds: Use a 2-inch biscuit cutter to cut the dough into rounds. Cut them as close together as possible. You want to get as many rounds as possible on your first pass through the dough. Gently press the scraps back together and cut out additional rounds.You should have 8 to 10 rounds, depending on how diligent you are with pressing the scrapes together. Transfer scones to prepared baking sheet, refrigerate, and preheat the oven: Transfer the scone rounds to the prepared baking sheet, spacing them about 1 inch apart.Refrigerate the unbaked scones while you arrange a rack in the middle of the oven and preheat the oven to 400°F. Brush scones with milk and bake: Once the oven has preheated, using a pastry brush, brush the scones with the remaining 1 tablespoon of milk and bake until golden brown, 18 to 22 minutes. Cool and serve scones: Let the scones cool for 5 minutes on the baking sheet before enjoying warm or transferring to a cooling rack to cool completely. Serve with clotted cream and jam, if desired. Directions: Simply Recipes

Air Fried Strawberry Cream Cheese Empanadas

Dessert made easy with the help of an air fryer. Try these delicious and sweet strawberry cream cheese empanadas with little to no mess. Substitute the strawberry with your favorite jam as desired. Ingredients: 1 pack of empanada discs 1 tbsp. strawberry jam (or any jam flavor) 1 tbsp. cream cheese Non-stick cooking spray Directions: Add the cream cheese and jam to half of the empanada disc. Spread evenly. Fold over and seal the edges with a fork. Egg wash the edges (optional). Coat air fryer pan with non-stick cooking spray. Cook at 325 degrees F for 8 minutes.

Tasting Chocolate Like a Pro

Most people will enjoy their chocolate without thinking much of the experience. But there are several tips and tricks to tasting chocolate like a pro. Use them to pick up on different flavors and textures your chocolate may contain. There’s also several ways you can determine the quality of the chocolate. Listen for a snap. There’s a scientific way to determine the quality of chocolate. A snap test allows you to determine if the chocolate is in temper. A tempered chocolate takes much skill and it’s one mark of quality. Break a piece and listen for a sound very much like when you snap your fingers. Dark chocolate will have a stronger snap than milk and white chocolate. The amount of cocoa butter will determine the sound of the snap. If the chocolate bends, it’s too warm or wasn’t stored properly. Smell a cut side. Just like any herb, chocolate has a residual smell that lingers even after cutting it. Much of what we associate to taste is actually smell. Smell an edge of the chocolate you just snapped off the main piece of the bar. You may notice aromas you didn’t notice before that are earthier or fruitier. Hold your nose. As the chocolate melts in your mouth, pinch your nose shut for a second or two, then release. This trick will allow you to smell much more intensely than before. It’s especially helpful if you’re trying chocolate and feel like you’re not getting much out of it. Let the chocolate melt in your mouth. Chew one or two times to break the solid piece up in your mouth, then let it melt inside your mouth. Breathe in and out as it melts. You’ll notice other aromas and flavors that were hiding at first. What may seem like just a dark chocolate, can actually reveal other nuttier flavors like cashew and even caramel. Palate Cleansers. A palate cleanser is a food or beverage that you can take while you’re tasting. This is similar to coffee beans at a perfume aisle. Chocolate tasters also take advantage of cleansers. Choose natural beverages and foods such as room-temperature lemon water or water crackers and wait until the flavor has completely left your mouth before tasting your next chocolate. Source: the Kitchn

Mint Julep Recipe

The refreshing Mint Julep cocktail is a pairing of sweet mint, simple syrup or sugar and bourbon. It’s perfect for the warmest summer nights thanks to the fresh ingredients. This recipe requires a traditional method to mint the julep, which combines 6 to 7 mint leaves with either sugar and a splash of water, or a tablespoon of simple syrup. Crushing the mint into the syrup will add to the spirit, resulting in a mint julep. Prep time: 5 minsServing: 1 cocktail Ingredients: 2 1/2 ounces Bourbon 1/2 ounce simple syrup or 1 to 2 sugar cubes 8 mint leaves (plus 2 sprigs for garnish) Crushed ice Directions: Combine the mint, simple syrup, and bourbon: Combine the mint, simple syrup or sugar cubes, and bourbon in your glass or cup. Using a spoon, macerate the mint by crushing it into the sugar and liquid, releasing its essence. Fill glass with crushed ice and pour cocktail: Fill your glass or cup with crushed ice, and gently press a spoon into the ice, moving it around a bit to incorporate the ingredients. Garnish and serve: Garnish with 1-2 mint sprigs, and very much enjoy. Source: Simply Recipes

The Biggest Mistakes with Baking Sheets

Baking sheets are extremely versatile for baking, broiling, roasting and much more. Combine a sheet with a wire rack and you’ll be able to perfectly cool baked goods, drain foods post-frying and make oven-cooked bacon. Avoid these common mistakes to keep them in their best condition. Sheets in the Dishwasher. An aluminum sheet pan will discolor in a dishwasher. They will also warp over time and leave them with a splotchy texture. It’s best to hand-wash these and always refer to the best cleaning methods based on the material. Incorrect Utensils. A metal utensil on a nonstick pan is a recipe for disaster. It will cause scratches and damage over time. Stick to wooden or silicone utensils for these kinds of pans. If you’re in the possession of uncoated aluminum sheet pans then it’s perfectly fine to use metal utensils. Older Baking Sheet Use. Not every browned baking sheet should be tossed out! In fact they brown food better than newer shiny ones. It’s always possible to clean even the dirtiest baking sheets. Warped Sheets. If a sheet pan is warped then it’s better to get rid of it. You can tell a baking sheet is warped if you hear a popping sound in the oven when it bakes. This means the sheet is no longer laying flat and can result in your food cooking unevenly. Oils will drip to one side, leaving your food parched on the other side. Quality Sheets. Not all sheets are created equal. A flimsier sheet is bound to warp much faster and you’ll end up needing to replace them more quickly. Look for durable, warp-resistant baking sheets that’ll last you years of problem-free baking. Source: the Kitchn

BBQ Pulled Jackfruit Tacos Recipe

Jackfruit is a great substitute for meat and an obvious choice for tacos, sandwiches, salads and wraps. Jackfruit is a large fruit that can be purchased in its young green, unripe form which has the texture of a stringy, pulled meat. Much like tofu, jackfruit takes on the flavor of whatever sauce, marinade or spaces you’re cooking it with. If you have any leftovers, it’s great in a breakfast burrito! Here’s how to prepare these delicious tacos. Prep time: 15 minsCook time: 10 minsTotal time: 25 minsServings: 4 to 6 servings Ingredients: 2 (14-ounce) cans jackfruit in brine, drained and rinsed 2 tablespoons extra virgin olive oil 1 small yellow onion, finely chopped (about 1 1/2 cups) 2 cloves minced garlic 1 jalapeño, seeded and finely chopped (optional) 3/4 cup barbecue sauce, store-bought or homemade 2 teaspoons ground cumin 1 teaspoon dried oregano 1 teaspoon ground coriander 1/2 teaspoon smoked paprika 1/2 teaspoon kosher salt 1 teaspoon grated orange zest To serve: 10 to 12 (6-inch) corn tortillas 1 ripe avocado, thinly sliced 4 radishes, thinly sliced 1/3 cup cilantro leaves, roughly chopped 1/3 cup shredded red cabbage 1/3 cup corn kernels, canned or fresh from the cob 1/4 cup sour cream (optional) 1 lime, cut into wedges Directions: Shred the jackfruit: Using your fingers or forks, break apart the chunks of jackfruit into shredded pieces. Cook the onions: In a large saucepan over medium heat, warm the olive oil. Add the onion and cook until translucent, about 5 minutes. Add the garlic and jalapeño and cook for an additional 1 minute, until the garlic is fragrant. Cook the jackfruit: Add the shredded jackfruit to the pan with the onions and stir well. Add the barbecue sauce, cumin, oregano, coriander, smoked paprika and salt to the pan.Stir to evenly distribute the spices and cook for another 4 to 5 minutes, or until the jackfruit is browned and slightly crisped around the edges. Fold in the orange zest. Assemble the tacos: Warm the tortillas and add a large spoonful of cooked jackfruit to the center of each. Top with avocado, radishes, cilantro, cabbage, corn, sour cream and a squeeze of lime. Source: Simply Recipes

Loaded Sheet Pan Nachos Recipe

Sheet pans easily prep, serve and clean-up. It’s no wonder why they’re the most popular trick among many recipes. Dinners are cooked faster while all the ingredients are cooked evenly. Nachos work great for a sheet pan since you won’t have to worry about balancing ingredients or having everything topple over. These loaded sheet pan nachos are perfect for a casual movie night or dinner with the family. They come together quickly and easily, and can be served straight from the pan. Prep time: 10 minsCook time: 7 minsTotal time: 17 minsServings: 6 to 8 servings Ingredients: For the nachos: 1 tablespoon olive oil 1 medium onion (about 1 cup), chopped 1 pound ground beef (80-20 mix) 1 teaspoon chili powder 1 teaspoon coriander 1/2 teaspoon dried oregano 3/4 teaspoon Morton kosher salt (maybe more) 1 (16-ounce) bag tortilla chips, preferably thick and sturdy 1 bell pepper, cored, halved and chopped (about 1 cup) 1 (15-ounce) can black beans, rinsed and drained 1 cup frozen corn 1 (2.25-ounce) can sliced black olives, about 1/4 cup 1 to 1 1/2 cups grated cheddar cheese or shredded Mexican cheese blend For garnish, optional: 1 avocado, cubed 2 scallions, green ends sliced thinly 1 plum tomato, diced 1/2 cup cilantro, chopped 1 jalapeño pepper, seeded and thinly sliced 1/3 cup sour cream For the cilantro-lime crème: 1 cup sour cream Juice of one lime 1/3 cup cilantro Pinch of salt Directions: Preheat the oven to 400°F. Cook the onions and beef: Heat the olive oil in a medium nonstick or cast iron skillet, and cook the onions for 5 minutes until they start to soften.Add the beef, chili powder, coriander, oregano and kosher salt. Break the beef up with a wooden spoon and cook until it browns, about 8 to 10 minutes. Remove from the heat and set aside. Line the pan with tortilla chips: This is not an exact science—about 6 to 8 handfuls of tortilla chips to line the sheet pan. You want them close and touching and mostly in one layer, but not too high. Add the beef: Using a slotted spoon to drain off the fat, transfer the beef to the pan with the chips, scattering it evenly across the pan. Be generous—you’ll use it all up. Add the toppings: Add the bell pepper, black beans, corn, black olives, and cheese. Bake the nachos: Bake the nachos in the oven for about 5 to 7 minutes, or until the cheese melts and becomes bubbly. Make the cilantro lime crème: While the nachos bake, place the sour cream, lime, cilantro, and salt into the bowl of a food processor fitted with the blade. Process until the ingredients become smooth and there are no lumps. Taste and add more salt if necessary.If you don’t want to bother with your food processor, you could finely chop the cilantro and stir it into the sour cream with the lime juice and salt. Drizzle the crème and serve: Remove the sheet pan from the oven and sprinkle with the fresh cilantro. Using a spoon drizzle the crème across the top of the nachos.Serve the pan as is right on the table with little bowls of the garnishes alongside. Source: Simply Recipes

Ways You’re Wasting Space in Your Kitchen

Every inch of your kitchen is important and begging to be maximized. Wasting space in one area will lead you to compensate for it in another. It’s a never ending domino effect of consequences, leading to frustration and lack of efficiency. Here are some of the key pinpoints people often waste space the worst. Vertical Space. Vertical storage is available nearly everywhere in a kitchen including cabinets and the pantry. A shelf-rise in a cabinet can give you the instant shelves you need to store necessary pots or pans. Tiered shelving in pantries allows you to see everything at first glance. Walls are also prime real estate! Shelves and hooks can be placed here for even more storage opportunities. Stacking Instead of Filing. A stack of baking sheets and cutting boards can be a nightmare. It also takes up more space than it should. Instead of forming these into unorganized mountains, turn them on their side and file them vertically. Tension rods are a great DIY solution for filing. Ignoring Backs of Doors or Cabinet Sides. A simple hook on the back of cabinet doors can provide a perfect place to store dish gloves, pot holders and more. Try hanging a rail on the side of a cabinet to sort out a space for cookware and utensils. You can even add hooks or magnetic strips to the bottom of upper cabinets for mugs and metal-lidded jars. Holding Onto Things For Too Long. One of the worst offenders for a kitchen’s organization is saving things you shouldn’t be. Reclaim wasted space by going through all kitchen possessions and tossing or moving things you don’t need. Methodically approach each section one at a time, such as all your mugs or utensils. Store rarely used appliances on the top shelf of a closet until it’s time to pull them out. Source: the Kitchn

The 2021 COS-305AERC Electric Range

The COS-305AERC range is getting an update! The new model features a more seamless stainless steel exterior and metal knobs. This design will easily fit many more kitchens while still delivering the same performance. The range is equipped with 5 burners on a smooth ceramic glass cooktop and a Turbo True European Convection oven. You can easily store trays and pans in the compartment drawer underneath. Previous Next Features: Smooth glass ceramic cooktop is easy to clean 4 cooktop burners and one warming zone, including two select a size burners to customize your cooking options Spacious 5 cu. ft. oven capacity with modern professional styling and self cleaning function Turbo True European Convection oven features a third element surrounding a rear fan for fast, even cooking Convection conversion function adjusts your recipe temperature and cook times for our oven 7 oven functions include Bake, Broil, Warm, Proof, Convection Bake, Convection Broil and Convection Roast Sleek large 4 in. digital display to monitor oven temperature and functions more effortlessly, with timer, Sabbath mode, and delay start options High-quality stainless steel knobs perfectly match your electric range for durability and trouble-free operation 2-Year limited parts and labor warranty The COS-305AERC is available among our popular retailers such as Amazon, Home Depot and Lowe’s! If you’re looking for other appliances, be sure to check out our products here.

Who Makes Cosmo Stoves?

Who Makes Cosmo Stoves? Cosmo Appliances are designed in Southern California and sold throughout the United States and Canada. Ovens, Ranges, Cooktops, Range Hoods and other products are sold through popular retailers such as Home Depot, Amazon, Lowe’s and Wayfair. Our appliances are offered in consideration to budget-conscious consumers, with a focus on refining products by selecting the best components available. A Cosmo kitchen appliance concentrates on contemporary styles by utilizing modern shapes and easy-to clean stainless steel. Our products are backed by US based customer support and manufacturer warranties to ensure years of reliable operation. Our goal has always been to craft a happy home with a happy kitchen. We are driven to produce products that inspire people to come together and create unforgettable moments, while turning dream kitchens into realities. A better home starts with Cosmo. If you’re ready for your next kitchen upgrade, our entire catalog is available! Browse our website to find images, manuals, specifications and diagrams to help you decide on the perfect appliance. When you’re ready to buy head over to our Dealers and Locations page to find where to purchase.