Month: October 2021

Air Fried Pizza Rolls Baked Pizza Recipe

Create a new delicious recipe with this pizza roll baked pizza. It’s easy and quick to make with just a few ingredients. Feel free to use your own preferred toppings. This recipe calls for traditional supreme toppings. You can have this pizza ready in a short amount of time. It makes for a great weekend lunch recipe. Ingredients: Pizza Rolls Marinara Sauce Mozzarella Cheese Mushrooms Pepperoni Green Bell Peppers Non-sticking Cooking Oil Directions: Air fry the pizza rolls for 12 minutes at 400°F Layer marinara sauce, pizza rolls, and mozzarella. Finish with another layer of marinara sauce, pizza rolls and preferred toppings Spray with cooking oil and air fry at 350°F for 12 minutes. Serve and enjoy! Shop Our Air Fryers Air Fryer Giveaway

How to Make Self Rising Flour

A self-rising flour is an ingredient found in scones, muffins or biscuits. If you don’t have it on hand, no weed to worry; there’s a good chance you have everything already at home. This flour is used in all types of baked goods, even some cake recipes. It’s a convenient shortcut as the flour will cause the batter or dough to expand while the salt will season the final baked good. A self-rising flour is not a substitute for all-purpose flour. Most of the time, a recipe that calls for all-purpose flour will include baking powder and salt in the ingredient list. Using a self rising flour will result in an abundance of baking powder and salt, possibly ruining the recipe. Prep time: 5 minsTotal time: 5 minsYield: 1 cup Ingredients 1 cup all-purpose flour 1 1/2 teaspoons baking powder 1/2 teaspoon fine sea salt or table salt Directions Combine the ingredients, then whisk: Add the flour, baking powder, and sea salt to a bowl, then whisk thoroughly to combine. Label and store: Use the self-rising flour right away or store it in a labeled airtight container at room temperature for up to 1 year. Source: Simply Recipes

Sun Chips Air Fried Chicken Recipe

Turn your favorite chips into a new recipe. These Sun Chip chicken strips are easy and quick to make. You can pair them with your favorite dipping sauces for a fun new meal the whole family will enjoy. The best part? You can prepare these in just minutes. It makes for a great weekend lunch recipe. Ingredients: Sun Chips Italian Seasoning Garlic Powder Salt Egg Flour Non-Stick Cooking Spray Directions: Crush Sun Chips in a plastic bag until they’re a small crumble Add Italian seasoning, garlic powder and salt to taste Coat the chicken strips with an egg wash, then cover in flour. Reapply the egg wash and then dip in the Sun Chip mix Oil the pan and chicken strips. Air fry each side at 375°F for 5 minutes on each side Serve and enjoy! Shop Our Air Fryers Air Fryer Giveaway

Breakfast Quesadilla Recipe

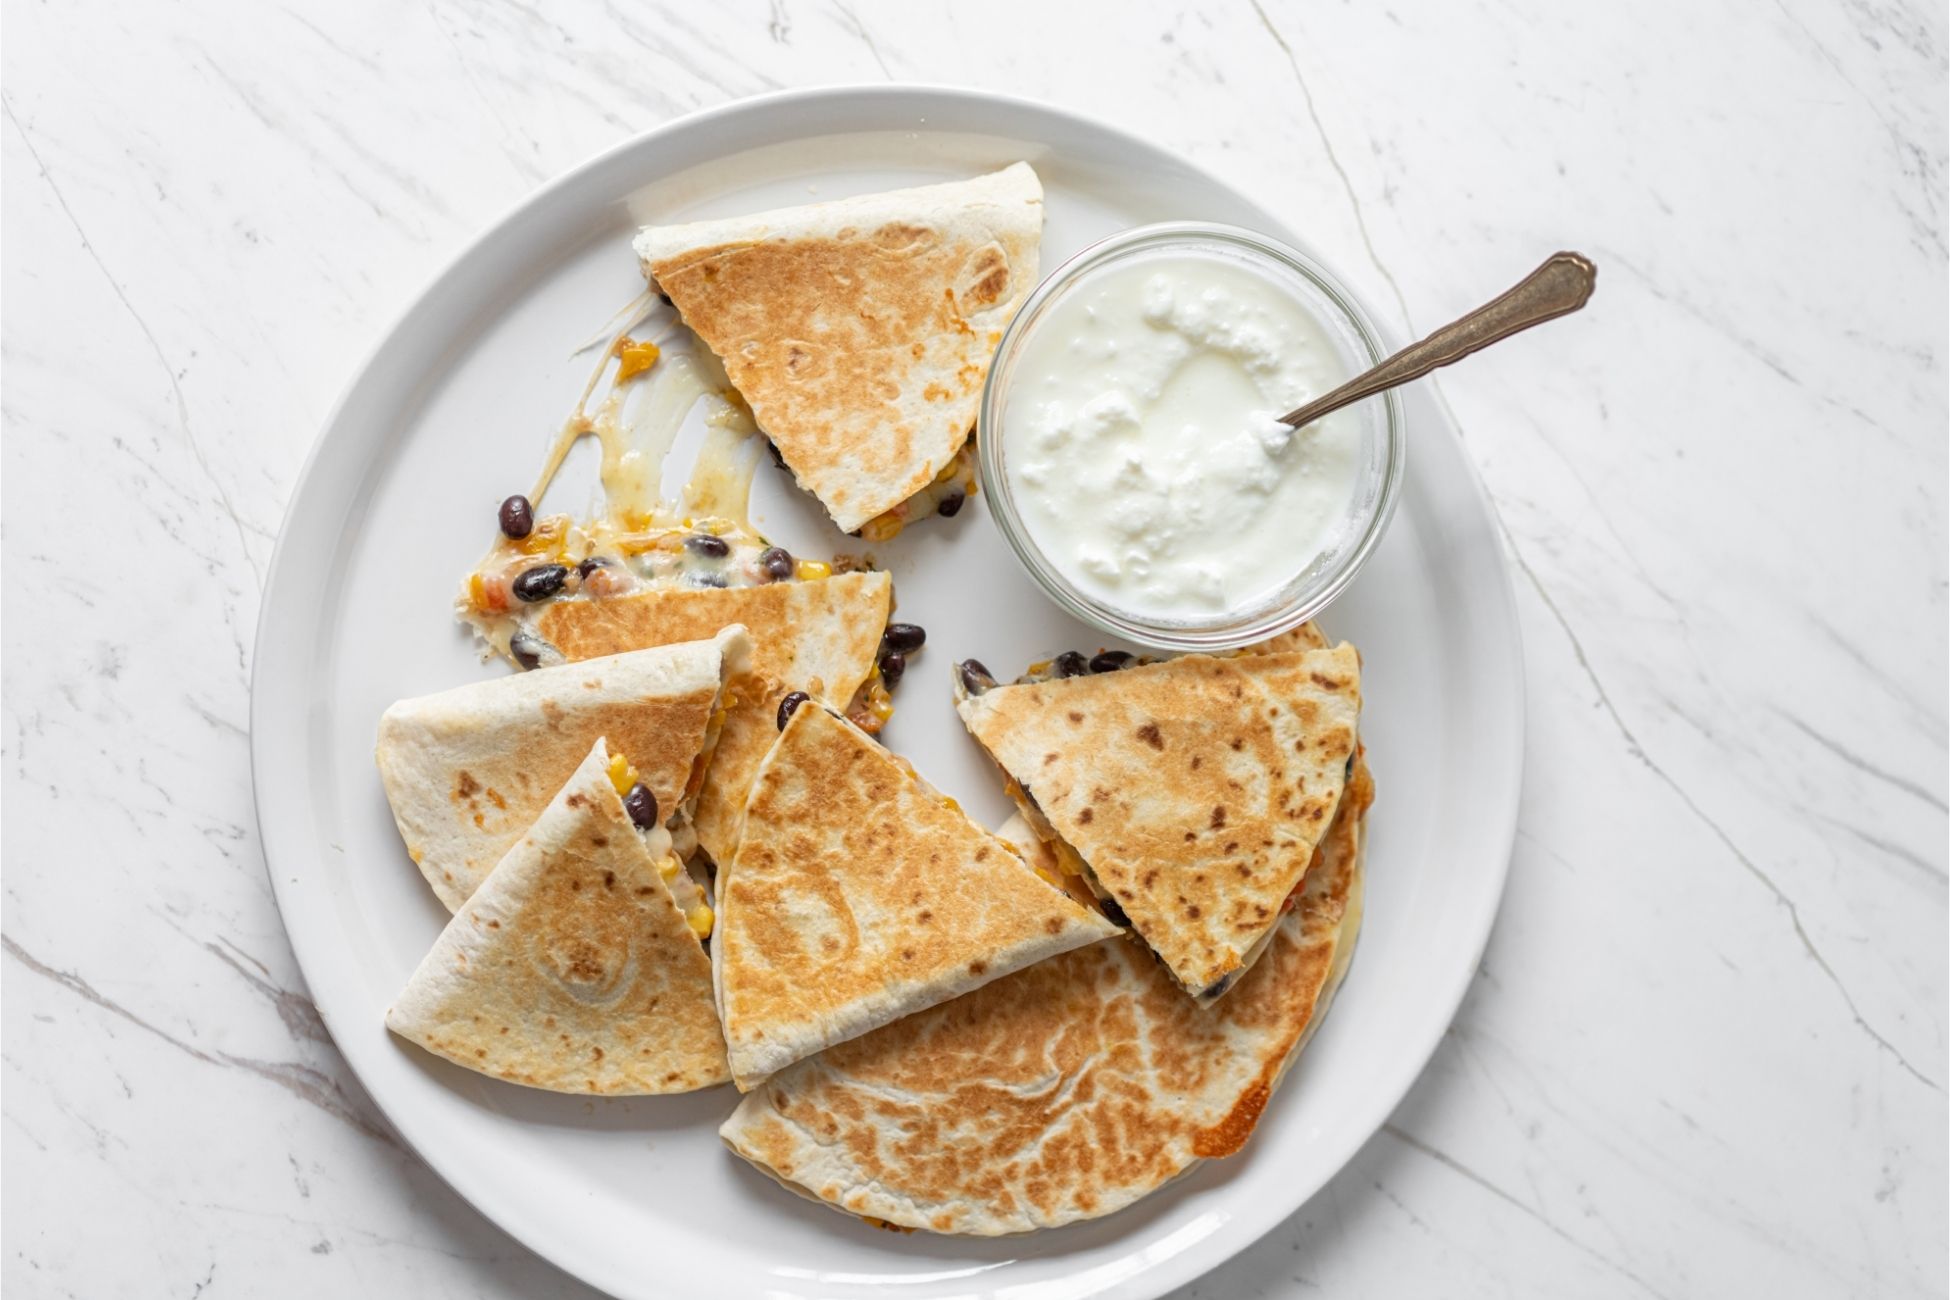
The ultimate Sunday breakfast recipe. These quesadillas are not only cheesy but have a bit of protein with scrambled eggs and black beans. If you find yourself in the mood for a bit more spice, add jalapenos and cilantro to the mix. It’s a perfect vegetarian meal to cut down meat consumption. They’re great any time of the day, morning, noon or night! You can make these in batches and freeze them. Simply reheat in a microwave for about two minutes then transfer to a skillet to crisp the outside. Prep time: 20 minsCook time: 20 minsTotal time: 40 minsServings: 6 servings Ingredients 2 teaspoons butter 1/4 cup chopped red onion 6 large eggs, beaten in a bowl 1/8 teaspoon salt, or to taste Pinch black pepper 1 (15-ounce) can black beans, rinsed and drained 1 (4-ounce) can chopped mild green chiles, drained 1/2 cup cilantro leaves 6 (9-inch) flour tortillas Pickled jalapeño peppers from a jar (optional) 1 1/2 cups grated sharp cheddar or Monterey jack cheese, or more, to taste Vegetable oil, to reheat the quesadillas Salsa Directions Scramble the eggs: In a nonstick skillet over medium heat, melt the butter. Add the onion and cook, stirring, for 30 to 40 seconds (just to soften them). Add the eggs, salt, and pepper, and cook and stir until they are set to your preference. Remove the pan from the heat. Make the filling: Stir the beans, mild green chiles, and cilantro into the eggs in the pan. Assemble the quesadillas: On one-half of each tortilla, spread about 1/2 cup of the filling. Top with a few jalapeno slices (if using) and 1/4 cup cheese. Fold and press together to flatten them. Cook the quesadillas: Spray or brush a skillet with vegetable oil, then place the skillet over medium heat. Cook the quesadillas for 1 to 2 minutes on each side, or until the cheese melts and the tortillas are lightly browned and crisp on the outside.You can either cook all of the quesadillas, cool them, cut them in half then freeze them. Or just cook what you want to eat right now, and freeze the rest, uncooked for later (this just saves you a little cooking and cooling time now). To serve: Enjoy with salsa, if you like.TO FREEZE: Line a baking sheet that will fit in your freezer with parchment paper or waxed paper. Spread as many assembled quesadillas as will fit on the baking sheet, top with a layer of paper, and add a second layer.Cover loosely with plastic wrap, and freeze until firm, about 3 hours. Transfer the frozen quesadillas to plastic freezer bags, stacking them between small pieces of parchment or waxed paper. Store for up to 2 months.TO REHEAT: Remove as many quesadillas as you like from the freezer. Spread on a microwave-safe plate and microwave for 2 minutes to partially defrost them. At this point, the tortillas can be a little soggy, but that can be remedied. Just follow the “Cook the Quesadilla” instructions in step 4. Source: Simply Recipes

Crispy Garlic Salmon Nuggets Recipe

Salmon is a great source of protein, especially for younger kids. If you’re struggling to get children to enjoy salmon or you’re just looking for a new way to prepare delicious nuggets, try out this recipe. It’s a quick and easy way to turn salmon into a delicious yet healthy meal. Pair these with some potato wedges or your favorite dipping sauce. Ingredients: 1 Egg 1 Tspn. Garlic Salt 1 Tspn. Italian Seasoning 1 Cup Panko Mix 1 Tbsp. Garlic 1 Tspn. Red Pepper Salmon Non-Stick Cooking Spray Directions: In a bowl mix the egg, garlic salt and Italian seasoning In another bowl mix the panko mix, garlic and red pepper Cut the salmon into small nugget-sized pieces. Coat in the egg mix then in the bread mix. Repeat if you’d like a thicker coating Oil pan and air fry the nuggets at 400°F for 4 minutes on each side Serve and enjoy! Shop Our Air Fryers Air Fryer Giveaway

3 of the Best Colors to Paint a Kitchen

Kitchens play a huge role in your day to day. It’s also one of the biggest factors to a home’s resale value. A well-designed kitchen can help your home stand out against competitors. This minor kitchen remodel can provide the biggest return on investment compared to more costly remodels. When deciding on a kitchen paint color, it should resonate with a wide array of buyers. Color is a fun, visual interest but can also be a risk. While some buyers like a calm, soothing blue others may prefer a vibrant and energetic color. If you’re trying to maximize your chances, stay light. Here are the three most resale-friendly colors according to real estate professionals. Greige. A combination of beige and gray, this color is a versatile neutral color. It can give the illusion of spaciousness in a small kitchen. Greige can come in many hues and shades with either warm or cool undertones. It can complement any color while delivering a timeless look. A buyer can imagine their pots, pans and decorations working well against a greige-colored kitchen. White. An energizing color, white suggests freshness and cleanliness. It’s a timeless style and works with any kitchen size. White is ideal for a resale since it’s essentially a blank slate begging to be personalized by future buyers. Light Green. While neutrals are a sensible choice, a lighter shade of green is a great option for kitchens. People are leaning towards a more natural and green environment. It offers a sense of calmness and a soothing feel to a kitchen. Source: the Kitchn

Lucky Charm Sugar Cookies Recipe

Make this quick and easy Lucky Charms cookie recipe with just a few ingredients. You can have these ready in just a few minutes with little to no mess. They’re perfect when paired with milk or a cup of coffee. Get the whole family involved! Creating a new fun recipe is a perfect way to spend time together. Ingredients: Packaged Sugar Cookies Cream Cheese Frosting Lucky Charms Non-Stick Cooking Spray Directions: Oil pan and air fry the packaged sugar cookies at 360°F for 14 minutes Frost your cookies with cream cheese frosting Top with Lucky Charms and press softly into place Serve and enjoy! Shop Our Air Fryers Air Fryer Giveaway

The Trick to Stop Berries from Bursting on the Bottom of Muffins

A homemade muffin is the best answer to an easy breakfast while heading to the office. However, even a good blueberry muffin often faces a problem when the fruit sinks to the bottom and bursts, gluing itself to the paper lining or pan. One trick to solving this dilemma is holding off on mixing the fruit in your muffin batter. Instead, drop a bit of the plain batter to each muffin cavity to create a thin layer. You can then gently fold in your mix-ins to the remaining batter. Proceed with placing the mixed batter over the plain batter, dividing evenly as needed. Continue to bake as normal. The layer of plain batter at the bottom will prevent the berries from sinking to the bottom of the pan and bursting. This method works with lined or unlined pans, making clean-up a breeze. It’ll also work with other berry mix-ins, dried fruit or even chocolate chips. Source: the Kitchn

BBQ Pringle Chicken Wings Recipe

Add a classic pringle flavor to chicken wings. These wings capture all the BBQ from the crushed up pringles while achieving a crispy exterior. You’ll only need eggs, flour and of course Pringles. You can easily prepare these in just a few minutes for a fun new appetizer. Pair it with your favorite dipping sauce. Ingredients: BBQ Pringles Eggs Flour Non-Stick Cooking Spray Directions: Crush the Pringles in a bag until it is a fine breadcrumb Dip the wings in the egg wash, then flour and return to the egg wash. Finally mix in the Pringle crumbs Spray the wings with cooking spray and air fry at 360°F for 10 minutes on each side Serve and enjoy! Shop Our Air Fryers Air Fryer Giveaway

Carving Pumpkins Safely This Halloween

One of the most integral parts of Halloween, pumpkin carving is a fun pastime but not without its safety tips. Here’s how to ensure a happy and healthy Halloween for all. Precautions. Scooping out pumpkin pulp and seeds is messy work, so it’s smart to work outside. Set up a workstation covered with some newspapers, preferably on a lawn. Pumpkin pulp on a driveway or deck can be slippery if dropped. You’ll want to collect your tools consisting of a marking tool, thick gloves, a kitchen knife, precision knife and a large spoon or garden trowel. Always be mindful of your cutting tools and don’t leave them lying around where children or pets could come across them. Carving. Draw out the pattern first as well as the marks on top to make the lid. Marking beforehand will give you a steadier hand when cutting. When cutting the lid, hold the kitchen knife at a 45-degree angle. You’ll end up with a lid that doesn’t fall through the hole once it begins to dry or lose mass. Afterwards, remove the pulp and seeds with the trowel or spoon. Set the innards in a container or bag, making sure your hands are clean and not slippery afterwards. Use a precision knife for the more intricate parts of the design. Avoid a “saw” motion with the knife as this can result in the knife slipping. Use a series of careful jabs instead. Illumination. A candle is the traditional way to light a jack-o-lantern, but an open candle can be a fire hazard. If using a candle, be thorough when removing any leaves or flammable material around. Never leave the candle unattended. Keep out of reach from trick-or-treaters and away from long, flowing costumes. A safer alternative to candles are glow sticks. There’s no flames, cord or batteries and they’re waterproof. Displaying. Traditionally jack-o-lanterns are placed at home entrances, but they can unintentionally invite rodents and insects to your home. These pests are drawn to the exposed soft inner flesh of the pumpkins. Place pumpkins a few feet away from entry points and make sure any cracks or gaps leading to your home are sealed. As the carved pumpkin begins to rot, pieces could be a slipping hazard. Monitor them daily and dispose of them when they’re not looking at their best anymore. Source: the Spruce