Year: 2021

Design 101: Mixing Materials

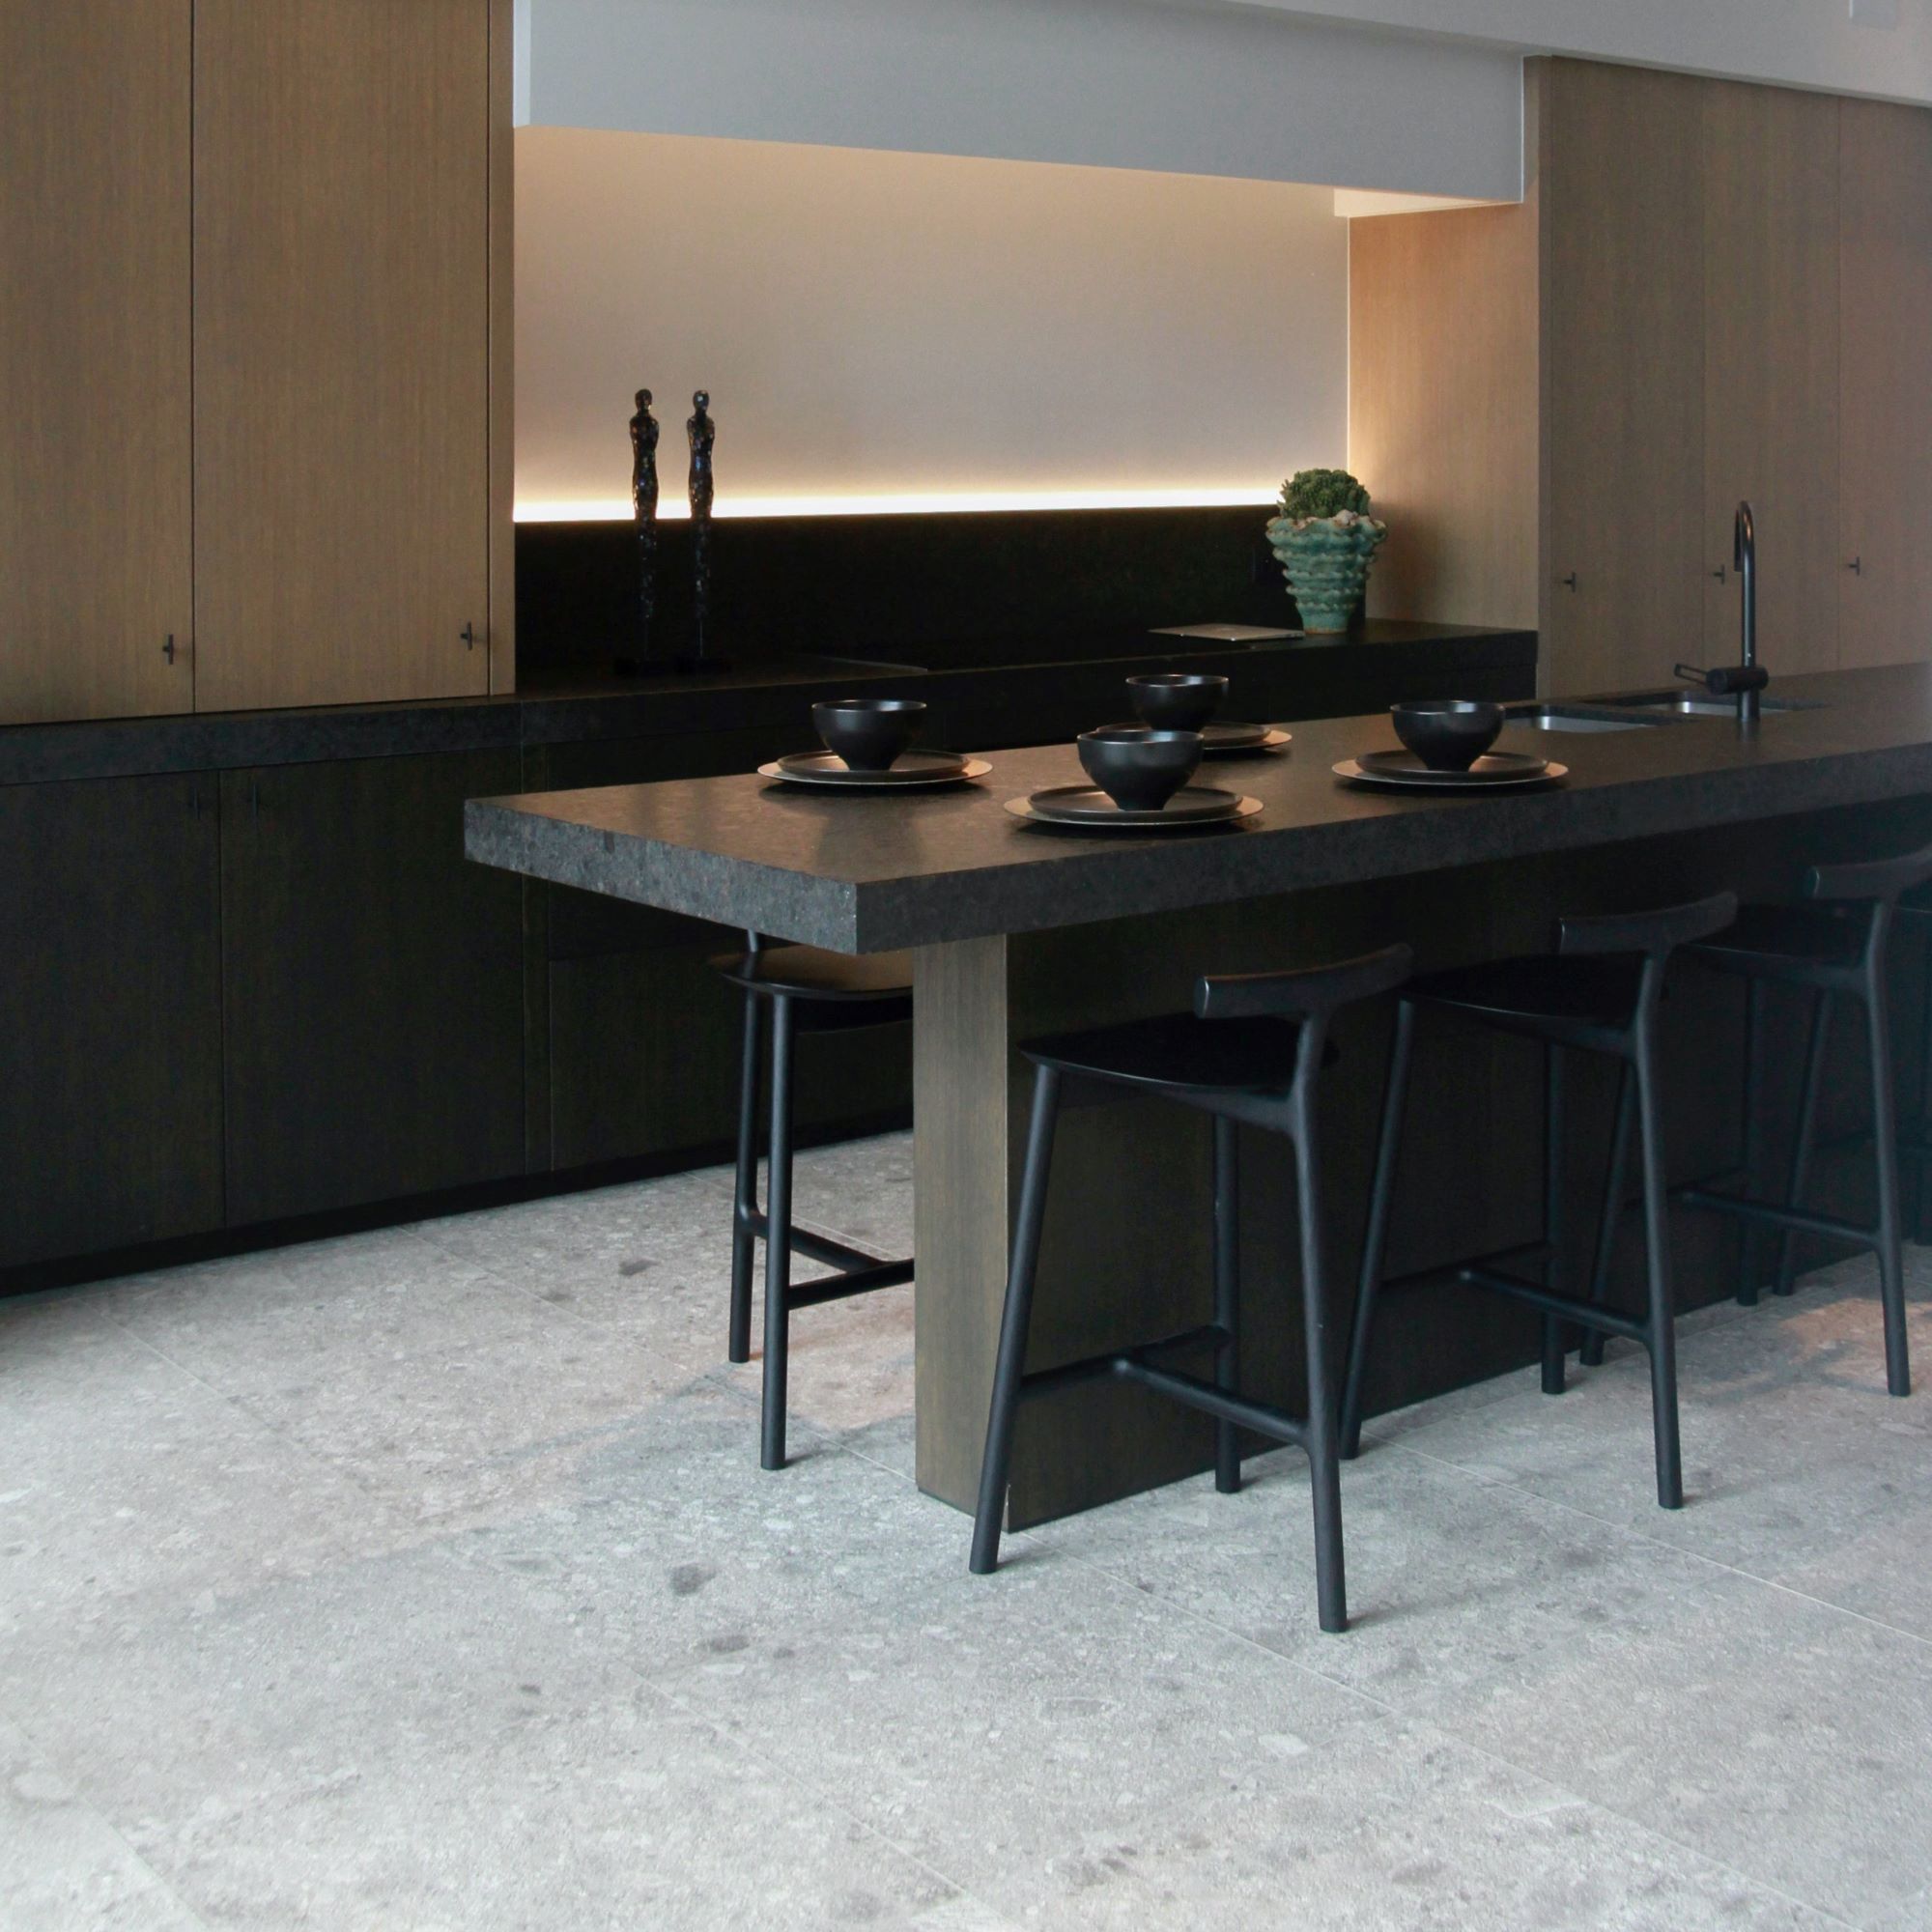
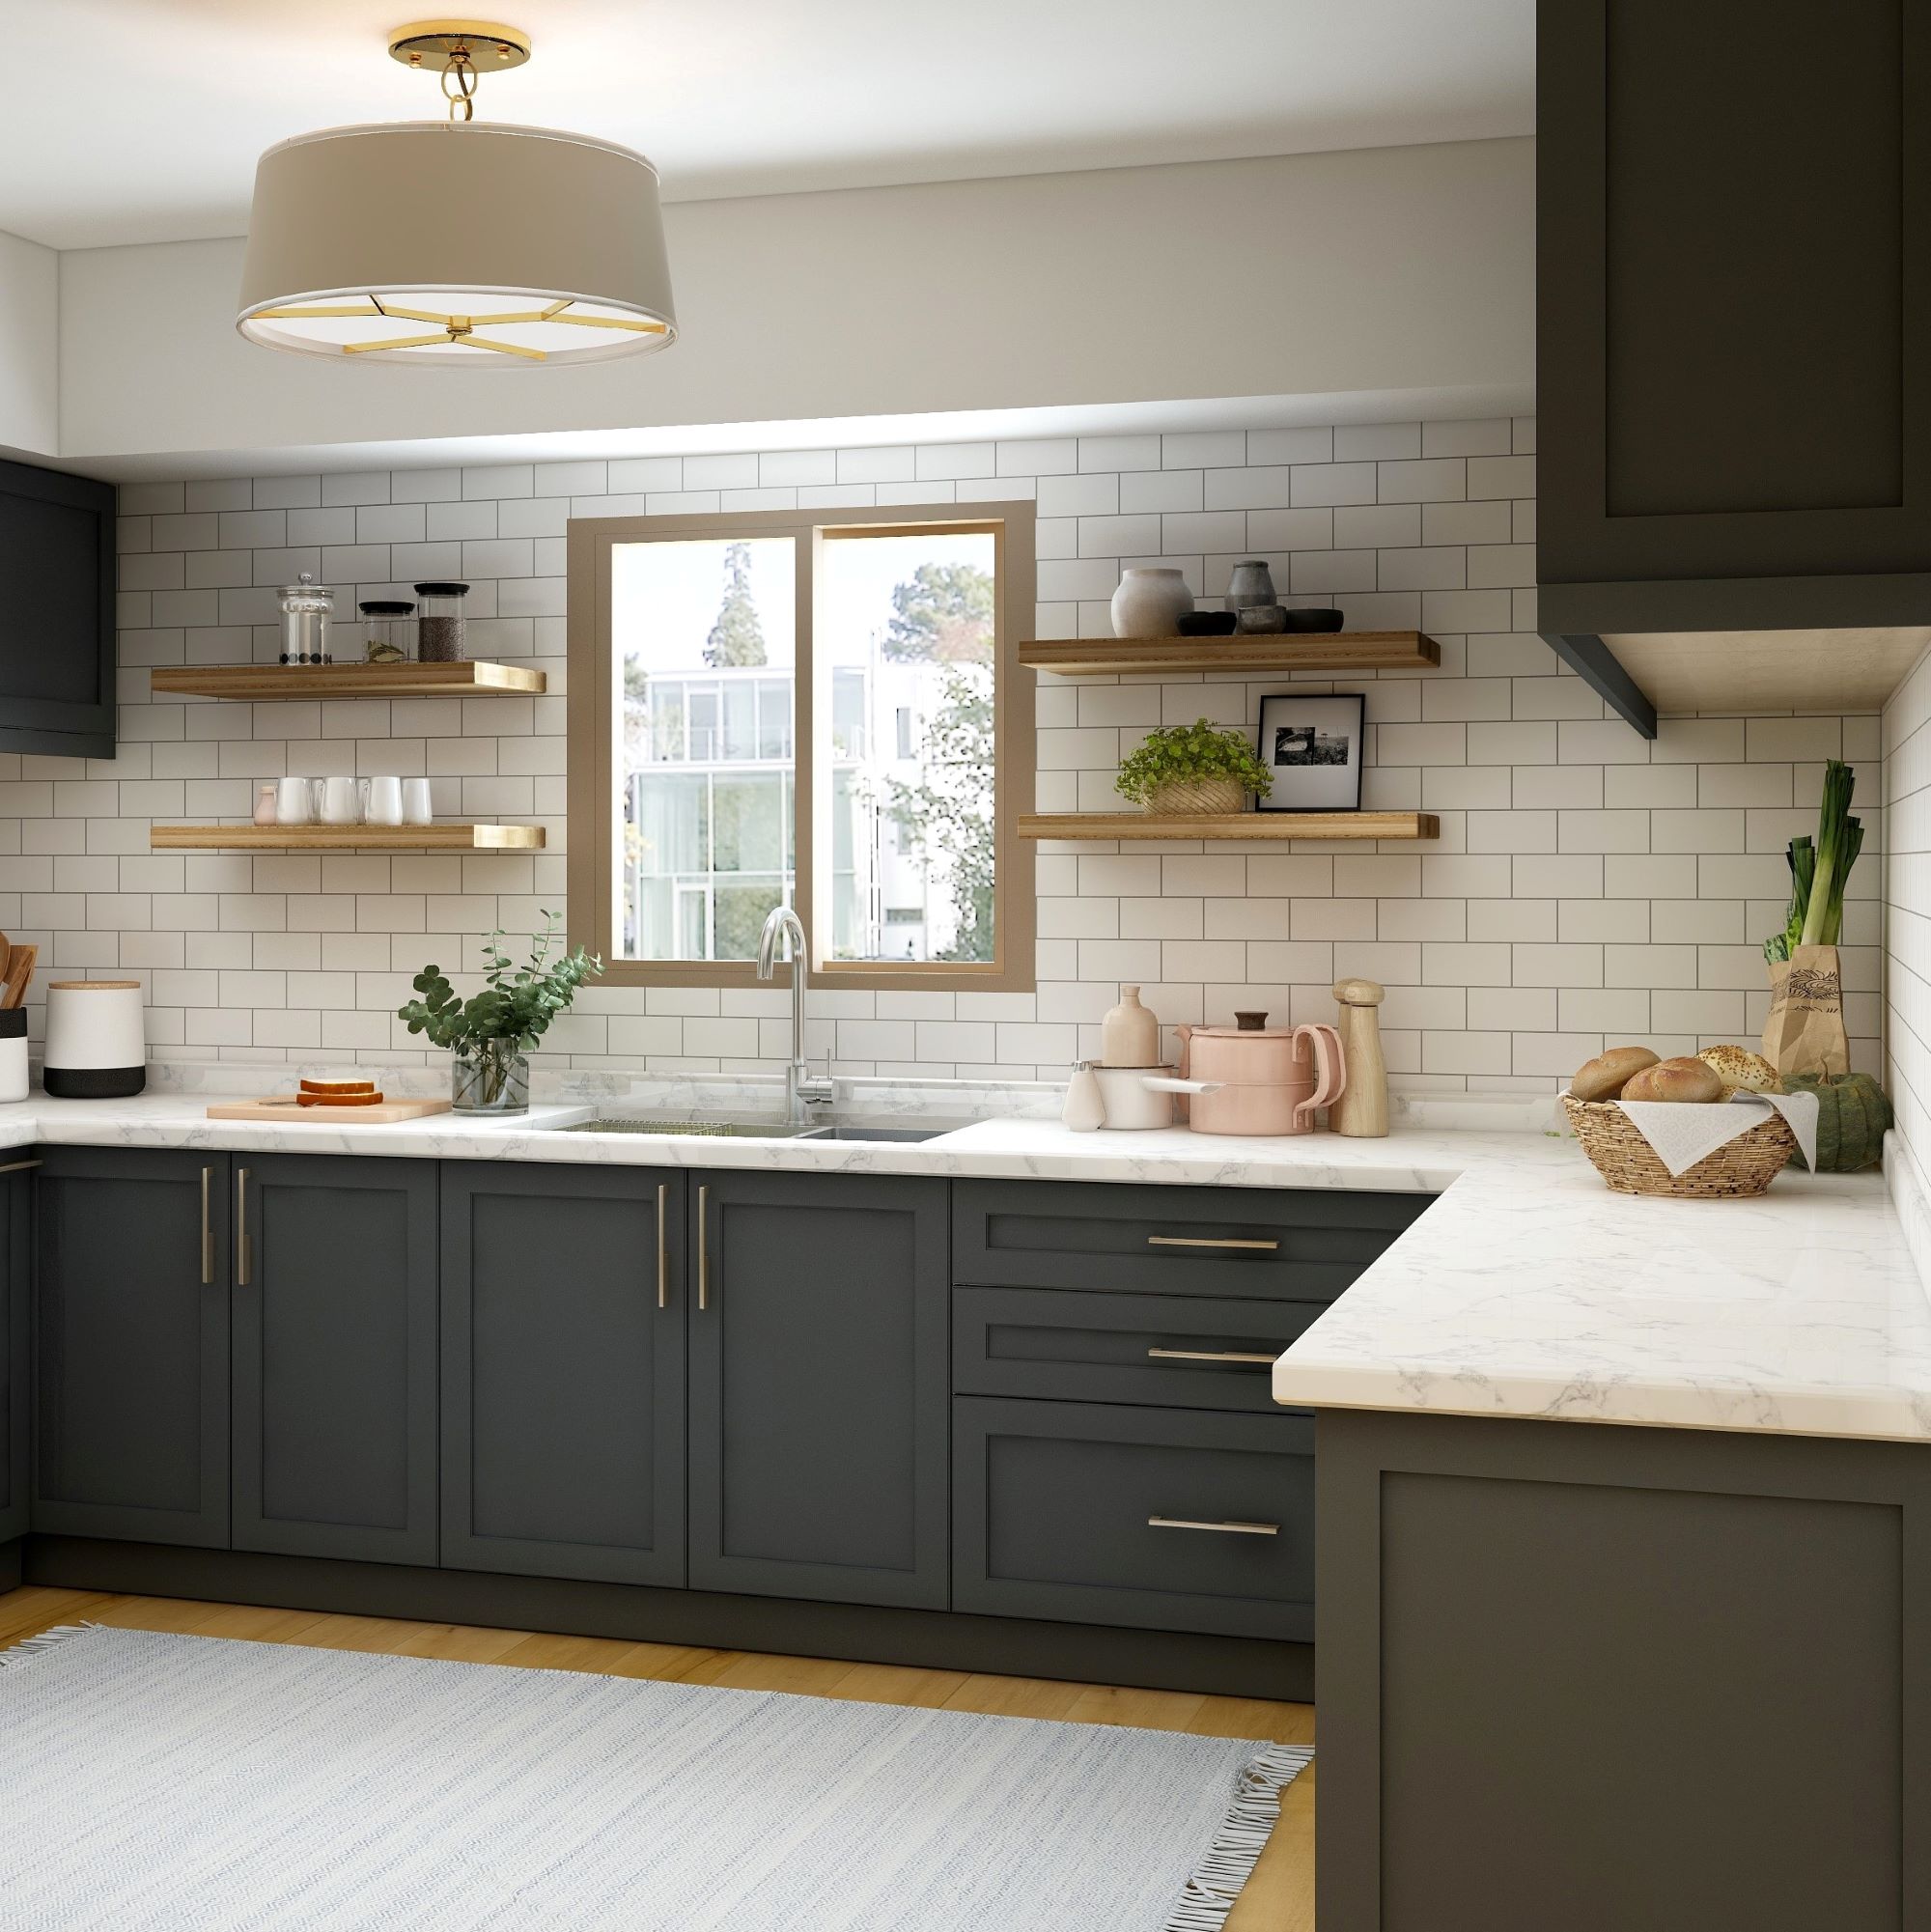
Creating a timeless kitchen space can be accomplished when incorporating and mixing different styles. You don’t need a massive budget to learn some key principles and apply them to your own kitchen. Here’s five ways you can leverage materials to create beautifully layered interiors. Contrast. Worry less about whether furniture should match and more on how different pieces can enrich each other when placed together. If you have straight lines and contemporary pieces, place a Baroque shape next to them to heighten both. Placing all similar pieces and styles together in one place could result in a lackluster design. Patina. Time plays a key role in a kitchen design. The history with antique pieces such as aged metal, worn leather or distressed wood captures the distinct richness to an interior. An abundance of glossy finishes will appear cold, you want a bit of wear to soften it. This adds the soul to a kitchen. Texture. Combining textures further enhances the soul of a space. You never want to cover everything with all wood or metal pieces. It’s much more interesting to look at the contrast of different textures. For instance, placing a blue clay against satin or a cool linen against a deeper velvet. If you find yourself overwhelmed, find a connection in tonality or color among textures. Light. Material will absorb or reflect light differently. You can create variations to enhance this further when deciding on pieces. Glass for example, can come in many different shapes and colors. Bringing in the light to a kitchen will enhance moods and bring a warmer environment to an otherwise dull space. Personality. Your kitchen at the end of the day needs to be a reflection of yourself. While it’s great to seek out materials based on their look, a personal kitchen tells a deeper story. Antiques passed down through a family or furniture purchased in memorable locations will play with the element of memory. You’ll feel happier when you look at a piece that has a deeper value to you. Sources: House Beautiful

Classic Linzer Cookies Recipe

Try this delicious recipe for a sweet tart cookie with a rich, tender crumb. Almonds take this dessert to the next level with fragrant warm notes of toasted nuts. Prepare these for a memorable occasion the whole family will love. Yield: 2 dozen Ingredients: 1/2 cup whole, skin-on almonds 2 1/4 cups all-purpose flour, divided 1/2 teaspoon salt 2 sticks (8 ounces) unsalted butter, at room temperature 1 cup granulated sugar 1 large egg 1 teaspoon vanilla extract 1/2 cup seedless raspberry jam 1/2 cup powdered sugar Directions: Toast the almonds. Toast the almonds in a small frying pan over medium heat, stirring frequently, until fragrant, 8 to 10 minutes. Set aside until cooled completely, about 20 minutes. Make almond flour. Place the cooled almonds and 1/2 cup of the flour in a food processor fitted with a blade attachment and process to a fine meal. Add the remaining 1 3/4 cups flour and salt, pulse to just combine, and set aside. Cream the butter and sugar. Place the butter and sugar in a stand mixer fitted with a paddle attachment. (Alternatively, use an electric hand mixer and a large bowl.) Beat on medium speed until fluffy and lightened in color, about 3 minutes. Add the egg and vanilla. Stop the mixer and scrape down the sides of the bowl with a rubber spatula. Add the egg and vanilla beat on medium speed until well-combined, about 1 minute. Add the flour. Stop again and scrape down the sides of the bowl. Add the flour mixture and mix on low speed until just incorporated, about 30 seconds. Divide the dough. Remove the bowl from the mixer and give the dough a few stirs with a rubber spatula, scraping the bottom of the bowl, to ensure that all of the ingredients are evenly incorporated. Divide the dough into 2 equal portions, about 4 1/2 ounces each. Chill the dough. Press each piece of dough into a 5×7-inch rectangle. Wrap each piece in plastic wrap and refrigerate until firm, about 1 hour. Roll the dough. Working with 1 piece of dough at a time, remove the dough from the refrigerator and unwrap. Sandwich the dough between two pieces of parchment paper and roll out to 1/4-inch thick. Cut the cookie bottoms. Use a 2-inch regular or fluted round cutter to cut as many rounds from the dough as possible. Place 12 rounds on a parchment paper-lined baking sheet and chill for 30 minutes. Repeat rolling and cutting the dough scraps, chilling the dough if it becomes too soft to get a clean cut. These rounds will be the bottoms of the cookies. Cut the cookie tops. Roll the remaining rectangle of dough out like the first. Use the 2-inch cutter to make rounds again, then use a 1-inch cutter to make a hole in the center of each round. Remove the center rounds (these can be baked off separately); these will be the tops of the cookies. Place the tops on another parchment-lined baking sheet. Repeat rolling and cutting any dough and scraps and chill the cookie tops for 30 minutes. Heat the oven. While the cookies are chilling, arrange 2 racks to divide the oven into thirds and heat the oven to 350°F. Bake the cookies. Bake the cookies until lightly golden-brown, 9 to 11 minutes. Cool completely before filling. Fill and decorate. Spread each cookie bottom with 1 teaspoon of raspberry jam and top with a cookie top. Use a fine-mesh strainer and sprinkle the tops of the cookies with powdered sugar just before serving. Source: the Kitchn

5 Options for Kitchen Flooring

Kitchen floors go through a lot. A flooring space must endure spills, drips, heat and dropped utensils. When deciding on a kitchen floor material, you’ll need to consider style, function and comfort. Here’s five materials you should look into. Hardwood While hardwood flooring by nature is very durable, it has its limitations in areas susceptible to moisture. Modern sealers and polyurethane finishes can aid in preserving hardwood floors longer however. The material will change over time and naturally degrade, but this can add more personality to a kitchen. You’ll always have the option of sanding and refinishing the floor to make it feel brand new. Bamboo Bamboo is actually harder than hardwood and is more resistant to moisture and water damage. It’s increasing in popularity for kitchens and is considered more durable than wood. It’s important to note bamboo is more expensive than wood and it’s harder to refinish due to the natural grain on the material. Ceramic Tile Ceramic tile is a material made from natural clay and is extremely durable for kitchen flooring. It’s also very hard and impervious to water damage. Under normal conditions, ceramic tile will maintain its appearance and function over time with little to no change. They also come in a variety of styles and colors, offering countless options. You should take into consideration that ceramic tile is a more cold material and some people can find it to be too hard. Concrete Another inexpensive option, concrete is usually already in place beneath existing floor coverings. There are many ways it can be polished, stained or treated to fit in any kitchen. This pairs perfectly with a modern-style kitchen. Similar to ceramic tile, concrete is a cold material that can be too hard for some people. Concrete isn’t everyone’s first choice, which can be a drawback when it’s time to sell your home. Natural Stone Tile Probably one of the most luxurious choices for kitchen flooring, natural stone tile is an actual rock with long-lasting durability. A natural stone flooring can be made of marble, granite, slate, limestone or sandstone. The drawback to natural stone is that the material is porous, making it susceptible to water and liquid stain penetration. Quality penetrating stone sealer can be applied annually to create an invisible coat of protection over the stone. Each stone material will have its own properties for hardness, scratch resistance and durability. Source: The Spruce

How to Make Your Home Smell Great

The smell of your home is unique. Although it may not always be smelling the best, there are some steps you can take to boost the overall aroma on a daily basis. Start here to deodorize your house instead of burning a fragrant candle for a quick fix. Garbage Disposal Start with your sink. Drop lemon-scented dish soap into the disposal and run the water, then turn it on. You can also put lemon or lime rinds through the disposal with plenty of water. If the smell persists pour ½ cup of baking soda into the garbage disposal while running warm water. Carpets and Rugs Carpets can absorb smells easily, especially with food spills. Sprinkle baking soda over the entire carpet and let it sit for a few hours before vacuuming. You can also try this method out on pet beds or mattresses. Trash Can Taking the trash out may be obvious, but it’s often the trash can itself that creates the worst smells. While deep cleaning your kitchen, sprinkle baking soda in your trash can or use a deodorizing pack or pod. Take it a step further by spraying everything down with disinfecting spray to kill any remaining bacteria. Simmer Herbs and Fruit Take citrus slices and herbs like lavender or mint and simmer with water in a small saucepan on your stove. The heat will permeate the scent throughout your house and can easily be customized based on your available ingredients. Add Plants Plants are a great decoration while also eliminating unpleasant smells. Try bringing in jasmine, eucalyptus, gardenias for pleasant fragrances in your home. Just be prepared for the proper care and maintenance these plants require. Source: Good Housekeeping

French Toast Casserole Recipe

Skip standing by the stove and let your oven do the work with this french toast casserole recipe. You get all the best parts of a classic french toast with less effort. Try this out for this weekend’s breakfast, just make it and refrigerate overnight. Ingredients: For the Casserole: 1 large loaf good-quality French loaf, sourdough, ciabatta, or challah (enough to yield 10 cups of chunks of bread) 1/2 cup (45g) chopped pecans 5 large eggs 1 1/2 cups whole milk 1/4 cup (50g) granulated sugar Zest from one medium orange (optional) 1/2 teaspoons ground cinnamon 1/4 teaspoon salt For the topping: 4 tablespoons unsalted butter, melted 3 tablespoons (40g) dark brown sugar 1 teaspoon ground cinnamon Pinch of salt Optional topping for serving: Dried cranberries Powdered sugar Maple syrup Directions: Preheat the oven to 375F (190C). Place an oven rack in the center position. Slice the bread into 1-inch slices and then cut them into 1-inch cubes. You can also tear the bread apart with your hands. Leave the crusts on. Layer the bread and pecans in a baking dish: Lightly grease a 2-quart (if you want thicker slices) or 3-quart baking dish (if you want thinner slices) with cooking spray or butter. Add enough bread cubes to cover the bottom. Sprinkle a few tablespoons of pecans on top. Continue layering the bread chunks and pecans. Prepare and add the custard: In a small bowl, whisk the eggs together. Add the milk, sugar, orange zest, 1/2 teaspoon of cinnamon, and salt, and mix well. Pour the egg and milk mixture evenly over all the bread chunks. (I found it easier to pour the mixture into a large measuring cup with a spout first before pouring the mixture over the bread.)At this point, the casserole can be baked right away, or covered and refrigerated overnight. Drizzle with topping: In another bowl, mix the melted butter with the brown sugar, 1 teaspoon cinnamon, and a pinch of salt. Using a spoon, drizzle the mixture evenly over all the bread chunks. Bake the casserole for 35 to 45 minutes. I baked mine for about 38 minutes. Leave the casserole in the oven longer if you want the chunks of bread on the top to be more brown and crunchier. Remove the casserole from the oven and let it cool for about 10 minutes before serving. Sprinkle dried cranberries and dust powdered sugar on top, if you like. Serve with maple syrup at the table. Source: Simply Recipes

Launch of the Cosmo YouTube Channel

Our YouTube channel is finally up and we’re excited to connect with our community in more ways than ever before. Our channel will consist of product showcase videos, company information, announcements and much more. You can even enter an air fryer giveaway on our most recent videos (just a heads up). Make sure to subscribe to be notified as soon as we post something new and let us know in the comments below what you’d like to see. About Us Video Subscribe Here

How Does an Air Fryer Work?

Although you’re not technically frying, since that involves submerging something in oil, air frying is a great alternative to reducing fat. An air fryer actually works very similarly to a countertop convection oven in that it has a heating element with a fan to blow air around a cooking chamber. The difference is an air fryer swirls the air around very quickly in a circular fashion to reach all of the surfaces of the food to create a crisp crust. An air fryer also takes advantage of a perforated basket which increases the food’s contact with the hot moving air. You won’t need to toss or shake fries during cooking for the perfect crisp. Conveniently sized to sit on a countertop, air fryers can help save valuable space in a kitchen as opposed to full sized ovens. Oil Content Many air fryers will need far less oil than typical frying would. However, a small amount of oil or spray can still prove beneficial to help with crisping. It’s best to go by the recipe and the type of air fryer you have. Non-Frying An air fryer can actually be used for many other things besides just creating a delicious crisp. Try roasting and baking in an air fryer for delicious desserts. It’s important to note that pastries won’t rise in the same way it would in a full-size oven. Source: The Kitchn

Breakfast Acai Bowl Recipe

Acai is a great fruit packed with antioxidants and omega-3 fatty acids. Try this recipe containing unsweetened frozen puree for a delicious flavor with slight olive oil notes. Add the classic toppings for a bowl loaded with fiber. Ingredients: Two 4-ounce packets unsweetened frozen acai puree 1 medium banana 1/2 cup blueberries 1 tablespoon honey 3 tablespoons granola 2 tablespoons pomegranate seeds 1 tablespoon unsweetened coconut flakes Directions: Break the frozen acai up a little by slapping the sealed packets on the countertop or hitting them with a meat mallet. Blend the berries with 1/2 the banana, 1/4 cup of the blueberries and the honey in the blender, stopping to stir and break up the mixture as needed, until it’s the consistency of a thick smoothie; transfer to a cereal bowl. Slice the remaining 1/2 banana. Arrange the slices, the remaining 1/4 cup blueberries, granola, pomegranate seeds and coconut flakes in neat piles or rows on top of the acai. Source: Food Network

How to Properly Work With Yeast

Yeast may be intimidating if you ever find yourself baking bread and are new to baking. Overworking it can leave you with a stone hard loaf and a ruined dinner. Here’s everything you should know about getting started with dry yeast. Activating vs. Proofing Yeast An active dry yeast is a form of yeast that has been dehydrated to give it a longer shelf life. This yeast requires adding some liquid and sometimes sugar to ensure it’s alive enough for baking. A recipe may call for “proving” the yeast which can be confused with proofing the bread. Activating Yeast To activate yeast you’ll sprinkle the dry yeast into a bit of water and let it sit until it’s slightly foamy. This water does not need to be hot–room temperature or slightly warm water works best. After the foam is visible, stir it with a spoon or fork until the yeast is completely dissolved. The yeast should be smooth and silky. Proofing Yeast Yeast proofs when the gluten has been developed through kneading the dough. The yeast will feed off of sugars in the starch and expel gas into the gluten. You’ll most likely want the dough to rise double its size before shaping. This ensures the yeast and gluten will have enough time to proof and develop. Baking the yeast will cause the gas inside to rapidly expand and any water to turn into steam. Properly activating the yeast, kneading the dough and letting it rise in a warm area will allow for the yeast to proof itself. Source: The Kitchn

Strawberry Mascarpone Tart Recipe

Bake a delicious strawberry tart with a sweetened mascarpone base. The combination of balsamic vinegar and sweetened strawberries is a perfect match for those who haven’t tried it. Learn how below. Prep time: 1 hour 30 minutes Cook time: 35 minutes Yield: serves 6 to 8 Ingredients: Tart Shell 1 sheet of puff pastry, thawed 1 egg whisked Filling and Glaze 2 lbs strawberries, stemmed and quartered 1/2 cup granulated sugar 1 Tbsp orange zest, divided 1 teaspoon lemon juice 12 ounces mascarpone cheese (can also use 8 ounces mascarpone mixed in with 4 ounces of ricotta or 4 ounces of whipped cream) 1/2 teaspoon vanilla 1/3 cup confectioner’s sugar (powdered sugar) 1 Tbsp balsamic vinegar (substitute a teaspoon of lemon juice if you don’t have balsamic) Directions: Roll out puff pastry sheet to 15×5 inches or 12×12 inches. Place on a baking sheet. Fold the edges over to form a border. Prick bottom of pasty with tines of a fork. Chill for 20 minutes. Preheat oven to 400°F. Use a pastry brush to brush on egg wash over exposed surfaces. Place in hot oven and cook until nicely browned all over, about 15 minutes. Remove from oven to a rack, let cool completely. Macerate strawberries in sugar: Gently combine strawberries, half of the orange zest, and the granulated sugar in large bowl so that the strawberries are coated with sugar. Let sit to macerate for 30 minutes. Make mascarpone base: Mix together the mascarpone cheese, confectioner’s sugar, the remaining orange zest, lemon juice and the vanilla in a medium bowl until well combined. Refrigerate until needed. Make strawberry balsamic glaze: After the strawberries have macerated for 30 minutes, place a sieve over a bowl and drain the liquid out of the strawberry mixture into the bowl. Take that strawberry liquid and put it in a small saucepan. Add a tablespoon of balsamic vinegar to the saucepan, and bring to a boil on medium high heat. Boil until the liquid has reduced to the consistency of syrup, remove from heat and let cool. Assemble the tart: Spread the mascarpone mixture over the bottom of the tart shell. Arrange the strawberries on top of the mascarpone mixture. Use a pastry brush to brush on the balsamic glaze. Sources: Simply Recipes