Recipes

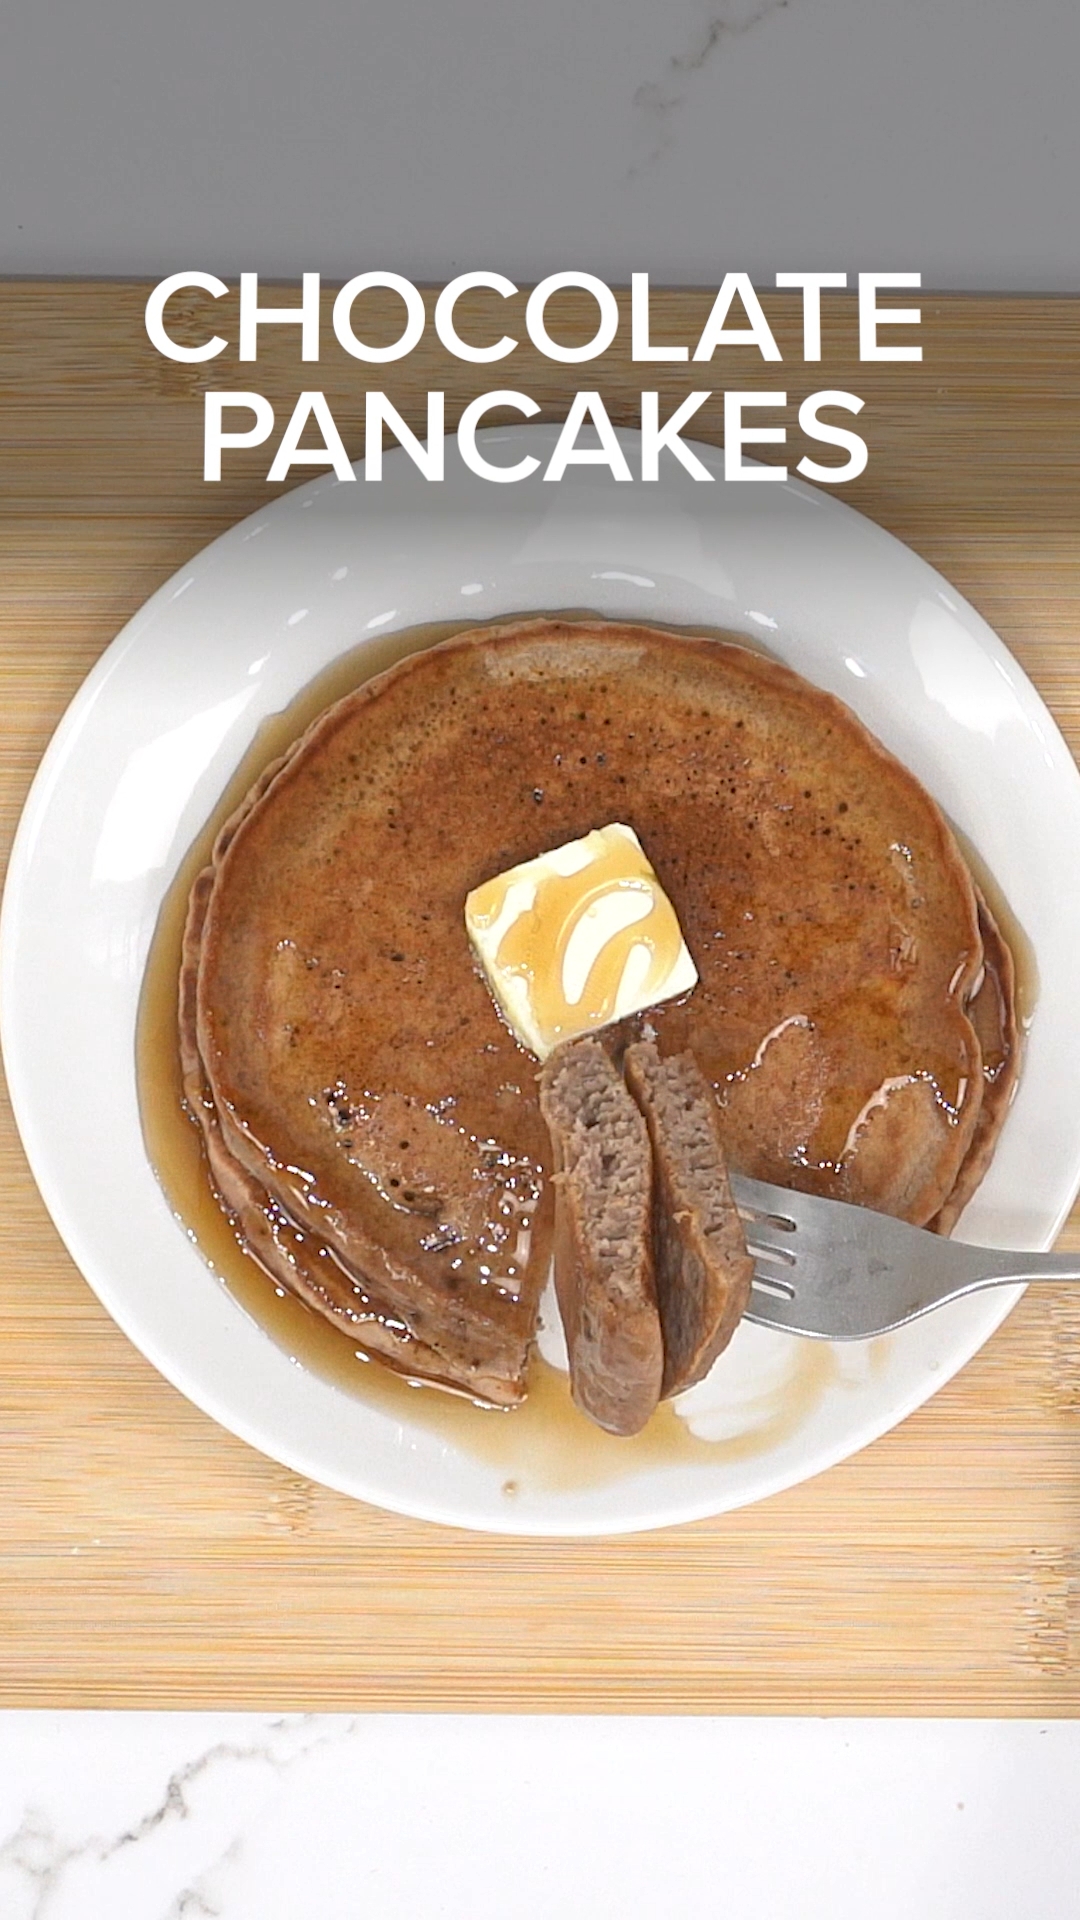
Easy Chocolate Pancakes: The Perfect Breakfast Treat Made on Your Griddle

Chocolate for breakfast isn’t just a dream – it’s a delicious reality when you make these easy chocolate pancakes on your griddle or stovetop. By combining pancake mix with brownie mix, you create fluffy, chocolatey pancakes that taste like dessert but work perfectly for weekend breakfasts or special occasion mornings. The beauty of this recipe lies in its simplicity: just a few pantry staples and about 10 minutes of cooking time stand between you and restaurant-quality chocolate pancakes. Using a griddle for pancake cooking provides the even heat and ample cooking surface that makes breakfast for the family quick and efficient. Whether you’re using an electric griddle, stovetop griddle, or even a large skillet, this recipe delivers consistent results that will have everyone asking for seconds. The combination of pancake and brownie mixes creates the ideal texture – fluffy like traditional pancakes but with rich chocolate flavor throughout. Why This Recipe Works So Well The genius of combining pancake mix with brownie mix creates a flavor and texture that neither mix achieves alone. Pancake mix provides the structure and fluffiness expected from good pancakes, while brownie mix adds deep chocolate flavor and slight richness that makes these pancakes special. Convenience factor makes this recipe perfect for busy mornings when you want something special without complicated preparation. Using pre-made mixes eliminates the need to measure multiple dry ingredients while ensuring consistent results every time you make them. Quick preparation means you can go from pantry to plate in about 15 minutes total. Mix the batter, heat your griddle, and cook – no lengthy prep work or special equipment required beyond basic kitchen tools. Customizable sweetness lets you control how dessert-like these pancakes become. The brownie mix adds sweetness, but you can adjust the amount or choose different brownie mix varieties to match your family’s preferences. Kid-approved flavor makes these pancakes an easy win for family breakfasts. Children who might resist plain pancakes often eagerly eat chocolate ones, making morning meals more enjoyable for everyone. Scalable recipe accommodates different family sizes easily. Double or triple the ingredients for large gatherings, or make the base recipe for smaller families with minimal waste. Choosing the Right Ingredients Simple ingredients make these chocolate pancakes accessible to everyone, but selecting quality mixes and fresh additions ensures the best possible results for your breakfast table. Pancake Mix Selection: Any complete pancake mix works for this recipe – brands that only require adding water are ideal. Buttermilk pancake mixes create especially fluffy results, while whole grain options add nutritional value if desired. Brownie Mix Choice: Standard brownie mix provides the chocolate flavor this recipe needs. Fudge brownie mixes create richer, more intense chocolate taste, while cake-style brownie mixes produce lighter chocolate flavor. Avoid mixes that include chocolate chips or other add-ins that might affect batter consistency. Water Quality: Since water comprises most of the liquid in this recipe, using filtered water can improve taste, especially in areas with heavily treated tap water. Room temperature water mixes more easily than cold water straight from the tap. Egg Freshness: Fresh eggs provide better binding and help create fluffier pancakes. Room temperature eggs incorporate into batter more smoothly than cold eggs directly from the refrigerator. Optional Add-Ins: Consider chocolate chips, vanilla extract, or a pinch of cinnamon to enhance flavor. These additions customize the basic recipe while maintaining its simplicity. Ingredients You’ll Need Dry Ingredients: Wet Ingredients: For Serving: Step-by-Step Preparation Technique Success with chocolate pancakes comes from proper mixing technique and griddle temperature management. Following these steps ensures fluffy, evenly cooked pancakes every time. Mixing the Batter: Pour 1 and 3/4 cups of pancake mix and 1/4 cup of brownie mix into a large mixing bowl. The ratio heavily favors pancake mix to maintain proper texture while adding enough brownie mix for chocolate flavor. Adding Wet Ingredients: Add 1 and 1/2 cups of water and 1 egg to the bowl with the dry mixes. The egg provides structure and helps bind the ingredients while adding richness to the final pancakes. Combining Ingredients: Stir the mixture together using a whisk or large spoon until just combined. The batter should remain slightly lumpy – overmixing develops gluten that creates tough, chewy pancakes instead of light, fluffy ones. Small lumps are fine and will disappear during cooking. Resting the Batter: Let the batter rest for 2-3 minutes while your griddle preheats. This brief rest allows the pancake mix to hydrate fully, resulting in better texture and easier cooking. Griddle Preparation: Preheat your griddle or large skillet over medium heat. Test readiness by sprinkling a few drops of water on the surface – they should sizzle and evaporate quickly when the griddle reaches proper temperature. Greasing the Surface: Lightly grease the griddle with butter, cooking spray, or a thin layer of oil. Use just enough to prevent sticking without creating greasy pancakes that absorb excess fat. Pouring the Batter: Pour the chocolate pancake batter onto the preheated griddle using a 1/4 cup measuring cup or ladle for consistent sizing. Leave adequate space between pancakes to allow for spreading and easy flipping. Cooking the First Side: Cook pancakes for 3-5 minutes on the first side. Watch for bubbles to form across the entire surface and for edges to look set and slightly dry. The bottom should be completely cooked and golden brown before flipping. Flipping Technique: Use a wide spatula to flip pancakes in one smooth motion. Slide the spatula completely under the pancake before flipping to prevent tearing or folding. The cooked side should show even browning with no raw batter. Cooking the Second Side: Cook for an additional 2-3 minutes on the second side. The second side typically cooks faster than the first since the griddle is fully heated and the pancake is partially cooked through. Checking Doneness: Pancakes are done when both sides are golden brown and the center feels firm when gently pressed. If unsure, you can insert a toothpick in the center – it should come out clean without

Cheesy Pizza Egg Rolls: The Ultimate Air Fryer Snack

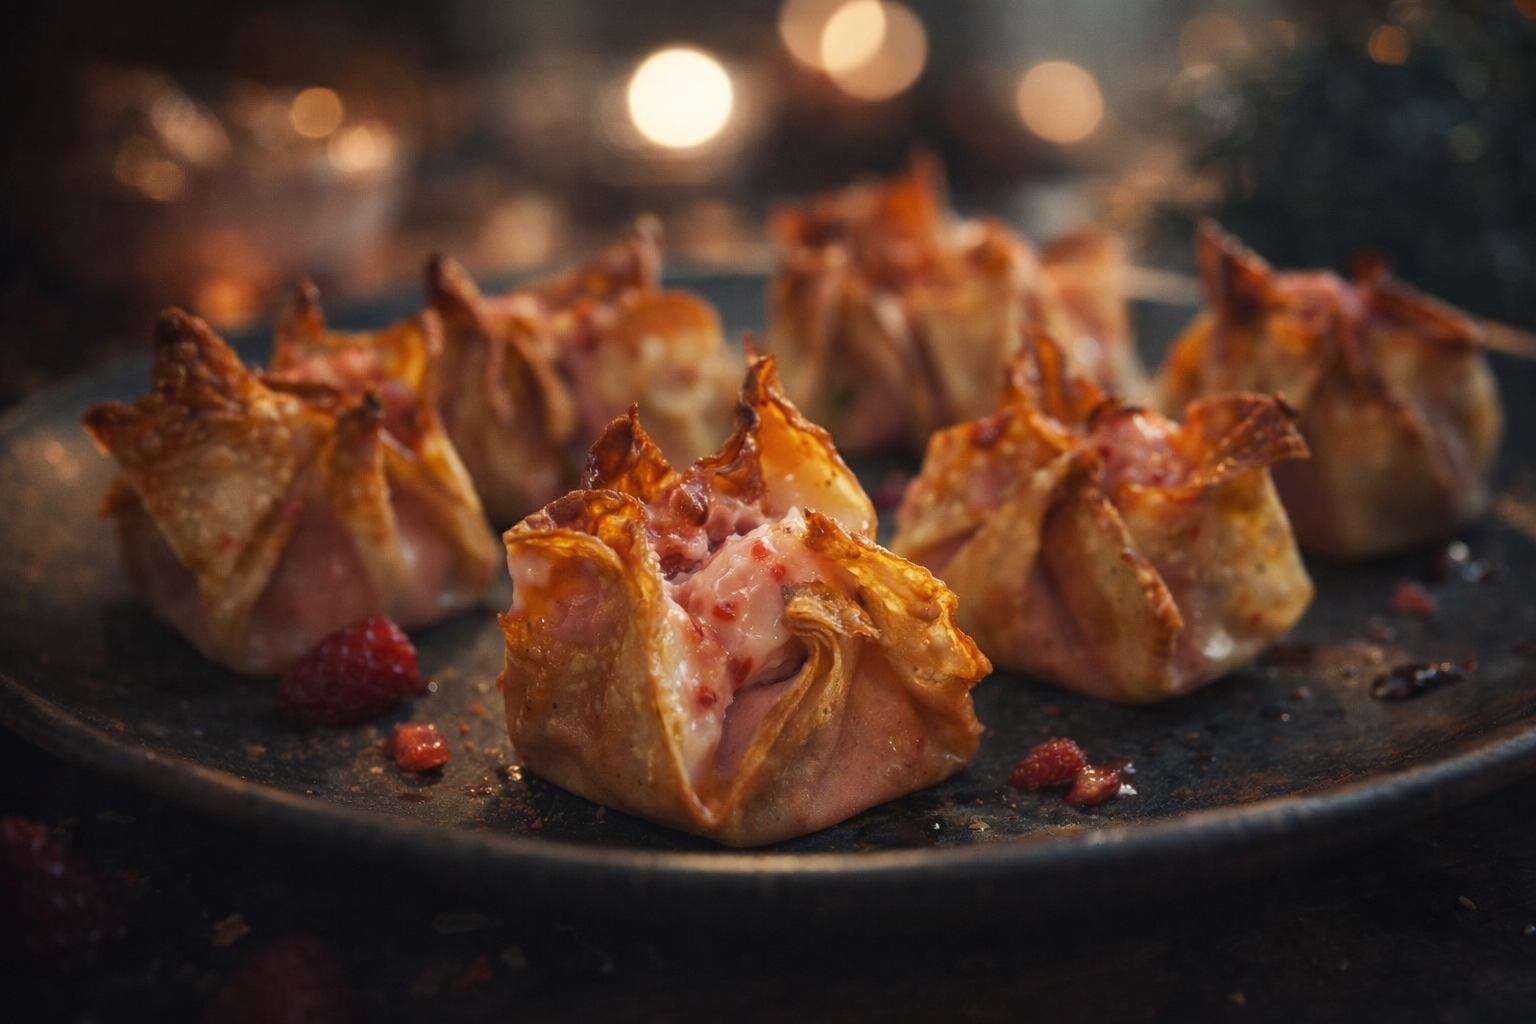
Egg rolls meet pizza in this genius air fryer creation that delivers all the flavors you love in a crispy, handheld package. These cheesy pizza egg rolls combine marinara sauce, melted mozzarella, and pepperoni wrapped in a golden, crunchy egg roll wrapper. Ready in just 10 minutes, they’re perfect for game day snacks, quick lunches, or whenever pizza cravings hit but you want something different. What makes these pizza egg rolls so appealing is their versatility and convenience. You can customize the fillings to match your favorite pizza toppings, make them ahead for easy entertaining, and cook them in your air fryer without the mess and calories of deep frying. The crispy exterior and gooey, cheesy interior create the perfect texture contrast that makes these impossible to stop eating. Why Air Fryer Pizza Egg Rolls Work So Well Air fryers revolutionize egg roll preparation by creating incredibly crispy wrappers without submerging them in oil. The rapid hot air circulation crisps every surface evenly, delivering results that rival deep frying while being significantly healthier and cleaner. The compact cooking chamber maintains consistent high heat that crisps the egg roll wrapper while melting the cheese inside perfectly. You get that satisfying crunch on the outside with hot, gooey cheese inside without any greasiness. Quick cooking time of just 5 minutes per side means you go from craving to eating in about 10 minutes total. The air fryer preheats quickly and cooks efficiently, making these egg rolls perfect for satisfying sudden snack attacks. Easy cleanup represents a major advantage over traditional frying which requires dealing with large amounts of hot oil. Air fryers need only a quick wipe-down after use, making the whole process more appealing for frequent cooking. Consistent results come from the air fryer’s controlled temperature and even heat distribution. Once you find the right timing for your specific air fryer, you can expect perfect pizza egg rolls every time. Healthier preparation uses minimal oil while achieving maximum crispiness. These egg rolls contain a fraction of the fat and calories of deep-fried versions without sacrificing texture or flavor. Choosing the Right Ingredients Simple ingredients make these pizza egg rolls accessible while allowing for endless customization based on your preferences and what’s in your kitchen. Egg Roll Wrappers: Use standard egg roll wrappers found in the refrigerated section of most grocery stores. Spring roll wrappers work too but create a different, more delicate texture. Keep wrappers covered with a damp towel while working to prevent them from drying out and cracking. Marinara Sauce: Any pizza or marinara sauce works well, but thicker sauces prevent soggy wrappers. If your sauce is thin, simmer it for a few minutes to reduce and thicken before using. Avoid using too much sauce, which can make wrappers soggy and difficult to seal. Mozzarella Cheese: Shredded mozzarella melts beautifully and provides that classic pizza cheese pull. Fresh mozzarella works but contains more moisture that can make wrappers soggy, so pat it dry before using. Pre-shredded cheese contains anti-caking agents that can affect melting, but it’s more convenient and works fine for these egg rolls. Pepperoni: Mini pepperoni or diced regular pepperoni distributes evenly throughout the filling. Turkey pepperoni offers a leaner option while maintaining that classic pizza flavor. You can also use salami, ham, or leave meat out entirely for vegetarian versions. Italian Seasoning: A sprinkle of Italian herbs enhances the pizza flavor. Dried oregano, basil, or garlic powder all work well. Fresh herbs contain too much moisture for this application. Oil for Brushing: A light coating of oil helps achieve golden, crispy wrappers. Use olive oil spray, vegetable oil, or even melted butter brushed on before air frying. Ingredients You’ll Need For the Egg Rolls: Optional Add-ins: For Serving: Step-by-Step Preparation Technique Success with these pizza egg rolls comes from proper assembly technique and understanding how the air fryer environment affects cooking. Following these steps ensures crispy, sealed egg rolls with perfectly melted fillings. Wrapper Preparation: Lay out egg roll wrappers on a clean work surface with one corner pointing toward you, creating a diamond shape. Keep unused wrappers covered with a damp towel to prevent drying and cracking. Filling Assembly: Place about 1-2 tablespoons of marinara sauce in the center of each wrapper, spreading it slightly but leaving plenty of border space. Add a small handful of shredded mozzarella cheese on top of the sauce, then arrange pepperoni pieces over the cheese. Sprinkle with a pinch of Italian seasoning. Avoid Overfilling: The biggest mistake is adding too much filling, which prevents proper sealing and causes leakage during cooking. Less is more – you want enough filling for flavor but not so much that wrappers can’t seal completely. Sealing Technique: Dip your finger in water and run it along all four edges of the wrapper to create a seal. Fold the bottom corner up over the filling, then fold in the left and right corners. Roll tightly toward the top corner, ensuring no gaps where filling could escape. Press the final corner firmly to seal completely. Check for Gaps: Hold each completed egg roll up to the light to check for any openings in the wrapper where filling might leak. If you spot gaps, use a dab of water on your finger to seal them before cooking. Oil Application: Lightly brush or spray each egg roll with oil on all sides. This step is crucial for achieving golden, crispy wrappers. Don’t skip it or your egg rolls will be pale and less crispy. Air Fryer Preparation: Preheat your Cosmo air fryer to 360°F. Proper preheating ensures immediate cooking when egg rolls are added, helping achieve crispy exteriors while melting the cheese inside perfectly. Arrangement: Place egg rolls in the air fryer basket in a single layer with space between each one. Don’t let them touch or overlap, which prevents even crisping. You’ll likely need to cook in batches depending on your air fryer size. First Side Cooking: Air fry at 360°F for 5 minutes on the

Easy Air Fryer Pumpkin Cookies: Fall Baking Made Simple

Fall baking doesn’t have to heat up your entire kitchen or take hours of your time. These air fryer pumpkin cookies deliver all the warm spices and soft texture you love about pumpkin treats without turning on your oven. Ready in under 15 minutes from start to finish, this recipe proves that air fryers aren’t just for savory foods – they’re secret weapons for quick, delicious baking projects. The beauty of air fryer baking lies in its speed and efficiency. Your air fryer preheats in minutes, bakes faster than a conventional oven, and keeps your kitchen cooler during those early fall days when you’re craving pumpkin flavor but don’t want the heat. These cookies come out soft, flavorful, and perfectly spiced every single time. Why Air Fryer Cookies Work So Well Air fryers circulate hot air around food rapidly, creating an environment similar to a convection oven but in a much smaller space. This concentrated heat means faster baking times and often more consistent results, especially for smaller batches of cookies. The compact cooking chamber of an air fryer maintains temperature more consistently than large ovens that can have hot and cold spots. Your cookies bake evenly without needing to rotate pans halfway through, simplifying the entire process. Energy efficiency becomes a real benefit when you’re baking small batches. Heating a full-size oven for a dozen cookies wastes energy, while an air fryer uses significantly less power and heats only the space needed for your batch. Temperature control in modern air fryers has improved dramatically, allowing for precise baking temperatures that rival conventional ovens. The 350°F setting works perfectly for these cookies, providing gentle heat that bakes them through without burning the edges. Quick preheating means you can go from cookie craving to finished cookies in about 15 minutes total. No waiting 10-15 minutes for your oven to reach temperature – most air fryers are ready in 2-3 minutes. Choosing the Right Ingredients Simple ingredients make these pumpkin cookies accessible to everyone, but making smart choices about each component can significantly improve your results while accommodating different preferences and dietary needs. Flour Selection: All-purpose flour provides the structure for these cookies. Measure accurately using the spoon-and-level method rather than scooping directly from the bag, which can compact flour and lead to dry cookies. Leavening Agents: Both baking soda and baking powder work together to create the perfect texture. Baking soda reacts with the acidity in brown sugar and pumpkin, while baking powder provides additional lift for soft, tender cookies. Spice Quality: Fresh spices make a noticeable difference in flavor. Cinnamon and ginger lose potency over time, so replace spices that have been sitting in your pantry for over a year for the best flavor. Pumpkin Puree: Use plain pumpkin puree, not pumpkin pie filling which contains added sugar and spices. Check the ingredient list – it should say only “pumpkin” with no other additives. Brown Sugar: Packed brown sugar provides moisture and deep, caramel-like sweetness that complements pumpkin beautifully. Light or dark brown sugar both work, with dark providing slightly more molasses flavor. Butter Quality: Real butter creates better flavor and texture than margarine or spreads. Softened butter should be pliable but not melted – leave it at room temperature for about an hour before baking. Ingredients You’ll Need Dry Ingredients: Wet Ingredients: Optional Toppings: Step-by-Step Preparation Technique Success with these cookies comes from proper mixing technique and understanding how the air fryer environment affects baking. Following these steps ensures soft, flavorful cookies every time. Dough Preparation: In a large mixing bowl, whisk together all dry ingredients until well combined. This distributes the leavening agents and spices evenly, preventing pockets of baking soda or concentrated spice in your finished cookies. Creaming Butter and Sugar: In a separate bowl, cream the softened butter and brown sugar together for 2-3 minutes until light and fluffy. This process incorporates air that helps create tender cookies with better texture. Adding Wet Ingredients: Beat in the egg until fully incorporated, then add pumpkin puree and vanilla extract. Mix until smooth and well combined. The mixture may look slightly separated – this is normal and will come together when you add the flour. Combining Wet and Dry: Add the dry ingredients to the wet ingredients gradually, mixing just until the flour disappears. Avoid overmixing, which develops gluten and creates tough cookies instead of soft, tender ones. Portioning: Use a cookie scoop or spoon to portion dough into balls about 1-2 tablespoons each. Smaller cookies work better in air fryers because they cook more evenly in the compact space. Chilling: Place portioned dough on a plate and refrigerate for 10-15 minutes. Chilled dough holds its shape better during baking and prevents excessive spreading. Air Fryer Preparation: Preheat your Cosmo air fryer to 350°F. Line the basket with parchment paper cut to size, or use perforated parchment designed for air fryers to prevent sticking. Arrangement: Place 4-6 cookies in the air fryer basket depending on size, leaving at least 1 inch between each for proper air circulation. Overcrowding prevents even cooking and browning. Baking: Air fry at 350°F for 10-12 minutes until edges are set but centers still look slightly soft. Check at 10 minutes – they’ll firm up as they cool. Cooling: Transfer cookies to a cooling rack immediately using a spatula. Handle gently as they’ll be soft when hot. Let cool at least 5 minutes before frosting. Recipe Variations and Flavor Combinations The basic pumpkin cookie recipe serves as an excellent foundation for numerous variations that can accommodate different tastes and dietary preferences while maintaining the simple preparation method. Chocolate Chip Addition: Fold 0.5-1 cup chocolate chips into the dough for extra sweetness and texture contrast. Semi-sweet or white chocolate chips both work beautifully with pumpkin spice flavors. Nutty Enhancement: Add 0.5 cup chopped pecans or walnuts for crunch and flavor depth. Toast the nuts first for even better taste and texture that complements the soft cookie base. Spice Adjustments: Increase cinnamon to 1 tablespoon

Chicken and Cheese Air Fryer Dumplings: Crispy, Cheesy Comfort Food Made Easy

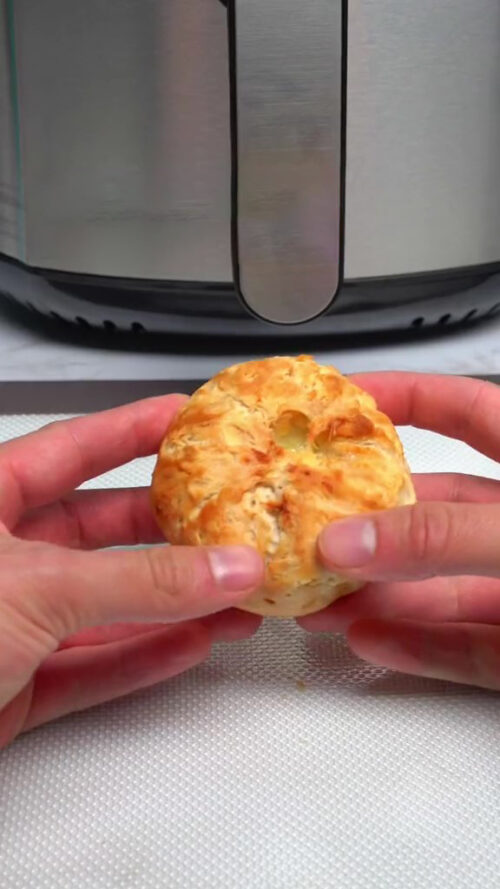
Air fryer dumplings have become incredibly popular for good reason – they deliver the crispy, golden exterior of deep-fried dumplings without the oil, mess, or guilt. These chicken and cheese air fryer dumplings take the concept even further by using convenient Pillsbury biscuit dough to create tender, flaky pockets filled with savory chicken and melted cheese. The result is a satisfying snack or appetizer that’s ready in just 10-12 minutes. What makes this recipe so appealing is its simplicity and accessibility. You don’t need specialized dumpling wrappers, complicated folding techniques, or hours of preparation. With just a few basic ingredients and your air fryer, you can create restaurant-quality dumplings that will impress family and friends while keeping your kitchen clean and your cooking stress-free. Why Air Fryer Dumplings Work So Well Air fryer technology revolutionizes dumpling preparation by using rapid hot air circulation to create crispy exteriors without submerging food in oil. This method produces results that rival traditional frying while being significantly healthier and more convenient. Crispy texture develops through the air fryer’s intense heat and air circulation that creates golden, crunchy exteriors on all sides. The circulating air reaches every surface, ensuring even browning that’s difficult to achieve with oven baking alone. Reduced oil consumption makes air frying appealing to health-conscious cooks who want crispy textures without excess calories from deep frying. These dumplings achieve satisfying crunch with minimal fat while maintaining all the flavor appeal. Quick cooking time of just 10-12 minutes makes these dumplings perfect for busy weeknights or last-minute appetizer needs. The air fryer preheats quickly and cooks efficiently, getting food on the table faster than conventional methods. Easy cleanup represents a major advantage over traditional frying, which requires dealing with large amounts of used oil and greasy cookware. Air fryers typically need only a quick wipe-down after use. Consistent results come from the air fryer’s controlled temperature and even heat distribution. Once you find the right timing for your specific air fryer, you can expect reliable results every time. Versatile applications mean you can use this same technique for various fillings and flavor combinations, making it a valuable cooking method to master for creating different dumpling styles. Choosing the Right Ingredients Simple ingredients make these dumplings accessible to everyone, but making smart choices about each component can significantly improve your results while accommodating different preferences and dietary needs. Pillsbury biscuit dough provides the perfect wrapper that’s easy to work with while creating tender, flaky layers when cooked. The pre-made dough saves time while producing consistent results that work beautifully in the air fryer. Cooked chicken offers protein and substance to the filling. Rotisserie chicken works excellently for convenience, while leftover cooked chicken breast or thighs provide economical options. Shredded or finely diced chicken distributes evenly throughout the filling. Cheese selection affects both flavor and melting properties. Mozzarella provides excellent stretch and mild flavor, while cheddar adds sharpness. Monterey Jack, pepper jack, or cheese blends can create different flavor profiles based on your preferences. Additional filling options can include diced vegetables like bell peppers or green onions, herbs like parsley or cilantro, or seasonings like garlic powder and Italian herbs. These additions customize flavors while maintaining the simple preparation method. Quality ingredients matter even in simple recipes. Fresh cheese that you shred yourself often melts more smoothly than pre-shredded varieties, while high-quality chicken provides better flavor and texture. Step-by-Step Preparation Technique Success with these dumplings comes from proper preparation and handling of the biscuit dough, which needs gentle treatment to create the best texture while sealing the filling securely. Dough Preparation: Separate individual biscuits from the tube and gently flatten each one into a circle large enough to hold filling and seal properly. Avoid overworking the dough, which can make it tough rather than tender and flaky. Filling Assembly: Place a small amount of shredded or diced cooked chicken in the center of each flattened biscuit. Add shredded cheese on top of the chicken, being careful not to overfill, which can prevent proper sealing. Sealing Technique: Gather the edges of the biscuit dough around the filling and pinch firmly to seal completely. Ensure there are no gaps or openings where filling might leak during cooking. The sealing is crucial for keeping the filling inside while the dumplings cook. Shaping: Gently roll the sealed dumplings between your palms to create smooth, round balls. This shaping helps ensure even cooking while creating an attractive finished appearance. Air Fryer Preparation: Preheat your Cosmo air fryer to 360°F. Proper preheating ensures immediate cooking when dumplings are added, helping achieve the crispy exterior texture. Arrangement: Place the prepared dumplings in the air fryer basket with adequate spacing between each one to allow proper air circulation. Overcrowding prevents even cooking and browning. Cooking: Air fry at 360°F for 10-12 minutes until the dumplings are golden brown and crispy on the outside. The biscuit dough should be cooked through and the cheese inside melted and gooey. Cooling: Allow the dumplings to cool for a few minutes before serving to prevent burns from the molten cheese filling. This brief rest also allows the structure to set for easier handling. Recipe Variations and Flavor Combinations The basic chicken and cheese dumpling recipe serves as an excellent foundation for numerous variations that can accommodate different tastes, dietary preferences, and ingredient availability. Buffalo Chicken Style: Mix cooked chicken with buffalo sauce before adding to the dumplings, then serve with blue cheese or ranch dressing for dipping. This variation provides spicy, tangy flavors that appeal to buffalo wing lovers. Italian-Inspired: Add Italian seasonings, garlic powder, and mozzarella cheese to the filling, then serve with marinara sauce for dipping. Include fresh basil or oregano for authentic Italian flavor. BBQ Chicken: Toss chicken with barbecue sauce before filling the dumplings, and use cheddar cheese for a classic barbecue flavor combination. Serve with additional BBQ sauce or ranch dressing. Tex-Mex Version: Season chicken with taco seasoning, add pepper jack cheese, and include diced jalapeños or green chiles. Serve with

Air Fried Chocolate Brownies: Gooey, Decadent Treats in Under 30 Minutes

Chocolate brownies are the ultimate comfort dessert, but traditional baking can heat up your kitchen and take considerable time. Air fried chocolate brownies solve both problems by delivering the same rich, fudgy texture you love in a fraction of the time while keeping your kitchen cool. Whether you’re craving a quick dessert for unexpected guests or want to satisfy a chocolate craving without waiting for the oven to preheat, this air fryer method produces consistently delicious results. The air fryer’s rapid air circulation creates a perfectly cooked brownie with crispy edges and a gooey center that rivals traditionally baked versions. Using a standard brownie mix makes this recipe accessible and foolproof, while the air fryer cooking method provides convenience that fits into busy schedules. These brownies prove that you don’t need traditional baking methods to achieve bakery-quality desserts at home. Why Air Frying Brownies Works So Well Air frying brownies might seem unconventional, but the technology actually provides several advantages over traditional oven baking for this particular dessert. Understanding these benefits helps you appreciate why this method produces such excellent results. Even heat distribution from the air fryer’s circulating hot air ensures consistent cooking throughout the brownie, eliminating common problems like undercooked centers or overdone edges that can occur in conventional ovens. Faster cooking time means you can have fresh brownies ready in 25-30 minutes total, including prep time. This speed makes air fried brownies perfect for last-minute dessert needs or when you want fresh-baked treats without extensive planning. No oven preheating required saves time and energy while keeping your kitchen cooler, particularly valuable during warm weather when running a full oven makes the entire house uncomfortably warm. Smaller batch size works perfectly for households that don’t need or want an entire pan of brownies. The air fryer capacity naturally creates portion control that prevents overindulgence while still satisfying chocolate cravings. Consistent results come from the air fryer’s precise temperature control and even heat circulation. Once you find the right time and temperature for your specific air fryer model, you can replicate perfect brownies every time. Easy cleanup with just the air fryer basket to wash beats dealing with multiple baking pans and oven racks. The simplified process makes brownies more accessible for weeknight desserts rather than special occasions only. Choosing Your Brownie Mix and Preparing the Batter While homemade brownie batter works beautifully, using a quality boxed mix provides convenience and consistent results that make this recipe accessible to cooks of all skill levels. Standard brownie mix selection should follow package directions for preparation. Most mixes require eggs, oil, and water, creating a thick batter that holds up well to air frying without becoming too dry or cakey. Fudgy versus cakey preferences can be accommodated by adjusting liquid amounts slightly. Slightly less liquid produces chewier, fudgier brownies while following package directions exactly typically yields balanced texture. Mix-ins and enhancements allow personalization of basic brownie mix. Chocolate chips, nuts, or a swirl of peanut butter transform simple brownies into special treats without complicating the basic recipe. Proper mixing technique matters even with boxed mixes. Stir just until ingredients combine without overmixing, which can create tough, dense brownies instead of the tender texture you want. Batter consistency should be thick and pourable, similar to traditional brownie batter. If your mixture seems too thick, add a tablespoon of water at a time until you achieve proper consistency. Room temperature ingredients combine more smoothly and create better texture. Take eggs out of the refrigerator about 30 minutes before mixing for optimal results. Preparing Your Air Fryer Pan Proper pan preparation ensures your brownies release cleanly while cooking evenly in the air fryer environment. The right pan and preparation make all the difference in final results. Pan selection matters significantly for air fryer brownies. Use a round or square pan that fits comfortably in your air fryer basket with adequate clearance for air circulation. Most 7-8 inch pans work well in standard air fryers. Non-stick options including silicone baking pans designed for air fryers provide easiest release and cleanup. These flexible pans also make removing finished brownies simple without breaking edges. Greasing thoroughly prevents sticking even with non-stick pans. Use cooking spray, butter, or oil to coat all surfaces that will contact batter, paying special attention to corners where brownies can stick. Parchment paper lining creates a foolproof release method. Cut parchment to fit your pan bottom and slightly up the sides, creating handles that make lifting finished brownies from the pan effortless. Pan size affects cooking time significantly. Smaller, deeper pans require longer cooking while larger, shallower pans cook faster. Adjust timing based on your specific pan dimensions. Batter depth should be 1-2 inches for optimal cooking. Too-thin batter overcooks quickly while too-thick batter may not cook through properly in the air fryer timeframe. Air Frying Temperature and Timing Getting the temperature and timing right ensures perfectly cooked brownies with the ideal texture balance of crispy edges and gooey center. Temperature Setting: Set your air fryer to 350°F for optimal brownie cooking. This moderate temperature allows thorough cooking without burning edges before centers set properly. Cooking Time: Air fry for 25-30 minutes, checking after 25 minutes to assess doneness. Different air fryer models and pan sizes affect timing, so start checking early rather than risk overcooking. Visual Cues: Watch for edges that pull slightly away from the pan and a top that appears set rather than wet. The center should still look slightly underdone as it continues cooking after removal from the air fryer. Toothpick Test: Insert a toothpick into the center of the brownies. It should come out with a few moist crumbs but not wet batter. For fudgier brownies, remove when the toothpick has more crumbs; for cakier brownies, wait for cleaner results. No Flipping Required: Unlike some air fryer recipes, brownies cook from all sides due to air circulation and don’t require flipping or rotating during cooking. Carryover Cooking: Brownies continue cooking after removal from the air fryer, so

Toasted Salami Rose Recipe: Turn Simple Ingredients into Stunning Appetizers

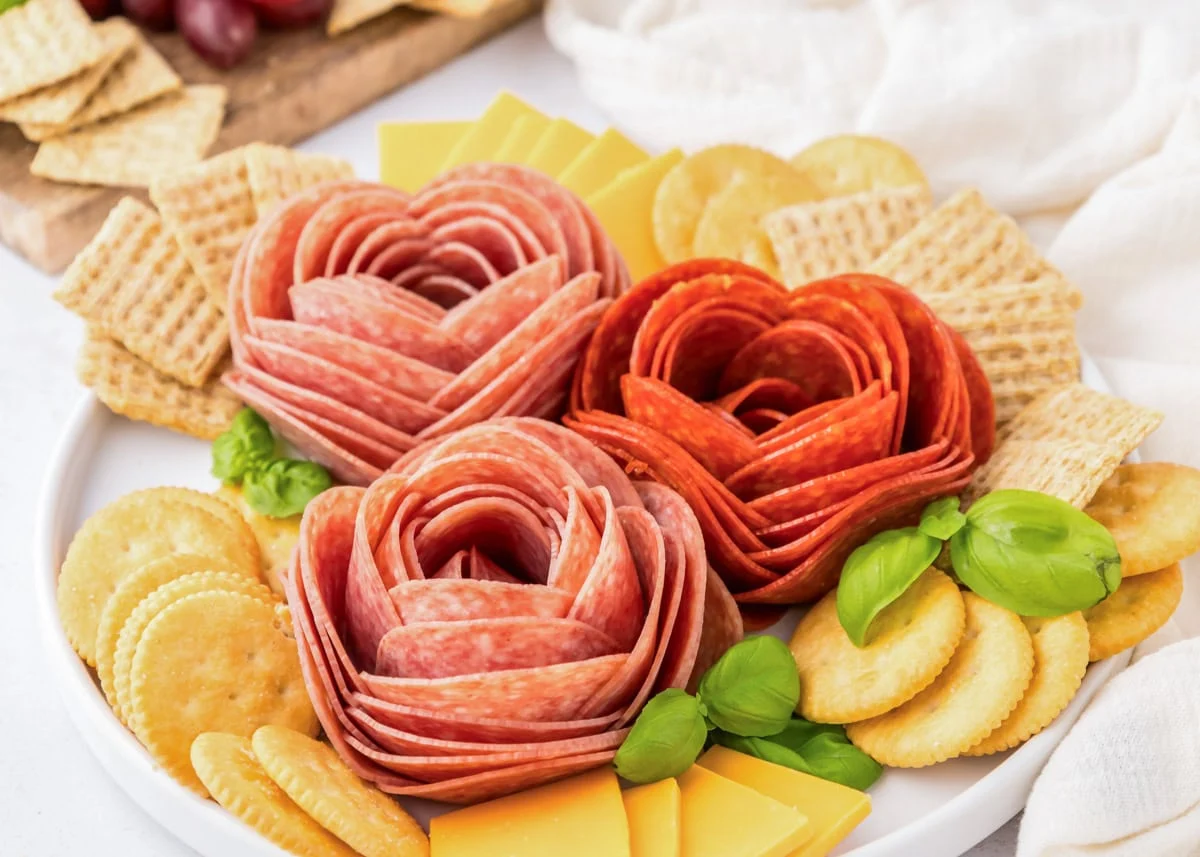
Sometimes the most impressive party appetizers come from the simplest ideas. These toasted salami roses prove that you don’t need complicated techniques or exotic ingredients to create something that looks absolutely stunning on any appetizer platter. With just salami and an air fryer, you can transform ordinary deli meat into beautiful, crispy rose-shaped treats that will have your guests asking for the recipe. The beauty of this recipe lies in its simplicity and visual impact. These salami roses work perfectly for everything from casual game day snacks to elegant party appetizers, holiday gatherings, or any occasion where you want to serve something that looks impressive but takes minimal effort to prepare. The air fryer creates perfectly crispy edges while maintaining enough flexibility for the rose shape to hold its form. Why This Recipe Works So Well The toasted salami rose concept succeeds because it combines visual appeal with satisfying texture and flavor. Understanding why this simple technique works helps you achieve perfect results every time while building confidence to experiment with variations. Air fryer technology creates the ideal cooking environment for salami roses because it circulates hot air evenly around the meat, crisping edges uniformly while preventing burning or uneven cooking that can occur with other methods. Salami’s natural fat content provides self-basting during cooking, ensuring the meat crisps beautifully without drying out or becoming tough. The fat renders during cooking, creating crispy edges with rich flavor. Layered construction of the rose shape provides structural integrity that holds up during cooking while creating an attractive presentation. The overlapping layers support each other, maintaining the rose form even as the meat crisps. Simple ingredients mean you can make these treats anytime without special shopping or planning. Most people keep salami on hand or can easily pick it up at any grocery store. Quick cooking time makes this recipe perfect for last-minute entertaining or when you need impressive appetizers without extensive preparation time. Room temperature serving eliminates timing stress because these salami roses taste great whether served warm from the air fryer or at room temperature after cooling. Choosing the Right Salami While various salami types can work for this recipe, certain characteristics produce better results. Understanding salami selection helps ensure your roses turn out perfectly every time. Thin-sliced salami works best because it’s flexible enough to roll into rose shapes while being substantial enough to hold its form during cooking. Look for deli counter salami sliced to medium thickness. Round salami slices are traditional, but the size matters less than the thickness and flexibility. Smaller slices create daintier roses while larger slices produce more substantial appetizers. Quality matters in both flavor and texture. Higher-quality salami typically contains better meat and seasonings while having the right fat-to-meat ratio for optimal crisping without excessive grease. Variety options include regular salami, Genoa salami, or even pepperoni for different flavors. Experiment with different types to find your favorite, though traditional salami tends to work most reliably. Fresh deli slicing often produces better results than pre-packaged sliced salami because you can control thickness and ensure slices are fresh and pliable rather than dried out. Step-by-Step Rose Formation Technique Creating perfect salami roses requires a simple but specific technique that ensures beautiful results. Following these detailed steps helps you master the process quickly. Container Selection: Use a shot glass or the bottom of a small styrofoam cup as your forming base. The container provides structure while you build the rose and makes the finished product easy to transfer. Layering Process: Start by placing approximately 10 salami slices around the edge of your container, overlapping each slice slightly. The overlapping creates the layered petal effect that makes the rose recognizable. Building the Center: Continue layering additional salami slices, working toward the center and slightly overlapping to create depth. The center layers form the rose’s bud while outer layers create fuller petals. Tightness Balance: Roll the salami snugly enough to hold the rose shape but not so tight that layers can’t separate slightly during cooking. Some looseness allows heat circulation while maintaining structure. Shape Refinement: Gently adjust the layers before cooking to create the most rose-like appearance. Slight tweaking of individual “petals” can improve the final presentation significantly. Careful Transfer: Once formed, carefully remove the rose from the container and place it in your air fryer basket. Handle gently to maintain the shape you’ve created. Air Frying for Perfect Results Proper air frying technique ensures your salami roses cook evenly while developing the crispy texture that makes them so appealing. Temperature and timing are crucial for optimal results. Temperature Setting: Set your air fryer to 360°F for optimal crisping without burning. This moderate temperature allows the salami to crisp gradually while the fat renders properly. Cooking Time: Air fry for 6-8 minutes, checking after 6 minutes to assess doneness. Cooking time can vary slightly based on your specific air fryer model and salami thickness. Visual Cues: Watch for edges to become crispy and slightly darker while the center remains flexible enough to maintain the rose shape. The salami should look toasted and crispy but not burned. No Flipping Required: The circulating air in the air fryer cooks the salami evenly from all angles, eliminating the need to flip or rotate during cooking. Batch Cooking: Depending on your air fryer size, you can cook multiple roses simultaneously. Just ensure adequate space between them for proper air circulation. Cooling Period: Allow roses to cool for a minute or two after removing from the air fryer. They’ll continue crisping slightly and become easier to handle as they cool. Recipe Variations and Flavor Ideas While basic salami roses are delicious on their own, creative variations can adapt this recipe for different tastes and occasions. These modifications provide options for various preferences and dietary needs. Cheese-Filled Roses: Place a small cube of mozzarella or cream cheese in the center before air frying. The cheese melts slightly during cooking, creating a creamy center that contrasts beautifully with crispy salami. Spicy Versions: Use spicy salami

Meal Planning for Busy Families: Save Time, Money, and Stress

The daily question “What’s for dinner?” can create stress that ripples throughout your entire evening, especially when busy schedules leave little time for spontaneous meal preparation. Effective meal planning transforms this daily challenge into a manageable system that saves time, reduces grocery expenses, and eliminates the mental load of constant food decisions. Far from being restrictive, good meal planning actually provides more freedom by removing daily decision-making pressure while ensuring your family enjoys varied, nutritious meals that fit your lifestyle and budget. Successful meal planning doesn’t require elaborate systems or hours of weekend preparation. The most effective approaches are simple, flexible systems that adapt to your family’s changing schedules while providing structure that prevents last-minute scrambling for dinner solutions. When done consistently, meal planning becomes a time-saving habit that improves both your family’s nutrition and your household’s overall organization. Understanding the Real Benefits of Meal Planning Many families resist meal planning because they associate it with rigid schedules or time-consuming preparation, but the actual benefits far outweigh the initial investment in developing planning habits. Time savings accumulate significantly when you eliminate daily decision-making about meals, shopping, and food preparation. The few minutes spent planning each week can save hours of daily mental energy and reduce multiple grocery store trips. Financial benefits result from strategic shopping that reduces impulse purchases while minimizing food waste. Planned meals use ingredients efficiently, often incorporating items across multiple recipes to maximize value and reduce spoilage. Stress reduction occurs when meal decisions are made during calm moments rather than rushed evening hours when everyone is hungry and patience runs thin. Having a plan eliminates the anxiety of facing empty refrigerators with no backup options. Nutritional improvements happen naturally when you plan balanced meals rather than defaulting to convenient processed foods during rushed decision-making. Planning allows time to consider nutritional variety and family dietary needs. Family satisfaction increases when everyone knows what to expect while still enjoying variety across the week. Children often respond better to meal routines, while adults appreciate the mental relief of predetermined dinner plans. Cooking skill development becomes possible when you can plan for recipes that challenge your abilities rather than always defaulting to the simplest options during time pressure. Starting Simple: Basic Meal Planning Strategies The most sustainable meal planning approaches start simple and build complexity gradually as families develop systems that work for their specific needs and schedules. Weekly planning provides the optimal balance between structure and flexibility, allowing you to consider the week’s schedule while avoiding the overwhelming complexity of longer-term planning that may not accommodate changing circumstances. Theme nights create structure while reducing decision fatigue. Designating Monday for slow cooker meals, Tuesday for pasta, Wednesday for leftovers, and so on provides framework while allowing variety within each category. Batch cooking strategies involve preparing larger quantities of versatile ingredients that can be used in multiple meals throughout the week. Cooking large batches of grains, proteins, or roasted vegetables provides building blocks for quick meal assembly. Flexible recipe rotation keeps favorites in regular circulation while introducing new options gradually. Maintain a list of family-approved meals to reference during planning sessions when creativity runs low. Season-based planning takes advantage of ingredient availability and pricing while aligning with family schedule patterns. Summer planning might emphasize grilling and fresh produce, while winter plans could focus on warming soups and hearty casseroles. Emergency backup plans prevent complete meal planning failure when unexpected schedule changes occur. Always have backup options like freezer meals, pantry-based recipes, or reliable takeout choices available. Creating Efficient Shopping Lists Strategic shopping list creation maximizes the benefits of meal planning while minimizing time spent shopping and reducing the likelihood of forgotten ingredients that derail planned meals. Store layout organization arranges your shopping list according to your preferred store’s layout, reducing shopping time while ensuring you don’t miss items located in different sections. Ingredient consolidation across multiple recipes helps you buy appropriate quantities while reducing waste. If three recipes call for bell peppers, buy enough for all three meals to use the ingredient efficiently. Staple inventory management involves checking current supplies before shopping to avoid overbuying items you already have while ensuring you don’t run out of frequently used ingredients. Bulk buying strategies for non-perishable items and frequently used ingredients can provide savings while reducing shopping frequency. Focus on items your family actually uses rather than buying bulk quantities of unfamiliar products. Price comparison habits help you recognize good deals while avoiding impulse purchases of expensive items that weren’t part of your planned meals. Track prices of frequently purchased items to identify genuine savings. Seasonal shopping takes advantage of produce availability and pricing cycles while planning meals around ingredients that are at their peak quality and affordability. Time-Saving Meal Prep Techniques Effective meal preparation goes beyond cooking entire meals in advance to include strategies that reduce daily cooking time while maintaining meal quality and family satisfaction. Ingredient prep sessions involve washing, chopping, and portioning ingredients for multiple meals during one session, reducing daily preparation time while maintaining fresh flavors in finished meals. Protein preparation strategies like marinating meats, cooking large batches of ground protein, or preparing slow cooker proteins provide ready-to-use components that speed up final meal assembly. Vegetable preparation includes washing and chopping vegetables for multiple uses, pre-roasting root vegetables, or preparing salad components that stay fresh for several days with proper storage. Grain and pasta preparation involves cooking larger quantities of rice, quinoa, or pasta that can be reheated quickly for different meals, saving cooking time while providing healthy carbohydrate bases. Sauce and dressing preparation creates flavor enhancers that transform simple ingredients into varied meals. Preparing several sauces or dressings during prep sessions provides options for customizing similar base ingredients. Storage system organization ensures prepped ingredients stay fresh and accessible while preventing confusion about what’s available for meal assembly throughout the week. Budget-Friendly Meal Planning Strategic meal planning can significantly reduce grocery expenses while maintaining nutritional quality and family satisfaction with planned approaches to ingredient selection and meal design. Loss

French Toast Lollipops: A Fun Twist on Breakfast Classics

French Toast Lollipops: A Fun Twist on Breakfast Classics Sometimes the most delightful breakfast treats come from reimagining familiar favorites in creative new ways. These French toast lollipops transform ordinary bread into handheld breakfast treats that are as fun to make as they are to eat. Perfect for weekend breakfast adventures, special occasions, or whenever you want to surprise your family with something unexpectedly delightful, these lollipops prove that breakfast can be both delicious and playful. The genius of French toast lollipops lies in their presentation and portability. By rolling bread into spirals and coating them in a cinnamon-sugar mixture before air frying, you create individual treats that capture all the flavors of classic French toast in a convenient, mess-free format that kids and adults alike will love. Why This Recipe Works So Well French toast lollipops succeed because they concentrate all the best elements of traditional French toast into bite-sized portions while adding the excitement of eating food on a stick. Understanding the technique helps you achieve perfect results every time. The spiral rolling technique creates multiple layers of bread that absorb the egg mixture while maintaining structural integrity. This method ensures each bite contains the custardy interior and crispy exterior that makes French toast so appealing. Individual portion control makes these treats perfect for parties, family breakfasts, or meal prep since each lollipop provides just the right amount of sweetness without overwhelming portion sizes. Air frying technology creates the perfect crispy exterior while maintaining tender, custardy interiors without the need for large amounts of oil or constant monitoring that stovetop cooking requires. The cinnamon-sugar coating adds textural interest and concentrated flavor that complements the vanilla-scented bread while creating an attractive appearance that makes these treats visually appealing. Stick presentation transforms ordinary breakfast into an interactive experience that encourages slower, more mindful eating while making the treats perfect for on-the-go consumption or party serving. Choosing the Right Ingredients Success with French toast lollipops starts with selecting appropriate ingredients that work together to create the perfect texture and flavor balance. Bread selection significantly affects the final result. Day-old bread works better than fresh because it absorbs the egg mixture without becoming too soggy, while maintaining enough structure to roll and hold together during cooking. White sandwich bread or brioche provide the best texture for rolling, as they’re soft enough to manipulate without tearing while having enough substance to create satisfying spirals that hold together. Fresh eggs create the custard base that transforms plain bread into French toast. Room temperature eggs mix more easily and create smoother custard that penetrates bread evenly. Pure vanilla extract provides the classic French toast flavor that makes these treats taste familiar despite their unique presentation. Quality vanilla makes a noticeable difference in the final flavor. Brown sugar and cinnamon create the signature coating that provides sweetness, spice, and textural contrast. The combination of these warm spices evokes comfort and familiarity. Lollipop sticks should be food-safe and appropriately sized for the bread spirals. Wooden craft sticks or actual lollipop sticks work well for this application. Step-by-Step Technique for Perfect Results Creating perfect French toast lollipops requires attention to technique during each step of the process to ensure attractive presentation and optimal texture. Bread Preparation: Remove crusts from bread slices and use a rolling pin to flatten each slice until it’s thin enough to roll easily without cracking. This step is crucial for creating tight spirals that hold together. Rolling Technique: Starting from one edge, roll each flattened bread slice tightly into a spiral, ensuring the roll stays compact and even. The tighter the roll, the better it will hold together during cooking. Stick Insertion: Carefully insert the lollipop stick through the center of each spiral, ensuring it’s secure but not protruding too far from either end. The stick should provide stability without interfering with cooking. Custard Mixture: Whisk eggs and vanilla extract thoroughly until completely combined. The mixture should be smooth and well-blended to ensure even coating and flavor distribution. Dipping Process: Dip each bread spiral into the egg mixture, ensuring all surfaces are coated but not oversaturated. Allow excess mixture to drip off to prevent soggy results. Coating Application: Roll the dipped spirals in the brown sugar and cinnamon mixture, ensuring complete coverage that will create the crispy, flavorful exterior during cooking. Air Frying Setup: Preheat your air fryer to 360°F and arrange the coated spirals with adequate spacing to allow proper air circulation around each lollipop. Cooking Process: Air fry for 4 minutes on each side, monitoring for golden-brown color and crispy texture. The timing may vary slightly based on your specific air fryer model and bread thickness. Final Presentation: Allow the lollipops to cool slightly before serving to prevent burns while ensuring they’re still warm enough to provide the optimal eating experience. Recipe Variations and Customizations The basic French toast lollipop recipe provides an excellent foundation for creative variations that accommodate different tastes and dietary preferences. Flavor Variations: Add different extracts like almond or maple to the egg mixture for unique flavor profiles. Orange zest can provide citrus brightness, while a pinch of nutmeg adds warmth and complexity. Coating Alternatives: Try different sugar and spice combinations such as maple sugar with cardamom, coconut sugar with ginger, or even a savory parmesan and herb coating for unexpected flavor profiles. Filling Options: Spread thin layers of cream cheese, Nutella, or fruit preserves on the bread before rolling to create filled lollipops with surprise centers that add richness and flavor complexity. Bread Substitutions: Experiment with different bread types like cinnamon swirl bread, challah, or even croissants for varying textures and flavors that change the character of the final product. Healthy Modifications: Use whole grain bread, reduce sugar content, or substitute egg whites for whole eggs to create lighter versions that maintain the fun factor while supporting dietary goals. Seasonal Adaptations: Incorporate seasonal spices like pumpkin pie spice in fall, or add dried fruit pieces and warm spices for holiday versions that celebrate specific times of

Perfect Flame Broiled Pizza Recipe: Crispy Results Every Time with Your Cosmo Oven

Sometimes the simplest solutions are the best ones. When you need a quick, satisfying meal that the whole family will enjoy, a perfectly cooked frozen pizza can save the day. This flame broiled pizza recipe proves that you don’t need complicated ingredients or techniques to create something delicious – just the right temperature, timing, and the reliable performance of your Cosmo 965AGFC oven to transform a frozen pizza into a crispy, golden meal that’s ready in just 15 minutes. The key to perfect frozen pizza lies not in the pizza itself, but in how you cook it. With the right oven temperature and technique, even a basic frozen pizza becomes something special – crispy on the bottom, perfectly melted cheese on top, and heated evenly throughout. This recipe takes the guesswork out of frozen pizza cooking while ensuring consistent, delicious results every time. Why This Simple Recipe Works So Well The success of this flame broiled pizza recipe comes from understanding how heat, timing, and proper oven use work together to create optimal results from frozen pizza. When done correctly, the results rival many restaurant pizzas while being ready in a fraction of the time. Optimal temperature of 400°F provides the perfect balance between cooking the crust thoroughly and melting the cheese without burning the toppings. This temperature ensures even heating throughout the pizza while creating the crispy bottom that makes pizza so satisfying. Consistent oven performance from the Cosmo 965AGFC ensures reliable results every time you make pizza. The even heat distribution and accurate temperature control eliminate the guesswork that can lead to overcooked or undercooked results. Simple preparation eliminates opportunities for error while ensuring anyone in the family can prepare a satisfying meal quickly. The straightforward approach makes this recipe perfect for busy weeknights, casual dinners, or whenever you need food ready fast. Predictable timing allows you to plan other meal components or activities around the 15-minute cooking time. This reliability helps with meal planning and ensures hot pizza when you need it. Minimal cleanup results from using a baking sheet and requiring no additional ingredients or preparation steps. The simple approach means less time cleaning and more time enjoying your meal. Understanding Your Cosmo 965AGFC Oven for Perfect Results The Cosmo 965AGFC oven’s features work perfectly for achieving consistent pizza results through precise temperature control and even heat distribution that ensures optimal cooking from crust to toppings. Digital display accuracy allows you to set and monitor the exact 400°F temperature needed for optimal pizza cooking. The precise temperature control eliminates guesswork while ensuring consistent results. Even heat distribution throughout the oven cavity means your pizza cooks uniformly regardless of rack position. This consistency ensures the crust crisps properly while toppings heat evenly without burning. Convection capability, if used, can reduce cooking time slightly while improving crust crispiness. The air circulation helps create better texture while maintaining even heating throughout the pizza. Reliable preheating ensures the oven reaches proper temperature before you add the pizza, preventing uneven cooking that can occur when starting with a cold oven. Timer functions help you track the 15-minute cooking time accurately, preventing overcooking while ensuring the pizza is fully heated and ready to serve. Step-by-Step Technique for Crispy Perfection Success with this recipe depends on proper technique and timing rather than complex preparation. Following these simple steps ensures consistent, delicious results every time. Pizza Preparation: Remove the frozen pizza from all packaging, including plastic wrap and cardboard backing. Place the pizza directly on a baking sheet to prevent sticking and make removal easier. Oven Preheating: Set your Cosmo 965AGFC oven to 400°F and allow it to preheat completely before adding the pizza. Proper preheating ensures immediate, even cooking when the pizza enters the oven. Baking Sheet Setup: Use a clean baking sheet that’s large enough to accommodate the entire pizza without overhang. The sheet protects your oven while making pizza removal safer and easier. Placement in Oven: Position the baking sheet with pizza in the center of the oven for optimal heat circulation. Center placement ensures even cooking while preventing hot spots that could burn edges. Timing: Cook for exactly 15 minutes without opening the oven door frequently. Consistent heat and timing produce the best texture and ensure the pizza is heated thoroughly. Removal and Serving: Remove the pizza carefully using oven mitts and allow it to cool for a minute or two before slicing. The brief cooling period prevents burns while allowing the cheese to set slightly. Choosing the Right Frozen Pizza While this recipe works with virtually any frozen pizza, understanding your options helps you select varieties that will produce the best results with this cooking method. Thin crust pizzas cook quickly and evenly at 400°F, often producing crispy results that many people prefer. These pizzas work particularly well with this recipe’s timing and temperature. Thick crust varieties may need an additional 2-3 minutes to ensure the crust is fully cooked through. Monitor these pizzas closely to achieve the desired texture without overcooking toppings. Rising crust pizzas benefit from the consistent heat that allows proper rising while ensuring even cooking. These varieties often produce restaurant-quality results when cooked properly. Specialty toppings like vegetables or multiple meats may require slight timing adjustments to ensure all components are heated properly. Dense toppings sometimes need extra time to heat through completely. Quality considerations include choosing pizzas with good ingredient distribution and appropriate sauce coverage. Better-quality frozen pizzas generally produce superior results regardless of cooking method. Enhancing Your Pizza Experience While this recipe is perfect as-is, simple additions or serving suggestions can transform a quick meal into something more special for family dinners or casual entertaining. Simple Additions: Fresh herbs like basil or oregano sprinkled on after cooking can add fresh flavor that complements the pizza. A light drizzle of olive oil can enhance both flavor and texture. Side Dish Pairings: A simple green salad, garlic bread, or vegetable sides can round out the meal while the pizza cooks. The 15-minute cooking time

Perfect Cinnamon Rolls Recipe: Fill Your Kitchen with Comfort and Warmth

Few things can transform your home into a cozy sanctuary quite like the aroma of fresh cinnamon rolls baking in the oven. This simple cinnamon roll recipe proves that you don’t need complicated techniques or hours of preparation to create bakery-quality treats that fill your kitchen with the perfect scent of comfort and warmth. Using convenient tube cinnamon rolls as a shortcut means you can have golden, gooey cinnamon rolls ready in under 20 minutes from start to finish. The beauty of this recipe lies in its simplicity and reliability. Whether you’re creating a special weekend breakfast, need a quick dessert for unexpected guests, or want to treat your family to something delicious on a regular weekday, these cinnamon rolls deliver consistent results that everyone will love. The combination of convenience and homemade taste makes this recipe perfect for busy families who still want to enjoy fresh-baked treats. Why This Simple Approach Works So Well Sometimes the best results come from the simplest methods. This cinnamon roll recipe succeeds because it focuses on proper technique and optimal baking conditions rather than complicated steps or exotic ingredients. Understanding why this approach works helps you achieve perfect results every time. Store-bought tube cinnamon rolls provide consistent quality and convenience while allowing you to focus on proper baking technique. These products are specifically formulated to rise and bake evenly, ensuring reliable results that taste homemade. Proper oven temperature at 400°F creates the ideal baking environment for achieving golden-brown exteriors while ensuring the centers cook through completely. This temperature balance produces the perfect texture contrast between crispy outside and soft, gooey inside. Close spacing on the baking sheet allows the rolls to support each other during rising and baking, creating taller, more tender rolls with soft sides. This technique mimics bakery methods while ensuring even heating. Non-stick preparation prevents sticking while ensuring easy removal of the finished rolls. Proper pan preparation protects the rolls’ appearance while making cleanup simple. Timing precision ensures optimal texture and appearance. Proper preheating and accurate baking time produce rolls that are perfectly done without being over-baked or under-cooked. The icing application technique at the end allows the warm rolls to slightly melt the icing, creating the perfect glaze consistency that soaks into the rolls while maintaining visual appeal. Choosing and Handling Tube Cinnamon Rolls While this recipe uses convenient tube cinnamon rolls, understanding how to select and handle them properly ensures the best possible results from this shortcut approach. Refrigerator temperature affects how easily the tube opens and how well the rolls separate. Allow tubes that have been very cold to come to room temperature for a few minutes before opening to prevent tearing. Tube opening technique involves following package directions carefully while being gentle to prevent damaging the pre-formed rolls. Most tubes pop open with gentle pressure on the seam. Roll separation should be done carefully to maintain the spiral shape that creates the characteristic cinnamon roll appearance. Gentle handling preserves the layers that create texture. Quality indicators include checking expiration dates and ensuring tubes haven’t been damaged during storage. Fresh products produce better rising and more attractive finished rolls. Storage considerations before baking suggest using tube rolls promptly after opening, as they’re formulated for immediate use rather than extended storage once exposed to air. Perfecting Your Baking Technique Success with cinnamon rolls depends on proper baking technique that ensures even cooking, optimal rising, and attractive appearance. These details make the difference between good and exceptional results. Pan Preparation: Use adequate cooking spray coverage to ensure easy release while avoiding excess that could make rolls greasy. Even coverage prevents sticking without affecting texture. Roll Placement: Position rolls close together but not touching initially, allowing space for rising during baking. The rolls will expand and touch during baking, creating soft sides. Oven Preheating: Ensure your Cosmo 965AGFC oven reaches 400°F before placing rolls inside. Proper preheating ensures immediate rising and browning when baking begins. Positioning: Place the baking sheet in the center of the oven for even heat circulation around the rolls. Center positioning prevents uneven browning or cooking. Timing Monitoring: Begin checking for doneness at 12 minutes, looking for golden-brown color and firm texture. Avoid over-baking, which can make rolls dry. Steam Release: Open the oven door briefly after baking to release excess steam, preventing rolls from becoming soggy from condensation. Achieving Perfect Texture and Appearance The goal is cinnamon rolls with golden-brown exteriors, soft centers, and appealing visual presentation that looks as good as it tastes. Golden brown color indicates proper baking without over-cooking. The rolls should have rich color while maintaining soft texture inside. Even rising across all rolls suggests proper spacing and oven temperature. All rolls should appear similar in size and height when finished. Soft centers can be tested by gently pressing the center of one roll. It should feel set but still slightly soft, indicating proper doneness. Clean release from the baking sheet indicates adequate non-stick preparation without excess oil that could affect texture or appearance. Proper icing consistency results from applying it to warm but not hot rolls, allowing slight melting without complete liquefaction. Icing Application for Best Results The icing application technique significantly affects both appearance and taste of the finished cinnamon rolls. Proper timing and method create the perfect glaze. Temperature timing matters for icing application. Apply icing when rolls are warm but not steaming hot to achieve the right consistency and absorption. Even distribution ensures all rolls receive adequate icing while maintaining attractive appearance. Pour or drizzle icing to cover all rolls evenly. Absorption benefits occur when warm rolls slightly melt the icing, allowing it to soak into the surface layers while maintaining surface glaze. Visual appeal improves with thoughtful icing application that creates attractive patterns while ensuring complete coverage. Serving timing affects icing consistency. Serve while icing is still slightly warm and glossy for optimal texture and appearance. Serving Suggestions and Presentation These cinnamon rolls work beautifully for various serving occasions, from casual family breakfasts to more