cooking at home

Fire Prevention Week Comes to the Air Fryer, and Safer Crisping Starts With Smart Placement

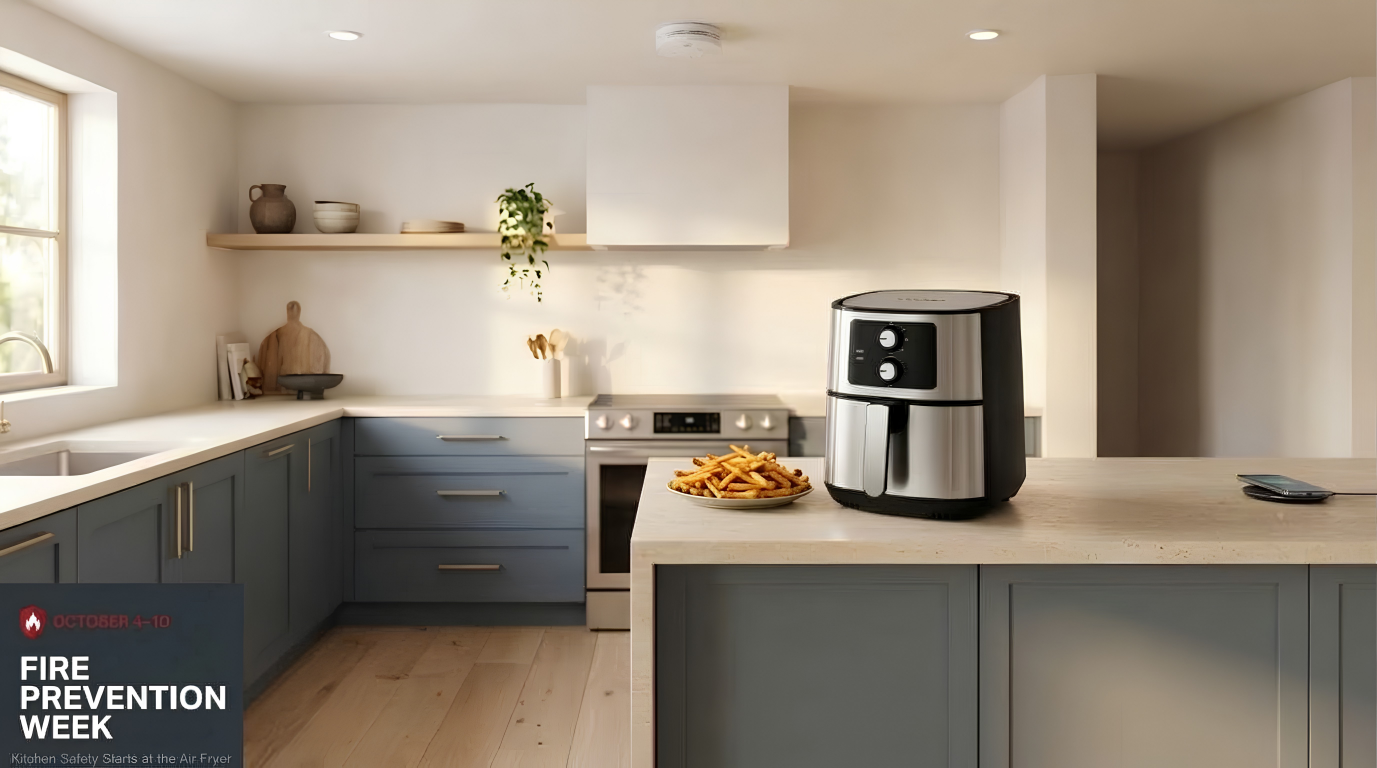
Fire Prevention Week is in its final days, running October 4 through 10, and the National Fire Protection Association has centered this year’s campaign on a habit nearly every household repeats daily. The 2026 theme, Charge into Fire Safety: Safe Charging Is a Superpower, focuses on lithium ion batteries and the everyday choices that keep phones, tablets, and cordless tools from overheating. In most homes, those devices charge on the same counter that holds the appliances that run the hottest. One of those appliances has quickly become an everyday essential. The air fryer now handles weeknight vegetables, frozen snacks, leftovers, and game day wings. Because it sits on the counter, runs hot, and is often used casually, it deserves a place in this week’s conversation. Why the Air Fryer Belongs in the Fire Safety Conversation An air fryer replaces a pot of hot oil with a compact chamber of fast moving hot air, removing one of the most familiar cooking fire risks. That does not make it risk free. Inside the housing, a heating element sits just above the food while a fan circulates air around it, so anything that drifts upward or collects below can overheat. Most air fryer problems follow a few predictable patterns. Grease and crumbs build up in the basket or pan and smoke during the next cycle. Loose parchment or foil is lifted by the fan into the heating element. The unit is pushed against a wall or tucked under a cabinet, trapping the hot air it vents. Each can be prevented with a small adjustment. The broader numbers explain why the counter deserves attention. NFPA estimates that from 2020 through 2024, kitchen and cooking equipment was involved in 48 percent of home structure fires each year, and unattended cooking remains a leading contributing factor. A countertop appliance with a timer can make it tempting to walk away, which is why the habits around it matter as much as the appliance itself. Give the Air Fryer Room to Breathe Placement is the first safety decision. An air fryer draws air in and pushes hot air out, usually through vents at the back or top of the unit, so it needs open space on every side. Set it on a flat, stable, heat resistant surface, away from the wall, the backsplash, and the edge of the counter, and follow the clearance distances listed in the owner’s manual. Avoid running it beneath upper cabinets, where rising heat and steam can collect against the underside of the cabinetry. Keep paper towels, mail, dish cloths, and plastic containers well away from the exhaust while the unit runs. Never operate an air fryer on the stovetop, even when the burners are off, since it is easy for someone to turn on the wrong knob. The power connection matters just as much. NFPA recommends plugging major heat producing appliances directly into a wall outlet, never into an extension cord or power strip. Choose an appliance listed by a qualified testing laboratory, check the cord regularly, and replace the appliance if the cord is frayed, kinked, or damaged. Everyday Habits That Prevent Air Fryer Fires Start with what goes in the basket. Avoid overfilling it, since food pressed against the top of the chamber sits too close to the heating element and cooks unevenly. Liners deserve extra care. Use only parchment or liners the manufacturer approves, never place a liner in the basket during preheating, and always weigh it down with food. A loose sheet can be lifted by the fan into the heating element in seconds. Foil should not block the airflow at the bottom of the basket, and paper towels do not belong inside the chamber at all. Bacon, wings, and sausages release grease that collects below the basket and can smoke heavily. Drain it between batches. Finally, stay in the room. A timer makes it easy to set a cook and walk away, but checking the food, especially toward the end of the cycle, catches problems before they grow. When the cycle ends, pull the basket out slowly and keep your face and hands clear of the steam. Cleaning Is a Fire Safety Step Leftover grease and crumbs are among the most common causes of smoke in an air fryer. Residue that stays in the basket or pan reheats with every cycle until it begins to char. Let the unit cool completely, unplug it, and clean the basket and pan after each use. Every so often, check the inside of the chamber and the area around the heating element for buildup, following the manual’s instructions and keeping water away from the electrical parts. How the Cosmo COS-58AFAKSS Supports Safer Habits Cosmo’s COS-58AFAKSS is a 5.8 quart electric hot air fryer with a stainless steel finish, designed for households that cook for several people at once. Its 1400 watt heating system and high speed air circulation handle frying, baking, grilling, and roasting with little to no added oil, which means one less pot of hot grease on the stovetop. Several of its features connect directly to the habits above. Separate knobs control temperature and time, so settings are easy to read at a glance. The temperature dial adjusts from 180°F to 400°F, allowing gentler settings for reheating and delicate foods instead of defaulting to maximum heat. The timer runs up to 30 minutes, and the auto shut-off feature turns off the heating element when the countdown ends, which helps protect against overcooking if a distraction runs longer than planned. That feature works best as a backup to attention, not a replacement for it. Cleaning is straightforward. The non-stick coated basket and grill pan are dishwasher safe, which makes it easier to clear grease after every use. Cosmo lists the unit as ETL Listed, which aligns with NFPA’s advice to choose appliances tested by a qualified laboratory. At 12.9 by 11.4 by 14.7 inches, plan for that footprint plus the recommended clearance. Charging and the Air Fryer Do Not Share
Fire Prevention Week Reaches the Microwave, and Safer Habits Start at Counter Height

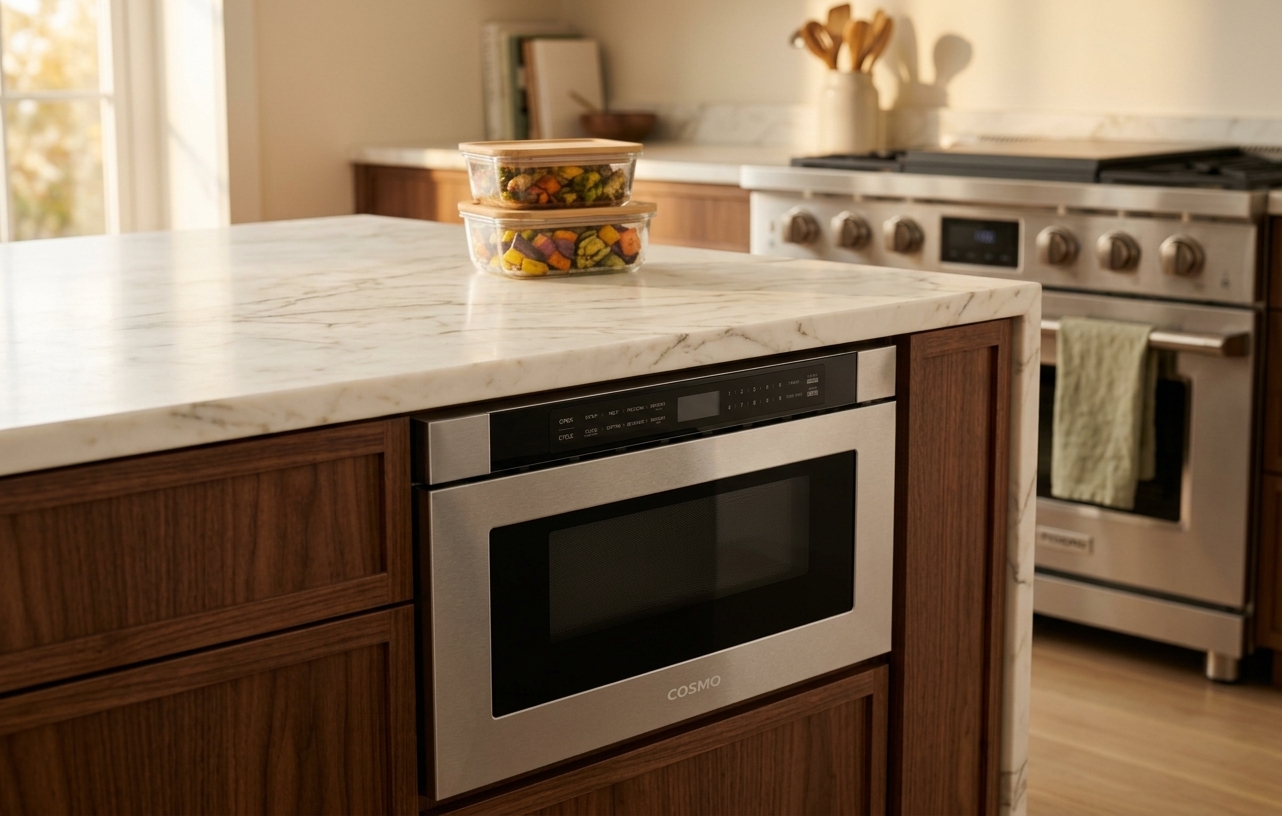
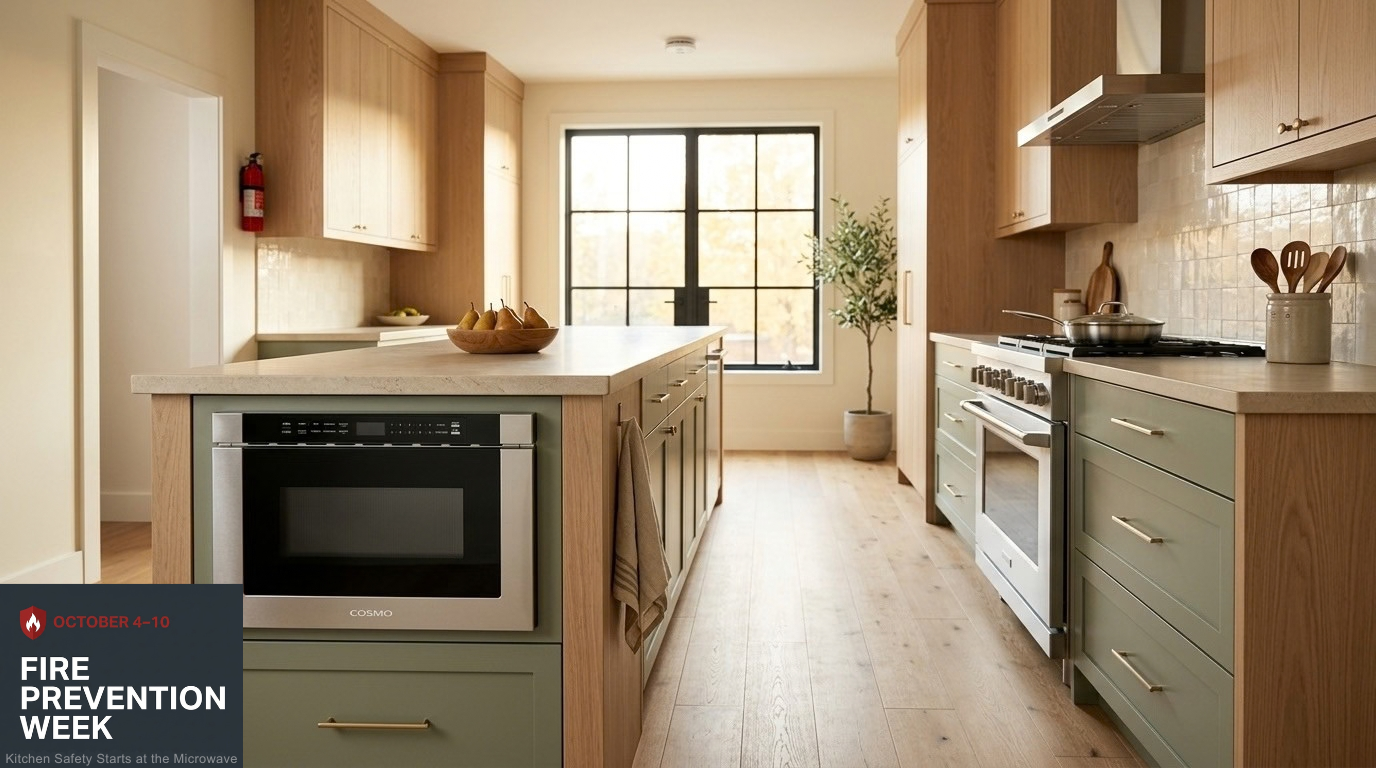
Fire Prevention Week is underway, running October 4 through 10, and the National Fire Protection Association has built this year’s campaign around something most people handle dozens of times a day. The 2026 theme, Charge into Fire Safety: Safe Charging Is a Superpower, focuses on lithium ion batteries and the habits that keep them from overheating. Those batteries power the phones, earbuds, tablets, and cordless tools that collect on kitchen counters, often within arm’s reach of the appliances that produce the most heat in the home. Most kitchen safety advice this week centers on the stovetop, and for good reason. The microwave deserves its own attention, though. It is the appliance people use most casually and often the first one children learn to operate. That familiarity is why a few deliberate habits, along with a thoughtful choice about where it sits, can make a real difference. Why the Microwave Belongs in the Fire Safety Conversation A microwave has no open flame and no glowing coil, so it rarely feels like a fire risk. It can still start one. Food heated too long can char and ignite, a forgotten bag of popcorn can scorch within minutes, and metal such as foil, twist ties, or dishes with metallic trim can spark inside the cavity. Paper products that are not labeled microwave safe, including some takeout containers and brown paper bags, can also overheat and catch. Fire is only part of the picture. NFPA notes that scald burns are the leading cause of injury from microwave ovens. Steam trapped under a plastic cover, a bowl of soup heated unevenly, or a mug of water that boils over can all cause injuries in the moments after the timer ends. Placement plays a role in those moments, because every hot dish has to travel from the cavity to the counter, and a shorter, lower trip is a safer one. Everyday Habits That Prevent Microwave Fires Start with what goes inside. Use only containers labeled microwave safe, and keep foil, metal utensils, and dishes with metallic accents out of the cavity. Follow package directions for popcorn and other convenience foods rather than guessing, and when in doubt, start with less time. A few extra seconds are easy to add and impossible to take back. Stay nearby while food heats, especially anything high in sugar or fat, which heats quickly and can scorch. How the microwave is powered matters too. NFPA recommends choosing a model listed by a qualified testing laboratory and plugging it directly into a wall outlet, never into an extension cord. Keep the interior clean, since leftover splatter can burn on the next cycle, and never run the microwave empty or use it to store paper or utensils. The minutes after cooking deserve the same care. Open covered dishes slowly and away from the face, stir food to break up hot spots, and let liquids rest briefly before lifting them out. The FDA cautions that water heated in a very clean, smooth container can become superheated without visibly boiling and erupt when it is moved. NFPA also advises never warming a baby bottle in the microwave, since uneven heating can leave dangerous pockets of hot liquid. Placement Is a Safety Decision NFPA’s microwave guidance includes a detail that is easy to overlook: the microwave should sit at a safe height, within easy reach of everyone who uses it. In many homes it is mounted above the range or set on a high shelf, which means lifting a hot bowl at shoulder level, sometimes over active burners. For shorter adults, older family members, and children warming their own snacks, that overhead motion is where spills and scalds often begin. A Microwave Drawer Brings the Heat Down to Safe Reach Cosmo’s COS-12MWDSS is a 24 inch built in microwave drawer designed for installation beneath the counter in standard kitchen cabinetry. Instead of a door that swings open at eye level, the drawer slides outward and the cavity faces upward, so food is lowered in and lifted out from above. The touch control panel runs along the top edge of the drawer at counter height, and Cosmo notes that this layout makes drawer microwaves accessible to a wider range of users than countertop models on high surfaces or over the range models. That design lines up closely with the safe height principle. A hot dish comes out at about waist level and goes straight onto the counter, with no reaching overhead and no stretching across a cooktop. The 1.2 cubic foot cavity runs on 1000 watts with 11 power levels, so delicate tasks like softening butter or melting chocolate can happen at lower power instead of a full blast that risks scorching. Four automatic presets for melt, soften, popcorn, and beverage take some of the guesswork out of common jobs, and weight and time defrost options work with an included defrosting rack. The child lock carries extra weight in a drawer. Because the unit sits lower, it is within easier reach of small hands, and when the lock is engaged it disables the control panel so the drawer cannot start a cooking cycle. In homes with young children, keeping the lock on by default is a simple habit worth building. It is worth being clear about what a drawer does not change. The COS-12MWDSS is not fire suppression equipment, and it does not ventilate the cooktop, so a range hood still has its own job to do. The drawer requires a 24 inch base cabinet cutout, a dedicated 120V outlet inside the cabinet, which fits NFPA’s advice against extension cords, and proper clearance so heat does not build up in the enclosed space. Follow the installation guide or work with a qualified installer. Charge Devices Away From Heat, Including the Microwave Back to this year’s theme. In many kitchens, a countertop microwave doubles as a shelf, and phones or tablets end up charging on top of it, right where warm air escapes during use. NFPA warns

Fire Prevention Week Starts With Safer Cooking and Clearer Air

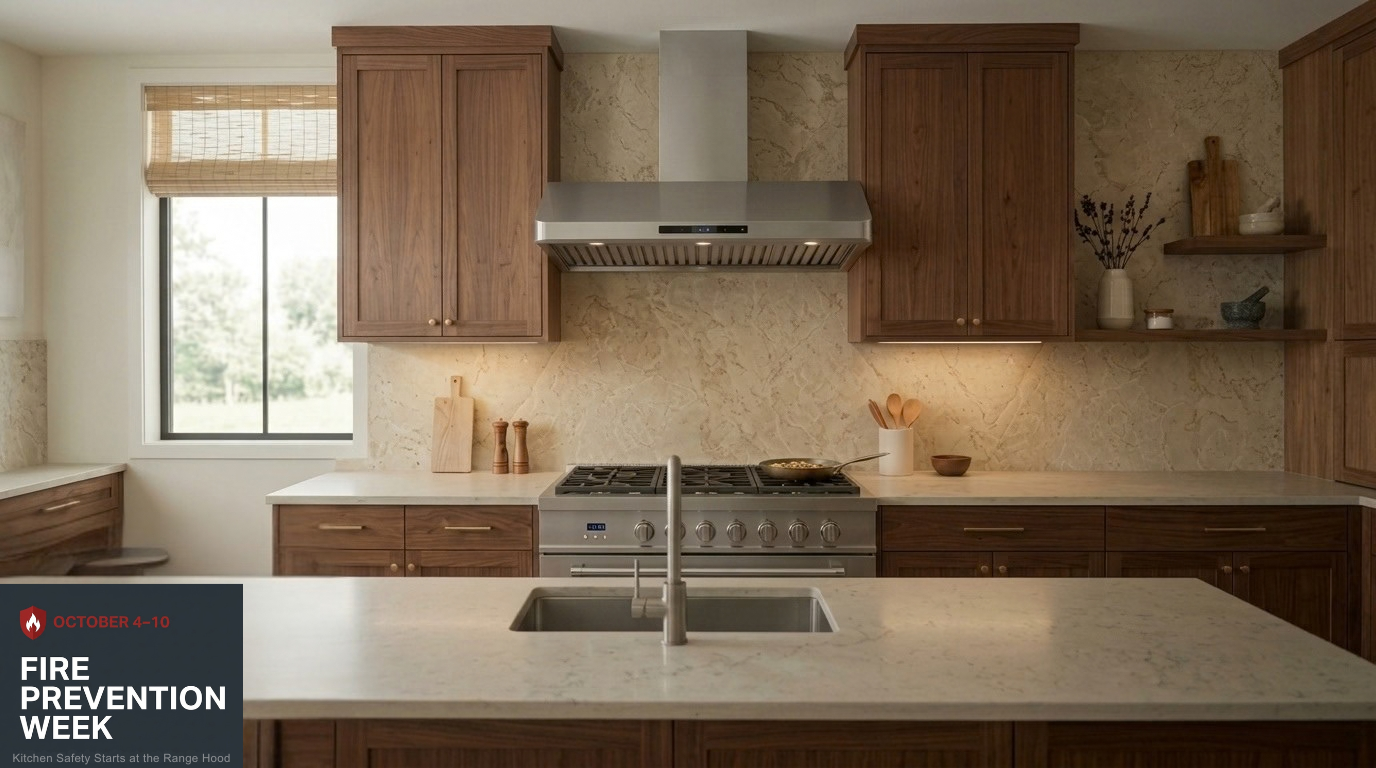
In 2026, the National Fire Protection Association is focusing on safe charging for devices powered by lithium ion batteries. Phones, tablets, cordless vacuums, and power tools often share counter space with meal preparation, so charging habits belong in any conversation about a safer kitchen. Cooking brings everyday risks. A hot pan, unattended oil, or a towel too close to a burner can turn a familiar meal into an emergency. A range hood can capture airborne grease, smoke, and odors, helping keep the cooking area comfortable and easier to maintain. It does not prevent or put out a fire, but good equipment and attentive habits can work together. A Familiar Room With Real Fire Risks Cooking is the leading cause of reported home fires in the United States. In its analysis of 2017 through 2021 incidents, the NFPA estimated an average of 158,400 reported home cooking fires each year. Ranges and cooktops were involved in 53 percent of those fires. The same report identifies unattended cooking as the leading contributing factor. These figures describe a real hazard, but they also point to an everyday opportunity: many incidents begin in familiar circumstances that people can learn to recognize. A pan of oil heats while someone answers the door. A pot boils over while a cook steps into another room. A dish towel slides close to a flame. None of these moments means a fire is inevitable, and no single appliance can remove the need for attention. They are reminders to keep the cooking zone clear, stay nearby, and make decisions before a distraction takes over. Stay Present at the Stove Stay in the kitchen when frying, boiling, grilling, or broiling food. If you need to leave, turn off the burner first. For simmering, roasting, or baking, check the food regularly, set a timer, and remain at home. A timer helps with memory, but it is not a substitute for checking on what is cooking. Keep paper towels, packaging, utensils, oven mitts, and dish cloths away from burners. Turn pan handles toward the center of the stove. Wear short or close fitting sleeves, and establish a three foot zone around the cooking area for children and pets. Wipe spills when the surface is cool, and do not use the oven or stovetop as storage. These habits also make ventilation more effective. When cooking creates steam or smoke, switch on the hood before the air spreads through the room. Use a lower setting for gentle simmering and a stronger setting for searing or several active burners. Leave it running briefly after cooking to clear lingering fumes, following the appliance instructions. What a Range Hood Can and Cannot Do Cosmo’s COS-QS48 is a 48 inch under cabinet range hood featured in a recent Cosmo product article. Its two motors provide up to 500 CFM of airflow, and its four speed fan lets a cook adjust ventilation to the meal. A backlit LCD touch panel and wireless remote make it possible to change settings without reaching across hot cookware. Three LED lights illuminate the cooking surface. Three permanent ARC FLOW stainless steel filters capture airborne grease and are dishwasher safe. The hood is designed for top venting, sending captured air through ductwork to the exterior when installed in that configuration. Confirm the hood, duct route, clearances, and electrical setup suit the kitchen, and follow the installation guide. A range hood is ventilation equipment, not a fire suppression system. It cannot make unattended cooking safe, stop a pan fire, or replace a smoke alarm. Grease that collects on filters and nearby surfaces also needs attention. The useful role of the COS-QS48 is more modest and practical: its width suits larger cooking surfaces, its fan offers several ventilation levels, and its removable filters can be cleaned. These features can support a kitchen that is easier to keep clear and comfortable while cooking. Keep Filters and Cooking Surfaces Clean Grease buildup can smoke during later cooking and add fuel to a fire if it catches. Check filters regularly, especially after frequent frying or high heat cooking. Remove and clean them as directed in the owner’s manual, and let them dry fully before reinstalling. Wipe the hood underside, backsplash, and nearby cabinets with a suitable cleaner, keeping moisture away from the controls. Clean the cooktop only after it has cooled, and remove crumbs or spilled food before the next meal. Check that the fan and lights are working as expected. If airflow seems weak, inspect the filter and consult the manual or a qualified installer about the ducting. A hood that is incorrectly sized or installed may not capture cooking byproducts as intended, so measure the cooking surface and verify fit before choosing equipment. Charge Devices Away From Cooking Heat The 2026 Fire Prevention Week theme, “Charge into Fire Safety: Safe Charging Is a Superpower,” calls attention to lithium ion batteries in household devices. A charging phone on a kitchen counter may seem harmless, but charging should happen away from hot appliances, splashes, and clutter. NFPA recommends using the manufacturer’s charger, choosing a hard flat surface, and unplugging the device when it is fully charged. Know the Plan Before a Fire Starts Working smoke alarms provide an early warning. Install them on every level, inside each bedroom, and outside sleeping areas. Test them monthly and replace batteries or units as directed. Keep alarms at least 10 feet from cooking appliances when possible to reduce nuisance alarms, while following local requirements and the alarm instructions. If a small grease fire starts in a pan, turn off the heat if safe and slide a lid over it. Do not move the pan or remove the lid until it is completely cool. Never pour water on burning oil or grease. For an oven fire, turn it off and keep the door closed. If the fire does not go out promptly, or you have any doubt, get everyone outside, close the door behind you, and call 911. Do not reenter. Make Safety Part

Fire Prevention Week Starts in the Kitchen, and the Safest Habits Begin at the Range

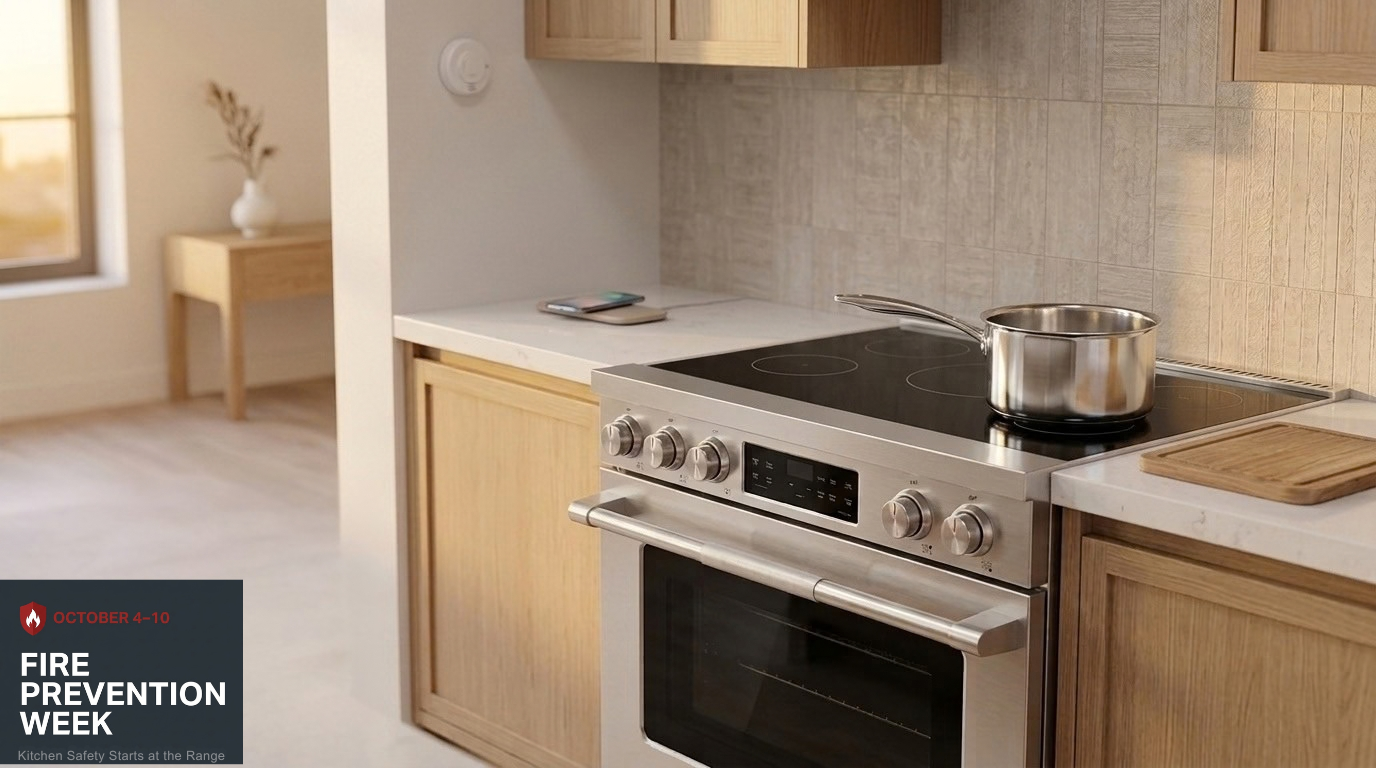
Every October, the National Fire Protection Association asks the country to spend a week thinking about something most households would rather avoid: how a fire actually starts. Fire Prevention Week runs October 4 to 10 this year, timed around the anniversary of the Great Chicago Fire of 1871, and it is one of the longest running public safety observances in the United States. This year’s theme, Charge into Fire Safety: Safe Charging Is a Superpower, puts the spotlight on lithium ion batteries, the rechargeable power source inside phones, tablets, laptops, cordless tools, and a growing list of small kitchen devices. A week about charging might not sound like a kitchen story, but the kitchen is where fire safety and daily life overlap the most. It is where dinner simmers, phones charge on the counter, and a tablet propped against the backsplash walks someone through a recipe. Cooking is also the leading cause of home fires in the country, which makes this the right week to look at the room with fresh eyes, especially in Southern California, where October already brings a heightened awareness of fire. The Numbers Behind the Busiest Room in the House NFPA estimates that from 2020 through 2024, kitchen and cooking equipment was involved in 48 percent of home structure fires each year, along with 35 percent of home fire injuries and 16 percent of home fire deaths. Ranges and cooktops account for just over half of home cooking fire incidents, and about two thirds of home cooking fires begin when food or other cooking materials ignite. Unattended equipment is a factor in roughly one quarter of those fires and about half of the deaths connected to them. The calendar matters too. Thanksgiving is the peak day for home cooking fires, with NFPA counting an estimated 1,446 of them on Thanksgiving Day in 2023, nearly five times the daily average. These numbers are not meant to alarm anyone. They point to something encouraging, which is that most cooking fires follow familiar patterns, and familiar patterns can be interrupted by ordinary habits. Stay Close to What You Are Cooking Unattended cooking is the leading contributing factor in home cooking fires, and the reason is easy to understand. A pan of oil can go from shimmering to smoking in a few minutes, and a phone call, a doorbell, or a quick trip to the garage is all it takes to lose track of it. The simplest rule in kitchen safety is also the most effective: if you leave the kitchen while frying, boiling, grilling, or broiling, turn the burner off first. For anything that cooks slowly, such as a roast, a simmering pot of chili, or a tray of cookies, set a timer and stay in the home while it runs. Keep towels, paper packaging, and oven mitts away from the burners, wear sleeves that are short or snug when you cook, and give children a three foot zone around the range. Good habits go further when the appliance supports them, and that is where Cosmo’s newest range comes in. The COS-RIS365SS is a 36 inch induction range from the Stellar Collection, and its cooktop works differently from a gas or traditional electric surface. Induction burners heat cookware directly using electromagnetic energy, which means there is no open flame and the heat is created in the pan rather than in an element beneath the glass. Cosmo describes the result as faster, safer, and more efficient cooking, which is a meaningful starting point for a household that wants fewer ignition sources near the stove. The five burners cover a full range of cooking, including a 2500W burner, two 1600W burners, two 1200W burners, and a 3600W sync bridge that joins burners for larger cookware like griddles. It is worth being clear about what induction does and does not change. A glass surface can still warm up from a hot pan, and food or oil in a pan can still ignite if it is left alone, so attention at the stove remains the most important safety feature in any kitchen. Induction also requires cookware with a magnetic base, and a simple refrigerator magnet will tell you whether a favorite pan qualifies. The oven carries its own safety details. The range includes an oven cavity cooling ventilation system for safe heat dissipation, overheating protection, and a cool to the touch oven handle to help prevent burns. The 6.1 cubic foot convection oven offers Bake, Convection Bake, Broil, Air Fry, Delay Start, and Keep Warm functions, with a digital display that includes a clock and timer, so the countdown you set for a roast is always in plain view. Air Fry uses a circulating fan and an included air fry tray to crisp food with less oil than conventional frying, which means one less pot of hot oil to watch. The range is CSA certified and should be installed according to its installation guide. Cleaning belongs in this conversation as well. Built up grease and food residue are a common source of smoke in an oven, so an oven that is easy to keep clean is easier to keep safe. The Steam Clean function loosens baked on residue using heat and moisture, which makes spills simple to wipe away before they have a chance to burn on again. Charging in the Kitchen, Honoring This Year’s Theme Back to the theme. The same counters that hold cutting boards also hold chargers, and the kitchen adds heat, steam, and spills to the mix. NFPA warns that damaged or incorrectly charged lithium ion batteries can overheat, catch fire, or explode, and a few small habits lower that risk considerably. Smoke Alarms and the First Sixty Seconds Smoke alarms are the quiet partner in every kitchen plan. Install them on every level of the home, inside each bedroom and outside each sleeping area, test them monthly, and place them about 10 feet away from cooking appliances so that routine searing does not tempt anyone to remove

National Fried Scallops Day and the Recipe for a Perfect Golden Scallop

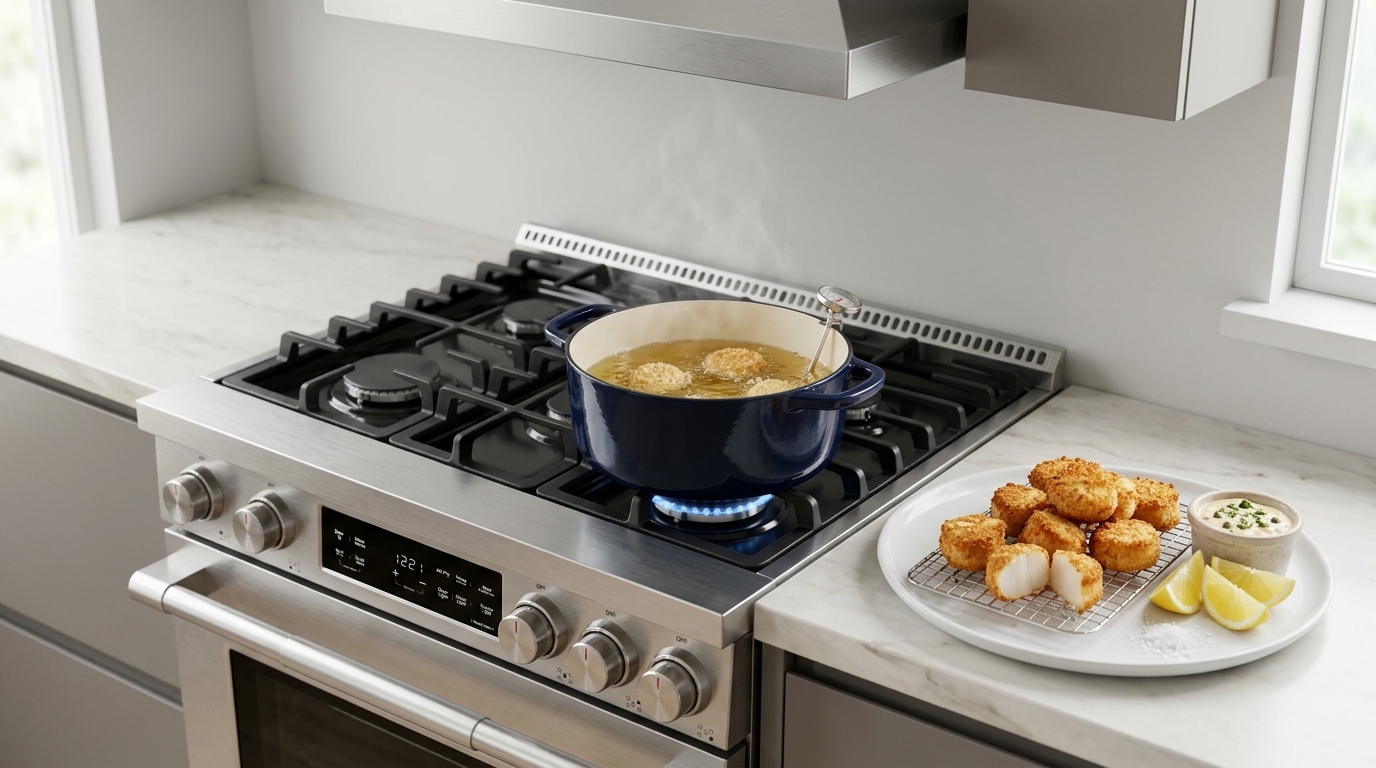
A Holiday Worth Cooking For Every October 2, seafood lovers across the country mark National Fried Scallops Day, a food holiday that arrives right at the start of National Seafood Month. Most people celebrate by ordering a basket at their favorite seafood shack. This year, consider making them at home instead. Done with care, homemade fried scallops rival anything served in a paper boat on the New England coast: a crisp, seasoned crust that shatters at first bite, giving way to a sweet, tender center that tastes faintly of the sea. Scallops have a reputation for being temperamental, and it is partly deserved. A minute too long in the oil turns them rubbery, and oil that is too cool leaves them greasy. But the fixes are simple and repeatable. The recipe below has been built around the three things that matter most: dry scallops, a coating that clings, and oil held at a steady temperature from the first batch to the last. Serves: 4Prep time: 45 minutes, including restingCook time: about 15 minutes Ingredients For the scallops For the breading For frying and finishing For the quick remoulade A Note on Buying Scallops The single most important ingredient decision is choosing dry scallops over wet ones. Dry scallops are packed without additives. Wet scallops are soaked in a phosphate solution that helps them hold water, and that water weeps out in the fryer, steaming the coating from the inside and preventing a proper crust. Dry scallops look ivory or slightly off white and feel tacky rather than slick. If only frozen scallops are available, thaw them overnight in the refrigerator, never at room temperature, and drain them well. Equipment and the Stove That Makes It Easier You will need a heavy Dutch oven or deep cast iron pot of at least 5 quarts, a clip on deep fry thermometer, a slotted spoon or spider strainer, three shallow dishes for breading, and two wire racks set over sheet pans, one for resting the breaded scallops and one for draining the fried ones. The most underrated piece of equipment is the burner itself. Each time a batch of cold scallops goes into the pot, the oil temperature drops, and the speed at which it recovers decides whether the next batch fries crisp or soaks up grease. The Cosmo COS-RGS305SS 30 inch Gas Range with 5 Burners and Convection Oven with Air Fry, one of the newest models in Cosmo’s Stellar Collection, is built for exactly this kind of cooking. Its cooktop pairs a 22,000 BTU burner with an 18,000 BTU burner, so the oil climbs back to temperature quickly between batches. Heavy duty cast iron grates hold a full Dutch oven steady, and solid metal knobs make small adjustments easy when the thermometer begins to drift. Meanwhile, its gentle 3,500 BTU burner can keep a small pan of lemon butter warm without scorching it. Whatever stove you cook on, switch on the range hood before you begin. Frying releases steam and airborne grease, and good ventilation keeps the kitchen comfortable. Method The Air Fry Variation Not every cook wants a pot of hot oil on a weeknight, and the Cosmo COS-RGS305SS offers a lighter route. Its 4.8 cubic foot convection oven includes a dedicated Air Fry function and comes with an air fry tray designed to circulate hot air around every side of the food. Follow steps 1 through 4 as written. Arrange the breaded scallops in a single layer on the air fry tray, leaving space between them, and mist them lightly with oil. Air fry until the crumbs are golden and crisp, turning them once halfway through. Begin checking after five or six minutes, since scallops move from perfect to overcooked quickly, and use the same doneness test described in step 7. The result is not identical to deep frying, but it comes remarkably close, with a crisp shell, a tender center and a fraction of the oil. Bringing It to the Table Fried scallops are at their best within minutes of leaving the oil, so have the table set before the first batch goes in. Pile them onto a warm platter with lemon wedges and the remoulade, or a classic tartar sauce if you prefer. Crisp coleslaw, hand cut fries or a simple green salad dressed in lemon vinaigrette round out the plate, and a chilled glass of Sauvignon Blanc or a cold lager makes a fine companion. National Fried Scallops Day is a reminder that some of the best restaurant dishes are well within reach at home. Buy dry scallops, dry them again, keep the oil honest and give each batch room to breathe. With the right technique and a stove that can keep up, the perfect golden scallop is closer than most cooks think.

Leftovers Done Right and What Your Microwave Can Do Beyond Reheating

The Second Meal Nobody Plans For Every kitchen runs on two kinds of cooking. There is the cooking a household plans, shops for, and talks about, and there is the quieter second shift that happens the next day, when a container comes out of the fridge and goes into the microwave with very little thought. That second shift is where a surprising amount of good food gets ruined. The chicken that was juicy on Sunday turns stringy on Monday, the rice goes hard at the edges and stays cold in the middle, and the pasta comes out with a sauce that has quietly separated into oil and something else. October makes the problem more noticeable. Soup season is already underway, braises and casseroles are back in rotation, and the stretch between now and the end of the year is built around big-batch cooking meant to be eaten more than once. A household that cooks one large pot on Sunday is really cooking three or four meals, and how well those later meals turn out depends almost entirely on what happens in the two or three minutes it takes to reheat them. Why Leftovers Go Wrong in the First Place Most reheating failures come from the same habit: treating the microwave as an on-off switch instead of a heat source with a dial. A microwave heats food by agitating the water molecules inside it, which means it reaches the wettest, thinnest, outermost parts of a dish first. Run it at full power for four straight minutes and the edges overcook and dry out long before the dense center catches up. That is how a single plate ends up both scorched and cold. Density and moisture matter as much as time. A mound of mashed potatoes, a thick slice of lasagna, and a stack of chicken thighs all hold cold at their core, while a thin layer of rice or a few spoonfuls of sauce heat almost instantly. When those items share a plate and a single high-power setting, something is always going to lose. The fix is not a better container or a longer timer. It is a slightly more deliberate routine. Leftovers Done Right, One Step at a Time Start with power, not time. Dropping to medium, somewhere around 50 to 70 percent, gives heat time to move inward from the edges instead of cooking the outside while the middle waits. It adds a minute or so, and it is the single change that makes the biggest difference for dense dishes like casseroles, meatloaf, and anything with cheese on top. Arrange the plate before it goes in. Spreading food into an even layer, or pushing it into a ring with an open center, removes the thick cold spot that microwaves struggle to reach. Thicker pieces belong toward the outside edge, where they get more energy, and delicate items toward the middle. Add a little moisture back. Rice, grains, and pasta lose water in the fridge, and a spoonful of water or broth sprinkled over the top before reheating turns into steam that plumps them back up. Covering the dish with a microwave-safe lid or a damp paper towel keeps that steam where it belongs instead of letting it escape and leaving the surface dry. Stir or flip halfway through. Reheating in shorter intervals, with a stir for saucy dishes and a flip for solid pieces, evens out the hot and cold zones that no cavity design fully eliminates. Let it rest before eating. A minute of standing time lets heat keep spreading through the food after the cycle ends, which is often what finishes off a stubborn cold center. For food safety, leftovers should reach 165°F all the way through, and a quick check with an instant-read thermometer on thicker items like chicken or casseroles takes the guesswork out of it. And know when the microwave is not the right tool. Anything that was crisp the first time, fried chicken, pizza crust, roasted potatoes, anything breaded, will come back soft no matter how carefully it is handled. Those are better revived in an oven or air fryer, while soups, stews, curries, grains, pasta, and saucy braises are exactly what the microwave does best. What Your Microwave Can Do Beyond Reheating Once a household starts using power levels deliberately, the microwave stops looking like a leftovers box and starts looking like what it actually is: a precise, low-mess heat source that handles a long list of small prep jobs faster than the stove. Softening butter is the most common one. A stick straight from the fridge can be brought to spreadable, bakeable softness in short bursts at low power, without the melted puddle that full power produces. Melting chocolate works the same way, with short intervals at reduced power and a stir between each giving a smooth, glossy result without a double boiler. Citrus gives up noticeably more juice after 10 to 15 seconds in the microwave, since the gentle warmth loosens the flesh before squeezing. A few seconds also makes garlic cloves easier to peel, as the skins pull away from the heat. Fresh herbs that are about to wilt can be dried instead of tossed. Spread between two paper towels and heated in short bursts, parsley, oregano, rosemary, and thyme dry out in a few minutes and hold their color better than they do air-drying over a week. Nuts, seeds, and breadcrumbs toast surprisingly well in a single layer on a plate, stirred every minute, and they come out evenly browned without the risk of a forgotten skillet on the burner. Stale bread or tortillas wrapped in a damp towel soften back to pliable in seconds. Even cleanup falls within the microwave’s range. A bowl of water with lemon slices or a splash of vinegar, heated until it steams, loosens splatters inside the cavity so they wipe away easily, and it takes care of lingering food odors at the same time. Cosmo’s COS-12MWDSS-NH, a 24-inch built-in microwave drawer

Ahi Shoyu Poke for Poke Day, With Crisp Wonton Chips and Perfect Sushi Rice

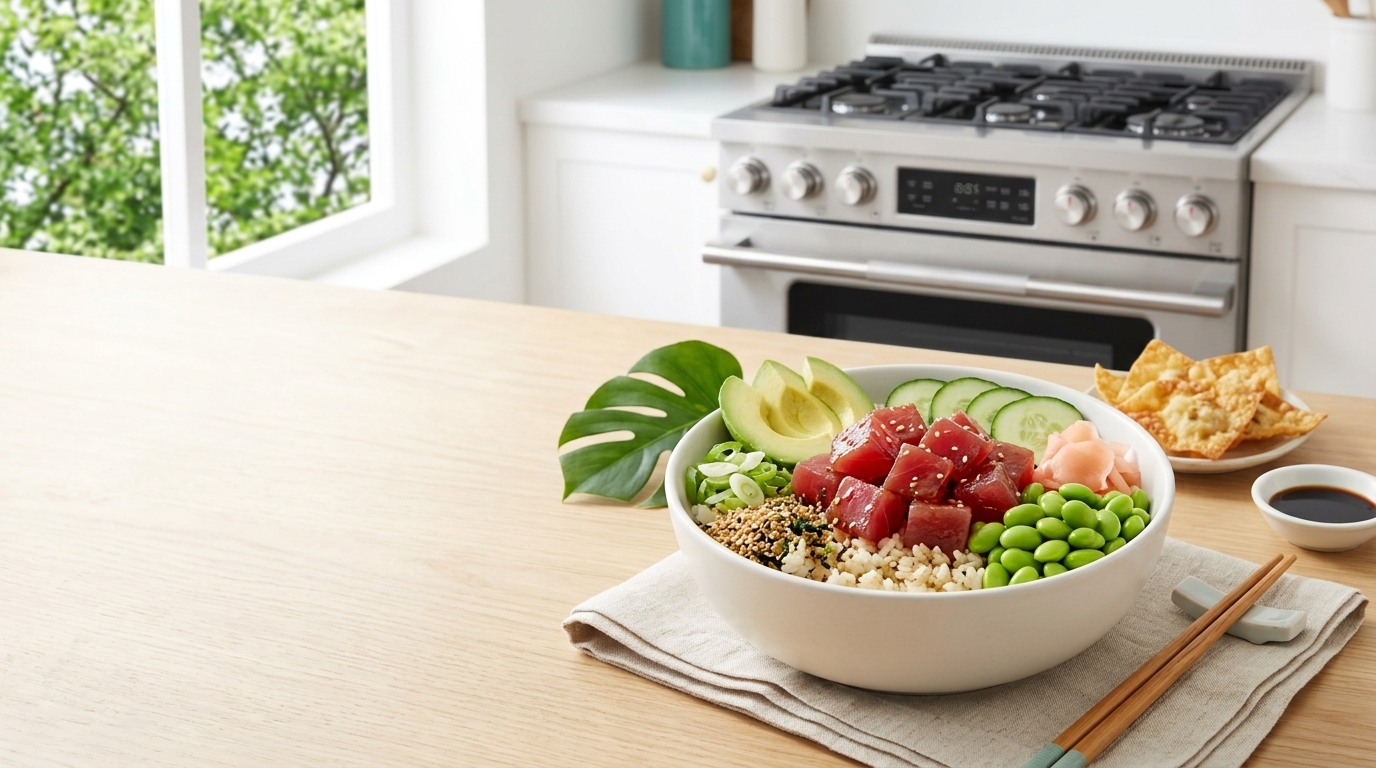
Poke, pronounced poh-KAY, comes from the Hawaiian verb meaning to slice or cut crosswise into pieces, and the dish it names is one of the oldest and most enduring foods of the islands. Long before Western contact, Native Hawaiian fishermen cut freshly caught reef fish into bite-sized pieces and seasoned them simply with coarse sea salt, limu (edible seaweed), and inamona, a paste of roasted and crushed kukui nut. Octopus and skipjack tuna, known locally as aku, were among the traditional choices, and the preparation was as much about respect for the catch as it was about flavor. Nothing was hidden, and nothing was wasted. The dish changed as Hawaii did. Japanese, Chinese, Korean, and Filipino laborers who arrived to work the plantations from the late nineteenth century onward brought soy sauce, sesame oil, and green onion, and over the decades those ingredients became so embedded that shoyu poke now reads as the classic version. Yellowfin ahi eventually became the fish of choice. Today poke is sold by the pound at island grocery counters, packed into plastic containers for beach days, and set out at family gatherings, birthdays, and graduations, where it functions as a symbol of hospitality and community. In the last decade it traveled far beyond Hawaii, first to West Coast poke shops and then to menus and home kitchens across the country. The Recipe for Ahi Shoyu Poke Bowls Every September 28, Poke Day gives home cooks a reason to try it themselves, and the dish is far more approachable than its restaurant reputation suggests. This version keeps the traditional soul of shoyu poke, then builds a complete meal around it with seasoned sushi rice and crisp wonton chips. Cosmo’s kitchen blog already has a salmon and avocado version if you prefer that direction. This recipe leans toward the classic ahi approach and makes four servings. For the poke For the rice and chips For serving Method Buying and Handling Raw Fish Safely Because poke is served raw, the fish matters more than any other ingredient. Buy from a fishmonger you trust and ask specifically for tuna intended to be eaten raw. Look for a deep, translucent red color with a clean, briny smell, and avoid anything dull, brown, or fishy. Keep it on ice on the way home, store it in the coldest part of the refrigerator, and use it the same day. The same principle behind The Ingredients You’re Storing Wrong applies here. Raw fish is also not recommended for pregnant women, young children, older adults, or anyone with a weakened immune system. Timing also matters for the rest of the meal. Rice and wonton chips can be made an hour or two ahead, and the toppings can be prepped in the morning, so the only last-minute task is dressing the fish. Set out the components buffet style and let guests build their own bowls, which suits a group with different tastes, and offer extra soy sauce, chili flakes, and lime wedges on the side. If serving raw fish is not right for your table, sear the tuna instead. Season a thick steak with salt and pepper, sear it for 60 to 90 seconds per side in a very hot skillet, slice it, and serve it over the same rice with the same toppings and dressing. The Range Behind the Bowl Poke itself needs no heat, but nearly everything around it does, and that is where a capable range earns its place. Cosmo’s COS-RGS366SS, a 36-inch gas range from the Stellar Collection, handles each supporting task in this recipe. Sushi rice depends on gentle, steady heat, and this range’s six burners span a wide output. A 3,500 BTU simmer burner holds a covered pot at the low, even temperature that keeps rice from scorching on the bottom. If you choose the seared ahi variation, the 22,000 BTU high-output burner on heavy-duty cast iron grates delivers the intense heat a cast iron skillet needs to sear a tuna steak in about a minute per side, leaving the center cool and rare. That range of control, from a whisper to a roar on the same cooktop, is hard to fake. The oven side is just as useful. The range’s 6.1 cubic foot convection oven includes an air fry function with a dedicated tray, which is a natural fit for wonton chips. Circulating hot air crisps thin wrappers evenly in minutes, using a fraction of the oil of a deep fryer and without dragging a countertop air fryer out of storage. The same function can crisp shallots or thin-sliced sweet potato as alternative toppings. The oven’s rack positions and the range’s storage drawer keep sheet pans within reach, and the digital touch controls, clock, and timer make it easy to time the chips against the rest of the prep. Front-mounted metal knobs handle the burners, so adjusting the flame is simple even with wet hands after rinsing rice. There is a practical benefit to working this way, too. A meal that involves raw fish, rice, and a crisp element can easily turn into a juggling act, with several dishes needing attention at different moments. Having the burners and the oven both up to the job means the rice can rest on the stovetop while the chips finish in the oven, and nothing has to wait its turn in a separate appliance. It keeps a weeknight version of the dish realistic, and it scales comfortably when the guest list grows for a weekend gathering. Cleanup is straightforward too. The steam clean function loosens splatters with heat and moisture, and the brushed stainless steel finish fits into nearly any kitchen. For a fuller look at what the range can do through the roasting season, see First Day of Fall. A Simple Way to Celebrate Poke rewards good ingredients, a sharp knife, and restraint. Season it lightly, serve it cold over warm rice, and let the fish speak for itself. For households that want the whole meal, the rice, the

Bringing Tableside Flambé Home: What Your Range Actually Needs to Pull It Off Safely

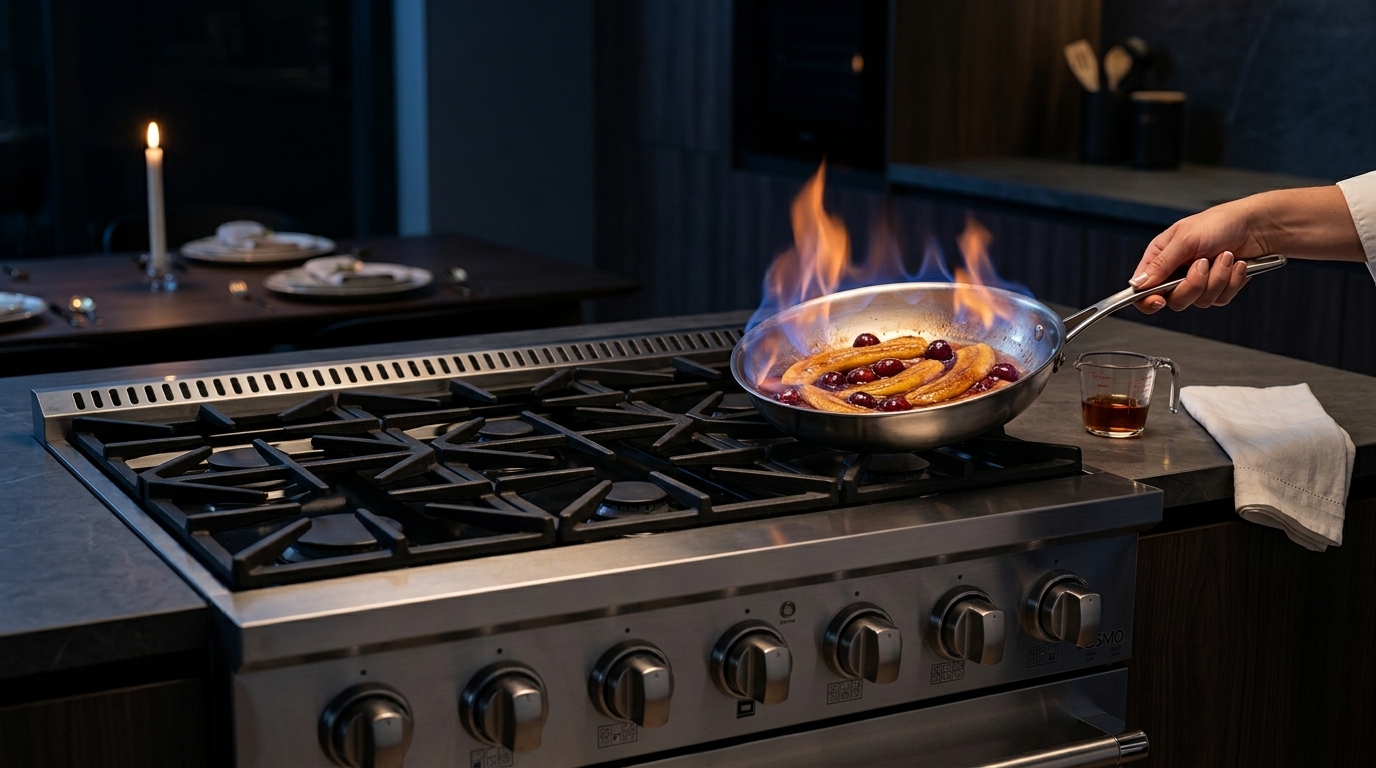
There is a specific kind of theater a flambé brings to a table, the room going quiet for a second as a server tips a pan and a controlled sheet of blue-orange flame rolls across a cherries jubilee or a pan of bananas foster. It reads as a restaurant trick, the kind of thing that belongs to someone with a captain’s cart and a fire extinguisher within arm’s reach, not a Tuesday dinner at home. That reputation is mostly undeserved. Flambéing is a fairly simple technique once the mechanics are understood, and the real barrier for most home cooks is not skill. It is a stovetop that was never built to give a cook the fast, precise control that lighting alcohol on fire actually requires. What Flambé Is Actually Doing Strip away the showmanship and flambéing is a fairly ordinary chemical event. A splash of high-proof alcohol, usually a fruit brandy, rum, or a liqueur, goes into a hot pan already holding fruit, a sauce, or a piece of meat, and the alcohol vapor rising off the pan ignites, burning off quickly while leaving behind a deeper, more concentrated flavor than the alcohol could contribute unburned. The flame itself lasts only fifteen to thirty seconds before the alcohol content burns away and the fire extinguishes on its own. Nothing about that description involves danger by design. The danger shows up when the pan is too hot before the alcohol goes in, when the alcohol is poured straight from the bottle instead of measured out, or when a cook is working over a burner that cannot be adjusted or shut off the instant something goes sideways. That last point is the one most home flambé guides skip past, and it is the one that actually determines whether the technique goes well. A recipe can tell a cook to remove the pan from heat before adding alcohol, to measure the pour in advance, and to keep a lid within reach. None of that advice does much good if the burner underneath the pan cannot respond as quickly as the cook needs it to. Why the Stove Matters More Than the Recipe Every serious flambé guide converges on the same handful of rules, and nearly all of them come back to timing. Alcohol should be measured into a cup rather than poured from the bottle, so a flame traveling up the alcohol stream never has a bottle to travel back to. The pan itself should come off direct heat, or the burner should be turned down, in the moment before the alcohol is added, since a pan that is too hot can ignite the alcohol vapor before a cook is ready for it. A long lighter or match, rather than a stovetop’s own flame, is the safer ignition source on an electric or induction surface, and even on gas, pulling the pan slightly away from the burner before adding alcohol keeps the vapor from catching prematurely. Loose sleeves get rolled up, hair gets tied back, and anything flammable gets cleared from the space above and around the pan before the alcohol ever comes out of the bottle. Every one of those steps assumes a cook who can move the pan, adjust the flame, or kill the heat entirely within a second or two of deciding to. That is where a home range with sluggish, imprecise burner control becomes the actual liability in the process, not the alcohol itself. A burner that takes several seconds to drop from high to low, or a single all-purpose burner asked to handle a hard reduction and then a delicate flambé finish without missing a beat, turns a fifteen-second technique into a much longer window where something can go wrong. The alcohol keeps cooking off while a cook waits for the heat to actually respond, and a pan sauce that should have stayed exactly where it needed to be either scorches or never develops the reduction a flambé dish depends on. Where the COS-GRP366 Fits Cosmo’s COS-GRP366, a 36-inch professional-style gas range with six sealed Italian-made burners, is built around exactly the kind of range and responsiveness a flambé technique actually needs. Its burner lineup runs from a 20,000 BTU high-output burner down through a 15,000 BTU burner, a 12,000 BTU burner, two 9,000 BTU burners, and a 6,000 BTU burner, which matters for a flambé dish in a way that is easy to overlook. The dish rarely starts as a flambé. It starts as a sauté or a reduction that needs real heat, a pan of bananas caramelizing in butter and sugar or a reduction of pan juices building toward the finish, and only in the final moment does the cook need to pull that same burner down to a controlled, moderate flame before the alcohol goes in. A range with a wide spread of burner outputs, rather than six burners tuned to nearly the same range, gives a cook that kind of headroom on a single burner instead of needing to shuffle a hot pan across the cooktop at the exact moment precision matters most. Metal control knobs on the COS-GRP366 respond instantly to a twist in either direction, a meaningful difference from a touch panel that has to register a tap and confirm a setting change before the burner actually responds, a lag that matters far more during a fifteen-second flambé than it does during an ordinary sauté. The range’s auto re-ignition system, which continuously monitors each burner’s flame and automatically relights it if a draft or a spill causes it to blow out, adds a layer of protection specific to open-flame cooking, catching a flame that might otherwise go dark without a cook noticing right away. The range’s 5.4 cubic foot convection oven, with its 22,000 BTU bake burner and even, fan-assisted heat distribution, rounds out the rest of a dinner built around a flambéed finish, whether that means keeping a tray of accompaniments warm or finishing the dish that came before the

National Beef Stroganoff Day: The Dish That Lives or Dies on What Happens After the Sour Cream Goes In

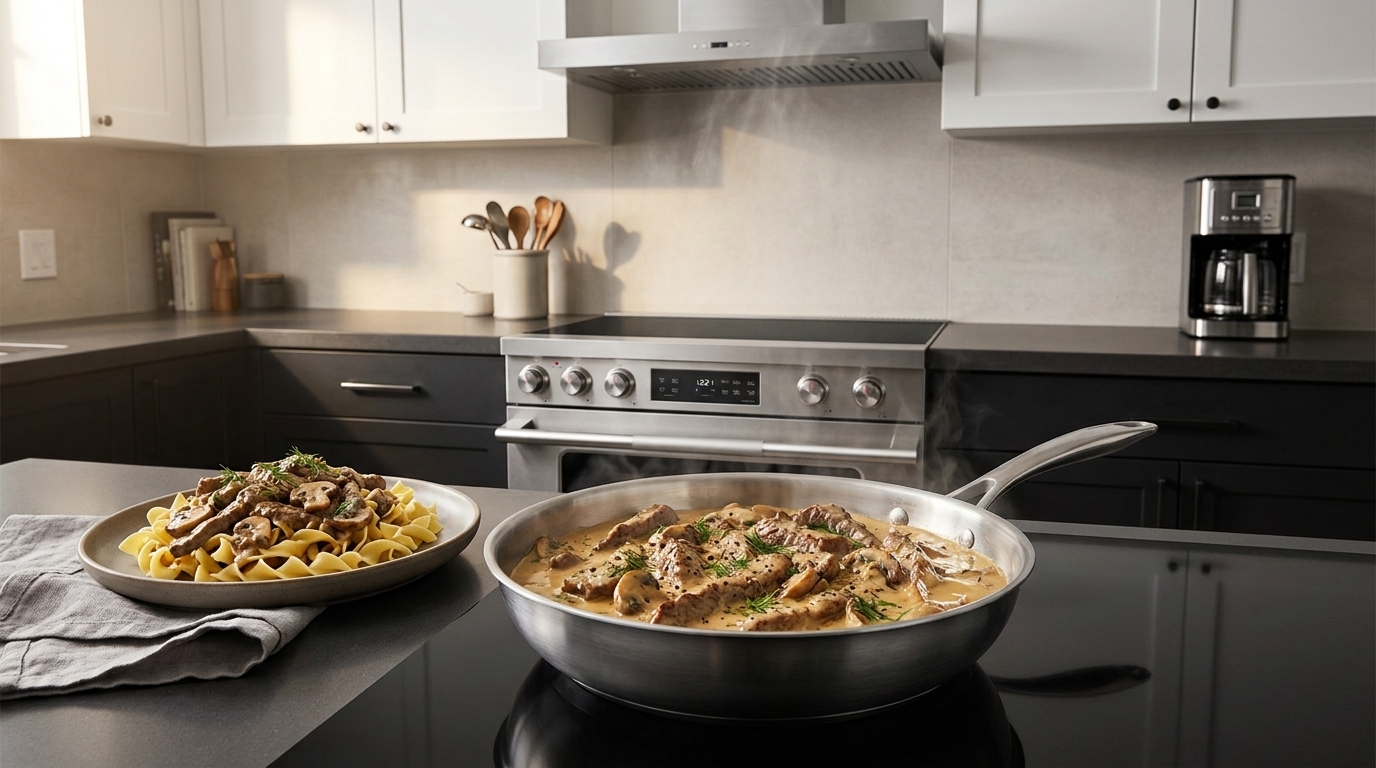
Most food holidays celebrate something a home cook already makes without thinking twice about it. National Beef Stroganoff Day, observed on September 21st, is a little different. Stroganoff is a dish nearly every American household recognizes by name, tender beef and mushrooms in a rich, tangy cream sauce over egg noodles, but one that fewer households actually make from scratch than the recipe’s popularity would suggest. Part of that gap comes down to a single, easy-to-miss detail in the technique: stroganoff’s sauce is built on sour cream, and sour cream does not behave the same way heavy cream or a basic pan sauce does once it hits real heat. Get that one step wrong, and a dish built around silky, tangy richness turns grainy and broken. Get it right, and stroganoff earns every bit of the reputation that has kept it on American dinner tables for more than a century. A Russian Import With an American Second Life Beef stroganoff traces back to 19th-century Russia, most commonly credited to the kitchens associated with the Stroganov family, though the exact origin story has always been more folklore than documented fact. The dish that reached America by the mid-20th century, strips of beef sautéed with onions and mushrooms, finished in a sour cream sauce, was already a departure from the earlier Russian versions, which sometimes used a mustard-forward sauce rather than the cream-based one that eventually became standard. What stuck, and what turned stroganoff into a fixture of mid-century American cookbooks, was the combination of an approachable ingredient list with a genuinely elegant result. It read as special-occasion food while using cuts of beef and pantry staples most households already had on hand, which is exactly why it became a Cold War-era dinner party favorite and, not long after, a weeknight regular served over egg noodles instead of rice. That dual identity, humble ingredients producing a dish that tastes considerably more refined than its grocery list suggests, is still the best argument for making stroganoff at home rather than ordering something similar at a restaurant. Good beef stroganoff is not an expensive dish. It is a technique-dependent one, and the technique is almost entirely about heat management rather than any hard-to-source ingredient or complicated multi-day process. Where Most Home Versions Go Wrong Ask any experienced home cook why their stroganoff came out grainy or thin instead of silky, and the answer nearly always traces back to the same mistake: the sour cream went into a pan that was too hot, or it sat over heat too long after being stirred in. Sour cream is a cultured dairy product with a relatively low tolerance for high heat. Push it past a gentle simmer, and the proteins that give it that smooth, tangy body start to separate, curdling into small white flecks suspended in a thin, broken liquid instead of melting seamlessly into the pan sauce. Once that happens, there is no fixing it. The dish is still edible, but it has lost the texture that makes stroganoff worth making in the first place. This is why so many stroganoff recipes read like a warning label by the time they get to the final step: remove the pan from heat, or reduce to the lowest possible setting, before the sour cream goes in, and never let the sauce come back to a boil afterward. That instruction is easy to write and considerably harder to execute on a standard stovetop, where the gap between a gentle simmer and a rolling boil on a single burner setting can be narrower than most home cooks expect, especially on a gas burner where visual flame height does not always correlate cleanly to the actual heat reaching the pan. A cook distracted for even a minute, stirring noodles or plating a side dish, can come back to a sauce that has quietly slipped past the point of no return. Precise, Instant Heat Changes the Outcome This is exactly the kind of failure point that a genuinely responsive cooktop is built to eliminate, and it is the strongest practical argument for cooking stroganoff on induction rather than gas or a standard electric coil. Cosmo’s COS-RIS365SS, a 36-inch freestanding induction range, gives a home cook direct, immediate control over the exact moment the sauce needs to drop from an active simmer to a bare, sauce-holding warmth. Because induction heats a pan by generating a magnetic field directly in the cookware itself rather than heating the air and the burner surface first, adjusting the dial changes the temperature at the food almost instantly, without the lag of a gas flame slowly settling to a new height or an electric coil taking a minute or two to cool from its previous setting. For a sauce with a narrow safe zone like stroganoff’s, that responsiveness is the difference between a sauce that stays exactly where it needs to be and one that overshoots by the time a cook notices and reacts. The range’s burner lineup backs up that precision with real range, not just fine control at the low end. Its five induction elements include one 2,500-watt burner and two 1,600-watt burners alongside two 1,200-watt units, enough output to properly sear beef strips over high, dry heat before the sauce stage ever begins, a step that matters as much to the finished dish as the sour cream technique does. Beef that goes into a crowded, lukewarm pan steams instead of browning, and stroganoff without a real sear on the beef loses much of the savory depth that makes the finished sauce worth building around. Getting both ends of that range, a hard sear early and a controlled, gentle finish later, out of the same burner without swapping pans or waiting on a cooktop to catch up is a genuine advantage for a dish built entirely around two very different heat requirements happening ten minutes apart. The range’s 6.1 cubic foot convection oven and included storage drawer round out a kitchen setup built for

National Monte Cristo Day: Why America’s Strangest Sandwich Deserves a Comeback

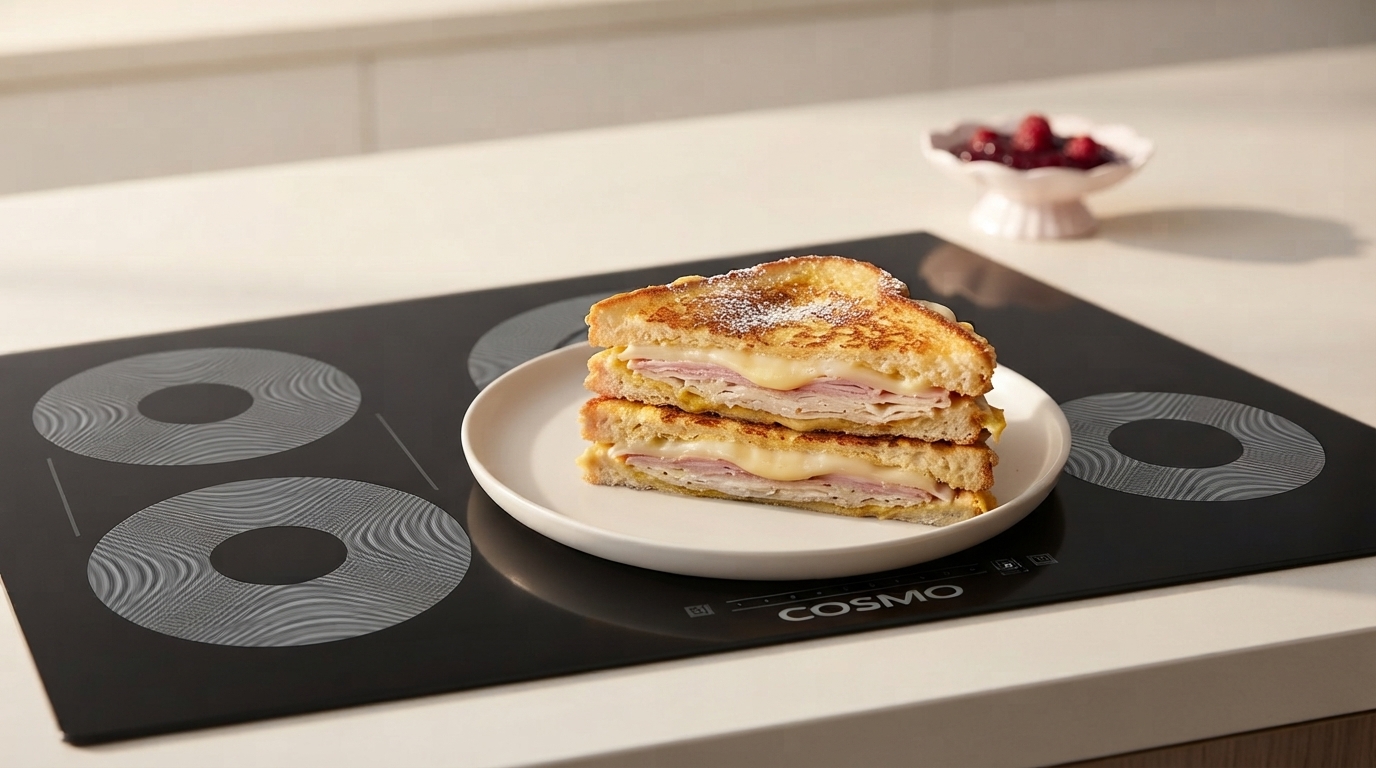
Every food holiday calendar is crowded with days built around something simple: a fruit, a cut of meat, a regional specialty everyone already understands at a glance. September 17 is different. National Monte Cristo Day celebrates a sandwich that has spent most of its life confused about what it actually is, part diner classic, part French toast, part deep-fried indulgence, and dusted with powdered sugar as if daring anyone to take it seriously. That confusion is exactly what makes it worth revisiting. The Monte Cristo is one of the few sandwiches built entirely around a cooking technique rather than a specific filling, and getting that technique right at home is a genuinely useful kitchen skill, not just a novelty for one day a year. What a Monte Cristo Actually Is Strip away the theatrics and a Monte Cristo is a ham and cheese sandwich, usually built with turkey or ham, sometimes both, layered with Swiss or Gruyère, that gets dipped in an egg batter closer to French toast custard than anything resembling a standard sandwich preparation. The whole thing is then griddled or fried in butter until the bread turns golden and slightly custardy, the cheese melts through the layers, and the outside develops a texture somewhere between a grilled cheese and a savory French toast. Restaurants that serve it well finish the plate with a dusting of powdered sugar and a small dish of raspberry or currant jam alongside, leaning fully into the sweet-savory contrast rather than apologizing for it. Food historians trace the sandwich back to the French croque-monsieur, by way of American diners and Southern California drive-ins in the mid-twentieth century, where it picked up its egg-batter treatment and its slightly theatrical presentation. Disneyland’s version, deep-fried rather than griddled and served with strawberry preserves, is probably the most famous American iteration and the reason a lot of people have heard of the sandwich at all without ever having made one. That lineage is part of why the Monte Cristo tends to divide people so cleanly. It reads as either a genuinely great use of leftover ham and cheese or a slightly unhinged experiment in what a sandwich is allowed to be, and honestly, both reactions are fair. A Sandwich That Lives or Dies on Heat Control What separates a good Monte Cristo from a soggy, undercooked mess comes down almost entirely to technique, and specifically to heat control during the cooking step. A slice of bread dipped in egg custard behaves differently on a hot surface than a dry slice of bread does. Too much heat too fast and the outside scorches while the center stays wet and eggy, essentially raw custard sandwiched between two burnt slices. Too little heat and the bread absorbs the egg mixture without ever developing the structure that holds a sandwich together, leaving something closer to bread pudding than a sandwich a person can actually pick up. This is the specific gap that separates a Monte Cristo made on a standard stovetop burner from one made with real, deliberate heat control. A traditional coil or open-flame burner tends to run hot in the center and cooler at the edges, which is a minor inconvenience for most cooking and a genuine problem for a dish that needs even, moderate heat across the entire surface of the pan for several minutes at a stretch. Restaurant kitchens solve this with a flat-top griddle, a continuous cooking surface that holds a steady temperature edge to edge, which is exactly why the Monte Cristo shows up so much more often on diner menus than in home kitchens. Most home stovetops simply are not built to replicate that surface. Bringing Griddle-Level Heat Control Into a Home Kitchen That gap is closing faster than most home cooks realize, largely because of a feature that has quietly become common on modern electric cooktops: the ability to bridge two burners into a single unified heating zone. Cosmo’s COS-304TBECC, a 30-inch electric cooktop with four burners and a black ceramic glass surface, includes exactly this kind of sync burner, a function that connects two adjacent elements into one continuous heating area sized for a griddle, a fish poacher, or any other oversized cookware that would otherwise straddle two separate burners at two separate temperatures. For a dish like a Monte Cristo, where a full flat-bottom griddle pan needs consistent heat from one edge to the other, that bridged zone is the difference between a sandwich that cooks evenly and one that scorches on one side while staying pale on the other. The cooktop’s touch controls matter just as much here as the sync burner itself. Because a Monte Cristo needs steady, moderate heat rather than a quick sear, the finer temperature graduations of a touch-based electric control give a cook more precision than a mechanical knob typically allows, the difference between a dial that jumps from medium to medium-high with nothing in between and a control that can hold a specific, consistent setting for as long as a batch of sandwiches takes to cook through. The cooktop’s triple-zone element, with its small, medium, and large selectable heating areas on a separate burner, also solves a smaller but real problem in a Monte Cristo kitchen: keeping a small saucepan of raspberry jam warm alongside the griddle without dedicating a full-size burner to a job that needs a fraction of the heat. None of this is complicated technology in the abstract. It is simply heat control built to match what a specific dish actually needs, rather than forcing a home cook to improvise around a stovetop designed primarily for pots and pans rather than a flat griddle surface. Making One Well, Start to Finish For anyone tackling a Monte Cristo for National Monte Cristo Day, the technique is straightforward once the heat is under control. Build the sandwich first, ham, turkey, or both, layered with a good melting cheese like Swiss or Gruyère between slices of a sturdy white or egg bread that