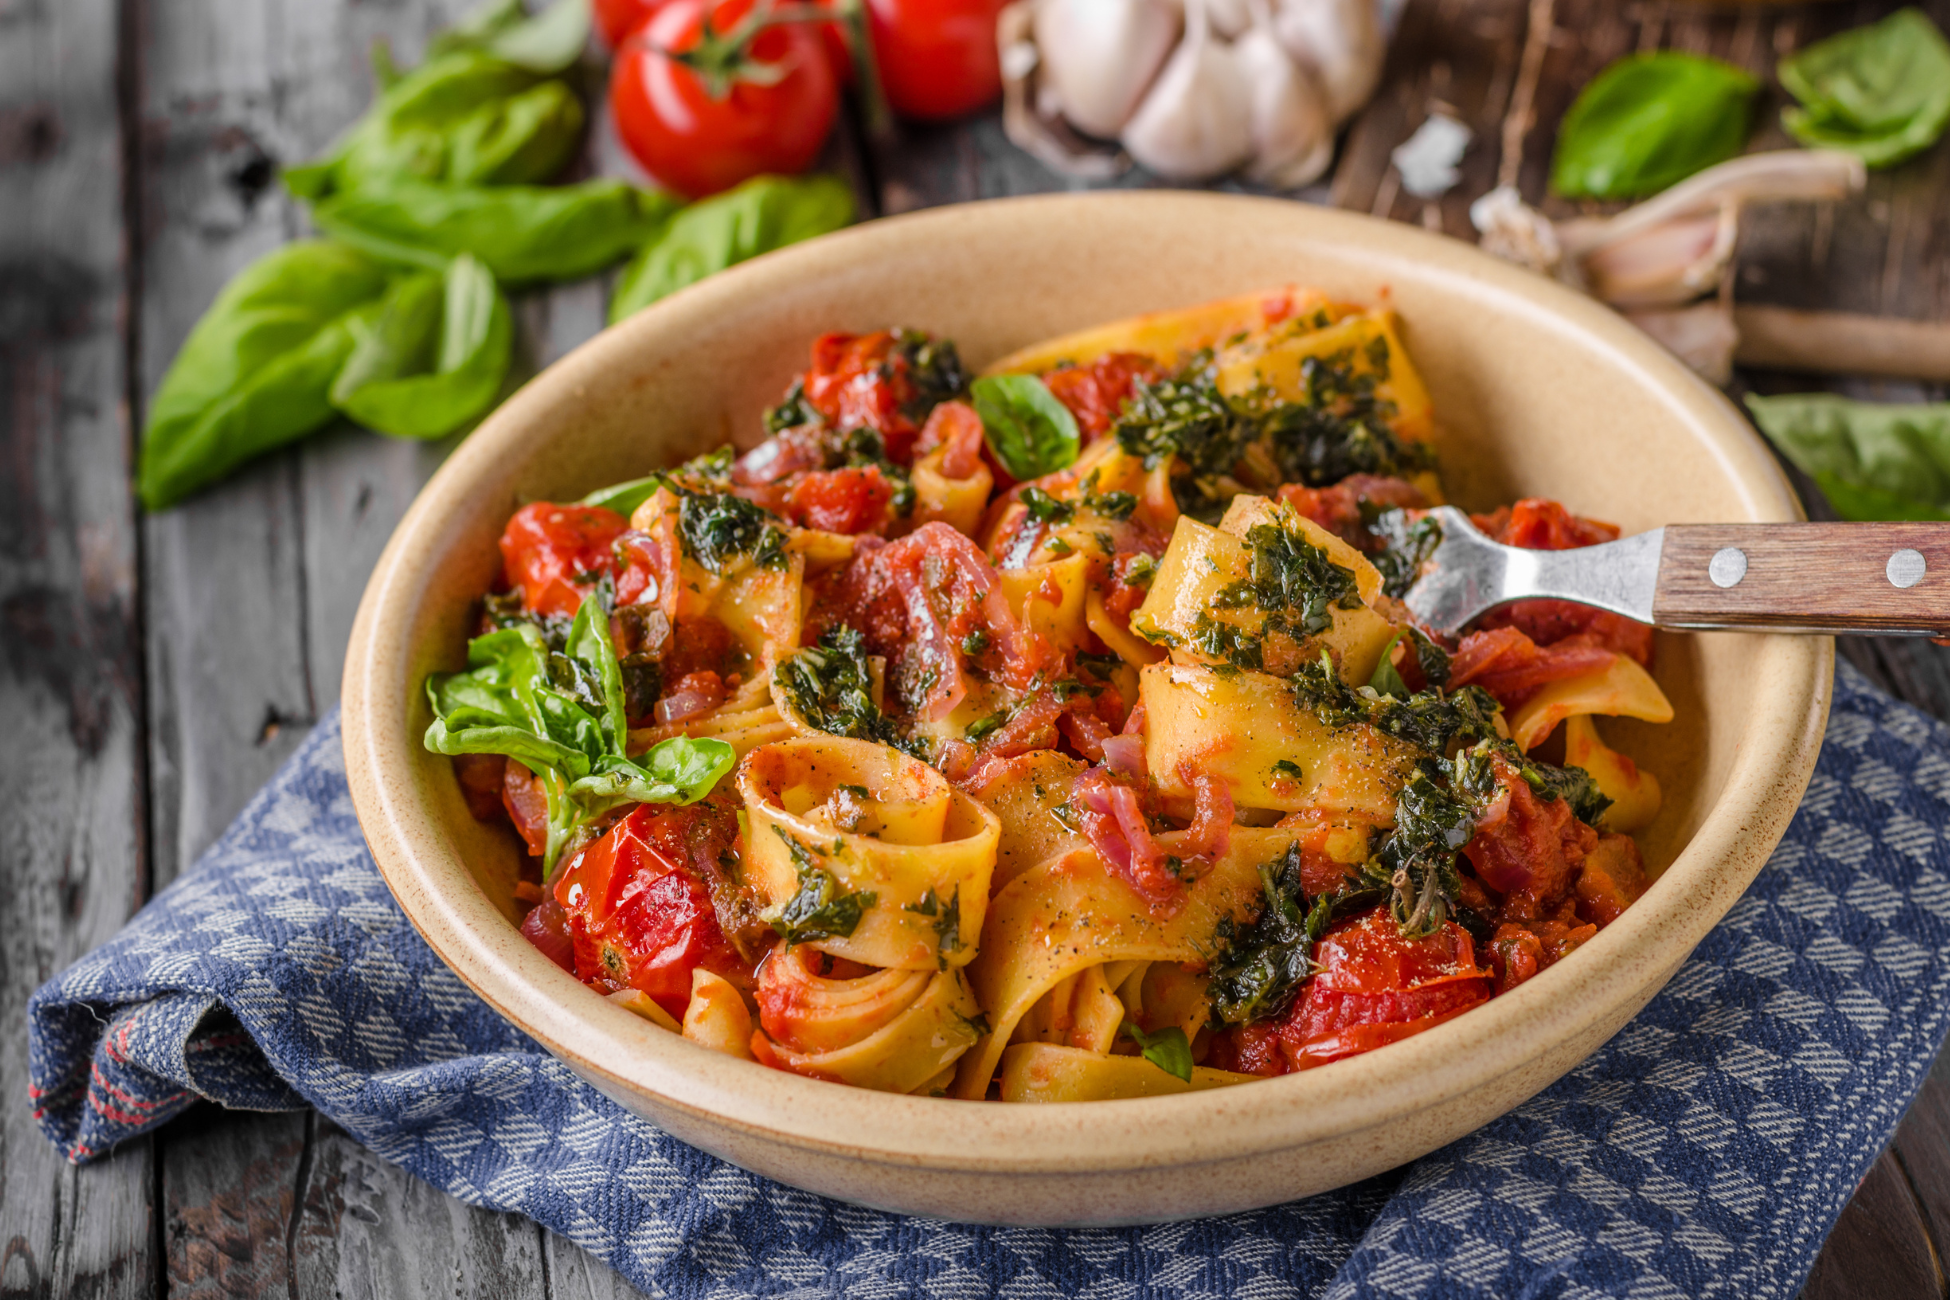
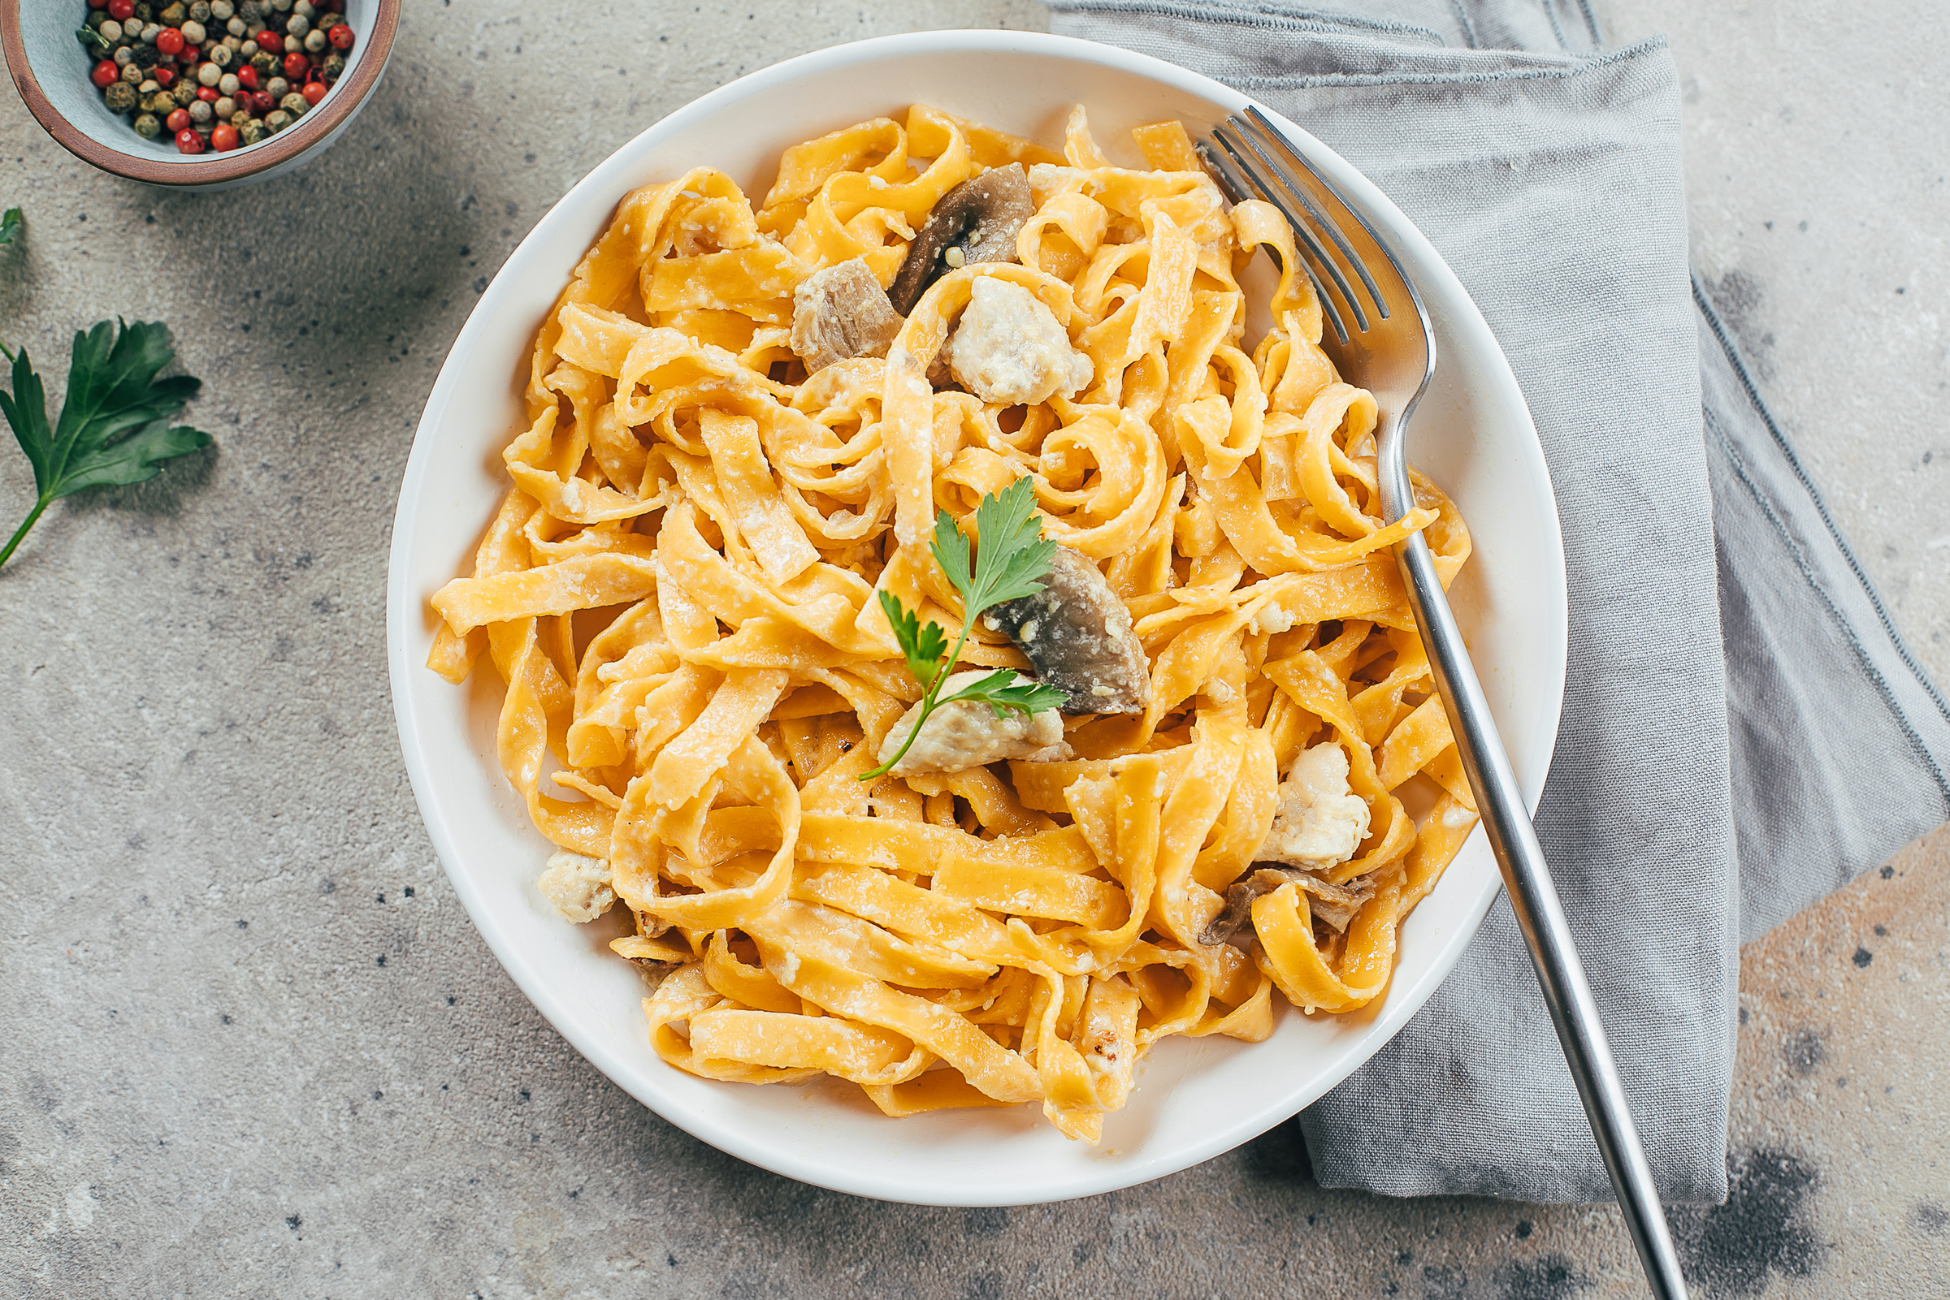
Recipes

Chicken Caesar Wrap Recipe

A classic and easy recipe for a perfect on the go lunch. This recipe calls for cooked chicken to make a more filling meal. Use bigger tortillas as they’re easier to wrap and don’t overfill or it’ll be harder to roll up. Prep time: 20 minsTotal time: 20 minsServings: 4 servingsYield: 4 wraps Ingredients 1 1/2 cups chopped cooked chicken 2 cups chopped romaine lettuce 1/3 cup Caesar dressing 1/4 cup freshly grated Parmesan cheese 1/2 cup croutons Salt, to taste Black pepper, to taste 4 large (10-inch) flour tortillas Directions Make the salad: In a large bowl, add the chicken, lettuce, Caesar dressing, Parmesan cheese, and croutons. Toss until everything is evenly coated in the dressing. Taste and season with salt and black pepper, if needed. Wrap the salad: Place a tortilla flat on a cutting board or clean work surface. Add a quarter of the salad in the center of the tortilla. Fold the left and right edges in towards the center, then tuck the side closest to you up and roll it tightly. Secure it with a toothpick, if you’d like. You could also keep the wrap seam side-down so that it doesn’t unroll. Assemble the remaining 3 wraps just like this. Serve: Cut the wraps in half or serve them whole. The chicken Caesar wraps can be wrapped in plastic wrap, parchment paper, or foil, and refrigerated for up to 2 days. Source: Simply Recipes

Smashed Potatoes Recipe

The newest contender to french fries. Smashed potatoes are as easy as it gets. Simply boil small potatoes, flatten them, douse in olive oil and bake. Serve along with a side dish or for breakfast with some eggs. Prep time: 5 minsCook time: 45 minsTotal time: 50 minsServings: 4 servings Ingredients 2 pounds small red or yellow ‘creamer’ or baby potatoes, rinsed or scrubbed if dirty 1 tablespoon kosher salt 4 to 6 tablespoons olive oil Freshly ground black pepper, to taste Flaky sea salt or table salt, for sprinkling Directions Pre-cook the potatoes: In a large saucepan, place the potatoes and cover them with cold water by 1 inch.Bring the water to a boil over high and add the salt. Adjust the heat to a steady simmer and cook, uncovered, for 15 to 25 minutes, or until the potatoes are easily pierced with the tip of a paring knife. (The exact time depends on the size of your potatoes, so start checking at the 15 minute mark.) Preheat the oven: Meanwhile, preheat the oven to 425ºF. Place 2 rimmed baking sheets in the oven. Drain and cool the potatoes briefly: Drain the potatoes in a colander. Line a baking sheet with a dish towel and spread the potatoes over it for 5 to 10 minutes to dry and cool. Press the potatoes: When the potatoes are cool enough to touch, set each potato on a cutting board or plate and press them with the heel of your hand to flatten them (or use the bottom of a dry 1-cup measuring cup.) You want to flatten them to about 1/4-inch thick without breaking them into too many pieces. Bake the potatoes: Remove the hot baking sheets from the oven and drizzle each with 1 tablespoon oil. Wearing oven mitts, tilt the pans so the oil spreads over the baking sheets. Arrange the potatoes over the two baking sheets, spreading them so they are not touching each other. Brush with as much of the remaining oil as you like using a basting brush and sprinkle with flaky salt.Bake for 20 to 25 minutes, or until they are golden and crispy. Sprinkle with black pepper to taste and serve hot. Source: Simply Recipes

Vegan Mac and Cheese Recipe

Achieve a creamy, delicious mac and cheese without the dairy. It’s easily made with just a few simple ingredients like potato, carrot and nutritional yeast. Customize the mac and cheese with your favorite add-ins such as cajun, broccoli, or peas. Prep time: 10 minsCook time: 20 minsTotal time: 30 minsServings: 6 to 8 servings Ingredients 1/2 cup raw cashew pieces 1 cup boiling water 8 ounces Yukon gold potatoes (about 2 medium), peeled and diced into 3/4-inch pieces 1 medium carrot, peeled and diced into 1/2-inch pieces (1/3 to 1/2 cup) 1 cup water Salt, for the pasta water 1/4 cup nutritional yeast flakes 1 tablespoon miso 1 tablespoon neutral oil or mild olive oil 1 teaspoon apple cider vinegar 1/2 teaspoon garlic powder 1/8 teaspoon ground turmeric 1/8 teaspoon cayenne pepper 1 pound macaroni or your favorite pasta Directions Soak the cashews: Put the cashews in a small heatproof bowl and pour 1 cup of boiling water over them. Set aside. Boil the potatoes and carrot: Put the diced potato and carrot in a medium saucepan. Add 1 cup water, or enough to barely cover the vegetables. Cover and bring to a boil over medium-high heat. Once boiling, reduce the heat to maintain a hearty simmer and cook, covered, until the potatoes are tender, about 10 minutes. Purée the sauce: Pour the potatoes, carrots, and cooking liquid into the jar of a blender. Add the cashews and 1/4 cup of their soaking water, along with the nutritional yeast, miso, oil, vinegar, garlic powder, turmeric, and cayenne. Purée until creamy, about 1 minute. If the sauce seems too thick, add a little more of the cashew-soaking water. Boil the pasta: Put a large pot of salted water on to boil over high heat. Add the macaroni to the boiling water and cook according to package directions until al dente (tender but with just a bit of resistance when you bite in). Reserve 1/2 cup pasta cooking water, then drain and return the pasta to the still-warm pot. Mix the sauce and macaroni: Pour the sauce into the pot with the macaroni and stir to combine. Add the reserved 1/2 cup pasta cooking water to the blender and run it for about 30 seconds to coax out any sauce still clinging to the sides, then pour into the sauce. Taste and serve: Taste and adjust seasonings as necessary. Serve immediately.Refrigerate leftovers, tightly covered, up to 4 days. Add a few tablespoons of water when reheating to help smooth out the sauce. Source: Simply Recipes

Milk Bread Rolls Recipe

The perfect soft and airy everyday bread. These milk bread rolls rely on a smart trick called tangzhong, helping them stay fresh longer. Measure out ingredients to avoid adding too much flour or too little milk, leaving you with dry rolls. Ingredients For the tangzhong 1/4 cup (30g) bread flour 2/3 cup (160g) whole milk For the dough 1/2 cup (120g) whole milk, cold 1 large egg, cold 3 cups (360g) bread flour 1/4 cup (50g) sugar 2 teaspoons (9g) active dry yeast or instant yeast 1 teaspoon kosher salt 4 tablespoons unsalted butter (57g), softened, plus more for bowl and pan For the egg wash 1 large egg 1 tablespoon water Directions Make the tangzhong: In a small saucepan, add the flour and milk, and whisk until no lumps remain. Set it over medium-low heat and cook, whisking constantly, until the mixture thickens and looks like smooth mashed potatoes, about 2 minutes 30 seconds to 3 minutes.Use a rubber spatula to scrape the tangzhong into the bowl of a stand mixer fitted with a dough hook. Add remaining dough ingredients: To the tangzhong, add the cold milk, egg, flour, sugar, yeast, salt, and butter. The cold milk and egg will cool down the hot tangzhong, so you don’t need to cool it down before adding the ingredients. You don’t need to stir the ingredients together before kneading. Knead the dough: Knead the dough on medium speed for no less than 10 minutes, until it pulls away from the sides of the bowl and it’s no longer sticky. Resist the temptation to add more flour even if the dough initially looks too wet. It will become stiff, smooth, and wrap itself around the hook after it’s kneaded. Let the dough rise: Use your hands to pull the dough off the hook, form it into a ball, and place it back into the bowl. Cover the bowl with plastic wrap and let it rise at room temperature for about 1 1/2 hours, until the dough doubles in size. Overnight rise option: Right after you knead it, pop the bowl with the dough into the fridge for up to 24 hours. When you’re ready to bake the rolls, proceed with the recipe. Meanwhile, prepare the cake pan: Lightly grease a 9-inch square cake pan with butter and line it with one 9×14-inch parchment paper. You’ll use the slings that come up two sides to pull the rolls out of the pan after they bake. Shape the rolls: Punch the risen dough with your fist—it will deflate and pull away from the sides of the bowl. Transfer the dough onto a clean kitchen counter and divide it into 9 equal pieces—about 87 grams each. The dough won’t be sticky and will be easy to work with.To shape each roll: Flatten a piece of dough using the palm of your hands. Pull the outer edges up and over the center, all around. Pinch the pulled-up edges together and flip the dough over so that the smooth side is facing up. Cup your hands around it to shape it into a ball. Transfer it into the prepared cake pan and shape the remaining pieces. Distribute them evenly in the cake pan 3×3 with some room between each roll. Let the dough rise, again: Cover the cake pan with plastic wrap and let the dough rise at room temperature for 45 minutes to 1 hour. The rolls will rise to touch each other, but not quite double in size. Meanwhile, preheat the oven to 350°F: Place the oven rack in the center. Make the egg wash: Whisk the egg and 1 tablespoon water in a small bowl. Use a pastry brush to lightly brush the tops of the rolls with the egg wash. Bake the rolls: Bake the rolls until golden brown on top, 20 to 25 minutes. The rolls will dome and rise tall, about an inch past the top of the pan. An instant-read thermometer inserted into the center of a roll in the middle of the pan should read 190°F or higher.Allow the rolls to cool slightly in the pan. Use the parchment paper sling to pull them out and serve warm. Store leftovers in a zip top bag or a tightly lidded container for up to 4 days on your kitchen counter—they’ll remain soft and fluffy. It’s not magic, it’s the tangzhong! Source: Simply Recipes

Glazed Baked Ham Recipe

A holiday classic. A baked ham is an easy dish to prepare while staying economical. Hams often go on sale the week before holidays bringing the cost down even more. For this recipe, look for an un-sliced bone-in half ham, preferably from the shank end. It’s enough to feed at least a dozen people. Prep time: 20 minsCook time: 90 minsTotal time: 110 minsServings: 12 servings Ingredients For the ham: 1 (9 to 11-pound) fully cooked (ready-to-eat) bone-in ham For the Sweet Hot Honey Mustard Glaze: 3 tablespoons sweet hot honey mustard, or brown mustard with honey 2 tablespoons brown sugar About 50 cloves For the Honey Thyme Glaze: 3 tablespoons unsalted butter, melted 2 tablespoons fresh thyme, or 2 teaspoons dry 1/4 cup cider vinegar 1/4 cup honey 1 tablespoon brown sugar 1 teaspoon Worcestershire sauce Directions Let the ham come close to room temp: Remove the ham from the refrigerator (still wrapped) a couple of hours before you intend to cook it so that it can get closer to room temperature. This will help it warm more evenly. Preheat the oven: Preheat the oven to 325°F. Score the skin and fat (if using an unsliced ham): Place the ham, fattier side up, in a foil-lined roasting pan.Score a diamond pattern in the fat with a sharp knife, about 1/4-inch to 1/2-inch deep, and the parallel lines about 1 1/2-inches apart. (You won’t need to do this if you’re using a spiral cut ham.)Do not score the meat itself, just the fat and any skin. You can score the fat as deeply as to where the fat meets the meat. If you want, you can first cut off any skin that might still be on the ham, but it isn’t necessary. Insert the cloves (if using): If using cloves (with the Sweet Honey Mustard Glaze), you can either put them in before applying the glaze or after. They look better if applied after, but it is easier to see the lines in the ham as a guide for placement if you put them in first.Place the cloves in the center of the diamonds to form a nice pattern around the top and sides of the ham (or along the edges of some of the precut slices if using spiral cut). Some people put the cloves in the intersection points of the scores. Do as you wish. You just want a nice pattern. Prepare the glaze: If using the sweet honey mustard glaze: Mix the mustard with the brown sugar in a small bowl.If using the honey thyme glaze: Mix thyme in with the hot melted butter and let sit for a few minutes. In a small saucepan on high heat, let the cider vinegar reduce down from 1/4 cup to 1 tablespoon, and remove from heat. Whisk in the butter and thyme. Add the honey, brown sugar, and Worcestershire sauce. Apply the glaze: Using a pastry brush, brush whichever glaze you are using over the ham. Only use about third of it (reserve the rest for later in cooking). Try to work the glaze into the scored lines. Bake the ham: Place ham in oven. (If using a spiral cut ham, first wrap tightly in aluminum foil so that the ham doesn’t dry out while cooking.)Cook for 1 to 1 1/2 hours (check after 1 hour, will take longer if the ham is not at room temp to begin with), or about 10 minutes per pound, until the internal temperature of the ham is 110° to 120° with a meat thermometer. (Note that the ham is already cooked when you buy it, all you are trying to do is heat it up for eating.)If using a non-spiral cut ham, baste the ham with the glaze a couple of times during the cooking. If you check on the ham and think that the glaze is at risk of getting too browned (like on the way to burnt), you can cover with a piece of foil. Baste and broil: When the ham has reached the desired temperature, baste again. (If using a spiral cut ham, open up the foil to expose the ham before basting.)Regardless of which ham you’re using, place it under the broiler for few minutes to get some nice browning on the top. Take the pan out of the oven and brush the ham all over with pan juices. Cover with aluminum foil and let rest for 15 minutes before serving. Slice: To slice a bone-in ham, cut around the bone first. Then use a long, sharp knife to slice off pieces around the bone.Another way to slice the ham is to make first a slice on wide end to get a flat lying surface. Then stand the ham upright on the wide end and make slices down the side, working around the bone. Source: Simply Recipes

Crispy Shrimp and Chive Dumplings Recipe

An easy appetizer for an upcoming party! Homemade dumplings are made simple with wonton wrappers instead of making the dough from scratch. The pan fry and steaming process can be done in just under 10 minutes. Serve along with a soy dipping sauce or sweet chili sauce. Prep time: 40 minsCook time: 25 minsTotal time: 65 minsServings: 10 servingsYield: 30 dumplings Ingredients 1 pound raw shrimp 1/2 cup chives 2 teaspoons ginger 2 teaspoons minced garlic 2 teaspoons cornstarch 1 teaspoon soy sauce 1 teaspoon sesame oil 1/2 teaspoon kosher salt 1/2 teaspoon granulated sugar 1/4 teaspoon black pepper 3 wrapper, wonton wonton wrappers 2 tablespoons vegetable oil 1/2 cup water Soy sauce or chili sauce, or dumpling sauce, for dipping Directions Prepare the shrimp: Chop the shrimp until it turns into a chunky paste. Make the filling: In a medium bowl, combine chopped shrimp, chives, ginger, garlic, cornstarch, soy sauce, sesame oil, salt, sugar, and pepper. Cover and refrigerate until ready to fill. Prepare the wrappers: If you purchased square wonton wrappers, use a 3 1/2-inch round cutter to cut out a circle shape. Keep the wrappers covered with a damp paper towel or plastic wrap to prevent them from drying out. Shape the dumplings: Lightly brush the edges of 1 wrapper with water. Add about 2 teaspoons of filling to center the wrapper (do not overfill). Fold the dough into a half moon shape, remove any air, and press the edges together. Brush the outer edge of the dumpling with water. Starting on one side then working to the other, create about 5 to 6 small pleats along the edges of the dumpling. Make sure to press the pleats to ensure that it is sealed well. Repeat with the remaining wrappers and filling. Pan-fry the dumplings: Heat a large nonstick pan over medium-high heat. Add 1 tablespoon of the oil. Carefully add 15 dumplings to the pan. Fry until the bottoms are golden brown, about 1 to 2 minutes. Steam the dumplings: Reduce the heat to medium-low. Very carefully, pour in 1/4 cup water into the side of the pan. Immediately cover, allowing dumplings to steam until the water evaporates, about 3 minutes. Remove the lid and turn up the heat to medium. Fry until bottoms are brown and crisp, about 1 to 2 minutes. Repeat with the remaining dumplings, adding the remaining 1 tablespoon of oil for browning and then 1/4 cup water for steaming. Serve: Serve the dumplings hot, with your favorite dipping sauce like soy sauce, sweet and sour, or spicy chili. Store in an airtight container in the refrigerator for up to 3 days. Source: Simply Recipes

Vegan Pumpkin Pie Recipe

An alternative that everyone can enjoy. Vegan pumpkin pie is nearly indistinguishable from traditional pumpkin pie and is super easy to make with a blender. Instead of eggs and heavy cream, this recipe calls for silken tofu. It bakes into a smooth filling and is easier to make than the usual way. Prep Time: 20 minsCook Time: 60 minsIn-Oven Cool Time: 30 minsTotal Time: 110 minsServings: 8 servingsYield: 1 (9-inch) pie Ingredients 1 homemade vegan pie crust or 1 premade vegan pie shell (see recipe note) 1 (15-ounce) can pumpkin purée (or 2 cups homemade pumpkin purée) 1 (12.3-ounce) shelf-stable package firm silken tofu 3/4 cup organic light brown sugar 1/4 cup plain, unsweetened nondairy milk 2 teaspoons ground cinnamon 1 teaspoon ground ginger 1/4 teaspoon ground nutmeg 1/4 teaspoon ground cloves 1/4 teaspoon salt Directions Line the pie dish: If using a homemade crust, roll it out and line a 9-inch pie dish. Stick the dish in the freezer while you work on the filling. If using a store-bought frozen crust, just keep it in the fridge or freezer until it’s time to bake the pie. Preheat the oven to 425°F. Position a rack in the bottom third of the oven. Make the filling: Combine the pumpkin, tofu, sugar, nondairy milk, spices, and salt in a blender or food processor. Blend or process until smooth, stopping to scrape down the sides as needed. Fill the pie shell and bake at a high temp: Pour the filling into the chilled pie crust. Tap the dish against the counter gently to coax out any air bubbles. Smooth the top with a metal spatula, if needed.Set on the rack in the lower third of the oven and bake at 425°F for 15 minutes. Lower the oven temperature and continue baking: After 15 minutes, lower the temperature to 350°F. Bake the pie another 45 minutes, until the top of the filling gets a matte look and the filling jiggles all as one unit (like a Jell-O mold) when you nudge the pie dish. Turn off the oven and let the pie cool in the oven with the door cracked open for 30 minutes. This helps minimize cracking. Cool, then serve: Set the pie on a wire rack to continue cooling for at least 2 hours before serving. The pie may crack as it cools, but don’t worry about it. Beads of liquid may appear on the top of the filling. If that bothers you, simply lay a paper towel over the filling to very gently blot them away. Serve with the vegan whipped topping of your choice, such as coconut whipped cream. Source: Simply Recipes