spring

Appliance Talk: Difference Between a Rangetop & Cooktop?

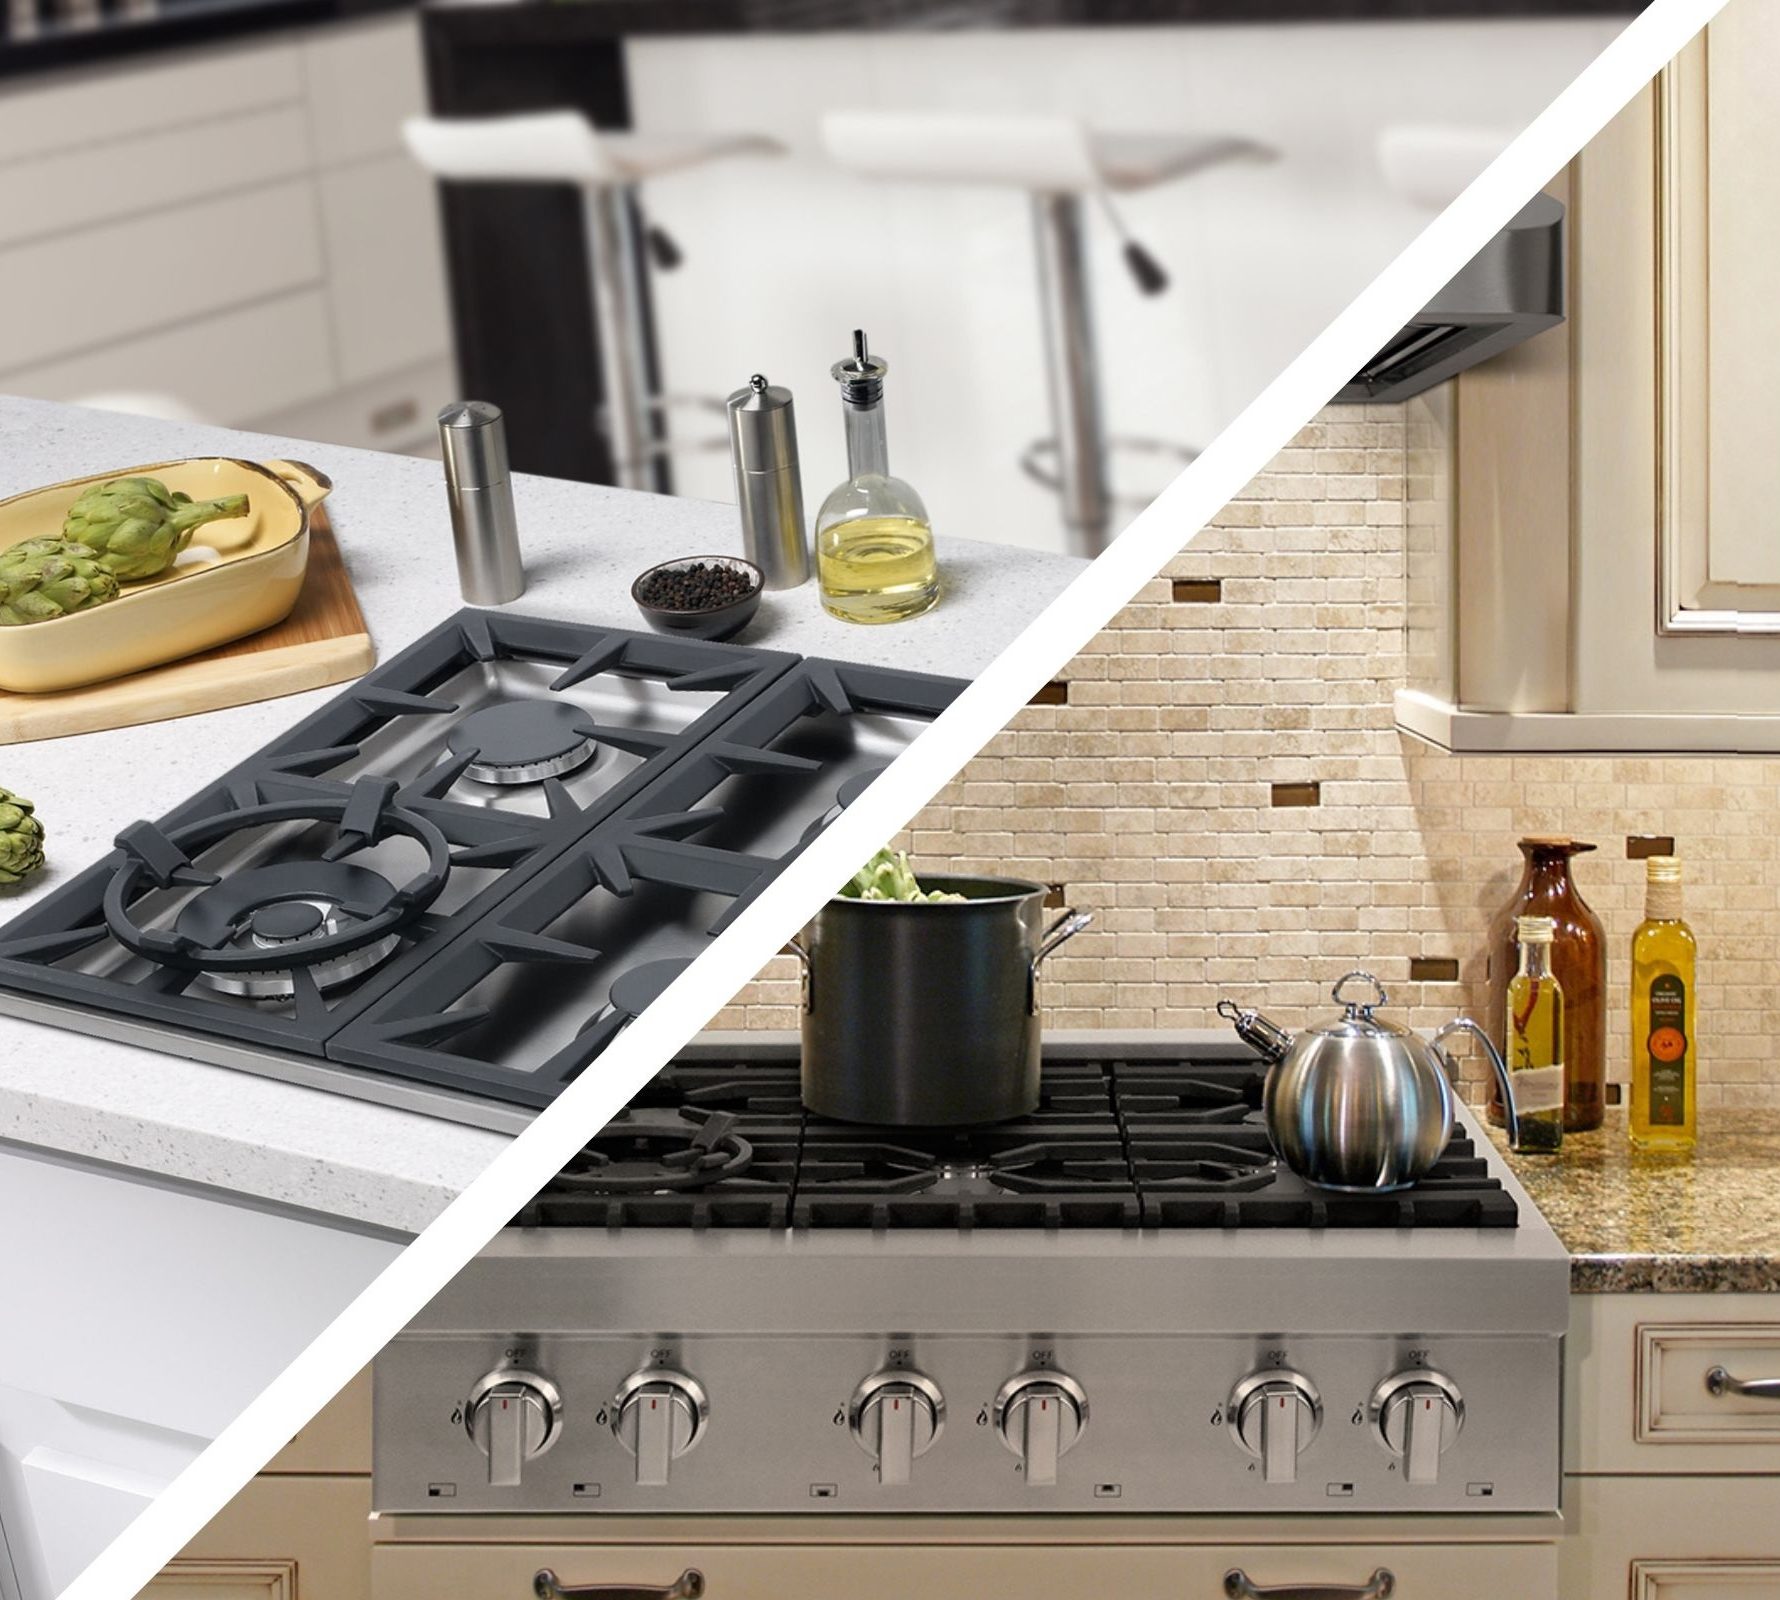
When remodeling your kitchen, or designing a brand new one, then you’ll need to think about which appliances you need. There are essential appliances every well designed kitchen needs and this includes a cooking appliance such as you range or a cooktop to cook on. Will you choose a range top or cooktop? To make your purchase with confidence we have decided to break it down for ya! In this comparison between the range top vs cooktop, you will discover the similarities and differences between these two kitchen applications. First, Let’s discuss the similarities. Rangetops and cooktops have either gas or electric models, and either one offers the ability to have a more flexible kitchen layout, so oven and rangetop or cooktop can be placed separately. Now, on to the differences. The major difference between rangetops and cooktops is the control features and installation method, which will determine how your countertop and cabinets are designed. The Pros of a Range Top These are the perks: A rangetop is very much like a hybrid of a range and a cooktop. rangetop slides into an opening directly into your countertops Range tops are sturdy and can handle heavy use. Range tops can either be powered by electric or gas. Range tops have knobs and controls on the front, which come in handy when trying to manage you’re cooking with multiple items on the burners. Range tops have a larger cooking surface. Range tops typically come with more professional features than others of its kind on the market. Like the sound of these Pros? CLICK HERE The Cons of a Range Top These aren’t exactly cons but these are a few things to consider. The front knobs and controls of the range top may be a safety concern where small children are concerned.  Range tops may be too large and bulky for smaller kitchens. The Pros of a Cooktop Cooktops have their pros too that make them a popular choice among many people. Cooktops are available in electric, gas, or induction cooking methods.  In general a Cooktop are smaller than Rangetops so they take up less space in your kitchen. The knobs and controls of cooktops are found on top of the unit. This allows an increased level of safety since they are more difficult for young kids to reach. Cooktops are often easier to clean. Like the sound of these Pros? CLICK HERE The Cons of a Cooktop Cooktops have they’re drawbacks, too! Cooktops are more compact, with less room or space to move around. Cooktops often come with less professional features than range tops do. Rangetops are going to require more space but they are perfect for those who do a lot of cooking and want the normal grates and feeling of a stove top. On the other hand, if space, efficiency, and simple is what you are after, then a cooktop may be your ideal appliance. When determining which one is right for your kitchen before you waste your money, consider the following: The size of your kitchen is going to have a great impact on which one you choose. You will need to determine the space available and how much of it you are willing to give up. Determine the amount of cooking you typically do you are going to need something hefty, sturdy, and large to withstand your level of use. Think about the method of cooking electric, gas, or induction? What level of professional features are you looking for, do you prefer something simpler or more advanced for your needs? Getting a new appliance for your kitchen is always exciting. However, it is important to remember that appliances are not the type of item you buy on a whim. They require installation and space, in addition to the purchase itself.

Kitchen Ventilation: Downdraft vs. Island Hood

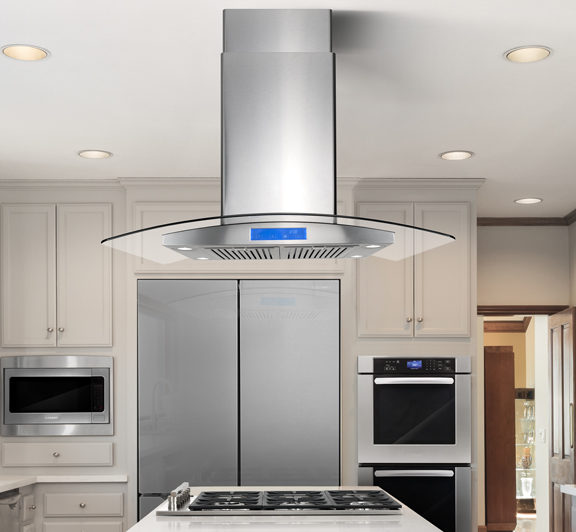
Before you decide which type is best for your home it is important to learn about the difference between downdraft vs. hood fan ventilation. Island Hoods Island hoods are installed in a space where the stove does not have any adjacent walls. The vent is connected to a duct that is fixed to the ceiling — thereby transferring the smoke away. If you have an island layout for a kitchen, these are the best options. They look good and give your space an aesthetic appeal. There are different styles like these units by Cosmo Downdrafts A downdraft ventilation system, or pop-up vents use proximity ventilation to pull smoke and grease downward, versus traditional ventilation which captures exhaust as it goes up. Downdrafts look different than a larger hood aesthetically. You can see the whole kitchen. Downdraft vs. Island Hood Functionally, island hoods are considered to be better for a few reasons. What are the pros of an Island hood fan? More effective: Island Hoods are generally larger and more powerful and clean the air better, especially if you cook large meals often. Keep in mind, smoke rises so it simpler to redirect where it is already headed Visual interest: Today’s range hoods are not only functional, but they are beautiful as well. Oftentimes, a stylish, stainless-steel range hood can be the focal point of your kitchen.  CFM: The max power on a downdraft is 1,000 CFM versus 1,500-1,800 on an island hood. There are limitations because Downdraft vents only work for cooktops unless you specifically buy a downdraft range.          Capture area: Smoke is first channeled, filtered and then exhausted. An island hood has plenty of capture area, but there is almost none in a downdraft. If you grill or wok, the downdraft will not be able to handle the smoke and grease. What are the pros of downdraft ventilation? While downdraft vents aren’t the ideal ventilation system for all kitchens, they can be an effective solution for certain situations. People like downdraft ventilation ranges for these reasons: No ductwork needed: You simply install the range and you’re done. Downdraft ventilation is invisible: Except when in use, a simple push of a button makes the vent rise and fall. Those looking for a sleek, minimal kitchen vibe will enjoy this feature. Pop-up vents take up less space: In a small kitchen, they can make room for more upper cabinets. Easy to Clean: Downdraft vents are easier to clean than full range hoods. In conclusion, adequate ventilation helps to remove excess heat and moisture from the room for superior comfort and temperature control.  Downdraft ventilation is discreet, sophisticated, and effective in some instances. It’s perfect for those looking for an uncluttered seamless kitchen, and for providing ventilation for kitchens where traditional ventilation isn’t possible. There’s no denying that Island Range Hoods provide many important benefits like protection from toxins and unpleasant odors. An Island hood is an important asset to your home and your health. Shop Island Hood

Simple Solutions for Small Appliances

Your family depends on the appliances in your kitchen. You have a few small appliances in your home that you want to keep in good working order. Here’s a quick list of small kitchen solutions for small kitchen appliances to make cooking and cleaning more convenient. Microwave Presets to Save Energy   Did you know that using the pre-set cooking times on the touchpad can help your microwave work more efficiently and save energy? It can also help you avoid cooking accidents. Use the pre-set times when thawing foods, too. Order Matters in the Blender One of the most important tips to keep in mind with any blender is the order of the ingredients you’re adding. Go from lightest to heaviest. That mean you should ALWAYS start with liquid and make sure it covers the blades. Cover Up the Stand Mixer  To prevent unwanted dust from getting into your Stand Mixer and into your food, keep it covered by attaching a shower cap around it. Know your Slow Cooker’s Limits The high setting is for when you just want to heat things up,  If you want vegetables to stay whole, don’t put them in the slow cooker on high for 12 hours unless they’re hard-shelled, like squashes. Delicate vegetables like zucchini or peppers will melt into nothing. When you’re slow cooking vegetables, put the slow cooker on a delayed start for about three to four hours and keep it set to low.  Clean your Coffee Pot The coffee pot, itself, should be cleaned regularly. Cleaning it every two weeks will keep old coffee and grounds that are stuck in the pot from imparting your brews with unwanted flavors.  Wipe the Outside Of the Rice Cooker’s Pot A common mistake some people have is placing the pot of uncooked rice into the cooker with the outside of the pot being wet. Not only could it damage the rice cooker’s heating elements, it also affects the cooking temperature of the rice. So give it a quick wipe on the outside first before you put the rice in.

How To Clean Stainless Steel Appliances the Natural Way

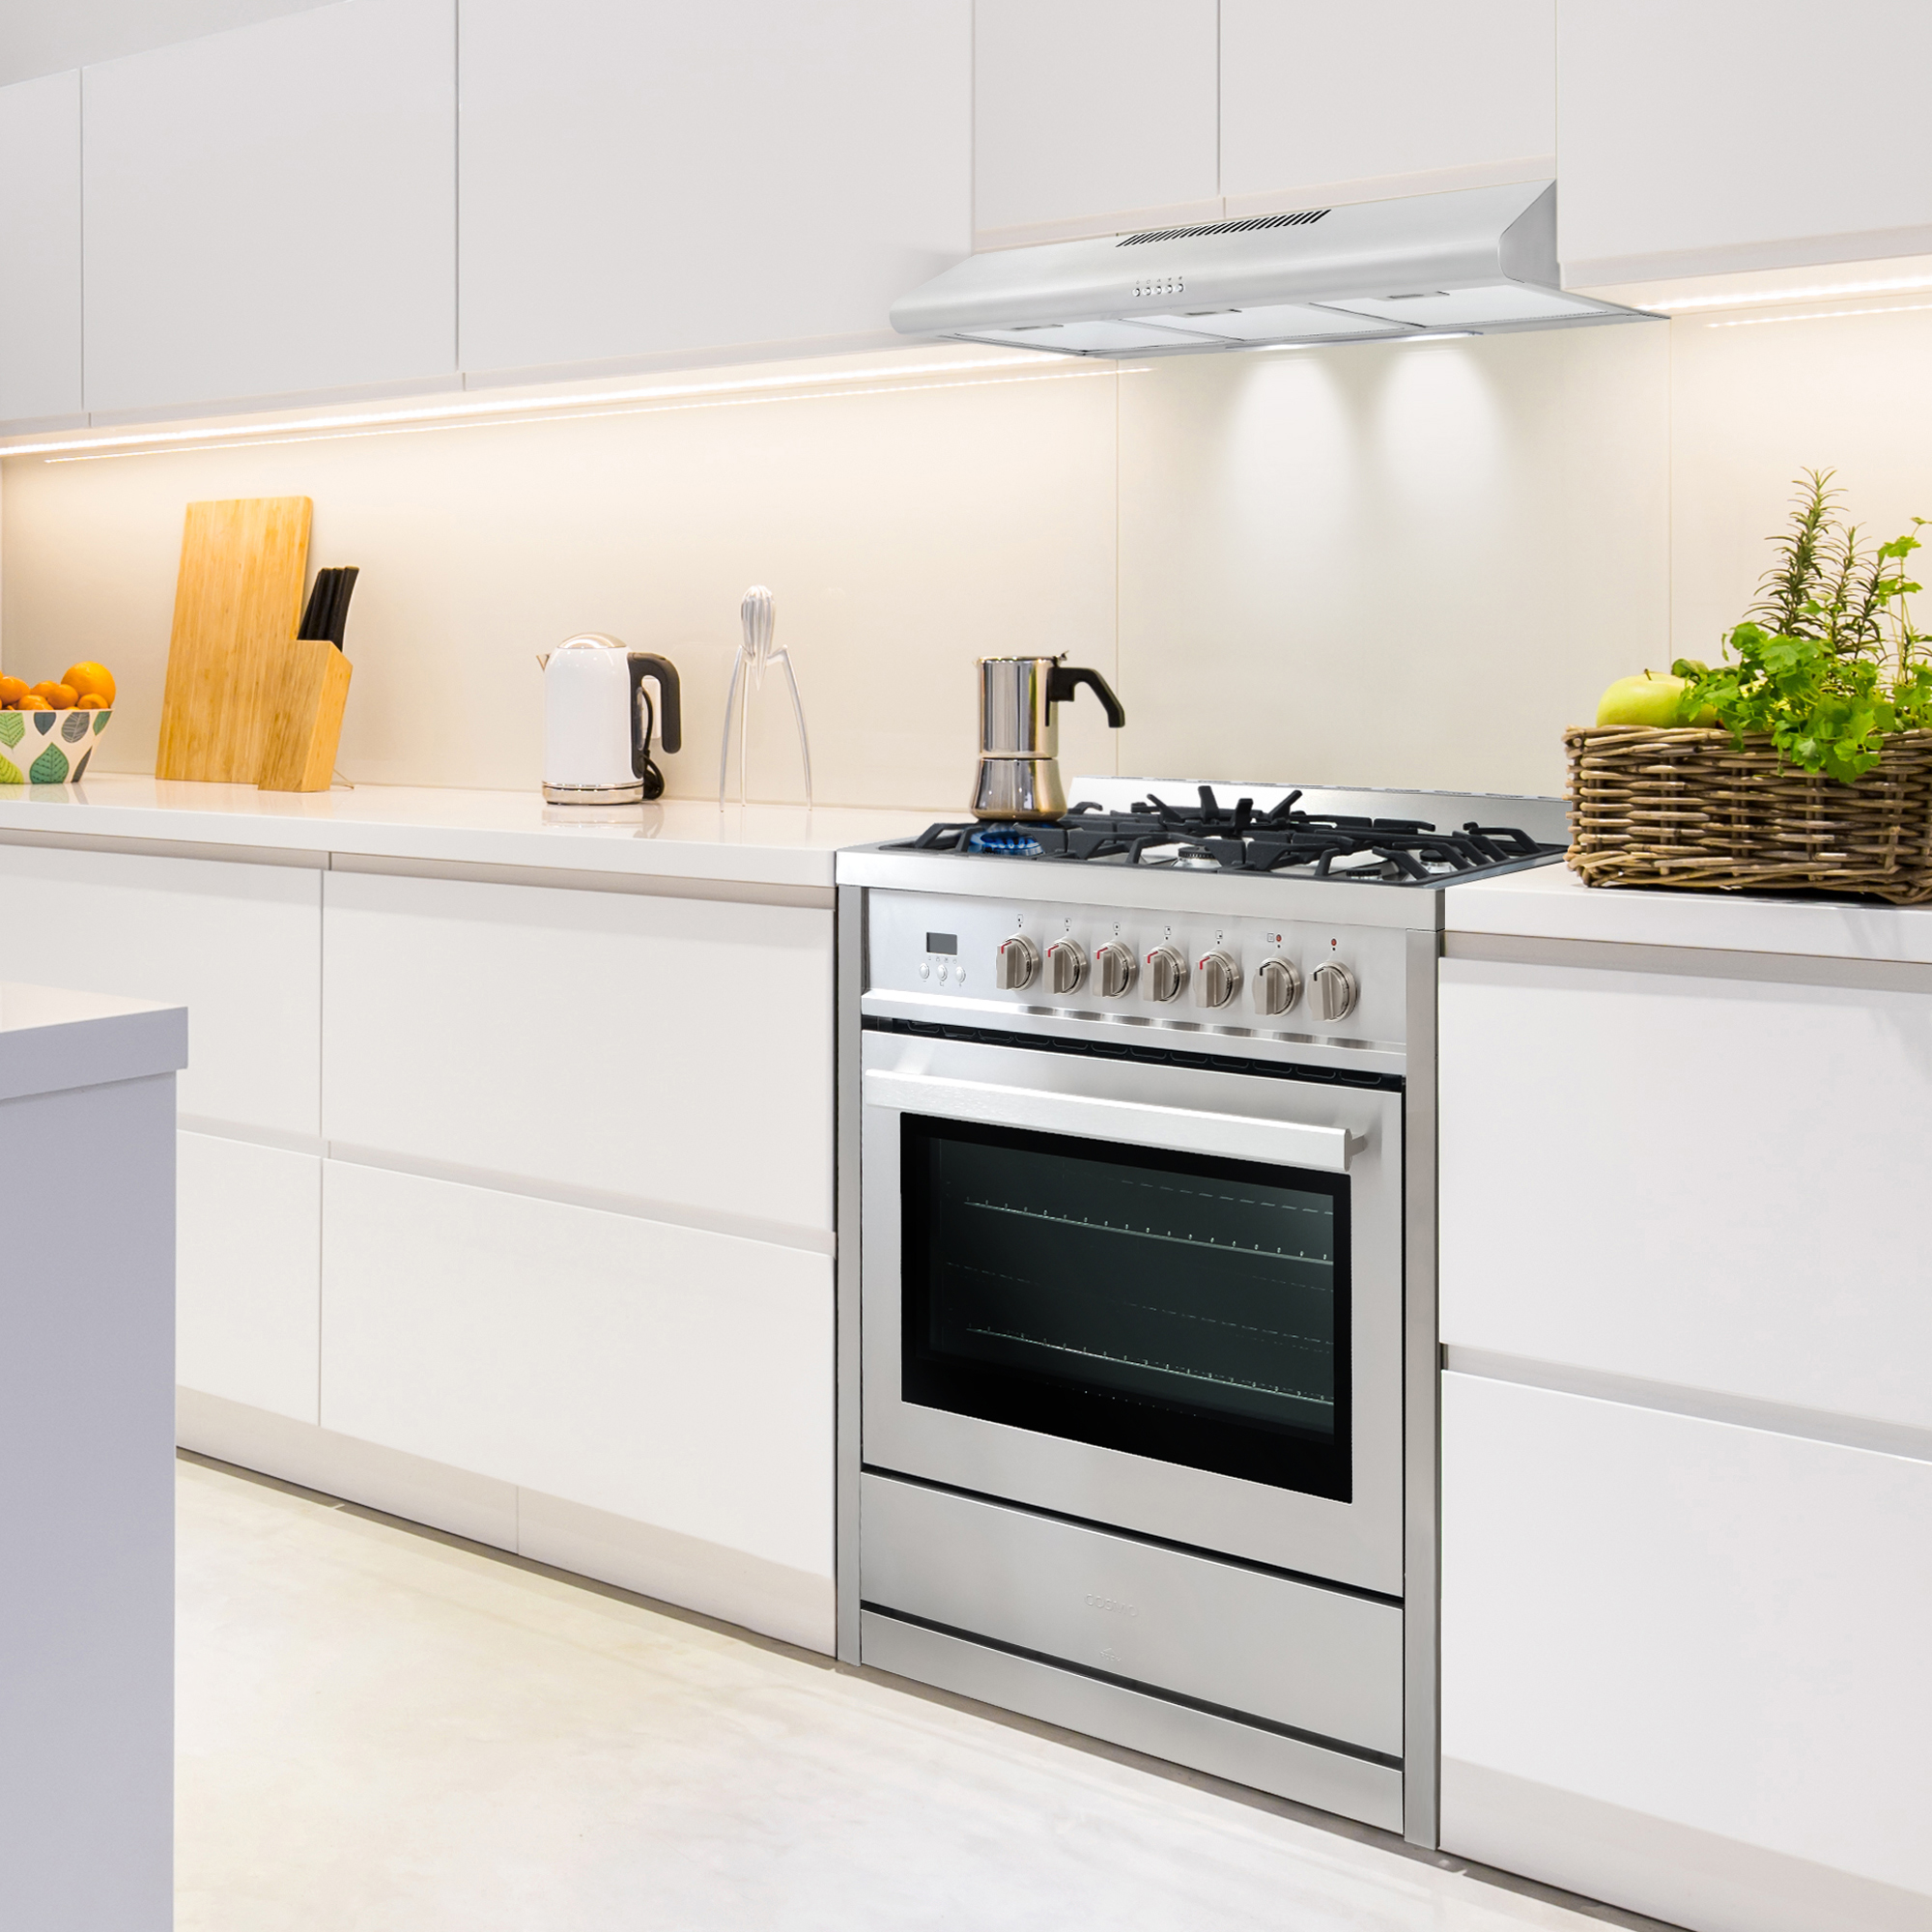
Instructions Check the manual: Before you clean a stainless steel appliance, it’s a good idea to check the manufacturer’s recommendations.  Gather your supplies: Cleaning is easier when you have all of your supplies together and ready to go. Determine the direction the grain: Like wood, Stainless steel also has a grain. Look closely. It will either be running horizontally or vertically. To clean your stainless steel, rub in the direction of that grain. To get your stainless steel appliances and fixtures sparkling clean here are some great DIY stainless steel cleaner recipes you can make at home.  Try vinegar: Wet a soft cloth (microfiber works best) with a diluted solution of 2 parts water to 1 part of vinegar. Wipe the entire surface from top to bottom, in a clockwise motion.  Follow with a dry cloth to wipe the area until completely dry. Polish with Olive Oil: To prevent smudges and fingerprints use olive oil. Apply a few drops of olive oil on a soft microfiber cloth. Wipe your stainless steel appliances in the direction of the grain.  A Baking Soda Scrub: Stainless steel pots and pans or countertops typically need a bit more attention. Make a soft paste out of baking soda and water and apply to the stain, allowing it to sit for about 20 minutes. Then, scrub the area with a cloth dampened in a solution of water and dish soap. It’s important to use a soft cloth and work parallel with the grain to avoid scratches. Be sure to fully rinse and dry. Add Shine with Coconut Oil: A small amount of coconut oil will give your stainless steel a nice shine. Use a soft cloth to buff. The Steam Clean: To sterilize stainless steel, you can also use a steam cleaner with a nozzle attachment. The steam will disinfect the surface, which can then be wiped dry with a soft cloth. Stainless steel can scratch easily so avoid using a brush attachment or any stiff cleaning tools.  For more recipes, ideas and inspiration follow our Facebook page For product information visit our website

6 Things You Didn’t Know You Can Clean in Your Dishwasher

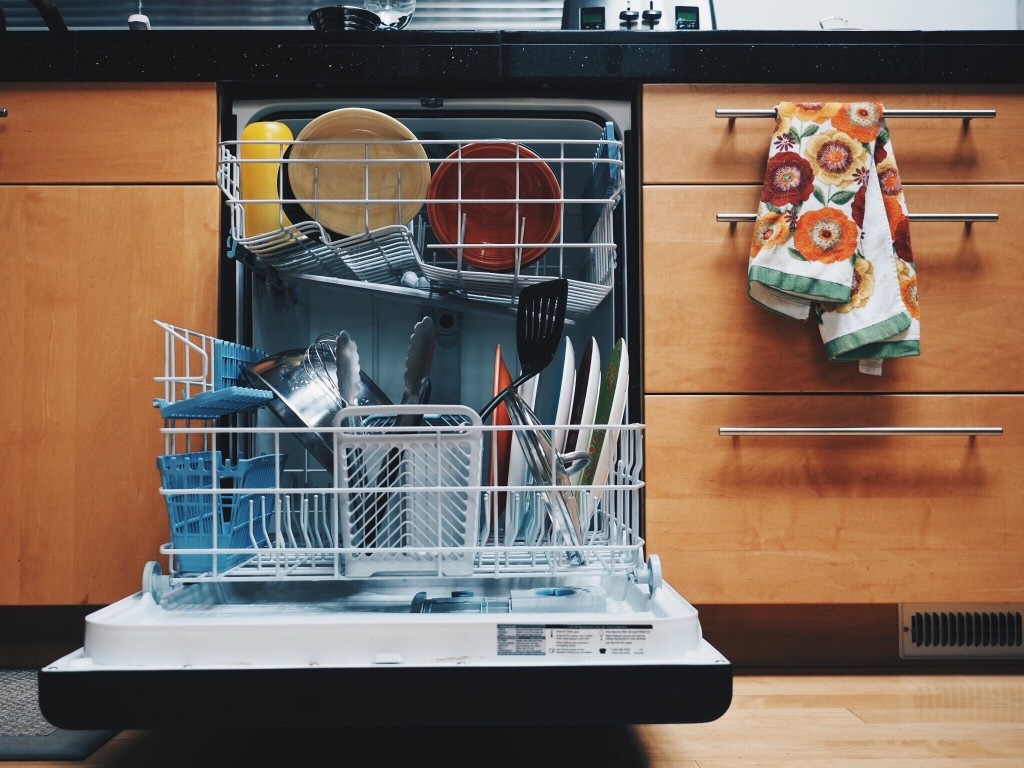
Despite being one of the best kitchen inventions ever! the dishwasher has long been an underrated kitchen appliance. There’re more things you can wash in it than just cereal bowls, coffee mugs and forks.  The dishwasher with all its capabilities will wash just about anything, like magic! Obviously, there are some things you should never put in the dishwasher, but there are a lot of items you probably never thought of washing in it either. The dishwasher is so handy, especially when spring cleaning. You can really save time while giving your household items a thorough clean. Things you can clean in a dishwasher: Art Supplies  You can wash your art brushes, paint bowls, watercolor palettes, placemats, and other art supplies right in the dishwasher. Make sure you scrape any old paint and rinse them before tossing in the dishwasher. Home Decor  Vases, decorative pottery, light fixtures, candles and oil lamps can easily be cleaned in the dishwasher. Use the top rack for most things except the heavier items. Avoid chipping delicate figurines and anything with gold or silver gilt.  Bathroom Accessories Save yourself some time from scrubbing and sanitizing bathroom accessories caked with soap scum and hard water stains. Put items like soap dishes and toothbrush holders on the top rack for an easy clean. Kitchen Tools  Most kitchen exhaust fans have a washable filter to capture grease and cooking odors and keep the air clean. Put the filter and any removable covers in the dishwasher for degreasing. Remove food residue and bacteria from silicone oven mitts, microwave turntables, and refrigerator shelving and bins. Each time you run a load of dishes add your kitchen sponges and scrubbing brushes.  Kids Toys  Your kids toys have probably been everywhere, dragged across the floor and left outside before finding their way into your kid’s mouth so throw those plastic toys and building blocks in the dishwasher. Small pieces should be placed in a mesh bag or box on the top rack for easy cleaning.  Tools and Car Accessories   Place tools in utensil holder, but avoid those that are electrical, battery operated or with wooden handles.  Run your ca or house keys throw a cycle if they get grimy. You will be amazed how clean hubcaps get after a hot water cycle. 

Spring Cleaning 101: 6 Easy Steps to Clean Your Refrigerator

Spring cleaning your refrigerator is about more than tossing old stuff and restocking it with fresh food. There’s more involved than just that, you’ll need to deodorize and disinfect, then take steps to ensure your refrigerator runs well and use less energy. Follow these 6 simple steps to clear it out, clean it up and restock the fridge. Gather your Supplies: Here’s what you’ll need Old towel for floor Bucket  Baking soda   Paper towels or rags  Sponges, dishcloths or rags Toothbrush  Multi-purpose surface spray Cooler Trash bags Vacuum Turn Off the Refrigerator To conserve energy it’s a good idea to turn your refrigerator off unless you have removable shelves and you’re good about keeping the door shut, then it’s okay to keep it plugged in. It’s safer to have the fridge unplugged when dusting the coils and cleaning the drip pan. If you can’t easily move the fridge or access the plug, turn off the circuit breaker that serves the refrigerator.  Empty the Refrigerator  The refrigerator completely of all items. Put any perishables like milk and meat in a cooler and leave other items on the counter. Do not leave food out for more than an hour. Go through the contents of your refrigerator and remove all expired or spoiled food. Compost old produce and recycle containers when possible. Clean the Removable Refrigerator Parts Take out all the removable shelves, drawers and door inserts; you can clean them more thoroughly when they’re outside the fridge, and this gives you better access to clean the inside of the refrigerator. Mix fragrance-free dish soap with warm water in the sink. Wash the items with a dish soap sponge, as you would hand-wash dishes. Once the removable parts are washed make sure they are completely dry before putting them back in place. Clean the Inside The good news is there’s a variety of cleaning solutions you can use to clean the interior of the fridge. While the choices for what you can clean with are flexible, we recommend making your solution instead of a harsh cleaning spray. You can use baking soda and water mix (1 tablespoon of baking powder per cup of water) or a mild soap and water mix to wash the counters and bins. Thoroughly wash the built-in fixtures, the bottom of the fridge, and be sure you get in the cracks. An old toothbrush is handy for the nooks and crannies. Wipe the inside of the freezer just as you did in the fridge. Wash ice cube trays and replace the ice with fresh water. Thin rags are great for cleaning the rubber seal around the door- one of the grimiest areas of the fridge where crumbs and debris end up. Clean the Outside The exterior of your fridge use microfiber cloths to clean, they’re great at eliminating the streaks and fingerprints on stainless steel. Carefully pull the fridge out from the wall, then vacuum the coils to remove dust that’s collected. Keeping your coils dirt-free can help your fridge run better. If your fridge has a drip tray, remove it and clean it like you did the shelves and place it back. Refrigerator Cleaning Hacks To absorb odors, keep a box of open baking soda in the fridge — don’t forget to replace it every one to three months. Wipe stainless steel in the direction of the grain. Clean your fridge right before a big grocery shop.Clean shelves and drawers in the dishwasher. Tell us: Do you do spring cleaning?

The Ultimate Kitchen Spring Cleaning To-Do List

Spring is here! Warmer weather, longer days, and thanks to that extra dose of Vitamin-D we’re feeling more energetic. It’s the perfect time for some spring cleaning and we’re ready to make our homes sparkle and shine! The kitchen is one room in the house that gets messy fast, and since it’s our favorite room, that’s where we’ll start our spring refresh.  Here’s a simple deep cleaning step-by-step routine for the kitchen.  Having an order in which to clean your kitchen makes getting the job done much simpler and faster. Everything seems easier when you have a plan. PRE-CLEAN: Wash, dry and put dirty dishes  away any. Quickly clear counter tops and wipe clean. Clear any clutter that does not belong in the kitchen. Determine if you need new kitchen supplies. Clean under the sink and eliminate the unnecessary. Clean and organize plastic ware and storage containers.  GATHER KITCHEN CLEANING MATERIALS Get all of your kitchen cleaning materials so you have everything on hand. Running around looking for cleaning supplies e.g. cloths, sponges etc. wastes time. Here’s a list of suggested items you might need:  Sponges.  Cleaning cloths.  Gloves.  Toothbrush.  All-purpose, non-abrasive cleaner.  Stainless steel cleaner, if you have stainless steel appliances.  Glass cleaner.  Lysol wipes.  Caddy or basket for cleaning supplies.  Telescoping duster.  Steam mop or conventional mop and bucket.  Vacuum or broom and dustpan  Empty basket or box. PANTRY When you’re getting things organized in the kitchen the pantry is one area that needs some special attention. To begin, check labels and toss expired, stale and empty items also, go through and top up old herbs and spices. Consider donating unopened items that you won’t use before they expire.  Wipe down all shelves with soapy water or kitchen cleaner. After wiping down the shelves, create a separate area for open items, arrange like items together with the oldest items in front; newest in back.  MICROWAVE  Simply, place a bowl filled with water and slices of lemon into the microwave and heat for 5 minutes. The lemon water boils like a sauna, loosening up all the caked on bits. The inside of your microwave gets dirty with splatters and splashes but cleaning it is “easy peasy lemon squeezy” with this cleaning hack. THE FRIDGE Like the Pantry, the refrigerator gets filled up quickly so first thing to do is go through the contents of your refrigerator and remove all expired or spoiled food. Wipe down the shelves with a soft rag and a non-abrasive all-purpose cleaning agent. Work from top to bottom. Place the crisper drawer in the sink to soak, if you need to. If not, just wipe it out and replace it. For a deep clean, unplug the fridge, pull it out, sweep and mop.   Finish with a new box of baking soda stuffed in the back.  STOVETOP No kitchen spring clean is complete if you don’t tackle the stovetop.  Using a dry cloth, brush loose crumbs to the ground. Remove the grates, if your stove has them, and wipe the stovetop with a non-abrasive cleaning agent. OTHER APPLIANCES Clean and/or polish exterior of dishwasher.   For the interior of your oven follow the manufacturer’s instructions to run self-cleaning cycle, if you don’t have this feature Baking soda and vinegar will do the trick. Then clean and polish the exterior of oven. Don’t forget to clean your small countertop appliances, e.g. coffee maker, toaster and toaster oven. CLEAN SINK, COUNTERTOP & CABINETS Free counter space is hard real estate to come by, especially in a smaller kitchen, so get rid of all the clutter from countertops first; try to get them as clear as possible, including countertop appliances. Only keep items out that you  use regularly.  Spray countertops with kitchen cleaner and wipe them clean. Tip! to make granite shine you can use glass cleaner. Wipe down cabinet exteriors and polish wood cabinet doors with furniture polish. Remember to clean inside cabinets and drawers, they tend to gather dust and crumbs. FLOORS Start by removing any movable furniture, then sweep the entire floor. Spot clean sticky or dirty areas with stains. Mop the floor with a heavy duty floor cleaner or use a solution of equal parts vinegar and hot water. The vinegar acts as a natural disinfectant and odor remover. THE WALLS Wipe down the walls, determine if the walls need spot washing in dirty spots don’t forget to clean air vents, doorknobs, doors, and switch plates. DUST Use a telescoping duster and dust the entire kitchen, starting up high and working your way down. Don’t forget light fixtures, the top of cabinets and the fridge. LINENS You may regularly launder your dish towels, but things like runners, oven mitts, and aprons get overlooked, so this is a good opportunity to throw them in the washing machine. GARBAGE DISPOSAL This spot is generally full of germs and can emit all sorts of odors! Give it a thorough flush with hot water, ice cubes, and lemon peels. THE SINK  Fill your sink with hot soapy water and pour in 1 cup bleach. Let stand for about an hour, then empty and scrub clean using a paste made from water and baking soda. Rinse well. EMPTY TRASH Finally, wipe down the outside of the bin and lid. Lysol wipes are excellent for this purpose. Place a fresh garbage bag in the bin. FINAL TOUCHES  You’re all done! Your kitchen is spotless and boy, does it sparkle!  Now add pretty touches with these quick and easy fresh Spring decor ideas. Because kitchen countertops are already at a premium to make the most of your décor, use a tray or cake stand to display smaller decorative items.  Remember to include soft spring colors and fruit & flowers of the season are perfect counter pieces.  We like fresh flowers and greenery because they look amazing on a kitchen counter. Other decorative pieces we like are wooden cutting boards,  you can lean them against your backsplash or stack them under decorative pieces.