Cooking

Food Safety at Summer Parties | What Heat Actually Does to Your Buffet

Food Safety at Summer Parties: What the Heat Actually Does to Your Buffet There’s a specific set of conditions that summer outdoor parties create for food safety that indoor entertaining simply doesn’t replicate. Ambient temperatures of 85-95°F, direct sunlight beating down on serving dishes, food sitting out for hours while guests graze casually, and the social dynamics of a party where nobody wants to be the person who announces that the potato salad has been sitting out too long — all of these combine into a situation where foodborne illness risk is meaningfully higher than most hosts realize or want to acknowledge. The statistics behind summer food poisoning are not reassuring. The CDC estimates that roughly 48 million Americans experience foodborne illness each year, with cases spiking significantly during summer months when warm outdoor temperatures create ideal conditions for bacterial growth. The connection between summer parties and foodborne illness isn’t coincidental — it’s a predictable consequence of serving temperature-sensitive food in environments where maintaining safe temperatures is genuinely difficult. Understanding what actually happens to food at different temperatures, why the two-hour rule exists and what it’s based on, and which foods carry the most risk under outdoor summer conditions gives you the practical knowledge to host parties where everyone goes home feeling good rather than experiencing the delayed consequences of something that sat in the sun forty-five minutes too long. The Temperature Danger Zone: What It Is and Why It Matters The phrase “danger zone” gets used frequently in food safety contexts without much explanation of what’s actually happening in the food during that temperature range, which makes the guidance feel abstract rather than grounded in something real. What the Danger Zone Is: The temperature range between 40°F and 140°F is where bacteria that cause foodborne illness grow most rapidly. Below 40°F, bacterial growth slows dramatically — cold temperatures don’t kill bacteria, they just make reproduction extremely slow. Above 140°F, most bacteria responsible for foodborne illness die off — the higher the temperature, the faster the kill rate. Between these two points, bacterial populations can double every 20 minutes under ideal conditions. What Doubling Every 20 Minutes Means in Practice: Start with 100 bacteria — an amount invisible and harmless. After 20 minutes in the danger zone: 200. After 40 minutes: 400. After 1 hour: 800. After 2 hours: approximately 6,400. After 4 hours: more than 400,000. The number at which many bacterial pathogens can cause illness in a healthy adult is somewhere in the thousands to tens of thousands range, depending on the specific organism. This is why the two-hour rule exists — it’s not an arbitrary conservative guideline, it’s a reflection of the bacterial growth curve that makes food genuinely dangerous past this window at room temperature. Summer Outdoor Temperature Acceleration: The two-hour rule is calculated for room temperature environments — roughly 70°F indoors. Outdoors in summer, ambient temperatures of 85-95°F are common, and direct sunlight can raise the surface temperature of serving dishes and food significantly above ambient air temperature. At 90°F ambient, the two-hour window compresses to approximately one hour. At temperatures above 90°F, the FDA and USDA recommend discarding perishable food after just one hour outdoors. This is the detail most summer party hosts don’t know and that makes outdoor summer entertaining significantly higher risk than typical room-temperature indoor serving. What High Heat Does to Different Food Categories Not all party foods carry equal risk in summer heat, and understanding which categories are most vulnerable helps you make targeted decisions about what needs the most protection rather than applying uniform anxiety to everything on the table. High Risk: Protein-Based Dishes Protein-rich foods — particularly those containing eggs, dairy, meat, and fish — provide ideal growth environments for the bacteria most commonly responsible for foodborne illness: Salmonella, Staphylococcus aureus, Listeria, and E. coli. Egg-Based Dishes: Potato salad, egg salad, macaroni salad with mayonnaise, deviled eggs, and similar preparations are among the highest-risk summer party foods. The combination of protein from eggs, fat from mayonnaise, and starchy carbohydrates from potatoes or pasta creates a nutrient-dense environment that supports rapid bacterial growth. The commercial mayonnaise itself — which contains vinegar and is quite acidic — is not the risk factor that most people assume. Eggs, potato, and any other protein additions in these salads are where the risk lives. Myth Correction: Many people believe that mayonnaise causes these salads to spoil quickly, when actually commercial mayonnaise’s acidity is a mild preservative. The problem is everything mixed with the mayonnaise, not the mayonnaise itself. However, this distinction doesn’t meaningfully change the food safety calculus — potato salad in the sun for three hours is dangerous regardless of what’s causing the danger. Cooked Meats: Grilled chicken, pulled pork, sliced brisket, and similar proteins that are cooked and then held for serving represent significant risk when they drop below 140°F and enter the danger zone. The challenge with cooked meats at outdoor parties is that they often start at serving temperature and cool through the danger zone gradually over the course of the party. Chafing dishes and covered serving vessels help maintain temperature, but without active heat sources, cooked meats cool to dangerous temperatures faster than hosts typically account for. Dips Containing Dairy or Protein: Queso dip, buffalo chicken dip, cream cheese-based dips, and similar preparations need active temperature maintenance. These are frequently served in the same bowl or slow cooker insert from the moment guests arrive until the party ends — a window that can easily exceed two to three hours at outdoor temperatures. Moderate Risk: Dairy-Based Items Dairy products — cheese boards, sour cream, cream cheese, whipped cream — carry moderate risk that varies significantly based on moisture content and preparation form. Cheese: Hard cheeses like aged cheddar, parmesan, and similar low-moisture varieties are considerably more stable at room temperature than soft cheeses. A properly aged hard cheese can sit at room temperature for 2-3 hours without significant safety concern. Soft cheeses — brie, camembert, fresh mozzarella, ricotta,

National Junk Food Day | Best Homemade Junk Food Recipes Worth Making

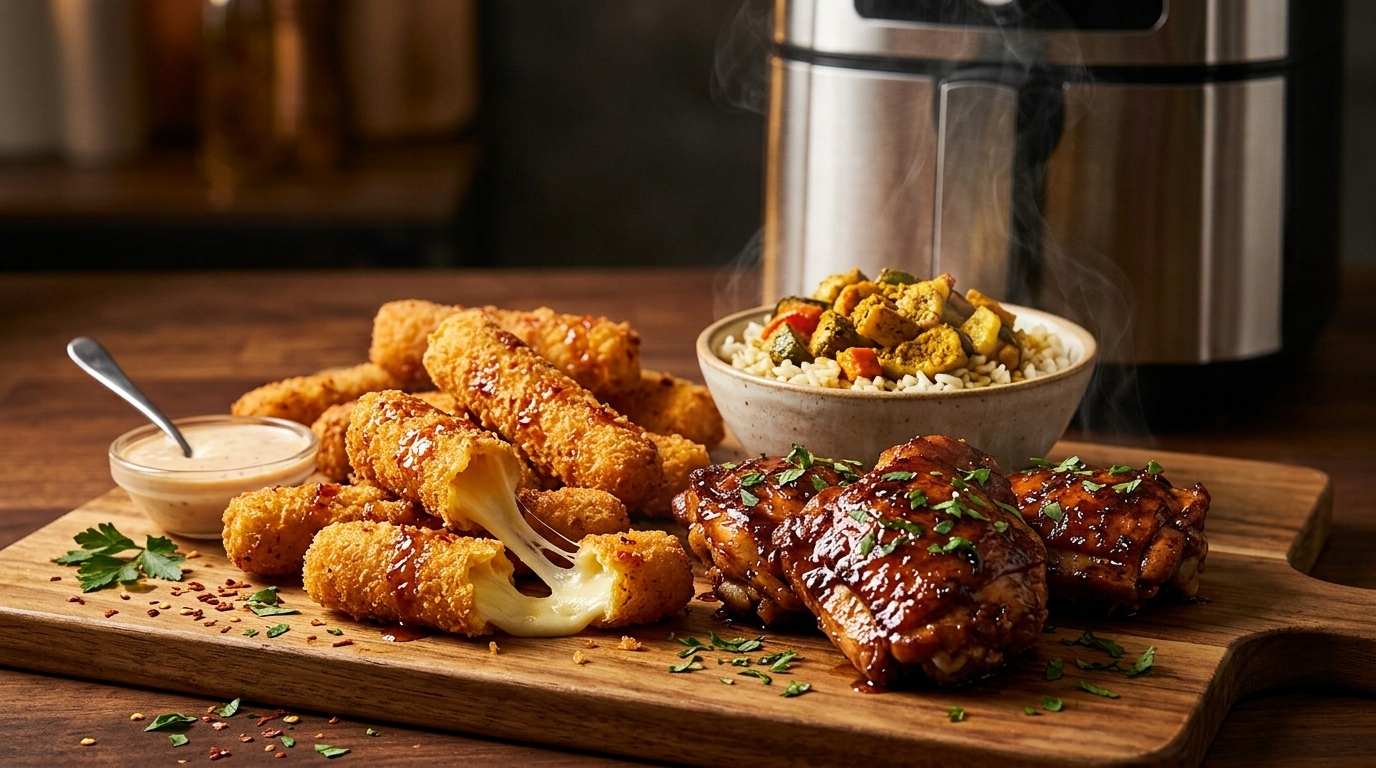
National Junk Food Day deserves a more interesting response than opening a bag of chips and calling it a celebration. The most satisfying version of junk food isn’t always the one that comes out of a package — it’s the one that tastes exactly like what you’re craving but made in your own kitchen with enough control over ingredients and technique that the result is genuinely better than the store-bought version it’s imitating. This isn’t health food dressed up in junk food clothing. These are real junk food recipes — the kind of food that exists purely to taste good, that you eat because you want it rather than because it’s good for you, and that hits the specific combination of fat, salt, sugar, and texture that defines the category. The difference is that made-at-home junk food lets you dial in exactly what you want, use better ingredients where they matter, and produce results that beat the packaged originals in ways that make the effort worth it. The air fryer, the oven, the stovetop, and the microwave all make appearances here — whatever gets the job done fastest for each specific recipe. Because on National Junk Food Day, efficiency is part of the point. Why Homemade Junk Food Hits Differently The argument for making junk food at home rather than buying it isn’t primarily about health — it’s about quality and satisfaction. Better Ingredients Where They Matter: The components in packaged junk food are optimized for shelf stability, cost, and mass production consistency rather than flavor maximization. Real cheese versus cheese powder. Fresh-cut potatoes versus extruded reconstituted potato product. Actual chocolate versus cocoa-adjacent compound coating. These differences are significant enough to taste, and in most cases the homemade version produces more intense satisfaction per bite than the packaged original because the ingredient quality actually delivers on what the cravings are asking for. Customization That Packaged Products Can’t Offer: Craving a specific heat level on your nachos, a particular ratio of toppings on a loaded fry, or a pizza with exactly the combination you actually want rather than the closest thing on a frozen shelf? Homemade junk food solves this directly. You’re making exactly what you want rather than compromising. The Freshness Factor: Most junk food is designed for shelf life — it’s formulated to taste good after months in a bag or box. The homemade version is made and eaten immediately, which changes the experience significantly. Fresh hot fries, a just-assembled nachos situation where the cheese is still bubbling, a burger where everything is at the right temperature simultaneously — these are qualitatively different from their packaged equivalents in ways that freshness explains almost entirely. The Experience of Making It: There’s something specifically satisfying about making junk food deliberately rather than consuming it passively from a package. Knowing exactly what went into it, controlling every element, and producing something that tastes genuinely good through actual cooking rather than industrial processing adds a dimension of satisfaction that passively eating a bag of chips doesn’t provide. Air Fryer Loaded Nachos Nachos are technically assembling rather than cooking, but the air fryer version produces something qualitatively different from microwave nachos or even oven nachos — cheese that bubbles and crisps at the edges of each chip, toppings that heat evenly, and a result that comes together in under 10 minutes. Ingredients: Tortilla chips (thick-cut hold up better than thin), shredded Monterey jack and sharp cheddar combined, black beans, pickled jalapeños, sour cream, guacamole, pico de gallo, hot sauce. Method: Layer chips in a single even layer in the air fryer basket. Top with the cheese mixture, distributing as evenly as possible so every chip gets coverage. Add black beans and jalapeños. Air fry at 350°F for 4-5 minutes until cheese is fully melted and beginning to bubble and crisp at the edges. Remove carefully and top immediately with cold ingredients — sour cream, guacamole, pico de gallo. The temperature contrast between hot cheesy chips and cold fresh toppings is part of what makes nachos specifically satisfying. The technique that separates good nachos from great ones is layering — add a middle layer of chips and cheese if the portion is large rather than piling everything on one layer and hoping heat penetrates to the bottom chips. Two thin layers beat one thick pile every time. Smash Burgers The smash burger’s rise to prominence over the past several years isn’t a trend — it’s the recognition that this technique produces a superior burger to the thick-patty approach that dominated home cooking for decades. A properly smashed burger has more exterior browning per bite than any other preparation, and exterior browning is where beef flavor lives. Ingredients: 80/20 ground beef, American cheese (the specific cheese matters here — American melts in a way that no other cheese replicates, covering the patty in a single smooth, creamy layer), soft potato buns, white onion finely diced, yellow mustard, pickles, ketchup, special sauce (mayo, ketchup, mustard, pickle brine in roughly equal parts). Method: Divide ground beef into 2.5-3oz balls — smaller than you think, because they spread during smashing. Heat a cast iron skillet or heavy stainless pan over high heat until it’s smoking. Place a beef ball in the pan, immediately cover with a piece of parchment paper, and smash flat with a heavy spatula using significant downward pressure. The patty should be thin enough to see the texture of the meat through the surface. Salt immediately after smashing. Cook undisturbed for 2-2.5 minutes — the bottom develops an aggressive crust while the top surface turns from pink to gray. Flip once, immediately add a slice of American cheese, and cook 30-45 more seconds. The thin patty means it’s done immediately after flipping. Toast the bun cut-side down in the same pan for 30-45 seconds. Assembly order matters: sauce on both bun halves, pickles on the bottom bun, onion on top of the patty before the cheese was added during cooking so they soften slightly, mustard

How to Grill Fish and Seafood | The Underrated Summer BBQ Category Explained

Every backyard cookout follows roughly the same script. Burgers go on first, hot dogs follow, maybe some chicken thighs, perhaps a rack of ribs if someone planned ahead. Fish and seafood almost never appear, and when they do it’s usually as an afterthought — a single salmon fillet for the guest who doesn’t eat red meat, cooked with less confidence than everything else on the grill and served with an apology. This is a missed opportunity of considerable magnitude. Fish and seafood are some of the best things you can cook on a grill — faster than any other protein, genuinely enhanced by high heat and smoke in ways that other cooking methods don’t replicate, and capable of producing results that make everything else on the table feel slightly ordinary by comparison. A properly grilled whole fish, a skewer of charred shrimp, or a swordfish steak with defined grill marks and a smoky, caramelized exterior represents the ceiling of what summer cooking can achieve, and most backyard cooks never get there because the category feels intimidating. The intimidation is understandable but mostly unfounded. Grilling fish and seafood does require different technique than grilling beef — but it’s not harder technique, just different. Understanding what actually makes fish stick, why some seafood species grill beautifully while others fall apart, and how timing works across different types removes most of the anxiety and replaces it with a category of summer cooking that rewards the small learning investment many times over. Why Fish and Seafood Belong on Your Summer Grill Before the technique, the case for making this category a regular part of the summer cooking rotation rather than an occasional experiment. Speed That Changes Dinner: Most fish and seafood cook in 8-15 minutes on a properly preheated grill — significantly faster than chicken, ribs, or any other protein that typically anchors a cookout. Shrimp takes 4-6 minutes total. A fish fillet takes 8-10 minutes. A whole fish takes 15-20 minutes depending on size. This speed makes fish and seafood ideal for weeknight grilling where extended cook times aren’t realistic, and for the later rounds of a cookout when guests are hungry again and waiting 45 minutes for something isn’t appealing. Flavor Enhancement from High Heat: The Maillard reaction that creates browning and flavor complexity on grilled proteins applies as meaningfully to fish and seafood as to beef — arguably more so, because fish and seafood’s lighter inherent flavor makes the contribution of grill char and caramelization proportionally more significant to the overall flavor experience. A seared tuna steak with defined grill marks and charred exterior tastes dramatically different from pan-seared tuna at the same doneness. The grill adds something that no other cooking method provides. Summer Ingredient Alignment: The best fish and seafood of the year is available in summer — not universally, but broadly. Summer is peak season for many shellfish varieties, domestic shrimp supply is abundant, and the overlap between what’s seasonal and excellent in seafood and what summer cooking calls for is significant. Eating grilled seafood in summer is eating what the season actually offers rather than fighting against it. Health Profile: Fish and seafood are among the leanest, highest-protein foods available, with the omega-3 content of fatty fish species adding nutritional value that most other proteins don’t carry. A summer diet that incorporates regular grilled fish alongside typical BBQ fare produces a healthier overall nutritional pattern without requiring any sacrifice in flavor or satisfaction. The Sticking Problem: Why It Happens and How to Prevent It Sticking is the primary reason people avoid grilling fish, and it’s worth addressing directly and completely because once you understand it, it’s almost entirely preventable. Why Fish Sticks More Than Beef: Fish proteins are more delicate than the proteins in beef, chicken, or pork. When fish contacts a grill surface, the proteins bond chemically with the metal in a way that’s more pronounced than with denser proteins. The fish also has higher moisture content than most meats, which creates steam at the contact surface that initially lifts the fish from the grates before the exterior has set — and if you try to move it before the exterior has cooked enough to release naturally, it tears rather than lifting cleanly. The Natural Release Principle: This is the single most important concept in grilling fish. A piece of fish placed on a properly preheated, properly oiled grill will stick initially, then release naturally when its exterior has cooked enough to set. If you try to lift or move the fish before this release happens, it will tear and stick. If you wait until the release happens, it will lift cleanly. The timing of this release — typically 3-5 minutes depending on heat and thickness — is what most people don’t wait for. They try to flip at 2 minutes, the fish sticks and tears, and they conclude that fish is difficult to grill. It isn’t difficult. It requires patience. Grill Temperature Is the Foundation: A properly preheated grill reduces sticking more than any other single factor. Cold or warm grates stick far more aggressively than properly hot grates where proteins set on contact rather than bonding with metal during a slow heat increase. Preheat your grill to medium-high heat with the lid closed for at least 10-15 minutes before placing any fish on it. The grates should be genuinely hot — a drop of water flicked onto them should evaporate immediately on contact. Cleaning the Grates: Residue from previous cooking creates additional sticking surfaces. Clean grates thoroughly with a grill brush immediately before cooking fish — while the grates are hot from preheating — to remove any accumulated residue. Clean grates reduce sticking and prevent old carbon residue from transferring off-flavors to delicate seafood. Oil the Grates, Not Just the Fish: Many cooks oil only the fish before grilling, which helps but doesn’t address the metal contact surface. Oiling the grates themselves — using a folded paper towel dipped in neutral oil, held

Why Summer Is the Best Time to Switch to Induction Cooking

Most people who eventually switch to induction cooking do it during a kitchen renovation, when replacing a broken appliance, or when moving into a new home — timing driven by circumstance rather than intention. Summer rarely comes up as a reason to make the switch, which is a missed opportunity, because summer is arguably the most compelling argument for induction cooking that exists and the season when the difference between induction and gas or electric cooking is most immediately and consistently felt. The case for induction cooking in summer isn’t primarily about cooking performance — though that case is strong on its own terms. It’s about what happens to your home’s comfort, your cooling costs, your indoor air quality, and your overall relationship with cooking when the ambient temperature is already fighting you before you’ve turned on a single burner. In summer, every heat source in your kitchen becomes more consequential than it is in October. The inefficiency of gas cooking that you tolerate comfortably in winter becomes a real quality-of-life issue in August. The kitchen you’ve been cooking in all year feels different when the outdoor temperature is 95°F and your range is adding combustion heat to an already-challenged cooling environment. Understanding what induction cooking actually does differently — not just in cooking performance terms but in thermal, efficiency, and air quality terms — makes the summer argument for switching much clearer than the general “induction is better” conversation that often stays abstract. What Induction Cooking Actually Is Before the summer-specific arguments, a clear explanation of what induction cooking does differently from gas and traditional electric is useful context for anyone who hasn’t lived with it. The Electromagnetic Mechanism: Induction cooktops use electromagnetic fields to heat cookware directly rather than heating a surface or producing a flame that then heats cookware. An induction element generates a rapidly alternating magnetic field that induces electrical currents in magnetic cookware placed on the surface. These currents encounter resistance within the cookware’s metal, and that resistance generates heat — directly in the pan, not in the cooktop surface or the air between the cooktop and the pan. What This Means Practically: The cooktop surface itself doesn’t get hot from the cooking process. Only the cookware heats. If you place your hand on the cooktop surface beside an active pan, the surface is warm from contact with the hot pan but not from the element itself. This is the fundamental thermal difference that drives most of induction’s summer advantages. Efficiency Numbers: Induction converts approximately 85-90% of consumed electrical energy into cooking heat in the pan. Traditional electric coil and ceramic cooktops convert roughly 65-70%. Gas converts approximately 40%. The energy that doesn’t become cooking heat in gas and electric alternatives becomes ambient heat in your kitchen — the waste heat that you feel standing at the stove and that your air conditioner works to remove. The Summer Heat Argument: The Numbers Are Compelling The efficiency difference between cooking fuel types has implications for indoor comfort that are usually abstract but become concrete in summer. Gas Cooking’s Heat Load in Summer: A gas burner at full output producing 15,000 BTU delivers roughly 6,000 BTU to the cooking pan and releases approximately 9,000 BTU into the kitchen as waste heat. Running five burners simultaneously at moderate output for a 30-minute cooking session can release tens of thousands of BTUs into your kitchen air — a heat load your air conditioning system then has to work to remove. In winter, this heat goes toward warming a home that needs warming. In summer, it’s purely waste that the cooling system compensates for at cost. Electric Cooktop Improvement, Incomplete: Traditional electric cooktops improve on gas’s thermal efficiency — approximately 65-70% versus gas’s 40% — but still generate meaningful waste heat through the heating element’s radiant output into the kitchen environment above and around the element rather than solely into the cookware. Induction’s Narrow Thermal Footprint: Because induction generates heat directly in the cookware rather than in an element or through combustion, the waste heat that escapes into the kitchen is dramatically lower. The main heat source in the kitchen during induction cooking is the hot cookware and the food itself — not the cooktop, not combustion byproducts, not a glowing element. When you finish cooking and remove the pan, the cooktop surface cools quickly without continuing to radiate heat into the kitchen. The Air Conditioning Implication: Every BTU of heat generated in your kitchen that the air conditioning system removes costs money in electricity consumption and mechanical wear on the cooling system. Reducing the kitchen’s heat load — which induction cooking does more significantly than any other cooking method change — directly reduces cooling costs during the months when air conditioning runs continuously. For households in hot climates running air conditioning from May through September, the cumulative energy savings from reduced kitchen heat load over a summer season are meaningful. The Perceived Comfort Difference: Beyond the measurable energy implications, cooking on induction in summer simply feels different than cooking on gas. Standing at an induction cooktop during a 30-minute cooking session, you’re not experiencing the radiant heat from combustion flames and hot elements that gas and electric cooking produce. The cooking is happening in the pan. The kitchen stays cooler. This isn’t subtle — people who switch to induction during summer consistently comment on how much more comfortable the cooking experience is before they start discussing cooking performance. Air Quality: The Summer-Specific Concern Summer’s indoor air quality implications of gas cooking have received increasing research attention, and the summer context makes the findings particularly relevant. Gas Combustion and Indoor Air: Gas combustion produces nitrogen dioxide, carbon monoxide, and formaldehyde inside homes during cooking. Research published in peer-reviewed journals over the past several years has documented indoor nitrogen dioxide levels during gas cooking that regularly exceed EPA outdoor air quality standards in kitchen environments. These concentrations are highest during cooking and dissipate over time with ventilation, but accumulate throughout

National French Fry Day | Every Fry Style Worth Making in Your Air Fryer

French fries are one of those foods that everyone has a strong opinion about and almost nobody agrees on. Some people are committed to thin and crispy. Others want thick steak fries with soft interiors. Waffle fries, curly fries, sweet potato fries, seasoned fries, loaded fries, the fry universe is significantly larger than any single restaurant’s menu suggests, and National French Fry Day on July 13th is the most legitimate excuse of the year to explore as much of it as possible from your own kitchen. The air fryer is why homemade fries are finally worth making regularly. Before air fryers became a standard kitchen appliance, homemade fries required either deep frying, which works brilliantly but involves managing a pot of hot oil, significant cleanup, and a kitchen that smells like a fast food restaurant for the rest of the day, or oven frying, which produces results that are simultaneously softer and less flavorful than either deep fried or air fried alternatives. The air fryer’s circulating high-heat air removes surface moisture from potato surfaces rapidly and continuously, creating the dry, crispy exterior that defines a good fry without the oil volume that deep frying requires. The result is genuinely crispy fries in 15-20 minutes with a tablespoon of oil rather than a quart, and cleanup that takes two minutes. This guide covers every significant fry style worth celebrating on National French Fry Day, classic thin fries, thick-cut steak fries, seasoned variations, sweet potato fries, loaded fry builds, and the dipping sauces that make all of them better. Everything goes through the air fryer. Everything is genuinely good. The Science of a Good Air Fryer Fry Before the recipes, understanding what makes an air fryer fry work, and what makes them fail, saves you from the most common mistakes that produce disappointing results. The Starch Removal Step: Raw potato surfaces are coated in starch that, if left on during cooking, creates a gummy layer that prevents proper crisping. Soaking cut fries in cold water for 20-30 minutes (or up to several hours in the refrigerator) pulls this surface starch out of the potato. After soaking, the water will be visibly cloudy with starch. Rinse the fries and dry them thoroughly — this step is non-negotiable for genuinely crispy results. Skipping it produces fries that are soft rather than crispy on the exterior regardless of cooking time or temperature. The Drying Step Is as Important as the Soak: After soaking, moisture on the fry surface needs to be removed before cooking. Pat fries dry with paper towels or a clean kitchen towel, pressing firmly to remove as much surface moisture as possible. Some cooks spread soaked fries on a clean towel and let them air dry for 10-15 minutes after patting. The drier the surface going into the air fryer, the crispier the exterior coming out. Oil Quantity: A thin, even coating of oil across all fry surfaces is what you’re after — enough to conduct heat and promote browning but not so much that fries become greasy. One tablespoon of neutral oil for a single-serving batch (one large potato) is approximately right. Toss thoroughly so every surface has contact with oil rather than some fries being well-coated and others dry. Single Layer is Non-Negotiable: Fries stacked on top of each other in the air fryer basket steam rather than crisp — the stacked surfaces don’t get direct hot air contact. A single layer with some space between pieces is what produces consistent crispiness. For larger batches, cook in multiple rounds rather than crowding the basket. Trying to rush a large batch into one crowded round produces uniformly mediocre fries rather than excellent fries that take a few extra minutes. Shaking Frequency: Shaking the basket every 5 minutes throughout cooking ensures all fry surfaces get direct air exposure rather than the bottom surfaces getting overcooked while the top ones remain underdone. For thin fries, shake every 4-5 minutes. For thicker cuts, every 5-7 minutes. Temperature and Time Variables: Higher temperatures (400-410°F) produce crispier exteriors faster. Lower temperatures (375-380°F) cook interiors more thoroughly before the exterior gets too dark — better for thicker cuts. Most standard-cut fries do well starting at 380°F for the first half of cooking, then increasing to 400°F for the final 5-7 minutes to develop maximum crispiness. Classic Thin Fries The baseline. Everything else is a variation on this standard — getting thin fries right in the air fryer is the foundational skill. Ingredients: 2 large russet potatoes, 1 tbsp neutral oil (vegetable, avocado, or canola), 1 tsp salt, ½ tsp black pepper. Method: Peel potatoes or leave skins on depending on preference — skin-on fries have more texture and flavor. Cut into ¼-inch thick sticks, keeping thickness as consistent as possible for even cooking. Soak in cold water for 20-30 minutes. Drain, rinse, and pat completely dry. Toss with oil, salt, and pepper. Air fry at 380°F for 8 minutes, shake, increase to 400°F and cook for another 8-10 minutes shaking every 4 minutes until golden and crispy. Taste and season with additional salt immediately out of the fryer — salt adheres better to hot fries. What Makes These Work: Russet potatoes have the right starch and moisture content for classic fries. Their high starch content means they crisp effectively on the outside while staying fluffy inside. Waxy potatoes like Yukon Golds produce a different result — denser interiors and less dramatic exterior crispiness — that suits wedges better than thin fries. Thick-Cut Steak Fries Steak fries require more patience than thin fries but reward it with substantial, satisfying bites that hold toppings better and have a more dramatic contrast between crispy exterior and fluffy interior. Ingredients: 2 large russet potatoes, 1.5 tbsp oil, 1 tsp salt, ½ tsp garlic powder, ½ tsp paprika, black pepper. Method: Cut potatoes into ¾-inch to 1-inch thick sticks — significantly thicker than classic fries. Soak in cold water for 30-45 minutes. Drain, rinse, and dry very thoroughly. Toss with oil

The Ingredients You’re Storing Wrong (And What It’s Costing You)

Food waste in American households runs at roughly 30-40% of the food purchased, and a meaningful portion of that waste isn’t from buying too much or forgetting about leftovers — it’s from storing food incorrectly in ways that accelerate spoilage well beyond what proper storage would allow. The frustrating part is that most of these storage mistakes aren’t obvious. They feel like correct behavior because they’re habitual, because the packaging sometimes gives misleading guidance, and because the connection between storage method and spoilage rate isn’t always immediately visible until food has already degraded past the point of usefulness. Understanding why certain foods spoil faster under specific storage conditions — not just what the correct storage method is, but why it’s correct — creates the kind of internalized knowledge that translates into better storage decisions for foods not covered by any specific rule you’ve encountered. The logic underlying food spoilage is consistent, and once you understand it, proper storage becomes intuitive rather than a collection of disconnected rules to remember and apply. The Refrigerator Isn’t Always the Right Answer The refrigerator feels like the safest place for food — cold temperatures slow bacterial growth, and most people default to refrigerating anything that seems perishable. But refrigeration damages a surprising number of foods through mechanisms that aren’t about bacterial spoilage at all. Tomatoes: Refrigerated tomatoes develop mealy, mushy texture and lose the volatile compounds responsible for their flavor. This happens because cold temperatures disrupt cell membrane function in ways that affect texture irreversibly, and because the enzymes responsible for developing tomato flavor compounds become inactive below certain temperatures. A tomato stored at 55-65°F ripens properly and maintains its texture and flavor. The same tomato in a 38°F refrigerator loses these qualities within days in ways that can’t be reversed by warming it back up before eating. Potatoes: Refrigerating potatoes converts starch to sugar through an enzymatic process that’s dramatically accelerated at cold temperatures. The result is potatoes that taste noticeably sweeter than they should, cook unevenly, and — most concerningly — develop higher levels of acrylamide (a potentially harmful compound) when cooked at high temperatures because of the elevated sugar content. Store potatoes in a cool, dark, ventilated space — a pantry, basement, or cabinet away from heat sources. Darkness matters because light exposure causes potatoes to produce solanine, the compound responsible for green coloration and bitterness. Onions and Garlic: Whole uncut onions and garlic heads deteriorate faster in refrigerators than in dry, cool, ventilated storage because the refrigerator’s humidity encourages mold growth on their papery outer skins. Once cut, the situation reverses — cut onions and peeled garlic belong in the refrigerator in sealed containers. The distinction between whole and cut is the relevant variable, not whether onions and garlic are generally refrigerated or not. Bread: Refrigerated bread goes stale faster than bread stored at room temperature because the starch retrogradation that causes staling accelerates at refrigerator temperatures — the cold temperature causes starch molecules to crystallize more rapidly than at room temperature. The freezer, counterintuitively, is better for extending bread’s life than the refrigerator. Freezing essentially pauses staling by stopping the molecular movement that retrogradation requires. Frozen bread thawed properly (or toasted directly from frozen) maintains better quality than bread that spent several days in a refrigerator. Stone Fruits: Peaches, nectarines, plums, and similar stone fruits continue ripening at room temperature and develop their full flavor and texture during this process. Refrigerating unripe stone fruits halts ripening in ways that sometimes prevent it from ever completing properly after the fruit warms again — the cold damages the ripening process rather than just slowing it. Ripen stone fruits at room temperature until they yield slightly to gentle pressure, then refrigerate if you need a few more days before eating them. Ethylene Gas Is Ruining Your Produce Ethylene gas is a naturally produced plant hormone that triggers ripening and eventually senescence in fruits and vegetables. Some produce items emit relatively high amounts of ethylene. Others are particularly sensitive to ethylene exposure. Storing high ethylene producers alongside ethylene-sensitive items in the same refrigerator or bowl accelerates spoilage dramatically, and this happens invisibly until the sensitive items are visibly over-ripe or damaged. High Ethylene Producers: Apples are among the highest emitters, along with avocados, bananas, tomatoes (another reason to keep them out of the refrigerator’s produce drawer), melons, pears, and stone fruits. These items actively ripen surrounding produce through the ethylene they release into enclosed spaces. Ethylene Sensitive Items: Leafy greens, broccoli, cauliflower, Brussels sprouts, kale, cucumbers, and carrots are highly sensitive to ethylene exposure. Even modest amounts of ethylene in their storage environment dramatically accelerates yellowing, softening, and deterioration. Storing a bag of apples in the same crisper drawer as broccoli or spinach produces noticeably faster spoilage of the greens. Practical Storage Separation: Keeping high ethylene producers in a separate crisper drawer from ethylene-sensitive vegetables is the most impactful single refrigerator organization change most households can make for reducing produce waste. Many refrigerators have two crisper drawers specifically because this separation is beneficial — use one for fruits and the other for vegetables rather than mixing them based on available space. The Banana Bowl Effect: The common practice of keeping a fruit bowl with bananas alongside other fruits on the counter accelerates ripening of the other fruits through the ethylene bananas emit continuously. If you want other fruits to ripen quickly, place them in a closed paper bag with a banana — the trapped ethylene concentrates and speeds ripening. If you want other fruits to last, keep them away from bananas. Moisture Is the Variable Most People Don’t Control Different foods require different moisture environments, and the refrigerator contains zones with meaningfully different humidity levels that most people use interchangeably without considering the moisture preferences of what they’re storing. Crisper Drawers and Their Settings: Most refrigerators include crisper drawers with humidity control settings — typically a vent or slide that allows more or less air circulation. High humidity settings (vents closed or

Gas vs. Charcoal Grill: Which Wins on the Fourth of July?

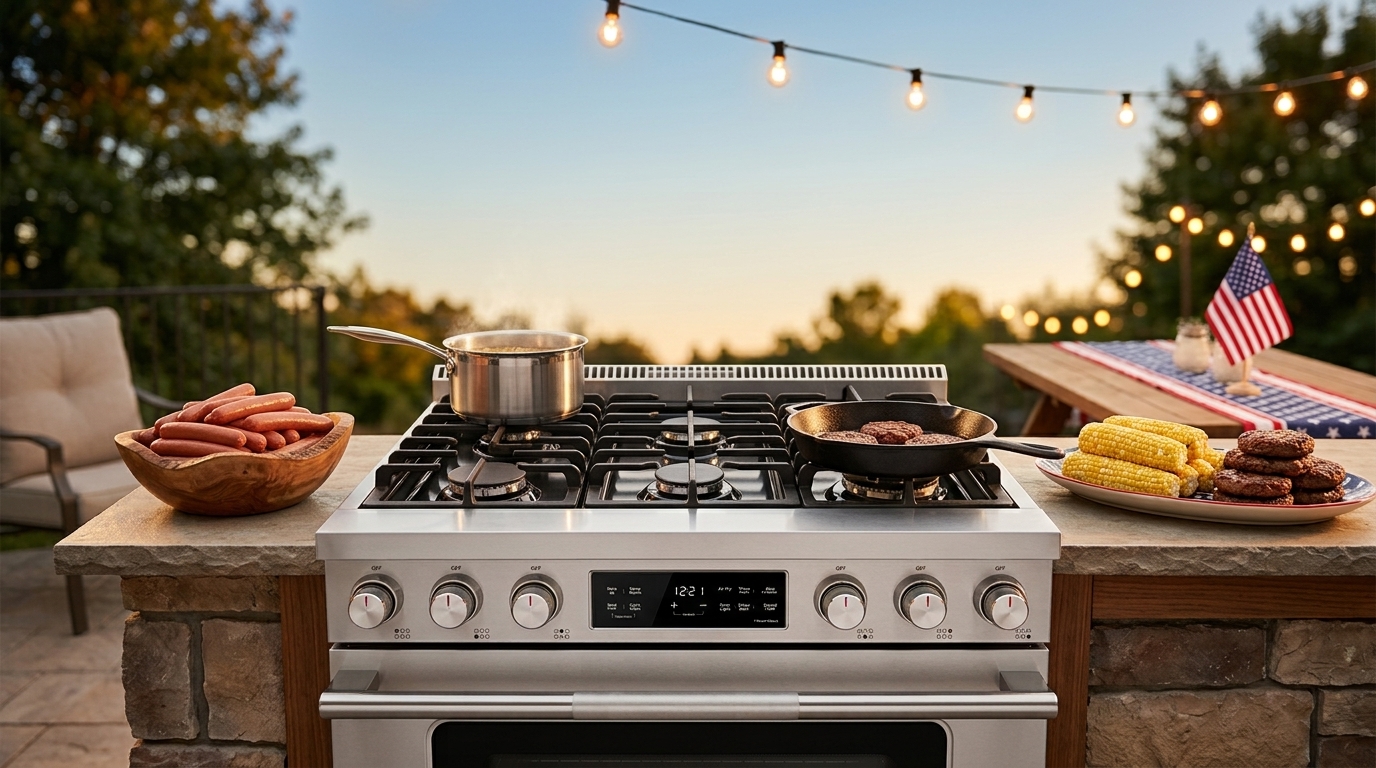
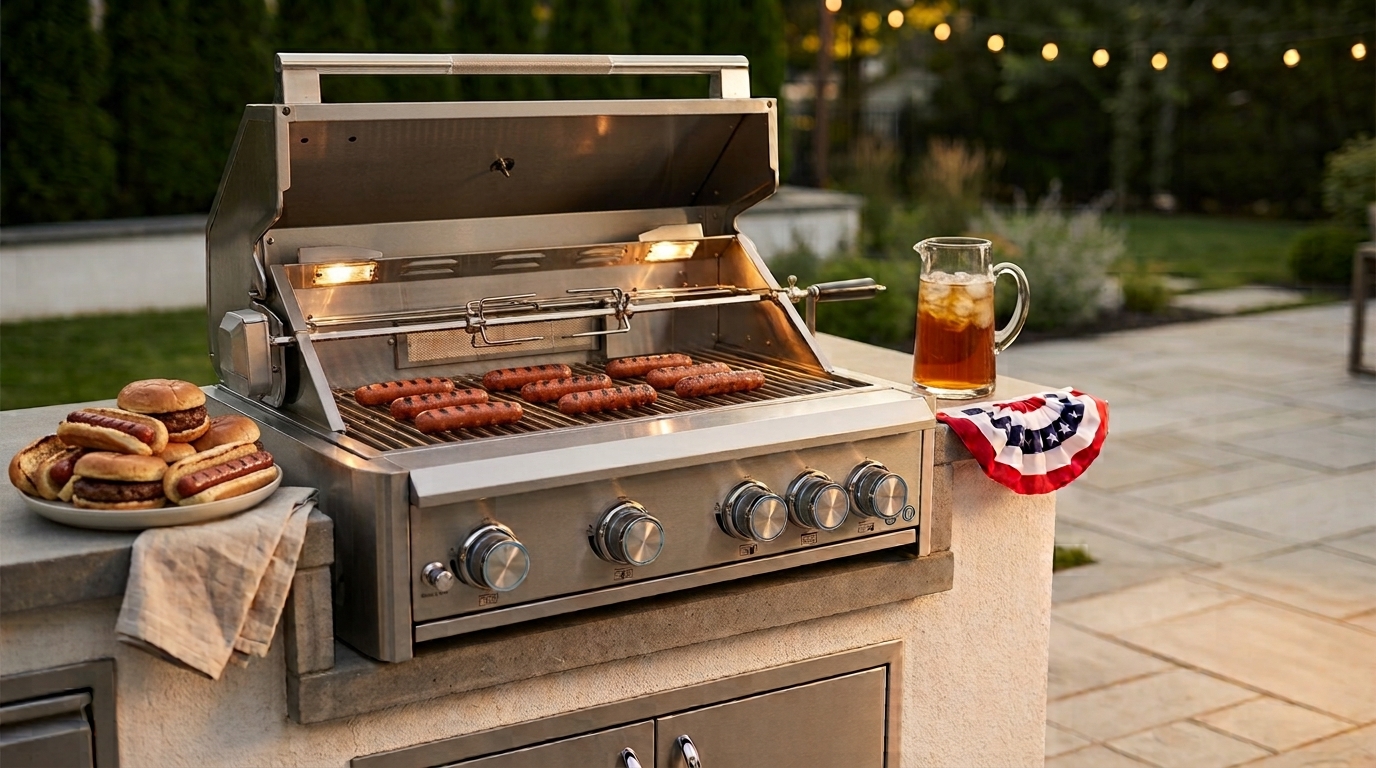
Few debates in backyard cooking generate as much heat as the gas versus charcoal question, and the Fourth of July is when it peaks. Everyone has a position. Charcoal advocates insist the flavor difference is so significant that gas grilling is essentially just outdoor cooking on a glorified stovetop. Gas advocates point out that charcoal requires more time, more skill, and more cleanup for a flavor difference that most guests — especially the ones three beers in and waiting for their burger — couldn’t identify in a blind taste test. Both sides make legitimate points. The problem with the debate is that it typically frames the question as an absolute when the actual answer depends on what you’re cooking, how many people you’re feeding, how much time you have, and what you genuinely value in a cooking experience. Understanding what each fuel type actually does well — and where each falls short — produces a more useful answer than picking a side based on identity or tradition. What Charcoal Actually Does Charcoal’s reputation for superior flavor is real but frequently misunderstood. The flavor difference isn’t primarily from the charcoal itself burning — it comes from what happens when fat and juices from cooking food drip onto the hot coals below. The Drip-and-Smoke Effect: When fat hits glowing charcoal, it vaporizes immediately into smoke and combustion byproducts that rise back up and coat the food. This process deposits aromatic compounds — aldehydes, furans, and other volatile chemicals produced by fat combustion — onto food surfaces in ways that genuinely affect flavor. It’s not subtle. When it’s working correctly, charcoal grilling produces a smoky, slightly charred exterior flavor that gas grilling simply cannot replicate because fat dripping onto burner tubes or flavor bars in a gas grill doesn’t produce the same combustion chemistry. Temperature Ceiling: Charcoal can reach higher temperatures than most residential gas grills — quality lump charcoal beds can sustain temperatures above 700°F, which is beyond what most home gas grills achieve. This extra heat produces more aggressive searing, faster Maillard browning, and more pronounced grill marks than the same food cooked on gas. Heat Variability as a Feature: Charcoal beds are naturally uneven — some areas burn hotter than others depending on coal distribution and airflow. Experienced charcoal grillers use this variability intentionally, creating hot zones for searing and cooler zones for gentle cooking or holding, sometimes within inches of each other. This isn’t a bug. It’s a management tool that produces results difficult to replicate on gas where temperatures are more uniform across burners. Two-Zone Fire Setup: Building a charcoal fire with coals stacked on one side and an empty side on the other creates a direct heat zone and an indirect heat zone in the same grill. This two-zone setup allows searing proteins over direct heat and then moving them to indirect heat to finish cooking through without burning exteriors — a technique that works on gas as well but is particularly effective on charcoal where the two zones have a more dramatic temperature differential. What Charcoal Gets Wrong Charcoal’s genuine advantages come with real operational costs that matter specifically in a Fourth of July context. Time to Ready: Charcoal takes 20-30 minutes from lighting to a grill that’s ready for cooking — longer if you’re using a chimney starter (the recommended method) and waiting for coals to ash over properly. On a day when guests are arriving, children are running around, and you’re also managing food prep, that 30-minute window creates scheduling pressure that gas eliminates entirely. Temperature Control Is a Skill: Managing a charcoal fire’s temperature requires adjusting vents, redistributing coals, and reading visual cues that take experience to interpret accurately. For a grill master comfortable with charcoal, this management is second nature. For someone who grills primarily on gas but fires up the charcoal grill specifically for the Fourth of July, it’s a potential source of inconsistent results at the worst possible moment. Fuel Management Over a Long Day: A Fourth of July cookout that runs from noon through evening requires multiple rounds of cooking — lunch items, afternoon snacks, dinner proteins. Charcoal fires require replenishment during long cooking sessions, and adding fresh charcoal to an active fire requires managing the new coals through their initial high-heat phase before they settle into steady cooking temperature. On gas, turning a burner up or down takes one second. Cleanup Reality: Post-party charcoal cleanup involves waiting for coals to cool completely (a few hours at minimum, or overnight to be safe), then disposing of ash properly before the grill can be stored. Gas cleanup is wiping down grates and replacing the cover. On a day when you’re already managing post-party fatigue and cleanup from hosting, the charcoal ash disposal step is a genuinely meaningful consideration. Weather Sensitivity: Wind affects charcoal fires in ways it doesn’t affect gas. Strong wind can cause temperature spikes from increased oxygen flow, or can cool fire beds faster than expected. Rain interrupts charcoal fires in ways that gas grills handle more gracefully with their enclosed burner systems. What Gas Actually Does Gas grills have been dismissed as inferior tools by charcoal purists for decades, but this dismissal underestimates what gas does genuinely well. Instant Readiness: Turn a knob, push an ignition button, and a gas grill is at cooking temperature within 10-15 minutes. There’s no charcoal to light, no waiting for an ash-over that signals proper cooking temperature, and no concern about whether the coals are ready when the first guests arrive hungry. For a holiday with complex logistics and variable timing, this reliability has real practical value. Precise Temperature Control: Gas burner output adjusts immediately and precisely. Reduce heat on a gas burner and it drops within seconds. Increase it and it rises just as quickly. Managing multiple burners at different temperatures simultaneously — searing on high heat while holding finished items at low heat while indirectly roasting something at medium — is straightforward on gas in a way that

The Ultimate Fourth of July BBQ Checklist

The Fourth of July puts more pressure on a backyard cooking setup than almost any other day of the year. It’s not one meal — it’s an all-day event that typically spans a long lunch, an afternoon of grazing, and a full dinner spread, often for more people than a typical weekend gathering. The grills that run flawlessly for a Tuesday night dinner sometimes reveal gaps when they’re asked to handle six hours of continuous cooking for twenty guests. A little advance planning the week before turns the holiday into something you actually enjoy rather than something you’re managing under pressure. This checklist works through the planning in the order that actually matters — equipment first, since gaps there are the hardest to fix last-minute, then food planning, then the day-of logistics that keep things running smoothly once guests arrive. One Week Out: Equipment and Grill Readiness The week before is when equipment problems are still fixable. Discovering a dead propane tank or a grill that won’t ignite on the morning of the Fourth turns a fun day into a stressful scramble. Check Propane Levels: If your grill runs on liquid propane, verify your tank has enough fuel for a full day of cooking — a holiday cookout burns through more propane than a typical weeknight dinner. A full 20-pound tank typically provides 18-20 hours of grilling time at medium heat, but high-heat searing and extended cooking sessions reduce this. If you’re uncertain how much fuel remains, most hardware stores and propane exchange locations can weigh a tank quickly. Buy or exchange for a full tank with several days to spare rather than discovering an empty one on the holiday itself, when exchange locations are busiest and most likely to be out of stock. Test Ignition and Burners: Fire up the grill a few days ahead and run it through all burners at various heat settings. This catches ignition problems, uneven burner performance, or any maintenance issues while there’s still time to address them. A grill that’s sat unused since last season sometimes needs a few minutes to clear out any debris or settled dust in the burner tubes before it runs cleanly. Clean the Grates and Interior: Built-up grease and carbon from previous use affects both flavor and fire safety. Scrub grates thoroughly with a grill brush, and if it’s been a while, remove and clean the flavor bars or heat distribution plates underneath where grease accumulates most heavily. A buildup of old grease is one of the more common causes of dangerous flare-ups during high-volume cooking sessions. Inspect Gas Lines and Connections: Check hoses and connections for cracks, brittleness, or leaks — soap and water solution brushed on connections will bubble visibly if gas is escaping. This is a five-minute check that matters significantly more on a day when the grill will run continuously for hours. Verify the Temperature Gauge: An accurate temperature gauge matters when you’re managing multiple proteins with different doneness targets across a long cooking session. If your grill includes a built-in thermometer, verify its accuracy against a separate probe thermometer, since built-in gauges can drift out of calibration over time and lead to misjudged cooking times. Check Rotisserie Equipment If You Have It: If your grill includes a motorized rotisserie kit, test the motor and confirm the spit rod and forks are in good condition. A whole rotisserie chicken or a rotisserie roast is a genuinely impressive centerpiece for a holiday spread, but only if the equipment is confirmed working before guests arrive expecting it. Five Days Out: Menu and Shopping Planning Locking in the menu with enough lead time avoids the grocery store chaos that builds through the days immediately before the holiday, when popular cuts of meat and key ingredients sell out at busy stores. Plan for Volume and Timing, Not Just Recipes: A Fourth of July spread typically needs items that can be ready at different points throughout the day — something quick for early arrivals, a main spread for the core meal, and lighter options for evening grazing as the day continues. Mapping out roughly what’s being served when helps you shop accurately and avoid either running short or making far more than needed. Buy Proteins Early If Possible: Popular cuts — brisket, ribs, good steaks, whole chickens — often sell out at smaller grocery stores in the days immediately before major grilling holidays. Buying several days ahead and freezing if needed, or at minimum reserving items with a butcher counter, avoids the situation where your planned menu isn’t actually available two days before the event. Account for Different Cooking Times: Brisket and ribs that need low, slow cooking over many hours operate on a completely different schedule than burgers and hot dogs that cook in minutes. If your menu spans both categories, plan which items go on the grill first and build a rough timeline working backward from when you want everything ready. Items requiring long cook times should typically start hours before guests arrive, while quick-cooking items get added closer to serving time. Don’t Forget Sides That Don’t Need the Grill: Potato salad, coleslaw, baked beans, corn on the cob, and similar sides can be prepared mostly or entirely ahead of time, reducing what needs active attention on the day itself. Building a menu where roughly half the dishes are make-ahead sides significantly reduces day-of stress. Plan Your Beverage and Ice Strategy: Ice sells out at local stores by midday on major summer holidays. Buy ice the day before if your freezer space allows, or plan an early morning ice run on the day itself rather than assuming it’ll be available in the afternoon. Two to Three Days Out: Prep Work Spreading prep work across multiple days rather than cramming it all into the day before reduces the time pressure that makes holiday cooking feel chaotic. Make Sauces and Marinades Ahead: Barbecue sauce, marinades, and dry rubs all benefit from being made several days ahead — flavors

Why Your Oven Temperature Is Probably Lying to You

Set your oven to 350°F and there’s a meaningful chance the interior never actually reaches that temperature, or reaches it briefly before swinging well above or below it for most of the cooking cycle. This isn’t a defect specific to any particular oven brand or price point — it’s a near-universal characteristic of how home ovens regulate temperature, and understanding it explains a surprising number of cooking frustrations that get blamed on recipes, ingredients, or cooking skill when the actual cause is sitting quietly in the appliance itself. Most home cooks assume their oven dial or digital display represents reality — that setting 350°F means the oven interior holds steady at 350°F throughout the cooking process. The actual behavior is considerably messier, and the gap between displayed and actual temperature explains everything from inconsistent baking results to recipes that work perfectly for some people and fail mysteriously for others using what should be identical instructions. How Oven Temperature Regulation Actually Works Understanding the mechanism behind oven temperature control reveals why the temperature swings happen and why they’re largely unavoidable with standard residential oven technology. The Cycling Behavior: Home ovens don’t maintain constant heat output. Instead, they cycle the heating elements on and off, turning elements on when the interior temperature drops below the set point and off when it rises above it. This cycling creates a sawtooth temperature pattern rather than a flat line — the actual interior temperature oscillates above and below the target setting continuously throughout cooking, rather than holding steady at the displayed number. Typical Swing Range: Standard residential ovens typically swing 15-25°F above and below their set temperature during normal cycling, meaning an oven set to 350°F might actually range between 325°F and 375°F throughout a cooking session, repeatedly. Budget ovens with simpler thermostats can swing more dramatically — sometimes 30-40°F in either direction. Higher-end ovens with more sophisticated temperature sensors and control systems typically swing less, but even premium ovens rarely hold dead-steady at the exact set temperature. Why This Design Exists: Continuous, perfectly steady heat output would actually require more sophisticated and expensive heating element control than the simple on/off cycling that most ovens use. The cycling approach is a cost-effective engineering compromise — elements run at full output when on, rather than modulating to a precise partial output, because full-output heating elements are simpler and cheaper to manufacture than elements capable of precise variable output. The Thermostat Placement Problem: Oven thermostats and temperature sensors are positioned at a single point, typically near the back or side wall of the cavity. This single-point measurement doesn’t account for temperature variation throughout the rest of the cavity — areas near the door, the corners, and spaces close to heating elements can run at meaningfully different temperatures than the area immediately surrounding the sensor, even when the sensor itself accurately reads its local temperature. Why Your Specific Oven Might Be Worse Than Average Beyond the inherent cycling behavior that all ovens exhibit, specific factors can make individual ovens run significantly hotter or cooler than their displayed settings. Calibration Drift Over Time: Oven thermostats can drift out of calibration through normal use and aging, particularly in older units or those that have experienced significant temperature cycling over years of regular use. An oven that was accurately calibrated when new might run 20-30°F off from its displayed temperature after several years without anyone noticing, because the gradual nature of the drift makes it hard to detect through normal cooking experience. Door Seal Degradation: Oven door gaskets degrade over time, losing their ability to seal completely. A compromised seal allows heat to escape continuously, which can cause the oven to run its heating elements more frequently to compensate, sometimes creating different cycling patterns than a properly sealed oven, and occasionally causing the displayed temperature to diverge further from actual cavity conditions. Sensor Position and Damage: Physical damage, buildup of food residue, or even minor sensor positioning issues from manufacturing variance can all affect how accurately the temperature sensor reflects actual cavity conditions. A sensor partially shielded by buildup reads differently than a clean sensor exposed directly to cavity air. Installation and Leveling Issues: An oven that isn’t properly leveled during installation can experience uneven heat distribution that interacts with the cycling behavior in ways that create more pronounced hot and cold zones than a properly leveled unit would show. How to Find Out What Your Oven Is Actually Doing Rather than assuming your oven’s temperature display is accurate or inaccurate, directly testing it removes the guesswork and gives you information that immediately improves your cooking results. The Oven Thermometer Method: A simple, inexpensive oven thermometer — the dial or mechanical type that doesn’t require batteries or calibration of its own — placed in the center of the oven and left there during a normal preheat and cooking cycle reveals the actual temperature your oven reaches and maintains. This is the single most useful and accessible tool for understanding your specific oven’s real behavior, and it costs under $10 in most cases. Reading the Pattern, Not Just One Number: Rather than checking the thermometer once and noting a single reading, observe it periodically throughout a 20-30 minute period after the oven indicates it has preheated. This reveals the cycling pattern — how high the temperature swings above the set point, how low it drops, and how long each cycle takes. This pattern information is more useful than a single snapshot reading because it shows you the actual range your food experiences during cooking rather than one moment in that range. Multi-Position Testing: Testing temperature at multiple rack positions and locations within the cavity — center, near the door, in back corners — reveals whether your oven has significant hot or cold zones beyond the standard cycling behavior. Many home cooks discover their oven runs notably hotter in the back than the front, or that one side consistently browns faster than the other, information that directly explains baking inconsistencies they may

The Knife Skills Gap: Why Most Home Cooks Never Close It and How To Actually Fix That

Knife skills sit in an unusual position in home cooking education. Everyone knows they matter. Cooking shows, culinary schools, and food writers universally emphasize them. Yet the overwhelming majority of home cooks never meaningfully improve their knife skills after the first few years of cooking on their own, no matter how many years or decades they continue cooking. They develop a functional baseline, rough chopping, imprecise slicing, occasional injuries, and stay there permanently, improving at recipes and flavor combinations while the knife technique that underlies all of it stagnates. This isn’t because knife skills are unusually difficult to learn. It’s because of specific patterns in how home cooks encounter information about knife skills, how they practice them, and what feedback they receive during that practice. Understanding these patterns explains why cooking experience alone doesn’t improve knife skills, and what a different approach looks like for someone who actually wants to close the gap rather than just knowing it exists. Why Cooking More Doesn’t Automatically Improve Knife Technique The intuitive assumption is that knife skills improve through accumulated cooking experience, the more you cook, the better your knife work becomes. This is true up to a basic functional threshold and almost entirely false beyond it. Repetition Without Correction Reinforces Bad Habits: Deliberate practice in any skill domain requires feedback that identifies errors and allows correction. Cooking at home provides neither. When you mince garlic inefficiently for the five hundredth time, no mechanism exists to tell you that you’re doing it inefficiently. The garlic gets minced, the dish gets made, and the inefficient technique gets practiced and reinforced five hundred times rather than improved upon. Repetition without corrective feedback doesn’t build skill, it builds habit, and habits are considerably harder to change than skills that haven’t yet been learned incorrectly. The Outcome Disconnect: Home cooking provides outcome feedback, did the dish taste good? But not process feedback, was the technique that produced it efficient, safe, and correct? A cook can produce excellent food for twenty years using knife technique that a culinary student would have corrected in their first week. The food’s quality doesn’t reveal the technique’s quality, so the feedback loop that would prompt improvement never activates. Functional Adequacy as a Ceiling: Most home cooks reach a level of knife competence that feels adequate for their cooking, they can get through recipes without significant difficulty even if they’re working harder and less safely than necessary. This adequacy removes the urgency that drives deliberate improvement. The cook who takes 8 minutes to dice an onion doesn’t feel the inefficiency the way a professional who needs to dice twenty onions does. Comfort with functional adequacy creates a ceiling that experience alone doesn’t push through. Tool Familiarity Without Technique: Many home cooks develop familiarity with their specific knife and cutting board setup without developing transferable technique. They know how their particular 8-inch chef’s knife behaves, where to grip it for their specific hand size, how much pressure their cutting board requires. This familiarity feels like skill but doesn’t transfer to different knives or environments, and it often accommodates poor technique rather than correcting it. What Knife Skills Actually Consist Of Before addressing how to improve, it’s worth being specific about what knife skills actually involve, since most home cooks have a vague understanding that they need work without clarity about what specifically needs improving. Grip and Control: The most fundamental knife skill is grip, how the hand holds the knife for maximum control during different cuts. The pinch grip, where the thumb and index finger pinch the blade just above the handle with remaining fingers wrapping the handle, provides the most control for most cutting tasks. The vast majority of home cooks use a handle grip where the entire hand wraps the handle, it feels more secure but reduces blade control and increases fatigue during extended cutting. This single technique difference explains a large portion of the speed and precision gap between practiced and unpracticed cutters. The Guide Hand: The non-knife hand is half of cutting technique and receives almost none of the attention. The guide hand uses the curled-finger position, fingertips curled under so knuckles guide the flat of the blade, to control food position and protect fingers simultaneously. Without this technique, cutting speed is limited by caution about finger proximity to the blade. With it, the knuckle acts as a fence that guides consistent slice thickness while protecting fingers. Most home cooks use flat-finger or pinch-hand positioning that neither guides cuts nor protects as effectively. Board Contact and Rocking Motion: Efficient chef’s knife technique uses a rocking motion where the knife tip stays in contact with the cutting board as the handle rises and falls, pivoting rather than lifting completely with each cut. Many home cooks lift the entire knife with each stroke, requiring more effort per cut and producing less consistent results. The rocking motion conserves energy, improves consistency, and allows faster cutting once the motion becomes automatic. Food Preparation Before Cutting: Knife technique starts before the knife touches food. Creating a flat stable surface by halving round vegetables before attempting to slice them, understanding the grain direction in proteins that affects how to cut against it, and knowing when to use different knife types for different tasks, these preparation decisions affect cutting quality before grip and motion even come into play. Knife Maintenance: A dull knife requires more force per cut, increases fatigue, reduces precision, and paradoxically increases injury risk because more pressure means less control and greater consequence when the knife slips. Knife maintenance, regular honing before each use and periodic sharpening, isn’t separate from knife skill, it’s a prerequisite for practicing knife skill on an appropriate tool. Practicing cutting technique on a dull knife is like practicing piano on an out-of-tune instrument, the mechanics may improve but the feedback is wrong. The Specific Techniques That Produce The Largest Improvements Not all knife technique improvements deliver equal returns. A few specific changes produce disproportionate improvements in speed, precision,