easy recipes

How to Incorporate Leafy Greens into Your Meals: A Guide to Delicious and Nutritious Dishes

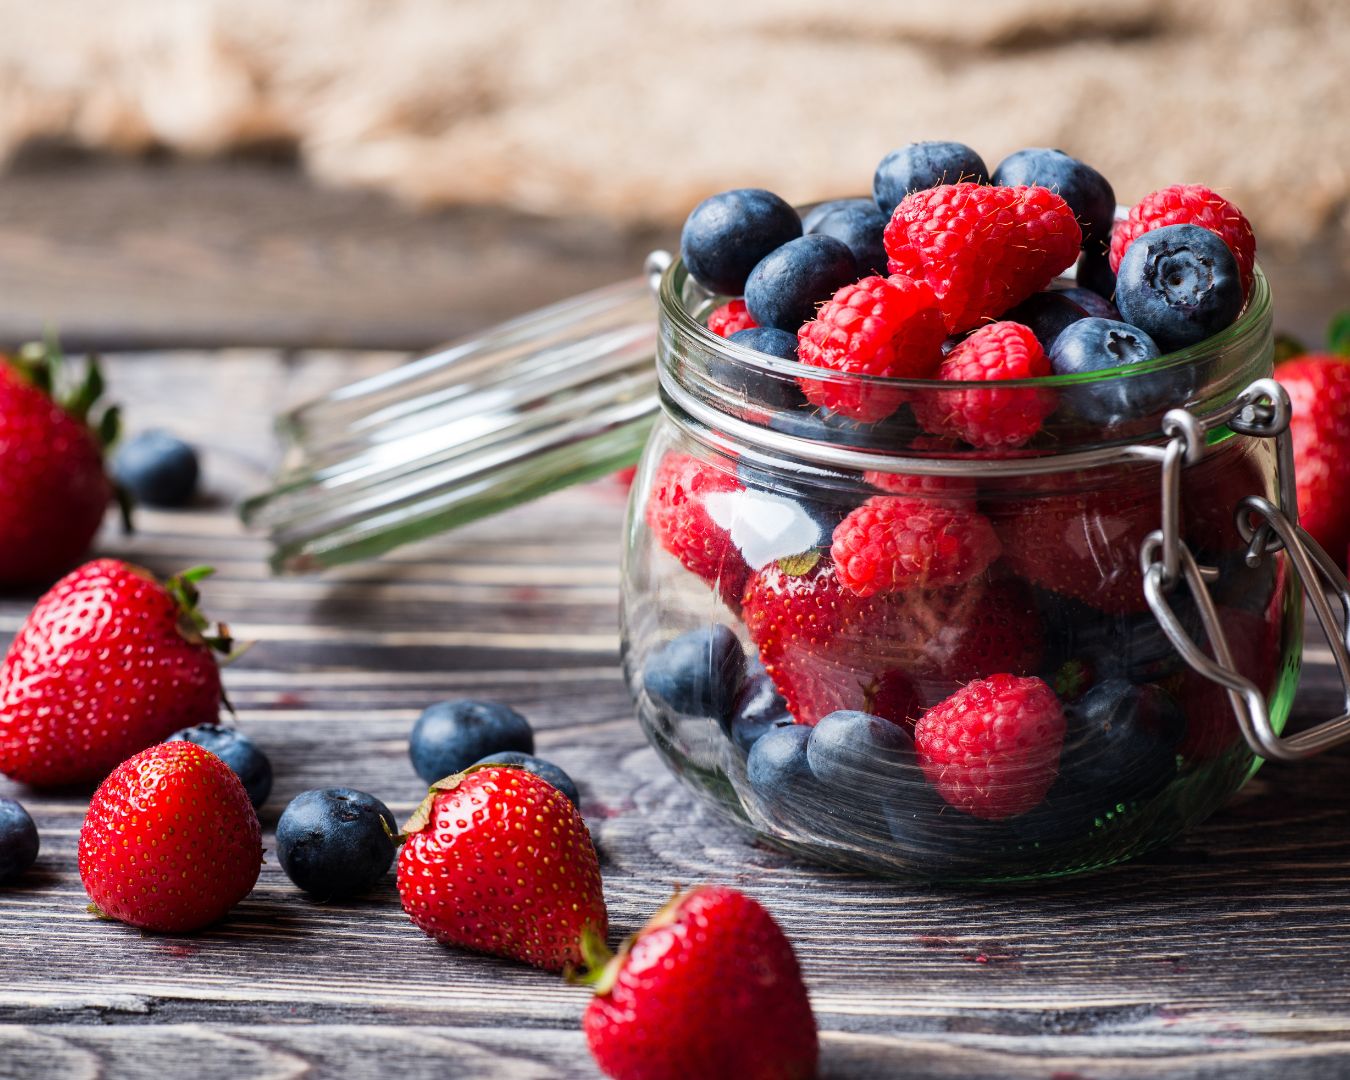
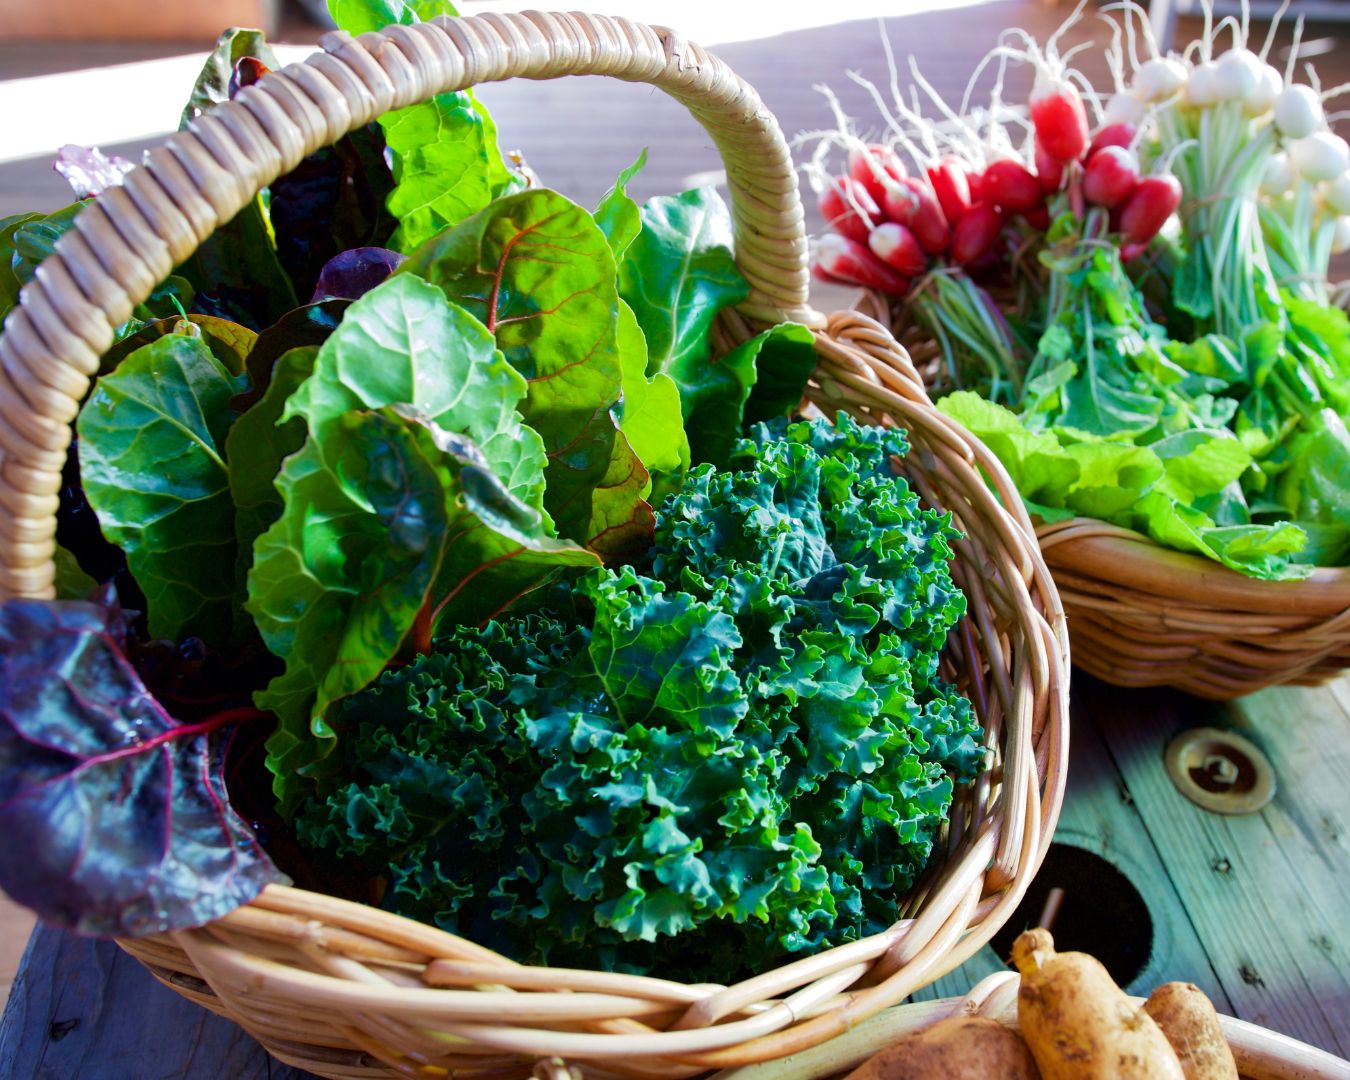
Leafy greens are packed with essential vitamins, minerals, and antioxidants, making them a valuable addition to any diet. From boosting your nutrient intake to adding vibrant flavors and textures, there are countless ways to incorporate leafy greens into your meals. In this blog post, we’ll explore creative and tasty methods to enjoy leafy greens in your daily cooking. Add Them to Smoothies Leafy greens are a fantastic addition to smoothies. They blend seamlessly with fruits and other ingredients, providing a nutrient boost without overpowering the flavor. Suggestions: Tip: Start with a small amount of greens if you’re new to adding them to smoothies. As you get used to the flavor, you can gradually increase the quantity. Toss Them into Salads Leafy greens form the base of many delicious salads. Mixing different types can add variety and texture to your salads. Suggestions: Tip: For extra flavor, add a variety of toppings like roasted nuts, fruit, or a protein source such as grilled chicken or chickpeas. Incorporate Them into Soups and Stews Leafy greens can enhance the flavor and nutritional profile of soups and stews. They add a subtle earthiness and a burst of color. Suggestions: Tip: Add greens towards the end of cooking to preserve their color and texture. They only need a few minutes to wilt and integrate into the dish. Use Them in Stir-Fries Leafy greens can be a great addition to stir-fries, adding both flavor and nutrients to your dish. Suggestions: Tip: Cook leafy greens quickly over high heat to maintain their vibrant color and crisp texture. Make Green Pesto Pesto doesn’t have to be made with just basil. You can use leafy greens to create a flavorful and versatile pesto. Suggestions: Tip: Use pesto as a sauce for pasta, a spread for sandwiches, or a topping for roasted vegetables. Incorporate into Baked Goods Leafy greens can also be added to baked goods for a hidden nutritional boost. Suggestions: Tip: For baked goods, finely chop or blend the greens to ensure they incorporate well into the batter. Create Leafy Green Wraps Leafy greens can be used as a low-carb, gluten-free alternative to traditional wraps or tortillas. Suggestions: Tip: Blanch the collard greens briefly to make them more pliable and easier to fold. Include in Breakfast Dishes Leafy greens can add a nutritious punch to your breakfast dishes, making them a great way to start the day. Suggestions: Tip: Sauté the greens briefly before adding them to scrambled eggs or an omelette to reduce their volume and enhance their flavor. Incorporating leafy greens into your meals is a delicious and nutritious way to boost your diet. From smoothies and salads to soups and baked goods, there are endless ways to enjoy these versatile vegetables. Experiment with different types of leafy greens and cooking methods to find your favorite combinations and make them a regular part of your culinary repertoire. Your taste buds and your body will thank you!

How to Properly Store and Cook Seafood: Ensuring Freshness and Flavor

Seafood is a delicious and nutritious source of protein, but it’s also highly perishable. Whether you’re working with fish, shrimp, scallops, or shellfish, it’s important to handle and store seafood correctly to maintain its freshness and ensure it’s safe to eat. In this blog post, we’ll explore the best practices for storing seafood and how to cook it to bring out its best flavor and texture. Why Proper Seafood Storage Matters Seafood spoils quickly due to its high water content and delicate proteins. Improper storage can lead to spoilage, loss of flavor, and even foodborne illnesses. Therefore, maintaining the right temperature and conditions is key to keeping your seafood fresh and safe to eat. How to Store Seafood Properly 1. Buy Fresh Seafood The journey to properly storing seafood starts at the market. When buying fresh seafood, look for the following indicators: 2. Keep Seafood Cold Seafood should be kept cold at all times to prevent bacterial growth. Once you bring seafood home, store it in the coldest part of your refrigerator at 32°F (0°C). Most home refrigerators are set between 35°F to 40°F, so to achieve optimal coldness, place seafood on a bed of ice in a shallow pan and cover it with a lid or plastic wrap. Replenish the ice as it melts. 3. Refrigerating Fresh Seafood 4. Freezing Seafood If you’re not planning to use your seafood within a day or two, freezing is the best option for long-term storage. Proper freezing techniques ensure that seafood retains its quality and flavor. Seafood can generally be frozen for up to 3-6 months. Thaw frozen seafood by transferring it to the refrigerator the night before you plan to use it, allowing it to defrost slowly. Best Practices for Cooking Seafood Once your seafood is properly stored, it’s time to cook it to perfection. Different types of seafood require different cooking methods, but the following tips will help you get the best results. 1. Thaw Seafood Properly If cooking frozen seafood, it’s important to thaw it properly to avoid affecting the texture and taste. The safest method is to thaw seafood overnight in the refrigerator. For faster thawing, place the seafood in a sealed plastic bag and submerge it in cold water, changing the water every 30 minutes until it’s thawed. 2. Avoid Overcooking Seafood cooks quickly, and overcooking can lead to dry, rubbery textures. Use the “10-minute rule” as a guide: cook fish fillets for 10 minutes per inch of thickness at a temperature of around 400°F (200°C). Shellfish and shrimp are done when they turn opaque and firm to the touch. 3. Check for Doneness 4. Use the Right Cooking Methods Here are a few popular cooking methods for different types of seafood: Storing Cooked Seafood Once cooked, seafood should be refrigerated within two hours to prevent bacteria growth. Store cooked seafood in an airtight container in the refrigerator for up to 3 days. If you have a large batch, freeze it for longer storage, but keep in mind that freezing may slightly alter the texture of cooked seafood. Handling seafood with care from purchase to plate ensures that you enjoy the freshest and safest meals possible. Proper storage, whether refrigerating or freezing, is crucial to maintaining the quality of seafood, while cooking it to the right temperature brings out the best flavor and texture. By following these best practices for storing and cooking seafood, you can savor the full experience of this delicious and healthy protein, all while keeping your kitchen safe and your meals full of flavor.

The Best Practices for Washing and Drying Fresh Berries to Prevent Mold

Fresh berries are a delicious and nutritious addition to any meal, whether sprinkled over yogurt, added to salads, or eaten straight from the carton. However, they are also highly perishable and can quickly develop mold if not handled properly. By using the right techniques for washing and drying berries, you can extend their freshness and prevent mold from ruining your precious fruit. In this blog post, we’ll walk you through the best practices for cleaning and storing berries so you can enjoy them for longer. Why Berries Are Prone to Mold Berries such as strawberries, blueberries, raspberries, and blackberries have high moisture content and delicate skin, making them susceptible to mold growth. If stored improperly, the moisture can encourage mold spores to develop, shortening the lifespan of your berries. Mold can spread rapidly, so it’s essential to handle berries with care from the moment you bring them home. Here’s how you can preserve your fresh berries and reduce the risk of mold development. Step-by-Step Guide: How to Wash and Dry Fresh Berries 1. Wash Just Before Eating or Using One of the most important rules for preventing mold on berries is to avoid washing them until you’re ready to eat or use them. Washing berries and then storing them while damp can trap moisture, creating the perfect environment for mold to grow. If you must wash berries ahead of time, make sure to dry them thoroughly before storing them. 2. Use a Vinegar and Water Solution A simple and effective way to clean berries is by using a vinegar and water solution. The vinegar helps kill mold spores and bacteria on the surface of the berries, significantly reducing the chances of mold formation. Here’s how to do it: The vinegar will not affect the taste of the berries, but if you’re concerned, you can give them a quick rinse with fresh water after the vinegar soak. 3. Rinse Carefully in Cold Water After the vinegar soak, carefully rinse your berries in cold water. This helps wash away any vinegar residue and ensures that your berries are clean and ready to eat. Be gentle when rinsing delicate berries like raspberries and blackberries to avoid crushing them. Use a colander to rinse the berries under cold running water. Avoid letting the berries sit in water for too long, as this can cause them to become soggy and more prone to mold. 4. Dry the Berries Thoroughly Once your berries are clean, it’s crucial to dry them thoroughly before storage. Excess moisture is the primary cause of mold development, so removing as much water as possible is key to prolonging their freshness. Here’s how to dry your berries properly: For especially delicate berries like raspberries and blackberries, use a soft cloth or paper towel to blot them dry instead of rubbing, as their skins are easily damaged. 5. Store Berries in a Well-Ventilated Container Once your berries are completely dry, it’s time to store them properly. To prevent mold, berries need airflow. Store them in a well-ventilated container that allows air circulation, rather than in a tightly sealed bag or container where moisture can accumulate. Here’s what works best for storing berries: 6. Check for Mold Regularly Even with proper washing, drying, and storage techniques, it’s essential to check your berries regularly for any signs of mold. Mold can spread quickly from one berry to another, so if you spot any berries with mold, remove them immediately to prevent the spread. If you notice any mushy or overripe berries, it’s a good idea to remove them as well, as they can accelerate the spoilage of the other berries in the container. Extra Tips for Extending the Life of Your Berries Berries are a delicious and nutritious snack, but they can quickly go bad if not stored properly. By following these best practices for washing, drying, and storing your berries, you can significantly extend their freshness and prevent mold from developing. Remember to wash berries just before eating, dry them thoroughly, and store them in a well-ventilated container in the fridge. With these simple steps, you’ll enjoy fresh, juicy berries for days without the worry of mold spoiling your produce.

The Role of Vinegar in Food Preservation: A Kitchen Staple for Longer-Lasting Foods

Vinegar has long been a trusted kitchen ingredient for food preservation, dating back centuries to when our ancestors used it to extend the shelf life of fruits, vegetables, and even meats. Today, vinegar remains one of the most effective and natural methods of preserving food while enhancing its flavor. This versatile liquid, which comes in various forms like apple cider, white, and wine vinegar, not only adds tangy zest to recipes but also plays a vital role in the preservation process. Let’s explore how vinegar works its magic and why it should be a staple in every kitchen. How Vinegar Preserves Food The secret to vinegar’s preserving power lies in its acidity. Vinegar typically contains 4-7% acetic acid, which lowers the pH level of foods, creating an environment that inhibits the growth of harmful bacteria, molds, and yeasts. When foods are submerged in vinegar, the acidic environment slows down the decomposition process, allowing the food to stay fresh for longer periods without refrigeration. This process is commonly used in techniques like pickling, marinades, and fermenting, where vinegar not only preserves the food but also enhances its flavor. Key Methods of Food Preservation with Vinegar 1. Pickling Pickling is perhaps the most well-known method of food preservation using vinegar. In this process, fruits, vegetables, and even some proteins are submerged in a brine made from vinegar, water, salt, and sometimes sugar or spices. The acidity of the vinegar prevents the growth of harmful microorganisms, keeping the food safe to eat for weeks or even months. Examples of popular pickled foods: In addition to preserving, pickling adds a tangy, tart flavor to foods, making them a delicious addition to salads, sandwiches, and charcuterie boards. 2. Canning with Vinegar Vinegar is also used in home canning, particularly with acidic fruits and vegetables. When foods are canned with vinegar, they are sealed in airtight containers, ensuring long-term preservation. The vinegar in the canning liquid prevents bacteria from growing, especially the bacteria responsible for botulism, which can be dangerous in improperly canned foods. Canning examples using vinegar: Using vinegar for canning is a natural, safe method to preserve seasonal produce so you can enjoy it year-round. 3. Marinades and Meat Preservation Vinegar is often used in marinades for meats and fish, not only to tenderize but also to preserve them for a short period. The acidic properties of vinegar slow down the spoiling process and help maintain the freshness of proteins before cooking. For example, meats that are marinated in vinegar-based sauces or dressings can be kept fresher longer. Vinegar also prevents bacterial growth on the surface of meats while adding flavor. 4. Fermentation Fermentation is another method of food preservation that sometimes involves vinegar. Although the fermentation process primarily relies on natural bacteria, vinegar can be added to speed up the acidification of foods. This method is commonly used in making kombucha, a fermented tea, as well as in fermented vegetables like sauerkraut and kimchi. Vinegar not only enhances the tanginess of these fermented products but also contributes to their longer shelf life and nutritional benefits, such as providing probiotics that promote gut health. Benefits of Preserving Food with Vinegar 1. All-Natural and Chemical-Free Vinegar is an all-natural preservative, free from artificial additives or chemicals. Unlike many store-bought preserved foods that use synthetic preservatives, vinegar offers a clean and safe way to keep foods fresh longer. 2. Longer Shelf Life Foods preserved in vinegar can last significantly longer than those stored using other methods. For example, properly pickled vegetables can be stored in the pantry for several months, offering a way to enjoy seasonal produce year-round. 3. Enhanced Flavor One of the added bonuses of preserving food with vinegar is the burst of flavor it imparts. Vinegar adds a tangy, sour note to foods, making them more interesting and complex. Pickled cucumbers, for instance, take on a sharp and refreshing bite, while pickled fruits develop a sweet and tangy complexity that complements both savory and sweet dishes. 4. Low-Cost and Accessible Vinegar is one of the most affordable and widely available food preservation ingredients. It doesn’t require specialized equipment or expensive ingredients, making it accessible for home cooks who want to try their hand at pickling or preserving food at home. 5. Safe and Reliable Vinegar has been trusted for centuries as a reliable method for preserving food safely. Its high acidity makes it a formidable opponent to harmful bacteria, ensuring that your preserved foods remain safe to eat for extended periods. Best Types of Vinegar for Preservation There are several types of vinegar that can be used for preserving food, each bringing a different flavor and acidity level. Here are a few of the best: Vinegar is much more than a kitchen condiment; it’s a powerful and natural preservative that extends the life of your food while adding rich, tangy flavors. From pickling to canning, marinades to fermentation, vinegar offers numerous ways to preserve food and maintain its freshness. Whether you’re looking to enjoy summer’s harvest throughout the winter or enhance your favorite recipes with bold flavors, incorporating vinegar into your food preservation practices is an easy, cost-effective, and healthful choice. So, next time you find yourself with an abundance of fresh produce, consider turning to vinegar as your go-to preservation tool. Your pantry and your taste buds will thank you!

Unique Recipes Featuring Pickled and Fermented Foods: A Tangy Twist for Your Kitchen

Pickled and fermented foods have been enjoyed for centuries, not just for their bold flavors but also for their health benefits. Rich in probiotics, these foods support gut health, aid digestion, and add a zesty touch to any dish. From tangy pickles to spicy kimchi, fermented and pickled ingredients can elevate your meals in surprising ways. Below are some unique recipes that bring out the best in pickled and fermented foods, offering creative twists on everyday dishes. Pickled Beet and Goat Cheese Salad Bright, earthy pickled beets pair beautifully with creamy goat cheese and fresh greens in this vibrant salad. Ingredients: Instructions: Kimchi Fried Rice Kimchi’s spicy, tangy flavor turns a simple bowl of fried rice into a bold, flavor-packed meal. This Korean-inspired dish is perfect for using up leftover rice and vegetables. Ingredients: Instructions: Pickled Red Onion and Avocado Tacos Give your tacos a tangy twist with quick-pickled red onions and creamy avocado. These plant-based tacos are fresh, flavorful, and perfect for a quick meal. Ingredients: Instructions: Fermented Dill Pickle Potato Salad Swap out regular pickles for fermented dill pickles in this refreshing take on a classic potato salad. The fermented pickles add a deeper, tangy flavor to the dish. Ingredients: Instructions: Miso-Marinated Grilled Eggplant Miso, a fermented soybean paste, adds an incredible umami depth to grilled vegetables. In this recipe, eggplant soaks up the savory miso marinade and develops a caramelized finish when grilled. Ingredients: Instructions: Incorporating pickled and fermented foods into your cooking adds layers of complexity and flavor while delivering health benefits. Whether you’re whipping up a simple salad or a hearty fried rice dish, these unique recipes offer creative ways to enjoy tangy, fermented ingredients. Give them a try, and discover how pickled and fermented foods can transform your meals!

Cooking and Baking with Sugar Alternatives: A Guide to Healthier Sweetening

Sugar alternatives can be a game-changer in your kitchen, offering a way to reduce refined sugar intake while still enjoying the sweet flavors you love. Whether you’re baking, cooking, or simply looking to cut back on sugar, exploring these alternatives can lead to healthier and equally delicious results. Here’s a comprehensive guide to cooking and baking with sugar alternatives! Understanding Sugar Alternatives Before diving into recipes, it’s important to understand the various types of sugar alternatives available. They fall into several categories: Choosing the Right Alternative The choice of sweetener depends on the recipe and your personal preferences. Here’s a rundown of popular alternatives and how they work in cooking and baking: Baking with Sugar Alternatives When baking, sugar alternatives can affect texture, color, and taste. Here are some tips for successful baking: Cooking with Sugar Alternatives When cooking with sugar alternatives, the method can vary depending on the sweetener: Health Considerations Recipes to Try Here are a few recipe ideas to get you started with sugar alternatives: Cooking and baking with sugar alternatives can be a fun and rewarding way to enjoy your favorite treats while making healthier choices. Experiment with different sweeteners to find the perfect balance for your recipes and preferences. With these tips and a bit of creativity, you can create delicious, sweet dishes that fit your dietary needs!

Unique Recipes Featuring Exotic Fruits: A Culinary Adventure

Exotic fruits bring a touch of the extraordinary to your kitchen, offering unique flavors, vibrant colors, and nutritional benefits that can transform ordinary dishes into extraordinary ones. From tangy to sweet, these fruits can be used in a variety of recipes to add a new dimension to your meals. If you’re ready to explore the world of exotic fruits, here are some unique recipes that highlight their delightful flavors and textures. Dragon Fruit Smoothie Bowl Dragon fruit, also known as pitaya, is a visually stunning fruit with a mildly sweet taste. Its vibrant pink or white flesh is dotted with tiny black seeds and has a texture similar to kiwi. Ingredients: Instructions: Papaya and Lime Chicken Salad Papaya adds a tropical twist to a classic chicken salad. Its sweetness complements the tangy lime dressing and crunchy vegetables. Ingredients: Instructions: Mango and Avocado Salsa Mango’s sweet and juicy flavor pairs beautifully with creamy avocado, making it a perfect complement to grilled meats or as a standalone dip. Ingredients: Instructions: Starfruit and Ginger Chutney Starfruit, also known as carambola, has a crisp texture and a tangy flavor that works well in a sweet and spicy chutney. It’s an excellent accompaniment to curries or grilled meats. Ingredients: Instructions: Passion Fruit Sorbet Passion fruit’s tangy, aromatic flavor makes it an ideal choice for a refreshing sorbet. This dessert is perfect for hot summer days or as a light finish to a meal. Ingredients: Instructions: Kumquat Marmalade Kumquats are small citrus fruits with a sweet-tart flavor. Their entire peel is edible, making them ideal for marmalade. Ingredients: Instructions: Exploring exotic fruits can add excitement and variety to your cooking. Whether you’re making a refreshing smoothie bowl, a zesty salsa, or a tangy chutney, these fruits offer unique flavors that can elevate your dishes and impress your taste buds. So don’t be afraid to step out of your culinary comfort zone and experiment with these exotic fruits. Your taste buds will thank you! Have you tried cooking with exotic fruits? Share your favorite recipes and experiences in the comments!

Fire Up the Grill for Father’s Day

It’s a time to fire up the grill, slow down and enjoy father’s day. When you’re thinking about what to feed your family off the grill, it should be a breeze, and you shouldn’t have to choose between good and good for you. Consider these tips for creating healthier, flavorful meals you can feel confident serving. Keep it simple. Skip the complicated recipes that call for a wide variety of ingredients, a multitude of steps and long cook times. Instead, seek out products and dishes that are made with ingredients you recognize and have just a handful of instructions. This will ensure less time in the kitchen and more time with loved ones. Focus on seasonal, clean ingredients. Get inspired by your local farmer’s market. One of the best parts about summer is the abundance of fresh fruits and vegetables that can add flavor and nutrients to your plate. Don’t forget the sides. To balance your spread of burgers and hot dogs, consider serving fresh asparagus or sweet corn in place of other salty, processed options. Fruits like peaches and pineapple work well on the grill, too, but remember to group produce by similar cooking times. Aim for a quick and fun cleanup. Perhaps one of the most overlooked secrets to a stress-free meal is to cut down on cleanup. A backyard barbecue can be one of the easiest messes to maintain as most of the prep is done outside on the grill. Try setting up a buffet line on your deck or patio where your family can build their burgers with customized toppings, like cheese, veggies and sauces. Then add a little bit of fun by putting on your favorite music playlist to help make a simple, everyday meal feel even more special. Burger with Grilled Pineapple and Honey Garlic Barbecue Sauce Total time: 30 minutesServings: 2 2 rings freshly cored pineapple 2 Burger patties, thawed salt, to taste freshly ground black pepper, to taste1 cup baby arugula2 sesame seed burger buns, lightly toasted1/4 cup crispy fried onions2 tablespoons honey garlic barbecue sauce Heat grill to medium heat. Grill pineapple slices 4-5 minutes per side until grill-marked and slightly caramelized. Cut slices in half and set aside. Wipe down grill to cook burger patties.  Season burger patties with salt and pepper, to taste. Grill 4-5 minutes per side until burgers are evenly browned with internal temperature of 165 F. To assemble, layer handful of baby arugula leaves on toasted bottom buns, top each with burger and two cut slices each of grilled pineapple. Sprinkle on crispy fried onions, drizzle with honey garlic barbecue sauce and place toasted sesame seed bun on top. Asian Marinated Grilled Shrimp Skewers 1 Pound large shrimp, shelled and de-veined (you can leave the tails on if you like, I took them off so we could shovel them in our mouths faster, ha!)3 Tbls unsalted butter2 Tbls soy sauce2 tsp lime juice, fresh squeezed1 tsp ginger, grated2 cloves garlic, minced1 1/2 Tbls sugar2 green onions, bruised but not chopped Place all ingredients except for the shrimp in a sauce pan over medium heat. Let come to a simmer then take off the heat and let cool on the counter. Place shrimp and marinade in a bag or bowl covered in plastic wrap and marinade for at least an hour in the fridge. Try to let marinade around 3-5 hours but not longer. Take shrimp out of marinade and place on skewers. If using wooden skewers, let these soak overnight in water. Grill over high heat until just cooked. Do not overcook or shrimp will become rubbery. This will only take about 3-4 minutes per side, depending how big the shrimp are. You can baste the shrimp with the marinade when they first hit the grill but after that, toss out the marinade. Serve and enjoy! These don’t need any condiments, they are super flavorful and moist on their own! Happy Father’s Day!

Sensational Summer Recipes to Try this Weekend

Whipping up a fresh cooked meal is one of the true joys of weekend summers, especially when grilled grub is paired with tantalizing sides and tempting desserts. Spice things up with Mexican Beef Sliders with Jalapeno Salsa and Avocado Cream coupled with a side like Roasted Potatoes then cap off a filling meal with these sweet and decadent Strawberry Cream Cheese Tartlets. If you’re looking for ways to mix meat and veggies all at once, these ideas for kebabs are a surefire way to please a variety of palates. Find more summer meal ideas at Culinary.net. Cook Up Kebabs As one of the most versatile main courses that can be grilled, kebabs offer nearly endless opportunities for customization. From protein to veggies, soaked wooden skewers can be loaded with just about any favorite flavors before hitting the grates. Consider these options for kicking your kebabs up a notch: Steak, cut into chunks Chicken, cut into chunks Bratwurst or sausage, cut into slices Ground beef, shaped into balls Lamb Shrimp Salmon, cut into chunks Bacon, cut into small pieces Sliced onions Sliced bell peppers Sliced jalapenos Sliced mushrooms Sliced cucumbers Cherry tomatoes   Summer Sliders with a Spicy Kick Summer calls for firing up the grill for a fresh-cooked meal, and sliders are an ideal way to enjoy a downsized version of a warm weather favorite. These Mexican Beef Sliders with Jalapeno Salsa and Avocado Cream are perfect for summer with their spicy kick of salsa and bright, cooling cream. Made with grass-fed beef, these mini burgers boast a lean, finely textured meat that tastes just as nature intended.   Mexican Beef Sliders with Jalapeno Salsa and Avocado Cream Prep time: 20 minutesCook time: 15 minutesServings: 4 Patties: 1 1/3 pounds lean grass-fed ground beef 1 clove garlic, crushed 1 medium onion, grated or finely chopped 1 egg, lightly beaten 3/4 cup red kidney beans, rinsed and drained 2 tablespoons tomato paste 3 teaspoons dried oregano, chopped 2 teaspoons mild smoked paprika 2 teaspoons ground cumin 1 teaspoon ground coriander 1/2 cup Parmesan cheese, grated salt, to taste pepper, to taste olive oil Jalapeno Salsa: 1 cup cucumber, thinly sliced into long ribbons 3/4 cup fresh cilantro leaves, chopped 1 red onion, finely sliced 1/2 cup pickled jalapenos, finely chopped salt, to taste pepper, to taste olive oil lime juice Avocado Cream: 1 avocado, mashed 1/2 cup sour cream 1 lime, juice and zest only salt, to taste pepper, to taste 8-12 slider buns, halved 2-3 cobs sweet corn, cooked and sliced into shards 8-12 small bamboo skewers To make patties: In bowl, combine beef, garlic, onion, egg, kidney beans, tomato paste, oregano, paprika, cumin, coriander, Parmesan cheese, salt, to taste, and pepper, to taste. Shape into 8-12 small patties. Cover and refrigerate 15 minutes. Heat grill or frying pan to medium heat. Brush patties with oil on both sides. Cook 2-3 minutes on each side, turning once to brown both sides evenly, until cooked through. To make Jalapeno Salsa: In bowl, combine cucumber, cilantro, onion and jalapenos; season with salt and pepper, to taste. Drizzle with olive oil and lime juice. To make Avocado Cream: In bowl, combine avocado, sour cream, lime juice and lime zest; season with salt and pepper, to taste. Spread Avocado Cream on bottom buns and place patties on top. Top patties with Jalapeno Salsa, corn and top buns. Press down gently and poke in skewers to secure sliders. A Sweet Summer Treat Sweet flavors and warm weather go hand-in-hand, and many summer occasions and get-together call for dessert. Take advantage of warm weather favorites like strawberries and raspberries with these Strawberry Cream Cheese Mini Tarts. Made using the best berries nature can provide, these bite-size tarts feature a graham cracker crust base and an indulgent cream cheese filling flavored with sliced strawberries, honey and lemon topped with sweet, juicy strawberries and raspberries.   Strawberry Cream Cheese Tarts Makes: 24 tarts (4 ounces each) 1/2 cup water 2 tablespoons lemon juice 3 tablespoons lemon zest 2 tablespoons gelatin 4 cups Well•Pict Strawberries, sliced, divided 1/3 cup honey 2 packages (8 ounces each) cream cheese 1/2 cup sour cream 1 cup ice cubes 2 cups graham cracker crumbs 1/2 cup melted butter 1 cup  Strawberries, rinsed, for garnish 1 cup  Raspberries, rinsed, for garnish In blender, mix water, lemon juice, lemon zest and gelatin until frothy. Add 2 cups strawberries and honey; blend until smooth. Pour into bowl and chill mix 15 minutes. In blender, mix cream cheese, sour cream and ice cubes while incorporating strawberry mixture. Mix in remaining strawberries. In blender or food processor, mix graham crackers and melted butter to crumb consistency. Lightly grease two medium muffin pans and pack graham cracker mixture at bottom of each opening. Pour strawberry mixture over graham cracker mixture and chill until set. Gently pull tarts from muffin tins and place on serving tray. Garnish with strawberries and raspberries. Roasted and Ready to Serve Summer meals centered around grilled fare call for a complementary pairing that completes the classic profile of warm weather food. Using a versatile vegetable like potatoes allows you to think up different methods of cooking for a new flavor each time. While you’re focused on the main dish being grilled, these Roasted Potatoes can bake away indoors for a simple side that requires little attention. Roasted Potatoes 1 pound potatoes, chopped into 1-inch cubes 1/2 cup onion, chopped into 1-inch cubes 1/2 cup green pepper, chopped into 1-inch cubes 1 teaspoon garlic, finely chopped 1 teaspoon vegetable oil 1/4 teaspoon salt 1/4 teaspoon pepper 1 tablespoon parsley, finely chopped 1/2 teaspoon paprika Preheat oven to 350° F. In medium bowl, mix potatoes, onions, green peppers and garlic. Add vegetable oil, salt, pepper, parsley and paprika. Mix well. Cover bowl and refrigerate 15 minutes. Spread potato mixture evenly on cookie sheet. Bake about 35 minutes. Photos courtesy of Getty Images (Kebabs and Roasted Potatoes)

Quarantine Cooking-Insanely Good-for-You Treats

While eating healthy and enjoying sweets seldom go hand-in-hand, choosing the right combination of nutritious ingredients can allow for guilt-free indulgences that shirks conventional dieting wisdom. In fact, some eating plans take it a step further by actually encouraging eating big in the evening when you’re naturally hungriest to help achieve your weight loss goals. Fruit Tarts Recipe courtesy of “Always Eat After 7 PM”Prep time: 40 minutesCook time: 1 hour, 20 minutesServings: 20 Custard: 8  egg yolks 1 cup raw honey 1 tablespoon coconut flour 3  cans (13 2/3 ounces each) full-fat coconut milk 1 teaspoon vanilla extract 1/4 teaspoon lemon zest Sugar Cookie Crust: 1/2 cup coconut oil, plus additional for greasing 1/2 cup palm shortening 1 cup coconut palm sugar 1 teaspoon baking soda 1 teaspoon cream of tartar 1/4 teaspoon salt 3  egg yolks 1⁄2  teaspoon vanilla extract 1  cup blanched almond flour 1⁄4   cup coconut flour 2 tablespoons arrowroot starch Toppings: 2 kiwis, peeled and sliced 1 mango, peeled, pitted and sliced into 1/2-inch strips 1/2 cup raspberries 1/2 cup blackberries 1/2 cup blueberries 1/2 cup red grapes 1 cup strawberries, thinly sliced fresh mint leaves, for garnish To make custard: In saucepan, whisk egg yolks and honey until smooth. Mix in coconut flour. In medium saucepan over medium heat, combine coconut milk, vanilla extract and lemon zest; bring to boil then remove from heat. Pour hot milk mixture into egg yolk mixture, stirring while pouring. Over low heat, simmer 5 minutes, stirring constantly. Remove from heat and let cool, continuing to stir occasionally. Once cooled to room temperature, pour into individual custard cups. Chill in refrigerator 30 minutes, or until serving. To make crust: Heat oven to 350° F. Line bottom of pie pan with parchment paper and grease with coconut oil. In large mixing bowl using electric mixer on high, beat coconut oil and palm shortening 30 seconds. Add coconut palm sugar, baking soda, cream of tartar and salt; beat until combined, scraping sides of bowl occasionally. Beat in egg yolks and vanilla until combined. Beat in almond flour, coconut flour and starch. Chill dough in refrigerator 15 minutes. Press chilled cookie dough into bottom of pie pan and 2 inches up sides. Bake 12 minutes, or until crust is golden and browned on top and edges. Remove from oven and cool 10 minutes. Place cooled crust in refrigerator 30 minutes or overnight before assembling. To assemble fruit tarts: Spread custard over chilled crust. Decorate top in circular pattern with kiwis, mango strips, raspberries, blackberries, blueberries, grapes and strawberries. Before serving, chill at least 30 minutes or freeze 1 hour to help keep toppings in place. Remove from freezer and set out at room temperature 20 minutes before slicing. Garnish with mint leaves. Nutritional information per serving: 192 calories; 14 g fat; 16 g carbohydrates; 61 mg sodium; 2 g fiber; 1 g protein; 9 g sugar. Cherry Garcia Ice Cream Recipe courtesy of “Always Eat After 7 PM”Prep time: 10 minutesServings: 4 1/4 cup fresh Bing cherries, pitted and halved 1/4 cup stevia-sweetened dark chocolate bar, chopped 3 overripe frozen bananas, peeled and cut into 1-inch pieces 1/4 cup unsweetened coconut milk 1 pinch sea salt Chill cherries and dark chocolate. In food processor, pulse frozen bananas, milk and salt until smooth, creamy consistency of soft serve is achieved. Stir in cherries and chocolate. Serve immediately or place in freezer-safe container and freeze until serving. Nutritional information per serving: 165 calories; 7 g fat; 27 g carbohydrates; 134 mg sodium; 6 g fiber; 2 protein; 12 g sugar. No Bake Salted Caramel Bars Recipe courtesy of “Always Eat After 7 PM”Prep time: 30 minutesCook time: 40 minutesServings: 30 Cookie Layer: 2 1/2 cups raw pecans 8 pitted dates, soaked in hot water 10 minutes then drained 2 tablespoons blanched almond flour 1 teaspoon coconut flour 1/4 teaspoon sea salt 1/4 cup granular zero-calorie, natural sweetener 3 tablespoons coconut oil, melted Caramel Layer: 1/2 cup coconut palm sugar 1/2 cup granular zero-calorie, natural sweetener 2 tablespoons full-fat coconut milk 2 tablespoons coconut oil 1 pinch sea salt 1 tablespoon vanilla extract 1/2 teaspoon baking soda Chocolate Layer: 2 cups stevia-sweetened chocolate chips 2 tablespoons coconut oil coconut oil 1/3 cup dry roasted macadamia nuts, chopped coarse sea salt To make cookie layer: Place large skillet over medium heat. Spread pecans over skillet and toast, stirring often, 8-10 minutes until golden. Remove from heat. Transfer toasted pecans to food processor and pulse until fine. Add dates, almond flour, coconut flour, sea salt, sweetener and coconut oil; pulse until dough forms. To make caramel layer: In skillet over medium heat, combine coconut palm sugar, sweetener, coconut milk, coconut oil, sea salt and vanilla extract; bring to boil. Once boiling, decrease heat to low and cook 5 minutes, stirring often. Remove skillet from heat; whisk in baking soda. Return pan to low heat and cook 2 minutes, stirring often. Remove caramel from heat and let cool and thicken 5 minutes. To make chocolate layer: In double boiler, melt chocolate chips and coconut oil. Stir until mixture is smooth then remove from heat. To assemble salted caramel bars: Line bottom and sides of 9-by-9-inch baking pan with parchment paper, leaving some hanging over sides. Lightly rub parchment paper with coconut oil. Press cookie dough into bottom of pan to create even layer. Place in freezer 5 minutes to harden. Pour caramel over cookie layer and spread to coat evenly. Place in freezer 5 minutes. Pour chocolate over caramel and spread to cover evenly. Sprinkle with macadamia nuts and coarse salt. Place in freezer 10 minutes until chocolate sets. Use overhanging parchment paper to ease set mixture out of pan. Transfer to cutting board and slice into bite-size bars. Nutritional information per serving: 180 calories; 15 g fat; 15 g carbohydrates; 56 mg sodium; 4 g fiber; 2 g protein; 4 g sugar.