Cooking

How to Grill Like a Pro: Tips for Success on the BBQ

Grilling is more than just a cooking method – it’s an art form that brings friends and family together, creating unforgettable memories over delicious, smoky flavors. Whether you’re a seasoned griller or just starting out, these tips will help you master the BBQ and impress everyone at your next cookout. Start with a Clean Grill A clean grill is essential for great grilling. Before you start, make sure to clean the grates with a wire brush to remove any residue from previous cooking sessions. This prevents sticking and ensures even cooking. Preheat Your Grill Preheating your grill is crucial. It helps to create those beautiful sear marks and ensures that your food cooks evenly. Aim to preheat for at least 15 minutes before adding any food. Oil the Grates To prevent sticking, oil your grill grates before cooking. Use a paper towel soaked in oil and, using tongs, rub it over the grates. This creates a non-stick surface, making it easier to flip your food. Use the Right Tools Invest in good quality grilling tools such as long-handled tongs, spatulas, and a meat thermometer. These tools not only make grilling easier but also help you cook food to the perfect temperature safely. Control the Heat Different foods require different grilling techniques. Use direct heat for quick-cooking items like steaks, burgers, and vegetables, and indirect heat for slower-cooking items like ribs, roasts, and whole chickens. This method allows you to cook food evenly without burning the exterior. Don’t Overcrowd the Grill Give your food enough space to cook properly. Overcrowding the grill can lead to uneven cooking and can also cause flare-ups. Cook in batches if necessary to ensure everything is perfectly grilled. Use a Meat Thermometer To achieve the perfect doneness, use a meat thermometer. It takes the guesswork out of grilling and ensures your meat is cooked to the right temperature. Here’s a quick guide: Let It Rest Allow your meat to rest for a few minutes after grilling. This lets the juices redistribute, resulting in a juicier and more flavorful bite. Tent your meat with aluminum foil and let it rest for 5-10 minutes. Experiment with Marinades and Rubs Marinades and rubs are great ways to add flavor to your grilled foods. Marinate your meat for at least 30 minutes before grilling, or use a dry rub to create a flavorful crust. Experiment with different combinations of herbs, spices, and liquids to find your favorite flavors. Practice Patience Grilling is a skill that improves with practice. Don’t be afraid to experiment with different techniques and recipes. Over time, you’ll learn the nuances of your grill and develop a knack for knowing when your food is perfectly cooked. Bonus Tips for BBQ Success Grilling like a pro is all about preparation, technique, and a willingness to experiment. With these tips in your grilling arsenal, you’re well on your way to BBQ success. So fire up the grill, invite some friends over, and enjoy the delicious rewards of your efforts.

Baking Hack: Mess-Free Batters with Ziploc Bags

Baking is a beloved pastime for many, but it often comes with its fair share of messes—especially when it comes to dispensing batter. Traditional pouring methods can lead to drips, spills, and uneven distribution, leaving behind a kitchen in need of serious cleanup. But fear not, there’s a simple solution that can revolutionize the way you bake: Ziploc bags. By filling a Ziploc bag with pancake or cake batter and snipping off a corner, you can effortlessly squeeze out perfect portions with minimal mess. Explore how this clever baking hack can streamline your baking process and leave you with delicious treats and a clean kitchen. The Ziploc Bag Method: The Ziploc bag method is as simple as it sounds. Start by preparing your batter according to your favorite recipe. Once your batter is ready, spoon it into a sturdy Ziploc bag, squeezing out any excess air before sealing it shut. Next, carefully snip off one of the bottom corners of the bag with scissors, creating a small opening for the batter to flow through. For pancakes, squeeze the batter directly onto a hot griddle in circular motions, creating perfectly round pancakes every time. For muffins or cupcakes, squeeze the batter directly into muffin tins, filling each cup to the desired level. The controlled flow of batter from the Ziploc bag ensures even distribution and precise portions, resulting in beautifully uniform baked goods. Benefits of Using Ziploc Bags: The Ziploc bag method offers several benefits beyond just mess-free baking. Firstly, it eliminates the need for additional utensils like measuring cups or ladles, reducing the number of dishes to clean up afterward. Secondly, it allows for greater precision and control, especially when filling intricate molds or shaping delicate pastries. Additionally, Ziploc bags are easy to store and transport, making them ideal for on-the-go baking or outdoor cooking adventures. Tips for Success: While the Ziploc bag method is simple, there are a few tips to keep in mind to ensure success. Use sturdy freezer-grade Ziploc bags to prevent leaks or tears during squeezing. When snipping the corner of the bag, start with a small opening and gradually increase the size as needed to control the flow of batter. And finally, practice makes perfect—experiment with different techniques and adjustments until you find what works best for you. Say goodbye to messy pouring methods and hello to effortless baking with the Ziploc bag method. Whether you’re whipping up a batch of pancakes for breakfast or baking a batch of muffins for a special occasion, this clever baking hack will streamline your process and leave you with delicious treats and a clean kitchen. So next time you reach for the mixing bowl, don’t forget the Ziploc bags—they just might become your new favorite kitchen tool.

Keep Ginger Fresh Longer by Storing It in the Freezer

Ginger is a versatile ingredient that adds a delightful zing to both savory and sweet dishes. However, it can spoil quickly if not stored properly. To keep ginger fresh for longer and make it more convenient to use, try storing it in the freezer. Here’s how to do it, along with the benefits of this simple hack. Why Store Ginger in the Freezer? 1. Extended Shelf Life: Fresh ginger can start to wilt and dry out within a week when stored at room temperature or in the refrigerator. Freezing ginger extends its shelf life for several months, ensuring you always have fresh ginger on hand. 2. Easy to Grate: Frozen ginger is much easier to grate than fresh. The fibrous texture of ginger becomes more manageable when it’s frozen, allowing you to grate it finely without the strings getting in the way. 3. Convenient Portions: Freezing ginger makes it easy to portion out exactly what you need for a recipe. You can freeze it in various forms to suit your cooking style, from whole pieces to pre-grated portions. How to Freeze Ginger 1. Freeze Whole Ginger: Simply place the whole, unpeeled ginger root in a freezer-safe bag or container. When you need some ginger, take it out of the freezer and grate the amount you need directly from the frozen piece. Return the remaining ginger to the freezer for future use. 2. Freeze Sliced or Chopped Ginger: Peel and slice or chop the ginger into desired sizes. Spread the pieces out on a baking sheet lined with parchment paper and freeze until solid. Transfer the frozen ginger pieces to a freezer-safe bag or container. This method allows you to grab pre-portioned pieces of ginger as needed. 3. Freeze Grated Ginger: Grate the ginger and place it in small mounds or portions on a baking sheet lined with parchment paper. Freeze until solid, then transfer the portions to a freezer-safe bag or container. This is perfect for adding a quick burst of flavor to your dishes without any prep work. 4. Use Ice Cube Trays: Grate or finely chop the ginger and place it into the compartments of an ice cube tray. Add a small amount of water to each compartment to cover the ginger. Freeze until solid, then pop the ginger cubes out and store them in a freezer-safe bag or container. This method is ideal for adding ginger to teas, soups, and stews. Tips for Using Frozen Ginger By freezing ginger, you ensure it stays fresh and flavorful, ready to enhance your favorite recipes. This simple storage hack not only reduces waste but also makes it easier to incorporate this healthy and aromatic root into your cooking. Give it a try and enjoy the convenience and extended freshness of frozen ginger!

Cooking for Heart Health: Delicious Recipes and Tips for a Healthy Heart

Cardiovascular disease remains one of the leading causes of death globally, making it crucial to adopt a heart-healthy diet. A diet rich in specific nutrients can significantly reduce the risk of heart disease. Here, we’ll explore the importance of a heart-healthy diet, share recipes that promote heart health, and highlight ingredients known to support cardiovascular well-being. The Importance of a Heart-Healthy Diet A heart-healthy diet is vital for preventing cardiovascular disease. It helps lower cholesterol levels, reduce blood pressure, maintain a healthy weight, and prevent the buildup of plaque in the arteries. Key components of such a diet include: Heart-Healthy Recipes 1. Salmon and Spinach Salad Ingredients: Instructions: 2. Walnut and Herb-Crusted Chicken Ingredients: Instructions: 3. Mediterranean Quinoa Salad Ingredients: Instructions: Tips for Reducing Sodium and Saturated Fat Adopting a heart-healthy diet is a powerful step in preventing cardiovascular disease. By incorporating nutrient-rich foods like leafy greens, fatty fish, nuts, and olive oil, you can promote heart health and enjoy delicious, satisfying meals. Use these recipes and tips to create a healthier lifestyle for you and your family, ensuring a heart-friendly diet that doesn’t compromise on flavor.

Ingredient Spotlights: Exploring the Health Benefits of Common Cooking Ingredients

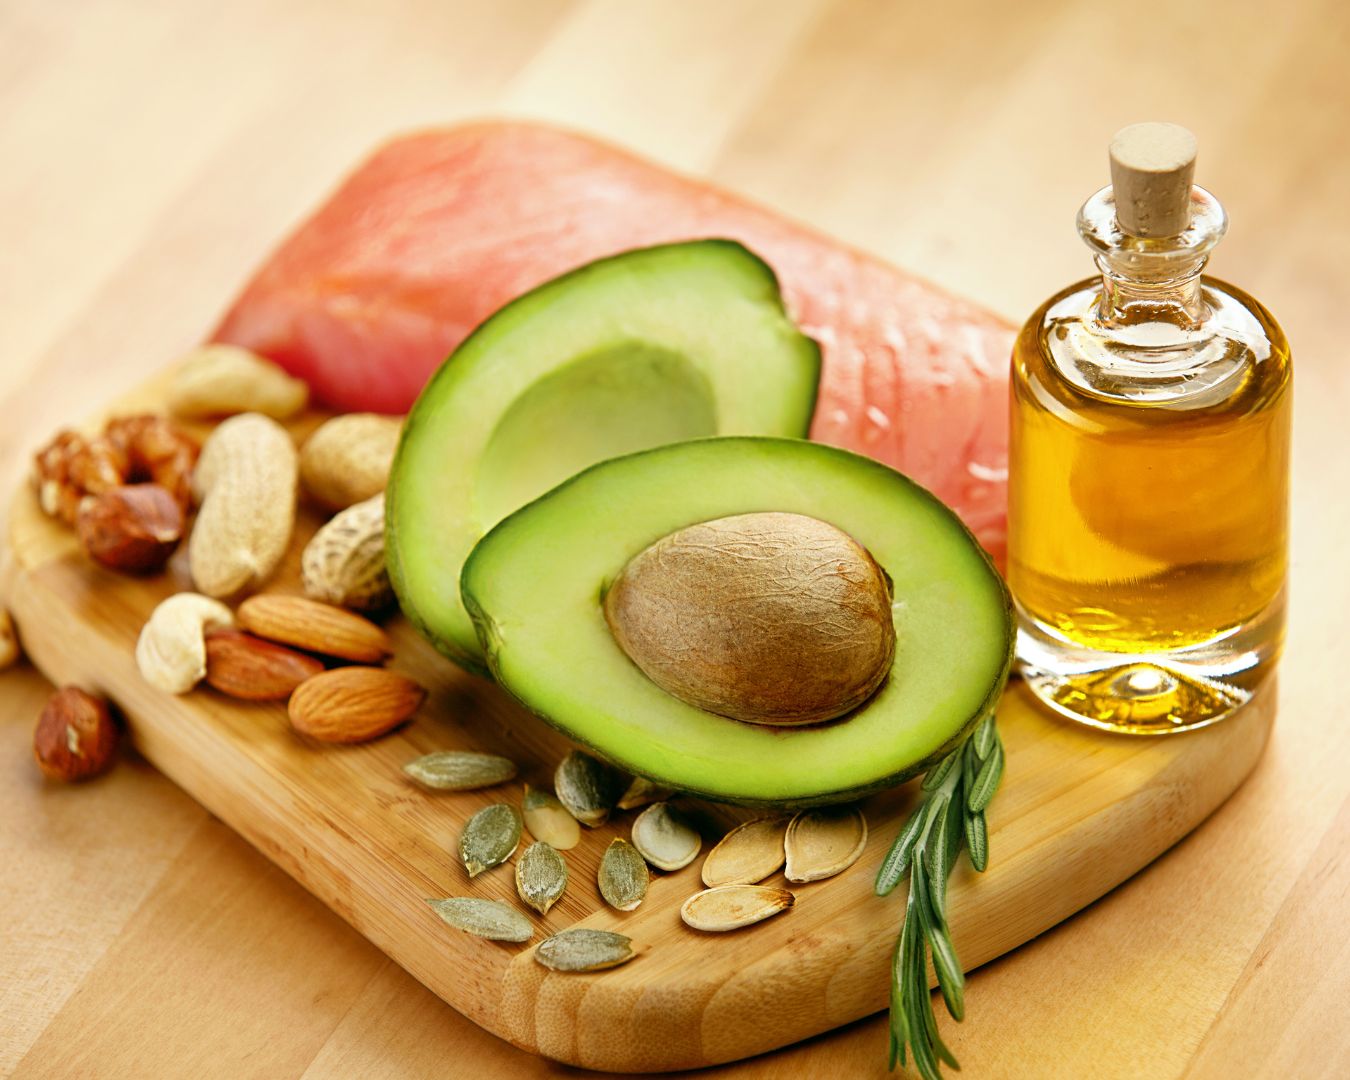
In the world of cooking, ingredients are more than just components of a recipe—they are nutritional powerhouses that fuel our bodies and support our overall health and well-being. Shine a spotlight on a variety of common cooking ingredients, exploring their health benefits and highlighting the important role they play in creating a balanced and nutritious diet. Leafy Greens Leafy greens such as spinach, kale, and Swiss chard are packed with vitamins, minerals, and antioxidants that support immune function, eye health, and bone strength. Incorporate leafy greens into your meals for an extra dose of fiber, which aids in digestion and promotes heart health. Lean Proteins Lean proteins like chicken breast, turkey, tofu, and fish are essential for building and repairing tissues, maintaining muscle mass, and supporting a healthy metabolism. Opt for lean proteins over fatty cuts of meat to reduce saturated fat intake and promote weight management. Whole Grains Whole grains such as brown rice, quinoa, oats, and barley are rich in fiber, vitamins, and minerals that help regulate blood sugar levels, promote digestive health, and reduce the risk of chronic diseases. Swap refined grains for whole grains in your meals to increase nutrient intake and promote long-term health. Colorful Vegetables Colorful vegetables like bell peppers, carrots, tomatoes, and sweet potatoes are loaded with antioxidants and phytonutrients that protect against inflammation, oxidative stress, and chronic diseases. Aim to fill half your plate with colorful vegetables to maximize nutrient intake and support overall health and vitality. Healthy Fats Healthy fats found in avocados, nuts, seeds, and olive oil provide essential fatty acids that support brain health, reduce inflammation, and promote heart health. Incorporate healthy fats into your meals in moderation to enhance flavor and increase satiety without compromising health. Fresh Herbs and Spices Fresh herbs and spices such as basil, cilantro, turmeric, and cinnamon not only add flavor and aroma to dishes but also boast a wide range of health benefits. Experiment with different herbs and spices in your cooking to enhance the nutritional value of your meals and support overall well-being. By incorporating a variety of nutrient-rich ingredients into your cooking, you can create delicious and wholesome meals that nourish your body and support your health goals. Whether you’re enjoying a colorful salad packed with leafy greens and vegetables or savoring a hearty bowl of whole grain pasta topped with lean protein and fresh herbs, each ingredient plays a vital role in promoting optimal health and vitality. So, embrace the diversity of ingredients available to you and let your meals be a celebration of flavor, nutrition, and well-being.

Prevent Slipping While Cooking: The Simple Trick of Using a Damp Paper Towel Under Your Cutting Board

Cooking in the kitchen involves a variety of tasks, from chopping vegetables to slicing meats. However, one common challenge that many home chefs face is keeping their cutting board stable and secure while working. A slipping cutting board can not only be frustrating but also dangerous, potentially leading to accidents and injuries. Fortunately, there’s a simple and effective solution to this problem: using a damp paper towel under your cutting board. Explore why this trick works and how you can implement it in your kitchen. Why Does It Work? The primary reason why placing a damp paper towel under a cutting board helps prevent slipping is friction. When you dampen a paper towel and place it between the cutting board and the countertop, it creates a slight adhesive effect. This helps to grip the surface underneath the cutting board, reducing the likelihood of it sliding around while you’re chopping, slicing, or dicing ingredients. Additionally, the moisture from the paper towel creates a small barrier between the cutting board and the countertop, further enhancing stability. How to Use a Damp Paper Towel: Using a damp paper towel to prevent slipping is a straightforward process. Here’s a step-by-step guide: Additional Tips: Cooking should be an enjoyable and safe experience, and preventing a cutting board from slipping is an important aspect of kitchen safety. By using a damp paper towel under your cutting board, you can create a more stable and secure working surface, reducing the risk of accidents and injuries. This simple yet effective trick is easy to implement and can make a significant difference in your cooking routine. Try it out during your next meal preparation and experience the benefits firsthand!

Keep Your Salad Greens Fresh Longer: The Paper Towel Trick

Nothing is more disappointing than opening your refrigerator to find your salad greens wilted and soggy. Fresh, crisp greens are essential for a delicious and healthy salad, but they can be tricky to store. Fortunately, there’s a simple and effective method to extend the life of your leafy greens: storing them with a paper towel. This easy trick absorbs excess moisture and keeps your greens fresh and crunchy for days longer. Here’s how to do it. Why Do Salad Greens Wilt? Before diving into the method, let’s understand why salad greens wilt. The main culprit is moisture. While greens need some humidity to stay fresh, excess moisture can cause them to become soggy and encourage the growth of mold and bacteria. Proper storage is key to balancing the right amount of moisture and air circulation. The Paper Towel Method Here’s a step-by-step guide to keeping your salad greens fresh using paper towels: 1. Wash Your Greens: 2. Dry Completely: 3. Layer with Paper Towels: 4. Seal and Store: 5. Replace Paper Towels as Needed: Additional Tips for Fresh Greens Benefits of the Paper Towel Method Keeping your salad greens fresh doesn’t have to be a challenge. With the simple addition of a paper towel, you can significantly extend their lifespan and enjoy crisp, delicious salads every time. This easy and effective method is a game-changer for anyone looking to maintain the quality and freshness of their greens. So next time you stock up on salad ingredients, remember the paper towel trick and savor the benefits of longer-lasting, perfectly fresh greens.

How to Make the Best Homemade Pizza: Tips and Techniques

Making homemade pizza can be a rewarding culinary experience that brings the flavors and techniques of a pizzeria right into your own kitchen. Whether you’re a pizza-making novice or a seasoned home chef, these tips and techniques will help you create the best homemade pizza, from the perfect crust to the most delectable toppings. Start with the Perfect Dough Ingredients: Instructions: Master the Art of Stretching Dough Stretching pizza dough by hand gives it a more rustic, artisan feel compared to using a rolling pin. Here’s how to do it: Choose the Right Sauce Classic Tomato Sauce: Select High-Quality Toppings Cheese: Meats and Veggies: Bake to Perfection Preheat Your Oven: Use a Pizza Stone or Steel: Baking: Finish with Fresh Ingredients Fresh Herbs: Drizzle of Olive Oil: Making the best homemade pizza involves mastering a few key techniques, from preparing the dough to selecting the right toppings and baking to perfection. With practice and these tips, you’ll be able to create delicious, restaurant-quality pizza in the comfort of your own kitchen. Happy pizza making!

Revive Stale Cookies: A Bread Trick for Freshness

Stale cookies are a disappointing sight, but before you toss them out, there’s a simple trick to breathe new life into them. By harnessing the power of bread, you can rescue those dry treats and enjoy them as if they were freshly baked. Delve into this ingenious method and learn how to revive stale cookies effortlessly. Assessing the Situation: When you notice your cookies starting to lose their freshness and become stale, it’s time to take action. Stale cookies can become dry and unappetizing, but there’s no need to despair just yet. The Bread Solution: Grab a slice of bread – any type will do – and place it in the container with your stale cookies. Seal the container tightly and leave it overnight. The magic lies in the bread’s ability to release moisture, which the cookies will absorb, rejuvenating them in the process. The Overnight Miracle: As the bread works its magic overnight, it imparts moisture to the cookies, effectively softening them and restoring their freshness. In the morning, you’ll be delighted to find that your once-stale cookies have been transformed into soft, chewy delights. Enjoying the Results: Once the cookies have been revitalized, they’re ready to be enjoyed once again. Whether you’re indulging in a midnight snack or sharing them with friends and family, you can savor the deliciousness of freshly revived cookies. Tips and Variations: With this simple bread trick, you can breathe new life into stale cookies and save them from ending up in the trash. Next time you find yourself with a batch of less-than-fresh cookies, remember this handy tip and enjoy the satisfaction of turning them into delicious treats once again.

Unconventional Kitchen Hacks: Using Dental Floss to Slice Soft Foods with Ease

In the world of culinary creativity, sometimes the simplest solutions are the most ingenious. When faced with the challenge of cutting soft, sticky, or delicate foods like cheese or cake, many home chefs turn to an unexpected tool in their arsenal: dental floss. Yes, you read that right – dental floss isn’t just for flossing your teeth anymore! Explore the surprising versatility of dental floss as a kitchen hack and how it can make slicing soft foods a breeze. Cheese Cutting Made Easy Soft cheeses like brie or goat cheese can be notoriously tricky to slice without crumbling or sticking to the knife. Enter dental floss – the perfect solution for achieving clean, uniform slices of soft cheese with minimal mess. Simply slide a length of unflavored dental floss underneath the cheese, cross the ends over the top, and pull them in opposite directions to slice cleanly through the cheese. Voila! You’ll have perfectly sliced cheese for your charcuterie board or cheese platter in no time. Neat and Tidy Cake Cutting When it comes to cutting cakes, especially delicate or frosted cakes, using a knife can often result in messy, uneven slices. Dental floss offers a simple and effective alternative for achieving clean, precise cuts without disturbing the cake’s delicate crumb or frosting. Just wrap a length of dental floss around the cake where you want to make the cut, then gently pull the ends in opposite directions to slice cleanly through the cake. You’ll be amazed at how effortlessly you can create professional-looking slices of cake with this clever technique. Perfectly Portioned Cinnamon Rolls Cinnamon rolls are a beloved treat, but cutting them into evenly sized portions can be a challenge. Dental floss comes to the rescue once again, offering a foolproof method for slicing through soft, gooey cinnamon rolls without squishing or distorting them. Simply slide a length of dental floss underneath the rolled dough, cross the ends over the top, and pull them in opposite directions to create clean, uniform slices. Your cinnamon rolls will look as though they came straight from the bakery, ready to be enjoyed with a cup of coffee or tea. Delicate Herb Bundles When it comes to chopping fresh herbs like parsley, cilantro, or chives, using a knife can often bruise or crush the delicate leaves, resulting in loss of flavor and texture. Dental floss offers a gentler alternative for bundling and slicing herbs, allowing you to preserve their freshness and integrity. Simply gather a bunch of herbs together and tie them tightly with a length of dental floss, then use scissors to snip the herbs directly above the floss for perfectly chopped herbs with minimal bruising. Who knew that dental floss could be such a handy tool in the kitchen? From slicing soft cheeses and cakes to portioning cinnamon rolls and chopping fresh herbs, dental floss offers a simple and effective solution for a variety of culinary tasks. So the next time you find yourself struggling to slice through a sticky or delicate food item, reach for the dental floss and let its surprising versatility work its magic in your kitchen. Your dishes will thank you for it!