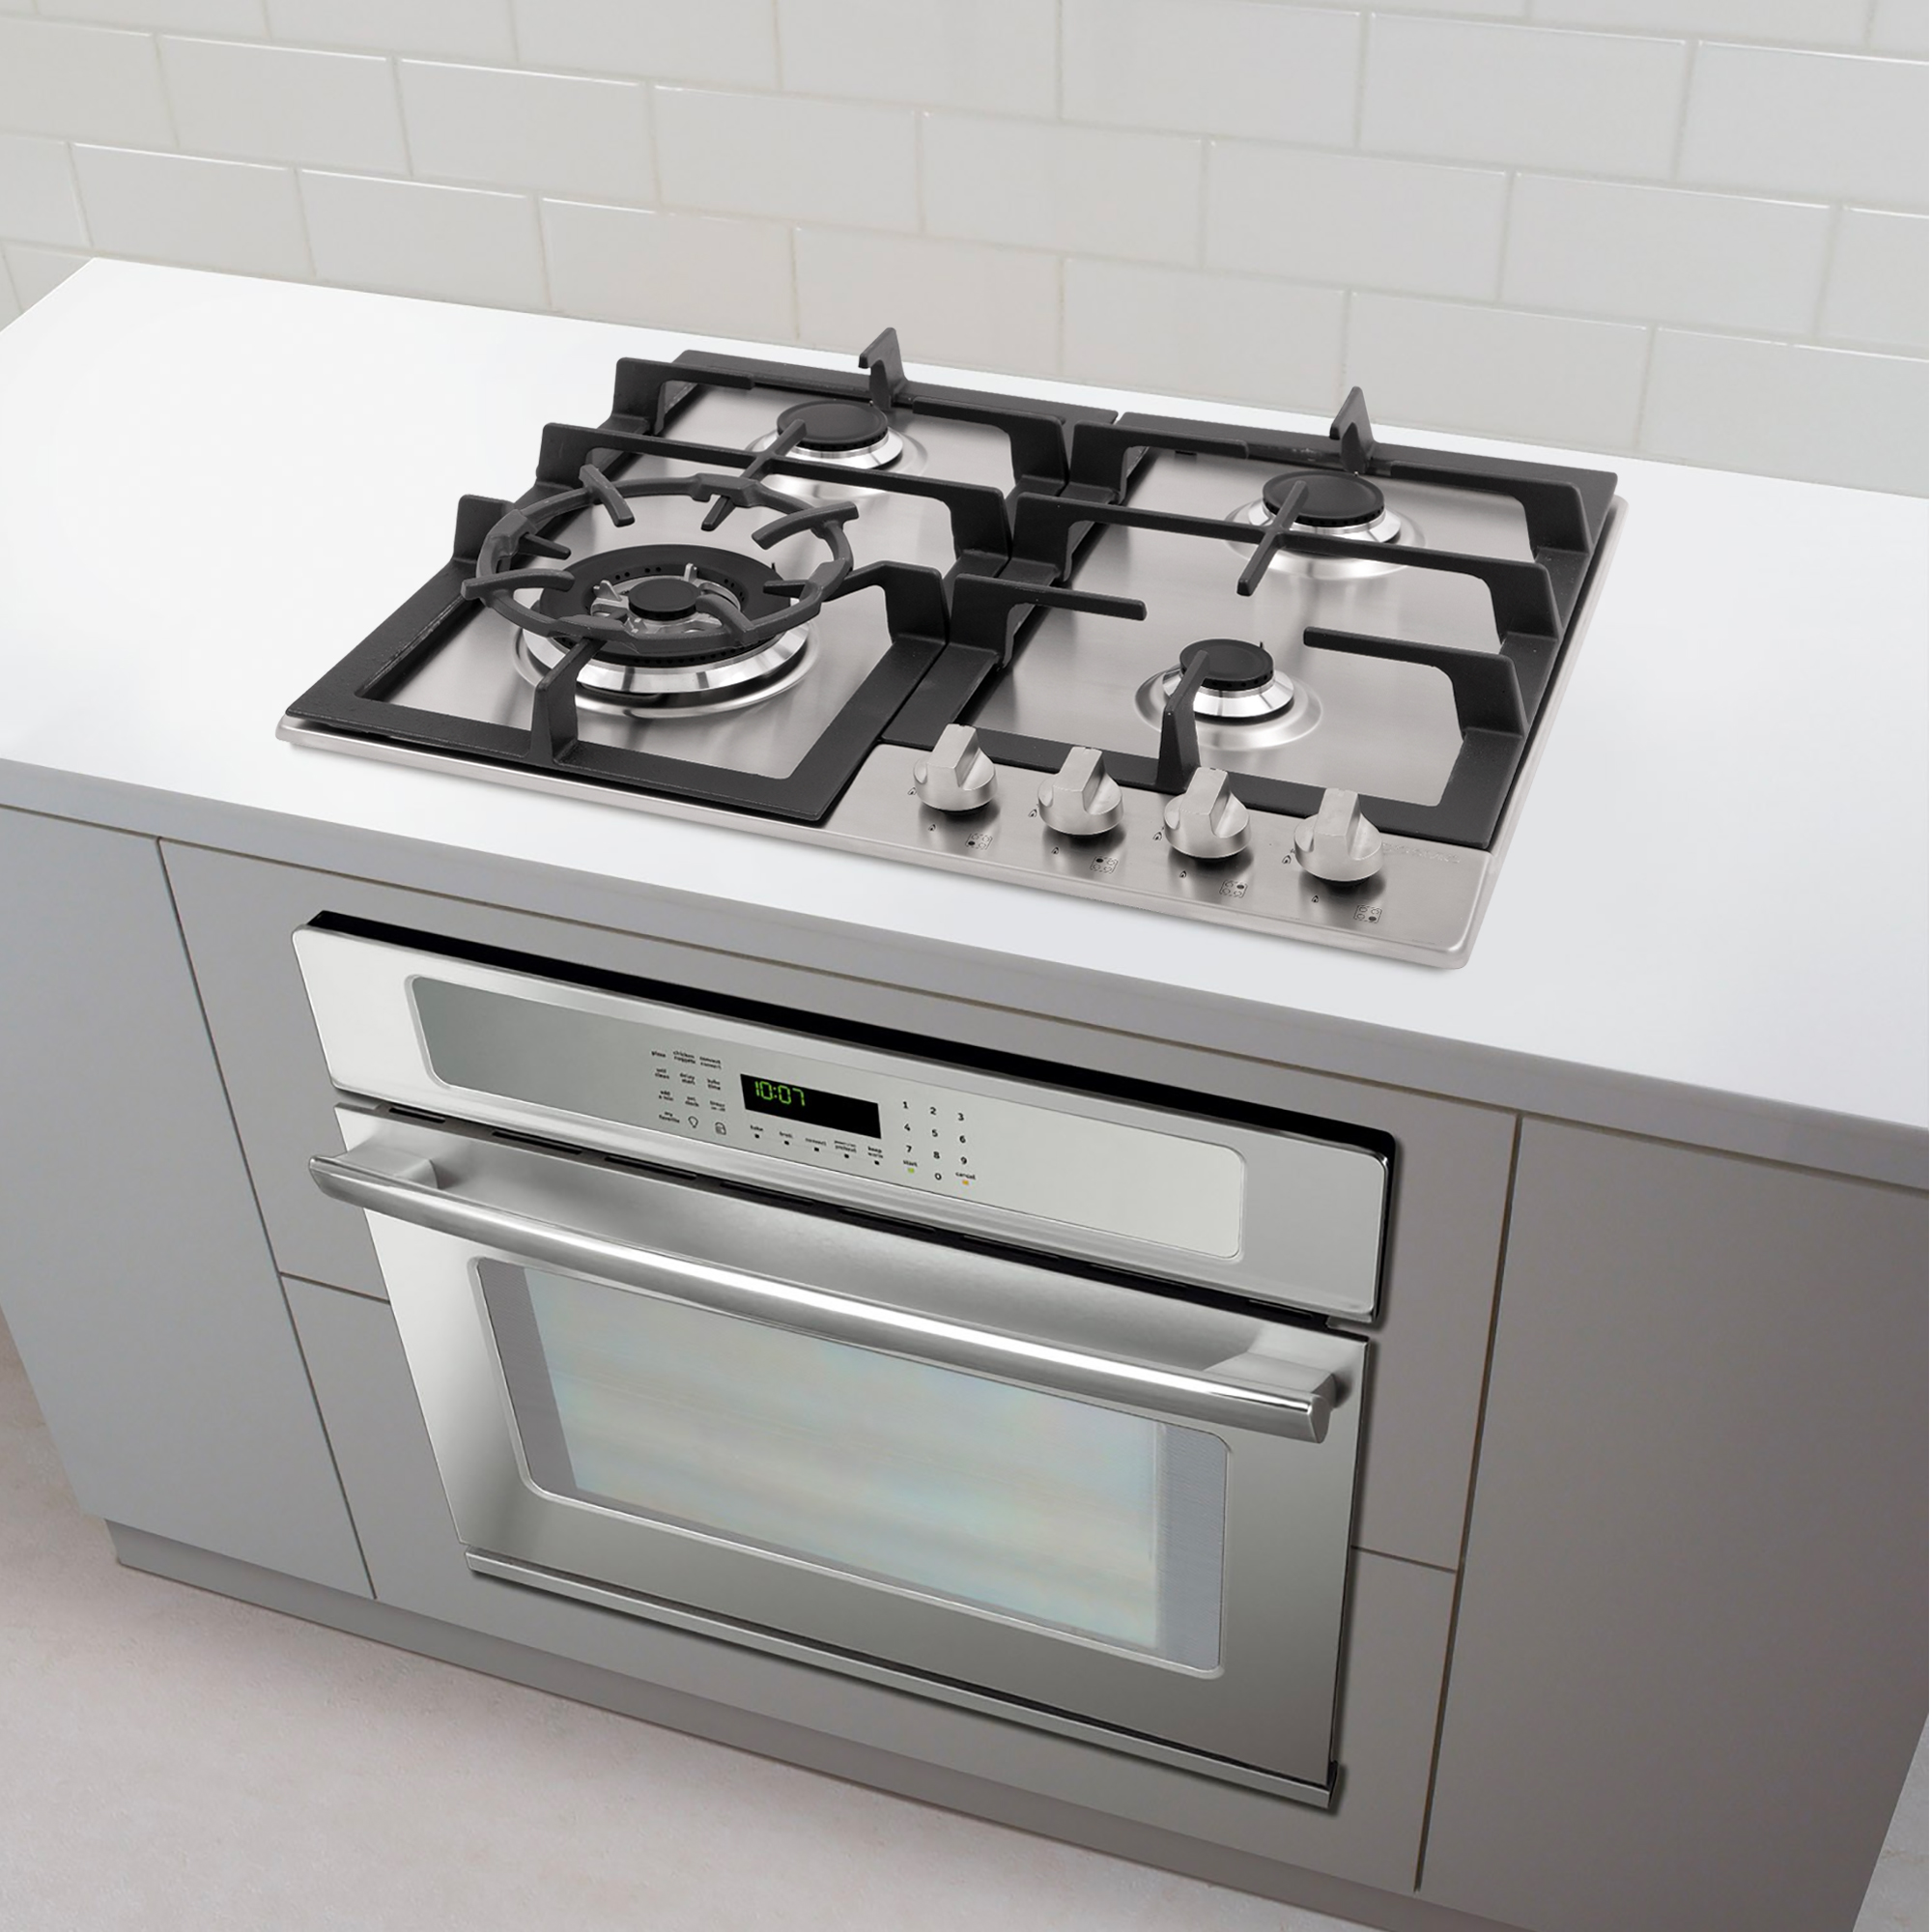
cosmo appliances

Choosing the Right Range Hood CFM: Ensuring Proper Ventilation

When it comes to creating a functional and comfortable kitchen, proper ventilation is essential. A range hood plays a critical role in managing smoke, odors, and heat produced during cooking, and choosing the right CFM (cubic feet per minute) rating is crucial for effective performance. Here’s a guide to help you understand CFM ratings and how to choose the right range hood for your needs. What is CFM? CFM stands for cubic feet per minute and measures the volume of air a range hood can move per minute. A higher CFM indicates a more powerful hood with greater airflow capacity. Proper ventilation is essential not only for removing smoke and odors but also for maintaining good air quality in your kitchen. Factors to Consider When Choosing CFM: How to Calculate the Right CFM for Your Kitchen: A common rule of thumb is to choose a range hood with a CFM rating that can move at least 100 CFM per 12 inches of cooktop width. For example, a 36-inch cooktop would ideally require a range hood with at least 300 CFM. However, if you frequently cook with high heat or have a larger kitchen, you might need a higher CFM rating. Choosing the right CFM for your range hood is crucial for ensuring effective ventilation and maintaining a comfortable cooking environment. By considering factors such as cooktop size, cooking style, kitchen layout, and the type of ventilation system, you can select a range hood that provides optimal performance and enhances your kitchen experience. Proper ventilation not only keeps your kitchen free from smoke and odors but also contributes to better air quality and a more enjoyable cooking space.

Using a Wall Oven for Multi-Rack Baking: Tips for Even Results

Baking multiple trays of cookies, casseroles, or roasts in a wall oven can save time and effort, but achieving even results on several racks requires a bit of know-how. Wall ovens offer versatility and efficiency, but to make the most of their capabilities and ensure that every dish comes out perfectly, follow these essential tips for multi-rack baking. Preheat Your Oven Completely Begin by preheating your wall oven to the desired temperature before placing your trays inside. This step is crucial as it ensures that your food starts baking at the correct temperature, promoting even cooking throughout. Most wall ovens will alert you when they’ve reached the set temperature. Position Racks Strategically For the best results, position your oven racks in the center of the oven. Proper rack placement allows for better air circulation around the trays, which is essential for even baking. If you’re using multiple racks, ensure there’s enough space between them to allow hot air to flow freely. Rotate and Switch Racks To avoid uneven baking, rotate your trays and switch their positions halfway through the cooking time. For instance, if you have trays on the upper and lower racks, swap them around after 10-15 minutes. This simple adjustment helps ensure that all trays get an equal amount of heat. Avoid Overcrowding Avoid placing too many trays in the oven at once. Overcrowding can obstruct airflow and lead to uneven baking. If you have a large quantity to bake, consider doing it in batches rather than cramming everything into the oven simultaneously. Utilize Convection Settings If your wall oven is equipped with a convection feature, use it to enhance air circulation. The convection fan helps distribute heat more evenly, which can improve baking results when using multiple racks. This feature is particularly useful for baking items like cookies or pastries. Monitor Baking Times Be aware that baking times can vary when using multiple racks. Start checking for doneness a few minutes earlier than the recipe suggests, as the presence of multiple trays may alter the cooking time. Keep an eye on your food to prevent overcooking. Choose the Right Bakeware The type and quality of your bakeware can impact baking results. Opt for dark, non-stick pans for even browning and avoid using warped or irregularly shaped pans. Consistent bakeware across racks can also help maintain uniform results. Maintain a Clean Oven A clean oven ensures optimal performance and prevents smoke or burning odors that can affect your food. Regularly clean your oven to remove any residue or spills that could impact heat distribution and baking efficiency. Mastering multi-rack baking in your wall oven opens up a world of possibilities, from preparing large family meals to baking a variety of treats all at once. By following these tips—preheating your oven, positioning racks properly, rotating trays, avoiding overcrowding, utilizing convection settings, monitoring baking times, using quality bakeware, and keeping your oven clean—you can ensure even results every time. With a bit of practice and attention to detail, your wall oven will become an invaluable tool in your kitchen, making baking more efficient and enjoyable.

How to Clean Fish and Remove Scales: A Step-by-Step Guide

Cleaning fish and removing scales can be a bit daunting if you’re new to it, but with the right techniques and tools, you can make the process smooth and efficient. Whether you’re preparing a fresh catch or store-bought fish, properly cleaning and scaling your fish is essential for ensuring a delicious and enjoyable meal. Here’s a step-by-step guide to help you clean fish and remove scales with ease. Tools You’ll Need: Step 1: Prepare Your Workspace Start by setting up your workspace. Place a cutting board on a stable surface and have your tools ready. If you’re cleaning a large number of fish, you might want to use a bowl or basin to catch any debris and water. Step 2: Rinse the Fish Rinse the fish under cold running water to remove any surface dirt and slime. Pat the fish dry with paper towels to make it easier to handle. Step 3: Remove the Scales Step 4: Gut the Fish Step 5: Clean the Fish Step 6: Store or Cook the Fish If you’re not cooking the fish immediately, store it in the refrigerator on a plate or in a container, covered with plastic wrap or aluminum foil. For longer storage, you can freeze the fish. Wrap it tightly in plastic wrap or place it in a vacuum-sealed bag to prevent freezer burn. Cleaning and scaling fish may seem like a daunting task, but with the right approach, it can become a quick and manageable part of your cooking routine. By following these steps—rinsing the fish, removing scales, gutting, and cleaning—you’ll ensure that your fish is ready for a delicious meal. With a bit of practice, you’ll be able to clean fish like a pro, making your seafood preparations both efficient and enjoyable.

Cooking and Baking with Berries: Sweet and Savory Delights in the Kitchen

Berries are nature’s candy—bursting with flavor, vibrant in color, and packed with nutrients. Whether you’re using strawberries, blueberries, raspberries, or blackberries, these versatile fruits can elevate both sweet and savory dishes. Here’s how to make the most of berries in your cooking and baking. Berry Basics: Selecting and Storing To get the best results in your kitchen, start by choosing ripe, fresh berries. Look for firm, plump berries without blemishes. Berries are delicate, so handle them with care and store them in the refrigerator. If you can’t use them immediately, freeze them on a baking sheet before transferring them to a storage bag for later use. Baking with Berries Berries add a burst of flavor and moisture to baked goods. From muffins and cakes to pies and tarts, they can be the star ingredient or a complementary addition. Cooking with Berries in Savory Dishes Berries aren’t just for desserts. Their natural sweetness and acidity can enhance savory dishes, adding a unique twist to your meals. Making Berry Preserves and Jams Preserving berries as jams or jellies is a fantastic way to enjoy their flavor year-round. Homemade berry preserves are perfect for spreading on toast, topping desserts, or even stirring into yogurt. Infusing Beverages with Berries Berries can also be used to create refreshing drinks and cocktails. Their vibrant colors and natural sweetness make them a popular choice for both alcoholic and non-alcoholic beverages. Berry Desserts Beyond the Oven Not all berry desserts require baking. You can make quick and easy berry-based desserts with minimal effort. Berries bring a burst of flavor, color, and nutrition to both sweet and savory dishes. Whether you’re baking them into cakes, adding them to salads, or preserving them as jam, there’s no limit to the culinary possibilities berries offer. Next time you’re in the kitchen, reach for a handful of berries and let your creativity shine!

Efficient Freezer Organization: How to Stack and Store Meat for Easy First-In, First-Out Access

Keeping your freezer organized not only helps you find what you need quickly but also ensures that your food stays fresh and safe. When it comes to storing meat, having a system in place for easy access and proper rotation can make meal planning and preparation more efficient. Here’s a guide to help you stack and store meat in the freezer for seamless first-in, first-out (FIFO) access. Use Clear, Sturdy Containers Start by investing in clear, freezer-safe containers or resealable plastic bags. Clear containers allow you to see the contents at a glance, while sturdy options prevent freezer burn and maintain the quality of the meat. Vacuum-sealing bags are also a great choice as they remove air and prevent freezer burn. Label Everything Proper labeling is crucial for keeping track of what’s in your freezer. Use a permanent marker or label maker to write the type of meat, date of storage, and any other relevant information on each container or bag. This practice helps you quickly identify what you have and ensures you use the older items first. Follow the FIFO Method To ensure that you’re using the oldest meat first, practice the FIFO method. When you add new items to the freezer, place them behind or underneath older items. This way, you’ll naturally pull out the older meat before it has a chance to expire. Organize by Type and Use Group similar types of meat together, such as beef, chicken, and pork. Within each group, you might organize by cuts or specific uses (e.g., ground meat, steaks, or roasts). This organization helps you locate what you need quickly and reduces the time the freezer door is open. Stack Smartly Stack containers and bags in a way that allows for easy access and visibility. Avoid overloading the freezer, as this can obstruct air circulation and make it harder to find items. Use bins or dividers to create sections within your freezer if needed. Place frequently used items on the top or in the most accessible spots. Keep an Inventory List Maintaining a written or digital inventory list can be a lifesaver. Update your list regularly as you add or remove items from the freezer. This list should include the type of meat, quantity, and expiration dates. You can keep the list on your phone, in a notebook, or even on a whiteboard attached to the freezer. Check and Rotate Regularly Periodically check your freezer to ensure that everything is in good condition and that items are being used in the correct order. Rotate items if necessary to maintain the FIFO system and prevent any items from getting lost or forgotten. Defrost and Clean Regularly defrost your freezer to remove ice build-up, which can reduce space and efficiency. While defrosting, take the opportunity to clean the interior and reorganize the items to ensure that everything is in its proper place. An organized freezer not only makes meal preparation easier but also helps you manage your food inventory effectively, reducing waste and ensuring that you always have fresh ingredients on hand. By using clear containers, labeling items, practicing the FIFO method, and keeping an inventory list, you can streamline your freezer organization and make the most out of your frozen meat supplies. With these tips, you’ll be able to enjoy hassle-free cooking and a well-managed kitchen.

Air Fryer Baking: Tips for Perfect Cakes, Muffins, and More

The air fryer has quickly become a kitchen staple, praised for its ability to cook foods quickly with less oil. But did you know that your air fryer can also be a fantastic tool for baking? From cakes to muffins and more, air fryer baking is a convenient way to enjoy your favorite treats with less hassle. Here’s how to make the most of your air fryer for perfect baked goods every time. Choosing the Right Bakeware Not all bakeware is suitable for air fryer baking. When selecting pans or molds, make sure they fit comfortably in your air fryer basket with room for air to circulate around them. Silicone molds, small cake pans, and ramekins are excellent options. Look for materials that can withstand high temperatures and avoid anything too large or tall. Adjusting Baking Time and Temperature Air fryers cook more quickly than conventional ovens, so it’s essential to adjust your baking times and temperatures. As a general rule, reduce the temperature by 25°F (about 15°C) from what your recipe calls for in a conventional oven. Keep a close eye on your baked goods, as they may cook 20-30% faster in the air fryer. Use of Parchment Paper Parchment paper can be your best friend when baking in an air fryer. It helps prevent sticking and makes cleanup a breeze. However, make sure to use perforated parchment paper or poke holes in the paper yourself to allow proper air circulation. Don’t Overcrowd the Basket Just like frying, baking in an air fryer requires good air circulation. Avoid overcrowding the basket, as this can lead to uneven cooking. If you need to bake in batches, take the time to do so for the best results. Preheating the Air Fryer Preheating your air fryer can help ensure even baking. Most air fryers only need a few minutes to reach the desired temperature. Preheating is especially important for recipes like cakes and muffins, where consistent temperature is key to a good rise. Testing for Doneness Since air fryer baking times can vary, always test for doneness before considering your treats finished. For cakes and muffins, insert a toothpick into the center—if it comes out clean or with a few crumbs, your baked goods are ready. If the top browns too quickly, you can tent it with a piece of aluminum foil. Experiment with Recipes Not all recipes will translate perfectly to the air fryer, so don’t be afraid to experiment. Start with small batches and adjust as needed. Consider converting your favorite oven-baked recipes by adjusting the temperature and keeping a close eye on cooking times. Understanding Airflow The magic of air fryer cooking is all about airflow. Make sure your baked goods are arranged to allow hot air to circulate evenly. This might mean placing cakes or muffins slightly off-center in the basket or rotating them during baking for even cooking. Grease the Bakeware Even with non-stick bakeware, it’s a good idea to lightly grease the surface to ensure your cakes and muffins release easily. This is especially important in an air fryer, where the circulating air can dry out the surface of your baked goods, making them more prone to sticking. Cooling and Storing Once your treats are baked to perfection, allow them to cool in the bakeware for a few minutes before transferring them to a cooling rack. This helps set the structure and prevents them from breaking apart. Store leftovers in an airtight container to keep them fresh. Baking in an air fryer opens up a world of possibilities for creating delicious treats with ease. By adjusting your baking techniques and being mindful of your air fryer’s unique characteristics, you can achieve perfect cakes, muffins, and more. So go ahead, dust off your favorite recipes, and give air fryer baking a try!

How to Cook Dried Pulses: A Comprehensive Guide

Dried pulses, including lentils, chickpeas, beans, and peas, are nutritious, versatile, and cost-effective pantry staples. Cooking them from dried not only enhances their flavor but also gives you better control over their texture and seasoning. Here’s a step-by-step guide to cooking dried pulses, ensuring they turn out perfectly every time. Types of Dried Pulses and Their Uses Understanding the different types of dried pulses can help you choose the right one for your recipes: Preparing Dried Pulses Before cooking, pulses require some preparation to ensure they are clean, tender, and safe to eat. Note: Lentils and split peas do not require soaking and can be cooked directly. Cooking Dried Pulses Once your pulses are prepared, follow these general steps to cook them: Tips for Perfectly Cooked Pulses Using Cooked Pulses Cooked pulses are incredibly versatile and can be used in a variety of dishes: Cooking dried pulses is a straightforward process that opens up a world of culinary possibilities. Whether you’re preparing a comforting soup, a hearty salad, or a flavorful curry, knowing how to cook dried pulses properly will enhance your dishes and provide you with nutritious, delicious meals. Embrace the versatility of pulses and enjoy their rich flavors and health benefits in your everyday cooking!

How to Safely Handle and Store Raw Meat at Home

Handling and storing raw meat properly is crucial for maintaining food safety and preventing foodborne illnesses. Raw meat can harbor harmful bacteria, such as Salmonella, E. coli, and Listeria, which can contaminate your kitchen and make you sick if not handled correctly. By following best practices for storage, handling, and preparation, you can ensure that your kitchen remains safe and your meals are healthy. In this blog post, we’ll guide you through the essential steps for safely handling and storing raw meat at home. Purchasing Raw Meat Storing Raw Meat Proper storage is essential to keep raw meat safe and fresh: Handling Raw Meat in the Kitchen Safe handling practices can prevent the spread of bacteria in your kitchen: Cooking Raw Meat Safely Proper cooking is essential to kill harmful bacteria: Storing Leftover Cooked Meat Proper storage of cooked meat is just as important: Disposing of Raw Meat Waste Safe disposal of raw meat waste helps maintain a clean kitchen environment: By following these guidelines for handling, storing, and cooking raw meat, you can significantly reduce the risk of foodborne illness in your home. Remember to prioritize cleanliness, prevent cross-contamination, and cook meat to the appropriate temperatures to ensure your meals are safe and delicious. Safe meat handling is a critical part of maintaining a healthy kitchen, and by implementing these practices, you can enjoy your meals with peace of mind.

Range Hood Lighting: Choosing the Best Options for Your Kitchen

When designing or upgrading your kitchen, selecting the right range hood lighting is crucial for both functionality and aesthetics. Proper lighting not only enhances the cooking experience by providing clear visibility of your stovetop but also contributes to the overall ambiance of your kitchen. With various lighting options available, it can be challenging to decide which is best for your needs. In this blog post, we’ll explore the different types of range hood lighting and provide tips on choosing the best option for your kitchen. Why Range Hood Lighting Matters Range hood lighting serves multiple purposes in the kitchen: Types of Range Hood Lighting There are several types of lighting commonly used in range hoods. Each type has its own advantages and considerations: 1. Incandescent Lighting Overview: Pros: Cons: 2. Halogen Lighting Overview: Pros: Cons: 3. LED Lighting Overview: Pros: Cons: 4. Fluorescent Lighting Overview: Pros: Cons: Choosing the Best Range Hood Lighting for Your Kitchen When selecting range hood lighting, consider the following factors: 1. Kitchen Style and Aesthetics 2. Energy Efficiency 3. Brightness and Coverage 4. Heat Emission 5. Maintenance and Replacement Installation Tips Choosing the right range hood lighting is essential for creating a functional and inviting kitchen. Whether you opt for the energy efficiency of LEDs, the bright light of halogen, or the traditional warmth of incandescent bulbs, the key is to select lighting that meets your needs in terms of brightness, energy use, and style. By considering the various lighting options and their pros and cons, you can ensure your kitchen is well-lit, energy-efficient, and aesthetically pleasing, making your cooking experience more enjoyable and your kitchen a more welcoming space.

How to Clean Kitchen Appliances with Baking Soda and Vinegar

Keeping your kitchen appliances clean is essential for maintaining a healthy, efficient, and well-functioning kitchen. While there are many commercial cleaning products available, you don’t need harsh chemicals to get the job done. Baking soda and vinegar, two common household items, are powerful natural cleaners that can tackle grease, grime, and stains on a variety of kitchen appliances. In this blog post, we’ll explore how to use baking soda and vinegar to clean some of the most commonly used kitchen appliances. Why Use Baking Soda and Vinegar? Together, baking soda and vinegar form a dynamic cleaning duo that’s safe, eco-friendly, and cost-effective. Cleaning Your Kitchen Appliances 1. Oven Ingredients: Procedure: 2. Microwave Ingredients: Procedure: 3. Refrigerator Ingredients: Procedure: 4. Dishwasher Ingredients: Procedure: 5. Coffee Maker Ingredients: Procedure: Baking soda and vinegar are powerful, natural cleaning agents that can effectively clean and maintain your kitchen appliances. By using these eco-friendly ingredients, you can keep your appliances in top shape without relying on harsh chemicals. Regular cleaning not only prolongs the life of your appliances but also ensures that your kitchen stays hygienic and pleasant. Give these tips a try and enjoy a cleaner, more efficient kitchen!