The COS-58AFAKSS Air Fryer: Crispy Results with Less Oil for Healthier Family Meals
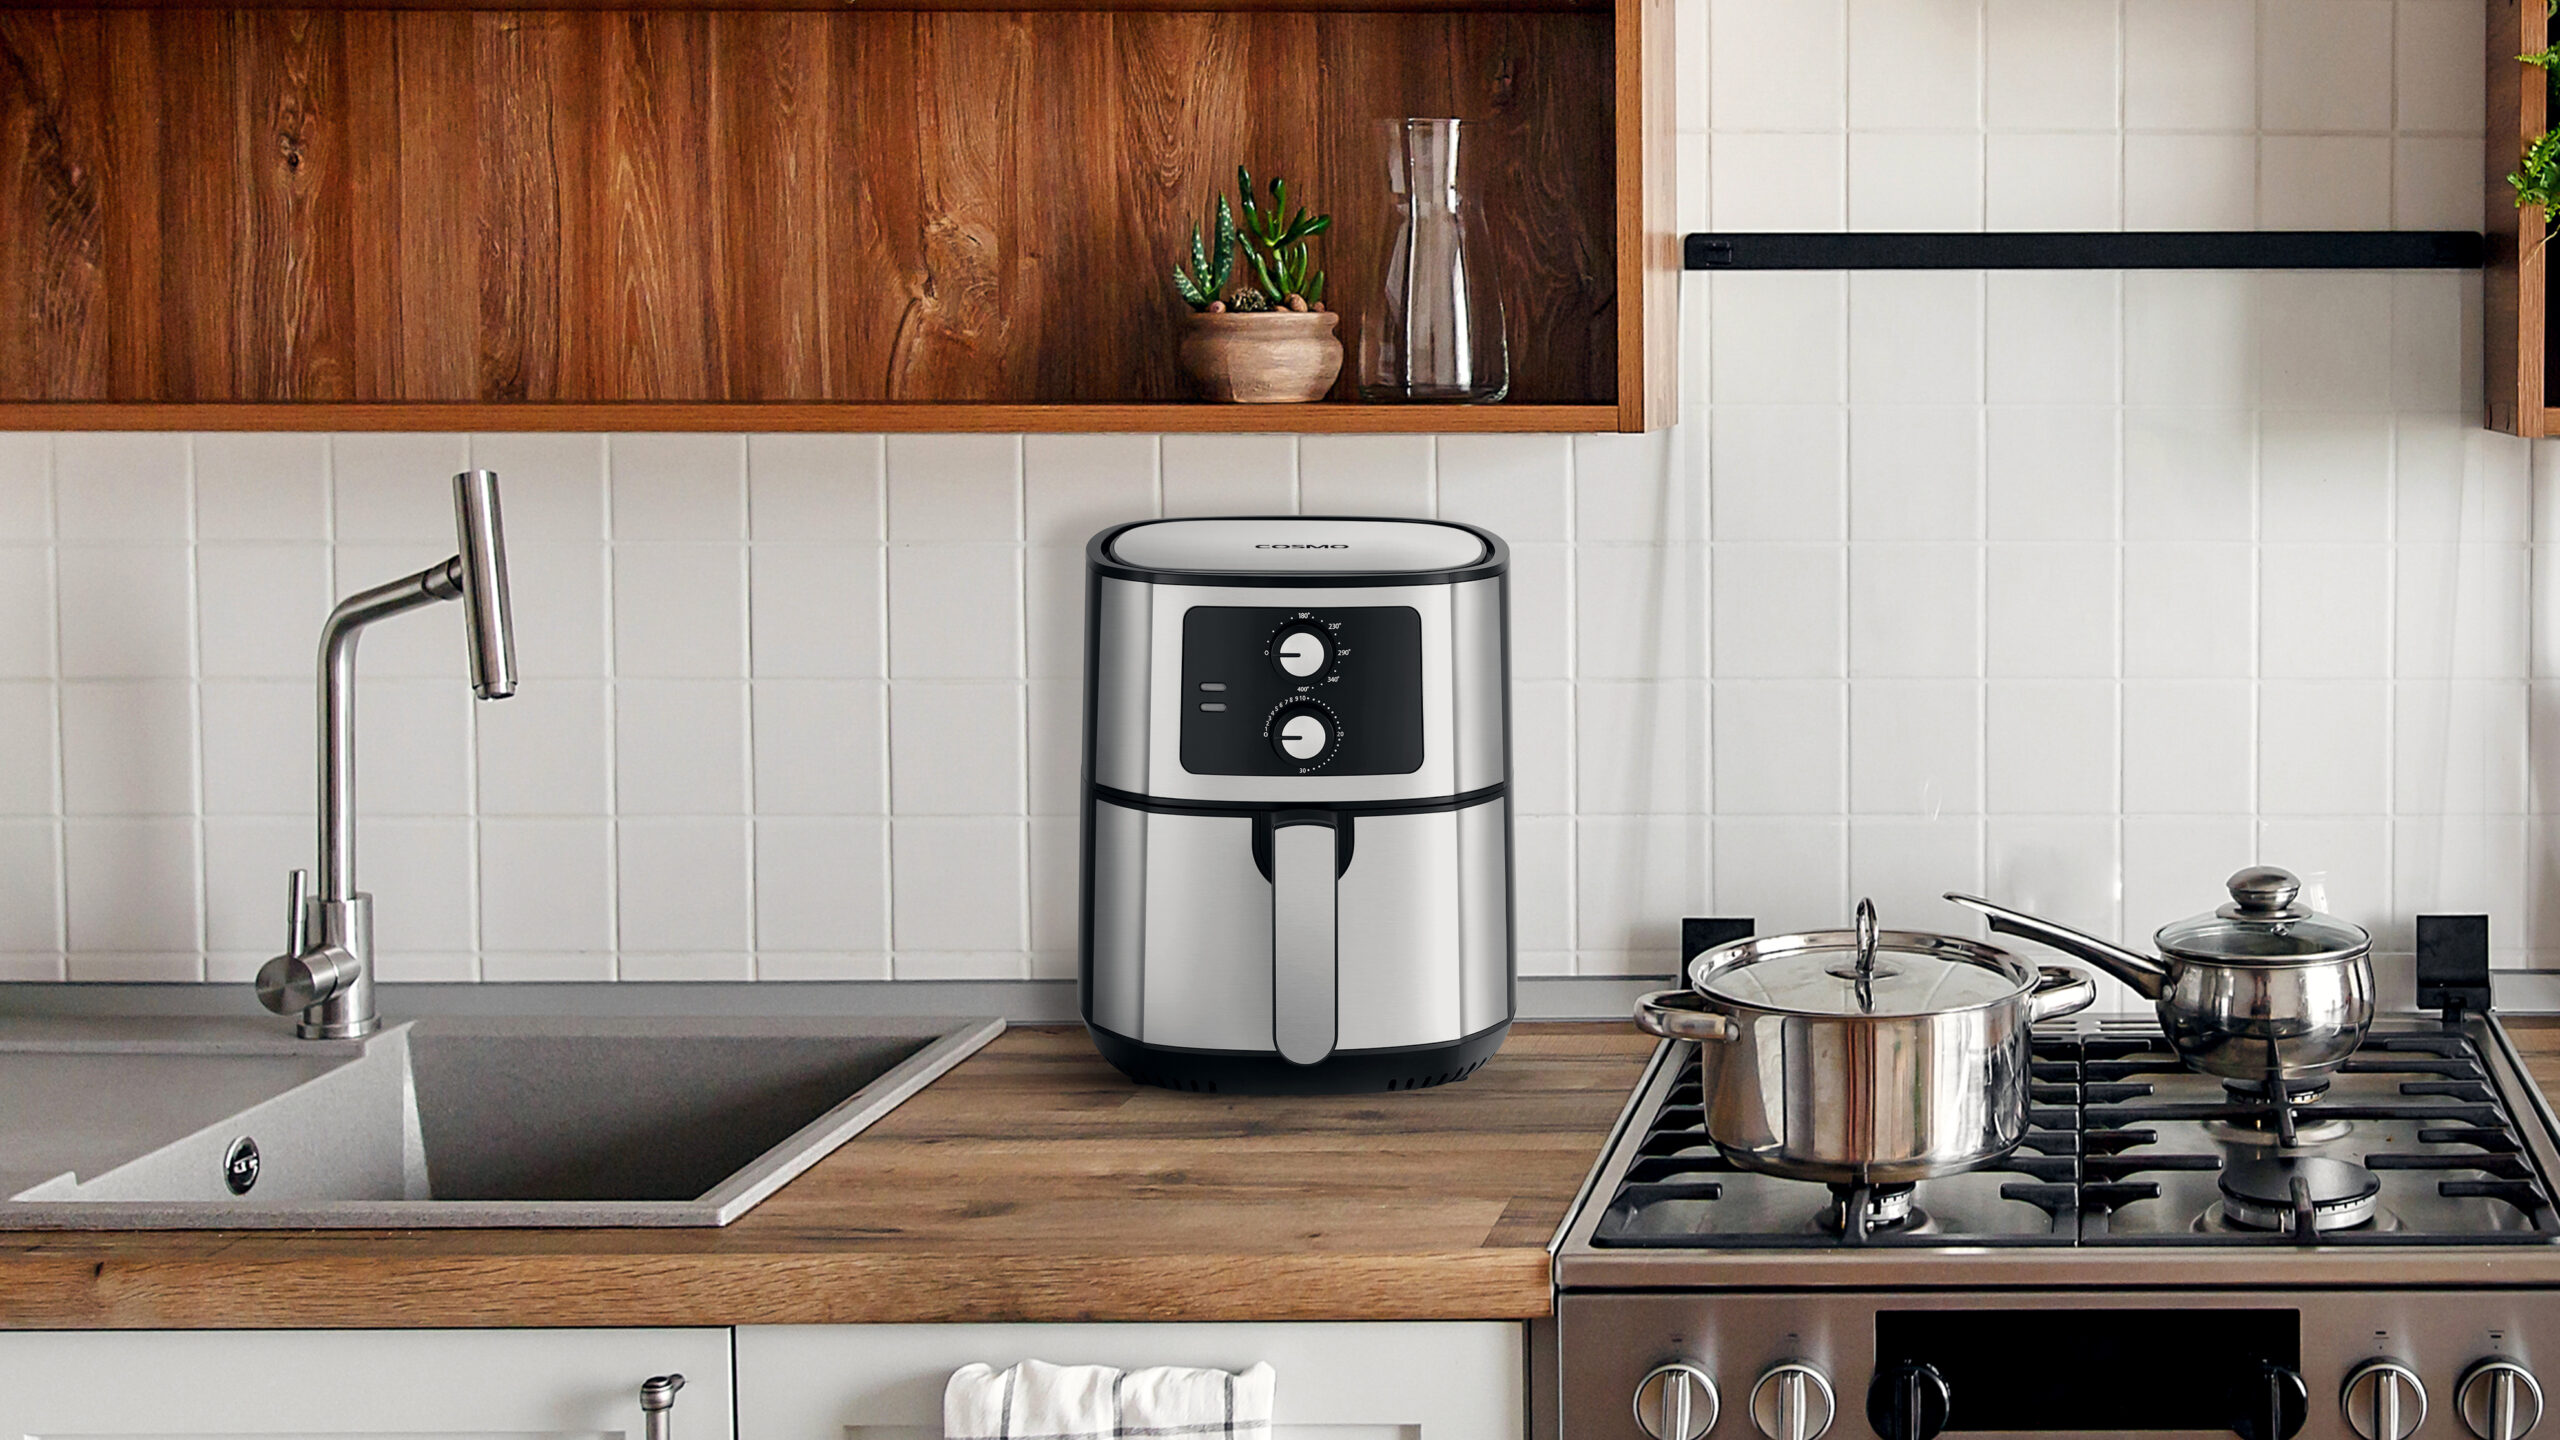
The COS-58AFAKSS air fryer transforms how you think about fried foods by using rapid air circulation technology to create crispy, golden results with up to 80% less oil than traditional frying methods. This 5.8-quart capacity air fryer proves that you don’t have to sacrifice taste or texture to enjoy healthier versions of your favorite foods. From crispy french fries and chicken wings to roasted vegetables and even baked goods, this versatile appliance brings restaurant-quality results to your home kitchen. Air frying technology has revolutionized home cooking by making it possible to achieve the crispy textures and rich flavors we love while significantly reducing oil content and cooking times. The COS-58AFAKSS makes this technology accessible and practical for busy families who want to eat better without spending more time in the kitchen or giving up the foods they enjoy. Revolutionary Air Frying Technology The COS-58AFAKSS uses advanced rapid air circulation technology that surrounds food with superheated air moving at high speeds, creating the Maillard reaction that produces crispy exteriors while keeping interiors tender and juicy. Rapid air circulation creates convection currents that cook food evenly from all angles, eliminating the need to flip or turn items during cooking while ensuring consistent browning and crisping across all surfaces. High-speed air movement at temperatures up to 400°F creates the same chemical reactions as traditional frying but without submerging food in oil. This process achieves similar textures and flavors with dramatically reduced fat content. Even heat distribution ensures consistent cooking results throughout the food basket, preventing the hot spots and uneven cooking that can occur with other cooking methods. Every piece cooks at the same rate for uniform results. Moisture removal through the circulating hot air creates the crispy exteriors that make air-fried foods so appealing while preserving the natural moisture inside foods for optimal texture contrast. Oil reduction of up to 80% compared to traditional frying methods means you can enjoy crispy foods with significantly fewer calories and less fat while maintaining the satisfying textures and flavors you crave. Generous 5.8-Quart Capacity for Family Cooking The spacious 5.8-quart basket accommodates family-sized portions while providing adequate space for proper air circulation that ensures even cooking and optimal crisping results. Family-sized portions allow you to cook enough food for 4-6 people in a single batch, making meal preparation more efficient while ensuring everyone can eat together rather than in shifts. Adequate air circulation space ensures optimal cooking performance even when the basket is reasonably full. Proper spacing allows hot air to reach all surfaces for even browning and crisping. Versatile cooking applications from individual snacks to complete meal components can fit comfortably in the generous basket size. You can prepare side dishes, main courses, or appetizers with equal effectiveness. Batch cooking efficiency improves when you can prepare larger quantities at once rather than cooking multiple small batches that extend meal preparation time and energy consumption. Entertaining capability allows you to prepare appetizers and party foods for groups without the constant monitoring that stovetop frying requires, freeing you to spend time with guests. Intuitive Knob Controls for Simple Operation The straightforward knob control system makes air frying accessible to cooks of all experience levels while providing precise control over temperature and timing for consistent results. Temperature control knob allows adjustment from 180°F to 400°F, providing the range needed for different foods and cooking techniques from gentle warming to high-heat crisping. Timer control with 30-minute capacity handles most air frying tasks while providing flexibility for longer cooking times when needed for larger items or batch cooking. Simple operation eliminates complex digital programming while providing the essential controls needed for successful air frying. The intuitive interface encourages regular use by making operation straightforward. Reliable mechanical controls resist the heat and moisture of kitchen environments while providing consistent performance over years of daily use. Simple mechanisms typically last longer than complex electronic alternatives. Visual feedback through clear markings and responsive knob action provides confidence that you’ve set controls correctly while allowing quick adjustments during cooking if needed. Auto Shut-Off Safety Feature The automatic shut-off function provides peace of mind and energy efficiency by stopping operation when the timer reaches zero, preventing overcooking and ensuring safe operation even if you’re distracted by other tasks. Cooking safety improves through automatic shut-off that prevents food from overcooking or burning if you forget about timing or become busy with other kitchen activities. Energy efficiency results from automatic operation cessation that prevents unnecessary power consumption when cooking is complete, contributing to lower utility costs over time. Convenience benefits allow you to set cooking parameters and focus on other meal preparation tasks without constantly monitoring the air fryer, making it easier to coordinate complete meals. Peace of mind comes from knowing the appliance will stop operating automatically, reducing concerns about kitchen safety while allowing you to multitask during meal preparation. Consistent results improve when timing is controlled automatically rather than relying on memory or attention during busy cooking periods when multiple tasks compete for your focus. Non-Stick Coated Parts for Easy Cleanup The non-stick coating on cooking surfaces and removable parts makes cleanup quick and simple while reducing the need for oil that traditional cooking methods require for preventing sticking. Easy cleaning results from non-stick surfaces that release food easily and wipe clean with minimal scrubbing. Most cleanup involves simple washing with warm soapy water. Reduced oil needs mean less greasy cleanup while the non-stick coating prevents food from adhering to surfaces even with minimal or no oil added to foods. Dishwasher-safe components allow thorough cleaning when needed while maintaining convenience for busy families who prefer machine washing of kitchen equipment. Long-lasting coating withstands regular use and cleaning while maintaining its non-stick properties over time, providing lasting convenience and easy maintenance. Food safety benefits from surfaces that clean thoroughly and easily, preventing buildup of food residues that could harbor bacteria or create off-flavors in subsequent cooking. Versatile Cooking Applications The COS-58AFAKSS excels at much more than just air frying, serving as a versatile cooking