Month: March 2021

Air Fryer Grilled Cheese Recipe

Your Air Fryer is the key to hands-off grilled cheese. You can set the timer, walk away and come back to perfectly crispy bread and melted cheese. The best combination for flavorful cheese is a combination of sharp cheddar and a nice melting cheese like Monterey Jack. You’ll prepare these in the usual way you do your ordinary melted cheese. Read how below. Yield: Serves 2Prep time: 5 minutesCook time: 15 minutes Ingredients: 2 tablespoons unsalted butter 4 ounces sharp cheddar cheese 4 ounces Monterey Jack, Gruyère, or low-moisture mozzarella cheese 4 slices rustic bread, or white or whole-wheat sandwich bread Instructions: Let 2 tablespoons unsalted butter sit at room temperature until softened. Heat an air fryer to 375ºF. Grate 4 ounces sharp cheddar cheese and 4 ounces Monterey Jack cheese on the large holes of a box grater (about 1 cup each). Toss together in a medium bowl. Spread the butter onto one side of each of 4 slices sandwich or rustic bread. Flip 2 of the slices over and divide the cheese evenly over these slices. Close the sandwiches with the remaining 2 bread slices butter-side up. Press the sandwiches slightly to close. Air fry the grilled cheeses: place in the basket (do one at a time if they will not fit in a single layer with some space around them) and air fry for 3 minutes. Flip the sandwich and air fry until golden brown, 3 to 4 minutes more. Source: the Kitchn

Browning Butter Like A Pro

Baked goods and savory treats made with brown butter give it an extra depth of flavor. It works some serious magic. It has a depth and an intensity that melted butter can lack. While brown butter isn’t hard to make on a stovetop, it can be more work. It requires an extra level of vigilance so the butter doesn’t overcook or burn. Simplify the process by browning the butter in a microwave instead! Cut the butter in roughly cut pieces and place in a microwave-safe bowl with a cover. Heat in a microwave on high for about 10 minute if you’re browning a cup of butter. This will be less if you’re browning less. Check the butter to see it has a nutty smell with browned bits and a deep amber color. If you haven’t achieved that quite yet, simply stick it back in the microwave for another minute or two. The most important part here is this is a completely hands-off experience. There’s no active time required. Brown butter will give your baked goods that extra bit of flavor, and with the microwave tip you’ll be sure to get the results you desire. Source: the Kitchn

Classic Tiramisu Recipe

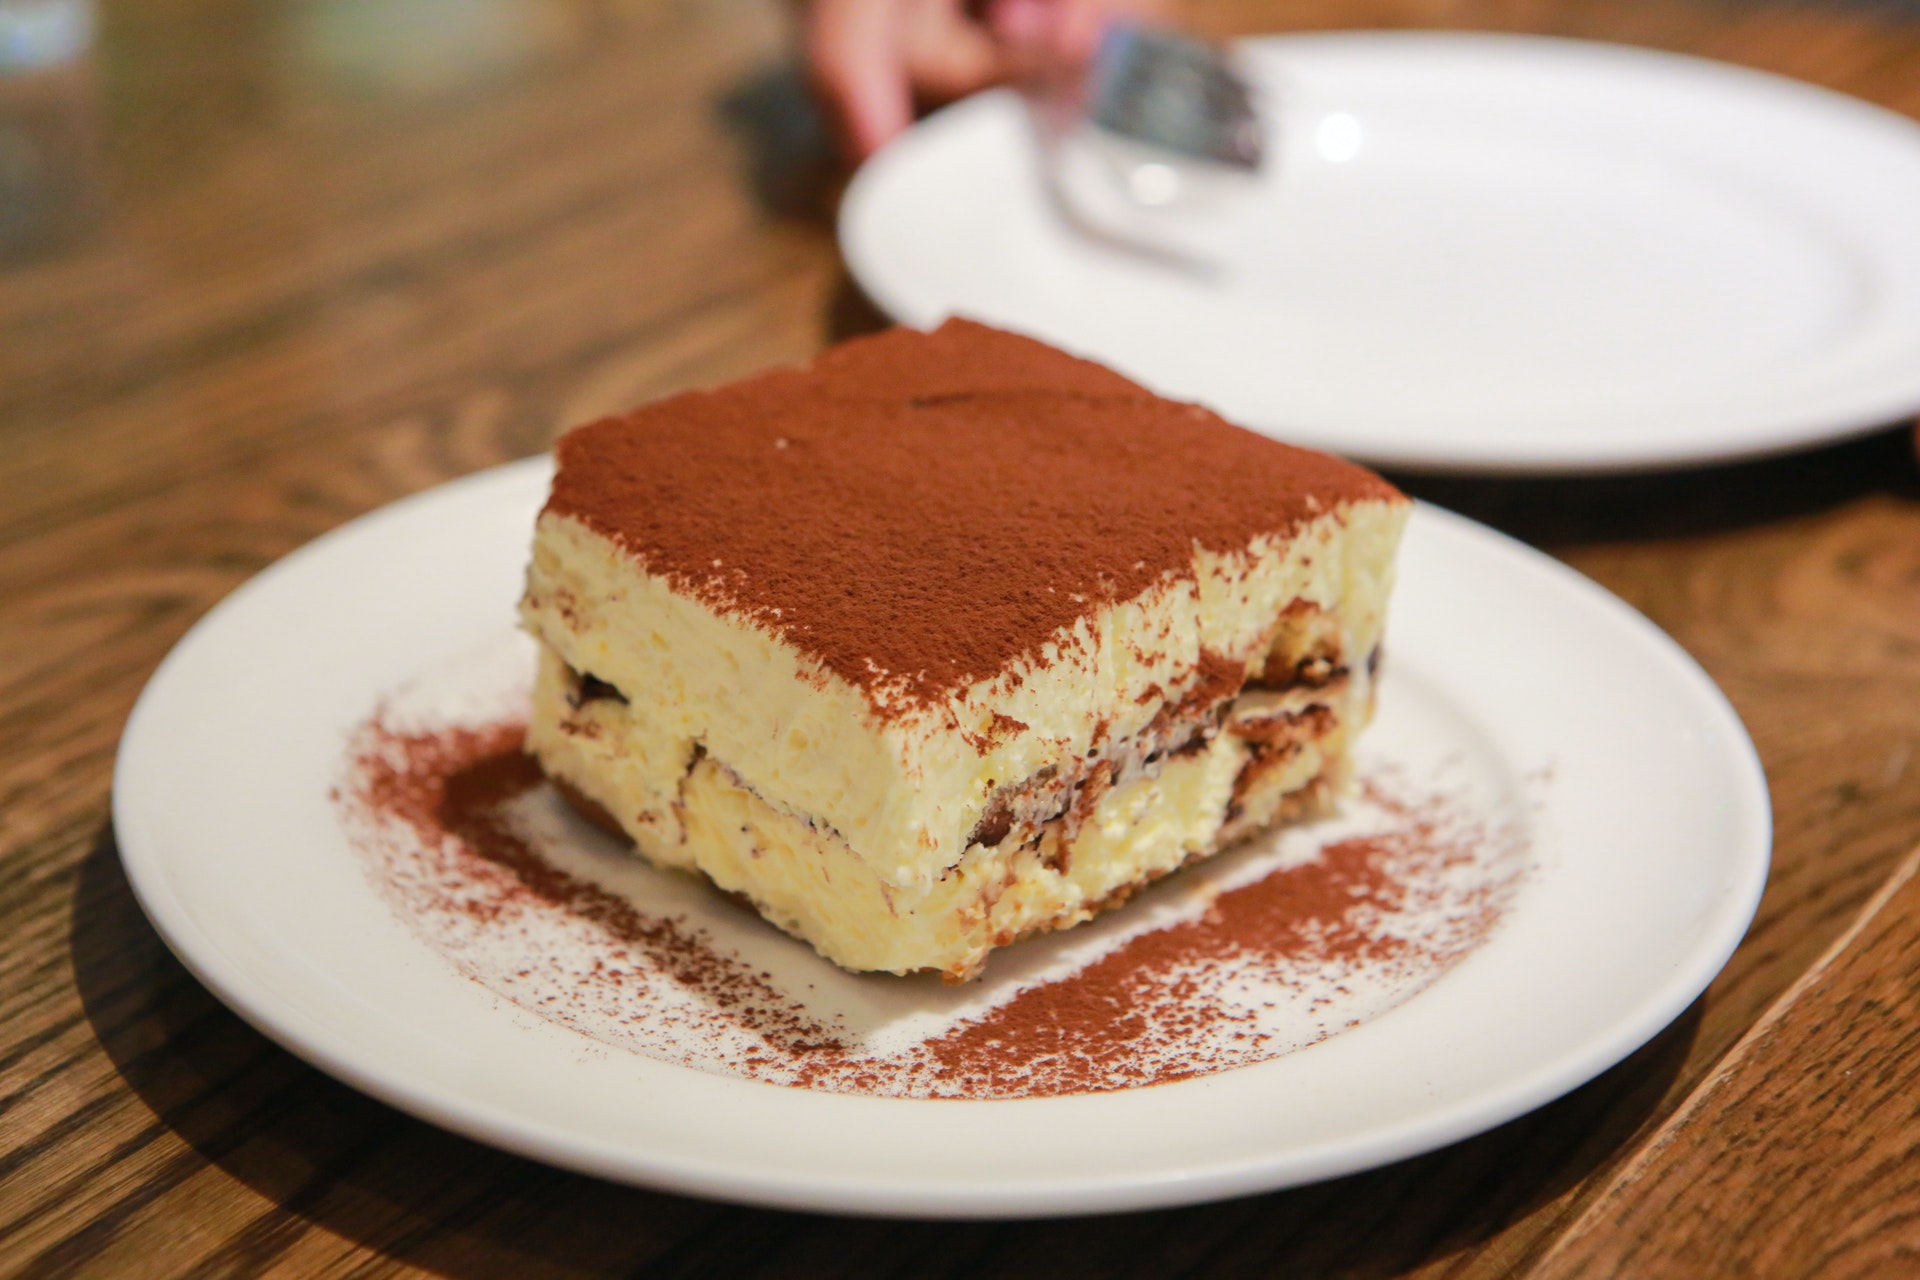
Tiramisu doesn’t have to be a dessert you only get at a restaurant. It’s not difficult at all to prepare at home, and with the proper technique you’ll be left with the perfect creamy filling. Try letting the zabaglione cool to room temperature before whipping the cream or you could melt it all together. Total time: 45 minsServings: 9 servings Ingredients: 6 large egg yolks 1 cup (200 grams) sugar, divided 3 ounces (6 tablespoons) dark rum, divided 1 1/2 cups (12 oz) mascarpone cheese, cold from the fridge 1 cup heavy whipping cream, cold from the fridge 1 cup boiling water 1 tablespoon instant espresso powder 1 (7-ounce) package ladyfingers Cocoa powder for dusting the top Directions: Prep the dish: Lightly oil an 8×8 inch baking dish. Whisk the yolks and sugar to make the zabaglione: Set a large heatproof bowl over a pan of simmering water to create a double boiler (the bowl should rest on the rim of the pan and the bottom should not touch the surface of the water).Whisk together the egg yolks and 3/4 cup of the sugar in the bowl. Continue whisking until the sugar has dissolved, the mixture has increased slightly in volume, and it looks light yellow color. Not sure? Rub a little of the mixture between two fingers (it will be warm, but not too hot to touch) – it should feel smooth and silky; if you feel any sugar granules, keep whisking. Add in the rum: Gradually whisk in 2 ounces (4 tablespoons) of the rum and continue whisking rapidly over the double boiler for about 10 minutes, until the mixture is thick, foamy, and very pale yellow. (You can also use a hand mixer for this step, if you prefer.)Remove the bowl from the double boiler and set aside until cooled to at least 90F or room temperature. Whip the mascarpone and cream: You can use either a hand mixer or a stand mixer with a whisk attachment for this step. If using a stand mixer, be very attentive and do not walk away while the mascarpone is whipping. Stand mixers are so powerful, that it’s easy to overwhip, which causes the mascarpone to separate. You have a little more wiggle room with a hand mixer.With a hand mixer or in the bowl of a stand mixer with a whisk attachment, beat the mascarpone on medium speed for 15 to 30 seconds, until it smooths out and softens. Be careful not to over-beat or else the mascarpone will separate and become grainy.With the mixer still on medium speed, gradually add the cream in a thin, slow stream until it’s all incorporated. This should take 1 to 2 minutes. Stop the mixer and scrape down the bowl. Continue beating with the mixer on medium-high speed for another 30 to 60 seconds, until the mixture holds firm, not-quite-stiff peaks. Mix the whipped cream and the zabaglione: Fold 1/3 of the whipped cream into the zabaglione to lighten it, then fold in the remaining whipped cream. Make the coffee dipping liquid for the ladyfingers: In a wide, shallow dish, whisk the remaining 1/4 cup sugar with the remaining 1 ounce (2 tablespoons) of rum, the boiling water, and the espresso powder. Stir to dissolve the sugar and espresso. Assemble the tiramisu: Dunk one ladyfinger at a time in the espresso liquid, turning it so that all sides are evenly moistened – a quick dunk is all you need; any more and the ladyfingers start to disintegrate. Arrange the dunked ladyfingers in rows on the bottom of the baking dish.Once you finish the layer, spread 1/2 of the mascarpone mixture over the top. Repeat dunking and arranging a second layer, and spread the remaining mascarpone over top. Chill the tiramisu: Cover the tiramisu and refrigerate for at least 8 hours or up to 24 hours to give the tiramisu time to firm up and for the ladyfingers to soften. Serve: Dust with cocoa before serving. Serve in wedges directly from the pan. Leftovers will keep for about 5 days. Source: Simply Recipes

Determining Wall Shelves Spacing and Spans

Wall shelves require a bit of planning before loading up your favorite dishes or plants. A shelf span is the distance between supports for the shelf. This span distance will vary based on the strength of the material of the shelf. In theory, the stronger the shelf the greater the distance you can put between wall supports. Shelf spacing will depend on preference and what you will store on the shelves. It’s important to fasten the shelf supports to wall studs whenever possible for maximum support. Span Limits The span limit will change depending on the material of the shelf as well as the load it will carry. For the following recommendations it’s assumed the shelf will support a full load of standard-sized hardback books. Plywood. Shelves should be ¾ inch thick or thicker. The longest recommended span is 36 inches between wall supports. Lumber. The longest recommended span between walls supports for 1×10 lumber is 24 inches. If the lumber is 1×12 then it is 28 inches. Particleboard. Single layer shelving made of particleboard should have a thickness of ⅝ inch. The recommended span for this would be 24 inches. If you have a thicker particleboard of ¾ inch then you can span wall supports by 28 inches. Spacing Recommendations The vertical spacing between shelves will ultimately be determined by the objects it will hold. Here’s a general clear shelf height depending on specific items. Paperback books: 8 inches Hardback books: 11 inches Large hardback catalogs: 14 inches Magazines: 14 inches DVDs: 8 inches Source: the Spruce

Marcella Hazan’s Famous Tomato Sauce Recipe

Look no further than this famous tomato sauce recipe. The Marcella Hazan Classic tomato sauce is adored by bloggers and food writers alike. The best part? It only needs four ingredients! It brings a bright and velvety tomato sauce with a richness from the butter. You don’t even need to mince the onion, it’s all hands-off. Enjoy this minimalist and simple yet satisfying recipe. Read about it below. Yield: Serves 2 to 4 Ingredients: 1 (28-ounce) can whole tomatoes, no salt or herbs added 5 tablespoons unsalted butter 1 small white onion, peeled and cut in half Kosher salt To serve: Cooked pasta Shaved Parmesan cheese Instructions: Place the tomatoes, butter, onion halves, and a pinch of salt in a large saucepan and bring to a simmer over medium-high heat. Lower the heat to maintain a gentle simmer and cook, stirring and crushing the tomatoes lightly with the back of a spoon occasionally, until droplets of fat appear on the surface of the tomatoes, about 45 minutes. Remove and discard the onion. Serve over hot pasta with Parmesan and black pepper, if desired. Source: Get Pocket

Why You Should Avoid Mixing Bleach with Other Cleaners

Bleach has long been controversial for household use due to the impact on both our health and the environment. But sometimes bleach is one of the few products that can get those white white or properly kill germs. If you ever need to use bleach it’s important to know a few key things about it. Bleach is considered a disinfectant and not a cleaner. This means its potency is greatly reduced when it comes in contact with dirt. You should always clean first and disinfect after if needed. Bleach should be handled with gloves and eye protection, and always stored away from children. One of the real dangers of bleach is when it’s mixed with other chemicals. Here are the few to absolutely steer clear from. Ammonia. Bleach and ammonia is a well known no-no. The problem is that many cleaners can contain ammonia, which can be dangerous if you unknowingly mix bleach with it. When combined these two produce chloramine gas which can burn your eyes and respiratory tract and cause internal organ damage. If the concentration is high enough it can not only be toxic, but also explosive. Vinegar. Vinegar seems very mild since it’s often used in so many other ways, but not with bleach. The combination produces chlorine gas, which causes coughing and irritation to mucous membranes. It also causes chemical burns and can be deadly if exposure is prolonged. Any acid mixed with bleach does the same, including lemon juice and some toilet bowl cleaners (which is why you shouldn’t pour bleach in the toilet!). Rubbing Alcohol. Alcohol combined with bleach produces chloroform, which can make you lose consciousness. Breathing chloroform for too long is deadly. Other dangerous substances can be produced when mixed with alcohol such as hydrochloric acid and chloroacetone. The takeaway here? Never mix bleach with anything besides water. Source: the Kitchn

Kitchen Items You Can Put in Your Dishwasher

We may think dishwashers are only useful for plates and utensils, however there are plenty of larger items it can clean as well. It leaves them cleaner than you might achieve normally. Here’s a list of the items that are generally okay to run through the dishwasher. As with any product, always follow your user manual first to see if there are any specific cleaning requirements. Stove Grates and Caps. As long as your grates and caps are coated in enamel they’re fine to put in a dishwasher. Check to see if they look or feel like raw uncoated metal. If so, skip the dishwasher and wash these manually. Microwave Tables. Depending on their size, these tables are often a pain to clean in a sink. If you’re worried these aren’t as clean as they should be, toss them in the dishwasher. Refrigerator Shelves and Drawers. Some of these may be too big to fit in a dishwasher, but you may be able to stack a few in the same place you normally stack plates. Others you might be able to lay across the top. Sink Drain Cover. This one may be relatively easy to clean by hand compared to the previous ones, but they’re generally covered in stuff you may not want to touch. Give it a wash in your dishwasher for a quick and effortless clean. Select Cosmo Range Hoods come with ARC-FLOW permanent stainless steel filters. These are designed to be washed as many times as you need in your dishwasher. They’re also conveniently sized to fit! Find our entire catalog of Wall Mount, Under Cabinet, or Island Range Hoods here. Source: Food Network

How to Clean Stainless Steel Pots and Pans

These pans can often carry a hefty price tag, so it’s important to keep them in pristine condition. Luckily, it’s easy to shine up these pots and pans if you have all the necessary ingredients. Read how below. What You’ll Need: Stainless steel cleaning powder or baking soda Water A non-abrasive scrubbing pad (a Dobie pad or non-abrasive sponge is ideal to minimize scratches) A detail brush, like a toothbrush, to clean crevices A toothpick Rubber gloves (optional, but recommended, to protect your hands) Instructions: Add a small amount of tap water into the pot, followed by generous shakes of powdered cleaner. With the sponge, mix the water and powder to form a paste-like texture. With the sponge, spread the mixture around the pot. Make sure to cover the sides or walls. If you need more, add more powder and water. Scrub away at the stains. Make more paste as needed to clean out any pesky pots or crevices. Repeat the process for the outside of the pain. Rinse and dry the pan with a lint-free towel. Source: the Kitchn