Month: July 2021

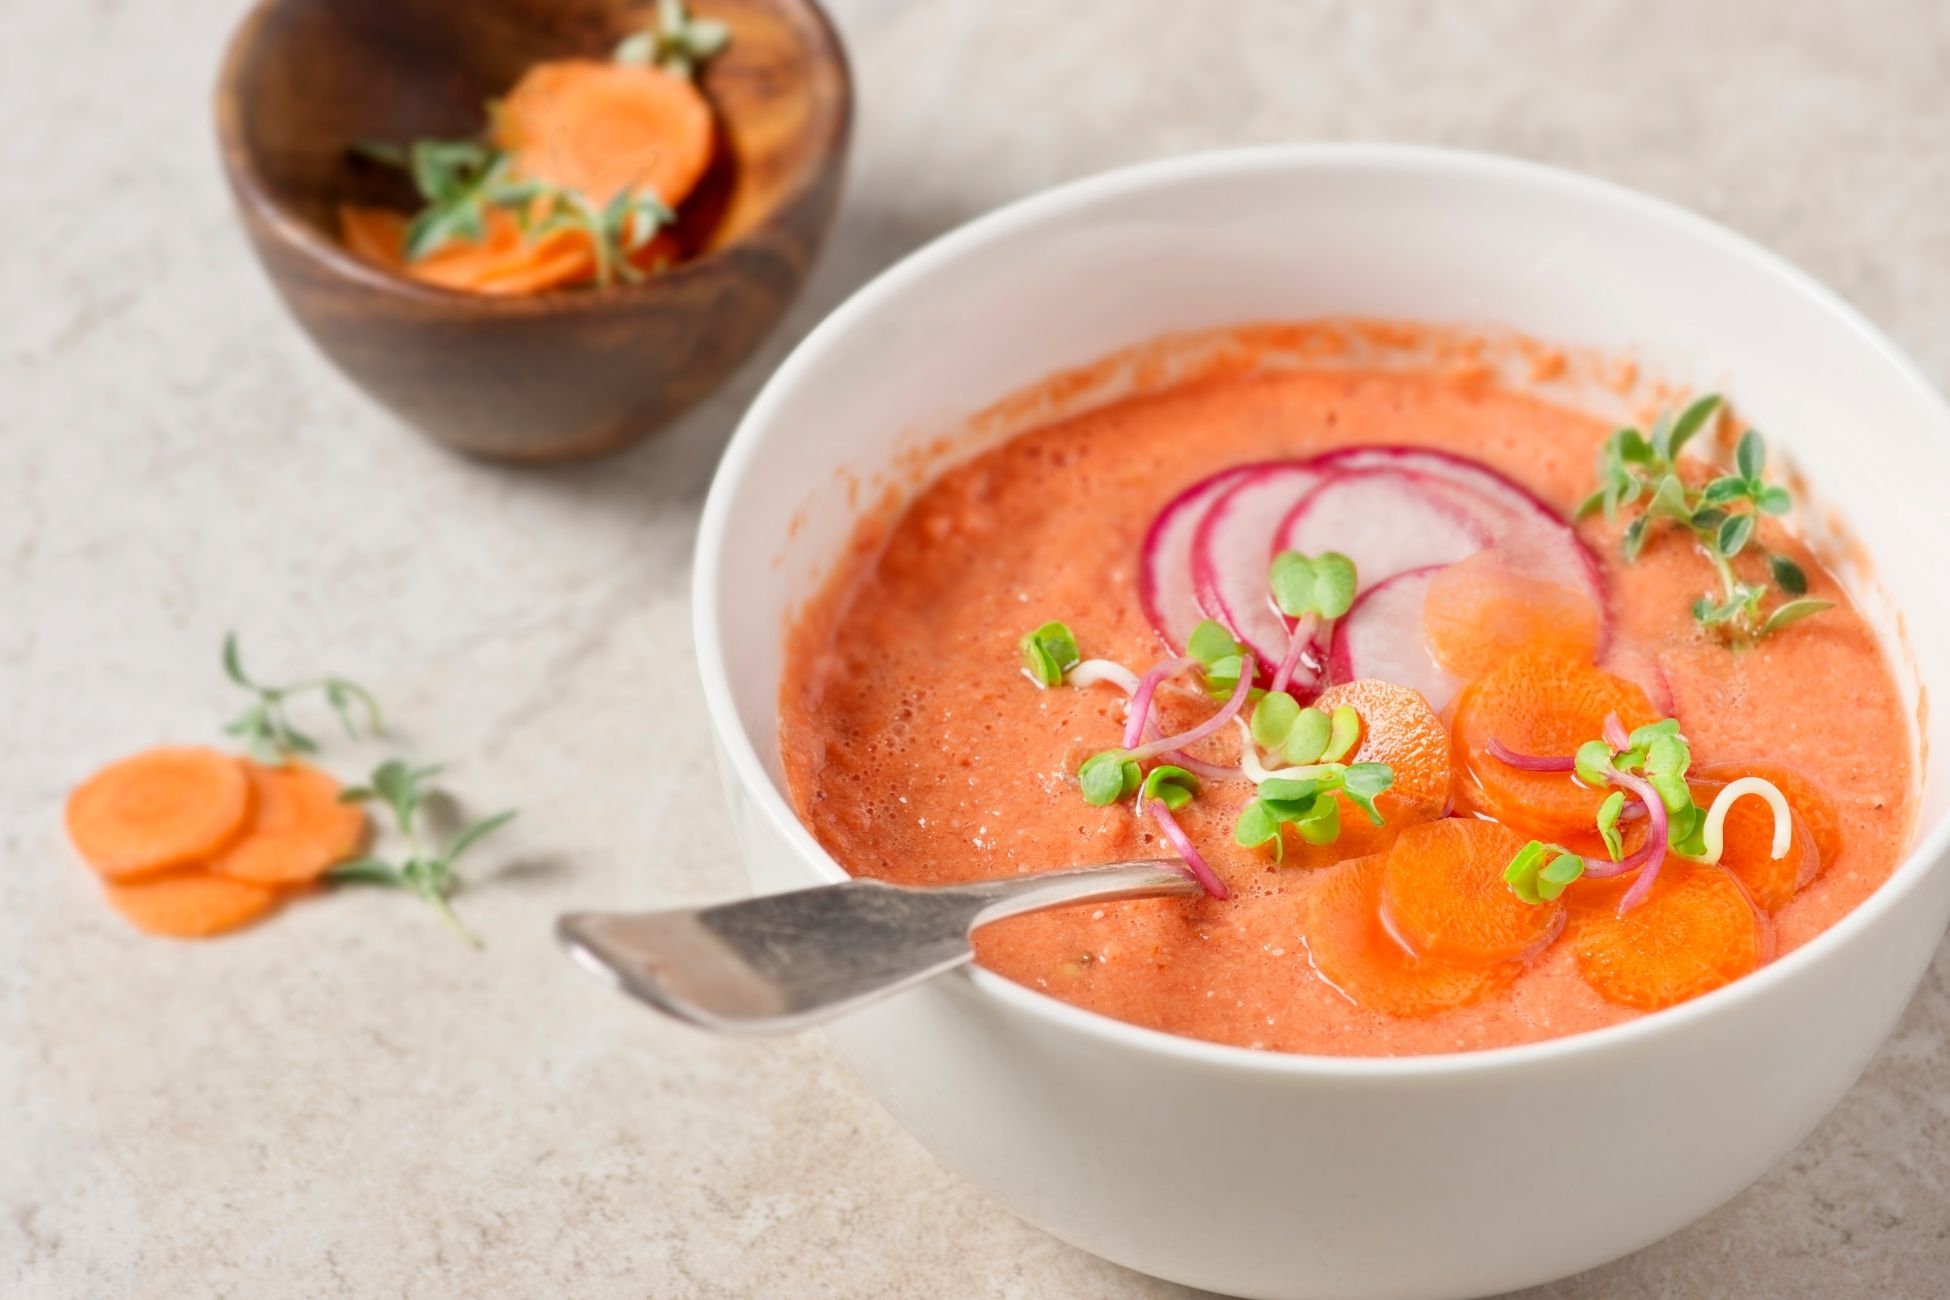
Watermelon Gazpacho Recipe

Gazpacho is a classic Iberian soup that typically relies on tomatoes, olive oil, sherry vinegar and bread. This refreshing twist brings watermelon to the forefront. The sweetness of the watermelon perfectly complements the other fruits in the gazpacho such as the tomatoes, cucumbers and bell peppers. It’s quick and easy to make. All you need is a blender and a few minutes of time to prepare it. Prep time: 15-20 minutesYield: Serves 4, makes 5 1/2 cups Ingredients: 1 pound seedless watermelon (about 1/2 personal watermelon), plus more for garnish 1 pound Roma or plum tomatoes (about 4) 1/2 medium English cucumber, plus more for garnish 1/2 medium red bell pepper, plus more for garnish 1/2 medium jalapeño pepper, plus more for garnish (optional) 1 clove garlic 2 tablespoons sherry vinegar 2 tablespoons olive oil 2 1/2 teaspoons kosher salt 1/4 teaspoon freshly ground black pepper Directions: Prepare the fruit and vegetables. Prepare the following ingredients, adding each to a blender as you complete them: Dice 1 pound seedless watermelon (about 3 cups). Quarter 1 pound Roma or plum tomatoes, scrape out the seeds with your fingers, and coarsely chop (about 2 1/2 cups). Seed and dice 1/2 English cucumber (about 1 cup), 1/2 medium red bell pepper (about 3/4 cup), and 1/2 medium jalapeño pepper, if desired. Smash 1 clove garlic with the side of a chef’s knife. Prepare the garnishes. Finely dice the following until you have about 2 tablespoons of each: watermelon, cucumber, and red bell pepper. Arrange in piles on a plate or in a shallow bowl, cover with plastic wrap, and refrigerate until ready to serve. Add the seasonings. Add 2 tablespoons sherry vinegar, 2 tablespoons olive oil, 2 1/2 teaspoons kosher salt, and 1/4 teaspoon black pepper to the blender. Purée the soup. Blend on medium-high speed to desired consistency, 30 seconds to 1 minute. Chill the soup. Refrigerate the soup in the blender until thoroughly chilled, at least 3 hours. Serve the soup. Stir or blend the soup to recombine if needed. Pour the soup into bowls and garnish with the reserved watermelon, cucumber, and bell pepper. Source: the Kitchn

Air Fried Corn on the Cob Recipe

Serve up an all-time favorite, corn on the cob, with record-breaking time thanks to an air fryer. Feel free to season the corn as desired. Coat with olive oil or lather in butter to ensure extra crispiness. These can be served on their own or with other BBQ dishes at your next cookout. Ingredients: Corn Olive Oil Cooking Spray Butter (optional) Pepper Garlic Salt Directions: Cut corn in half to fit into air fryer Spray with olive oil or lather in butter Season with fresh pepper and garlic salt Cook at 400°F for 10 to 15 minutes

Make Strawberry Lemonade from Scratch

We’re well into summer, and nothing complements the season better than a glass of ice-cold strawberry lemonade. As with most things, strawberry lemonade tastes best when made from scratch. You’ll only need a few simple ingredients to make a pitcher full of the summertime treat. Serve it for your next family cookout or even add a shot of our favorite liquor for a delicious alcoholic beverage. Ingredients: 2 cups strawberries (10 to 12 ounces) 2 pounds lemons (8 to 10 medium) 1 cup plus 2 tablespoons granulated sugar 4 cups cold water, plus more as needed Ice Directions: Prep the strawberries and squeeze the lemons. Hull and quarter 2 cups fresh strawberries. Place in a blender. Juice 2 pounds lemons until you have 1 1/2 cups juice. Add the juice to the blender. Make the strawberry mixture and strain. Add 1 cup plus 2 tablespoons granulated sugar and blend on high speed until the strawberries are puréed and the sugar is dissolved, 20 to 25 seconds. Pour the mixture through a fine-mesh strainer into a 2-quart or larger pitcher. Discard the contents of the strainer. Add the water and serve over ice. Add 4 cups cold water to the pitcher and stir until thoroughly combined. Taste the strawberry lemonade; if it’s too intense, add more cold water 1/4 cup at a time as needed. Serve the strawberry lemonade over ice. Source: the Kitchn

Air Fried Fajitas Recipe

Serve up classic and delicious fajitas in only a few minutes with the help of your air fryer. The combination of seasonings, chili, peppers and onions leave the fajitas packed with flavor. There’s no need to fire up an oven or spend more time waiting for these to cook. Just line your air fryer basket with aluminum foil and you’ll have fajitas ready to go in under 10 minutes. Serve them alone or along your favorite side dishes. Ingredients: 5 tablespoons olive oil 2 tablespoons garlic salt 2 tablespoons black pepper 2 tablespoons chili 1 lb meat 1/4 cup bell pepper 1/4 cup onion 1/8 cup green onions Directions: Mix olive oil, garlic salt, black pepper and chili in a bowl Mix in the meat, bell pepper, onions and green onions Line air fryer basket with aluminum foil and load the fajitas Cook at 400°F for 5 minutes. Mix and cook for another 5 minutes if needed

Tips for Moving Appliances

Planning a move in the near future? Follow along this guide to ensure your kitchen appliances are properly prepared for the transition. Skip out on extra mover fees and avoid any malfunctioning appliances after the move. With all major appliances, it’s best to contact the dealer for specific move instructions or refer to the owner’s manual. What You’ll Need: Household cleaner Cleaning and/or work gloves Packing tape Screwdriver and/or wrench Refrigerator. Unplug your refrigerator at least 24 hours prior to the move. Dispose of all perishables and make sure it is cleaned thoroughly. Once the freezer has defrosted, clean and dry all surfaces and removable containers. This will prevent mildew and odors forming. Either remove or secure all racks so they don’t shift around during the move. If your refrigerator has an icemaker, disconnect the water line and make sure it’s completely drained. Stove. Thoroughly clean the inside and outside of the stove. Be sure to remove the racks or securely fasten them so they don’t shift around. If you have a gas stove contact your gas company or where the stove was purchased from to find out if you can move it without a professional. Make sure the gas is turned off before you start disconnecting the line with care. These lines can be fragile and require special handling. Tape down the knobs and elements to make sure nothing is lost during the move. Dishwasher. The dishwasher needs to be emptied and the utensil holder/rack removed and packed separately. Run a cycle then let the unit dry before you tape the door closed. Finishing Touches. Secure all power cords so they don’t dangle or come loose. Make sure all the doors, extra nuts or screws are taped and secured before moving. Source: the Spruce

Kentucky Hot Brown Recipe

Indulge with this classic Kentucky Hot Brown recipe. If you like a hot turkey sandwich, you’ll definitely love this! The open-faced sandwich sits on toasted sliced bread piled high with roasted turkey, tomato and creamy mornay sauce. It’s topped off with crispy bacon and a sprinkle of parsley. The contrasting textures of crispness, creaminess and tang make it a perfect standalone meal. Prep time: 10 minsCook time: 20 minsTotal time: 30 minsServings: 2 servingsYield: 2 open-face sandwiches Ingredients: For the sandwich: 4 slices bacon 4 thick slices Texas toast or white sandwich bread 10 ounces deli-sliced roast turkey 1 tomato 1/8 teaspoon kosher salt (optional) 1/8 teaspoon freshly ground black pepper (optional) 1/2 teaspoon chopped fresh parsley, for garnish For the cheese sauce: 2 tablespoons unsalted butter 2 tablespoons all-purpose flour 1 cup whole milk, room temperature 1/2 cup heavy cream, room temperature 1/4 cup (1 ounce) grated Pecorino Romano 1/2 teaspoon kosher salt 1/8 teaspoon freshly ground black pepper 1/8 teaspoon ground nutmeg Directions Preheat the oven, prepare two baking sheets: Preheat the oven to 400°F. Line two rimmed baking sheets with heavy duty aluminum foil—one for the bacon and other to assemble the sandwiches, it should be large enough to set two slices of bread side by side. Cook the bacon: Lay the bacon slices on one of the baking sheets.Cook the bacon, until crispy and to your liking, rotating the pan halfway through cooking if necessary, and checking for doneness at about 12 minutes.Transfer bacon to a paper-towel lined plate to drain excess grease. Toast the bread and assemble the sandwiches: Toast 4 slices of bread in a toaster, toaster oven, or regular oven.On the remaining baking sheet place two slices of toast side by side in a single layer. Cut the other two slices of toast on a diagonal to form triangles and set those pieces aside.Cut four slices of tomato. Divide the turkey evenly between the slices of toast on the baking sheet. Top each stack of turkey with two slices of tomato. Season with salt and pepper. Make the cheese sauce: Set a small heavy-bottomed saucepan over medium heat. Add the butter. Once it melts, slowly whisk in the flour and continue to whisk until the mixture turns a shade darker and begins to smell slightly nutty, about 1 minute. This will allow the raw flour taste to cook out.Slowly pour in the milk and cream, whisking constantly, until the mixture is smooth and thick, about 3 minutes. When you first start pouring in the liquid, it will look ugly and grainy. Don’t worry! It will calm down, come back together and smooth itself out once all of the liquid is whisked in. Remove from heat and add the cheese: Remove the sauce from the heat and whisk in the cheese, salt, pepper, and nutmeg. Whisk to combine until the cheese melts. Taste and adjust seasonings as necessary, keeping in mind the saltiness of your turkey.Spoon half of the sauce over each sandwich. Broil the sandwiches: Set the oven rack about 5 inches from the broiler element. Preheat the broiler. Broil the sandwiches until the sauce is browned in spots and bubbling, 3 to 5 minutes. Serve the sandwiches: With a spatula, transfer each sandwich and two triangles of toast to a plate. Spoon the remaining sauce from the baking dish onto the plates.Crisscross 2 slices of bacon over top each sandwich and garnish with parsley. Serve while still hot. Source: Simply Recipes

Cream Cheese Peach Empanada Recipe

Add this recipe to your dessert to-do list! Cream cheese peach empanadas pack all the ingredient essentials to satisfy your sweet tooth. Try using ripe peaches for the best results. Involve your entire family for a fun and easy air fryer recipe this week. Ingredients: Peach 1/4 Cup Cornstarch 1 Tablespoon Cinnamon 1/8 Cup Brown Sugar Goya Empanada Disc Cream Cheese Non-stick Cooking Spray Directions: Peel and chop a ripe peach Mix the cornstarch, cinnamon, brown sugar and peaches in a bowl Spray air fryer pan with non-stick spray and load peaches Cook at 400°F for 3 to 4 minutes Stuff and seal the Goya empanada disc with the peaches and cream cheese Spray with cooking spray and sprinkle with cinnamon Cook at 350°F for 7 minutes on each side

Cinnamon Ice Cream Recipe

Nothing is more refreshing than a rich and creamy cinnamon flavored ice cream during these hot summer days. It’s a great alternative to vanilla ice cream when served with pie, cake or fresh fruit. If you want a bit more flavor add a teaspoon of vanilla extract. Easily prepare this recipe with simple, everyday ingredients. Prep time: 8 minsCook time: 15 minsChurning time: 25 minsTotal time: 48 minsServings: 8 servingsYield: 1 quart Ingredients: 2 teaspoons of ground cinnamon1 cup of whole milk3/4 cup of sugar1/2 teaspoon of salt2 cups of heavy cream, divided6 egg yolks Directions: Heat the cinnamon until fragrant: Place the cinnamon in a small, dry skillet, over low heat. Keep the skillet moving just until the cinnamon becomes fragrant, just about a minute at the most. Remove from heat (note that too long in the pan will burn the cinnamon). Warm the milk, sugar, salt, cinnamon, and 1 cup of cream: In a medium saucepan over medium heat, heat the milk, sugar, cinnamon, and 1 cup of cream, whisking to incorporate the cinnamon into the liquid. Chill remaining cream over bowl of ice, and prepare strainer over bowl: While the milk mixture warms, set a bowl over another bowl filled with ice. Place the remaining cup of cream into the now-chilled bowl and set a mesh strainer on top. Temper the egg yolks, and add to cinnamon cream mixture: In a separate bowl, whisk together the egg yolks. Slowly, pour the warm milk mixture into the egg yolks, whisking constantly to keep the eggs from cooking. Pour the mixture back into the saucepan. Heat until mixture thickens: Stir the mixture constantly over medium heat with a wooden spoon or heat-proof spatula, scraping the bottom as you stir. Stir until the custard thickens and coats the back of a spoon. When you run your finger through the custard across the back of the spoon, the custard should not run. Pour the custard through the strainer into the chilled cream: Stir until combined and cooled over the ice bath. Chill the mixture thoroughly and then process in your ice cream maker: Process the ice cream mixture according to the manufacturer’s instructions. Source: Simply Recipes

Avocado Egg Boat Recipe

Looking to mix up how you prepare avocados? Prepare them in an egg boat recipe instead! This recipe leaves the avocados delicious and flavorful with minimal effort needed. Pair these with your favorite breakfast dishes or on their own. Ingredients: Avocado 2 Eggs Garlic Salt Scallions Directions: Cut avocado in half and scoop out a bit from the center to make room for the eggs. Crack an egg in each side and season with garlic salt Cook at 350°F for 12 to 15 minutes. Top with scallions (optional).

An Easy Trick to Measuring Sticky Ingredients

If you’ve ever made a smoothie with peanut or almond butter then you’ve probably run into a common issue. After struggling to get the ingredient out of the jar and into a measuring cup, half of it sticks and stays there. You’ll be left with a mess and a slightly-less-than-accurate amount for your recipe. However, there’s an easy trick to avoid this issue altogether. Simply spray the measuring cup with a little oil or cooking spray before using it. Afterwards, the ingredient will slide right out. It works for many other sticky ingredients such as honey and corn syrup. You can apply this same cooking spray trick to other common kitchen hassles. If you ever need to grate cheese, apply some cooking spray to the grater before using it. Spray tupperware before using it to prevent colored stains. Source: the Kitchn