
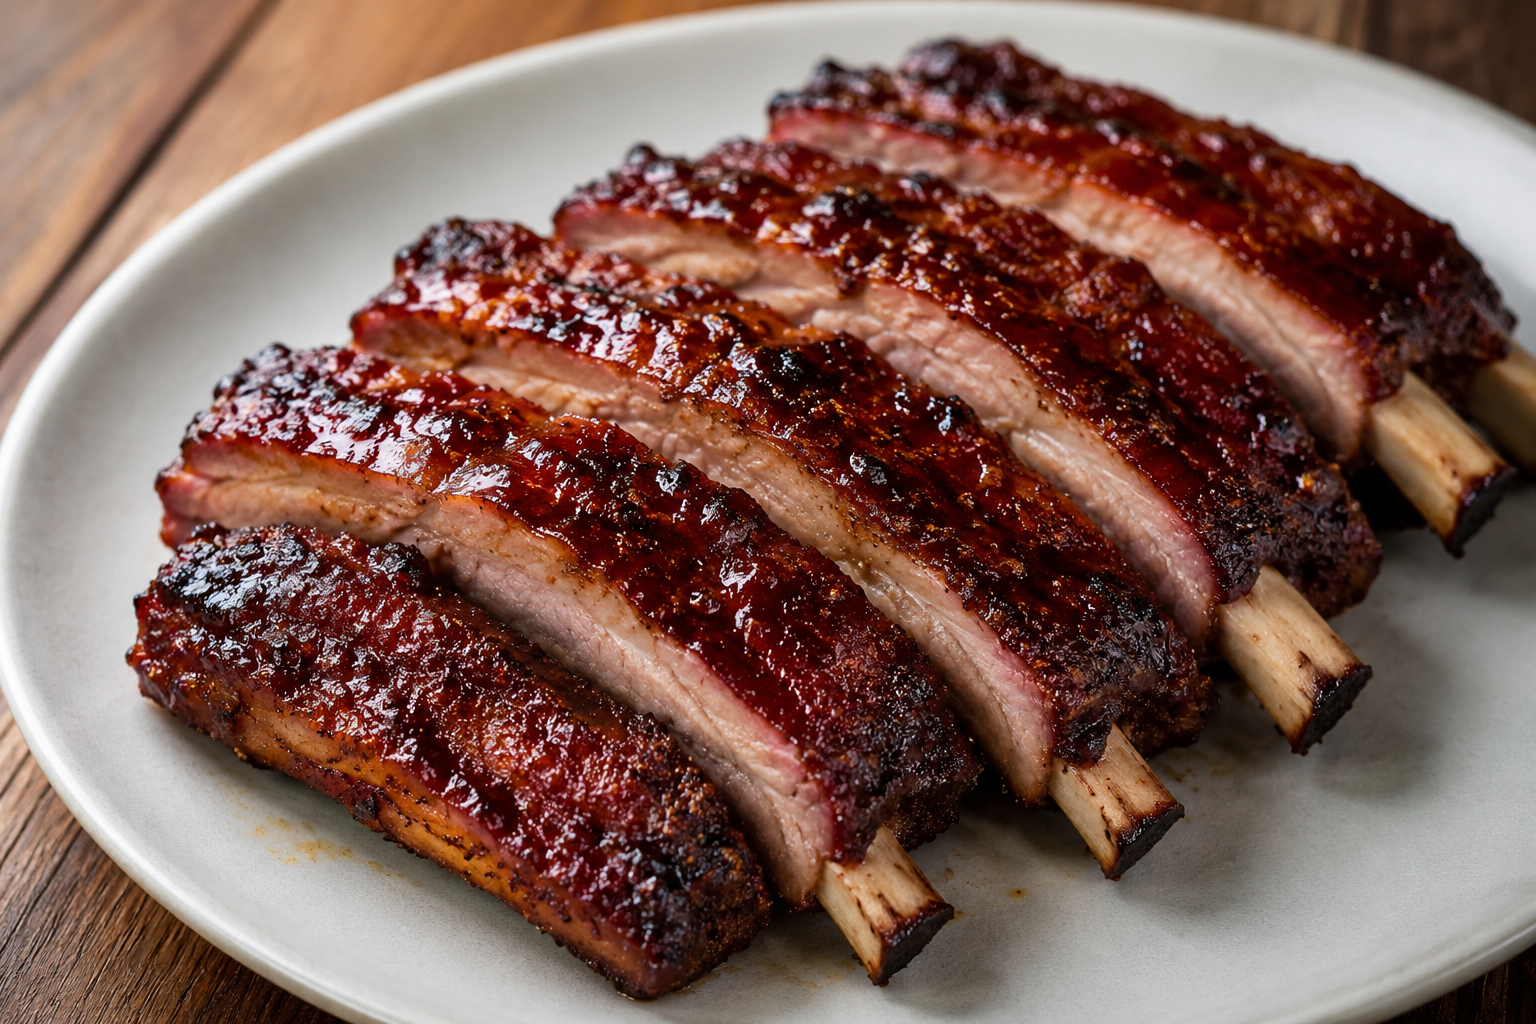
Baby Back Ribs Recipe | Low and Slow Oven Method with Grill Finish
Baby back ribs made at home have a reputation for being complicated or time-consuming in a way that puts people off attempting them. The reality is that the active work involved is minimal — a thorough seasoning session before they go in the oven, and a few minutes of grill attention at the end. The hours in between require almost nothing from you. The oven does the work, the foil seal keeps the moisture in, and the grill finish at the end delivers the char and caramelization that separates genuinely great ribs from the ones that are merely tender.
This recipe uses a technique that serious rib cooks have relied on for years: a low oven braise sealed in foil followed by a hot grill finish. The oven phase at 300°F for three hours breaks down the collagen in the ribs, converting it to gelatin that keeps the meat moist and produces the tender, pull-from-the-bone texture that defines a properly cooked baby back. The grill finish — just 3-5 minutes per side on high heat — develops the exterior char, firms the crust, and adds the smoky, caramelized character that oven cooking alone can’t produce. Together, the two methods create ribs that are deeply tender from the inside out with a charred, seasoned exterior that makes them look and taste like they came from somewhere serious.
The Blue Hog dry rub is the seasoning foundation here — a competition BBQ rub with a balanced profile that eliminates much of the guesswork from building a complex dry rub from scratch. The mustard binder holds everything in place during the long cook. The additional seasonings — oregano, thyme, cayenne, garlic powder, onion powder, paprika, salt, and pepper — build on the Blue Hog base to create a more layered, herbaceous profile that makes these ribs distinctly more interesting than a single-rub application produces.
Why This Technique Works So Well
The oven-then-grill method is one of the most reliable approaches to excellent home ribs, and understanding why it works helps you execute it with confidence.
The foil seal during oven cooking creates a steam environment around the ribs that accelerates collagen breakdown. Collagen — the connective tissue that makes ribs tough when undercooked — converts to gelatin over time and heat, and the moist heat inside the foil packet accelerates this conversion more effectively than dry oven heat alone. The result after three hours is ribs where the meat is genuinely yielding throughout, not just on the surface.
The low oven temperature — 300°F — is important. Higher oven temperatures would cook the ribs faster but produce dried, tight meat as the moisture evaporates before the collagen has time to properly convert. 300°F is slow enough to let the conversion happen thoroughly while the foil packet retains moisture that would escape in an open roasting environment.
The mustard binder deserves more attention than it gets in rib recipes. Yellow mustard’s acidity helps break down the surface proteins slightly during the early cooking phase, improving seasoning penetration, and the mustard itself largely disappears flavor-wise during the long cook — guests who are told there’s mustard on the ribs often can’t detect it at all. What they taste is the seasoning, not the mustard. It’s a technique borrowed from competition BBQ where binders are used specifically to make dry rubs adhere and penetrate more effectively.
The grill finish introduces something the oven fundamentally cannot produce — direct high heat contact with the rib surface that caramelizes the rendered fat and seasoning crust into the charred, textured exterior that separates barbecue from roasted pork. Even 3-5 minutes per side on a hot grill creates a meaningfully different exterior character than straight oven cooking produces.
Membrane Removal: Why It Matters
The membrane — technically called the peritoneum — is a thin, papery silverskin on the bone side of the rack. Whether to remove it is technically optional in this recipe, but it’s worth doing.
The membrane stays tough through cooking, creating a somewhat chewy barrier between the bone and the meat that affects both texture and seasoning penetration. Removing it allows the dry rub to contact the meat directly on both sides rather than sitting on top of a layer that won’t absorb flavor.
Removing it takes about 60 seconds once you know the technique. Slide a butter knife under the membrane at one end of the rack — typically where the first bone meets the membrane. Lift slightly to separate it from the bone, then grip it firmly with a paper towel (dry hands on slippery membrane tend to slide) and pull with steady pressure toward the other end of the rack. It usually comes off in one clean piece. If it tears, use the butter knife to lift the remaining sections and pull each piece individually.
Choosing the Right Ingredients
The ingredient choices here are specific enough to be worth discussing.
Ribs: Baby back ribs — the smaller, leaner rib cut from the upper portion of the rib cage — suit this oven method well. Their lighter collagen content responds to three hours at 300°F appropriately, producing tender ribs without the risk of them becoming overcooked and mushy that spare ribs’ longer required cook time would demand in the same time window. Choose racks with good meat coverage across the bones — thin racks with visible bone through the meat won’t reward the technique the same way a meaty rack will.
Blue Hog Dry Rub: Blue Hog Tennessee Red and their original competition rubs have a strong following in BBQ competition circles for good reason — they’re well-balanced, not dominated by any single flavor note, and work across different cooking methods. Using it as the base of the seasoning stack here means you’re building on a proven foundation rather than starting from scratch. If Blue Hog isn’t available in your area, any quality competition-style BBQ dry rub serves the same purpose.
Additional Seasonings: The additional herbs and spices applied alongside the Blue Hog rub add specific dimensions. Oregano and thyme bring herbaceous complexity that straight BBQ rub profiles sometimes lack. Cayenne controls heat level — adjust based on your household’s preference, from a pinch for mild to a full teaspoon for meaningful heat. Paprika adds color and mild sweetness. The garlic powder, onion powder, salt, and pepper reinforce the savory foundation that the Blue Hog rub starts.
Mustard: Standard yellow mustard — the kind in a squeeze bottle — is what most BBQ cooks use as a binder. Don’t use Dijon or anything fancy. Yellow mustard’s neutral flavor makes it invisible in the final product, which is the goal.
Ingredients
Serves 2-3
- 1 rack baby back pork ribs (approximately 4 oz seasoning per rack)
- Yellow mustard, enough to coat both sides
- Blue Hog dry rub, generous amount
- 1 tsp dried oregano
- 1 tsp dried thyme
- ½ tsp cayenne pepper (adjust to taste)
- 1 tsp garlic powder
- 1 tsp onion powder
- 1 tsp paprika
- Salt and pepper, to taste
- Olive oil (for grill grates)
- Butter and garlic paste (for finishing, optional)
- Aluminum foil
Step-by-Step Instructions
Step 1 — Preheat and Prep the Tray
Preheat your oven to 300°F (150°C). Line a large baking tray with aluminum foil, leaving significant overhang on all sides — you’ll need enough foil to completely wrap and seal the rack later. The foil needs to create a tight, secure packet with no gaps where steam can escape during the long oven cook.
Step 2 — Remove the Membrane
Place the rack bone-side up on the foil-lined tray. Using a butter knife, work under the membrane at one bone end to create a starting point. Grip with a paper towel and pull the membrane from the rack in one smooth motion. Discard. This step is optional but consistently produces better texture and seasoning penetration in the finished rib.
Step 3 — Apply the Mustard Binder
Coat both sides of the rack with a thin, even layer of yellow mustard. Don’t apply it too thickly — a thin layer is all that’s needed to function as a binder. The mustard should cover all meat surfaces but not be so heavy that it pools or drips.
Step 4 — Combine and Apply the Dry Rub
In a small bowl, combine the Blue Hog dry rub with the oregano, thyme, cayenne, garlic powder, onion powder, paprika, salt, and pepper. Mix to combine. Apply the seasoning mixture generously to both sides of the rack — you want visible seasoning coverage across all meat surfaces. Using your hands, massage the seasoning firmly into the meat so it adheres to the mustard binder and contacts the meat directly rather than sitting loosely on the surface. Be thorough — this is where the flavor foundation of the finished rib is built.
Step 5 — Wrap and Seal
Wrap the rack tightly in the overhanging foil, folding edges over multiple times to create a secure seal that won’t open during cooking. The packet needs to hold steam inside — a loose seal defeats the purpose of the foil wrapping phase. If the foil seems thin or the seal feels uncertain, add a second layer of foil over the outside of the packet.
Step 6 — Low and Slow Oven Cook
Place the foil-wrapped rack on the baking tray and put it in the preheated 300°F oven. Cook for approximately 3 hours. Resist the urge to open the foil packet to check during the cooking period — every opening releases steam that the foil is retaining for a reason.
At the 3-hour mark, carefully open the foil packet — hot steam will escape immediately when you break the seal, so open the far end first and let it vent before reaching in. Test the ribs with tongs by picking up the rack from one end. A properly cooked rack will bend significantly, with the meat looking like it’s about to pull away from the bone ends. A toothpick or thin probe inserted between bones should slide through the meat with no resistance. If the rack still feels stiff, reseal the foil and return to the oven for another 20-30 minutes before testing again.
Step 7 — Grill Finish
Preheat your grill to medium-high heat for 5 minutes with the lid closed. Brush or wipe the grill grates with a small amount of olive oil to prevent sticking. Carefully transfer the rack from the foil packet to the grill grates. The ribs will be very tender at this point and need to be moved carefully — use two pairs of tongs or a wide spatula to support the rack during transfer.
Grill for 3-5 minutes on the first side without moving, allowing grill marks and char to develop on the seasoning crust. Flip carefully and grill the second side for another 3-5 minutes. Watch closely during this phase — the rendered fat and sugars in the seasoning can catch quickly on high grill heat. You’re looking for defined grill marks and caramelized char on the exterior without burning through to the meat beneath.
If applying a BBQ sauce finish, brush sauce on during the last 2 minutes of grill time rather than earlier — the sugars in sauce burn quickly on high grill heat.
Step 8 — Rest and Slice
Remove the rack from the grill and allow it to rest for 5-10 minutes before slicing. Resting allows the temperature to equalize and juices to redistribute through the meat — cutting immediately releases the juices that resting would have retained. After resting, slice between the bones using a sharp knife, using the bone as a guide for each cut. Serve immediately.
Optional Butter and Garlic Finish
For an extra layer of richness, melt a tablespoon of butter with a small amount of garlic paste in a microwave-safe bowl and brush the mixture over the ribs immediately after they come off the grill. The butter melts into the hot surface of the ribs and the garlic paste adds savory depth that complements the dry rub seasoning. This finishing step is optional but noticeably improves the richness of the final result.
Recipe Variations
The base technique here is adaptable to several variation directions.
Seasoning Variations:
- Sweet and Smoky: Add 2 tablespoons of brown sugar to the dry rub mixture for a sweeter crust that caramelizes particularly well on the grill finish. Reduce cayenne to balance the added sweetness.
- Kansas City Style: Apply a generous layer of thick, sweet BBQ sauce during the last 10 minutes of oven cooking before the foil is fully sealed, then add another coat during the grill finish for a lacquered, saucy exterior.
- Memphis Dry Style: Skip any sauce entirely — serve the ribs with only the dry rub crust for the classic Memphis competition approach where the seasoning speaks for itself without sauce.
- Honey Garlic: Mix 2 tablespoons of honey with 1 tablespoon of garlic paste and brush over the ribs during the last 2 minutes of grill time for a sticky, caramelized finish.
Cooking Variations:
- Smoker Alternative: If you have a smoker, skip the oven phase entirely. Smoke the ribs unwrapped at 225-250°F for 2-3 hours with apple or cherry wood, then wrap in foil for 1-2 hours, then unwrap for a final 30 minutes to firm the bark. The result will have more pronounced smoke flavor than the oven method.
- Full Oven Approach: If a grill isn’t available, increase the oven temperature to 425°F after unwrapping the foil and cook for an additional 10-15 minutes to develop some exterior browning and crust. The result won’t match the grill’s char character but produces a well-cooked, attractive rib nonetheless.
Serving Suggestions
Baby back ribs anchor a spread naturally and pair with a range of sides that suit the same summer BBQ context.
Classic Pairings: Coleslaw — either creamy or vinegar-based — is the natural counterpart to the rich, fatty rib. Its acidity and crunch provide contrast that makes the ribs taste even better between bites. Baked beans, corn on the cob, and potato salad are the other elements of the classic BBQ plate that work alongside without competing.
Bread for Sauce Management: A thick slice of white bread or a soft roll is worth including not as a side dish exactly but as a functional element — it soaks up rendered fat and any sauce that runs from the ribs onto the plate in a way that makes eating them significantly more satisfying.
For a Group: Baby back racks scale directly — plan roughly one rack per two to three people as a main course depending on appetite and the rest of the spread. Multiple racks fit on the foil-lined tray simultaneously in the oven; the grill finish can be staggered if the grill surface doesn’t accommodate all racks at once.
Troubleshooting Common Issues
Ribs Still Tough After 3 Hours: The rack wasn’t adequately sealed in the foil, or your oven runs cooler than its dial suggests. Reseal and return to the oven for 30-minute increments until the bend test passes. A small oven thermometer placed inside confirms whether your oven is holding 300°F accurately.
Bark Burning on Grill: Grill temperature too high or ribs on too long during finish. Medium-high rather than full high grill heat, and watch closely — 3-5 minutes is a guideline, but your grill’s actual behavior may require adjusting this window shorter.
Ribs Falling Apart During Transfer: Properly cooked baby back ribs are genuinely fragile. Use two pairs of tongs or support the rack from beneath with a wide spatula during all transfers. Some tearing is normal and doesn’t affect the eating experience — it just makes for slightly less photogenic presentation.
Dry Ribs: Either the foil seal had gaps that allowed steam to escape, or the ribs cooked longer than needed before the foil was opened. Err toward checking at 3 hours rather than letting them go longer than needed — properly sealed ribs at 300°F rarely need more than 3 hours and 15 minutes.
Storage and Reheating
Baby back ribs store and reheat better than most people expect, making leftovers worth managing properly.
Storing: Slice between bones before refrigerating for easier storage and reheating. Store in an airtight container or wrapped tightly in foil for up to 4 days.
Reheating: Wrap leftover ribs in foil with a tablespoon of water or apple juice inside the packet to provide steam moisture. Heat in a 300°F oven for 15-20 minutes until heated through. This method maintains moisture better than microwaving, which tends to dry ribs out unevenly. A final 2-minute grill or broiler pass after oven reheating restores some exterior char that softens during storage.
Freezing: Fully cooked ribs freeze well for up to 3 months. Wrap individual portions in foil, then in plastic wrap or a freezer bag. Thaw overnight in the refrigerator before reheating using the foil-and-oven method above.
Perfect for Any Occasion
Baby back ribs made with this oven-to-grill method are more accessible than their reputation suggests — most of the three-hour cook time requires nothing from you, and the techniques involved are learnable on the first attempt. The result is ribs with genuinely tender interiors and charred, seasoned exteriors that hold up to any comparison. Whether you’re cooking for a summer gathering, a family dinner, or a personal project on a weekend afternoon when the grill is coming out anyway, this method produces ribs worth making regularly rather than saving for special occasions.