Author : Cosmo

New Cosmo Gas Ranges Coming Soon

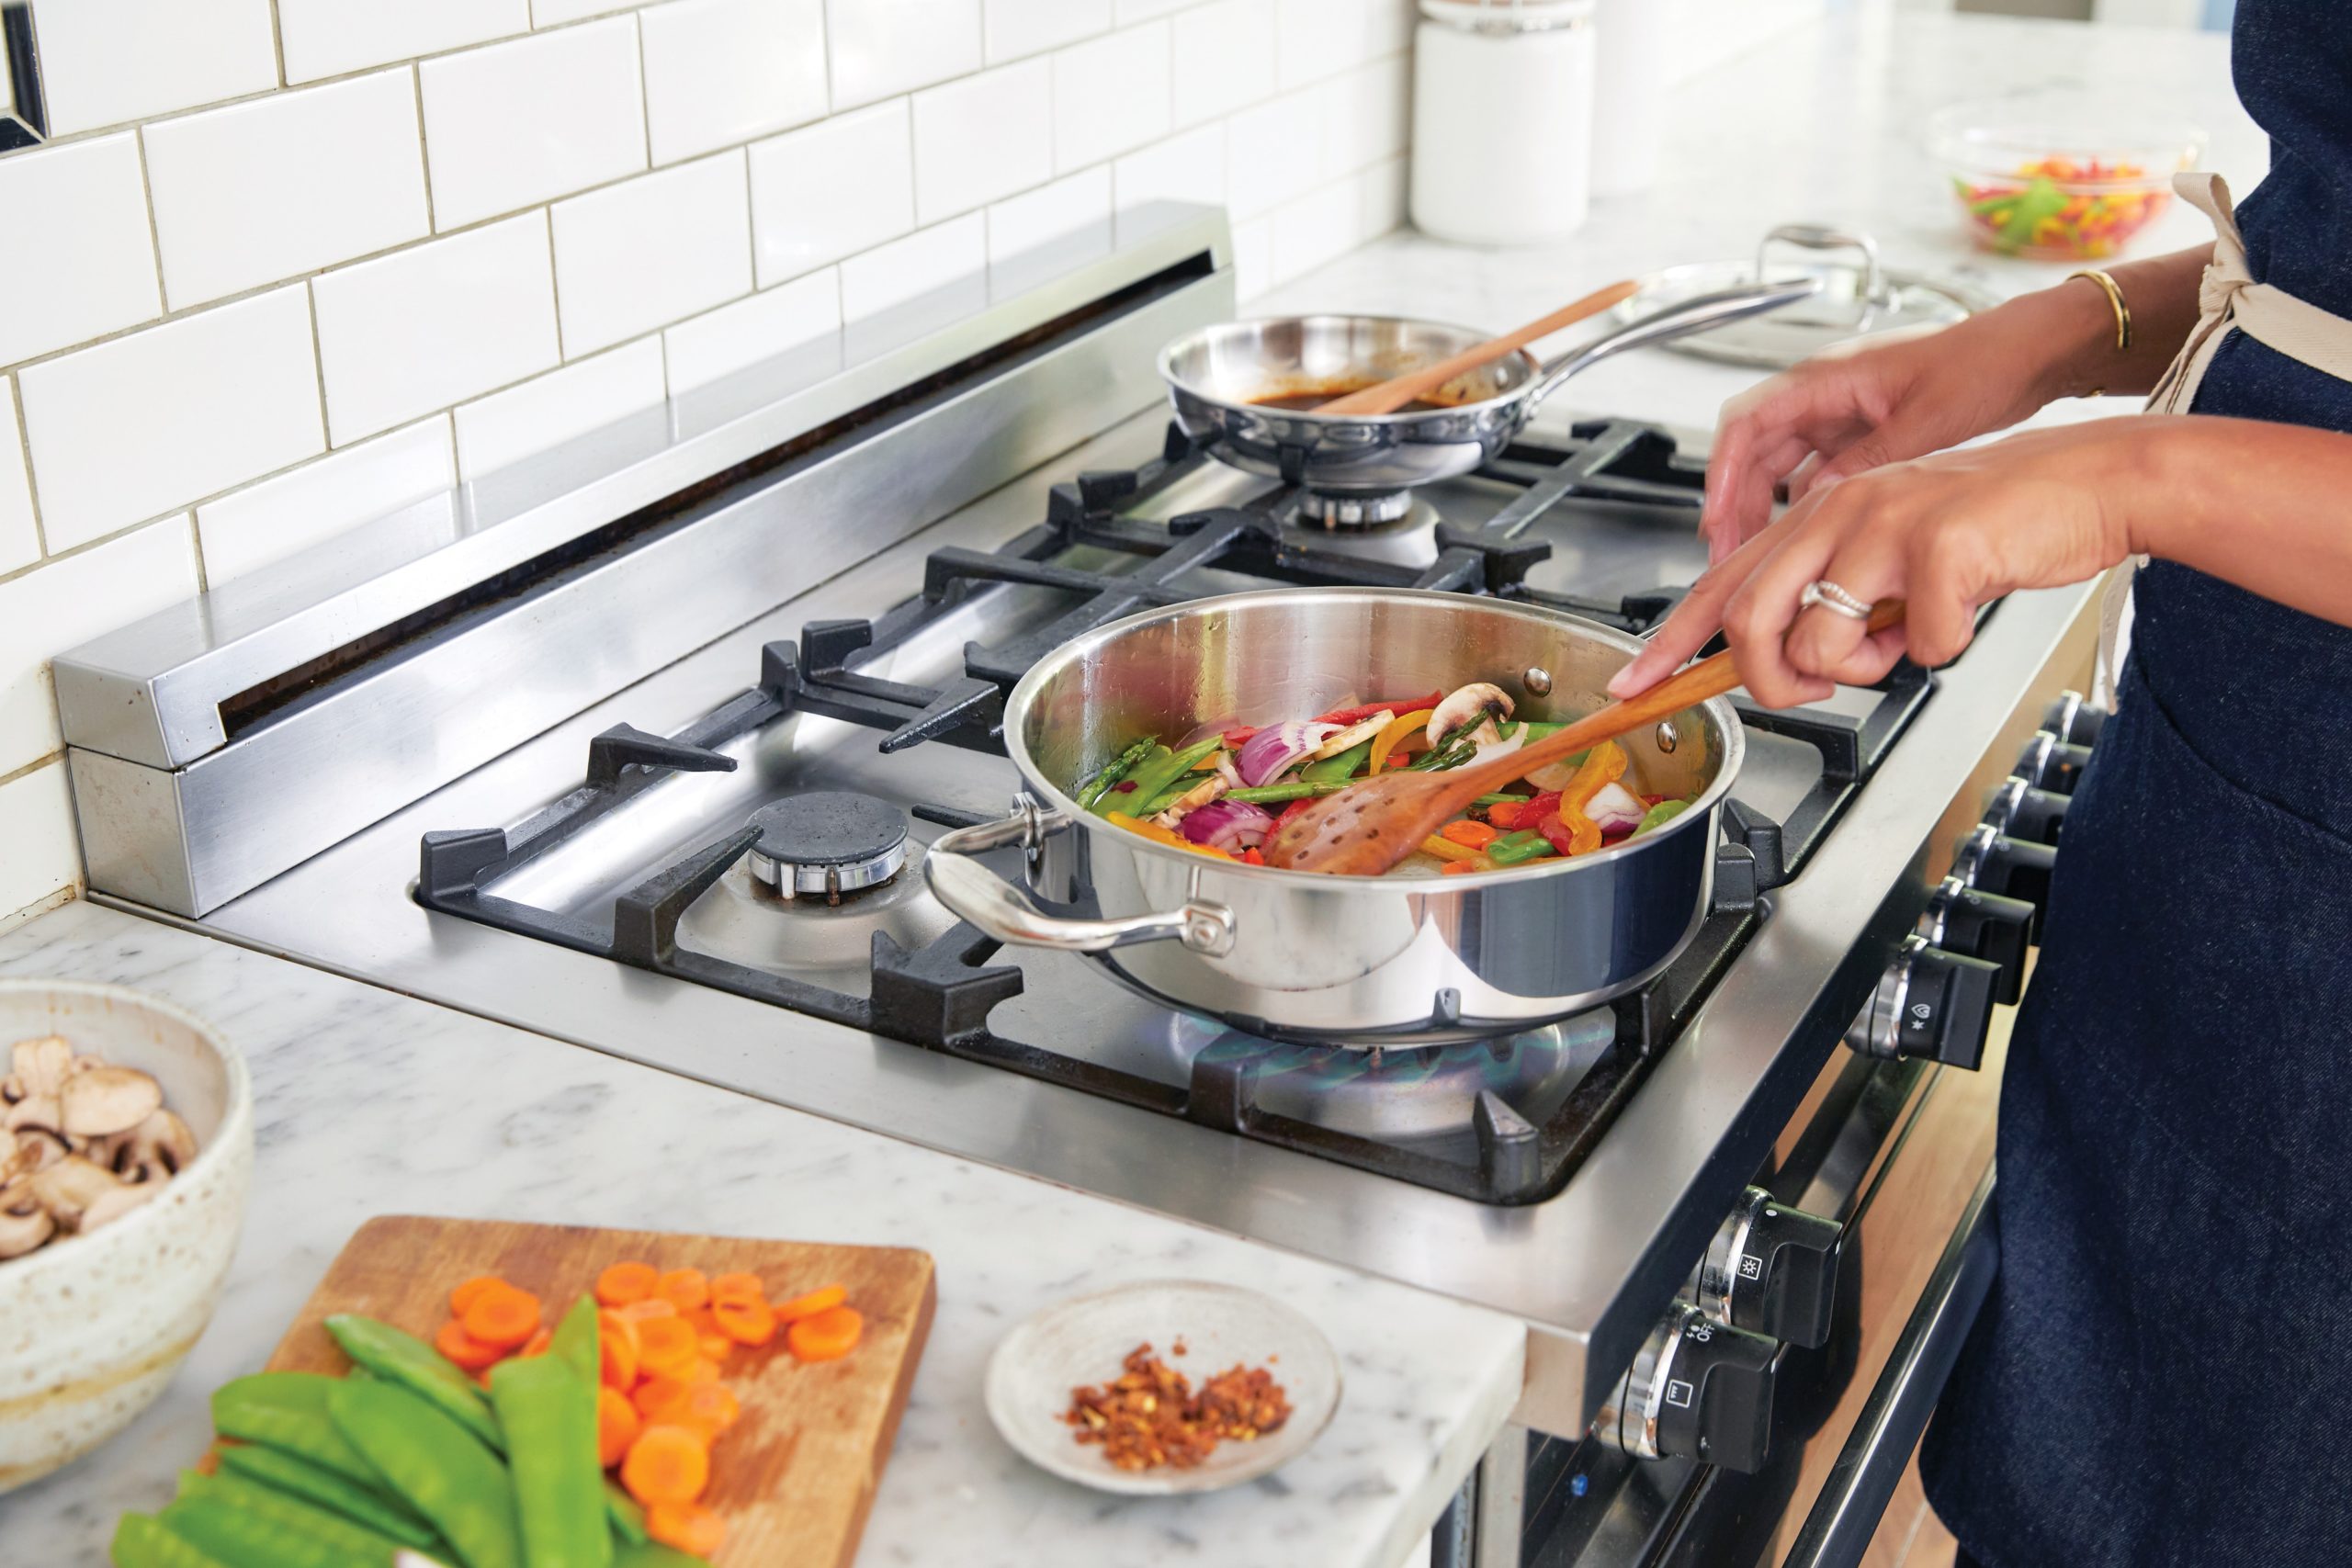
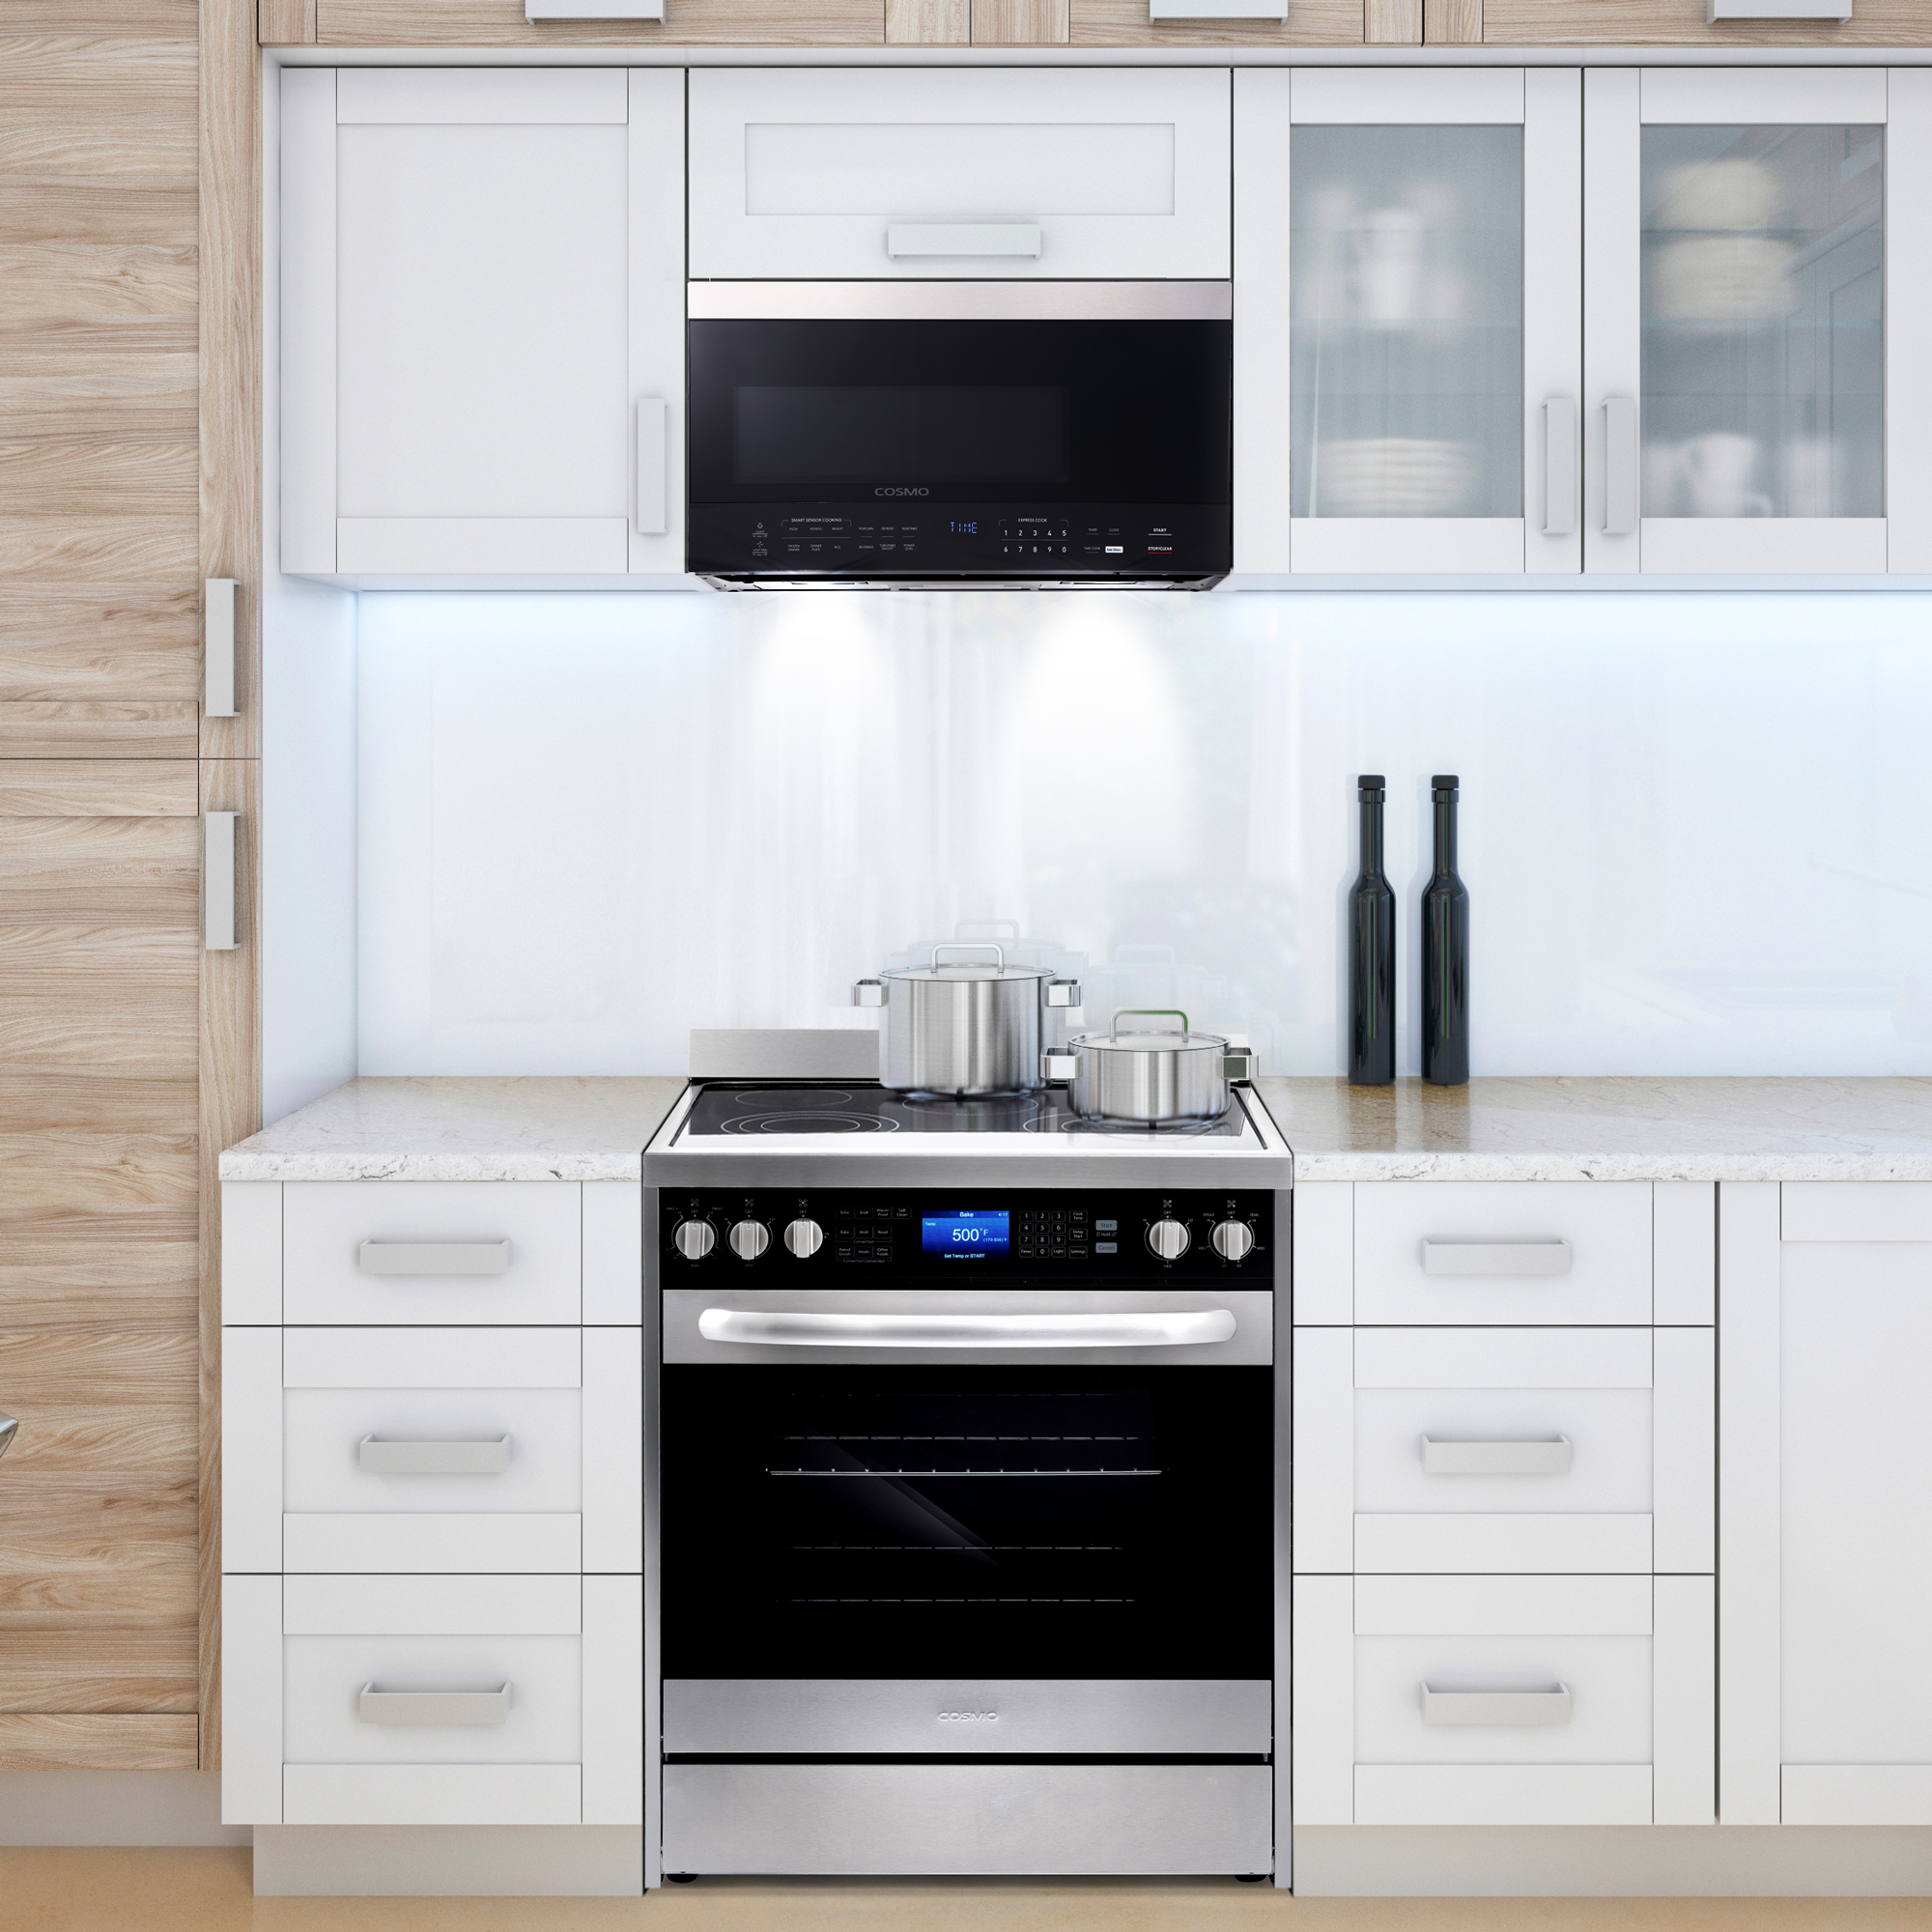
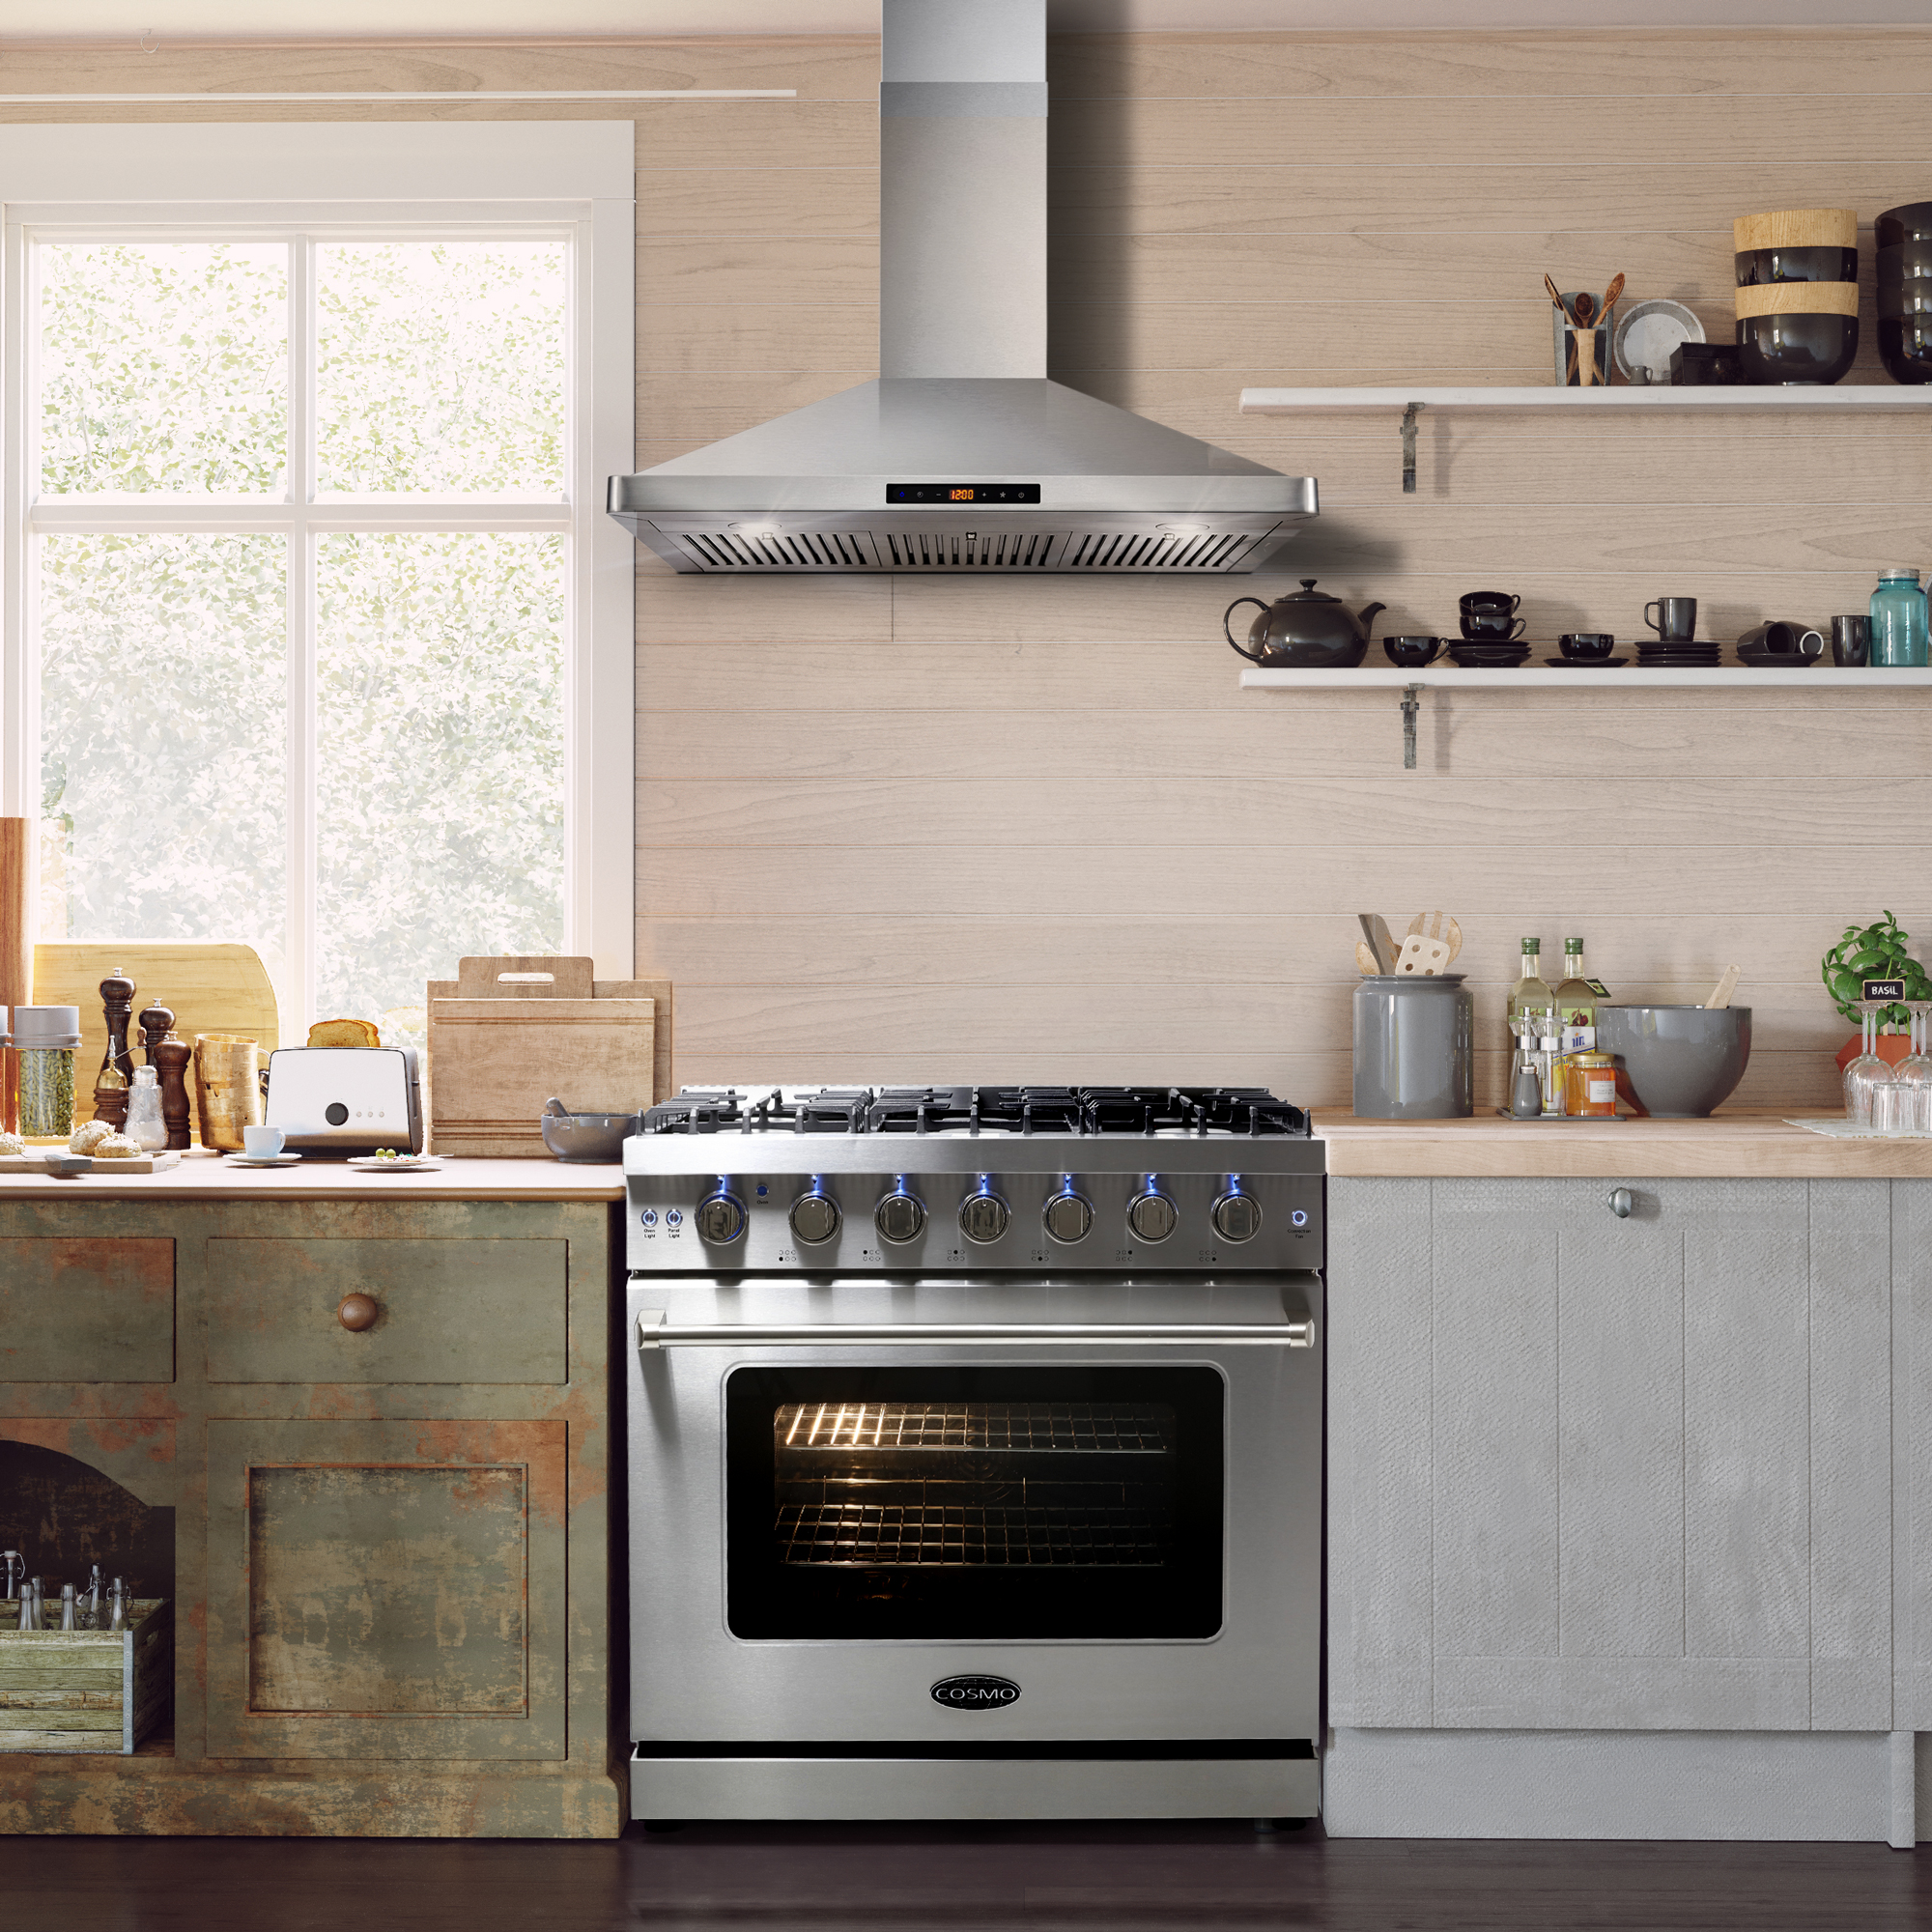
The new Cosmo range carries the modern sophistication we expect to see from a Cosmo Kitchen appliance. Cosmo is excited to introduce its new portfolio of Gas Ranges that make a bold statement.  They truly are a whole new class of chef’s kitchen inspired cooking products. Cosmo’s COS-ERPG models will be available in 30, 36 and 48 inches.  This model of gas range combines professional styling and performance quality to elevate your home cooking experience. This professional range has a beautiful, brushed stainless steel finish and three Layered glass windows, and a storage drawer at bottom.  Let’s take a closer look at what Cosmo’s Range brings to you: Large oven capacity is a prerequisite for most modern home kitchens and the COS-ERPG models have it in spades, so baking for a crowd is done in time. Their cooktops are equipped with a variety of different burners to suit needs from the largest pots and pans down to the most delicate sauces.  Special oven functions give you the precision to create everything from juicy roasts to delicate desserts. Designed for durability, these gas range are constructed with industrial, corrosion resistant grade stainless steel. A removable backsplash means this range is suitable for either freestanding or slide-in.  Whichever model you choose, these ranges all bring the kitchen together for the modern-day homeowner. Their refined design of the ranges is compatible with any home decor that makes updating your kitchen a breeze. The COS-EPRG366 gas range is the smartest way to revamp your kitchen, without having to compromise quality for price.  Look for them soon where Cosmo appliances are sold!! PROS: Six cooktop burners and one warming zone, including two select a size burners to customize your cooking options Spacious 6 cu. ft. oven capacity with modern professional styling Smooth glass ceramic cooktop is easy to clean Black Porcelain Drip Pan for Easy Surface Cleaning Heavy Duty Continuous Cast Iron Cooking Grates  Black ABS Knobs  Gray Porcelain Oven Interior with White Flakes One Halogen Lights Commercial Convection Fan  Three Layers Glass Window Storage Drawer at Bottom

Cooking with a Range – Beginner’s Guide to Cooking like a Pro at Home

Everyone is entertaining at home these days, and whether it’s for a small group or large gathering, the trend of professional-grade kitchens in the home is here to stay.  A top chef’s kitchen adds lots of value to your home, and the focus is the appliances.  Here are some key factors to consider when choosing pro-style chef-grade Gas Range . Gas Heats up Faster Because the Flame Is the Source of Heat Gas stoves heat much faster than electric,  with gas stoves, the flame itself is the source of heat. This means you don’t need to wait on for the burner to get hot – your pan will instantly begin feeling the heat. When You Turn off the Burner, You Turn off the Heat  When you turn off the burner, you turn off the flame. And, when you turn off the flame, you turn off the heat. Simmering May Take Some Practice  When it comes to cooking on a gas range, there’s  one thing that many people have trouble with, and that’s how to simmer. It may take some practice. With a bit of practice, you will find the perfect setting for the simmer function.  Learn What Gas Smells Like and Know How to Turn the Gas Off  it’s very important to know what natural gas and propane (depending on which you have) smell like. While leaks are very rare, they are possible. For your safety, knowing how to turn off the gas is crucial. Take the time to learn where the valve switch is and how to use it before you even cook. Be Mindful of the Flame Remember that you are cooking with an open flame. With a gas range, the flame is the heat. So, if something comes in contact with it, a fire can start very quickly. Watch out for things such as kitchen towels, oven mitts, long hair, loose clothing, etc. And, get in the habit of turning a burner off the moment you remove a pan from it. Keep It Clean No matter how hard you try, cooking can get messy. Food splatters, drips, spills, and so forth. And while you may want to overlook this mess or believe that it will cook off the next time the oven or stove are turned on, you are leaving yourself with a potentially dangerous situation. The leftover debris from your cooking may actually catch fire the next time you go to light your burner. So make a point to clean after each use. When Baking, Consider Rotating Your Pans One of the biggest complaints from bakers is the uneven heating that occurs in a gas oven. Unless you have a convection fan, you may find that your food may bake faster on one side. To prevent any issue with over- or under-cooked food, consider rotating your pans throughout the baking time. This will help each side to be evenly exposed to the heat.

Delicious Microwave Recipes Made Ready in Minutes

Cream Cheese French Toast In a Mug Recipe PREP TIME: 5 mins COOK TIME: 1 min 20 secs YIELD: 1 cup Recipe by fabulesslyfrugal.com Ingredients 1 ounce cream cheese 2 teaspoons granulated sugar 1 large egg 1/4 teaspoon vanilla 2 tablespoons milk 1 cup cubed bread or croissant (about 1 1/2 slices hearty bread cut into 1/2-inch pieces) 2 tablespoons raspberries (fresh or frozen), chopped Instructions Place cream cheese and sugar in mug, ramekin, or other microwave-safe small bowl. Use a fork to mash the cream cheese and sugar together until well combined. Add the egg, vanilla, and milk and use the fork to whisk until mixture is combined. It is ok if there are still small lumps of cream cheese. Add cubed bread or croissant pieces and gently fold them into the mixture without breaking them apart, until each piece is no longer dry. Let sit for about 1 minute, to allow bread to soak up the mixture. Microwave for 1 minute. If there is still liquid, microwave for another 10-30 seconds, depending on your microwave, until the mixture is solid. (1 minute and 20 seconds works well for me.) Careful, mug may be hot! Sprinkle chopped berries on top. If desired, sprinkle powdered sugar over top as well. Serve warm. 15-Minute Meat Loaf Prep:10 mins Cook:25 mins Yield:1 meatloaf (6 servings) Recipe by Thespruceeats.com Ingredients 1 tbsp. olive oil 1/3 cup minced onion Optional: minced garlic (to taste) 3 tbsp. quick cooking oats 1 (8 oz.) can tomato sauce 1/2 tsp. dried thyme leaves 1/4 tsp. dried marjoram leaves 1/4 tsp. garlic salt Dash white pepper 1 egg 1 lb. ground chuck 1 tbsp. brown sugar 1 tbsp. Worcestershire sauce 1 tbsp. prepared mustard Instructions Gather the ingredients. In a small microwave-safe bowl, combine oil, onion, and garlic; cook 3 to 4 minutes on high until soft. Combine with oats, 1/2 the tomato sauce, thyme, marjoram, garlic salt, pepper, and egg in a large bowl. Mix in meat with your hands. Gently shape into an 8×4 inch loaf. Place into a 9×5 inch glass loaf pan, making sure the meat mixture doesn’t touch the sides of the pan. Cover pan with microwave-safe waxed paper. Microwave at high power for 5 minutes, then carefully siphon off the juices using a turkey baster. Combine brown sugar, Worcestershire sauce and mustard with remaining tomato sauce. Spoon this mixture over the meatloaf, making sure to evenly coat top and sides. Return pan to the microwave, rotating one-half turn. Cover pan with microwave-safe waxed paper and cook at 50% for 15 to 20 minutes or until an instant-read meat thermometer inserted in the center of the loaf registers 160 F. Cover with foil and let stand 5 minutes on a solid surface before serving. (The temperature of the meatloaf will rise about 10 degrees during standing time.)   Microwave Risotto with Ham, Peas and Cheese Prep: 15 MINTotal: 40 MINServings: 4Recipe by -Tablespoon.com Ingredients • 4 tablespoons butter• 1/2 cup finely chopped onion• 2 cloves garlic, finely chopped• 1/4 teaspoon ground black pepper• 1 cup uncooked short-grain• Arborio rice• 2 1/2 cups chicken broth (from 32-oz carton)• 1 cup diced ham• 1 cup Cascadian Farm™ frozen organic peas (from 10-oz bag)• 1/2 cup shredded Parmesan cheese (2 oz) Instructions 1. In 2-quart microwavable bowl, place 2 tablespoons of the butter, the onion, garlic and pepper.2. Cover tightly with plastic wrap; microwave on High 2 to 4 minutes or until onion is soft. Add rice; stir to coat with butter. Cover; set aside.3. In 4-cup microwavable measuring cup, place broth. Microwave uncovered on High 5 minutes or until hot. Pour into rice mixture; stir. Cover tightly with plastic wrap; microwave on High 5 minutes.4. Stir mixture. Cover tightly; microwave on Medium (50%) for 12 minutes. Stir in ham and frozen peas; continue to cook on Medium (50%) 5 to 7 minutes longer or until rice is tender and liquid is absorbed.5. Stir in remaining 2 tablespoons butter and the cheese. Serve immediately.

Healthy Living: Steps to Take for a Healthier Lifestyle

There isn’t a better time than now to start getting fit with health information and products so easily accessible. Simply incorporate the basics into your daily routine – good nutrition, adequate exercise and a daily supplement – and start down the path toward better health. Plan a Nutritious Diet The Dietary Guidelines for Americans describes a healthy diet as one that emphasizes fruits, vegetables, lean meats, poultry, fish, beans, eggs, nuts, whole grains and fat-free or low-fat milk products. It should be low in saturated fat, trans fat, cholesterol, salt and added sugar. Warm weather makes fresh produce more easily accessible. Eat more fruits and vegetables by setting freshly washed and prepared produce on the kitchen counter or at eye level in the fridge. At every meal, make sure half your plate is made up of fruit and vegetable servings. One-fourth of your plate at every meal should be made up of grains, such as wheat, rice, oats, cornmeal or barley. People who eat whole grains as part of a healthy diet have a reduced risk of some chronic diseases. The remaining one-fourth of your plate should be lean or low-fat cuts of meat, plant-based protein or seafood. Get Regular Exercise The Department of Health and Human Services recommends an adequate amount of exercise every day. This guide can point to the right amount of exercise to add to your schedule: Get at least 150 minutes of moderate aerobic activity every week. For best results, spread the time out over several days.   Do strength training exercises at least twice a week. Lifting weights builds muscle, which means the body burns more calories – even at rest. It’s important to keep in mind that when people are active, they produce more free radicals. The antioxidants found in supplements can help buffer the negative effects of the workout. Improving your diet, exercising regularly, taking a daily supplement and getting enough restorative sleep are all important steps to overall wellness. Work to incorporate each step into your daily routine until you reach your goal of good health Source: eLivingToday.com For more great recipes, tips and appliance news, follow us on Facebook or Instagram.

Cosmo’s Over the Range Microwave : Equipped to Clear the Air as a Range Hood

Cosmo’s Over the Range Microwave Oven cooks meals with precise control and delicious results.  Over the Range Microwave Ovens are among the most popular ovens in the market right now.  Unlike traditional countertop microwaves, over-the-range microwaves  help to free up counter space and provides some extra features too; like a  built-in exhaust fans to vent smoke and steam and eliminate unwanted odors. Don’t worry about the next big meal you’re planning. Cosmo’s COS-3016ORM1SS microwave oven offers just the power and features you need.  POWER 1000 Watts of power for more speed and efficiency of cooking. The microwave’s ten different power levels, adds some much-needed flexibility to your cooking. The microwave also uses a sensor that automatically adjusts cooking time and power—convenient indeed.  CAPACITY With all the space of 1.6 cu. ft. capacity there’s enough room for big dishes, and you’ll be able to cook more than one meal at a time with the turntable that accommodates various dish sizes, the turntable also conveniently turns off for large dishes. VENTING & EXHAUST An over-the-range microwave takes the place of a range hood, its vent fan works to filter out smoke and other odors from cooking. The Vent Fan cycles between high speed and low speed. The fan automatically starts when heat rises from range surface units or burners and stays on until the temperature decreases. It cannot be turned off manually during this time. This protects the microwave from excessive temperatures. PRE-PROGRAMMED SETTINGS Take the guesswork out of the cooking time when cooking with the sensor.  Sensor cooking detects the humidity released by your cooking food and adjusts the cooking time based on the type and amount of food cooking.  Rely on touch presets for your convenience for tasks like melting, softening, defrosting, and popcorn.  SAFETY The microwave come with a child safety lock. It ensures that children, when left unattended, cannot open the microwave oven. This is a good precaution to take. The great thing about over-the-counter microwaves is that they’re located above, so it’s harder for children to reach them. Still they could climb the counter to reach it. So having the extra safety precautions is always a plus. DESIGN Smartly designed with a sleek black glass finish that elevates the kitchens’ aesthetic with a modern profile. The easy-to-read digital display adds to the microwaves sleek look. Thanks to high-quality LED lighting the food looks wonderful even during preparation in the oven.   The Cosmo Over the Counter Microwave oven is undoubtedly the height of home cooking luxury. When you upgrade your kitchen with Cosmo Appliances, you bring professional quality home at factory direct prices. Previous Next I WANT THIS MICROWAVE

Space Saving Places To Put Your Microwave

If there’s one kitchen appliance every home needs it’s a microwave but it’s one bulky appliance with a large footprint.   The typical location for a microwave oven is on the countertop, where it takes up so much precious counter space.  The second most common location is above the stove which is a popular option for smaller kitchens. The Over the Range microwave (OTR microwave) doubles as a vent hood.  Here are some great  OTR microwave options to choose from. 1. 24″ Over The Range Microwave Oven in Black/Stainless Steel  2. 30″ Stainless Steel Over the Range Microwave Oven  We know you want your microwave and you want your space too!? So here are six smart ways to get it off the countertop and out of the way. Under The Countertop  Stash the microwave on a lower shelf or in a cabinet shelf of an island, or in a specially-built cupboard nook. This has become a popular option in many kitchens lately. Just be aware of placing the microwave too low, which can become a nuisance if you use the microwave a lot. If you have curious small children, you want to make sure that the microwave is out of reach. Cosmo COS-BIM22SSB Built-in Microwave Oven with Smart Sensor, Touch Presets, 1200W & 2.2 cu. ft. Capacity, 24 inch, Stainless Steel 1200 WATTS OF POWER: With 10 power levels, cook meals with precise control and delicious results  CONVENIENT TOUCH PRESETS: Pre-programmed buttons for popcorn, potato, pizza, frozen veggies, beverages, and dinner plates  SMART SENSOR: Smart sensor cooking measures when food is hot  BUILD INTO CABINETRY: Incorporate the microwave into your kitchen cabinets using our Trim Kit (Part # COS-30BIMTK, purchased separately)  DIMENSIONS: Exterior dimensions (WxDxH): 24. 4 x 13. 6 x 19. 6 in; Turntable diameter: 16. 5 in. Over the Wall Oven.  You can also install a microwave in the wall, like an oven. If you have a wall oven, then the ideal microwave placement is above it. Installing your microwave oven in the wall means you’re not giving up any cabinet, island, or counter space. Plus, you’ll be able to install a slightly larger microwave because walls can bear more weight. On an Upper Shelf  If you can make do with a smaller microwave, then you can tuck it onto a shelf as part of your upper cabinets. Depending on the model you choose you may find that you need the shelf the microwave sits on to protrude out a little further than your upper cabinets, and you’ll want to plan ahead so that your electrician puts the required outlet on the wall in the space where the microwave will live. In A Drawer  This is a twist on the under-countertop option, but with a drawer microwave. This is installed under the counter and slides open like a drawer. This is one of the more space-efficient options especially for very small kitchens. Recess into a Wall Depending on the kitchen floor plan, you may be able to recess the microwave into a space taken from a closet or garage. Before cutting into a wall, ask a builder or remodeler to check the structure of the wall and add reinforcement if necessary. For more great recipes, tips and appliance news, follow us on Facebook or Instagram.

Simple Solutions for Small Appliances

Your family depends on the appliances in your kitchen. You have a few small appliances in your home that you want to keep in good working order. Here’s a quick list of small kitchen solutions for small kitchen appliances to make cooking and cleaning more convenient. Microwave Presets to Save Energy   Did you know that using the pre-set cooking times on the touchpad can help your microwave work more efficiently and save energy? It can also help you avoid cooking accidents. Use the pre-set times when thawing foods, too. Order Matters in the Blender One of the most important tips to keep in mind with any blender is the order of the ingredients you’re adding. Go from lightest to heaviest. That mean you should ALWAYS start with liquid and make sure it covers the blades. Cover Up the Stand Mixer  To prevent unwanted dust from getting into your Stand Mixer and into your food, keep it covered by attaching a shower cap around it. Know your Slow Cooker’s Limits The high setting is for when you just want to heat things up,  If you want vegetables to stay whole, don’t put them in the slow cooker on high for 12 hours unless they’re hard-shelled, like squashes. Delicate vegetables like zucchini or peppers will melt into nothing. When you’re slow cooking vegetables, put the slow cooker on a delayed start for about three to four hours and keep it set to low.  Clean your Coffee Pot The coffee pot, itself, should be cleaned regularly. Cleaning it every two weeks will keep old coffee and grounds that are stuck in the pot from imparting your brews with unwanted flavors.  Wipe the Outside Of the Rice Cooker’s Pot A common mistake some people have is placing the pot of uncooked rice into the cooker with the outside of the pot being wet. Not only could it damage the rice cooker’s heating elements, it also affects the cooking temperature of the rice. So give it a quick wipe on the outside first before you put the rice in.

Let Kids Get Hands-On with Healthy Treats

Snacks are a way of life for people of all ages, but especially children, who consume about 25% of their daily calories from snacks, according to research published in the “Journal of Nutrition Education and Behavior.” Providing nutritionally balanced snacks for your children at home can make for a happy and healthy day. Planning snacks that are as delicious as they are healthy is a winning solution, and snacks are a simple way to add more nutrition to your child’s diet. Red, White and Blue Greek Yogurt Bark Prep time: 5 minutesServings: 12 3 cups plain non-fat Greek yogurt 1/3 cup honey, plus additional for drizzling (optional) 1 teaspoon vanilla 1/2 cup strawberries, sliced into rounds 1/2 cup blueberries 1/2 cup raspberries, halved In medium mixing bowl combine Greek yogurt, 1/3 cup honey and vanilla. On parchment paper-lined baking sheet, spread Greek yogurt mixture to 1/4-inch thickness. Press strawberries, blueberries and raspberries into yogurt. Freeze at least 3 hours. Break into pieces upon removing from freezer. Peanut Butter Yogurt Dip Prep time: 5 minutesServings: 4 3/4 cup vanilla Greek yogurt 1/4 cup peanut butter 1 dash cinnamon apples, graham crackers or other dipper of choice In bowl, six Greek yogurt, peanut butter and cinnamon until smooth. Serve with apples, graham crackers or another dipper of choice. Good Morning Yogurt Parfait Prep time: 5 minutesServings: 1 1/2 cup sliced or diced fruit, any variety 6 ounces low-fat or fat-free vanilla yogurt 1/4 cup granola or other cereal (optional) In small bowl or cup, layer fruit and yogurt, starting with fruit on bottom. Top with cereal or granola, if desired. Note: This recipe can be made using low-fat or non-fat cottage cheese sweetened with honey and cinnamon. Frozen Banana Pops Prep time: 2 hoursServings: 8 4 large bananas, peeled 8 wooden ice pop sticks 2 cups vanilla non-fat Greek yogurt 1/2 cup creamy natural peanut butter Cut each banana in half and carefully insert wooden ice pop stick in bottom of each, about one-third into banana. Place bananas on large baking sheet lined with parchment paper. Freeze bananas until partially frozen, about 30 minutes. Carefully dip each banana in tall pint glass of vanilla yogurt to coat, leaving 1/2-inch at bottom of banana uncoated. Return yogurt-coated bananas to parchment paper-lined baking sheet and freeze until completely firm, about 1 hour. Microwave peanut butter until smooth and creamy, about 30-45 seconds. Drizzle peanut butter evenly over bananas then place on baking sheet to freeze until peanut butter is firm, about 30 minutes. Serve immediately or wrap each banana in plastic wrap and store in freezer up to 3 months.

How to Chill Wine Quickly

One of the biggest factors that affects way you experience wine is serving temperature; which has an impact on the wine’s flavor, structure, and aroma. That being said, what do you do when company is on the way and you’re in need of some perfectly chilled wine now. Resist the urge to add ice cubes to your glass; this dilutes the wine.  So we decided to take a look at the proper serving temperature, because getting your wines temperature just right is one of the most important factors for enjoying wine.  Submerge the Wine Bottle in Ice Water And Salt This is the method preferred by sommeliers. Make an ice bath for your bottle, you should use a 50/50 ratio of ice and water.  There is a one special ingredient that you need –Salt! It will further drop the freezing temperature of water, which will chill your wine faster! Make sure the bottle is completely submerged, to ensure the contents of the entire bottle evenly chill. Drop Frozen Grapes into Your Wine Glass More than just a delicious healthy snack frozen grapes are also a great way to chill wine. Drop your frozen grapes into your glass—they’ll function just like ice cubes, except you won’t end up with watered-down wine. Use Wine Pearls in Your Wine Glass Unlike ice cubes which dilute your wine, Wine Pearls are hand-polished stainless steel “pearls” that have a freezing gel inside, which works to quickly cool your glass of wine, without affecting the taste in the process. Wine Pearls will keep your wine cold for up to an hour. Use your Freezer If you choose to use the freezer, be very careful (don’t want the bottle to explode). The right way to do it is to wrap the bottle in a wet tea towel before you put it in. The damp towel will freeze quickly, and thanks to the frozen towel, the wine will chill in half the time it usually would (Note: The tea towel might be stuck to the bottle when you remove it from the freezer—to fix this, simply run it under warm water and the towel will slide off.) Chill Your Wine by the Serving  Since glass bottles can be thick and insulated, the wine will chill faster once it’s out of the bottle. Keep a bag of frozen grapes in the fridge, you can just use them as needed. It is a great way to chill wine, since it will cool down the wine without watering it down too. Right now, you need to chill your wine quickly but if you want to avoid this problem in the future there is a solution that will make sure your wine is always at optimal temperature. Consider buying a wine cooler by Cosmo, designed for chilling wine and other beverages by eliminating harmful light, fluctuating temperatures, humidity, and vibration. Read about it here LEARN MORE HERE For more great recipes, tips and appliance news, follow us on Facebook or Instagram.

Cosmo’s Wine Cooler- Designed to Preserve and Protect Wine

What is a wine cooler? Wine coolers are fast becoming “the” must have appliance for wine lovers and enthusiast. Designed for chilling wine and other beverages, a wine cooler is made to eliminate harmful light, fluctuating temperatures, humidity, and vibration. If you drink a lot of wine and don’t have a proper basement for long-term storage, then a wine cooler is great for everyday use, and it creates the most ideal conditions for wine storage than refrigerators that create an environment that is too cold for a wine bottle. For those wine enthusiasts that insist on professional grade wine refrigeration, for at home use Cosmo has combined advanced technology and our signature sleek appearance for you to enjoy quick access to cold drinks and your favorite wine. Our 24 inch wine cooler delivers exactly the right temperature, with a single zone temperature that can be set at an ideal temperature to allow your wine to mature properly. Cosmo’s COS-24BIWCS wine cooler offers impressive features to preserve and protect your prized bottles.   Capacity For those that want plenty of space for their collection, the 146L (48 bottles) Cosmo model is sufficiently on the larger side of wine cooler sizes. This wine cooler will give you space to grow into, and you can remove some shelves to accommodate larger bottles. Adjustable Temperature You have the power to maintain the flavor of your favorite wine with a temperature range between 5C- 20C/ 41F 68F and a fan cooling system. When you’re using a single zone wine cooler for your various red and white wines, we recommend a cellar temperature of approx. 58 degrees Fahrenheit. Digital display and LED lighting The Cosmo Wine Cooler has an LCD display and digital touchpad, so you can set the temperature to your liking. The wine cooler is lit with blue LED lighting that illuminates the interior for an elegant presentation of your wine collection. Removable racks We designed the wine cooler with 6 shelves made of natural beech wood that is strong enough to hold the bottles.  These shelves have telescopic sliding rails and notches on the sides of the shelves to keep the bottles from falling. Glass door Fine Wine requires precision and need more than a refrigerator. Our Wine Cooler features a seamless stainless steel Insulated 3-layer glass door frame for an elegant look and heat-safe storage. Premium-Grade Stainless Steel Exterior The perfect balance of luxury design and a classic trim for a refined look to enhance the aesthetic of any room décor. With reversible doors and flexible installation options, you have the best use of space by either installing the unit under the counter with its built-In or free standing Installation that also allows you to place it anywhere. The important thing to keep in mind is the Cosmo wine cooler is the complete package and provides the ultimate environment for your wine/drink collection, so you know you will have perfectly chilled and flavored wine anytime you want some. Previous Next PROS Premium-Grade Stainless Steel Exterior Built-In / Free Standing Installation allows you to place it anywhere LED lighting illuminates the interior for elegant presentation of your collection Stores up to 48 bottles of your favorite selection of wines at the right serving temperature Insulated 3-layer glass door for an elegant look and heat-safe storage Advanced fan cooling system Technology Digital Touchpad Control enables easy control 6 Beachwood shelves with telescopic rails for convenient access to bottles Internal Temperature Range: 5°C- 20°C/ 41°F 68°F Door Lock for security I WANT THIS WINE COOLER