kitchen

Making Homemade Berry Preserves and Jams: A Sweet Delight

There’s something incredibly satisfying about making your own berry preserves and jams. The process not only fills your kitchen with delicious aromas but also allows you to enjoy the vibrant flavors of fresh berries all year long. Whether you’re looking to make a gift for someone special or just want to stock up on homemade goodies, this guide will walk you through the steps to create your own berry preserves and jams. Choosing Your Berries 1 Selecting Fresh Berries For the best results, use fresh, ripe berries. Common choices include strawberries, raspberries, blueberries, blackberries, and a mix of these. Opt for berries that are free from mold and bruising. 2 Frozen Berries If fresh berries are not available, frozen berries work well. Just be sure to thaw them completely and drain any excess liquid before using. Essential Equipment 1 Canning Jars Choose canning jars with new, clean lids. Pint or half-pint jars are ideal for preserves and jams. 2 Large Pot and Utensils You’ll need a large pot for cooking the fruit mixture and a ladle for transferring the hot jam into jars. A canning funnel can help pour the jam into jars without spills. 3 Canning Tools Invest in a canning kit that includes tongs for handling hot jars, a magnetic lid lifter, and a jar lifter to safely remove jars from the hot water bath. Preparing the Berries 1 Washing and Sorting Rinse the berries thoroughly under cold water. Remove any stems, leaves, and damaged berries. 2 Mashing or Chopping Depending on the type of jam or preserve you want, mash the berries with a fork or potato masher for a smoother texture, or chop them if you prefer chunkier preserves. Making the Jam Basic Berry Jam Recipe Preserves vs. Jam 1 Preserves have larger pieces of fruit and a chunkier texture. To make preserves, cook the fruit with less pectin and allow the mixture to thicken with larger fruit chunks remaining. 2 Jam has a smoother texture and is made with more fruit pectin, resulting in a thicker consistency. For jam, mash the fruit to a finer consistency before cooking. Flavor Variations 1 Spiced Berry Jam Add spices like cinnamon, cloves, or nutmeg to your berry mixture for a unique twist. 2 Citrus Twist Incorporate orange or lime zest along with the lemon juice for an extra burst of citrus flavor. 3 Mixed Berry Blend Combine different types of berries for a complex, multi-layered flavor in your preserves and jams. Storage and Shelf Life Store homemade berry preserves and jams in a cool, dark place. Properly canned jars can last up to a year. Once opened, refrigerate and use within a few weeks. Making your own berry preserves and jams is a rewarding and enjoyable activity that allows you to savor the taste of summer all year long. With a bit of time and effort, you can create delicious, homemade treats that are perfect for breakfast, snacks, or gifts. Enjoy the process and the delightful results of your homemade berry preserves!

Cleaning Your Wall Oven: Best Practices for a Spotless Appliance

Your wall oven is a vital part of your kitchen, but keeping it clean can be challenging with regular cooking and baking. A spotless oven not only looks great but also ensures better performance and longevity. Here’s a guide to cleaning your wall oven using effective practices that will make the task much easier! Regular Maintenance: Wipe Spills Immediately One of the easiest ways to keep your wall oven clean is by tackling spills as soon as they happen. After each use, allow the oven to cool down slightly and use a damp cloth to wipe away grease, food splatters, or spills before they harden. This prevents buildup and makes deep cleaning less daunting. Deep Cleaning with Natural Solutions For deep cleaning, you can skip harsh chemicals and use a homemade baking soda and vinegar solution: This method is safe, effective, and environmentally friendly. Self-Cleaning Function: How and When to Use It If your wall oven has a self-cleaning feature, it’s a great tool for removing grime. Here’s how to use it safely: Only use the self-cleaning function occasionally, as frequent use can wear down oven components. Cleaning the Oven Door The glass door of your oven often collects grease and fingerprints. Here’s a quick method to clean it: For baked-on grease, you can apply a baking soda paste and let it sit for 15 minutes before wiping it off. Don’t Forget the Racks Your oven racks can also accumulate grease over time. To clean them: Inspect the Gasket The rubber gasket around the oven door helps maintain the oven’s temperature. If it becomes dirty or damaged, it can lead to heat loss. Gently wipe the gasket with a damp cloth and inspect it regularly for any wear or tears. Preventing Future Buildup To keep your wall oven cleaner for longer, consider these tips: Regular cleaning and maintenance will not only keep your wall oven looking spotless but will also enhance its efficiency and extend its life. By following these best practices, you’ll save time and avoid heavy-duty scrubbing down the road. Whether it’s quick wipe-downs or deep cleaning with natural solutions, a little effort goes a long way in ensuring your wall oven continues to perform its best!

How to Temper Chocolate for Baking and Confectionery

Tempering chocolate is an essential skill for any baker or confectioner aiming to create glossy, smooth, and perfectly set chocolate treats. Properly tempered chocolate has a professional finish, a satisfying snap, and a smooth texture that melts beautifully. Whether you’re making chocolates, dipping fruits, or coating cakes, understanding how to temper chocolate can elevate your confections to the next level. Here’s a step-by-step guide to tempering chocolate for baking and confectionery. What is Tempering Chocolate? Tempering chocolate is the process of heating and cooling chocolate to stabilize the cocoa butter crystals, ensuring that the chocolate has a smooth texture and a glossy finish when it sets. Proper tempering helps prevent chocolate from becoming dull or developing unsightly streaks and ensures it has a satisfying snap when broken. Why Temper Chocolate? Ingredients and Tools Needed Methods for Tempering Chocolate There are three common methods for tempering chocolate: the Seeding Method, the Tabling Method, and the Microwave Method. Here’s how to use each method effectively. 1. Seeding Method Steps: 2. Tabling Method Steps: 3. Microwave Method Steps: Tips for Success Tempering chocolate may seem like a delicate process, but with a bit of practice and the right technique, you can achieve beautifully finished confections every time. Whether you’re creating elegant chocolate candies, coating fruits, or decorating cakes, mastering the art of tempering will help you create treats with a glossy finish, satisfying snap, and smooth texture. So grab your chocolate, gather your tools, and start tempering! Have you tried tempering chocolate before? Share your tips and experiences in the comments!

Unique Recipes Featuring Exotic Fruits: A Culinary Adventure

Exotic fruits bring a touch of the extraordinary to your kitchen, offering unique flavors, vibrant colors, and nutritional benefits that can transform ordinary dishes into extraordinary ones. From tangy to sweet, these fruits can be used in a variety of recipes to add a new dimension to your meals. If you’re ready to explore the world of exotic fruits, here are some unique recipes that highlight their delightful flavors and textures. Dragon Fruit Smoothie Bowl Dragon fruit, also known as pitaya, is a visually stunning fruit with a mildly sweet taste. Its vibrant pink or white flesh is dotted with tiny black seeds and has a texture similar to kiwi. Ingredients: Instructions: Papaya and Lime Chicken Salad Papaya adds a tropical twist to a classic chicken salad. Its sweetness complements the tangy lime dressing and crunchy vegetables. Ingredients: Instructions: Mango and Avocado Salsa Mango’s sweet and juicy flavor pairs beautifully with creamy avocado, making it a perfect complement to grilled meats or as a standalone dip. Ingredients: Instructions: Starfruit and Ginger Chutney Starfruit, also known as carambola, has a crisp texture and a tangy flavor that works well in a sweet and spicy chutney. It’s an excellent accompaniment to curries or grilled meats. Ingredients: Instructions: Passion Fruit Sorbet Passion fruit’s tangy, aromatic flavor makes it an ideal choice for a refreshing sorbet. This dessert is perfect for hot summer days or as a light finish to a meal. Ingredients: Instructions: Kumquat Marmalade Kumquats are small citrus fruits with a sweet-tart flavor. Their entire peel is edible, making them ideal for marmalade. Ingredients: Instructions: Exploring exotic fruits can add excitement and variety to your cooking. Whether you’re making a refreshing smoothie bowl, a zesty salsa, or a tangy chutney, these fruits offer unique flavors that can elevate your dishes and impress your taste buds. So don’t be afraid to step out of your culinary comfort zone and experiment with these exotic fruits. Your taste buds will thank you! Have you tried cooking with exotic fruits? Share your favorite recipes and experiences in the comments!

Blending Your Own Herb Mixes: A Fresh Approach to Flavor

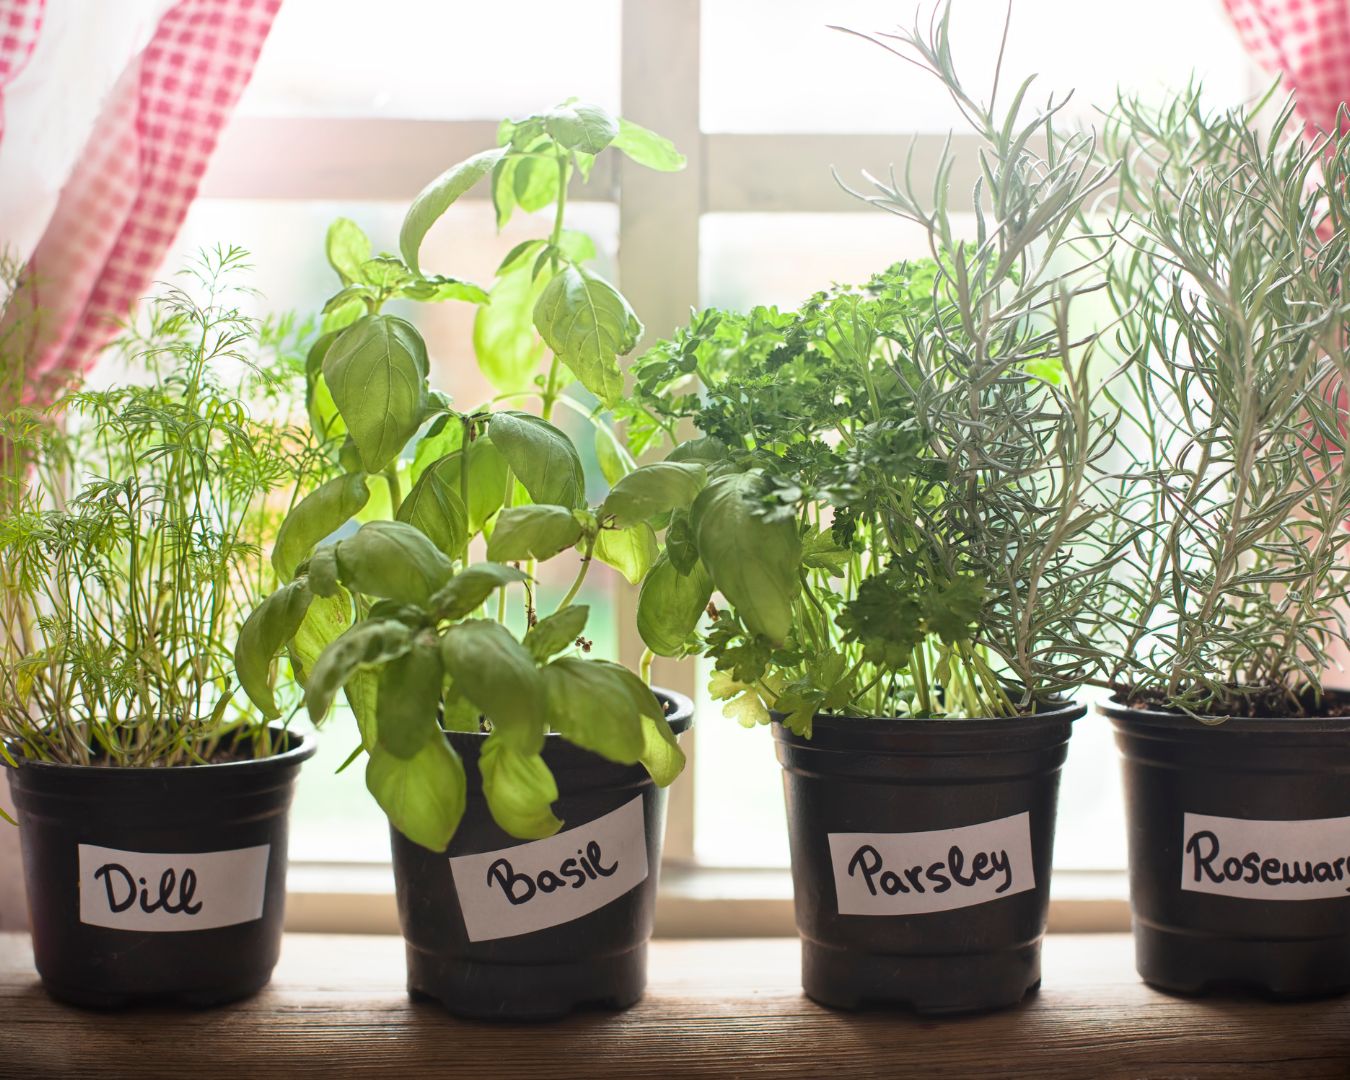
Herbs are the unsung heroes of the kitchen, elevating dishes with their vibrant flavors and aromatic profiles. While pre-made herb mixes are convenient, blending your own can be a game-changer, allowing you to customize flavors to suit your taste and dietary preferences. Whether you’re a seasoned cook or a kitchen newbie, creating your own herb mixes is a fun and rewarding way to enhance your culinary creations. Here’s a guide to help you get started with blending your own herb mixes at home. Why Blend Your Own Herb Mixes? Essential Herbs to Start With When creating your own herb blends, it’s important to choose high-quality, fresh herbs. Here are some versatile herbs to consider: Basic Steps to Blend Your Own Herb Mixes Popular Herb Mixes to Try Tips for Success Blending your own herb mixes is a simple yet impactful way to elevate your cooking. With a little experimentation and creativity, you can create personalized blends that enhance your favorite dishes and bring new dimensions of flavor to your kitchen. So gather your herbs, start mixing, and enjoy the fresh, vibrant flavors of your homemade herb blends! Have you tried blending your own herb mixes? Share your favorite combinations in the comments!

Cooktop Accessories: Enhancing Your Cooking Experience

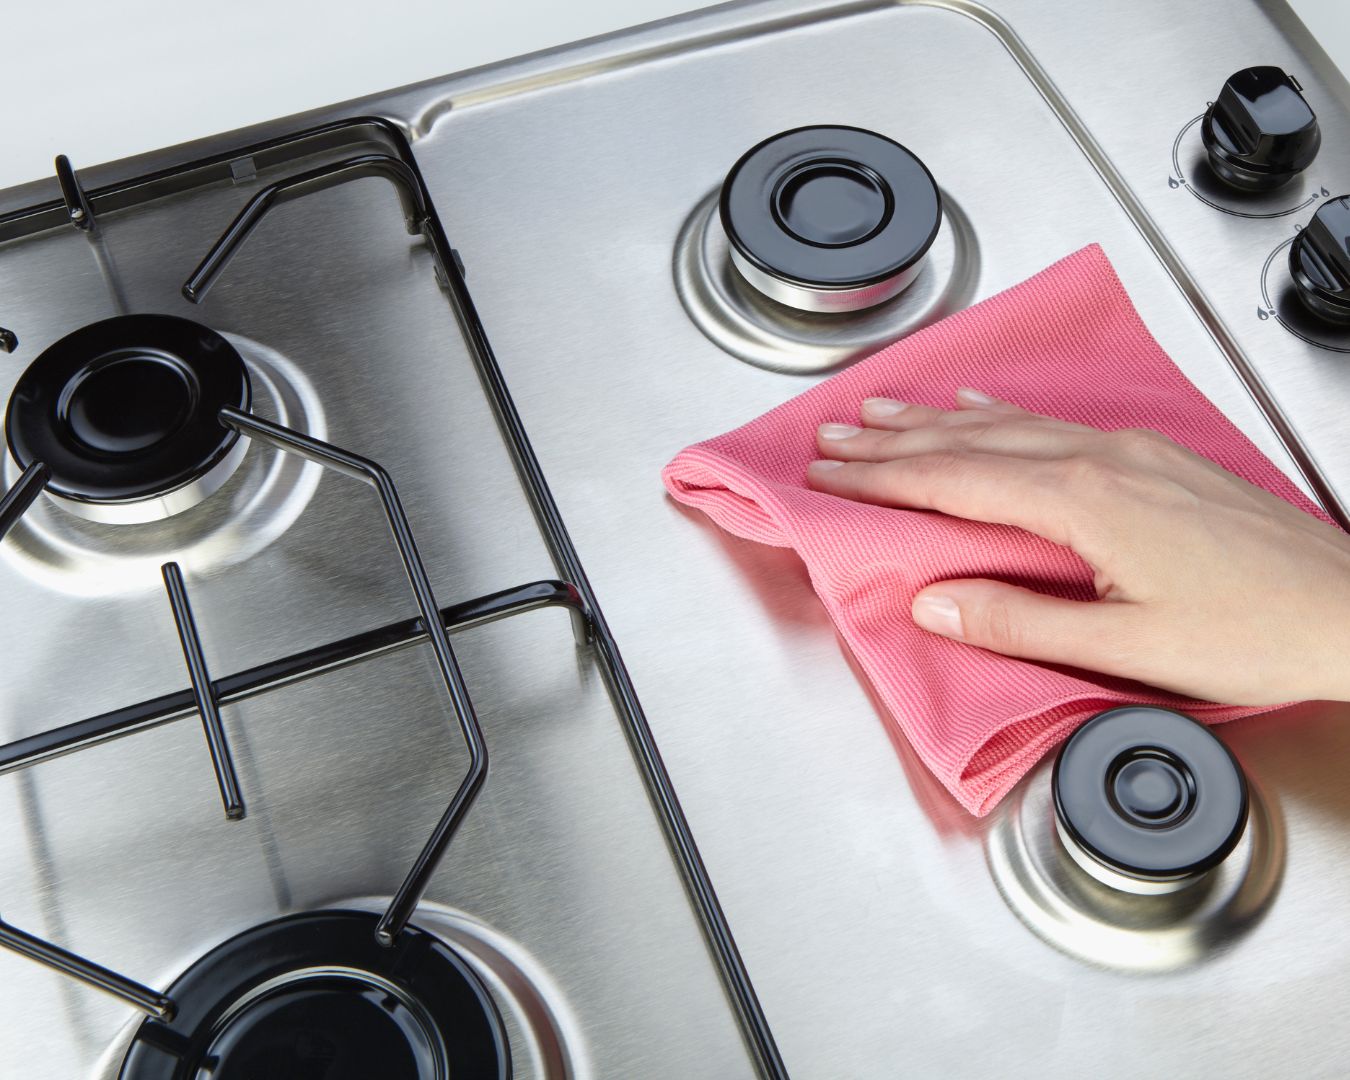
When it comes to home cooking, the cooktop is often the heart of the kitchen. Whether you have a gas, electric, or induction cooktop, having the right accessories can make a world of difference in your cooking experience. From ensuring even cooking to making cleanup a breeze, the right tools can enhance both convenience and efficiency. Let’s dive into some essential cooktop accessories that can help take your culinary adventures to the next level! Griddles for Perfect Pancakes and More A griddle is a must-have accessory for your cooktop, especially for making breakfast favorites like pancakes, eggs, and bacon. It provides a flat, even cooking surface that spans multiple burners, allowing you to cook larger batches at once. Many griddles are reversible, with a smooth surface on one side for pancakes and a ridged surface on the other for grilling vegetables, sandwiches, or even steak. Tip: When using a griddle, preheat it on medium heat for even cooking. Non-stick versions make flipping and cleanup a breeze! Wok Ring for Stir-Frying If you’re a fan of Asian cuisine or love stir-frying, a wok ring is an excellent accessory. A wok ring stabilizes the rounded bottom of a traditional wok on your cooktop, ensuring better heat distribution and control. With it, you can achieve high-heat cooking without worrying about the wok tipping over. Tip: Use a carbon steel wok for the best results. It heats up quickly and evenly, making it perfect for quick stir-fries, fried rice, and even steaming. Simmer Plate for Low-Heat Cooking When it comes to slow cooking, making sauces, or simmering soups, a simmer plate can be a game-changer. It acts as a buffer between your pot and the cooktop, distributing heat evenly and preventing scorching. This is particularly useful when you need low, consistent heat for dishes like custards, delicate sauces, or melting chocolate. Tip: Simmer plates are ideal for recipes that require precision, especially on gas cooktops, where flames can sometimes be too intense. Splatter Guards for Mess-Free Cooking No one enjoys cleaning grease splatters from the cooktop, backsplash, or countertops. A splatter guard is a simple accessory that sits on top of your pans and prevents grease, oil, and sauce from splattering as you cook. This is especially useful when frying or sautéing at high heat. Tip: Opt for a stainless steel or silicone splatter guard with fine mesh—it allows steam to escape while keeping your cooktop clean. Cooktop Mats for Easy Cleanup Cooktop mats are designed to protect your cooktop from spills, stains, and scratches. These mats, often made of heat-resistant silicone, can be placed under pots and pans while cooking. Afterward, simply remove the mat and wipe it clean. Cooktop mats are particularly useful for electric and induction cooktops, where scratches and smudges can be more noticeable. Tip: Make sure to choose a mat that’s designed for your specific type of cooktop. For induction cooktops, the mat needs to be compatible with the induction surface. Cast Iron Grill Pan for Indoor Grilling Love grilling but don’t want to fire up the outdoor grill? A cast iron grill pan lets you enjoy the flavor of grilled foods year-round. With raised ridges, this pan creates beautiful grill marks while allowing fat to drip away from the food, simulating outdoor grilling. It’s perfect for grilling everything from steaks and burgers to veggies and seafood. Tip: Preheat your grill pan on the cooktop for a few minutes to achieve those perfect sear marks. Don’t forget to season the cast iron regularly to maintain its non-stick surface. Pot and Pan Lids for Efficient Cooking Investing in high-quality lids that fit your pots and pans can make cooking more efficient. A well-fitted lid helps trap heat and moisture, which reduces cooking time and retains flavors in your dishes. It’s also an essential tool for simmering, braising, or steaming. Tip: Opt for glass lids with vent holes—they allow you to monitor your food while releasing excess steam, preventing over-boiling. Cooktop Cleaner Kit for a Sparkling Finish Once the cooking is done, keeping your cooktop clean is essential for both hygiene and longevity. A dedicated cooktop cleaner kit typically includes a gentle cleaner, a scraper, and a microfiber cloth to remove stains, spills, and burnt-on food without scratching the surface. Tip: For induction or electric glass cooktops, avoid using abrasive cleaners or scouring pads. Instead, stick to non-scratch cleaners designed for glass surfaces. By incorporating these accessories into your kitchen routine, you’ll find that cooking becomes not only easier but also more enjoyable. From preparing meals more efficiently to ensuring your cooktop stays in pristine condition, these tools are small investments that bring big benefits. So, whether you’re whipping up a quick breakfast or preparing a gourmet dinner, make sure you have the right accessories on hand to enhance your cooking experience! What cooktop accessory can’t you live without? Let us know in the comments!

How to Make Nut Milks and Butters at Home

Making nut milks and butters at home is easier than you might think, and the results are both delicious and healthy. By preparing these staples yourself, you can control the ingredients, skip additives or preservatives, and customize the flavor to your liking. Whether you’re dairy-free, looking to reduce processed foods, or just love fresh and natural ingredients, homemade nut milks and butters are a fantastic addition to your kitchen routine. In this guide, we’ll walk you through the process of making nut milks and nut butters at home, using common nuts like almonds, cashews, and peanuts. Get ready to elevate your homemade creations with these simple steps! How to Make Nut Milks at Home Homemade nut milk is creamy, delicious, and free from preservatives or unnecessary additives. The basic recipe applies to any type of nut, whether almonds, cashews, or hazelnuts. Basic Ingredients: Instructions: Tips: Nut Milk Variations: How to Make Nut Butters at Home Homemade nut butters are rich, creamy, and incredibly satisfying. You can make smooth or chunky versions with any nut, including peanuts, almonds, or hazelnuts. Plus, you can customize the flavor with sweeteners or spices to suit your taste. Basic Ingredients: Instructions: Tips: Nut Butter Variations: Benefits of Making Your Own Nut Milks and Butters Making nut milks and butters at home is not only simple but incredibly rewarding. With just a few ingredients and a blender or food processor, you can enjoy fresh, healthy, and delicious alternatives to store-bought products. Whether you’re lactose-intolerant, vegan, or just looking for wholesome, preservative-free options, homemade nut milks and butters offer an easy way to boost the nutritional value of your meals. So, go ahead and experiment with different nuts, flavors, and combinations, and enjoy the satisfaction of creating your own kitchen staples!

Discover the Health Benefits of Different Culinary Oils: Olive, Avocado, Coconut, and More

Choosing the right oil for cooking can have a big impact on the flavor and nutritional value of your meals. While some oils are known for their heart-healthy benefits, others can add unique flavors and specific health advantages to your dishes. In this blog post, we’ll explore the health benefits of some of the most popular culinary oils, including olive, avocado, coconut, and others, to help you make informed choices for your kitchen. Olive Oil: The Heart-Healthy Classic Olive oil, especially extra virgin olive oil (EVOO), is a staple of the Mediterranean diet and has been celebrated for its health benefits for centuries. Health Benefits: Best Uses: Olive oil is ideal for salad dressings, drizzling over vegetables, or low- to medium-heat cooking. Use extra virgin olive oil for its robust flavor in cold dishes and light sautéing. Avocado Oil: Nutrient-Dense and Versatile Avocado oil is another excellent oil that’s growing in popularity due to its nutritional profile and versatility. Health Benefits: Best Uses: Avocado oil has a high smoke point, making it ideal for high-heat cooking, such as grilling, roasting, and frying. Its mild flavor also makes it a great option for salad dressings or drizzling over vegetables. Coconut Oil: A Unique Source of Medium-Chain Triglycerides (MCTs) Coconut oil has garnered attention for its distinctive composition, particularly its high content of medium-chain triglycerides (MCTs), which provide unique health benefits. Health Benefits: Best Uses: Coconut oil works well in baking, sautéing, and frying due to its high smoke point and rich flavor. It can also be used in curries or added to smoothies for an energy boost. However, use it in moderation due to its high saturated fat content. Flaxseed Oil: A Plant-Based Source of Omega-3s Flaxseed oil is prized for its high concentration of alpha-linolenic acid (ALA), a plant-based omega-3 fatty acid, which is essential for heart health. Health Benefits: Best Uses: Flaxseed oil should not be heated, as it has a low smoke point. Use it in salad dressings, drizzled over cooked vegetables, or mixed into smoothies. Store flaxseed oil in the refrigerator to prevent it from going rancid. Sesame Oil: Flavorful and Rich in Antioxidants Sesame oil is a flavorful oil commonly used in Asian and Middle Eastern cuisines. It comes in two varieties: light sesame oil and toasted sesame oil, each with distinct uses. Health Benefits: Best Uses: Light sesame oil is good for stir-frying and sautéing due to its higher smoke point. Toasted sesame oil has a strong, nutty flavor and is best used as a finishing oil or in dressings and marinades. Grapeseed Oil: A Mild and Heart-Healthy Option Grapeseed oil is a byproduct of winemaking and is known for its light, mild flavor and high polyunsaturated fat content. Health Benefits: Best Uses: Grapeseed oil has a high smoke point, making it great for frying, sautéing, and roasting. Its mild flavor makes it a good choice for salad dressings or as a base for homemade mayonnaise. Walnut Oil: Nutty Flavor and Omega-3s Walnut oil is less commonly used in cooking but is highly valued for its omega-3 content and rich, nutty flavor. Health Benefits: Best Uses: Walnut oil is best used as a finishing oil in salads, drizzled over vegetables, or added to baked goods. It has a low smoke point, so it’s not ideal for high-heat cooking. The right culinary oil can enhance not only the flavor of your dishes but also your health. Whether you’re looking for heart-healthy options like olive or avocado oil, energy-boosting coconut oil, or omega-3-rich flaxseed and walnut oils, each oil brings unique benefits to the table. By choosing a variety of oils and using them appropriately in your cooking, you can optimize both the taste and the nutritional value of your meals.

Boost Your Health by Easily Incorporating Superfoods into Your Diet

Superfoods are nutrient-dense foods packed with vitamins, minerals, and antioxidants that can significantly benefit your health. From leafy greens like kale to seeds like chia, these foods provide essential nutrients that can support your immune system, improve digestion, and enhance overall well-being. But how do you seamlessly add these powerful foods to your everyday diet? In this post, we’ll explore easy and delicious ways to incorporate superfoods into your meals without overwhelming your routine. Start Your Day with Superfoods at Breakfast Breakfast is a great opportunity to infuse your meal with superfoods, giving your body a healthy head start. Upgrade Your Snacks with Superfoods Snacks are an excellent way to sneak more superfoods into your diet. Supercharge Your Salads Salads are a natural home for superfoods and can be customized with a wide range of nutrient-dense ingredients. Power Up Your Lunch and Dinner Incorporating superfoods into your main meals is easier than you think with a few simple swaps. Supercharge Your Soups and Stews Soups and stews provide the perfect opportunity to incorporate superfoods without much effort. Drink Your Superfoods Superfoods don’t have to be limited to solid foods. Beverages can also be a great way to boost your nutrient intake. Incorporate Superfoods into Your Desserts Yes, even your desserts can be supercharged with nutrients without sacrificing flavor! Incorporating superfoods into your diet doesn’t have to be complicated. By making small, intentional changes, you can gradually increase the amount of nutrient-dense, health-boosting foods you consume. Whether it’s adding a handful of spinach to your smoothie or using quinoa as a base for your salad, these small adjustments can have a big impact on your overall health and well-being. So start experimenting with these simple ideas and give your meals a nutritional upgrade today!

How to Choose and Maintain Kitchen Towels for Different Cleaning Tasks

Kitchen towels are an essential tool for keeping your kitchen clean and efficient. However, not all kitchen towels are created equal, and selecting the right ones for different tasks—whether drying dishes, wiping counters, or handling hot pans—can make a significant difference. Maintaining them properly is also key to ensuring their longevity and keeping your kitchen hygienic. Here’s a comprehensive guide on how to choose the best kitchen towels for various tasks and tips for maintaining them. Choosing the Right Kitchen Towels for Different Tasks When selecting kitchen towels, consider the type of material and size best suited for each specific cleaning or cooking task. a) Cotton Towels for General Cleaning and Drying Cotton towels are soft, absorbent, and ideal for general kitchen tasks such as drying dishes, wiping countertops, and cleaning spills. b) Microfiber Towels for Detailed Cleaning Microfiber towels are excellent for tasks that require precision, like wiping down appliances or polishing glass surfaces. These towels trap dust and grime effectively without leaving streaks behind. c) Terry Cloth Towels for Absorbing Spills Terry cloth towels, with their looped texture, are ideal for soaking up large spills or wiping up messes in the kitchen. d) Flour Sack Towels for Baking and Proofing Flour sack towels are lightweight, thin, and made from soft cotton. These towels are great for tasks that require a delicate touch, like covering bread dough while it proofs or drying freshly washed fruits and vegetables. e) Lint-Free Towels for Glassware When drying glassware or crystal, you’ll want to avoid towels that leave lint behind. Linen or specially designed glass-drying towels are ideal for this task. Maintaining Your Kitchen Towels Once you’ve selected the right towels for your kitchen, proper maintenance will ensure they stay clean, fresh, and in good condition. a) Wash Kitchen Towels Regularly Kitchen towels, especially those used for drying hands or wiping surfaces, should be washed frequently to prevent the spread of bacteria and germs. Pro Tip: Wash towels separately from clothes, as kitchen towels can pick up grease and food particles that you don’t want transferring to your laundry. b) Avoid Cross-Contamination Assign specific towels for different tasks to avoid cross-contamination in the kitchen. Pro Tip: Keep your towels organized by hanging them in designated spots. This will prevent them from being used interchangeably and ensures that you always know which towel is meant for which task. c) Air Dry Towels Thoroughly Damp towels can become a breeding ground for bacteria and mold. After use, make sure to hang towels in a well-ventilated area so they can air dry completely between uses. Pro Tip: Consider purchasing quick-dry towels if you live in a humid environment or if you frequently use towels throughout the day. d) Treat Stains Promptly Kitchen towels are prone to stains from food, grease, and sauces. Treat stains as soon as possible to prevent them from setting. Pro Tip: If you do use bleach, limit it to white towels and only use it occasionally to prevent fiber breakdown. e) Replace Worn-Out Towels Even with proper care, kitchen towels will eventually wear out. Pay attention to signs of wear, such as fraying edges, thinning fabric, or a musty odor that won’t go away, even after washing. Pro Tip: Rotate your towels regularly, using all of them evenly to avoid wearing out just a few. This can extend the life of each towel. Choosing the right kitchen towels for specific tasks can make your kitchen cleaning routine more efficient and hygienic. Whether you need a durable terry cloth towel for absorbing spills or a lint-free towel for drying glassware, having the right towels on hand is essential. By maintaining them properly—washing regularly, air drying thoroughly, and treating stains—you’ll ensure they remain in top condition and serve you well in the kitchen. With a little care and organization, your kitchen towels will help keep your cooking space clean and efficient.