
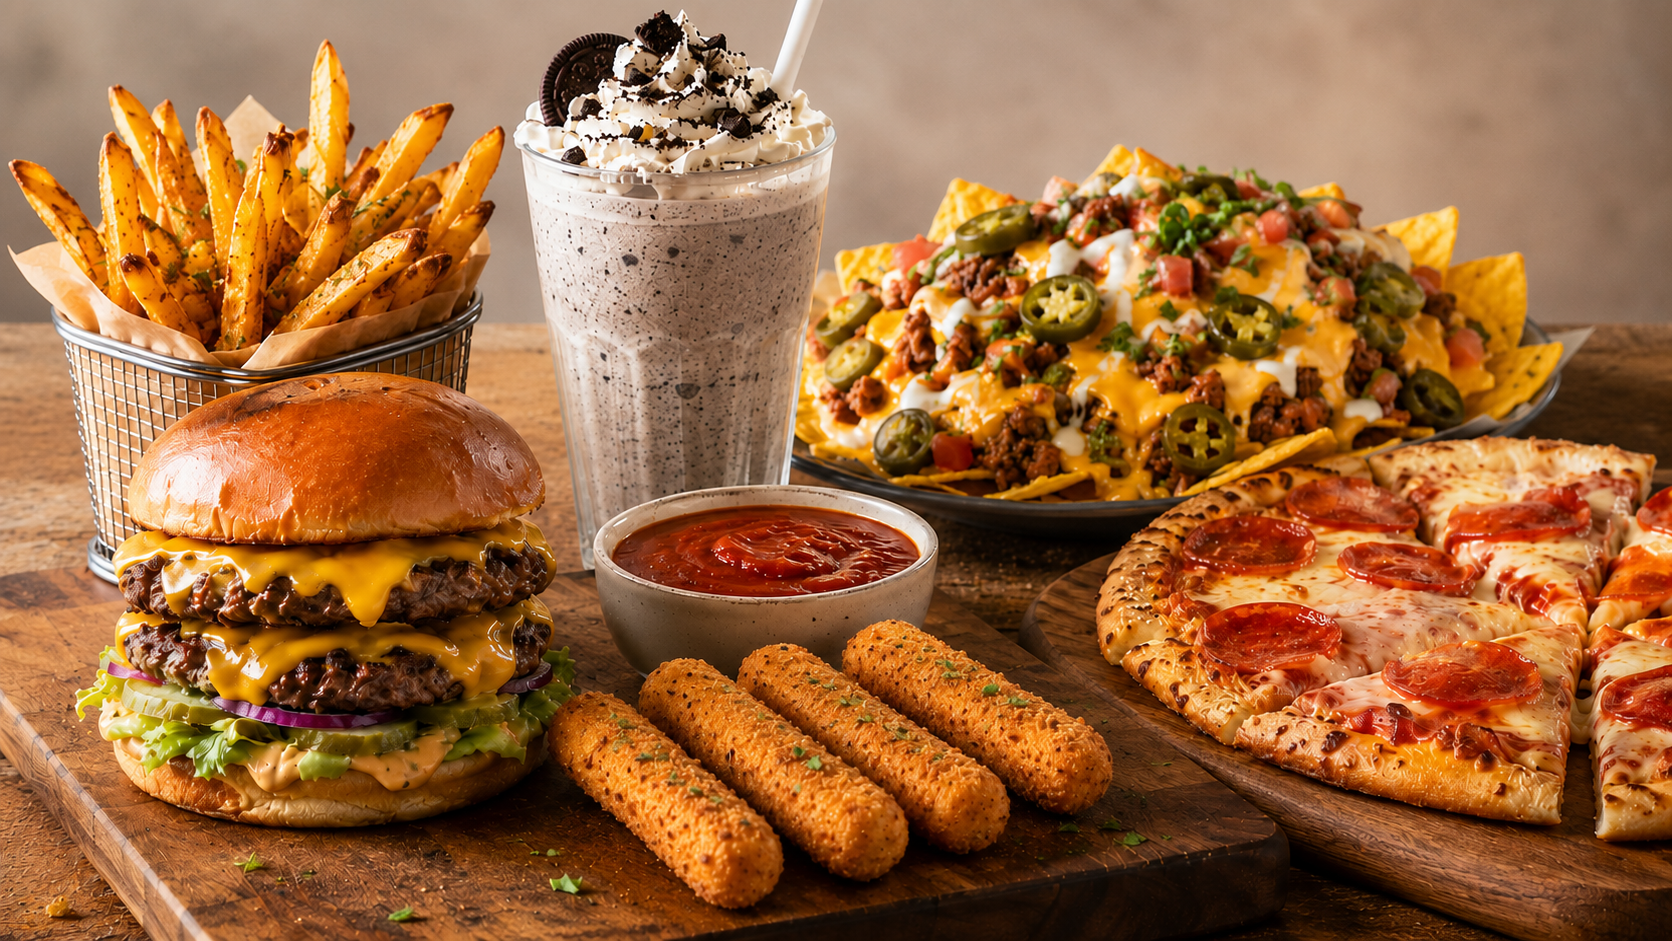
National Junk Food Day | Best Homemade Junk Food Recipes Worth Making
National Junk Food Day deserves a more interesting response than opening a bag of chips and calling it a celebration. The most satisfying version of junk food isn’t always the one that comes out of a package — it’s the one that tastes exactly like what you’re craving but made in your own kitchen with enough control over ingredients and technique that the result is genuinely better than the store-bought version it’s imitating.
This isn’t health food dressed up in junk food clothing. These are real junk food recipes — the kind of food that exists purely to taste good, that you eat because you want it rather than because it’s good for you, and that hits the specific combination of fat, salt, sugar, and texture that defines the category. The difference is that made-at-home junk food lets you dial in exactly what you want, use better ingredients where they matter, and produce results that beat the packaged originals in ways that make the effort worth it.
The air fryer, the oven, the stovetop, and the microwave all make appearances here — whatever gets the job done fastest for each specific recipe. Because on National Junk Food Day, efficiency is part of the point.
Why Homemade Junk Food Hits Differently
The argument for making junk food at home rather than buying it isn’t primarily about health — it’s about quality and satisfaction.
Better Ingredients Where They Matter: The components in packaged junk food are optimized for shelf stability, cost, and mass production consistency rather than flavor maximization. Real cheese versus cheese powder. Fresh-cut potatoes versus extruded reconstituted potato product. Actual chocolate versus cocoa-adjacent compound coating. These differences are significant enough to taste, and in most cases the homemade version produces more intense satisfaction per bite than the packaged original because the ingredient quality actually delivers on what the cravings are asking for.
Customization That Packaged Products Can’t Offer: Craving a specific heat level on your nachos, a particular ratio of toppings on a loaded fry, or a pizza with exactly the combination you actually want rather than the closest thing on a frozen shelf? Homemade junk food solves this directly. You’re making exactly what you want rather than compromising.
The Freshness Factor: Most junk food is designed for shelf life — it’s formulated to taste good after months in a bag or box. The homemade version is made and eaten immediately, which changes the experience significantly. Fresh hot fries, a just-assembled nachos situation where the cheese is still bubbling, a burger where everything is at the right temperature simultaneously — these are qualitatively different from their packaged equivalents in ways that freshness explains almost entirely.
The Experience of Making It: There’s something specifically satisfying about making junk food deliberately rather than consuming it passively from a package. Knowing exactly what went into it, controlling every element, and producing something that tastes genuinely good through actual cooking rather than industrial processing adds a dimension of satisfaction that passively eating a bag of chips doesn’t provide.
Air Fryer Loaded Nachos
Nachos are technically assembling rather than cooking, but the air fryer version produces something qualitatively different from microwave nachos or even oven nachos — cheese that bubbles and crisps at the edges of each chip, toppings that heat evenly, and a result that comes together in under 10 minutes.
Ingredients: Tortilla chips (thick-cut hold up better than thin), shredded Monterey jack and sharp cheddar combined, black beans, pickled jalapeños, sour cream, guacamole, pico de gallo, hot sauce.
Method: Layer chips in a single even layer in the air fryer basket. Top with the cheese mixture, distributing as evenly as possible so every chip gets coverage. Add black beans and jalapeños. Air fry at 350°F for 4-5 minutes until cheese is fully melted and beginning to bubble and crisp at the edges. Remove carefully and top immediately with cold ingredients — sour cream, guacamole, pico de gallo. The temperature contrast between hot cheesy chips and cold fresh toppings is part of what makes nachos specifically satisfying.
The technique that separates good nachos from great ones is layering — add a middle layer of chips and cheese if the portion is large rather than piling everything on one layer and hoping heat penetrates to the bottom chips. Two thin layers beat one thick pile every time.
Smash Burgers
The smash burger’s rise to prominence over the past several years isn’t a trend — it’s the recognition that this technique produces a superior burger to the thick-patty approach that dominated home cooking for decades. A properly smashed burger has more exterior browning per bite than any other preparation, and exterior browning is where beef flavor lives.
Ingredients: 80/20 ground beef, American cheese (the specific cheese matters here — American melts in a way that no other cheese replicates, covering the patty in a single smooth, creamy layer), soft potato buns, white onion finely diced, yellow mustard, pickles, ketchup, special sauce (mayo, ketchup, mustard, pickle brine in roughly equal parts).
Method: Divide ground beef into 2.5-3oz balls — smaller than you think, because they spread during smashing. Heat a cast iron skillet or heavy stainless pan over high heat until it’s smoking. Place a beef ball in the pan, immediately cover with a piece of parchment paper, and smash flat with a heavy spatula using significant downward pressure. The patty should be thin enough to see the texture of the meat through the surface. Salt immediately after smashing. Cook undisturbed for 2-2.5 minutes — the bottom develops an aggressive crust while the top surface turns from pink to gray. Flip once, immediately add a slice of American cheese, and cook 30-45 more seconds. The thin patty means it’s done immediately after flipping. Toast the bun cut-side down in the same pan for 30-45 seconds.
Assembly order matters: sauce on both bun halves, pickles on the bottom bun, onion on top of the patty before the cheese was added during cooking so they soften slightly, mustard on top of the patty. Serve immediately — smash burgers wait for nobody.
Homemade Pepperoni Pizza
The gap between mediocre homemade pizza and excellent homemade pizza is almost entirely in the dough and the oven temperature. High heat and a proper base produce results that make delivery pizza feel like a compromise.
Ingredients: Pizza dough (store-bought fresh dough from the grocery store refrigerator section works very well — don’t use the tube kind), crushed San Marzano tomatoes with a pinch of salt and dried oregano as sauce, fresh mozzarella torn rather than shredded, low-moisture mozzarella shredded, pepperoni, fresh basil added after baking, good olive oil.
Method: Preheat your oven to its maximum temperature — typically 500-550°F — with a pizza stone or heavy sheet pan inside for at least 45 minutes. The preheating time matters because the stone or pan needs to be fully saturated with heat to cook the crust bottom properly. Stretch dough thin on a floured surface, working from the center outward. Sauce lightly — less sauce than you think, spread thinly rather than ladled. Layer mozzarella, pepperoni. Slide onto the hot stone or pan and bake 8-10 minutes until crust edges are charred and blistered and cheese is bubbling and developing brown spots. Top with fresh basil and a drizzle of olive oil immediately out of the oven.
The fresh mozzarella and low-moisture mozzarella combination is the detail that makes a significant difference — fresh mozzarella provides flavor and creaminess, low-moisture provides the browning and stretch that fresh mozzarella alone doesn’t achieve as well.
Chili Cheese Fries
Chili cheese fries built properly — crispy air fryer fries as the base, real chili not from a can if you have 20 extra minutes, melted actual cheese rather than cheese sauce — produce results that are genuinely difficult to improve upon.
Ingredients for the Chili: 1 lb 80/20 ground beef, 1 can diced tomatoes, 1 can kidney beans, 1 tbsp cumin, 1 tbsp chili powder, 1 tsp garlic powder, 1 tsp onion powder, cayenne to heat preference, salt and pepper.
Method: Brown beef in a pan, drain excess fat. Add all remaining ingredients and simmer 15-20 minutes until slightly thickened. Season aggressively — underseasoned chili on cheese fries is a significant disappointment.
Fry Base: Air fryer fries (see the National French Fry Day entry for the full method) cooked to genuine crispiness. Load into a serving vessel immediately, top with chili while both are hot, add shredded sharp cheddar which melts into the hot chili, finish with diced white onion and jalapeños.
The sequence matters — fries first while hot, immediately topped with hot chili so the heat starts melting the cheese before it even goes on, cheese added directly to the hot chili surface so it melts from below as well as from ambient heat. Sour cream added last so it stays cold and provides temperature contrast.
Buffalo Chicken Dip
Buffalo chicken dip occupies a specific niche in the junk food universe — it functions as a dip with chips but is rich enough to serve as a meal, and it consistently disappears faster than almost any other dish at any gathering it appears at.
Ingredients: 2 cups shredded rotisserie chicken, 8oz cream cheese softened, ½ cup Frank’s RedHot (specifically Frank’s — the vinegar-forward flavor profile is what makes this work), ½ cup ranch dressing, 1 cup shredded sharp cheddar.
Method: Combine softened cream cheese, hot sauce, and ranch dressing until smooth. Fold in shredded chicken. Transfer to an oven-safe dish. Top with shredded cheddar. Bake at 375°F for 20-25 minutes until bubbling throughout and cheese is melted and beginning to brown at edges. Serve immediately with thick-cut tortilla chips, celery sticks, and additional ranch or blue cheese dressing on the side.
The air fryer version: same assembly, 350°F for 12-15 minutes. Smaller quantity — halve the recipe for single-person or two-person serving — in a small oven-safe ramekin. Done before the oven version has finished preheating.
Homemade Potato Chips
Genuinely good homemade potato chips — thin enough to be translucent, seasoned immediately out of the oil, eaten while hot — bear almost no resemblance to the packaged alternative in texture and flavor quality.
Ingredients: 2 large russet potatoes, neutral frying oil (vegetable or canola), kosher salt, preferred seasoning (Old Bay, smoked paprika, vinegar powder, or simply salt).
Method: Slice potatoes as thin as possible — a mandoline set to the thinnest setting is the right tool here. Paper-thin slices produce the most satisfying chip texture. Soak slices in cold water for 30 minutes to remove starch that would cause sticking and uneven browning. Dry completely and thoroughly — moisture in frying oil causes violent splattering.
Heat 2-3 inches of oil in a heavy pot to 325-350°F. Fry in small batches — crowding drops the oil temperature and produces greasy chips rather than crispy ones. Cook for 3-4 minutes, watching closely, until chips turn light golden and bubbling in the oil subsides (the subsiding bubbles indicate moisture has cooked out). Remove to paper towels and season immediately — salt adheres to hot chips and doesn’t adhere to cool ones. Eat immediately while hot and at peak crispiness.
The air fryer version works with very thin slices at 360°F for 8-10 minutes with light oil coating, though the result is good rather than excellent compared to the oil-fried version.
Mozzarella Sticks
Properly made mozzarella sticks — with a crust thick enough that the cheese doesn’t escape before you bite through it, and a temperature high enough that the cheese inside is fully melted and pulls rather than being merely warm — are significantly better than the frozen version.
Ingredients: String cheese or block mozzarella cut into sticks, flour, 2 eggs beaten, Italian seasoned breadcrumbs, panko breadcrumbs combined, garlic powder, salt, neutral oil for frying or air fryer.
Method: Set up a three-stage breading station: flour, beaten egg, breadcrumb mixture. Coat each mozzarella stick in flour first, then egg, then breadcrumbs, then egg again, then breadcrumbs a second time. The double-breading is essential — a single coat of breading cracks and allows cheese to escape. Freeze breaded sticks for at least 30 minutes (up to overnight) before cooking. The freezing step is non-negotiable — it ensures the cheese stays solid long enough for the crust to set during cooking before the interior melts and tries to escape.
Air fryer method: 390°F for 6-8 minutes. Fry method: 350°F oil for 2-3 minutes. Serve with marinara immediately — mozzarella sticks that sit for more than 2-3 minutes after cooking develop a rubbery texture as the cheese cools and contracts.
Cookies and Cream Milkshake
The junk food category extends to drinks, and a properly made milkshake — full-fat ice cream, whole milk used sparingly, real mix-ins rather than flavored syrup — produces something that milkshake chains charge $8 for and that takes 2 minutes to make at home.
Ingredients: 3 large scoops vanilla ice cream (full-fat, quality brand), ¼ cup whole milk, 6-8 Oreo cookies, whipped cream.
Method: In a blender, combine ice cream and milk. Blend just until combined — over-blending warms the milkshake and makes it too thin. Add roughly broken Oreo pieces and pulse 3-4 times to incorporate without fully breaking them down. Large cookie pieces in a milkshake are better than fine crumb throughout. Pour into a tall glass, top with whipped cream and a whole Oreo, and serve immediately with a wide straw.
The ratio of ice cream to milk is what separates a thick milkshake from a thin one. Less milk is almost always right. A milkshake that requires effort to pull through the straw is the correct consistency — if it pours freely, there’s too much milk.
Cinnamon Sugar Soft Pretzels
Soft pretzels made at home are genuinely impressive relative to the effort involved, and the cinnamon sugar version hits the sweet-salty-doughy combination that defines the specific junk food satisfaction of a mall pretzel.
Ingredients: 1 packet active dry yeast, 1 cup warm water, 1 tbsp sugar, 2.5 cups flour, 1 tsp salt, 2 tbsp butter melted, baking soda for the water bath, additional melted butter for finishing, cinnamon sugar mixture (½ cup sugar, 2 tsp cinnamon).
Method: Dissolve yeast in warm water with sugar — let sit 5 minutes until foamy. Combine with flour, salt, and melted butter and knead 5-7 minutes until smooth and elastic. Let rise 1 hour until doubled. Divide into 8 portions, roll each into a long rope and shape into pretzel form. Boil each pretzel briefly in water with 2 tablespoons baking soda for 30 seconds per side — this step creates the chewy exterior and dark color. Place on oiled sheet pan and bake at 450°F for 10-12 minutes until deep golden brown. Brush immediately with melted butter and coat generously in cinnamon sugar while hot.
The baking soda bath is the step most people skip when they discover it in the recipe — it seems like an unnecessary extra step. It isn’t. The alkaline water bath is what produces the specific chewy exterior and the blistered, browned surface that makes a soft pretzel taste like a soft pretzel rather than like bread shaped into a pretzel form.
Celebrating Junk Food Day Right
National Junk Food Day isn’t a permission slip for eating badly — it’s an invitation to eat exactly what you want with some intention behind it. Making junk food at home rather than defaulting to packaged versions produces better results, more satisfaction per bite, and the specific pleasure of having made something good rather than simply consumed something convenient.
Pick two or three things from this list that hit what you’re actually craving. Make them properly. Eat them while they’re hot. That’s the most appropriate possible celebration of a holiday dedicated to the category of food that exists purely because it tastes good.