cooking at home

Unique Recipes Featuring Exotic Fruits: A Culinary Adventure

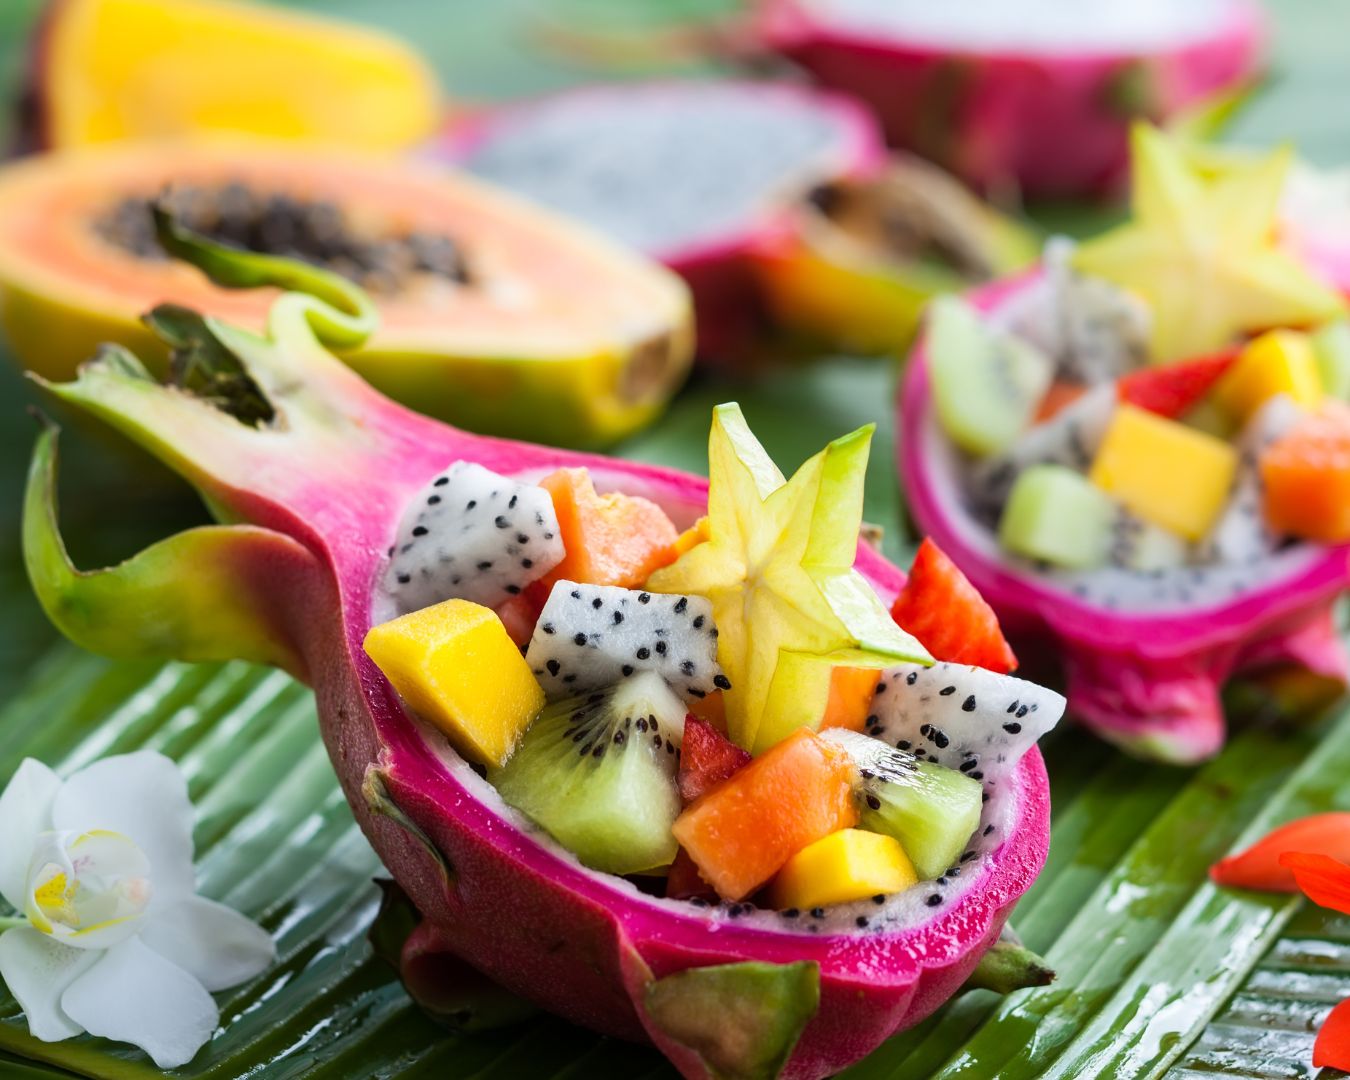
Exotic fruits bring a touch of the extraordinary to your kitchen, offering unique flavors, vibrant colors, and nutritional benefits that can transform ordinary dishes into extraordinary ones. From tangy to sweet, these fruits can be used in a variety of recipes to add a new dimension to your meals. If you’re ready to explore the world of exotic fruits, here are some unique recipes that highlight their delightful flavors and textures. Dragon Fruit Smoothie Bowl Dragon fruit, also known as pitaya, is a visually stunning fruit with a mildly sweet taste. Its vibrant pink or white flesh is dotted with tiny black seeds and has a texture similar to kiwi. Ingredients: Instructions: Papaya and Lime Chicken Salad Papaya adds a tropical twist to a classic chicken salad. Its sweetness complements the tangy lime dressing and crunchy vegetables. Ingredients: Instructions: Mango and Avocado Salsa Mango’s sweet and juicy flavor pairs beautifully with creamy avocado, making it a perfect complement to grilled meats or as a standalone dip. Ingredients: Instructions: Starfruit and Ginger Chutney Starfruit, also known as carambola, has a crisp texture and a tangy flavor that works well in a sweet and spicy chutney. It’s an excellent accompaniment to curries or grilled meats. Ingredients: Instructions: Passion Fruit Sorbet Passion fruit’s tangy, aromatic flavor makes it an ideal choice for a refreshing sorbet. This dessert is perfect for hot summer days or as a light finish to a meal. Ingredients: Instructions: Kumquat Marmalade Kumquats are small citrus fruits with a sweet-tart flavor. Their entire peel is edible, making them ideal for marmalade. Ingredients: Instructions: Exploring exotic fruits can add excitement and variety to your cooking. Whether you’re making a refreshing smoothie bowl, a zesty salsa, or a tangy chutney, these fruits offer unique flavors that can elevate your dishes and impress your taste buds. So don’t be afraid to step out of your culinary comfort zone and experiment with these exotic fruits. Your taste buds will thank you! Have you tried cooking with exotic fruits? Share your favorite recipes and experiences in the comments!

How to Make Nut Milks and Butters at Home

Making nut milks and butters at home is easier than you might think, and the results are both delicious and healthy. By preparing these staples yourself, you can control the ingredients, skip additives or preservatives, and customize the flavor to your liking. Whether you’re dairy-free, looking to reduce processed foods, or just love fresh and natural ingredients, homemade nut milks and butters are a fantastic addition to your kitchen routine. In this guide, we’ll walk you through the process of making nut milks and nut butters at home, using common nuts like almonds, cashews, and peanuts. Get ready to elevate your homemade creations with these simple steps! How to Make Nut Milks at Home Homemade nut milk is creamy, delicious, and free from preservatives or unnecessary additives. The basic recipe applies to any type of nut, whether almonds, cashews, or hazelnuts. Basic Ingredients: Instructions: Tips: Nut Milk Variations: How to Make Nut Butters at Home Homemade nut butters are rich, creamy, and incredibly satisfying. You can make smooth or chunky versions with any nut, including peanuts, almonds, or hazelnuts. Plus, you can customize the flavor with sweeteners or spices to suit your taste. Basic Ingredients: Instructions: Tips: Nut Butter Variations: Benefits of Making Your Own Nut Milks and Butters Making nut milks and butters at home is not only simple but incredibly rewarding. With just a few ingredients and a blender or food processor, you can enjoy fresh, healthy, and delicious alternatives to store-bought products. Whether you’re lactose-intolerant, vegan, or just looking for wholesome, preservative-free options, homemade nut milks and butters offer an easy way to boost the nutritional value of your meals. So, go ahead and experiment with different nuts, flavors, and combinations, and enjoy the satisfaction of creating your own kitchen staples!

Boost Your Health by Easily Incorporating Superfoods into Your Diet

Superfoods are nutrient-dense foods packed with vitamins, minerals, and antioxidants that can significantly benefit your health. From leafy greens like kale to seeds like chia, these foods provide essential nutrients that can support your immune system, improve digestion, and enhance overall well-being. But how do you seamlessly add these powerful foods to your everyday diet? In this post, we’ll explore easy and delicious ways to incorporate superfoods into your meals without overwhelming your routine. Start Your Day with Superfoods at Breakfast Breakfast is a great opportunity to infuse your meal with superfoods, giving your body a healthy head start. Upgrade Your Snacks with Superfoods Snacks are an excellent way to sneak more superfoods into your diet. Supercharge Your Salads Salads are a natural home for superfoods and can be customized with a wide range of nutrient-dense ingredients. Power Up Your Lunch and Dinner Incorporating superfoods into your main meals is easier than you think with a few simple swaps. Supercharge Your Soups and Stews Soups and stews provide the perfect opportunity to incorporate superfoods without much effort. Drink Your Superfoods Superfoods don’t have to be limited to solid foods. Beverages can also be a great way to boost your nutrient intake. Incorporate Superfoods into Your Desserts Yes, even your desserts can be supercharged with nutrients without sacrificing flavor! Incorporating superfoods into your diet doesn’t have to be complicated. By making small, intentional changes, you can gradually increase the amount of nutrient-dense, health-boosting foods you consume. Whether it’s adding a handful of spinach to your smoothie or using quinoa as a base for your salad, these small adjustments can have a big impact on your overall health and well-being. So start experimenting with these simple ideas and give your meals a nutritional upgrade today!

Choosing the Right Cookware for Your Cooktop

Choosing the right cookware for your cooktop is essential for cooking efficiently, extending the life of your appliances, and achieving the best results with your meals. Whether you have an induction, gas, or electric cooktop, selecting the right pots and pans can make all the difference in your cooking experience. In this guide, we’ll explore how to match your cookware to your cooktop, ensuring compatibility and optimal performance. Know Your Cooktop Type Before selecting cookware, it’s important to understand the type of cooktop you have, as different cooktops work best with specific materials. Choosing the Right Material Each material has its own benefits, and understanding the differences can help you make an informed choice based on your cooking style and cooktop type. Ensuring Size and Shape Compatibility The size and shape of your cookware should match the size of the burner or heating element for optimal heat distribution. Consider Weight and Ease of Handling Heavy cookware like cast iron can be a fantastic choice for certain dishes but may be harder to maneuver, especially when full. If you do a lot of lifting or stirring, consider lighter options like aluminum or stainless steel. Maintenance and Durability Some cookware materials require more care than others. Here’s what to consider: Induction Compatibility If you’re using an induction cooktop, your cookware must be compatible. A simple test is to see if a magnet sticks to the bottom of the cookware. If it does, it’s induction-ready. Popular induction-friendly materials include cast iron, magnetic stainless steel, and some forms of clad aluminum. Selecting the right cookware for your cooktop can elevate your cooking experience, prevent unnecessary damage to your appliances, and help you prepare delicious meals efficiently. Consider your cooktop type, the material of the cookware, and factors like maintenance and ease of use before making your choice. With the right cookware, your kitchen will be equipped for any culinary adventure!

Tips for Efficiently Using Your Kitchen Timer and Thermometer: Precision for Perfect Cooking

A kitchen timer and a thermometer are two of the most essential tools for any home cook or baker. They help ensure that your meals are cooked to perfection by providing precise control over cooking times and temperatures. However, using these tools efficiently can make all the difference between a deliciously moist roast and an overcooked one, or perfectly baked cookies versus burnt edges. Here are some tips to help you make the most out of your kitchen timer and thermometer for flawless results in the kitchen. Know When to Use a Timer and When to Use a Thermometer While both the timer and thermometer help with cooking accuracy, they serve different purposes, and knowing when to rely on each one is key. Pro Tip: For dishes like roasts, cakes, or custards, use both tools: the timer as a general guide and the thermometer to ensure the dish reaches the perfect internal temperature. Set Multiple Timers for Different Tasks When cooking multiple dishes at once, it’s easy to lose track of time and overcook or undercook an item. Using multiple timers can help you keep everything on track, ensuring all components of your meal are ready at the same time. Pro Tip: To prevent forgetting a timer, place a sticky note near the stove or oven with labels that remind you which timer belongs to which dish. Place the Thermometer Properly for Accurate Readings Using a thermometer correctly is crucial for ensuring accurate readings, especially with meat and poultry. Incorrect placement can lead to misleading results, which can result in undercooking or overcooking your dish. Pro Tip: Always clean your thermometer before and after each use to prevent cross-contamination, especially when working with raw meat. Use Rest Times Wisely Resting is crucial for meats and baked goods to finish cooking and settle after being removed from the heat. Your kitchen timer and thermometer can help you make the most of this process. Pro Tip: For meats, aim to remove them from the heat 5-10 degrees below your target internal temperature and let carryover cooking bring it up to the final desired temperature. Program Your Timer for Prep Steps Timers aren’t just for cooking—they’re also helpful during preparation. Many recipes require timed tasks, such as letting dough rise, marinating meat, or allowing batter to rest. Set your timer for each of these steps to ensure you’re not rushing through important prep tasks. Pro Tip: Use different sound alarms or labels to distinguish between prep timers and cooking timers. Stay Hands-On with Cooking Thermometers Digital and instant-read thermometers are fantastic tools, but they require active attention. You can’t just stick them in and leave them like a timer. Here’s how to get the most accurate readings: Pro Tip: Invest in a probe thermometer that stays in the meat while it cooks, giving you a real-time temperature reading without having to open the oven. Use Alarms for Thermometer Targets Some thermometers come with built-in alarms that alert you when your food reaches the desired temperature. This feature ensures that you don’t have to keep opening the oven or grill to check. Pro Tip: If your thermometer doesn’t have an alarm, set a separate timer as a reminder to check the temperature at regular intervals during cooking. Keep Batteries and Accuracy in Check A dead battery or an inaccurate reading can lead to cooking disasters. Regularly check your thermometer and timers to ensure they’re functioning correctly. Mastering the use of your kitchen timer and thermometer can elevate your cooking from good to great by ensuring precise timing and temperature control. Whether you’re baking cookies, roasting meats, or deep-frying, these tools help you cook with confidence, ensuring your food is cooked safely and to perfection. By following these tips, you’ll avoid overcooked meals and undercooked disasters, making your time in the kitchen more efficient and enjoyable.

How to Cook for Gluten-Free Diets at Home: A Comprehensive Guide

Cooking for a gluten-free diet at home can seem challenging, especially if you’re used to incorporating wheat, barley, and rye into your meals. However, with a bit of knowledge and creativity, you can create delicious and satisfying gluten-free meals that everyone can enjoy. Whether you’re cooking for yourself or a loved one with gluten sensitivity or celiac disease, here’s a comprehensive guide to help you navigate the world of gluten-free cooking at home. 1. Understanding Gluten and Its Sources Gluten is a protein found in wheat, barley, and rye. It acts as a binding agent, giving bread and other baked goods their structure. For those with celiac disease or gluten intolerance, consuming gluten can lead to serious health issues. Here’s a list of common foods that contain gluten: 2. Stocking Your Gluten-Free Pantry The first step to cooking gluten-free meals is to ensure your pantry is stocked with gluten-free alternatives. Here are some essential items to include: 3. Reading Labels and Choosing Safe Products When shopping for gluten-free ingredients, it’s crucial to read labels carefully. Look for products that are certified gluten-free, as these undergo strict testing to ensure they contain no gluten. Be aware of cross-contamination, which can occur when gluten-free foods come into contact with gluten-containing items. 4. Cooking Techniques for Gluten-Free Meals Here are some cooking techniques to keep in mind when preparing gluten-free meals: 5. Creating Delicious Gluten-Free Meals With the right ingredients and techniques, you can create a variety of gluten-free meals. Here are some ideas to get you started: 6. Dessert Options Just because you’re cooking gluten-free doesn’t mean you have to skip dessert! Here are some gluten-free sweet treats: 7. Staying Informed and Getting Creative The world of gluten-free cooking is constantly evolving, with new products and recipes emerging regularly. Join gluten-free cooking groups, follow blogs, and attend cooking classes to learn new techniques and find inspiration. Cooking for a gluten-free diet at home doesn’t have to be daunting. With the right ingredients, techniques, and creativity, you can prepare delicious, satisfying meals that cater to gluten-free needs. By embracing the variety of gluten-free foods available and experimenting in the kitchen, you can make healthy and tasty meals that everyone can enjoy—gluten-free or not!

Spice Up the Season With These Easy Recipes

The holiday season is upon us, and with that comes delicious foods for the whole family! Snacks are a staple for any occasion but are often overlooked. Don’t miss the opportunity to bring a memorable experience when you impress your family with these recipes. Learn how to make these delicious treats below, courtesy of AmericanPecan.com Reindeer Pecan Brownies Prep time: 20 minutes Cook time: 15 minutes Yield: 20 brownies Nonstick cooking spray 1 stick (½ cup) unsalted butter, melted 1 tablespoon pecan or canola oil 1 cup, plus 2 tablespoons, granulated sugar 2 large eggs 1 teaspoon vanilla extract ½ cup all-purpose flour ½ cup cocoa powder 1 teaspoon espresso powder (optional) ¼ teaspoon kosher salt 20 raw pecan halves, cut in half 40 candy eyeballs 20 red chocolate candies ¼ cup chocolate chip Preheat oven to 350 F. Spray mini muffin tin with nonstick cooking spray. In large bowl, whisk melted butter, oil and sugar until well combined. Add eggs and vanilla extract; beat until mixture is thick and pale in color, about 1 minute. Sift in flour and cocoa powder. Add espresso powder, if desired, and salt. Using rubber spatula, fold dry ingredients into butter mixture until just combined. Batter should be thick. Using 1-tablespoon cookie scoop, transfer batter to prepared mini muffin tin. Bake 13-15 minutes until toothpick inserted in center comes out mostly clean, with some lingering crumbs. Add chocolate chips to heat-safe bowl; microwave until smooth and melted. Pour melted chocolate into sandwich bag and cut off small portion of one corner to use as tip. Use melted chocolate to “glue” on pecan antlers, candy eyeballs and red candy noses to brownies. Allow chocolate to set before transferring brownies to airtight container. Note: Brownies will stay fresh for up to three days. No-Bake Pumpkin Pecan Pie Bites Prep time: 15 minutes Chill time: 1 hour Yield: 12 bites (6 servings) Crust: 1 1/2 cups raw pecan pieces 3/4 cup pitted medjool dates (about 7 dates), soaked in hot water 10 minutes 1 pinch pink salt Filling: 1/3 cup pumpkin puree 1/3 cup full fat coconut milk 1 teaspoon pumpkin spice 1/4 cup maple syrup 1 pinch pink salt 1 scoop collagen peptides (optional) 12 raw pecan halves, for topping To make crust: In food processor, process pecan pieces, drained dates and salt until combined and “dough” starts to form into ball. To make filling: In bowl, combine pumpkin puree, coconut milk, pumpkin spice, maple syrup, pink salt and collagen peptides, if desired. Whisk until smooth. Line cupcake tin and evenly distribute crust mixture, about 1 1/2 tablespoons in each cupcake opening. Use fingers to press crust into even layer. Evenly disperse pumpkin pie filling among openings until tins are about half full. Top each with one pecan half and place in freezer at least one hour. Source: American Pecan Council

Father’s Day Gifts for the Man Who Loves to Cook

Hey Family, Father’s Day is coming up. Yey! Sure, typical Father’s Day gifts generally get the job done – think golf clubs, tool set and even a stylish tie – but what about the dad who enjoys spending time making magic in the kitchen. Don’t forget him. Give him the tools he needs to succeed, whether he’s baking for the big game, preparing a meal for the family, trying out a new recipe or seeking to master the perfect steak. Reaching one’s fullest potential in the kitchen requires the right equipment, so put the best gear in his hands (or on his counter) and up his culinary experience with these ideas from Cosmo Appliances. From a Portable Induction Cooktop Burner to an Airfryer turn his Kitchen countertop into a versatile powerhouse, give your food-savvy dad what he needs to up his culinary game. For more Father’s Day gift inspiration visit cosmoappliances.com. A Super Range for a Super Dad Dad deserves tools as bold and innovative as his culinary creations. Featuring Gas or Dual Fuel Ranges that combine modern styling with high-performance cooking technology. Dad will appreciate the authentic professional appearance with a robust profile. With high performance sealed burners that deliver exhilarating precision while the convection oven provides consistent heat for perfect roasting, baking, and broiling. These one-of-a-kind Ranges are sure to take his culinary prowess to a whole new level. Previous Next BUY THIS RANGE Chef on the Go For those warm summer weekends, camping is a fantastic activity that provides hours of enjoyment and a welcome opportunity to connect with loved ones and nature. After a day full of outdoor activities, Dad will want to prepare something easy, simple and very fast. Upgrade your camping cuisine with a portable Induction cooktop. Thanks to induction technology, electromagnetic currents generate heat from within the metal in the cookware for extremely fast and even heating. Boasting impressive safety features unlike burners with flammable and combustible vapors, our system remains cool to touch until cookware is placed on it. It’s sleek, compact design allows him to enjoy cooking anywhere he goes. BUY THIS COOKTOP Guilt-Free Crispy Fried Food  Made popular by claims air frying is a healthy alternative for frying food; because it replicates the wonders of deep-frying in a healthier way so Dad can still indulge in his fave fried foods like French fries. The Air Fryer, uses rapid air technology to fry, bake, roast or grill your food with only a tablespoon or less of oil. Think of it as a hi-tech counter-top convection oven. For recipe ideas click here BUY THIS AIR FRYER Bonus Gift for Dad who Loves Wine For those wine enthusiasts that insist on professional grade wine refrigeration, for at home use Cosmo has combined advanced technology and our signature sleek appearance for you to enjoy quick access to cold drinks and your favorite wine. Our 24 inch wine cooler delivers exactly the right temperature, with a single zone temperature that can be set at an ideal temperature to allow your wine to mature properly. BUY THIS WINE COOLER

Essential Pantry Staples to Have on Hand

Keeping a well-stocked pantry ensures you can pull together a quality meal on a moment’s notice or when unexpected circumstances keep you from making it to the store. In many homes, the pantry is filled with mismatched odds and ends that may not fit together, but you can shop smart to gather basic ingredients you need for a wide range of recipes. Spices: A robust spice rack lets you customize all the other ingredients for dishes as simple or complex as you like. As you’re building a spice collection, start with basics like salt, pepper and garlic powder. Also add some of your favorite dried herbs like basil, thyme and ginger then build the rest of your supply around your favorite foods so you can easily create familiar dishes with what you have on hand. Protein: You may be surprised by how many protein options can be stored in your pantry. Aside from nuts, beans and peanut butter, keeping a selection of canned seafood can allow you to create well-balanced, protein-rich dishes whether you’re topping a salad, adding the finishing touch to your favorite pasta, filling a wrap or more. For example, wild-caught canned tuna or salmon can be the foundation for a multitude of recipes.   Oils: When used in moderation, oils are an essential cooking ingredient that add flavor and depth. Extra-virgin olive oil can be used for everything from sauteing proteins and drizzling over veggies to creating dips and dressings. Many home cooks also favor canola oil as a neutral cooking oil that can be used in a wide range of preparations. Grains and Pastas: Most pastas have a long shelf-life, making them a great addition to a well-stocked pantry. Pasta and grains can be the foundation of a meal when paired with sauce and protein or veggies, or as an easy side dish. Include your favorite styles of regular pasta along with options like couscous, quinoa and rice. Canned Vegetables: You can pack in plenty of healthy nutrients without a trip to the farmer’s market or produce section. Put your personal touch on canned veggies to enhance their flavor, like adding some onion (or onion powder or flakes), salt and pepper to cut green beans. Be sure to keep plenty of choices on hand for vegetables you enjoy eating on their own and ones you might use as ingredients. Broth or Stock: Whether you use it as the base for a delicious soup or to add flavor in countless other recipes, broth and stock can be found with both meat and vegetable bases so you can easily create sauces and more. Condiments: These sauces and accompaniments help perk up your favorite foods. There’s no standard list of right and wrong, but staples like ketchup, mustard, mayonnaise, barbecue, soy and hot sauce top many people’s must-have lists.  

Common Cooking Myths Busted

It isn’t just inexperienced home cooks who make mistakes in the kitchen. There are countless cooking myths that keep even the most competent chefs from reaching their full potential in the kitchen. Before you suffer through another less-than-stellar meal, make sure you’re not falling for these cooking myths. And start making every meal healthier and more delicious. Myth No. 1: Frozen isn’t as good as fresh Frozen food is just as—and in some cases more—nutritious than fresh varieties. Fresh food is often picked before the fruit or vegetable is ripe, then packaged, shipped, and stocked. The time from harvesting to your plate could be days, even more than a week. During that time, the food loses nutrients. Frozen food, however, is harvested at peak ripeness and flash-frozen within hours. Myth No. 2: Microwaving destroys nutrients in food Nutrients break down when exposed to heat, no matter the source. Cooking foods in water or other liquids can also make nutrients leach out of the food. Since microwaving is so quick and uses very little liquid, it preserves more nutrients than other cooking methods such as boiling or baking. Myth No. 3: Cooking removes nutrients from vegetables. Many people believe that eating vegetables raw is the best way to get their nutrients. Most vitamins are not too much affected by heat from boiling or steaming, and cooking vegetables might actually make some of them easier to digest. Boiling water-soluble vitamins (like vitamin C and B) does remove some n nutrients into the water, but most remain. Myth No. 4:  Cast-iron skillets work only on gas stoves; you can’t cook with them on an electric range. Cast iron works great on electric, although it may take a little longer to achieve the same results since cast iron is slightly slower to heat on an electric heating element. If you’re using a cast-iron skillet on an electric range, you may find that you need to cook things slightly longer. Myth No 5: It’s bad to refreeze previously-frozen food Food thawed on the counter (a serious no-no!) should never be returned to the freezer for safety reasons. In fact, you might want to consider throwing it out entirely. However, Frozen foods that were thawed in the fridge and not on the counter can be returned to the freezer. Myth No 6: Cooking with a Grill has limitations Think of your grill as basically a big oven with a lid, you can cook just about anything on it — providing you have the right vessel. There are a few “ungrillable” items that are great prepared over hot coals. Myth No. 7: Slow cookers are good for everything Slow cookers are wonderful but they can’t cook everything. There are some things that just aren’t going to turn out well in the slow cooker, no matter how hard you try. Since most types of fish and shellfish cook very quickly, the slow cooker is not advisable for most seafood dishes. Myth No. 8: Don’t Wash Cast Iron Pans You should definitely wash your pans. Coat the surface of the pan in cooking oil before soaping it down. This way the dish soap won’t damage the seasoning.