easy recipes

The Zone Diet: A Balanced Approach to Healthy Eating

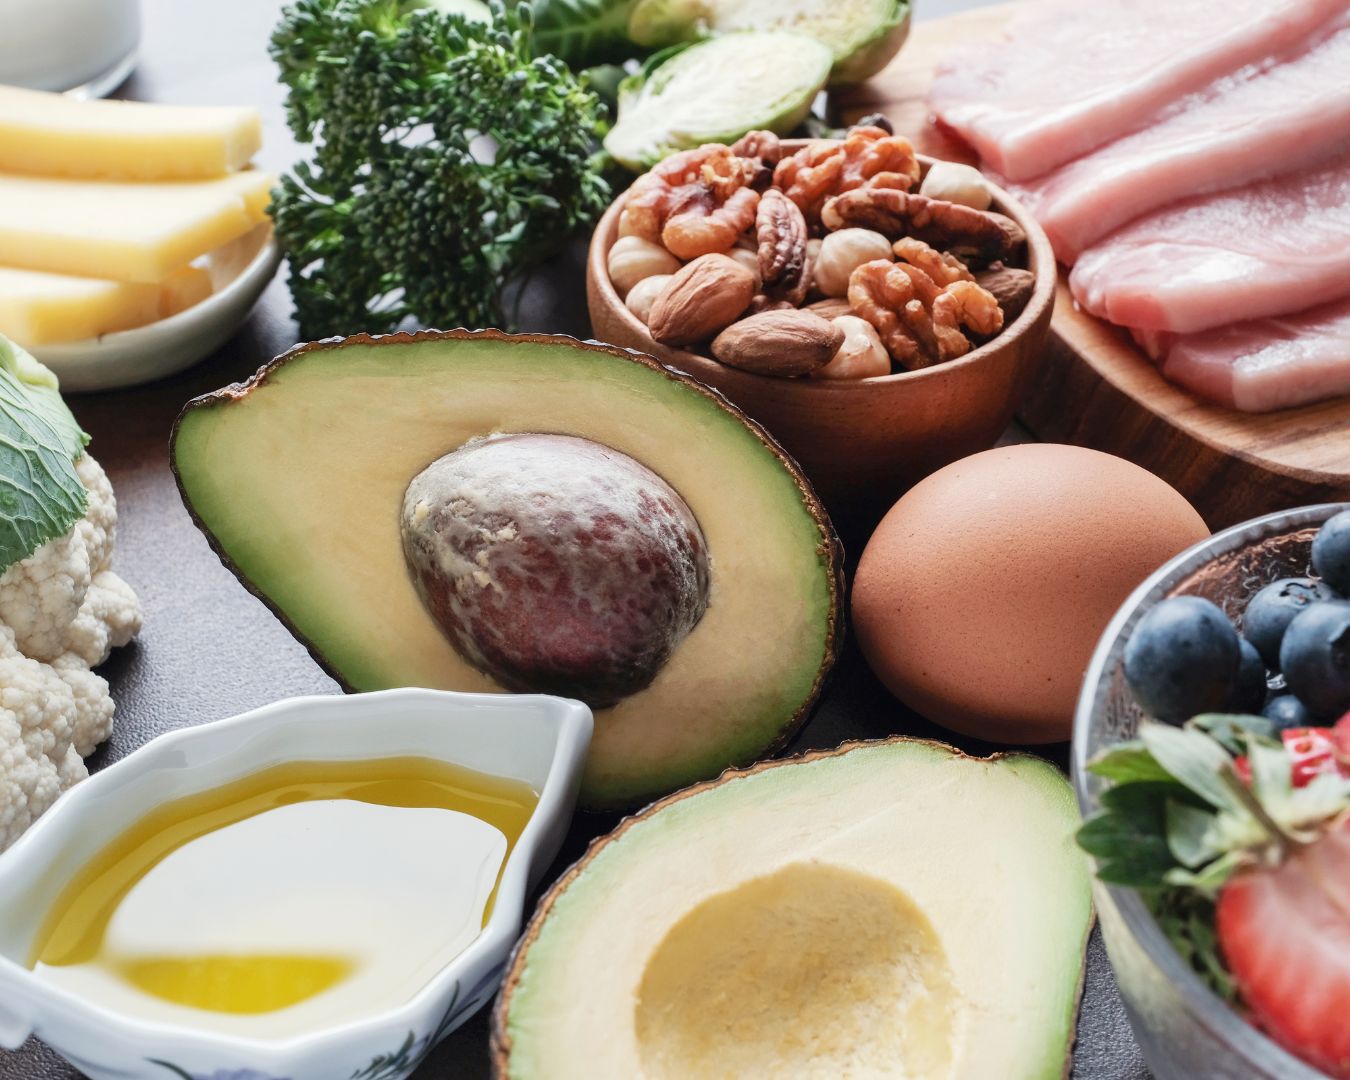
The Zone Diet, developed by Dr. Barry Sears, is a unique approach to nutrition that emphasizes balancing macronutrients to control insulin levels and promote optimal health. This diet plan is based on a specific ratio: 40% carbohydrates, 30% protein, and 30% fat. By adhering to these proportions, followers of the Zone Diet aim to reduce inflammation, improve mental and physical performance, and achieve a healthy weight. Let’s dive into the key principles and benefits of the Zone Diet and how you can incorporate it into your daily routine. Understanding the Macronutrient Ratio At the heart of the Zone Diet is the macronutrient ratio of 40% carbs, 30% protein, and 30% fat. Here’s a closer look at what each macronutrient entails: Benefits of the Zone Diet The Zone Diet offers several potential benefits that make it an appealing choice for many people: How to Get Started with the Zone Diet Transitioning to the Zone Diet can be straightforward with a bit of planning and preparation. Here are some steps to help you get started: Sample Zone Diet Meal Plan To give you an idea of how to structure your meals, here’s a sample one-day meal plan following the Zone Diet principles: Breakfast: Lunch: Dinner: Snack: The Zone Diet offers a balanced and structured approach to eating that can help you achieve better health and well-being. By focusing on the right proportions of carbohydrates, proteins, and fats, you can stabilize your insulin levels, reduce inflammation, and improve your overall quality of life. Whether you’re looking to lose weight, enhance your mental clarity, or boost your physical performance, the Zone Diet provides a sustainable and effective way to reach your goals. Give the Zone Diet a try and experience the benefits of balanced nutrition for yourself!

Inverter Technology: The Key to Evenly Cooked Microwave Meals

Microwaves have become an essential kitchen appliance, offering convenience and speed in our busy lives. However, one common frustration with traditional microwaves is uneven cooking, often resulting in hot spots and cold patches. Enter inverter technology—a game-changer in the world of microwave cooking. In this blog post, we’ll explore what inverter technology is, how it works, and why it is the key to achieving perfectly cooked microwave meals. What is Inverter Technology? Inverter technology in microwaves refers to a method of generating microwave energy continuously, rather than in the traditional on-off cycling method. Traditional microwaves operate by switching the magnetron (the component that generates microwaves) on and off, creating bursts of high power followed by periods of no power. This can lead to uneven cooking and inconsistent results. In contrast, microwaves with inverter technology can deliver a consistent stream of energy at different power levels. This means that food is cooked more evenly and gently, preserving texture and flavor. How Inverter Technology Works In a microwave equipped with inverter technology, the power level is controlled more precisely. Instead of cycling between full power and no power, the inverter modulates the microwave energy to maintain a steady power output. This continuous energy flow ensures that the food cooks evenly throughout, eliminating the common issue of hot and cold spots. Benefits of Inverter Technology Choosing the Right Inverter Microwave When selecting an inverter microwave, consider the following factors: Inverter technology represents a significant advancement in microwave cooking, addressing the long-standing issue of uneven heating. By delivering continuous, precise energy, inverter microwaves ensure that your meals are cooked evenly, preserving their flavor and texture. If you’re looking to upgrade your kitchen appliances, consider investing in a microwave with inverter technology. It’s a small change that can make a big difference in your cooking experience.

Cooking with Kids: Fun and Easy Recipes for Family-Friendly Meals

Cooking with kids can be a delightful and educational experience that not only teaches them valuable life skills but also creates lasting memories. Engaging children in the kitchen helps them develop a love for cooking and healthy eating while providing an opportunity for quality family time. In this blog post, we’ll explore the benefits of cooking with kids and share some fun and easy recipes perfect for family-friendly meals. Benefits of Cooking with Kids Tips for Cooking with Kids Fun and Easy Recipes for Family-Friendly Meals 1. Mini Pizzas Mini pizzas are a fun and customizable meal that kids love to make and eat. Ingredients: Instructions: 2. Fruit and Yogurt Parfaits These colorful parfaits are perfect for breakfast or a healthy snack. Ingredients: Instructions: 3. Chicken and Veggie Skewers These skewers are a fun way to get kids to eat their veggies. Ingredients: Instructions: 4. Homemade Granola Bars These no-bake granola bars are a healthy and delicious snack that kids can help make. Ingredients: Instructions: Cooking with kids is a wonderful way to spend quality time together while teaching them valuable skills and encouraging healthy eating habits. By choosing fun and easy recipes, you can make the experience enjoyable for everyone involved. So, gather your ingredients, roll up your sleeves, and enjoy some family-friendly cooking adventures in the kitchen!

How to Make Fermented Foods at Home: A Guide to Sauerkraut and Kimchi

Fermented foods have been enjoyed for centuries across various cultures, celebrated not only for their tangy flavors but also for their numerous health benefits. Fermentation enhances the nutritional value of foods, preserves them, and introduces beneficial probiotics that support gut health. Making fermented foods like sauerkraut and kimchi at home is both rewarding and relatively simple. Here’s a comprehensive guide to get you started on your fermentation journey. Understanding Fermentation Fermentation is a natural process where microorganisms such as bacteria, yeasts, and molds break down sugars and other compounds in food, producing acids, gases, and alcohol. This process not only preserves the food but also develops complex flavors and textures. Benefits of Fermentation: Making Sauerkraut at Home Sauerkraut, a staple in German cuisine, is fermented cabbage that develops a tangy flavor through the action of lactic acid bacteria. Ingredients: Equipment: Instructions: Making Kimchi at Home Kimchi, a Korean staple, is a spicy and flavorful fermented vegetable dish typically made with napa cabbage and radishes. Ingredients: Equipment: Instructions: Tips for Successful Fermentation Making fermented foods at home, like sauerkraut and kimchi, is a rewarding way to add bold flavors and probiotic benefits to your diet. With just a few simple ingredients and some patience, you can create delicious, health-promoting foods right in your kitchen. Enjoy the process of fermentation and the unique, tangy flavors of homemade sauerkraut and kimchi!

Use a Spoon to Easily Remove the Seeds from Squash or Melons

Dealing with seeds in squash and melons can be a messy and frustrating task. However, there’s a simple tool that can make this process quick and easy—a spoon! In this blog post, we’ll walk you through the steps to efficiently remove seeds from squash and melons using a spoon, along with some tips to make your kitchen prep even smoother. Why Use a Spoon? A spoon is perfectly shaped to scoop out seeds and fibrous material from squash and melons. Its curved edge can scrape the inner walls cleanly without damaging the flesh, making it an ideal tool for this task. Steps to Remove Seeds from Squash 1. Choose the Right Squash 2. Cut the Squash 3. Scoop Out the Seeds 4. Clean the Cavity Steps to Remove Seeds from Melons 1. Select a Ripe Melon 2. Cut the Melon 3. Scoop Out the Seeds Tips for Easier Seed Removal Benefits of Using a Spoon Using a spoon to remove seeds from squash and melons is a simple and effective method that saves time and minimizes mess. This technique is easy to master and requires no special tools, making it accessible for everyone. Next time you’re preparing a squash or melon, grab a spoon and make seed removal a breeze!

How to Grow and Preserve Fresh Herbs for Year-Round Flavor

Fresh herbs can elevate any dish, adding vibrant flavors and aromatic qualities that dried versions often lack. Growing and preserving your own herbs ensures you have a ready supply of these culinary treasures right at your fingertips. Here’s a comprehensive guide to help you successfully grow and preserve fresh herbs, so you can enjoy their flavor all year long. Choosing the Right Herbs Before you start, decide which herbs you want to grow. Some popular choices include: Consider your climate and growing conditions. Some herbs thrive indoors, while others prefer outdoor gardens. Planting Fresh Herbs A. Indoor Herbs: B. Outdoor Herbs: Caring for Your Herb Garden Harvesting Herbs Preserving Fresh Herbs A. Drying: B. Freezing: C. Herb Infusions: Using Preserved Herbs Growing and preserving your own herbs not only enhances the flavor of your meals but also adds a personal touch to your culinary creations. Whether you prefer to dry, freeze, or infuse your herbs, having a supply of fresh or preserved herbs allows you to enjoy the taste of summer throughout the year. Start your herb garden today and savor the benefits of homegrown flavors in every dish!

Delicious Vegetarian and Vegan Recipes for Your Air Fryer

The air fryer has become a beloved kitchen appliance, celebrated for its ability to create crispy, delicious foods with less oil. For vegetarians and vegans, it’s a fantastic tool to prepare healthy, flavorful meals without sacrificing taste or texture. Here’s a collection of vegetarian and vegan recipes that are perfect for your air fryer, making your meal prep both exciting and health-conscious! Crispy Air Fryer Chickpeas Ingredients: Instructions: Air Fryer Veggie Spring Rolls Ingredients: Instructions: Air Fried Vegan Buffalo Cauliflower Ingredients: Instructions: Air Fryer Stuffed Portobello Mushrooms Ingredients: Instructions: Air Fried Vegan Falafel Ingredients: Instructions: The air fryer is an excellent tool for preparing delicious vegetarian and vegan meals with minimal oil. These recipes are just a starting point—feel free to experiment with your favorite vegetables, seasonings, and sauces. Enjoy the convenience of quick, healthy, and flavorful meals that cater to your dietary preferences!

Mastering Cooking Techniques for Different Cuts of Meat: Braising, Grilling, and Stewing

When it comes to preparing meat, the cooking technique you choose can greatly impact the flavor, texture, and overall quality of the dish. Different cuts of meat require different methods to bring out their best characteristics. Understanding how to cook various cuts properly ensures delicious results every time. Here’s a guide to some of the most popular cooking techniques—braising, grilling, and stewing—and how to use them effectively with different cuts of meat. Braising: Perfect for Tough Cuts What Is Braising? Braising is a cooking technique that involves cooking meat slowly in a small amount of liquid. This method combines both dry and moist cooking, starting with searing the meat to develop flavor and then simmering it in liquid to tenderize the meat. Best Cuts for Braising: How to Braise: Benefits: Grilling: Ideal for Tender Cuts What Is Grilling? Grilling involves cooking meat over direct heat, either on a gas or charcoal grill. The high heat caramelizes the exterior of the meat, adding a smoky, charred flavor. Best Cuts for Grilling: How to Grill: Benefits: Stewing: Great for Flavor and Tenderness What Is Stewing? Stewing is a method of cooking meat slowly in a liquid, similar to braising but often with smaller, bite-sized pieces. This technique is used to cook meat thoroughly and develop deep, complex flavors. Best Cuts for Stewing: How to Stew: Benefits: Mastering different cooking techniques for various cuts of meat can elevate your culinary skills and ensure delicious results. Whether you’re braising a tough cut to tender perfection, grilling a juicy steak for a quick meal, or stewing meat for a hearty dish, understanding these methods will help you make the most of your ingredients. Experiment with these techniques to discover new flavors and textures in your cooking, and enjoy the satisfying results of your efforts.

Optimizing Kitchen Workflow: Designing Your Kitchen Layout for Maximum Efficiency and Convenience

A well-designed kitchen layout is crucial for creating an efficient and enjoyable cooking environment. Whether you’re a culinary enthusiast or just looking to streamline your daily meal prep, optimizing your kitchen workflow can make a significant difference in how smoothly and efficiently you operate. Here’s how to design your kitchen layout to maximize efficiency and convenience. Understanding the Kitchen Work Triangle The Work Triangle is a fundamental concept in kitchen design, which involves placing the three main work areas—the sink, stove, and refrigerator—in a triangular layout. This design minimizes the distance between these key areas, making it easier to move between them and reducing unnecessary steps. The ideal work triangle should have: Prioritizing Workflow Zones Design your kitchen around specific workflow zones to streamline different tasks: Maximizing Storage Efficiency Effective storage solutions are key to maintaining an organized and functional kitchen: Integrating Smart Appliances and Technology Incorporating smart appliances and technology can enhance your kitchen’s efficiency: Ensuring Adequate Lighting Proper lighting is essential for both functionality and ambiance: Creating a Comfortable Work Environment A comfortable and ergonomically designed kitchen can enhance your cooking experience: Personalizing Your Space Finally, personalize your kitchen to reflect your style and preferences: Optimizing your kitchen layout for maximum efficiency and convenience involves thoughtful planning and consideration of your cooking habits, storage needs, and design preferences. By focusing on the kitchen work triangle, prioritizing workflow zones, maximizing storage, integrating smart technology, ensuring proper lighting, creating a comfortable work environment, and personalizing your space, you can create a kitchen that not only enhances your cooking experience but also becomes a central hub for family and friends. With the right design, your kitchen will be both functional and inviting, making every meal preparation a pleasure.

Creative Kitchen Hack: Use an Overturned Muffin Tin to Create Edible Bowls

If you’re looking to add a fun and unique touch to your meals, try using an overturned muffin tin to create edible bowls for serving salads or desserts. This clever kitchen hack not only elevates your presentation but also allows you to incorporate more delicious elements into your dishes. Here’s a step-by-step guide on how to achieve this, along with some creative ideas for serving. Why Edible Bowls? Edible bowls are a fantastic way to make your meals more exciting and visually appealing. They’re perfect for parties, special occasions, or simply adding a touch of creativity to your everyday meals. Imagine serving a fresh salad or a decadent dessert in a crispy, edible bowl—it’s sure to impress your guests and make your meal memorable. How to Create Edible Bowls Using a Muffin Tin Ingredients and Supplies: Procedure: Creative Serving Ideas 1. Fresh Salads: Fill your edible bowls with a fresh, crisp salad. The bowl adds a crunchy texture that complements the greens and dressings. Try a classic Caesar salad or a vibrant mixed greens salad. 2. Fruit Desserts: For a sweet twist, serve a fruit salad or a berry medley in the edible bowls. The crispy dough adds a delightful contrast to the juicy fruits. 3. Ice Cream and Sorbet: Create a unique dessert by scooping ice cream or sorbet into the bowls. Add toppings like chocolate chips, fruit, or nuts for extra indulgence. 4. Appetizers: Use the bowls for savory appetizers like bruschetta, dips, or small portions of pasta. The edible bowl adds an extra layer of flavor and texture to your appetizers. Tips for Success Using an overturned muffin tin to create edible bowls is a simple yet innovative way to elevate your dining experience. Whether you’re serving salads, desserts, or appetizers, these edible bowls add a fun and tasty twist to your meals. Give it a try at your next gathering or family dinner, and watch as your guests are delighted by this creative touch!