
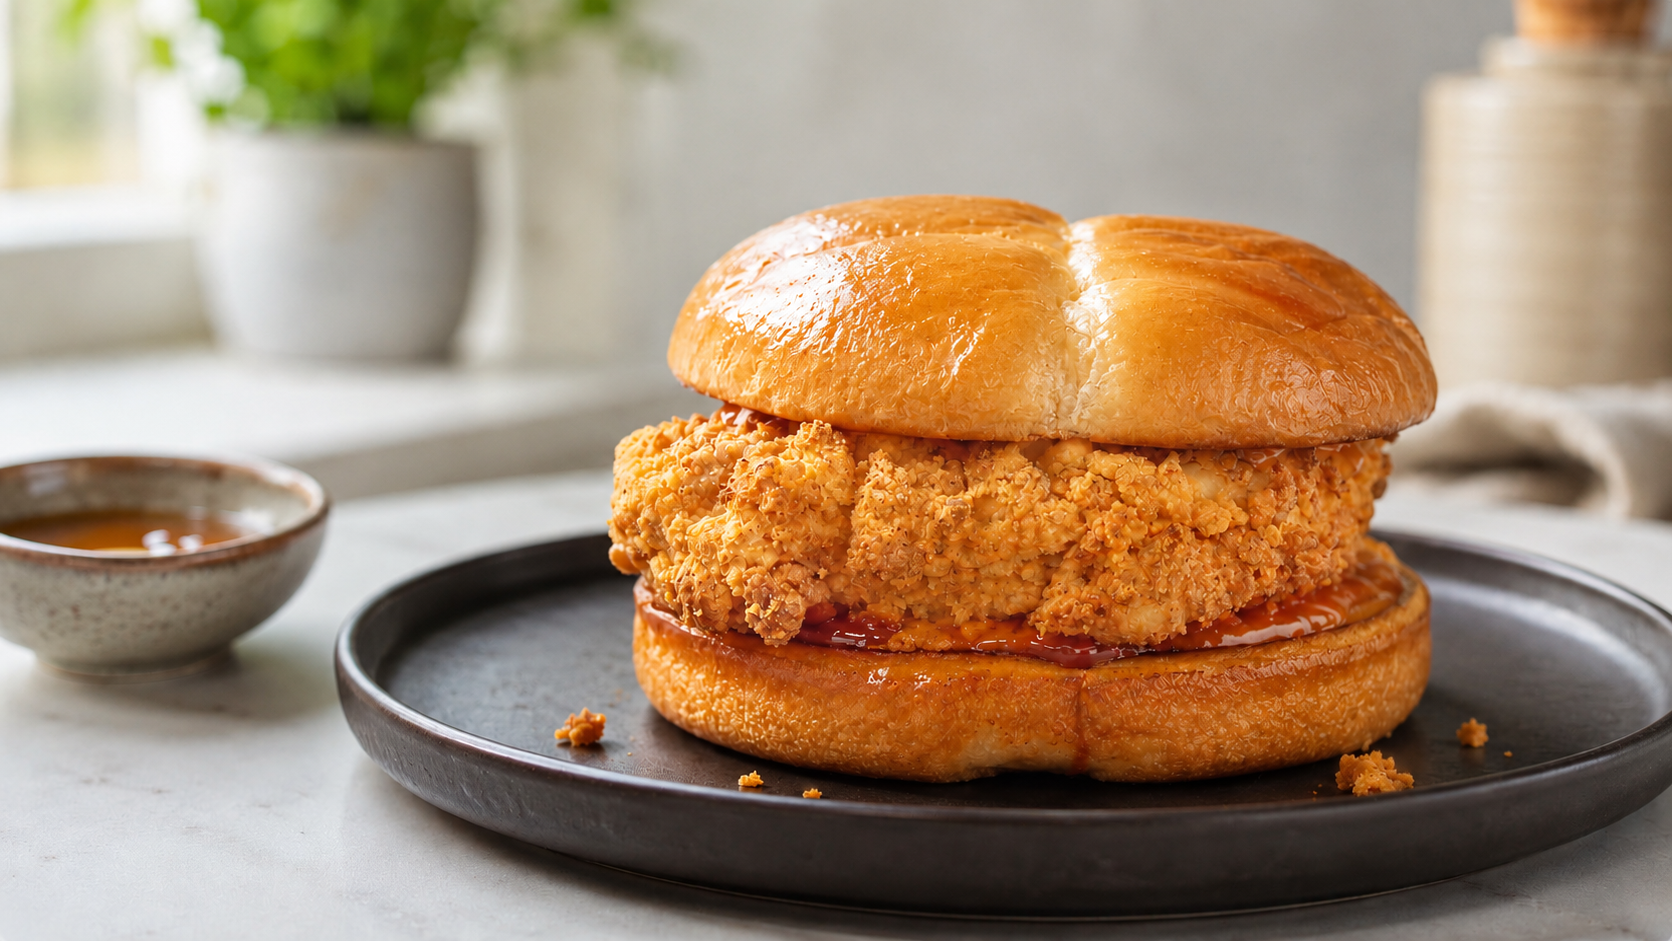
Hot Honey Spicy Chicken Sandwich: Crispy Oven-Baked Chicken Thigh with Hot Honey Sauce
The hot honey chicken sandwich has earned its place as one of the more compelling things happening in sandwich culture right now, and for good reason — the combination of aggressively spiced crispy chicken against the sweet, lingering heat of a honey-based sauce hits a flavor combination that’s genuinely difficult to stop eating. This version builds that combination around bone-in-free chicken thighs coated in a double-dredged batter that delivers genuine crunch through oven baking rather than deep frying, finished with a hot honey sauce that carries heat from cayenne, paprika, and crushed red pepper tempered by the sweetness of honey and the creaminess of mayo.
The double dredge — wet mix, dry mix, wet mix, dry mix — is the technique that separates genuinely crispy oven-baked chicken from the merely okay versions that come out of most home ovens. Each layer builds on the previous one, with the alternating wet and dry passes creating a coating thick enough to develop real texture during baking rather than the thin, somewhat pale crust that a single dredge produces. The baking powder in the dry mix does critical work here — it creates small air bubbles in the coating during baking that expand and set, producing the cragged, irregular surface texture that catches sauce and creates the crunch that makes this sandwich worth making.
The hot honey sauce does double duty in this recipe — it goes on the bottom bun as a base and again on top of the chicken before the top bun goes on. This layering strategy means every bite hits sauce from below and above the chicken, with the heat from the spiced coating sandwiched between two applications of sweet heat. The brioche bun, toasted golden in butter on a skillet, adds a slight richness and structural integrity that keeps everything together without competing with the main event.
Why This Recipe Works So Well
Every element here is making a specific contribution that adds up to a sandwich genuinely worth the effort.
Chicken thighs over chicken breasts is a deliberate choice that affects the finished sandwich significantly. Thighs have more fat than breasts — fat that renders during the baking process and keeps the meat juicy through the 25-30 minute oven cook that the coating needs to properly set and brown. A chicken breast at the same thickness would be noticeably drier by the time the crust reaches the right color and texture. Thighs stay moist while the coating does its job.
Removing the outer skin before dredging allows the coating to bond directly to the meat rather than sitting over a layer of skin that can cause the coating to slide or separate. The double dredge creates its own exterior texture — you don’t need the skin for crunch, and removing it means the coating adheres properly and stays on through the baking process and through sauce application.
Baking powder in the dry mix is the detail that most home cooks either skip or don’t understand. It’s not a leavening agent in this context — it’s a texture agent. The alkaline baking powder raises the pH of the coating surface, which accelerates Maillard browning at lower temperatures and creates a more dramatically cragged exterior texture through the gas it releases during baking. The corn starch in the dry mix works alongside it — corn starch absorbs surface moisture from the wet dredge and creates a coating that crisps more effectively than flour alone.
The wire rack matters. Chicken placed directly on a sheet pan sits in its own rendered fat and steam, producing a soft bottom rather than consistent crunch across the entire piece. Elevated on a wire rack, hot air circulates under the chicken during baking, producing a crispy exterior on all surfaces rather than one soggy side.
Choosing the Right Ingredients
Chicken Thighs: Boneless, skinless chicken thighs — either bought that way or with the skin removed at home — in roughly equal sizes so they cook evenly. Flatten slightly with your palm if one side is significantly thicker than the other to ensure even cooking through the baking window.
Brioche Buns: The slightly enriched, slightly sweet character of brioche suits the hot honey flavor profile specifically — it complements the honey’s sweetness rather than competing with the spice. Look for buns that are large enough to accommodate a full chicken thigh without the meat hanging dramatically over the edges. Avoid ultra-soft slider-style brioche that won’t hold up structurally under the sauce and chicken.
Honey: Standard liquid honey works. If you want to lean into the hot honey concept more deliberately, use a honey with some natural floral character — wildflower or clover — that has enough flavor presence to register alongside the spice components. Avoid heavily processed honey that tastes primarily of sweetness without any character.
Colby Jack Cheese: The recipe lists this as optional and it genuinely is — the sandwich works without cheese because the sauce provides sufficient richness and flavor complexity on its own. If you want cheese, Colby jack melts well and adds a mild, creamy element that softens the heat slightly. Add it directly to the hot chicken during the last few minutes of oven cooking rather than in a separate step.
Ingredients
Serves 2
For the Chicken:
- 2 boneless chicken thighs, skin removed
- Salt and pepper to season
Dry Mix:
- ½ cup baking powder
- ½ cup corn starch
- 1½ tbsp cayenne pepper
- 1½ tbsp onion powder
- 1½ tbsp crushed red pepper flakes
- 1½ tbsp garlic powder
Wet Mix:
- 2 eggs
- ¼ cup milk
- 1½ tbsp cayenne pepper
- 1½ tbsp onion powder
- 1½ tbsp crushed red pepper flakes
- 1½ tbsp garlic powder
Hot Honey Sauce:
- 3 tbsp mayonnaise
- 2 tbsp ketchup
- 2 tbsp honey
- 1 tbsp cayenne pepper
- 1 tbsp paprika
- 1 tbsp crushed red pepper flakes
For Assembly:
- 2 brioche buns
- Butter for toasting
- Colby jack cheese, sliced (optional)
- Cooking oil spray
Step-by-Step Instructions
Step 1 — Season the Chicken
Remove skin from chicken thighs if not already done. Season both sides with salt and pepper. Set aside while you prepare the dredging components and sauce — letting the salt sit on the chicken for 10-15 minutes before dredging helps it penetrate slightly into the surface.
Step 2 — Make the Dry Mix
In a wide, shallow bowl combine the baking powder, corn starch, cayenne, onion powder, crushed red pepper flakes, and garlic powder. Whisk together until evenly distributed. The wide bowl format matters for dredging — a deep narrow bowl makes it harder to get even coating coverage across the full surface of the chicken thigh.
Step 3 — Make the Wet Mix
In a separate wide, shallow bowl whisk together the eggs and milk until fully combined. Add the cayenne, onion powder, crushed red pepper flakes, and garlic powder and whisk again until the spices are evenly distributed throughout the liquid. The wet mix carries seasoning as well as adhesion — under-seasoned wet mix means the interior of the coating has less flavor than the exterior.
Step 4 — Make the Hot Honey Sauce
In a small bowl combine mayonnaise, ketchup, honey, cayenne, paprika, and crushed red pepper flakes. Mix thoroughly until completely uniform in color and texture. Taste and adjust — more honey for sweetness, more cayenne for heat, more ketchup for body. Set aside. The sauce can be made ahead and refrigerated for up to 5 days.
Step 5 — Double Dredge the Chicken
Set up your dredging station with the wet mix and dry mix side by side, and a wire rack set over a sheet pan at the end. Work one chicken thigh at a time.
Dip the seasoned chicken thigh completely in the wet mix, letting excess drip off. Transfer to the dry mix and press firmly on all surfaces, including the edges, ensuring complete coating coverage. Return to the wet mix — a second complete dip — letting excess drip again. Return to the dry mix for a second complete coating, pressing firmly to adhere.
Place the double-dredged chicken thigh on the prepared wire rack sprayed with cooking oil. Repeat with the second thigh. Let both rest on the rack for 10 minutes — this resting period allows the coating to hydrate and set slightly, improving adhesion during baking and producing a more even final texture.
Step 6 — Bake the Chicken
Preheat the oven to 400°F for at least 5 minutes. Spray the coated chicken thighs lightly with cooking oil spray — this helps the exterior brown evenly by providing a thin fat layer across the coating surface. Place the rack with the chicken into the oven.
Bake for 25-30 minutes, flipping the chicken at the halfway mark (12-13 minutes). Flipping ensures the underside gets direct heat exposure for even browning across the entire exterior. After flipping, if using Colby jack cheese, add it in the last 3-4 minutes of baking and return to the oven to melt.
The chicken is done when the coating is deep golden brown and an internal temperature of 165°F is reached at the thickest part. If the coating is browning well before 25 minutes, check the internal temperature — the thighs may be done early depending on thickness.
Step 7 — Toast the Buns
While the chicken finishes its last few minutes in the oven, heat a skillet over medium heat. Add a small amount of butter and let it melt and foam. Place the brioche buns cut-side down in the butter and toast for 30-45 seconds until the cut surface is golden and the butter has absorbed into the bun. Watch closely — brioche’s sugar content means it browns faster than standard buns. Remove and set aside.
Step 8 — Assemble and Serve
Spread a generous amount of hot honey sauce across the bottom bun — don’t be conservative here, the sauce is the central flavor element and needs to be present in every bite. Place the chicken thigh directly on the sauce. Spoon another layer of hot honey sauce over the top of the chicken before adding the top bun. Press gently to compress the sandwich slightly and serve immediately while the chicken is at peak crispiness.
Recipe Variations and Combinations
The hot honey spicy chicken sandwich base works across several variation directions.
Heat Level Variations:
- Mild Version: Reduce cayenne in both the dry and wet mix to ½ tbsp each and reduce crushed red pepper similarly. Keep the sauce proportions the same but reduce the cayenne to 1 tsp. The coating retains its character without the sustained heat level that the full recipe delivers.
- Extra Hot Version: Add 1 tbsp of hot sauce to the wet mix for additional heat penetration into the coating itself. Double the cayenne in the sauce and add a thin layer of sliced pickled jalapeños between the chicken and the top sauce application.
- Nashville Hot Style: Replace the hot honey sauce with a Nashville-style paste — cayenne, brown sugar, garlic powder, paprika, and lard or melted butter — brushed directly onto the hot chicken immediately out of the oven. Serve with pickle chips on the sandwich to balance the heat.
Topping Variations:
- Slaw Addition: A thin layer of creamy coleslaw between the chicken and the top sauce application adds crunch and cooling creaminess that contrasts the heat effectively. Shredded cabbage tossed with mayo, apple cider vinegar, celery salt, and a pinch of sugar dresses simply and holds up without making the bun soggy.
- Pickle Forward: Add a generous layer of dill pickle chips on the bottom bun beneath the sauce. The pickle’s acidity cuts through the richness of the double-dredged coating and the mayo-based sauce in a way that refreshes between bites.
- Honey Butter Bun: Mix equal parts softened butter and honey, spread on the bun faces before toasting instead of plain butter. The honey butter caramelizes slightly against the skillet heat and adds another honey layer to the overall flavor profile.
Serving Suggestions
The hot honey spicy chicken sandwich is a complete meal on its own but pairs naturally with a few sides that suit its flavor profile.
Classic Pairings: Crinkle-cut fries or waffle fries from the air fryer — the starch and salt balance the heat. Coleslaw on the side provides the cooling dairy and crunch contrast that fried chicken has always paired with. Pickles on the side for anyone who wants additional acid balance.
For a Group: This recipe scales directly — the oven handles multiple wire racks simultaneously, and the sauce makes in larger quantities in the same bowl in the same time. Four chicken thighs on two racks fit in most standard ovens without crowding. Time the bun toasting to finish as the chicken comes out so everything arrives at the table simultaneously.
Drink Pairings: The sustained heat from cayenne and crushed red pepper in both the coating and the sauce benefits from something cold and neutral — an ice cold lager, a tall glass of lemonade, or sweet iced tea. Carbonation specifically helps reset the palate between bites.
Troubleshooting Common Issues
Coating Falling Off During Baking: Insufficient resting time after dredging or not pressing firmly enough during the dry mix stages. The 10-minute rest after dredging is important — it allows the coating to bond. If coating is still falling off, the wet mix may have been too watery — ensure the egg and milk are fully whisked together before adding spices.
Coating Not Crispy Enough: The wire rack is essential — chicken sitting directly on a pan will have a soft underside regardless of everything else. If the rack is in place and crispiness is still insufficient, the coating may need more cooking spray before baking. A thin, even layer of oil spray over the entire coated surface is what enables browning.
Chicken Not Cooked Through at 30 Minutes: Thighs that are significantly thicker than average may need additional time. Use a probe thermometer rather than relying purely on timing — 165°F internal temperature is the reliable indicator of doneness regardless of the visual appearance of the coating.
Sauce Too Sweet or Too Hot: The sauce is genuinely adjustable — taste before assembling and correct. More honey shifts it sweet, more cayenne shifts it hot, more ketchup adds body and mild sweetness, more mayo adds creaminess and cools the heat level. Make small adjustments and taste again before committing.
Storage and Reheating
The double-dredged chicken stores and reheats better than most fried or baked chicken because the thick coating provides structural protection for the meat beneath.
Storing: Store cooked chicken thighs unassembled in an airtight container refrigerated for up to 3 days. Store sauce separately. Don’t assemble sandwiches before storage — the sauce softens the bun and the coating loses crispiness within an hour of assembly.
Reheating: The air fryer is the best reheating method for this chicken — 375°F for 5-7 minutes restores significant crispiness to the coating that refrigeration softens. The oven at 375°F for 10-12 minutes also works well. Avoid microwaving which softens the coating irreversibly.
Sauce Storage: Hot honey sauce keeps refrigerated in a sealed container for up to 5 days. Stir before using as components can separate slightly during storage. The sauce actually improves slightly after a day as the spices bloom further into the mayo and honey base.
Perfect for Any Occasion
The hot honey spicy chicken sandwich rewards the effort involved with results that hold up to any comparison — restaurant-quality crunch from a home oven, a sauce that carries genuine complexity rather than simple heat, and a presentation that looks as deliberate as it tastes. Weekend lunch, casual dinner, game day food, or any occasion where a chicken sandwich worth eating sounds like the right answer — this recipe handles all of it from a single oven and one skillet.