food

Keep a Jar of Homemade Seasoning Mix on Hand for Easy Flavoring of Meats and Vegetables

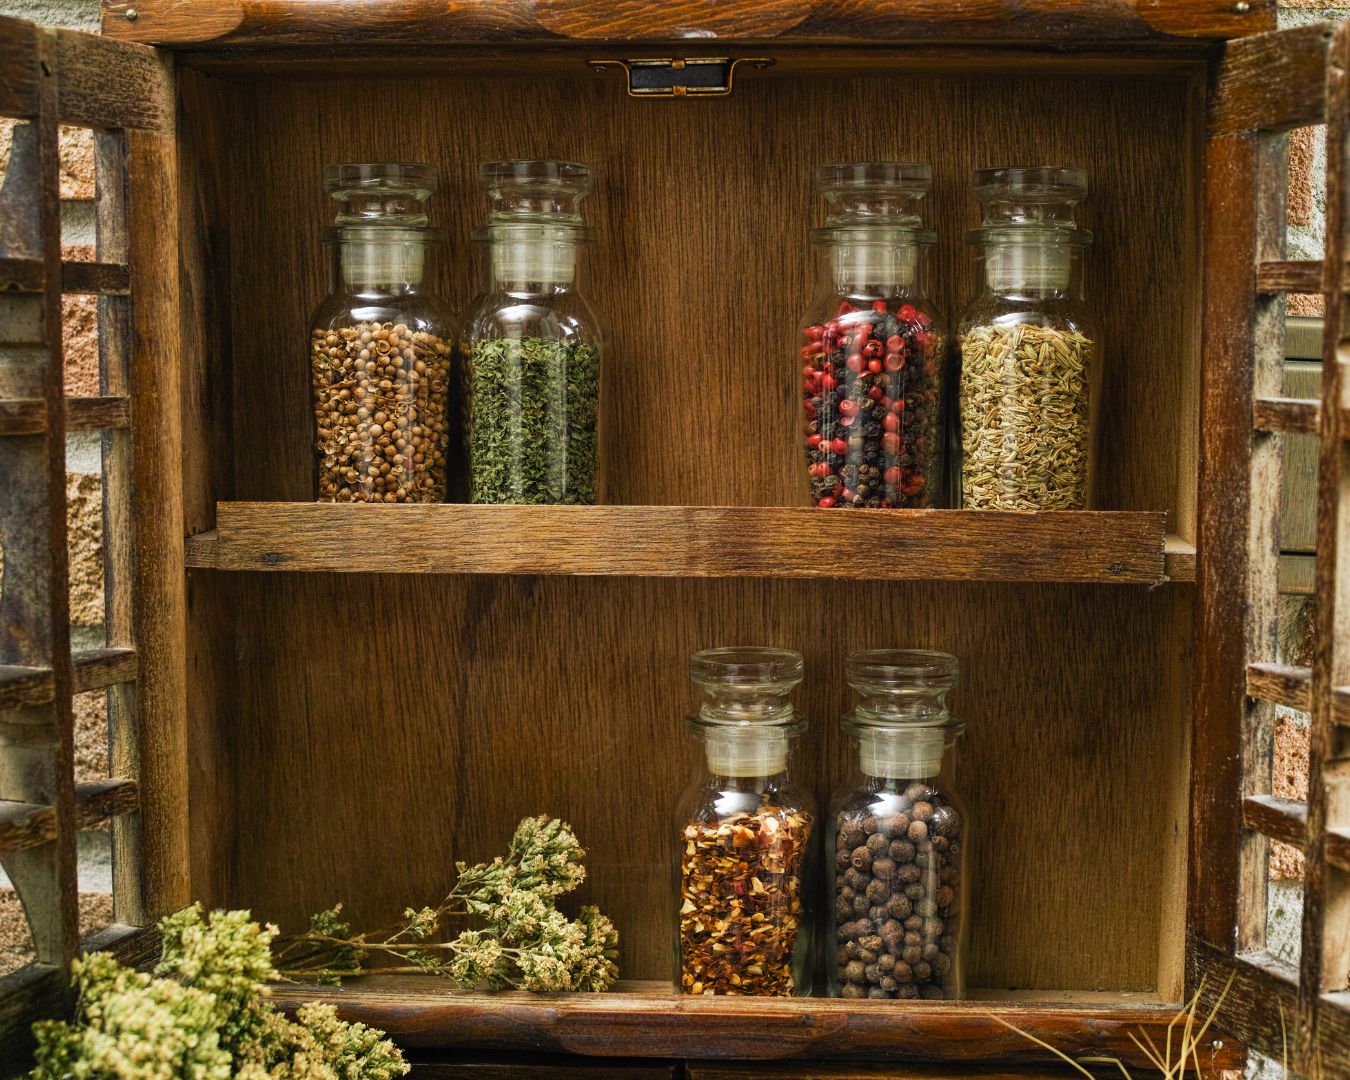
In a busy kitchen, convenience is key. One of the simplest ways to make your cooking more efficient and flavorful is by keeping a jar of homemade seasoning mix on hand. A well-balanced seasoning mix can transform ordinary meats and vegetables into delicious, restaurant-quality dishes with minimal effort. By creating your own blend, you control the ingredients and tailor the flavors to your preferences, making every meal more enjoyable. In this blog post, we’ll explore the benefits of homemade seasoning mixes, how to create your own, and some ideas for using them in your everyday cooking. Why Make Your Own Seasoning Mix? Making your own seasoning mix offers several benefits: How to Create Your Own Seasoning Mix Creating a homemade seasoning mix is simple and only requires a few steps: 1. Choose Your Base Ingredients The base of your seasoning mix will typically include salt, pepper, and a combination of herbs and spices. Here are some common ingredients to consider: 2. Balance the Flavors The key to a great seasoning mix is balance. You’ll want to achieve a harmonious blend of salty, savory, spicy, and herbaceous notes. Start by combining small amounts of each ingredient and tasting the mix as you go. Adjust the proportions to suit your taste preferences. Here’s a basic recipe to get you started: All-Purpose Seasoning Mix 3. Mix and Store Once you’ve perfected your blend, mix the ingredients thoroughly in a bowl. Transfer the seasoning mix to an airtight jar or container to keep it fresh. Store it in a cool, dry place away from direct sunlight. Properly stored, your homemade seasoning mix can last for several months. How to Use Your Seasoning Mix With your homemade seasoning mix ready to go, you’ll find countless ways to use it in your cooking. Here are a few ideas to get you started: 1. Seasoning Meats 2. Flavoring Vegetables 3. Enhancing Grains and Legumes Keeping a jar of homemade seasoning mix in your kitchen is a simple yet effective way to enhance the flavor of your meals with minimal effort. Whether you’re cooking meats, vegetables, grains, or legumes, a well-crafted seasoning mix can elevate your dishes and make meal preparation easier and more enjoyable. By creating your own blend, you have full control over the ingredients and flavors, ensuring that every dish you make is perfectly seasoned to your liking. Give it a try, and you’ll soon wonder how you ever cooked without it!

How to Cook Dried Pulses: A Comprehensive Guide

Dried pulses, including lentils, chickpeas, beans, and peas, are nutritious, versatile, and cost-effective pantry staples. Cooking them from dried not only enhances their flavor but also gives you better control over their texture and seasoning. Here’s a step-by-step guide to cooking dried pulses, ensuring they turn out perfectly every time. Types of Dried Pulses and Their Uses Understanding the different types of dried pulses can help you choose the right one for your recipes: Preparing Dried Pulses Before cooking, pulses require some preparation to ensure they are clean, tender, and safe to eat. Note: Lentils and split peas do not require soaking and can be cooked directly. Cooking Dried Pulses Once your pulses are prepared, follow these general steps to cook them: Tips for Perfectly Cooked Pulses Using Cooked Pulses Cooked pulses are incredibly versatile and can be used in a variety of dishes: Cooking dried pulses is a straightforward process that opens up a world of culinary possibilities. Whether you’re preparing a comforting soup, a hearty salad, or a flavorful curry, knowing how to cook dried pulses properly will enhance your dishes and provide you with nutritious, delicious meals. Embrace the versatility of pulses and enjoy their rich flavors and health benefits in your everyday cooking!

How to Safely Handle and Store Raw Meat at Home

Handling and storing raw meat properly is crucial for maintaining food safety and preventing foodborne illnesses. Raw meat can harbor harmful bacteria, such as Salmonella, E. coli, and Listeria, which can contaminate your kitchen and make you sick if not handled correctly. By following best practices for storage, handling, and preparation, you can ensure that your kitchen remains safe and your meals are healthy. In this blog post, we’ll guide you through the essential steps for safely handling and storing raw meat at home. Purchasing Raw Meat Storing Raw Meat Proper storage is essential to keep raw meat safe and fresh: Handling Raw Meat in the Kitchen Safe handling practices can prevent the spread of bacteria in your kitchen: Cooking Raw Meat Safely Proper cooking is essential to kill harmful bacteria: Storing Leftover Cooked Meat Proper storage of cooked meat is just as important: Disposing of Raw Meat Waste Safe disposal of raw meat waste helps maintain a clean kitchen environment: By following these guidelines for handling, storing, and cooking raw meat, you can significantly reduce the risk of foodborne illness in your home. Remember to prioritize cleanliness, prevent cross-contamination, and cook meat to the appropriate temperatures to ensure your meals are safe and delicious. Safe meat handling is a critical part of maintaining a healthy kitchen, and by implementing these practices, you can enjoy your meals with peace of mind.

Culinary Uses of Fermented Dairy in Recipes

Fermented dairy products have been a staple in various cuisines around the world for centuries. These products, which include yogurt, kefir, sour cream, buttermilk, and more, are not only rich in flavor but also offer a range of health benefits. The fermentation process enhances the nutritional value of dairy, making it easier to digest and packed with probiotics that promote gut health. In this blog post, we’ll explore the culinary uses of fermented dairy in recipes, highlighting how these versatile ingredients can elevate your cooking and baking. Why Use Fermented Dairy in Cooking? Fermented dairy products bring a unique tang and richness to dishes, along with several other benefits: Common Fermented Dairy Products and Their Uses 1. Yogurt Overview: Culinary Uses: 2. Kefir Overview: Culinary Uses: 3. Sour Cream Overview: Culinary Uses: 4. Buttermilk Overview: Culinary Uses: 5. Crème Fraîche Overview: Culinary Uses: Incorporating Fermented Dairy into Everyday Cooking Fermented dairy products are incredibly versatile and can be used in a variety of dishes, from appetizers to desserts. Here are some ideas for incorporating them into your daily cooking: Fermented dairy products are a fantastic addition to any kitchen, offering a unique combination of flavor, texture, and health benefits. From yogurt and kefir to sour cream and buttermilk, these ingredients can be used in a wide range of culinary applications. Whether you’re baking a cake, marinating meat, or whipping up a creamy sauce, fermented dairy adds depth and richness to your dishes. By incorporating these versatile ingredients into your cooking, you can elevate the flavor and nutritional value of your meals, creating delicious and wholesome dishes that everyone will love.

How to Remove Sticky Residue from Kitchen Surfaces

Sticky residue on kitchen surfaces can be frustrating to deal with, especially when it seems impossible to remove. Whether it’s from spilled food, adhesive labels, or leftover grime from cooking, sticky residue can make your kitchen look unclean and attract more dirt over time. Fortunately, with the right techniques and tools, you can effectively remove sticky residue from various kitchen surfaces without damaging them. In this blog post, we’ll explore different methods to tackle sticky residue and restore your kitchen surfaces to their original condition. Identifying the Type of Surface Before you begin removing sticky residue, it’s important to identify the type of surface you’re dealing with. Different surfaces require different cleaning methods to avoid damage: General Cleaning Tips for Sticky Residue For most kitchen surfaces, these general tips will help remove sticky residue effectively: Methods for Removing Sticky Residue a. Soap and Warm Water For most surfaces, a mixture of mild dish soap and warm water is a safe and effective first step: b. Baking Soda Paste Baking soda is a gentle abrasive that works well on stubborn sticky residue: c. White Vinegar White vinegar is an effective natural cleaner that can dissolve sticky residue: d. Rubbing Alcohol or Vodka Rubbing alcohol or vodka can effectively dissolve adhesive residue on most surfaces: e. Cooking Oil or Coconut Oil For surfaces that are sensitive to harsh chemicals, cooking oil or coconut oil can help loosen sticky residue: f. Commercial Adhesive Removers For stubborn sticky residue, you may need to use a commercial adhesive remover. These products are specifically designed to break down adhesives: Special Considerations for Different Surfaces Preventing Sticky Residue in the Future To keep your kitchen surfaces clean and free from sticky residue: Sticky residue can be a nuisance, but with the right approach, it’s easy to remove from your kitchen surfaces. By using gentle cleaning methods and being mindful of the type of surface you’re working with, you can effectively clean and maintain a sparkling kitchen. Keep these tips in mind to ensure your kitchen remains free of sticky residue and looking its best.

Tips for Mastering the Art of Soups and Stews at Home

Soups and stews are the ultimate comfort foods—warm, hearty, and nourishing. Whether you’re simmering a pot of chicken noodle soup or crafting a rich beef stew, mastering these dishes is a rewarding skill. With the right techniques, you can elevate your homemade soups and stews to restaurant-quality meals. Here are some tips to help you perfect the art of making soups and stews at home. Build a Flavorful Base The foundation of any great soup or stew is its base. Whether it’s a broth, stock, or a combination of sautéed vegetables, taking the time to build a flavorful base is crucial. Layer Your Flavors To achieve a complex and well-rounded flavor profile, layer your ingredients and seasonings gradually. Cook Low and Slow Soups and stews benefit from slow, gentle cooking. This allows the ingredients to meld together and the flavors to deepen. Balance the Flavors A well-balanced soup or stew should have the right combination of flavors—salty, sweet, sour, and umami. Use the Right Equipment The tools you use can make a big difference in the outcome of your soup or stew. Don’t Forget the Garnishes Garnishes can add texture, color, and an extra layer of flavor to your soups and stews. Store and Reheat Properly Soups and stews often taste better the next day, but proper storage and reheating are key. Mastering the art of soups and stews is all about patience, attention to detail, and understanding the balance of flavors. By following these tips, you’ll be able to create delicious, comforting bowls of soup and hearty stews that will warm your soul and impress your family and friends. So grab your favorite pot, gather your ingredients, and start simmering your way to culinary success!

How to Clean Kitchen Appliances with Baking Soda and Vinegar

Keeping your kitchen appliances clean is essential for maintaining a healthy, efficient, and well-functioning kitchen. While there are many commercial cleaning products available, you don’t need harsh chemicals to get the job done. Baking soda and vinegar, two common household items, are powerful natural cleaners that can tackle grease, grime, and stains on a variety of kitchen appliances. In this blog post, we’ll explore how to use baking soda and vinegar to clean some of the most commonly used kitchen appliances. Why Use Baking Soda and Vinegar? Together, baking soda and vinegar form a dynamic cleaning duo that’s safe, eco-friendly, and cost-effective. Cleaning Your Kitchen Appliances 1. Oven Ingredients: Procedure: 2. Microwave Ingredients: Procedure: 3. Refrigerator Ingredients: Procedure: 4. Dishwasher Ingredients: Procedure: 5. Coffee Maker Ingredients: Procedure: Baking soda and vinegar are powerful, natural cleaning agents that can effectively clean and maintain your kitchen appliances. By using these eco-friendly ingredients, you can keep your appliances in top shape without relying on harsh chemicals. Regular cleaning not only prolongs the life of your appliances but also ensures that your kitchen stays hygienic and pleasant. Give these tips a try and enjoy a cleaner, more efficient kitchen!

Using Griddles on Cooktops: Tips for Perfect Pancakes and More

A griddle is a versatile kitchen tool that can transform your cooktop into a flat, expansive cooking surface perfect for making pancakes, grilling sandwiches, searing meats, and so much more. Whether you’re cooking for a crowd or just want to master the art of perfectly cooked pancakes, using a griddle can elevate your culinary skills. In this blog post, we’ll explore how to use a griddle on your cooktop and share tips for making perfect pancakes and other delicious dishes. Why Use a Griddle on Your Cooktop? Griddles offer several advantages: Getting Started: How to Use a Griddle on Your Cooktop Step 1: Choose the Right Griddle Step 2: Preheat the Griddle Tips for Perfect Pancakes Making perfect pancakes is an art, and a griddle can help you achieve consistently fluffy, golden-brown results. Here are some tips: 1. Use a Batter Dispenser 2. Control the Heat 3. Flip at the Right Time 4. Don’t Overcrowd the Griddle 5. Keep Pancakes Warm More Griddle Cooking Tips While pancakes are a breakfast favorite, griddles can be used for so much more. Here are some additional tips for making the most of your griddle: 1. Perfectly Crispy Bacon 2. Grilled Sandwiches 3. Searing Meats and Vegetables 4. Breakfast Spread Cleaning and Maintaining Your Griddle To keep your griddle in top condition, follow these cleaning and maintenance tips: 1. Clean After Each Use 2. Seasoning (For Cast Iron) 3. Avoid Abrasive Cleaners Using a griddle on your cooktop opens up a world of culinary possibilities, from perfectly cooked pancakes to savory seared meats. By following these tips and techniques, you can make the most of your griddle and enjoy delicious meals with ease. Whether you’re cooking breakfast for the family or grilling up a quick dinner, a griddle is an invaluable tool that brings versatility and convenience to your kitchen. So, fire up your griddle and start cooking!

Tips for Reducing Sodium and Sugar in Home-Cooked Meals

Incorporating healthy habits into your cooking can have a significant impact on your overall well-being. Two common dietary concerns are excessive sodium and sugar intake, which can contribute to various health issues like high blood pressure, heart disease, and diabetes. Fortunately, reducing sodium and sugar in your home-cooked meals doesn’t mean sacrificing flavor. Here are some practical tips to help you create delicious, healthier dishes. Use Fresh Herbs and Spices One of the best ways to reduce sodium is by enhancing the flavor of your meals with fresh herbs and spices. Basil, cilantro, parsley, rosemary, thyme, and oregano can add depth and aroma to your dishes without the need for extra salt. Spices like cumin, paprika, turmeric, and ginger can also elevate the flavor profile of your food, making it more enjoyable and satisfying. Tip: Experiment with different herb and spice combinations to find what you like best. For example, a mix of garlic, rosemary, and lemon zest can make a roasted chicken dish pop with flavor. Opt for Low-Sodium Alternatives When shopping, choose low-sodium or no-salt-added versions of common ingredients like canned beans, tomatoes, broths, and sauces. These products are widely available and can make a big difference in your sodium intake. Tip: If you can’t find low-sodium options, rinse canned foods like beans and vegetables under cold water to remove some of the added salt. Cook from Scratch Preparing meals from scratch allows you to control the amount of sodium and sugar that goes into your food. Processed and pre-packaged foods are often loaded with hidden salts and sugars. By making your own soups, sauces, and dressings, you can avoid these additives and tailor the flavors to your taste. Tip: Homemade tomato sauce, for example, can be seasoned with garlic, onion, and herbs instead of relying on store-bought versions that may contain high levels of sodium and sugar. Reduce Sugar Gradually If you’re trying to cut back on sugar, do it gradually so your taste buds have time to adjust. Start by reducing the amount of sugar called for in recipes by one-quarter to one-third. In many cases, you won’t even notice the difference. Tip: In baking, you can often replace some of the sugar with natural sweeteners like applesauce, mashed bananas, or pureed dates. These alternatives add sweetness along with additional nutrients and fiber. Be Mindful of Sauces and Condiments Sauces, dressings, and condiments can be sneaky sources of sodium and sugar. Ketchup, barbecue sauce, soy sauce, and salad dressings often contain high levels of both. Consider making your own versions at home, where you can control the ingredients. Tip: For a low-sodium, low-sugar alternative to soy sauce, try using coconut aminos or make a simple dressing with olive oil, vinegar, mustard, and herbs. Increase the Use of Vegetables Vegetables are naturally low in sodium and sugar and can add bulk, flavor, and nutrients to your meals. Incorporate more vegetables into your dishes, such as stir-fries, soups, and casseroles, to reduce the need for added salt or sugar. Tip: Use vegetables like carrots, bell peppers, and onions to naturally sweeten dishes. Roasting vegetables can also bring out their natural sweetness, eliminating the need for additional sugars. Watch Portion Sizes Sometimes, reducing sodium and sugar can be as simple as watching your portion sizes. Consuming smaller portions naturally limits your intake of these ingredients, even if you don’t alter the recipe. Tip: Use smaller plates or bowls to help control portion sizes and avoid the temptation to overeat. Read Labels Carefully When buying packaged foods, always read the nutrition labels. Look for products with lower sodium and sugar content, and be aware of the various names sugar can go by, such as corn syrup, fructose, glucose, and sucrose. Tip: Choose foods labeled as “low sodium,” “no added sugar,” or “unsweetened.” Keep in mind that “reduced sodium” or “reduced sugar” products may still contain significant amounts. Use Citrus and Vinegar for Flavor Citrus fruits like lemons, limes, and oranges, as well as vinegars, can add brightness and acidity to your dishes, enhancing flavor without the need for extra salt or sugar. A squeeze of lemon or a splash of vinegar can transform a dish, making it taste fresh and vibrant. Tip: Try using balsamic vinegar or lemon juice in salad dressings or marinades to cut down on sugar while adding a tangy kick. Plan Your Meals Planning your meals in advance allows you to think about how much sodium and sugar are in each dish. This way, you can balance your diet throughout the week and ensure you’re not consuming too much of either. Tip: Incorporate a variety of meals with whole grains, lean proteins, and plenty of fruits and vegetables to keep your diet diverse and nutritionally balanced. Reducing sodium and sugar in your home-cooked meals doesn’t have to be a daunting task. With a few simple changes and mindful cooking practices, you can create flavorful, satisfying dishes that are better for your health. Start with these tips, and enjoy the benefits of a diet that’s lower in sodium and sugar without compromising on taste.

A Guide to Different Types of Cheese and Their Culinary Uses

Cheese is a versatile and beloved ingredient found in cuisines all around the world. With so many varieties available, each with its unique flavor, texture, and aroma, knowing how to use them can elevate your culinary creations. Whether you’re a cheese connoisseur or just looking to expand your palate, this guide will introduce you to different types of cheese and how to best incorporate them into your cooking. Fresh Cheeses Characteristics: Fresh cheeses are typically soft, creamy, and have a mild flavor. They are not aged and have a high moisture content. Soft-Ripened Cheeses Characteristics: These cheeses have a soft, often bloomy rind with a creamy interior. They are aged for a short period, allowing the flavors to develop while maintaining a soft texture. Semi-Soft Cheeses Characteristics: Semi-soft cheeses have a smooth, sliceable texture and mild to moderately strong flavors. They are slightly aged and have a higher moisture content than harder cheeses. Hard Cheeses Characteristics: Hard cheeses are aged longer, resulting in a firm texture and more concentrated flavors. They have a low moisture content and can range from mild to sharp in taste. Blue Cheeses Characteristics: Blue cheeses are known for their distinct blue or green veining, created by the mold Penicillium. They have a pungent aroma and strong, tangy flavor. Washed-Rind Cheeses Characteristics: Washed-rind cheeses have a strong, sometimes funky aroma, resulting from the process of washing the rind with brine, beer, wine, or spirits during aging. This encourages the growth of bacteria that give the cheese its characteristic flavor. Processed Cheeses Characteristics: Processed cheeses are made by blending natural cheeses with emulsifiers, preservatives, and sometimes additional ingredients like milk or cream. They have a uniform texture and a longer shelf life. Goat Cheeses Characteristics: Goat cheeses, or chèvre, are made from goat’s milk and have a tangy flavor that can range from mild to sharp. They can be fresh, aged, or semi-soft. Smoked Cheeses Characteristics: Smoked cheeses are infused with a smoky flavor during the aging process, either by being smoked over wood chips or by adding liquid smoke. Whether you’re crafting a gourmet meal or simply enjoying a snack, understanding the different types of cheese and their uses can enhance your culinary adventures. From the creamy texture of fresh cheeses to the bold flavors of blue and smoked varieties, there’s a cheese for every palate and occasion. Experiment with different pairings and dishes to discover new ways to enjoy this versatile ingredient.