kitchen

Tips for Reducing Sodium and Sugar in Home-Cooked Meals

Incorporating healthy habits into your cooking can have a significant impact on your overall well-being. Two common dietary concerns are excessive sodium and sugar intake, which can contribute to various health issues like high blood pressure, heart disease, and diabetes. Fortunately, reducing sodium and sugar in your home-cooked meals doesn’t mean sacrificing flavor. Here are some practical tips to help you create delicious, healthier dishes. Use Fresh Herbs and Spices One of the best ways to reduce sodium is by enhancing the flavor of your meals with fresh herbs and spices. Basil, cilantro, parsley, rosemary, thyme, and oregano can add depth and aroma to your dishes without the need for extra salt. Spices like cumin, paprika, turmeric, and ginger can also elevate the flavor profile of your food, making it more enjoyable and satisfying. Tip: Experiment with different herb and spice combinations to find what you like best. For example, a mix of garlic, rosemary, and lemon zest can make a roasted chicken dish pop with flavor. Opt for Low-Sodium Alternatives When shopping, choose low-sodium or no-salt-added versions of common ingredients like canned beans, tomatoes, broths, and sauces. These products are widely available and can make a big difference in your sodium intake. Tip: If you can’t find low-sodium options, rinse canned foods like beans and vegetables under cold water to remove some of the added salt. Cook from Scratch Preparing meals from scratch allows you to control the amount of sodium and sugar that goes into your food. Processed and pre-packaged foods are often loaded with hidden salts and sugars. By making your own soups, sauces, and dressings, you can avoid these additives and tailor the flavors to your taste. Tip: Homemade tomato sauce, for example, can be seasoned with garlic, onion, and herbs instead of relying on store-bought versions that may contain high levels of sodium and sugar. Reduce Sugar Gradually If you’re trying to cut back on sugar, do it gradually so your taste buds have time to adjust. Start by reducing the amount of sugar called for in recipes by one-quarter to one-third. In many cases, you won’t even notice the difference. Tip: In baking, you can often replace some of the sugar with natural sweeteners like applesauce, mashed bananas, or pureed dates. These alternatives add sweetness along with additional nutrients and fiber. Be Mindful of Sauces and Condiments Sauces, dressings, and condiments can be sneaky sources of sodium and sugar. Ketchup, barbecue sauce, soy sauce, and salad dressings often contain high levels of both. Consider making your own versions at home, where you can control the ingredients. Tip: For a low-sodium, low-sugar alternative to soy sauce, try using coconut aminos or make a simple dressing with olive oil, vinegar, mustard, and herbs. Increase the Use of Vegetables Vegetables are naturally low in sodium and sugar and can add bulk, flavor, and nutrients to your meals. Incorporate more vegetables into your dishes, such as stir-fries, soups, and casseroles, to reduce the need for added salt or sugar. Tip: Use vegetables like carrots, bell peppers, and onions to naturally sweeten dishes. Roasting vegetables can also bring out their natural sweetness, eliminating the need for additional sugars. Watch Portion Sizes Sometimes, reducing sodium and sugar can be as simple as watching your portion sizes. Consuming smaller portions naturally limits your intake of these ingredients, even if you don’t alter the recipe. Tip: Use smaller plates or bowls to help control portion sizes and avoid the temptation to overeat. Read Labels Carefully When buying packaged foods, always read the nutrition labels. Look for products with lower sodium and sugar content, and be aware of the various names sugar can go by, such as corn syrup, fructose, glucose, and sucrose. Tip: Choose foods labeled as “low sodium,” “no added sugar,” or “unsweetened.” Keep in mind that “reduced sodium” or “reduced sugar” products may still contain significant amounts. Use Citrus and Vinegar for Flavor Citrus fruits like lemons, limes, and oranges, as well as vinegars, can add brightness and acidity to your dishes, enhancing flavor without the need for extra salt or sugar. A squeeze of lemon or a splash of vinegar can transform a dish, making it taste fresh and vibrant. Tip: Try using balsamic vinegar or lemon juice in salad dressings or marinades to cut down on sugar while adding a tangy kick. Plan Your Meals Planning your meals in advance allows you to think about how much sodium and sugar are in each dish. This way, you can balance your diet throughout the week and ensure you’re not consuming too much of either. Tip: Incorporate a variety of meals with whole grains, lean proteins, and plenty of fruits and vegetables to keep your diet diverse and nutritionally balanced. Reducing sodium and sugar in your home-cooked meals doesn’t have to be a daunting task. With a few simple changes and mindful cooking practices, you can create flavorful, satisfying dishes that are better for your health. Start with these tips, and enjoy the benefits of a diet that’s lower in sodium and sugar without compromising on taste.

How to Clean Kitchen Light Fixtures and Ceiling Fans: A Step-by-Step Guide

Keeping your kitchen light fixtures and ceiling fans clean is essential not only for maintaining their appearance but also for ensuring they operate efficiently. Dust, grease, and grime can accumulate quickly in these areas, affecting the quality of light and airflow. Here’s a comprehensive guide to help you clean your kitchen light fixtures and ceiling fans effectively. Cleaning Light Fixtures 1. Safety First Before starting any cleaning, ensure safety: 2. Gather Your Supplies You’ll need: 3. Dust and Remove Debris 4. Clean the Fixture 5. Reassemble and Test Cleaning Ceiling Fans 1. Safety Precautions Before cleaning your ceiling fan: 2. Gather Your Supplies You’ll need: 3. Dust the Blades 4. Clean the Fan’s Housing 5. Reassemble and Test Additional Tips Cleaning your kitchen light fixtures and ceiling fans may seem like a daunting task, but with the right techniques and tools, it can be straightforward and effective. Regular cleaning not only enhances the look of your kitchen but also ensures that your fixtures and fans operate efficiently. By following these steps, you can maintain a clean, bright, and well-ventilated kitchen environment.

A Guide to Different Types of Cheese and Their Culinary Uses

Cheese is a versatile and beloved ingredient found in cuisines all around the world. With so many varieties available, each with its unique flavor, texture, and aroma, knowing how to use them can elevate your culinary creations. Whether you’re a cheese connoisseur or just looking to expand your palate, this guide will introduce you to different types of cheese and how to best incorporate them into your cooking. Fresh Cheeses Characteristics: Fresh cheeses are typically soft, creamy, and have a mild flavor. They are not aged and have a high moisture content. Soft-Ripened Cheeses Characteristics: These cheeses have a soft, often bloomy rind with a creamy interior. They are aged for a short period, allowing the flavors to develop while maintaining a soft texture. Semi-Soft Cheeses Characteristics: Semi-soft cheeses have a smooth, sliceable texture and mild to moderately strong flavors. They are slightly aged and have a higher moisture content than harder cheeses. Hard Cheeses Characteristics: Hard cheeses are aged longer, resulting in a firm texture and more concentrated flavors. They have a low moisture content and can range from mild to sharp in taste. Blue Cheeses Characteristics: Blue cheeses are known for their distinct blue or green veining, created by the mold Penicillium. They have a pungent aroma and strong, tangy flavor. Washed-Rind Cheeses Characteristics: Washed-rind cheeses have a strong, sometimes funky aroma, resulting from the process of washing the rind with brine, beer, wine, or spirits during aging. This encourages the growth of bacteria that give the cheese its characteristic flavor. Processed Cheeses Characteristics: Processed cheeses are made by blending natural cheeses with emulsifiers, preservatives, and sometimes additional ingredients like milk or cream. They have a uniform texture and a longer shelf life. Goat Cheeses Characteristics: Goat cheeses, or chèvre, are made from goat’s milk and have a tangy flavor that can range from mild to sharp. They can be fresh, aged, or semi-soft. Smoked Cheeses Characteristics: Smoked cheeses are infused with a smoky flavor during the aging process, either by being smoked over wood chips or by adding liquid smoke. Whether you’re crafting a gourmet meal or simply enjoying a snack, understanding the different types of cheese and their uses can enhance your culinary adventures. From the creamy texture of fresh cheeses to the bold flavors of blue and smoked varieties, there’s a cheese for every palate and occasion. Experiment with different pairings and dishes to discover new ways to enjoy this versatile ingredient.

Using Your Microwave for Baking: Tips and Tricks for Success

Microwaves are typically known for reheating leftovers or quickly cooking simple meals, but did you know they can also be used for baking? While a microwave won’t completely replace a traditional oven, it can be a handy alternative for small batches, quick desserts, or when your main oven is occupied. Here’s how to make the most of your microwave for baking, along with some tips and tricks to ensure success. Choose Microwave-Safe Bakeware The first step to successful microwave baking is choosing the right bakeware. Use only microwave-safe containers, such as glass, ceramic, or silicone, to avoid any mishaps. Avoid metal pans or dishes with metallic trims, as they can cause sparks or damage your microwave. Also, consider using round containers rather than square or rectangular ones, as they promote more even cooking. Understand Power Levels Microwaves typically operate at different power levels, which can be adjusted depending on what you’re baking. Lower power levels mimic the slow, steady heat of an oven and are ideal for baking. For instance, if your microwave’s maximum power is 1000 watts, you might want to bake at 50% power (500 watts) to avoid overcooking the outside while the inside remains undercooked. Use Small Portions and Batches Microwaves work best for smaller portions, so keep this in mind when baking. Large cakes or loaves may not cook evenly, leading to dry or rubbery textures. Stick to individual servings or small batches, like mug cakes, brownies, or mini cookies, for the best results. Additionally, since microwaves cook food quickly, small portions ensure even baking throughout. Rotate and Monitor Microwaves can have hot spots, so it’s crucial to rotate your dish halfway through baking to ensure even cooking. If your microwave doesn’t have a turntable, manually rotate the dish every minute or so. Also, keep an eye on your baked goods and check for doneness frequently, as microwaves can cook faster than you might expect. Add Moisture Microwave baking can sometimes dry out baked goods, especially if cooked for too long. To combat this, consider adding a small cup of water in the microwave alongside your dish. The steam from the water will help keep your baked goods moist. Alternatively, use ingredients like yogurt, applesauce, or even a bit of extra butter or oil in your recipes to maintain moisture. Experiment with Timing Microwave baking times can vary significantly from those in a conventional oven, so be prepared to experiment. Start by setting a shorter cook time and increase it gradually until you achieve the desired result. It’s better to undercook slightly and add extra time than to overcook and ruin your dish. Use Pre-Packaged Microwave Baking Mixes For beginners, pre-packaged microwave baking mixes can be a great way to get started. These mixes are specifically designed for microwaves and come with precise instructions, making it easier to achieve a successful bake. Once you’re comfortable, you can start experimenting with your own recipes. Allow for Carryover Cooking Microwave-baked goods often continue to cook slightly after being removed from the microwave due to residual heat. To avoid overcooking, let your baked goods rest for a minute or two after removing them from the microwave. This rest time allows the heat to distribute evenly, ensuring a better texture. Know When to Use the Microwave While the microwave is convenient, it’s not suitable for all types of baking. Delicate pastries, flaky pie crusts, and recipes requiring a crispy or browned exterior are better suited to a traditional oven. However, for quick cakes, puddings, and other simple treats, the microwave can be a lifesaver. Baking in a microwave can be a convenient and efficient way to prepare small, quick treats. With the right techniques and a bit of experimentation, you can achieve delicious results that rival those from a conventional oven. Whether you’re whipping up a quick dessert or trying out a new recipe, these tips and tricks will help you make the most of your microwave for baking success.

How to Select and Store Eggs for Maximum Freshness

Eggs are a staple in many kitchens, valued for their versatility and nutritional benefits. Whether you’re baking, cooking, or enjoying them on their own, choosing the right eggs and storing them properly is crucial for maintaining their freshness and flavor. In this blog post, we’ll explore how to select the best eggs at the store and the best practices for storing them to ensure they stay fresh and safe to eat. How to Select the Best Eggs 1. Check the Carton Date: 2. Inspect the Eggs: 3. Consider the Egg Size and Grade: 4. Look for Specialty Eggs: How to Store Eggs for Maximum Freshness 1. Store Eggs in the Refrigerator: 2. Place Eggs on a Middle Shelf: 3. Store Eggs Pointy End Down: 4. Check for Freshness: 5. Use Older Eggs for Baking: 6. Don’t Wash Eggs Before Storing: Selecting and storing eggs properly ensures that they remain fresh, safe, and delicious for all your culinary needs. By following these simple tips, you can make the most of your egg purchases, whether you’re making breakfast, baking a cake, or whipping up a batch of homemade mayonnaise. Remember to always check for freshness and store eggs at the correct temperature to enjoy their full flavor and nutritional benefits.

How to Clean a Blender and Other Small Kitchen Appliances

Small kitchen appliances like blenders, coffee makers, and toasters are essential tools in our daily cooking routines. However, over time, they can accumulate food residue, grease, and stains, which not only affect their performance but also pose hygiene risks. Regular cleaning and maintenance are key to extending the life of these appliances and ensuring they function efficiently. In this blog post, we’ll guide you through the process of cleaning your blender and other common small kitchen appliances, so you can keep your kitchen tools in top shape. How to Clean a Blender Blenders are versatile appliances, used for everything from smoothies to soups. However, their design can make them tricky to clean properly. Here’s how to do it: 1. Disassemble the Blender: 2. Rinse Immediately After Use: 3. Use Warm Soapy Water: 4. Deep Clean the Components: 5. Clean the Base: 6. Reassemble and Store: How to Clean Other Small Kitchen Appliances 1. Coffee Maker: Coffee makers can accumulate mineral deposits and coffee oils, affecting the taste of your brew. Here’s how to clean it: 2. Toaster: Toasters collect crumbs and can become a fire hazard if not cleaned regularly. 3. Microwave: Microwaves can quickly become dirty from food splatters and spills. 4. Food Processor: Food processors can trap food particles in various parts, making them difficult to clean. Keeping your small kitchen appliances clean is essential for maintaining their performance and ensuring your kitchen remains a safe and hygienic space. By following these cleaning tips for your blender, coffee maker, toaster, microwave, and food processor, you can extend the life of your appliances and enjoy consistently great results in your cooking and food preparation. Make regular cleaning a part of your kitchen routine, and your appliances will thank you with years of reliable service.

Correct Internal Cooking Temperatures for Different Foods

Cooking food to the correct internal temperature is crucial for ensuring both safety and flavor. Undercooked food can harbor harmful bacteria that may cause foodborne illnesses, while overcooked food can lose its taste and texture. Knowing the right temperatures for different types of food helps you cook confidently, whether you’re grilling, roasting, baking, or frying. In this blog post, we’ll explore the correct internal cooking temperatures for various foods to help you achieve delicious and safe results every time. Why Internal Cooking Temperature Matters Cooking food to the proper internal temperature kills harmful bacteria like Salmonella, E. coli, and Listeria, which can cause serious health issues if ingested. Different foods have different recommended temperatures because of their unique compositions and potential for contamination. Using a food thermometer is the most reliable way to ensure your food has reached the safe internal temperature. Internal Cooking Temperatures for Different Foods 1. Poultry (Chicken, Turkey, Duck) 2. Ground Meats (Beef, Pork, Veal, Lamb) 3. Beef, Veal, Lamb (Steaks, Roasts, Chops) 4. Pork (Chops, Roasts, Tenderloin) 5. Fish and Shellfish 6. Eggs 7. Leftovers and Casseroles 8. Ham (Fresh or Cooked Before Eating) Tips for Using a Food Thermometer Cooking to the correct internal temperature is key to enjoying safe and delicious meals. By using a food thermometer and following the recommended temperatures for different foods, you can ensure that your dishes are cooked to perfection every time. Whether you’re preparing a tender steak, juicy chicken, or delicate fish, knowing these temperature guidelines will help you serve meals that are both flavorful and safe. Make your kitchen a safer place by incorporating these practices into your cooking routine, and take the guesswork out of achieving the perfect doneness.

Range Hood Height: Finding the Perfect Installation Height

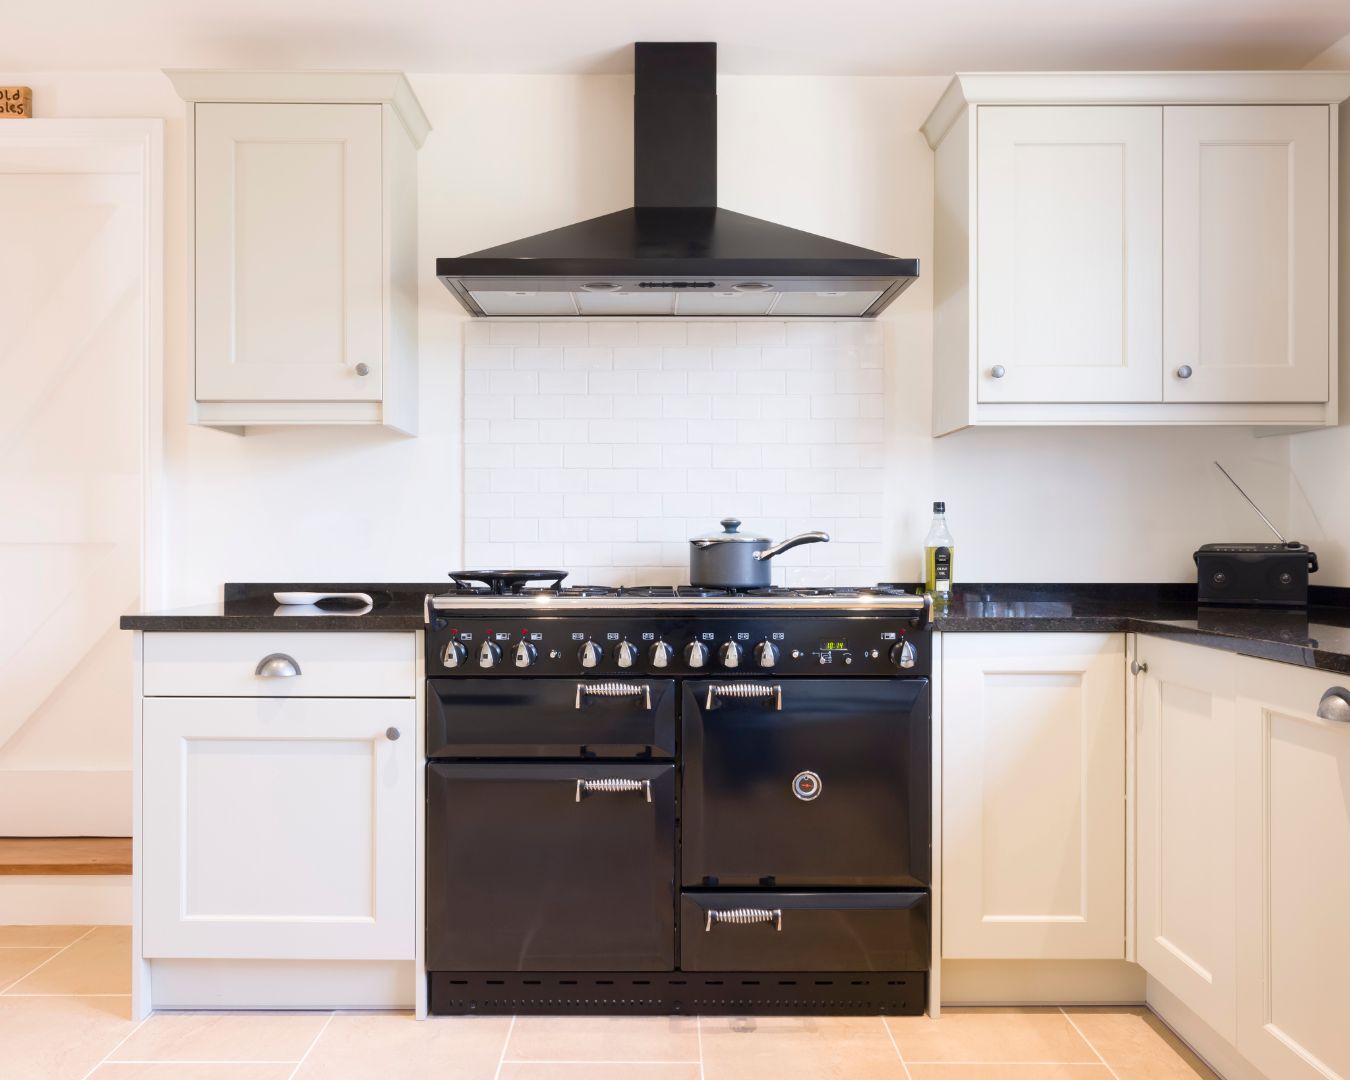
When it comes to kitchen ventilation, the range hood is an essential appliance that plays a critical role in maintaining a clean, odor-free, and safe cooking environment. However, to achieve optimal performance, it’s important to install your range hood at the correct height above your cooktop. Installing it too high or too low can affect its efficiency, reducing its ability to remove smoke, steam, and cooking odors effectively. In this blog post, we’ll guide you through the key factors to consider when determining the perfect installation height for your range hood. Understanding the Basics Range hoods are designed to capture and vent out smoke, steam, and odors generated during cooking. The correct installation height ensures that the range hood can effectively capture these airborne particles without compromising its efficiency or your cooking experience. General Guidelines While the ideal height can vary depending on the type of range hood and your specific kitchen setup, there are general guidelines that can help you find the right height for your installation: Factors to Consider: Tips for a Seamless Installation: Finding the perfect installation height for your range hood is essential for ensuring optimal performance and maintaining a comfortable cooking environment. By considering factors such as cooktop type, ceiling height, and personal cooking habits, you can determine the ideal height that suits your kitchen’s needs. Whether you’re installing a new range hood or adjusting an existing one, following these guidelines will help you achieve the best results. Proper range hood installation not only enhances the efficiency of your kitchen ventilation but also adds to the overall aesthetic appeal of your kitchen. So take the time to measure, adjust, and install your range hood at the right height to enjoy a cleaner, safer, and more enjoyable cooking experience.

How to Properly Clean and Maintain Your Baby Utensils

When it comes to caring for your baby, cleanliness is paramount, especially when it involves feeding utensils. Properly cleaning and maintaining baby utensils is essential to ensure your little one stays healthy and free from harmful bacteria. Here’s a comprehensive guide on how to keep your baby’s utensils spotless and in great condition. Clean Immediately After Use One of the most important habits to develop is cleaning baby utensils immediately after each use. This prevents food from drying and sticking to the utensils, making cleaning much easier and more effective. Sanitize Regularly While regular washing is important, sanitizing your baby’s utensils is crucial to killing any lingering bacteria, especially for newborns or during cold and flu season. Dry Thoroughly After cleaning and sanitizing, it’s important to dry the utensils completely before storing them. Moisture can lead to mold and bacterial growth, so ensure everything is fully dry. Store Safely Proper storage is key to keeping baby utensils clean and ready for use. Follow these tips for safe storage: Inspect Regularly Regularly inspect your baby’s utensils for signs of wear and tear. Damaged utensils can harbor bacteria and may pose a choking hazard. Use Utensils Safely Proper usage of baby utensils is also part of maintaining them. Follow these tips to ensure safe use: Know When to Replace Utensils Even with the best care, baby utensils won’t last forever. Knowing when to replace them is crucial to maintaining hygiene and safety. Properly cleaning and maintaining your baby’s utensils is essential for keeping your little one safe and healthy. By following these tips, you can ensure that your baby’s utensils remain clean, safe, and in good condition, providing peace of mind every time your baby eats. Regular cleaning, sanitizing, and careful inspection will help you keep your baby’s feeding experience as safe as possible.

How to Care for and Maintain Wooden Cutting Boards

Wooden cutting boards are a kitchen essential, beloved for their durability, natural beauty, and ability to protect knives. However, to keep your wooden cutting board in top condition, proper care and maintenance are essential. With the right techniques, you can extend the life of your cutting board and ensure it remains a safe and functional tool in your kitchen. Here’s a comprehensive guide on how to care for and maintain your wooden cutting boards. Clean Immediately After Use After each use, it’s important to clean your wooden cutting board promptly. This prevents food particles and juices from soaking into the wood, which can lead to stains, odors, and bacterial growth. To clean your board: Dry Immediately After washing, it’s crucial to dry your wooden cutting board immediately to prevent water from seeping into the wood. Waterlogged wood can lead to warping, cracking, and even mold growth. Follow these steps: Disinfect Naturally Wooden cutting boards are naturally antibacterial, but it’s still a good idea to disinfect them regularly, especially after cutting raw meat, poultry, or fish. You can disinfect your board naturally using the following methods: Condition Regularly Wooden cutting boards need to be conditioned regularly to prevent the wood from drying out and cracking. Conditioning helps to maintain the board’s luster and provides a protective barrier against moisture. Here’s how to do it: Remove Stains and Odors Over time, wooden cutting boards can develop stains and odors from foods like garlic, onions, and beets. To remove these: Avoid Excessive Moisture Moisture is the enemy of wooden cutting boards. To keep your board in good condition, follow these tips: Resurface When Necessary Over time, your wooden cutting board may develop deep cuts, scratches, or grooves that can harbor bacteria. If this happens, it’s time to resurface the board: Store Properly Proper storage is key to maintaining the longevity of your wooden cutting board: A well-cared-for wooden cutting board can last for years, providing a reliable and attractive surface for all your culinary creations. By following these care and maintenance tips, you can keep your cutting board in excellent condition, ensuring it remains a safe, durable, and beautiful part of your kitchen.