Home

Coastal Kitchen Design: Bringing a Beachy Vibe into Your Home

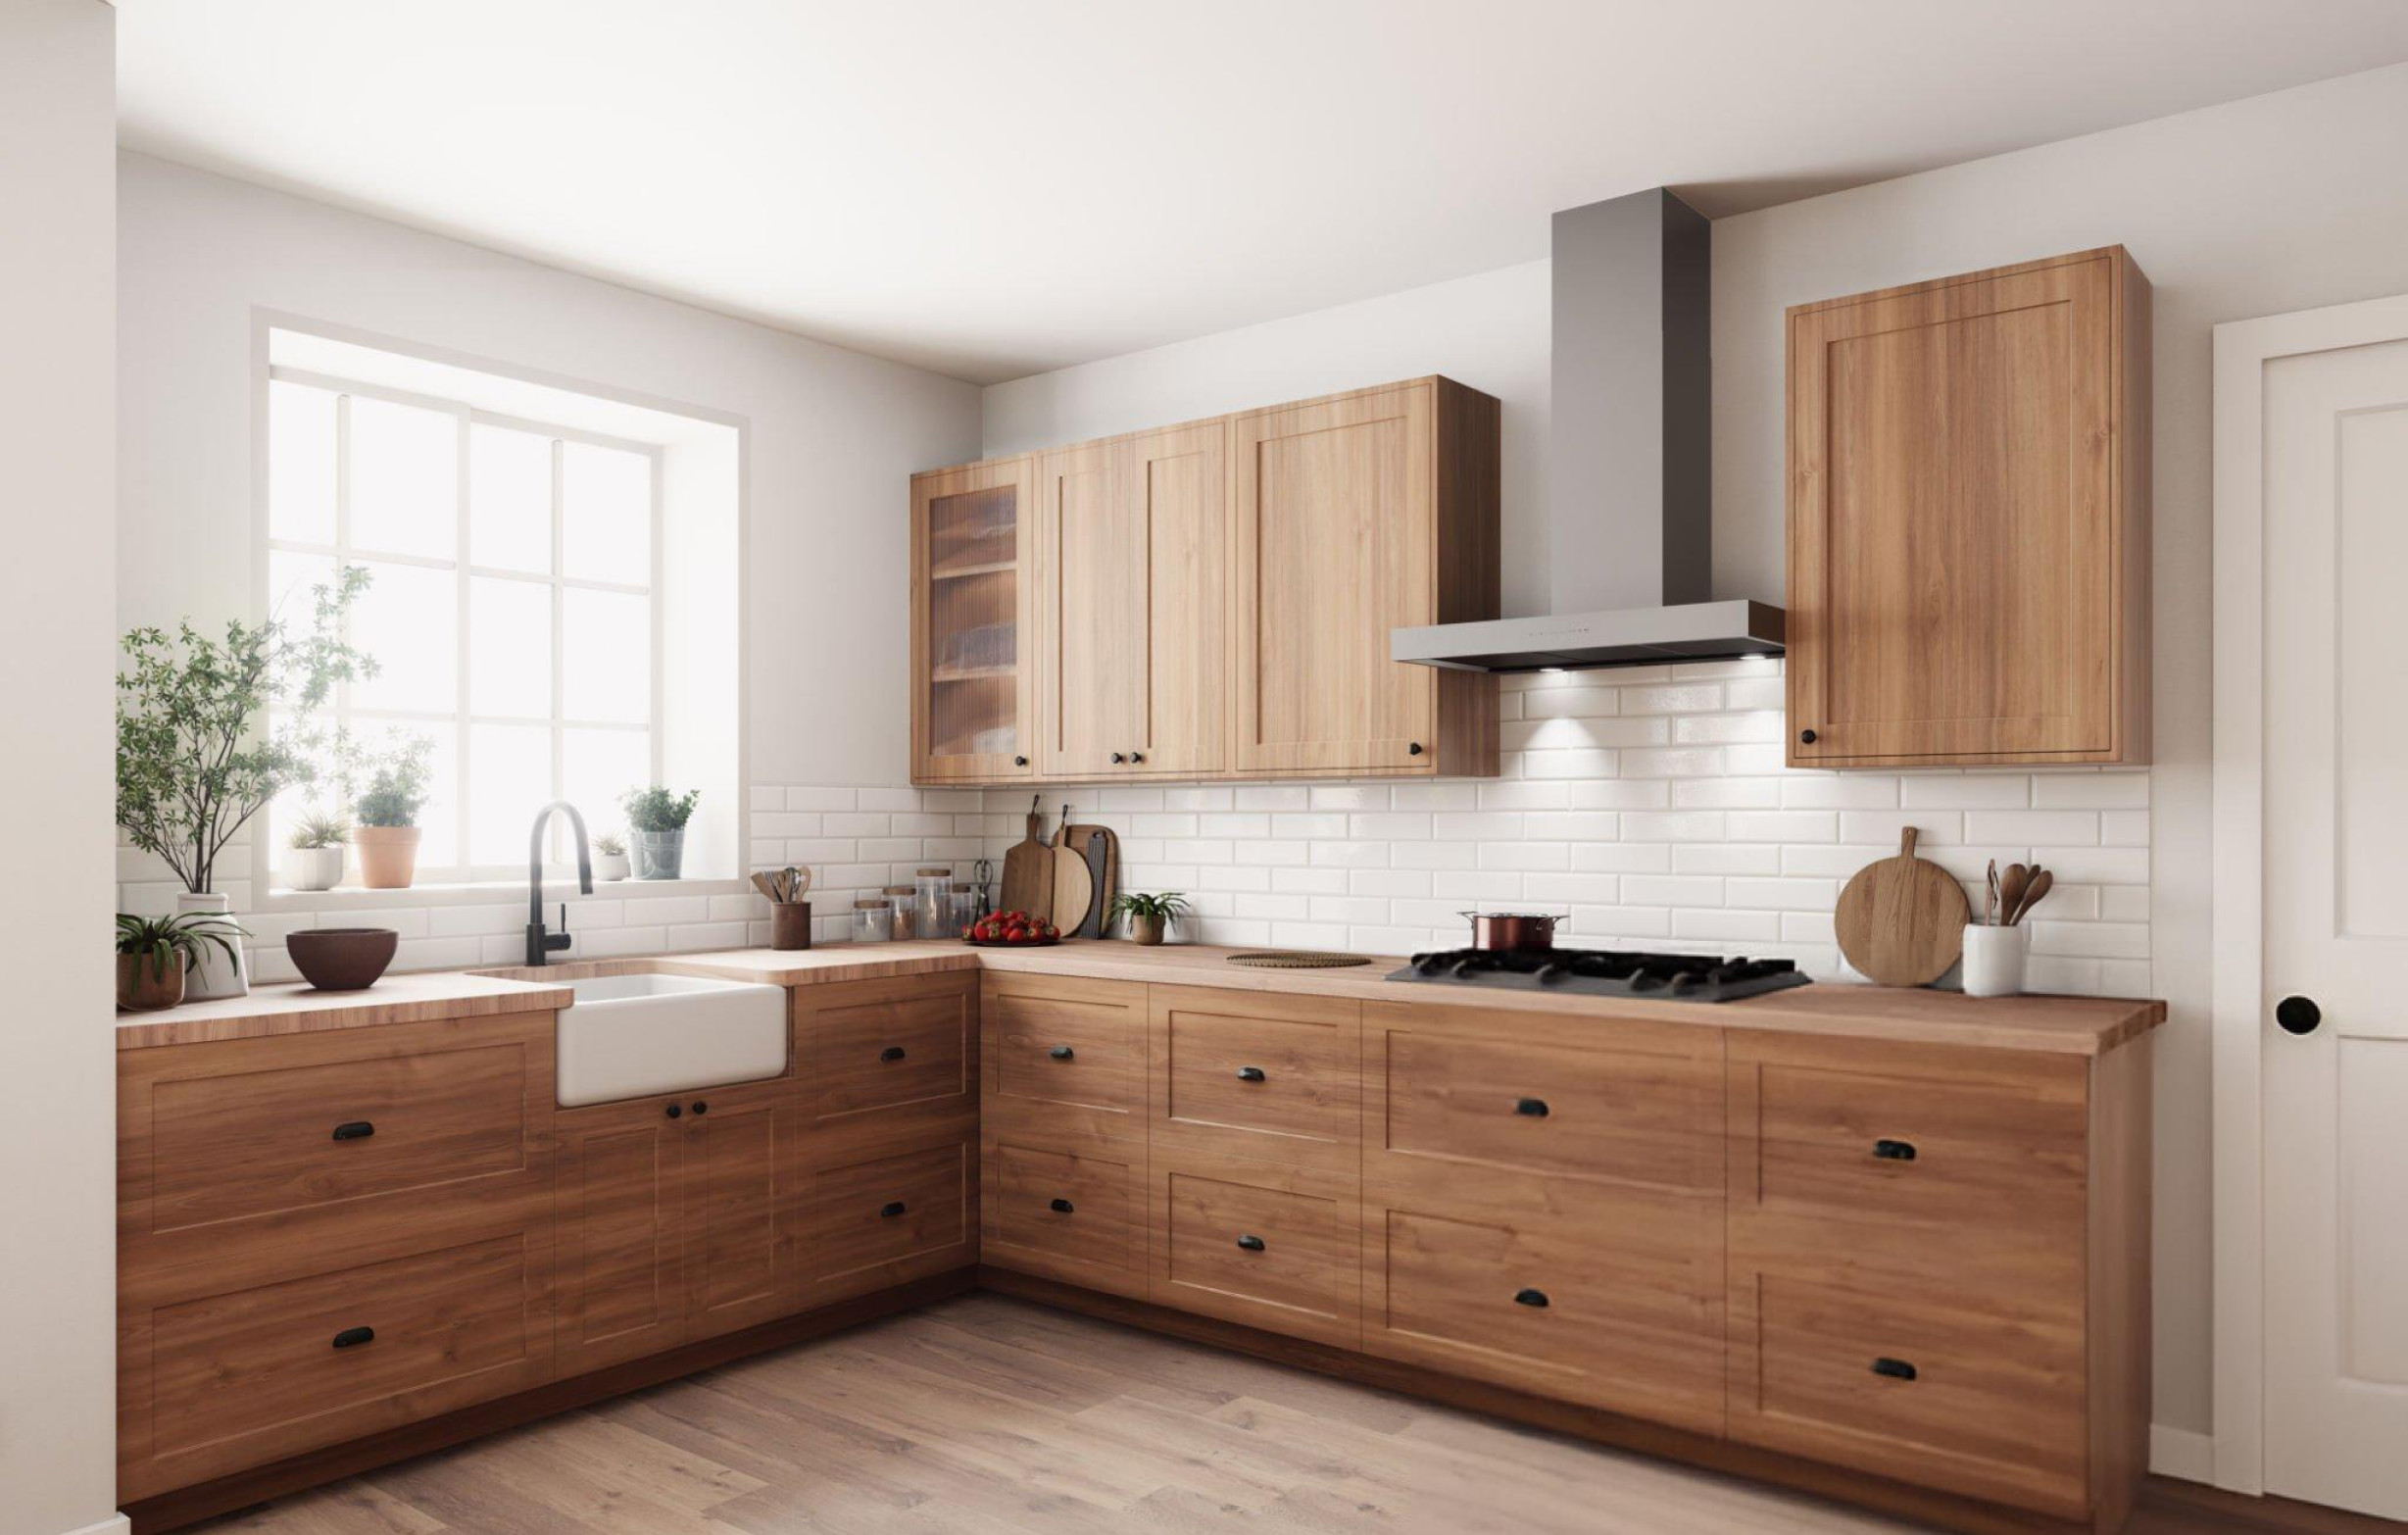
The coastal kitchen design trend is all about creating a light, airy, and relaxing space that brings the tranquil beauty of the beach right into your home. Whether you live by the ocean or simply dream of seaside living, incorporating coastal elements into your kitchen can evoke that serene, beachy vibe year-round. Here are some key elements and tips to help you achieve a stunning coastal kitchen design. Color Palette The foundation of any coastal kitchen is its color palette. Think soft, soothing shades that reflect the beach environment: Natural Materials Using natural materials is key to achieving an authentic coastal feel. Consider incorporating the following: Light and Airy Spaces Maximize natural light to enhance the breezy, open feel of a coastal kitchen: Coastal Decor Elements Incorporate beach-inspired decor to add personality and charm: Functional and Stylish Lighting Choose lighting that complements the coastal look while providing ample illumination: Open Shelving Open shelving can make your kitchen feel more spacious and allows you to showcase your coastal decor: Textiles and Soft Furnishings Incorporate textiles that evoke the coastal feel: Creating a coastal kitchen is about more than just decor – it’s about embracing a lifestyle that’s relaxed, welcoming, and inspired by nature. By focusing on a soothing color palette, natural materials, ample light, and beach-inspired accents, you can transform your kitchen into a serene coastal retreat. Embrace the beauty of the beach and enjoy the tranquil, refreshing ambiance of your new coastal kitchen. Whether you’re cooking, entertaining, or simply enjoying a cup of coffee, your beachy kitchen will be a delightful haven of relaxation and style.

Green Thumb Starter: Gardening Tips for Beginners

Embarking on a gardening journey can be an incredibly rewarding experience, whether you’re cultivating a lush outdoor oasis or nurturing a thriving indoor garden. However, for beginners, getting started can feel overwhelming. In this blog post, we’ll share essential gardening tips and hacks to help beginners kickstart their gardening journey and grow their own herbs, vegetables, or flowers with confidence. 1. Start Small: As a beginner gardener, it’s essential to start small and manageable. Choose a few easy-to-grow plants or herbs that are well-suited to your climate and growing conditions. Starting with a small garden bed or a few pots will allow you to gain confidence and experience before expanding your garden. 2. Know Your Space: Whether you have a spacious backyard or a small balcony, it’s important to consider your available space when planning your garden. Take note of sunlight exposure, soil quality, and drainage conditions to ensure that your chosen plants will thrive in their environment. 3. Invest in Quality Soil: Good soil is the foundation of a healthy garden. Invest in high-quality potting mix or garden soil that is well-draining and nutrient-rich. Consider adding organic matter like compost or aged manure to improve soil fertility and structure. 4. Water Wisely: Proper watering is essential for plant health, but it’s easy to overwater or underwater your plants, especially as a beginner. Take the time to learn the watering needs of your plants and adjust your watering schedule accordingly. Use a watering can or a drip irrigation system to deliver water directly to the plant’s roots and avoid wetting the foliage. 5. Learn from Mistakes: Gardening is a learning process, and it’s okay to make mistakes along the way. If a plant doesn’t thrive or a gardening experiment fails, take it as an opportunity to learn and grow. Keep a gardening journal to track your successes and failures, and use them as valuable learning experiences. 6. Embrace Sustainable Practices: As you embark on your gardening journey, consider incorporating sustainable practices into your gardening routine. Composting kitchen scraps, using organic fertilizers, and practicing water conservation techniques are just a few ways to minimize your environmental impact and create a more sustainable garden. With these essential gardening tips for beginners, you’ll be well-equipped to start your gardening journey with confidence and enthusiasm. Remember to start small, know your space, invest in quality soil, water wisely, and embrace sustainable practices along the way. Whether you’re growing herbs, vegetables, or flowers, gardening is a rewarding and fulfilling hobby that allows you to connect with nature and enjoy the fruits of your labor.

Creative Ways to Get Picky Eaters to Try New Foods

Getting picky eaters, especially children, to try new foods can be a challenging task for many families. However, with a bit of creativity and patience, you can encourage even the fussiest eaters to expand their palate. Here are some fun and effective strategies to help your family embrace a wider variety of foods. Involve Them in Meal Prep Why It Works: Kids are more likely to try foods they’ve helped prepare. How-To: Invite your children to join you in the kitchen. Let them wash vegetables, stir ingredients, or even help with simple chopping (under supervision). When kids are involved in the cooking process, they feel a sense of ownership and curiosity about the food they’ve helped create. Make Food Fun Why It Works: Presentation can make new foods more appealing. How-To: Use cookie cutters to create fun shapes out of fruits, vegetables, and sandwiches. Arrange foods into smiley faces or animals on the plate. The playful presentation can make mealtime more enjoyable and enticing for picky eaters. Create a Food Adventure Why It Works: Turning mealtime into an adventure can make trying new foods exciting. How-To: Introduce a theme night, such as “Around the World,” where you explore cuisines from different countries. Use maps or stories to explain the origins of the dishes. The educational element can pique children’s interest and make them more willing to try new flavors. Offer a Dip Why It Works: Dipping can make unfamiliar foods more palatable. How-To: Provide a variety of healthy dips like hummus, yogurt-based dressings, or guacamole. Let your child dip vegetables, fruits, or new foods into their favorite sauce. The familiar taste of the dip can help ease the introduction of new foods. Sneak in the New Why It Works: Gradual introduction can help children get used to new tastes. How-To: Mix small amounts of new foods with their favorite dishes. For example, add finely chopped vegetables to pasta sauce or blend fruits into smoothies. Gradually increase the amount of the new ingredient over time as they become accustomed to the taste. Be a Role Model Why It Works: Children often imitate the eating habits of adults. How-To: Show enthusiasm for trying new foods yourself. Eat a variety of healthy foods and express enjoyment. When kids see you enjoying different foods, they are more likely to follow suit. Introduce One New Food at a Time Why It Works: Avoiding overwhelming choices can make the process smoother. How-To: Introduce new foods one at a time alongside familiar favorites. This approach allows your child to focus on and assess the new food without feeling pressured by too many options. Encourage Taste Tests Why It Works: Small, pressure-free bites can build acceptance. How-To: Set up a “taste test” where your child is encouraged to take just one bite of a new food. Praise them for trying, regardless of whether they like it. Sometimes it takes multiple exposures before a child accepts a new food. Use Positive Reinforcement Why It Works: Rewards can motivate children to try new foods. How-To: Offer praise or small rewards for trying new foods. Create a sticker chart where they can earn a sticker for each new food they try, and offer a small prize when they reach a certain number of stickers. Make it a Family Activity Why It Works: Group experiences can reduce resistance. How-To: Plan family activities around food, such as visiting a farmers’ market or going on a pick-your-own produce outing. Let your child choose new fruits or vegetables to try at home. The involvement and choice can make them more open to trying new foods. By incorporating these creative strategies into your mealtime routine, you can help your picky eater become more adventurous with their food choices. Remember, patience and persistence are key. Celebrate small victories and continue to introduce new foods in a fun and positive way.

10 Essential Home Safety Tips for Every Household

Ensuring the safety of your home and loved ones is paramount. From preventing accidents to preparing for emergencies, implementing practical safety measures can make all the difference. We’ll discuss 10 essential home safety tips that every household should consider, covering areas such as fire safety, childproofing, and emergency preparedness. 1. Install Smoke Detectors: Smoke detectors are crucial for early detection of fires. Install them on every level of your home, including inside bedrooms and near sleeping areas. Test them monthly and replace batteries at least once a year. 2. Create a Fire Escape Plan: Develop a detailed fire escape plan with your family. Identify primary and secondary escape routes from each room and establish a designated meeting point outside. Practice fire drills regularly to ensure everyone knows what to do in an emergency. 3. Secure Furniture and Appliances: Prevent tip-over accidents by securing heavy furniture and appliances to the wall using brackets or straps. This is especially important for items like bookshelves, dressers, and TVs, which can pose a serious risk, especially to children. . 4. Childproof Your Home: Childproofing is essential to keep young children safe from common hazards. Install safety gates at the top and bottom of stairs, cover electrical outlets with outlet covers, and use cabinet locks to prevent access to harmful substances. 5. Store Hazardous Materials Safely: Store household chemicals, medications, and other hazardous materials out of reach of children and pets. Use child-resistant locks or cabinets with safety latches to prevent accidental ingestion or exposure. 6. Assemble an Emergency Kit: Prepare an emergency kit with essential supplies to sustain your family during a disaster or evacuation. Include items such as water, non-perishable food, first aid supplies, flashlights, batteries, and important documents. 7. Know How to Shut Off Utilities: Familiarize yourself with how to shut off the utilities in your home, including gas, electricity, and water. In the event of a disaster or emergency, knowing how to turn off these services can help prevent further damage or hazards. 8. Maintain Carbon Monoxide Detectors: Carbon monoxide (CO) is a silent killer, as it is colorless and odorless. Install CO detectors near sleeping areas and test them regularly. Replace batteries as needed and replace detectors every 5-7 years. 9. Practice Home Security Measures: Take steps to secure your home against burglars and intruders. Install deadbolt locks on exterior doors, use motion-sensor lights to deter trespassers, and consider installing a home security system for added protection. 10. Stay Informed and Prepared: Stay informed about potential risks in your area, such as natural disasters or community emergencies. Sign up for local alerts and stay connected with neighbors. Regularly review and update your emergency plans and supplies as needed. By implementing these 10 essential home safety tips, you can create a safer environment for you and your family. From preventing accidents to being prepared for emergencies, taking proactive measures can make a significant difference in protecting your home and loved ones.

Kitchen Organization Hacks: Maximize Efficiency and Ease of Use

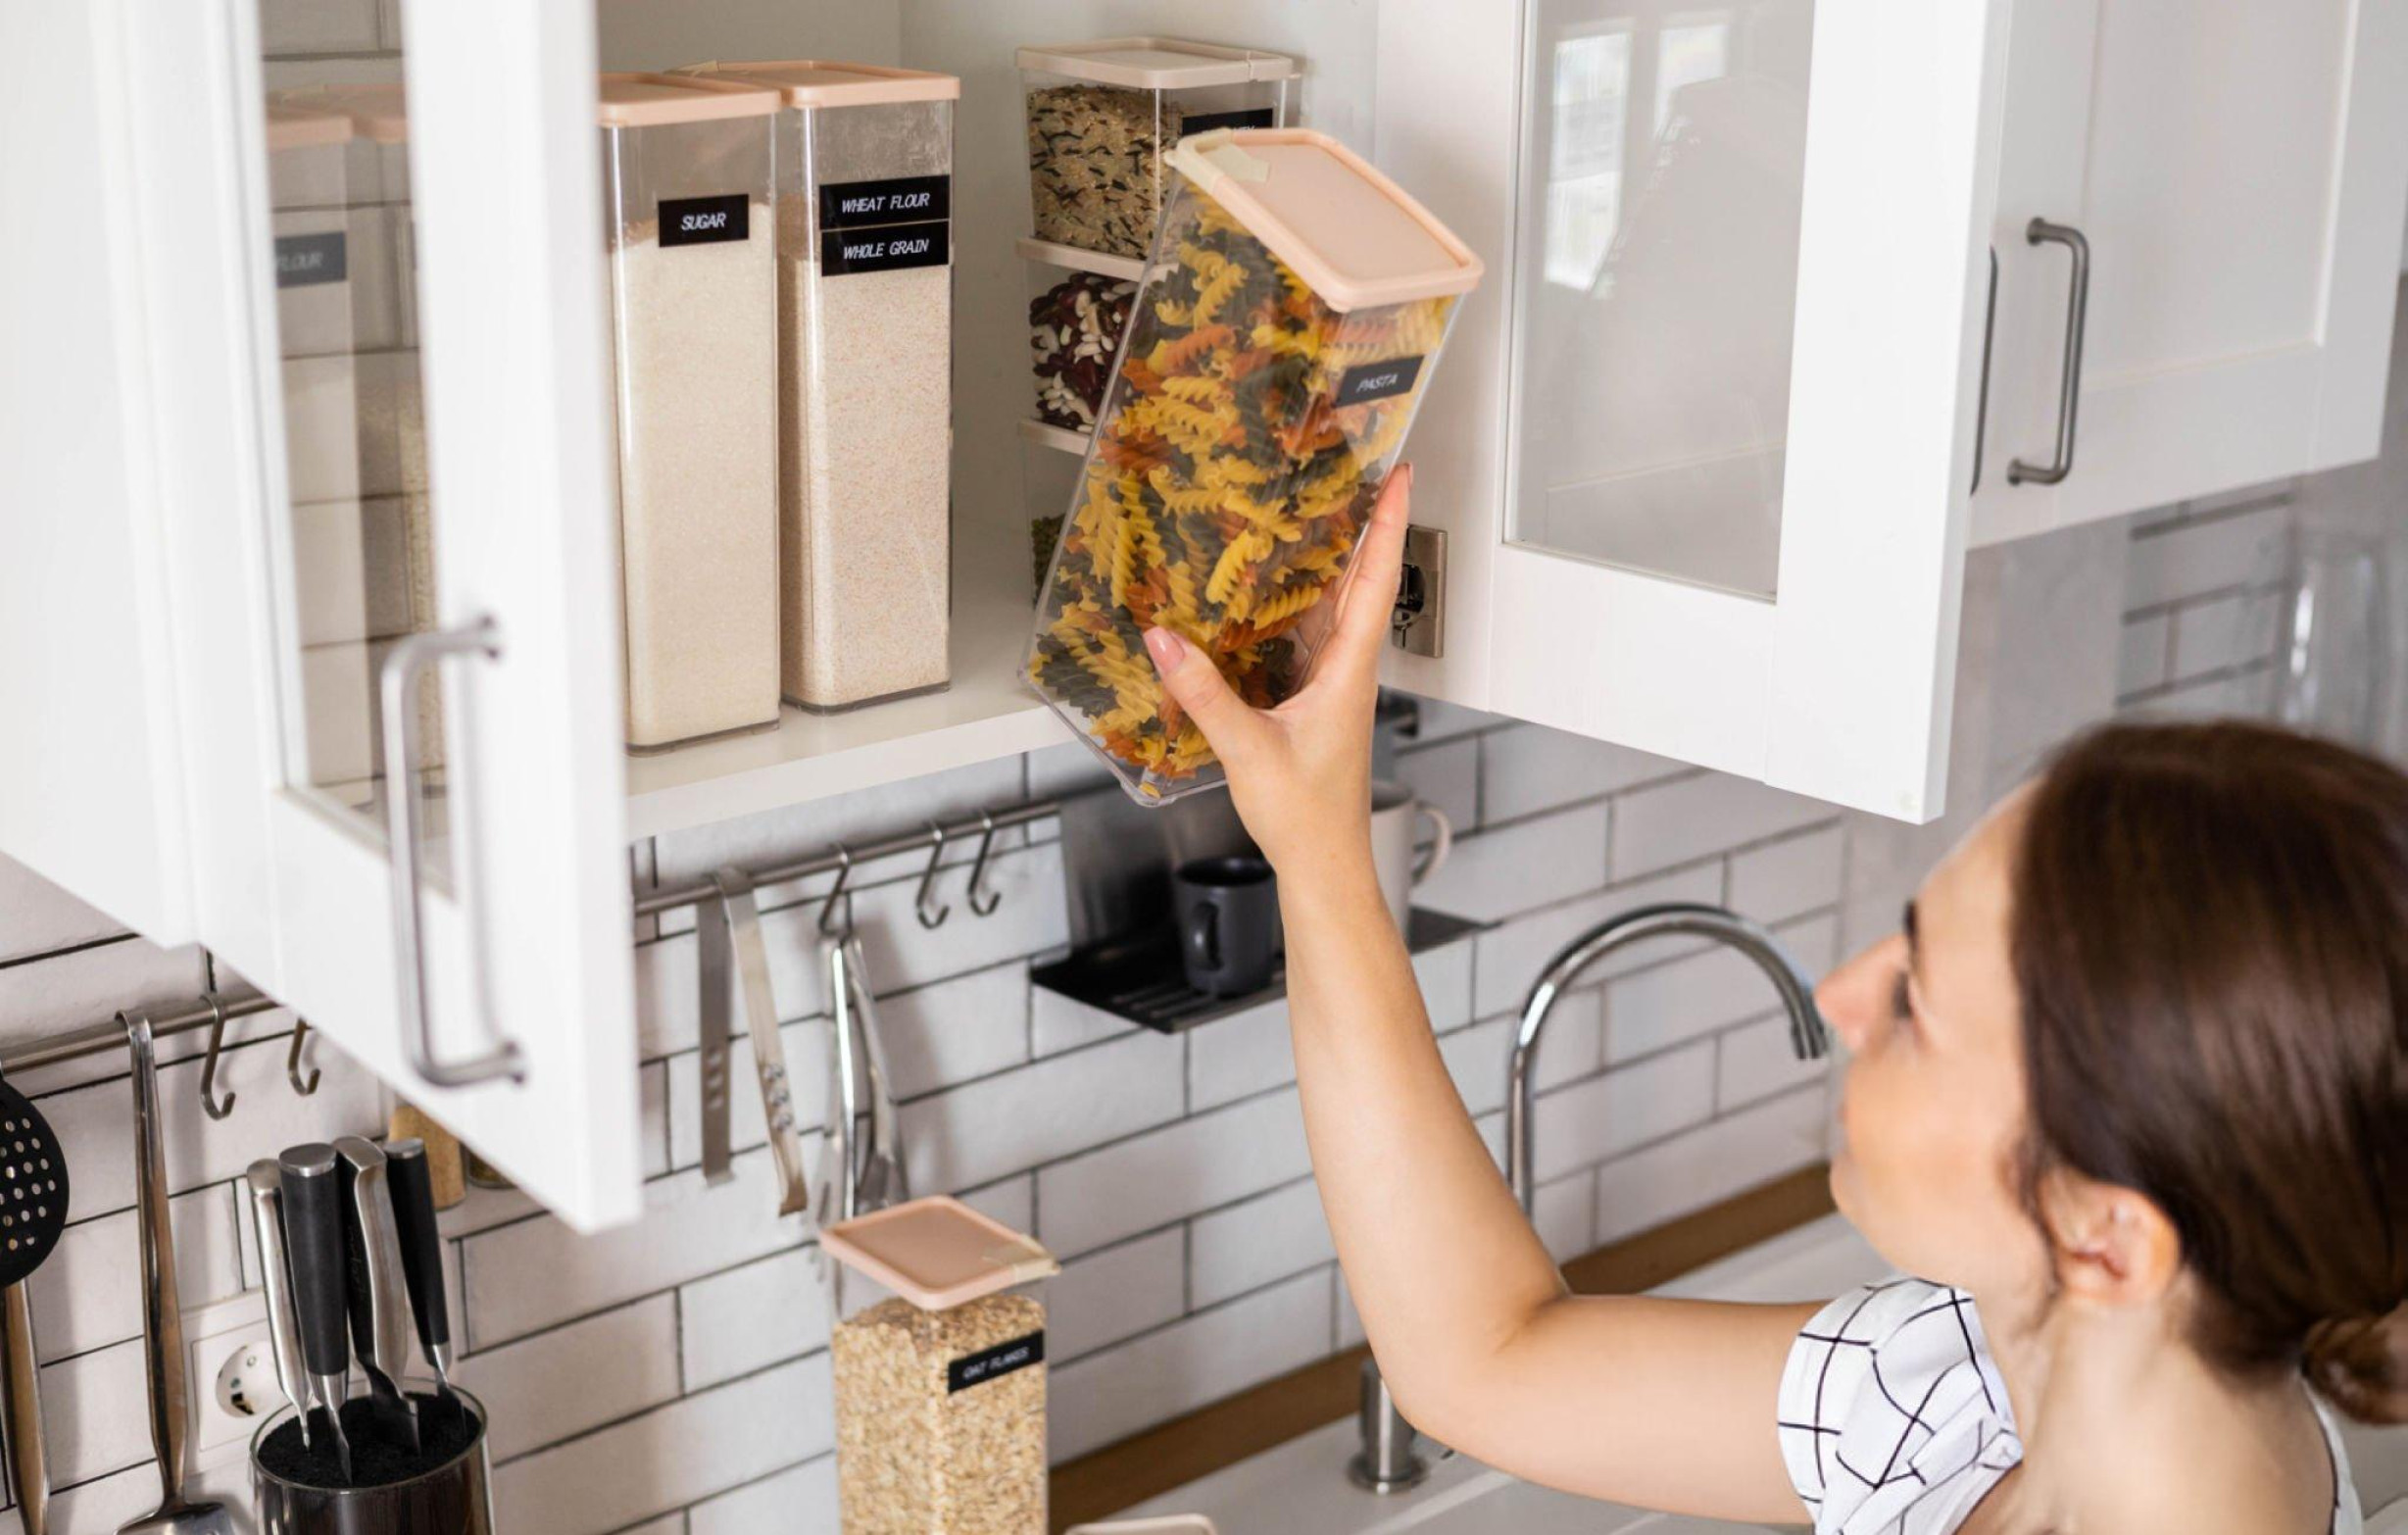
A well-organized kitchen can make cooking and meal preparation a breeze. When everything has a designated place and is easy to find, you save time and reduce stress. Here are some creative kitchen organization hacks to help you maximize efficiency and ease of use in your cabinets, drawers, and pantry. Declutter First Before you start organizing, declutter your kitchen. Remove items you no longer use or need. Donate or discard duplicates and anything that’s expired or broken. This will give you a clean slate to work with and make the organization process smoother. Use Drawer Dividers Drawer dividers are perfect for organizing utensils, cutlery, and small kitchen gadgets. They keep items separated and easy to find. Tip: DIY Dividers Use cardboard or wooden strips to create DIY dividers for custom-sized compartments. Install Pull-Out Shelves Pull-out shelves in cabinets provide easy access to items at the back. They’re especially useful in lower cabinets where it can be hard to see and reach everything. Tip: Sliding Baskets Install sliding baskets for a budget-friendly alternative to pull-out shelves. Utilize Vertical Space Maximize vertical space in your kitchen cabinets and pantry by adding extra shelves or stacking shelf organizers. Tip: Tension Rods Use tension rods to create vertical dividers for cutting boards, baking sheets, and trays. Label Everything Labels help everyone in the household know where things belong and make it easier to find items quickly. Use labels for pantry containers, spice jars, and storage bins. Tip: Chalkboard Labels Chalkboard labels are reusable and can be updated as your storage needs change. Use Clear Containers Clear containers make it easy to see what’s inside, reducing the time spent searching for ingredients. They also keep food fresher and more organized. Tip: Uniform Containers Use uniform containers for a cohesive look and to save space.  Install a Pegboard A pegboard is a versatile storage solution for kitchen walls. It’s great for hanging pots, pans, utensils, and even small shelves. Tip: Customize with Hooks and Baskets Customize your pegboard with various hooks and baskets to fit your storage needs. Magnetic Storage Magnetic strips and boards can be used to store knives, spice jars, and other metal kitchen tools. They save drawer and counter space while keeping items easily accessible. Tip: Magnetic Spice Jars Attach magnetic spice jars to the side of your fridge or a magnetic board for a stylish and practical storage solution. Over-the-Door Organizers Use over-the-door organizers for additional storage on cabinet and pantry doors. They’re perfect for spices, snacks, cleaning supplies, and more. Tip: Shoe Organizers Repurpose clear shoe organizers for pantry items like snacks and small packages. Lazy Susans Lazy Susans are great for corner cabinets and pantries. They make it easy to access items without having to dig through everything. Tip: Double-Decker Lazy Susan Use a double-decker Lazy Susan to maximize vertical space in your pantry or cabinets. Store Pots and Pans Efficiently Storing pots and pans can be challenging due to their size and shape. Use a pot rack or install hooks inside a cabinet to hang them. Alternatively, use a pan organizer rack to stack them neatly. Tip: Lid Organizer Use a lid organizer to keep pot and pan lids in order and easy to find. Utilize the Underside of Shelves The underside of shelves is often overlooked but can be a great storage spot. Attach hooks or small baskets to store mugs, utensils, or even spices. Tip: Under-Shelf Baskets Under-shelf baskets add an extra layer of storage without taking up additional space. Create a Coffee Station Designate a specific area for your coffee maker, mugs, and supplies. Use a small cart or a section of your counter to keep everything together and organized. Tip: Coffee Pod Organizer Use a coffee pod organizer or a small basket to keep coffee pods, filters, and other accessories in one place. Use Tiered Racks Tiered racks provide additional layers of storage, making it easier to see and access items in cabinets and on countertops. Tip: Spice Rack Use a tiered spice rack to keep spices organized and easily accessible. Keep Frequently Used Items Accessible Store frequently used items like cooking utensils, oils, and spices in easily accessible spots near your cooking area. This reduces the time spent searching for these essentials while cooking. Tip: Countertop Caddy Use a countertop caddy to keep utensils and oils handy but organized. A well-organized kitchen not only looks great but also functions efficiently, making meal preparation more enjoyable. By implementing these creative organization hacks, you can transform your kitchen into a space that’s both practical and pleasant to work in. Happy organizing!

Open Shelving vs. Cabinets: Pros and Cons for Kitchen Storage

Choosing the right storage solutions for your kitchen can greatly impact its functionality and aesthetic. Open shelving and cabinets are two popular options, each with its own advantages and drawbacks. To help you make an informed decision, we’ve outlined the pros and cons of both open shelving and cabinets for kitchen storage. Open Shelving Pros 1. Visual Appeal and Spaciousness Open shelving creates an airy and open feel in your kitchen, making it appear larger and more inviting. This style is perfect for showcasing your dishware, glassware, and decorative items, adding a personal touch to your kitchen decor. 2. Accessibility and Convenience With open shelving, everything is within easy reach. This convenience is ideal for frequently used items, allowing you to quickly grab what you need without rummaging through closed cabinets. 3. Cost-Effective Open shelving is generally more affordable than traditional cabinets. It requires less material and labor to install, making it a budget-friendly option for kitchen renovations. Cons 1. Dust and Maintenance Items on open shelves are exposed to dust and kitchen grease, requiring regular cleaning to maintain their appearance and hygiene. This can be a significant drawback if you’re looking for low-maintenance storage solutions. 2. Limited Storage Space Open shelves offer less storage space compared to cabinets, as they typically cannot hold as many items. This can be a challenge in smaller kitchens or for those with a large amount of kitchenware. 3. Cluttered Appearance If not organized meticulously, open shelving can quickly look cluttered and messy. It requires a commitment to maintaining an organized and aesthetically pleasing arrangement. Cabinets Pros 1. Ample Storage Space Cabinets provide ample storage space, helping to keep your kitchen organized and clutter-free. They can accommodate a wide range of items, from pots and pans to small appliances and pantry goods. 2. Protection from Dust and Grease Cabinets protect your kitchenware from dust, grease, and other contaminants, reducing the need for frequent cleaning. This makes them a practical choice for storing less frequently used items. 3. Streamlined and Neat Appearance Closed cabinets offer a clean and streamlined look, hiding away any mess and maintaining a tidy kitchen environment. This is particularly beneficial in modern and minimalist kitchen designs. Cons 1. Higher Cost Cabinets tend to be more expensive than open shelving due to the materials, hardware, and labor involved in their construction and installation. This can be a significant consideration if you’re working with a limited budget. 2. Accessibility Issues Items stored in cabinets, especially those at the back or on higher shelves, can be harder to access. This may require additional organizational tools, such as pull-out shelves or lazy Susans, to improve accessibility. 3. Visual Clutter In some kitchen designs, a row of upper cabinets can create a heavy and closed-in feeling. This can be counterproductive in smaller kitchens, making the space feel cramped and less inviting. When deciding between open shelving and cabinets, consider your kitchen’s size, style, and how you use your space. A combination of both might be the ideal solution, providing the benefits of each while mitigating their drawbacks. Hybrid Approach Ultimately, the choice between open shelving and cabinets depends on your personal preferences, lifestyle, and the overall design of your kitchen. By weighing the pros and cons of each option, you can create a kitchen that is both beautiful and practical, tailored to your unique needs.

Creating a Functional Kitchen Layout

Designing a kitchen that is both functional and aesthetically pleasing can transform your cooking space into a haven of efficiency and comfort. Whether you’re planning a complete kitchen renovation or simply looking to improve your existing layout, understanding key design principles is essential. In this blog post, we’ll explore the work triangle concept, ergonomic considerations, and optimal placement for appliances and storage to help you create a kitchen layout that maximizes efficiency and ease of use. The Work Triangle Concept The work triangle is a time-tested kitchen design principle that enhances functionality by positioning the three primary work areas—the sink, stove, and refrigerator—at the points of an imaginary triangle. This layout minimizes unnecessary movement, making cooking and cleaning more efficient. Here’s a closer look at the components of the work triangle: For optimal efficiency, each side of the work triangle should measure between 4 and 9 feet, and the total distance around the triangle should be between 12 and 26 feet. This ensures that the kitchen is compact enough to minimize walking distances but spacious enough to prevent crowding. Ergonomic Considerations Ergonomics plays a crucial role in kitchen design by ensuring that the layout is comfortable and convenient for users. Here are some key ergonomic principles to consider: Optimal Placement for Appliances and Storage Strategic placement of appliances and storage solutions can significantly enhance kitchen efficiency. Here are some tips for optimal placement: Creating a functional kitchen layout involves thoughtful planning and consideration of key design principles. By incorporating the work triangle concept, ergonomic considerations, and optimal placement for appliances and storage, you can design a kitchen that is both efficient and enjoyable to use. Whether you’re cooking a quick weeknight dinner or preparing a feast for family and friends, a well-designed kitchen layout will make the experience more pleasant and productive. Remember, the goal is to create a space that works for you and your lifestyle, making cooking and cleaning an effortless and enjoyable part of your day.

Emergency Preparedness: Essential Supplies and Plans for Your Home

Emergencies can strike at any moment, from natural disasters like hurricanes and earthquakes to unexpected power outages or medical emergencies. Being prepared can make all the difference in how you and your family navigate these challenging situations. Explore the essential supplies and plans you need to prepare your home for emergencies, ensuring the safety and well-being of your loved ones. Create a Comprehensive Emergency Kit Develop a Family Emergency Plan Prepare for Power Outages: Safeguard Against Natural Disasters Stay Informed Practice Regular Drills Being prepared for emergencies is essential for protecting yourself, your family, and your home. By creating a comprehensive emergency kit, developing a family emergency plan, and staying informed about potential threats, you can minimize the impact of disasters and ensure a safer and more secure environment for everyone. Take the time to prepare now, so you can face whatever challenges may arise with confidence and resilience.

Budget-Friendly Decorating Ideas: Refresh Your Home Decor Without Breaking the Bank

Refreshing your home decor doesn’t have to cost a fortune. With a little creativity and resourcefulness, you can transform your space on a budget. In this blog post, we’ll explore budget-friendly decorating ideas that will breathe new life into your home without breaking the bank. From thrifty shopping tips to easy DIY projects, there are plenty of ways to refresh your home decor affordably. Thrifty Shopping Tips DIY Projects Budget-Friendly Decor Ideas Refreshing your home decor on a budget is easier than you think. With thrifty shopping tips, DIY projects, and budget-friendly decor ideas, you can transform your space without breaking the bank. Get creative, think outside the box, and have fun exploring affordable ways to refresh your home decor and make your space uniquely yours.

How to Make the Best Homemade Pizza: Tips and Techniques

Making homemade pizza can be a rewarding culinary experience that brings the flavors and techniques of a pizzeria right into your own kitchen. Whether you’re a pizza-making novice or a seasoned home chef, these tips and techniques will help you create the best homemade pizza, from the perfect crust to the most delectable toppings. Start with the Perfect Dough Ingredients: Instructions: Master the Art of Stretching Dough Stretching pizza dough by hand gives it a more rustic, artisan feel compared to using a rolling pin. Here’s how to do it: Choose the Right Sauce Classic Tomato Sauce: Select High-Quality Toppings Cheese: Meats and Veggies: Bake to Perfection Preheat Your Oven: Use a Pizza Stone or Steel: Baking: Finish with Fresh Ingredients Fresh Herbs: Drizzle of Olive Oil: Making the best homemade pizza involves mastering a few key techniques, from preparing the dough to selecting the right toppings and baking to perfection. With practice and these tips, you’ll be able to create delicious, restaurant-quality pizza in the comfort of your own kitchen. Happy pizza making!