dinner ideas

Choosing the Right Refrigerator Size: Capacity and Dimensions Guide

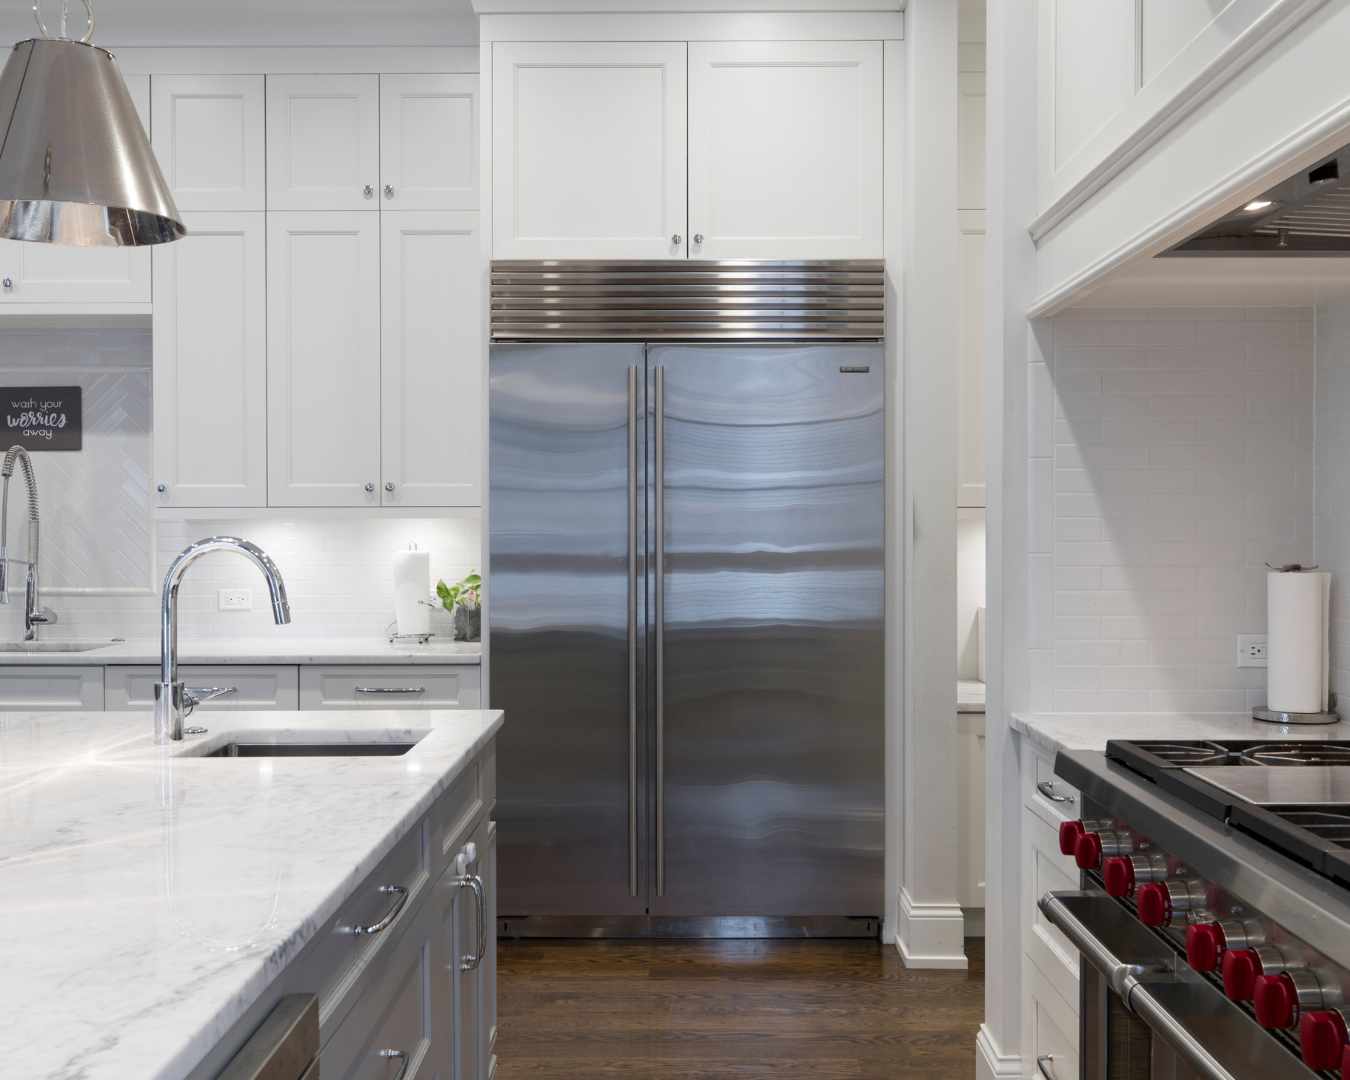
When it comes to selecting a new refrigerator, size matters—both in terms of capacity and dimensions. Finding the right refrigerator ensures you have enough space for your food while fitting perfectly into your kitchen layout. This guide will help you navigate the key considerations for choosing the ideal refrigerator size for your home. Assess Your Needs Household Size: The size of your household greatly influences the type of refrigerator you need. Here’s a general guideline based on family size: Lifestyle Considerations: If you entertain frequently or store large quantities of food, opt for a larger capacity. Additionally, consider if you need specialized features such as a bottom freezer, French doors, or side-by-side compartments. Understand Refrigerator Types and Their Dimensions Top-Freezer Refrigerators: These traditional models have a separate freezer compartment above the refrigerator. They are typically more compact and offer a good balance of storage and accessibility. Bottom-Freezer Refrigerators: The freezer is located at the bottom, making fresh food more accessible. These models are often larger and offer a more spacious refrigerator section. French Door Refrigerators: Featuring a bottom freezer and two side-by-side doors for the refrigerator compartment, these models combine style with efficiency and are ideal for larger kitchens. Side-by-Side Refrigerators: With the freezer and refrigerator sections side by side, these models are great for smaller kitchens where space is limited. Compact Refrigerators: Ideal for small spaces or secondary locations, compact refrigerators have limited capacity but are perfect for dorms or small apartments. Measure Your Space Available Space: Measure the width, height, and depth of the area where the refrigerator will go. Remember to account for extra space around the refrigerator for proper ventilation and ease of access. Ensure there’s enough clearance for door swings and drawers. Doorways and Hallways: Measure the dimensions of doorways, hallways, and staircases through which the refrigerator will need to pass. This ensures the new refrigerator will fit through these spaces without issues. Check Interior Dimensions Shelving and Storage: Consider how many shelves, drawers, and compartments you need. Adjustable shelves and bins can add flexibility to accommodate various food items and containers. Freezer Space: If you store a lot of frozen food, ensure the freezer compartment is large enough and includes features such as adjustable shelves or bins for better organization. Evaluate Energy Efficiency Energy Star Rating: Look for refrigerators with an Energy Star rating, which indicates better energy efficiency and lower operating costs. A more efficient model can save money on your electricity bill over time. Consider Additional Features Water and Ice Dispensers: Built-in water and ice dispensers add convenience but may require additional space and can affect internal storage capacity. Smart Features: Some refrigerators come with smart technology that allows you to monitor and control the appliance remotely, track expiration dates, or even view inside the fridge from your smartphone. Choosing the right refrigerator size involves evaluating your household needs, measuring your available space, and understanding the different types and features available. By carefully considering these factors, you can find a refrigerator that fits your space, meets your storage requirements, and enhances your kitchen’s functionality and style.
Cooking with the Cosmo COS-23AFAKB 2.3-Quart Compact Electric Air Fryer

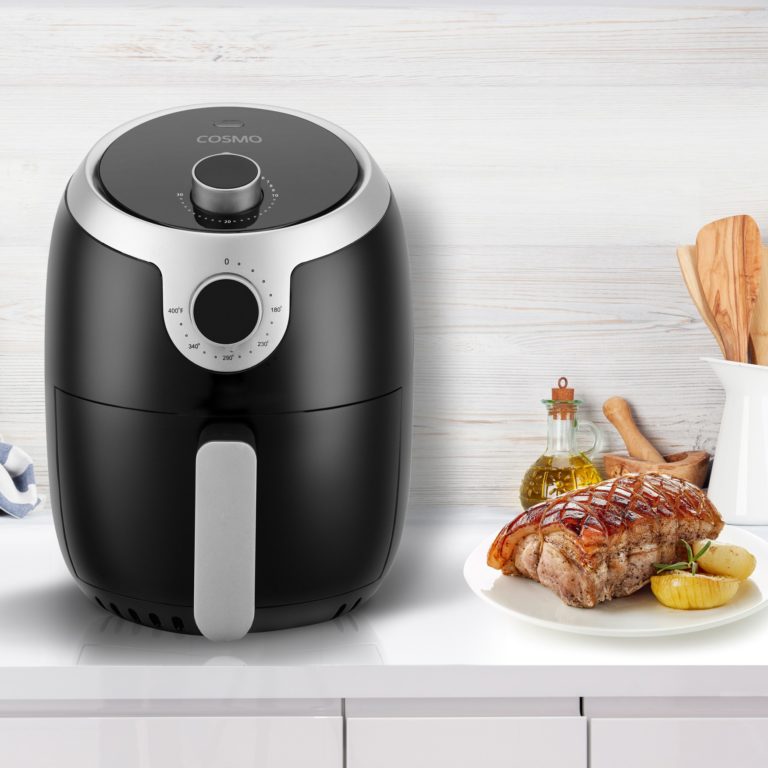
Air fryers have revolutionized home cooking, offering a healthier way to enjoy crispy and delicious meals without excessive oil. The Cosmo COS-23AFAKB 2.3-Quart Compact Electric Air Fryer is an excellent addition to many kitchens, providing convenience, efficiency, and versatility in a compact design. Why an Air Fryer is a Must-Have Appliance Air fryers use rapid air circulation to cook food evenly, producing crispy textures similar to deep frying but with significantly less oil. This makes them a healthier alternative while also being faster and easier to use compared to traditional ovens. Whether you’re looking to fry, bake, roast, or reheat, an air fryer simplifies meal prep with minimal mess and effort. Key Features of the COS-23AFAKB Benefits of Choosing the COS-23AFAKB The compact size makes it ideal for small kitchens, dorms, and RVs while still providing efficient and even cooking. Its quick preheating time and easy cleanup make meal preparation hassle-free. Additionally, with healthier cooking options, you can indulge in crispy favorites without the guilt.The Cosmo COS-23AFAKB 2-Quart Compact Electric Air Fryer is a game-changer for those looking to cook delicious, healthier meals with ease. Whether you’re making crispy fries, roasted vegetables, or even baked goods, this air fryer is a versatile tool that enhances your cooking experience.

How to Make Your Own Dried Fruits at Home

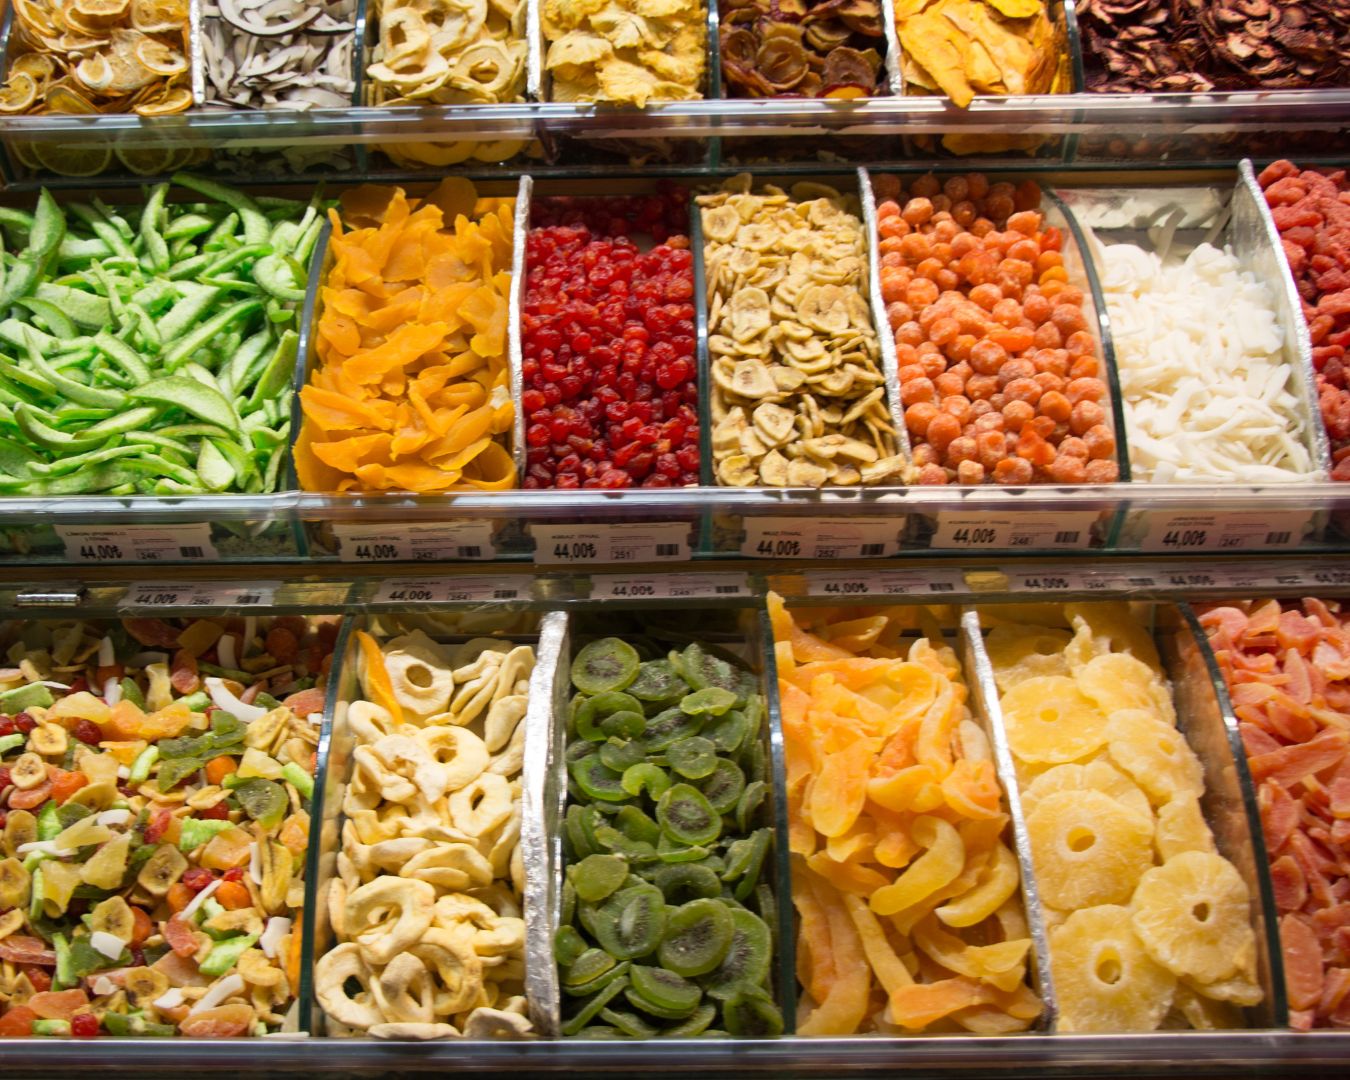
Dried fruits are a delicious and nutritious snack that can be enjoyed year-round. They are perfect for adding to trail mixes, cereals, or baked goods, and they also make a healthy on-the-go snack. While store-bought dried fruits are convenient, they often contain added sugars and preservatives. Making your own dried fruits at home allows you to control the ingredients and create a healthier, more natural product. Plus, it’s a great way to preserve fruits when they are in season. In this blog post, we’ll guide you through the process of making your own dried fruits at home. Why Make Your Own Dried Fruits? Choosing the Right Fruits Not all fruits are created equal when it comes to drying. Some fruits dry better than others, and some may require more preparation. Here are some of the best fruits to dry at home: Preparation Drying Methods There are several methods you can use to dry fruits at home. The method you choose may depend on the equipment you have available and the type of fruit you’re drying. 1. Using a Dehydrator A dehydrator is the most efficient and controlled method for drying fruits. It circulates warm air around the fruit, removing moisture while preserving nutrients. Steps: Tips: 2. Oven Drying If you don’t have a dehydrator, your oven can do the job. Oven drying is a bit less precise but still effective. Steps: Tips: 3. Sun Drying Sun drying is the most traditional method, but it requires the right conditions: hot, dry weather with temperatures consistently above 85°F. Steps: Tips: Storing Your Dried Fruits Once your fruit is dried, it’s important to store it properly to maintain freshness. Enjoying Your Homemade Dried Fruits Homemade dried fruits are incredibly versatile. Enjoy them as a snack on their own, mix them into granola or oatmeal, add them to baked goods, or rehydrate them for use in recipes like stews, sauces, or desserts. Making your own dried fruits at home is a rewarding process that allows you to enjoy your favorite fruits year-round. With a little time and effort, you can create healthy, preservative-free snacks that are both delicious and nutritious. Whether you use a dehydrator, oven, or even the sun, the key to success is patience and attention to detail. Give it a try, and you’ll soon be enjoying the sweet taste of homemade dried fruits.

How to Remove Burnt Food from Pots and Pans

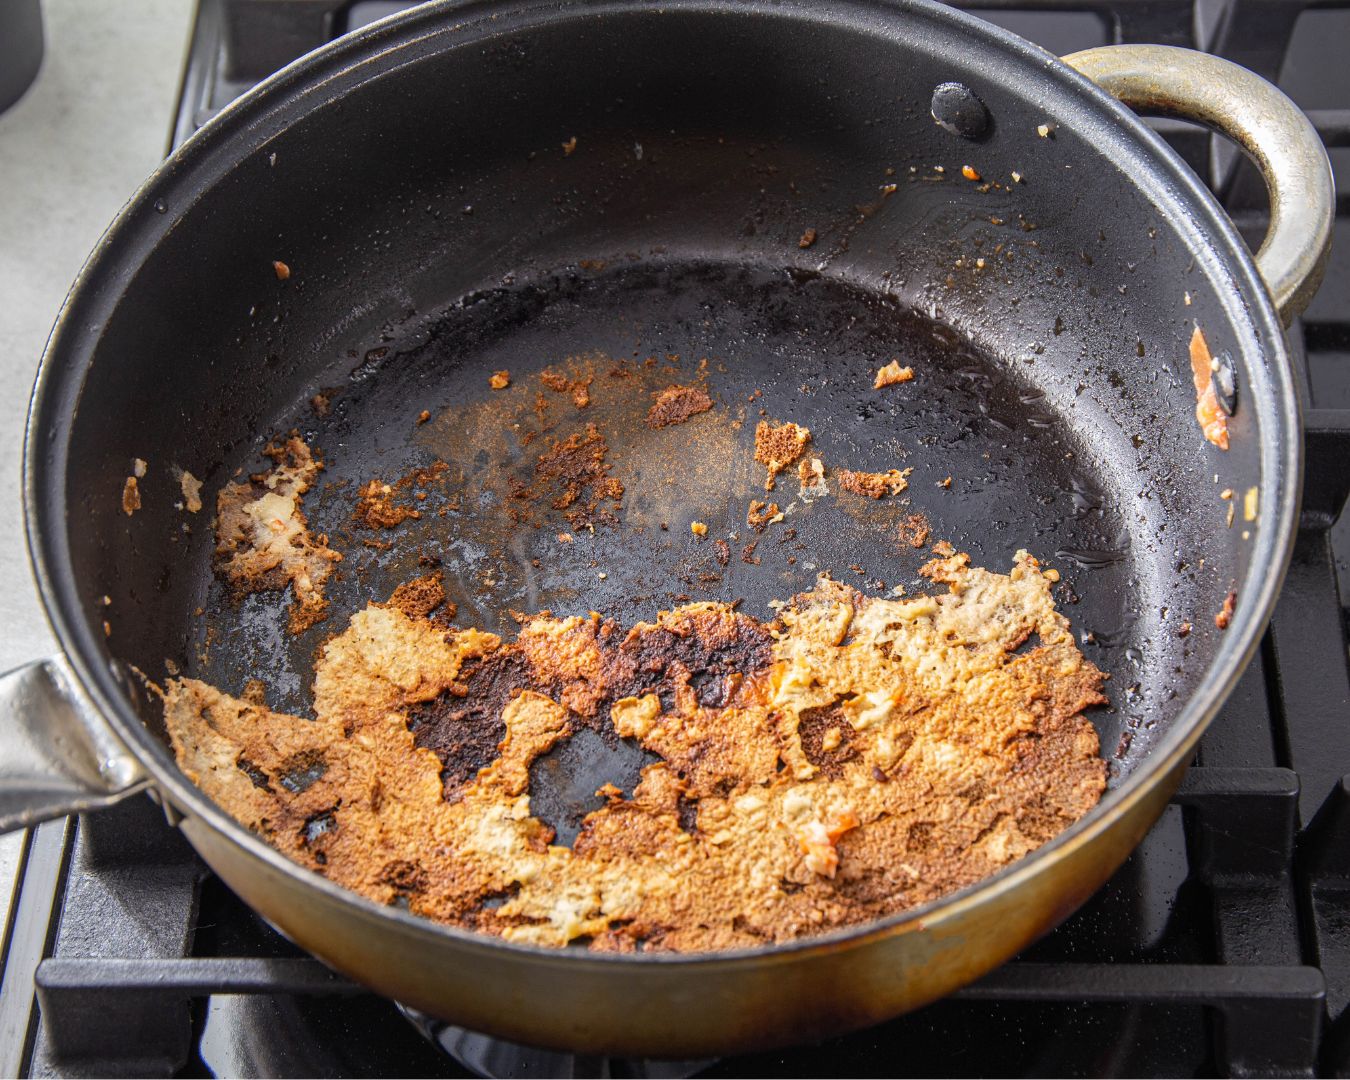
We’ve all been there: a moment of distraction in the kitchen leads to burnt food stuck to the bottom of your favorite pot or pan. Not only can this be frustrating, but it can also seem impossible to clean without damaging the cookware. Thankfully, there are several effective methods to tackle burnt food and restore your pots and pans to their former glory. In this blog post, we’ll explore different techniques to remove burnt food from various types of cookware. Understanding Your Cookware Before diving into cleaning methods, it’s important to know what type of cookware you’re dealing with. Different materials require different care: Method 1: The Boiling Water and Baking Soda Method Best for: Stainless steel, enamel-coated, and some non-stick pans. Instructions: Tips: Method 2: The Vinegar and Baking Soda Soak Best for: Stainless steel, cast iron, enamel-coated, and non-stick pans (with care). Instructions: Tips: Method 3: The Salt Scrub Best for: Cast iron and stainless steel. Instructions: Tips: Method 4: The Overnight Soak Best for: All types of cookware. Instructions: Tips: Method 5: The Aluminum Foil Ball Scrub Best for: Stainless steel and enamel-coated cookware. Instructions: Tips: Additional Tips and Precautions Burnt food on pots and pans can be a hassle, but with the right methods, it’s possible to clean even the most stubborn messes. Whether you prefer the gentle soak or the abrasive power of baking soda and vinegar, these techniques will help you restore your cookware to its pristine condition. By understanding your cookware and using the appropriate cleaning method, you can ensure that your pots and pans stay in great shape for years to come.

Proper Storage of Spices to Maintain Freshness

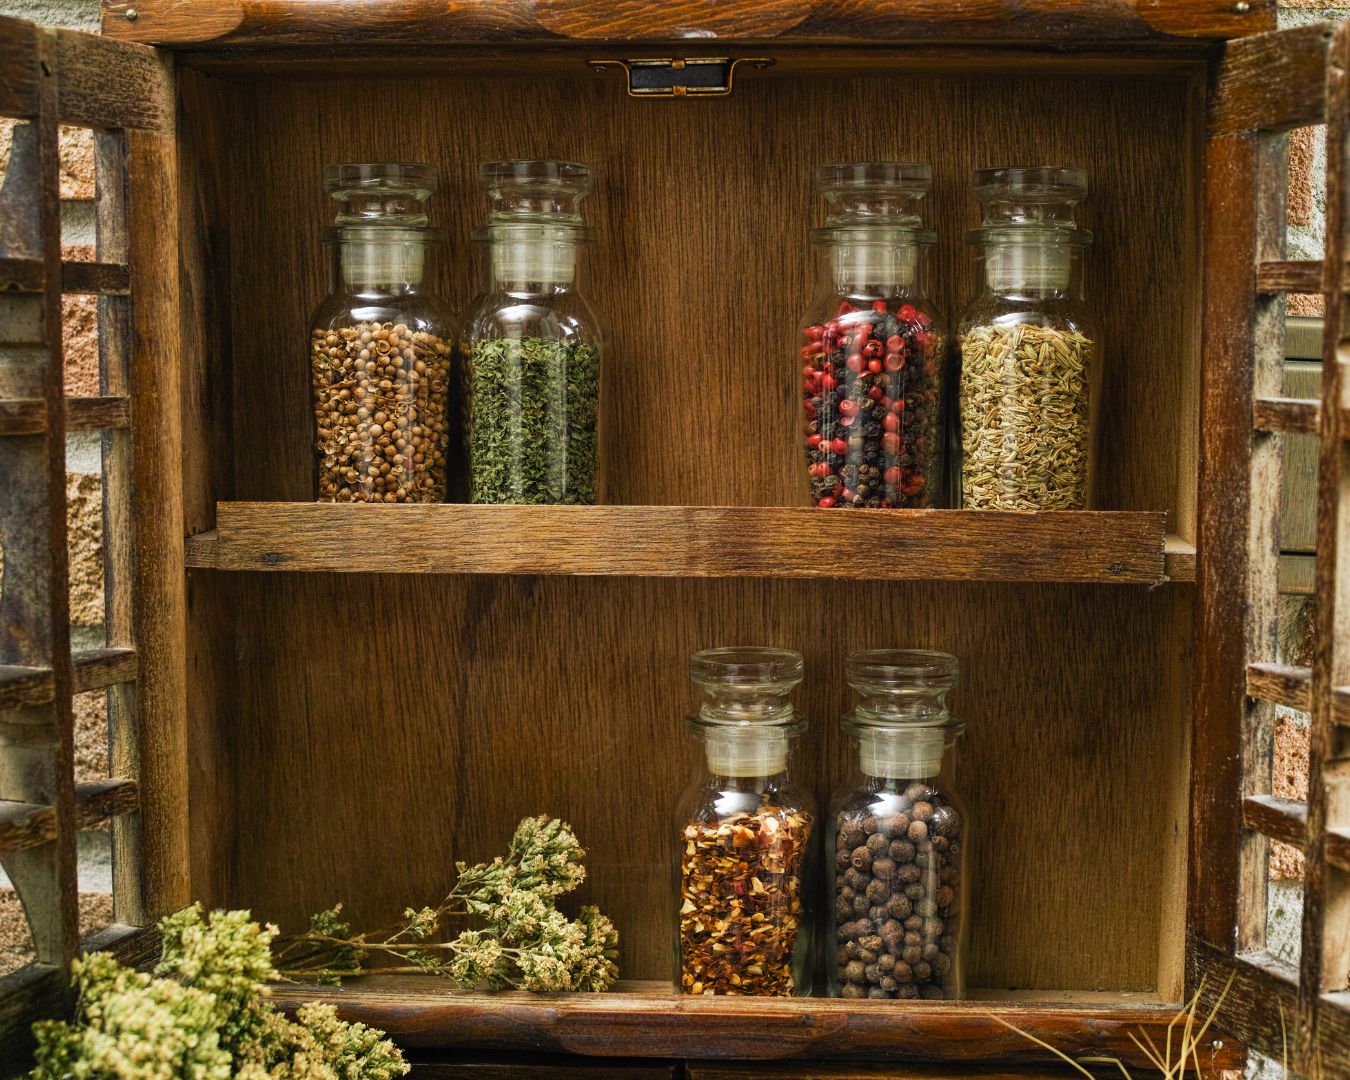
Spices are the heart of any kitchen, transforming ordinary dishes into flavorful creations. However, to get the most out of your spices, it’s essential to store them properly. Improper storage can lead to loss of flavor, aroma, and potency over time. In this blog post, we’ll explore the best practices for storing spices to ensure they remain fresh and vibrant for as long as possible. Why Proper Storage Matters Spices contain volatile oils that give them their distinctive flavors and aromas. When these oils are exposed to light, heat, air, or moisture, they begin to degrade, causing the spices to lose their potency. Proper storage helps to preserve these oils, ensuring that your spices retain their flavor and nutritional benefits for an extended period. General Guidelines for Storing Spices Specific Storage Tips for Different Types of Spices Additional Tips for Maintaining Spice Freshness Proper storage of spices is key to maintaining their freshness, flavor, and nutritional benefits. By keeping your spices away from heat, light, air, and moisture, and by storing them in airtight containers, you can extend their shelf life and ensure that they remain a vibrant part of your culinary creations. Remember to buy in small quantities, label and date your spices, and enjoy the enhanced flavors that fresh spices bring to your cooking. 

Different Cooking Methods for Root Vegetables: Roasting, Mashing, Frying, and More

Root vegetables, such as potatoes, carrots, beets, and parsnips, are versatile and nutritious ingredients that can be prepared in a variety of ways. Their hearty texture and natural sweetness make them a staple in many cuisines around the world. In this blog post, we’ll explore different cooking methods for root vegetables, each bringing out unique flavors and textures. Whether you’re looking to roast, mash, fry, or try something new, there’s a method to suit every palate. Roasting: Enhancing Natural Sweetness Roasting is one of the most popular methods for cooking root vegetables. This technique involves cooking the vegetables in a hot oven, which caramelizes their natural sugars and enhances their flavors. Benefits: Roasting brings out the natural sweetness of root vegetables and gives them a crispy exterior with a tender inside. Mashing: Comfort in Every Bite Mashing root vegetables creates a creamy, comforting dish that’s a great alternative to traditional mashed potatoes. This method is perfect for creating smooth, buttery side dishes. Benefits: Mashing is a versatile method that allows you to create a variety of flavors and textures, from rustic and chunky to silky and smooth. Frying: Crispy and Satisfying Frying is a method that adds a crispy exterior to root vegetables, making them irresistibly delicious. Whether you’re frying in a pan or deep-frying, this technique creates a satisfying crunch. Benefits: Frying gives root vegetables a crispy texture that’s perfect for snacks or side dishes. Boiling: Simple and Nutritious Boiling is one of the simplest methods for cooking root vegetables. It’s quick, easy, and preserves the natural flavors of the vegetables. Benefits: Boiling is a straightforward method that retains the nutrients in root vegetables and prepares them for other dishes. Steaming: Retaining Nutrients and Flavor Steaming is a gentle cooking method that preserves the nutrients and natural flavors of root vegetables. It’s ideal for those who prefer a simple, healthy preparation. Benefits: Steaming preserves the color, texture, and nutritional value of root vegetables while keeping them tender. Grilling: Smoky and Charred Goodness Grilling root vegetables adds a smoky flavor and appealing charred edges, making them a perfect addition to summer barbecues or as a side dish. Benefits: Grilling imparts a unique, smoky flavor to root vegetables and adds a satisfying char that enhances their natural sweetness. Root vegetables are incredibly versatile, offering a range of textures and flavors depending on the cooking method you choose. Whether you prefer the sweetness brought out by roasting, the creamy comfort of mashing, the crispiness of frying, or the simplicity of boiling and steaming, there’s a method to suit every taste. Experiment with different techniques to find your favorite way to enjoy these nutritious and delicious vegetables.

How to Prepare Tofu and Tempeh: A Guide for Delicious Plant-Based Meals

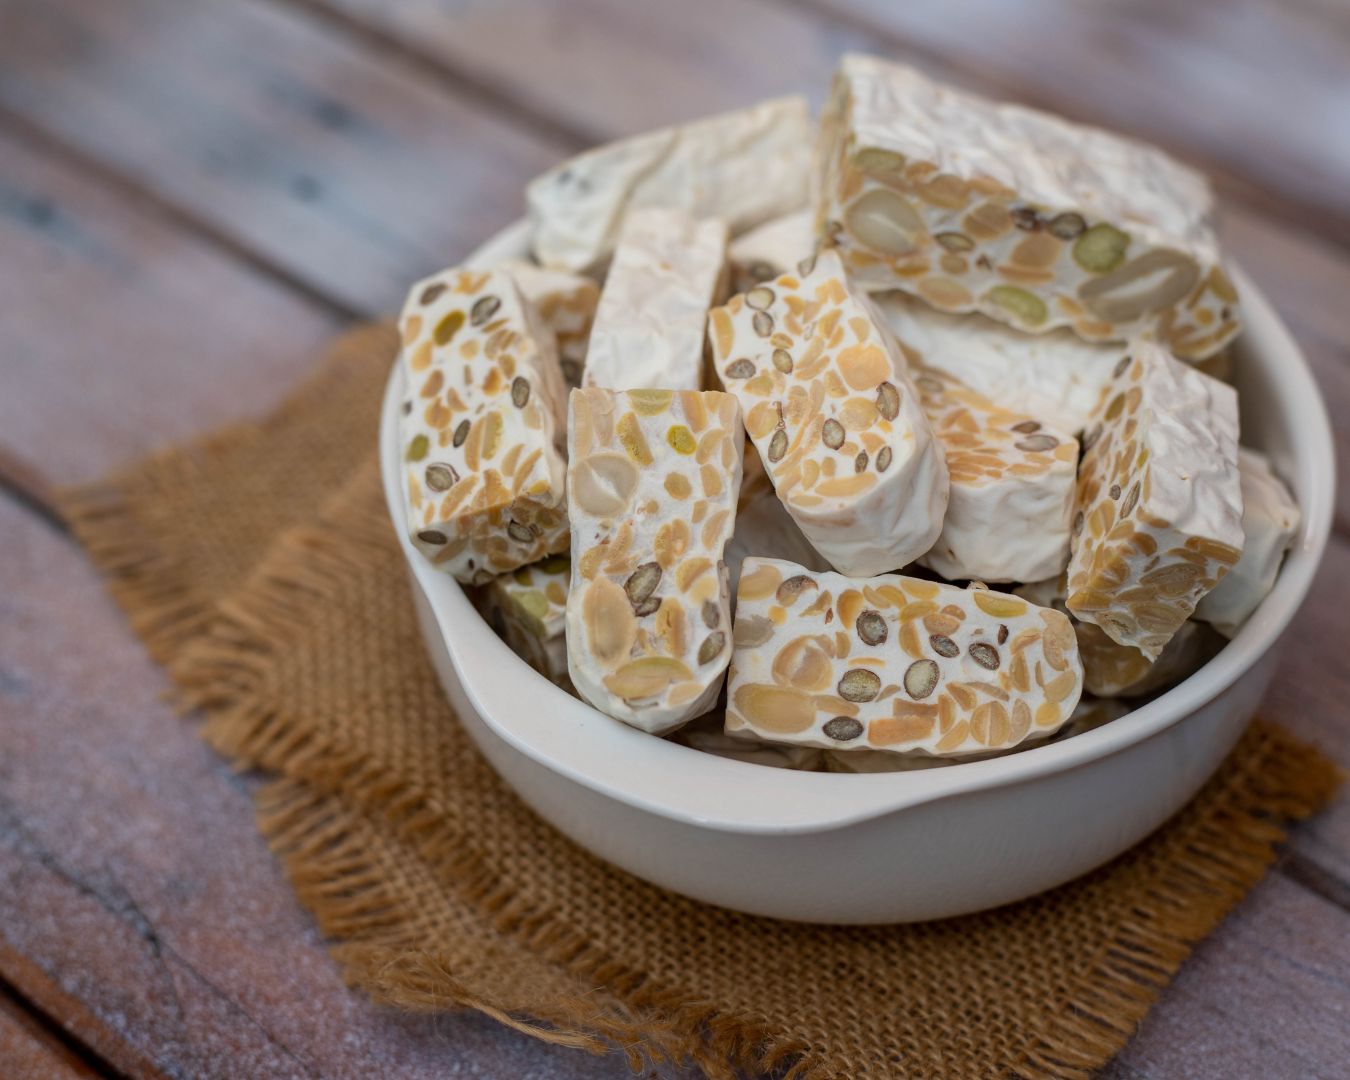
Tofu and tempeh are two versatile and nutrient-rich plant-based proteins that have become staples in vegetarian and vegan diets. Both are made from soybeans, but they have distinct textures, flavors, and preparation methods. Whether you’re new to plant-based cooking or looking to expand your culinary repertoire, this guide will walk you through the basics of preparing tofu and tempeh, offering tips and techniques to create delicious and satisfying dishes. Understanding Tofu and Tempeh Tofu is made by curdling fresh soy milk, pressing it into solid blocks, and cooling it—similar to the process of making cheese. It comes in various textures, from silken to extra firm, making it suitable for a wide range of dishes. Tofu has a mild flavor, which allows it to absorb the flavors of marinades and sauces easily. Tempeh is made by fermenting cooked soybeans with a specific type of mold, creating a firm, nutty, and slightly earthy-tasting product. Unlike tofu, tempeh has a more robust texture and can be sliced, crumbled, or cubed. The fermentation process also makes tempeh a good source of probiotics, which are beneficial for gut health. How to Prepare Tofu 1. Choosing the Right Tofu 2. Pressing Tofu Pressing tofu removes excess water, which helps it absorb marinades better and achieve a firmer texture. Here’s how to press tofu: 3. Marinating Tofu Tofu’s mild flavor makes it an excellent canvas for marinades. Here’s a basic marinade recipe: 4. Cooking Tofu How to Prepare Tempeh 1. Steaming Tempeh Steaming tempeh before cooking helps soften its texture and reduce any bitterness. Here’s how: 2. Marinating Tempeh Like tofu, tempeh benefits from marinating to enhance its flavor. Use a similar marinade as you would for tofu or try a bolder mix with ingredients like coconut milk, curry paste, or smoked paprika. 3. Cooking Tempeh 4. Crumbling Tempeh Tempeh can be crumbled and used as a plant-based alternative to ground meat in recipes like tacos, chili, or pasta sauces. Recipe Ideas for Tofu and Tempeh Tofu Stir-Fry: Marinate tofu in soy sauce, garlic, and ginger, then stir-fry with your favorite vegetables and serve over rice or noodles. Tempeh Tacos: Marinate crumbled tempeh in taco seasoning, then sauté until crispy. Serve in tortillas with avocado, salsa, and fresh cilantro. Tofu Scramble: Crumble firm tofu and cook with turmeric, garlic powder, and your favorite vegetables for a plant-based alternative to scrambled eggs. BBQ Tempeh Sandwiches: Marinate tempeh in BBQ sauce, grill, and serve on a bun with coleslaw and pickles. Tofu and tempeh are versatile, nutrient-rich plant-based proteins that can be prepared in a variety of delicious ways. Whether you prefer the soft, absorbent texture of tofu or the firm, nutty taste of tempeh, these soy-based foods offer endless possibilities for creating satisfying meals. By following these preparation tips and experimenting with different recipes, you can enjoy the full potential of tofu and tempeh in your plant-based cooking.

Maximizing Energy Efficiency with the COSMO 30” Gas Cooktop (COS-DIC304)

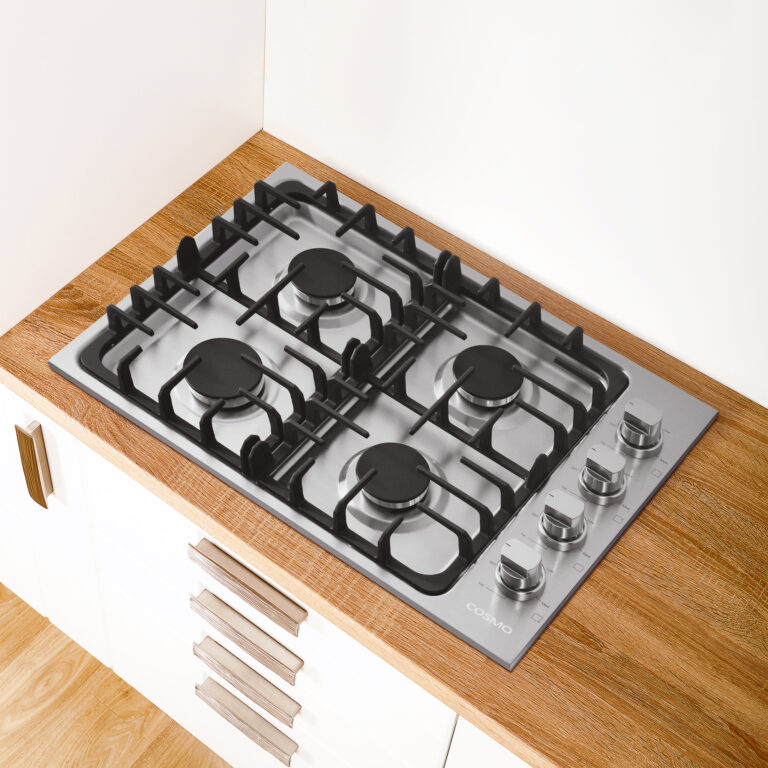
The COSMO 30” Stainless Steel Drop-In Gas Cooktop (COS-DIC304) is a powerhouse in the kitchen, providing excellent performance with its 4 sealed burners. But with the rising costs of utilities and an increasing focus on sustainability, many homeowners are looking for ways to use their kitchen appliances more efficiently. If you’re planning to get the most out of your new cooktop, here are some energy-saving tips to keep your cooking efficient while keeping costs low. 1. Match Your Cookware to the Burner Size One of the simplest and most effective ways to increase energy efficiency is by using the right cookware for each burner. The COSMO COS-DIC304 features different-sized burners, each designed for specific tasks. To get the most out of your gas burners: When you use the appropriately sized pot or pan, you avoid wasting energy by heating an oversized pot with a smaller burner, or vice versa. 2. Keep Lids On When Cooking Covering your pots and pans with a tight-fitting lid helps trap heat and steam inside, allowing food to cook faster. This reduces the amount of time you need the burner on, saving both energy and gas. Plus, it helps preserve the flavors and nutrients in your food. 3. Use the Right Flame Level With the COSMO COS-DIC304, you have full control over the flame. For energy efficiency, you don’t always need to turn the burner up to its highest setting. Cooking on medium heat is often more than sufficient for many tasks, from boiling pasta to simmering sauces. Overheating food or boiling water at full blast wastes energy, so aim to adjust the flame based on your cooking needs. 4. Keep the Burner Clean The sealed burners on the COSMO COS-DIC304 are designed for easy cleaning, but don’t overlook the importance of maintenance. Regularly cleaning the burners and surrounding areas ensures maximum heat transfer. If food residue or grease builds up on the burner caps, it can block the flame and reduce efficiency, meaning you’ll need to use more gas to reach the desired cooking temperature. 5. Preheat Efficiently When using the cooktop for high-heat cooking (like frying or grilling), it’s tempting to preheat the pan for a long time. Instead, use shorter preheating times to reduce energy consumption. Simply place your cookware on the burner for a few minutes to allow it to heat up before cooking. 6. Cook in Batches When Possible If you’re preparing multiple items, consider batch cooking on the COSMO COS-DIC304. Cooking more food at once means using the burner for longer periods, but also allows you to make the most out of each cooking session without wasting heat. This can be especially useful when cooking meals for the week, making leftovers, or preparing dishes that require similar cooking temperatures. 7. Turn Off Early and Let Residual Heat Finish Cooking Cooktops cool down quickly after the flame is turned off, so you can take advantage of the residual heat from your burners. For dishes that need a bit of extra time after the burner is turned off—like rice or stews—simply turn the burner off a few minutes before the cooking time ends and let the heat do the work. 8. Ensure Proper Ventilation This tip isn’t just about energy efficiency—it’s about cooking safety. The COSMO COS-DIC304 features high-performance burners that generate significant heat. Make sure to keep your kitchen well-ventilated so that you don’t waste energy trying to cool the space down after cooking. A good range hood can help vent excess heat and keep your kitchen comfortable, allowing you to avoid turning on additional cooling systems. 9. Plan Cooking Times Around Busy Hours If your household is particularly busy, consider meal planning during times when you’ll be using the cooktop anyway. This minimizes wasted energy, especially if you’re already preparing multiple meals at once. You can also combine stovetop cooking with baking in your oven, using both appliances efficiently. 10. Use Pressure Cookers and Steamers While the COSMO COS-DIC304 has burners that handle most cooking tasks with ease, pressure cookers and steamers are fantastic for speeding up cooking times and saving energy. These appliances require less heat and shorten cooking durations, helping you make the most of your cooktop while using less gas.With a few small adjustments, the COSMO 30” Stainless Steel Drop-In Gas Cooktop (COS-DIC304) can be even more energy-efficient, helping you cook like a pro while keeping costs down. From using the right cookware to making the most of residual heat, these tips will help you achieve perfectly cooked meals without wasting energy. After all, a little efficiency goes a long way in both your cooking and your utility bills!

How to Store and Preserve Citrus Fruits: Tips for Maximizing Freshness

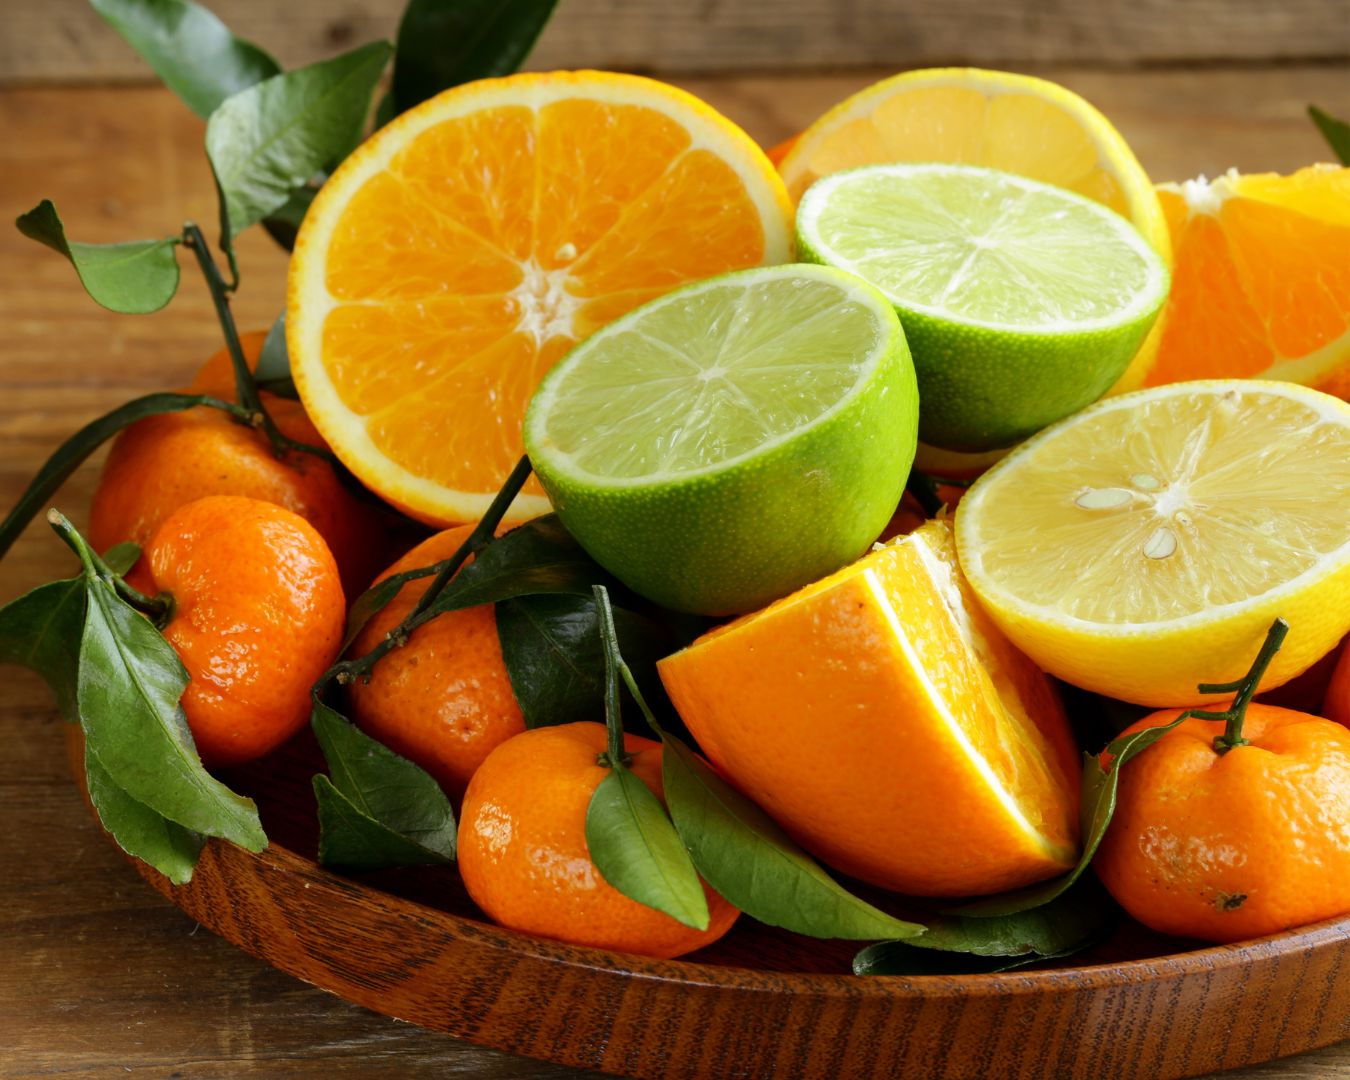
Citrus fruits, with their bright flavors and high vitamin C content, are a kitchen staple. Whether you love juicy oranges, zesty lemons, or tangy limes, knowing how to store and preserve these fruits properly can help you keep them fresh for longer, reduce waste, and ensure that you always have a burst of citrusy goodness on hand. In this blog post, we’ll cover the best practices for storing and preserving citrus fruits, so you can enjoy their vibrant flavors whenever you need them. Storing Citrus Fruits at Room Temperature If you plan to use your citrus fruits within a few days, storing them at room temperature is perfectly fine. Here’s how to do it: Tip: If you’re storing different types of citrus together, such as lemons, limes, and oranges, make sure they’re not piled too closely to allow for proper air circulation. Refrigerating Citrus Fruits For longer storage, the refrigerator is your best friend. Citrus fruits can last up to three to four weeks when properly stored in the fridge. Freezing Citrus Fruits Freezing is an excellent way to preserve citrus fruits for months. While the texture may change slightly, frozen citrus can still be used in cooking, baking, and drinks. Here’s how to freeze citrus fruits: Tip: Frozen citrus slices are great for adding to drinks. They can double as ice cubes to chill your beverage while adding a burst of flavor! Preserving Citrus in Jars Preserving citrus in jars is a time-honored method that enhances their flavor and extends their shelf life. Two popular techniques are making citrus preserves or pickling the fruits. Tip: Properly sealed jars can keep citrus preserves and pickled citrus fresh for up to a year when stored in a cool, dark place. Dehydrating Citrus Dehydrating citrus fruits is another fantastic way to preserve them. Dried citrus slices can be used in teas, garnishes, or as a snack. Tip: Store dried citrus slices in an airtight container in a cool, dark place. They can last up to a year and are perfect for adding flavor to your favorite recipes! Citrus fruits are versatile, flavorful, and nutritious, but they require proper storage and preservation techniques to stay fresh. Whether you’re storing them at room temperature, refrigerating, freezing, preserving in jars, or dehydrating, following these tips will help you make the most of your citrus bounty. By keeping your citrus fruits fresh, you can enjoy their bright flavors all year round!

How a Wall Mount Range Hood Elevates Your Kitchen Design (Featuring COS-6324EWH)

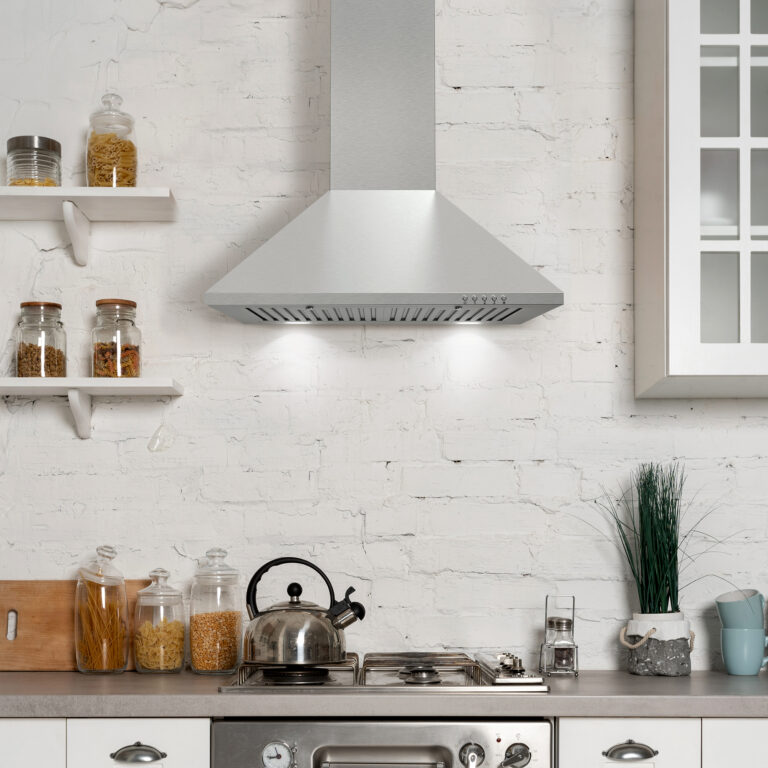
A well-designed kitchen isn’t just about aesthetics—it’s about functionality, efficiency, and creating a space that makes cooking enjoyable. One of the key elements that can transform your kitchen is a wall mount range hood. Unlike under-cabinet models, wall-mounted range hoods create a bold statement while ensuring superior ventilation. Among the choices in wall-mounted range hoods, the COS-6324EWH 24-inch Wall Mount Range Hood by Cosmo stands out for its elegant design, efficient performance, and user-friendly features. Whether you’re renovating your kitchen or upgrading your current setup, this article will explore how the COS-6324EWH can enhance both the look and functionality of your cooking space. The Benefits of a Wall Mount Range Hood 1. Enhancing Kitchen Aesthetics One of the biggest advantages of a wall-mounted range hood is its ability to become a design focal point. Unlike traditional under-cabinet models that remain tucked away, a wall-mounted range hood serves as a stunning centerpiece, drawing the eye upward and adding a sense of luxury to your space. The COS-6324EWH features a sleek, modern design with a modern canopy wall that blends seamlessly with contemporary kitchen aesthetics. The stainless steel adds sophistication while ensuring durability. 2. Superior Airflow for a Cleaner Kitchen Grease, smoke, and odors are common byproducts of cooking, and without proper ventilation, these elements can linger in your kitchen, affecting air quality. The COS-6324EWH is designed to effectively remove airborne grease, heat, and odors, ensuring that your kitchen remains fresh and comfortable. This model efficiently clears out steam and cooking fumes, making it ideal for both everyday cooking and high-heat techniques like searing and stir-frying. 3. Flexible Venting Options It  is configured for ducted use by default, allowing it to vent outside and away from your home. However, it can be converted to a recirculating system with the optional purchase of the Carbon Filter Kit CFK6, providing flexibility to suit different kitchen setups. This flexibility ensures that no matter your kitchen’s structure, you can enjoy the benefits of effective ventilation. 4. Energy-Efficient LED Lighting Proper lighting is crucial for precision while cooking. The COS-6324EWH is equipped with LED lights that provide bright, energy-efficient illumination over your cooktop. Unlike traditional halogen bulbs, LEDs consume less power and have a longer lifespan, ensuring consistent lighting without frequent replacements. 5. Quiet Yet efficient Performance Loud range hoods can be disruptive, especially in open-concept kitchens. The COS-6324EWH is engineered for quiet operation, allowing you to maintain a peaceful environment while still benefiting from high-powered ventilation. Even at its highest speed, the noise level remains manageable, making it a great choice for homes where the kitchen is a central gathering space. 6. Multi-Speed Fan Control Different cooking styles require different levels of ventilation. The COS-6324EWH comes with a 3-speed fan, allowing you to adjust the suction power depending on your cooking needs. Whether you’re simmering on low heat or frying at high temperatures, this hood provides the right amount of airflow for optimal performance. 7. Easy-to-Clean Stainless Steel Filters Maintaining a clean kitchen is essential, and range hoods can quickly accumulate grease buildup. Fortunately, the COS-6324EWH is equipped with durable stainless-steel filters that are dishwasher-safe, making cleaning effortless. Simply remove the filters and place them in the dishwasher for a hassle-free cleanup. Installation Tips for COS-6324EWH Installing a wall mount range hood requires some planning, but with the right approach, you can achieve a flawless setup. Here are a few tips to ensure a smooth installation process: Maintenance and Cleaning Tips To keep your COS-6324EWH performing efficiently and looking sleek, follow these maintenance guidelines: A wall mount range hood does more than just remove smoke and odors—it enhances your kitchen’s overall design, improves air quality, and makes cooking a more enjoyable experience. The COS-6324EWH 24-inch Wall Mount Range Hood is an excellent choice for homeowners who want a combination of style, power, and convenience. With its sleek design, energy-efficient LED lights, and easy-to-clean filters, this range hood is a must-have addition to many modern kitchens. Whether you’re renovating or simply upgrading your ventilation system, the COS-6324EWH is sure to elevate your cooking space to the next level. Upgrade your kitchen today and experience the difference of a high-quality wall mount range hood!