cooking tips

Why “Quick Weeknight Dinners” Take 90 Minutes

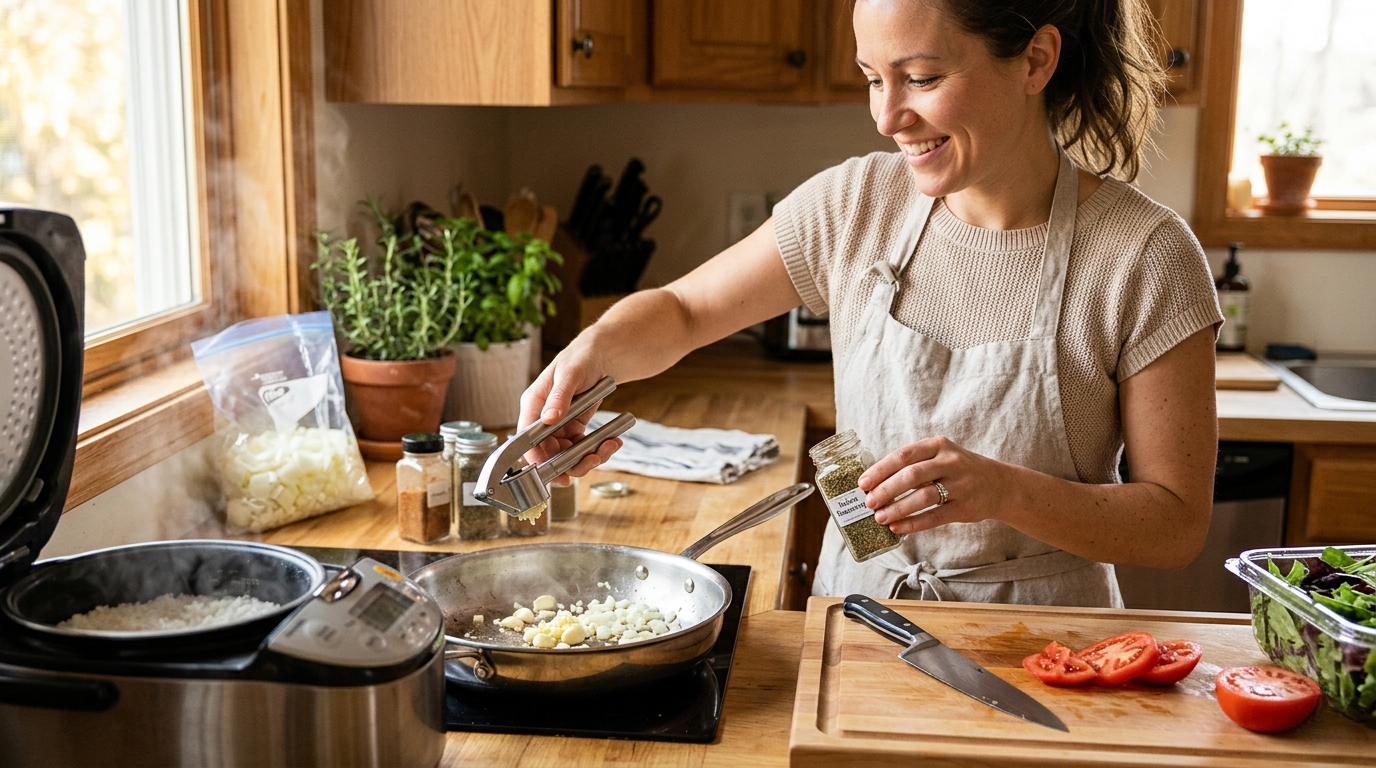
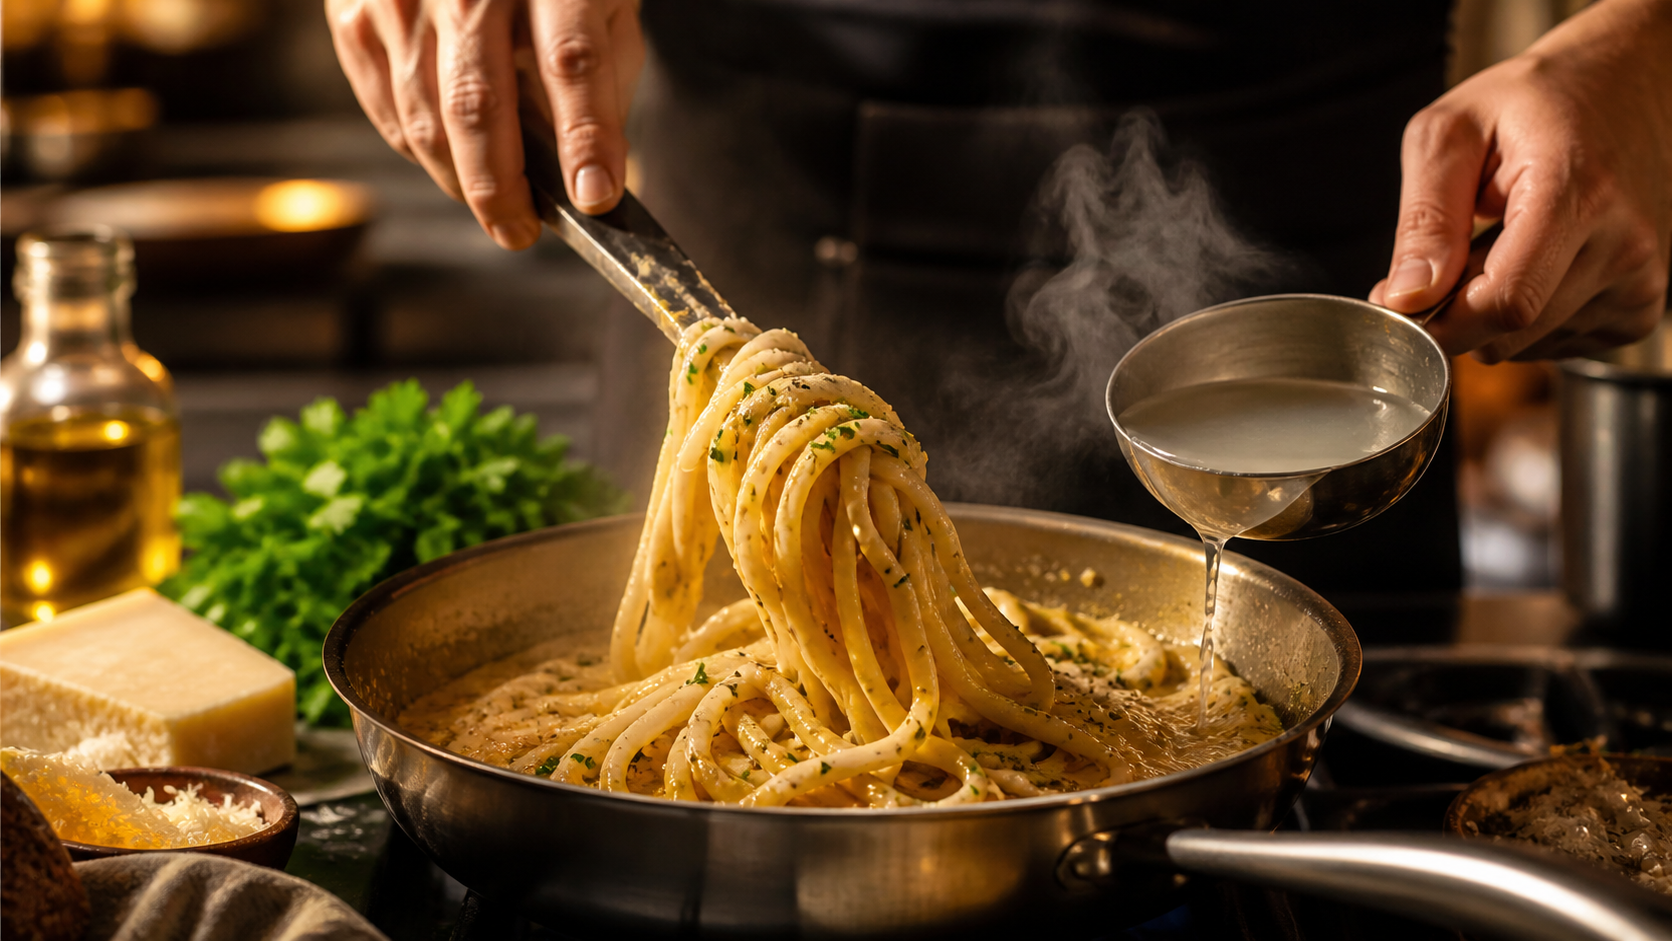
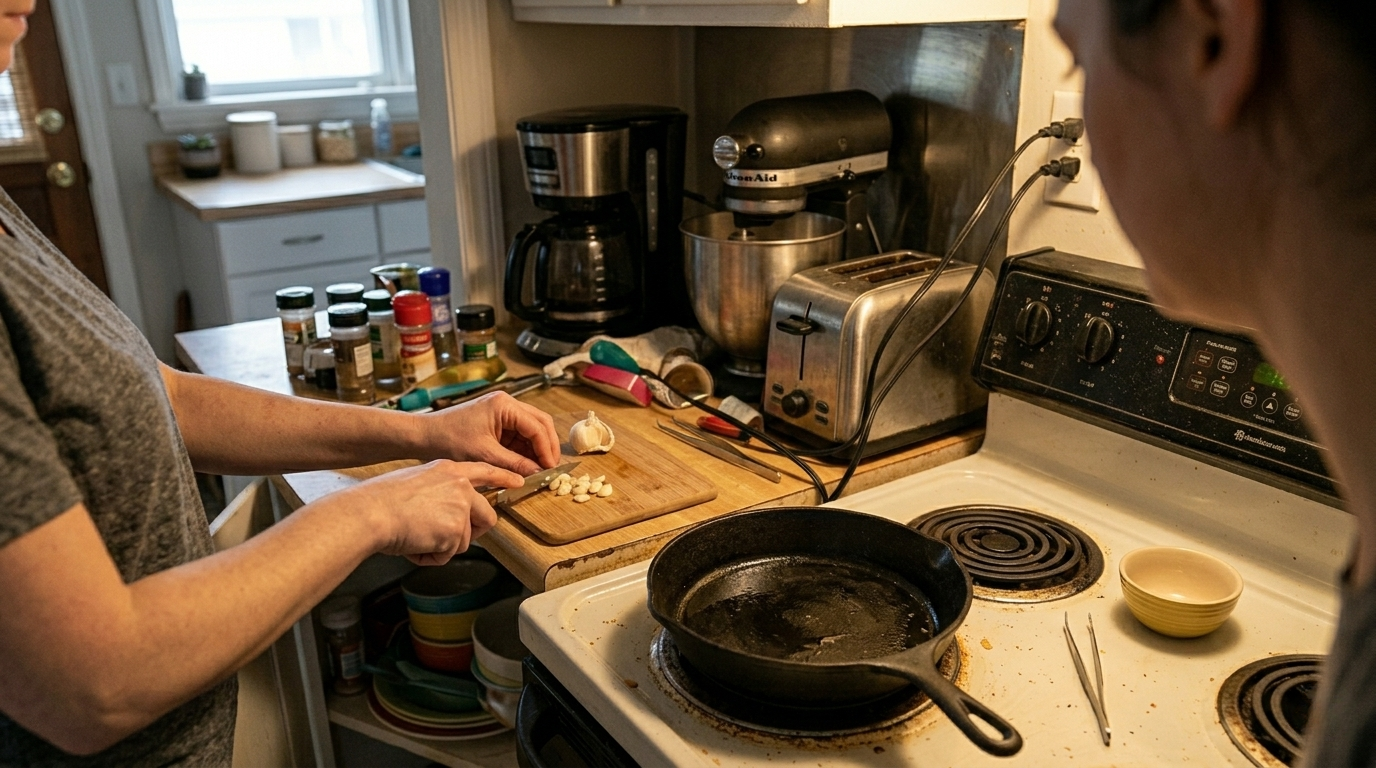
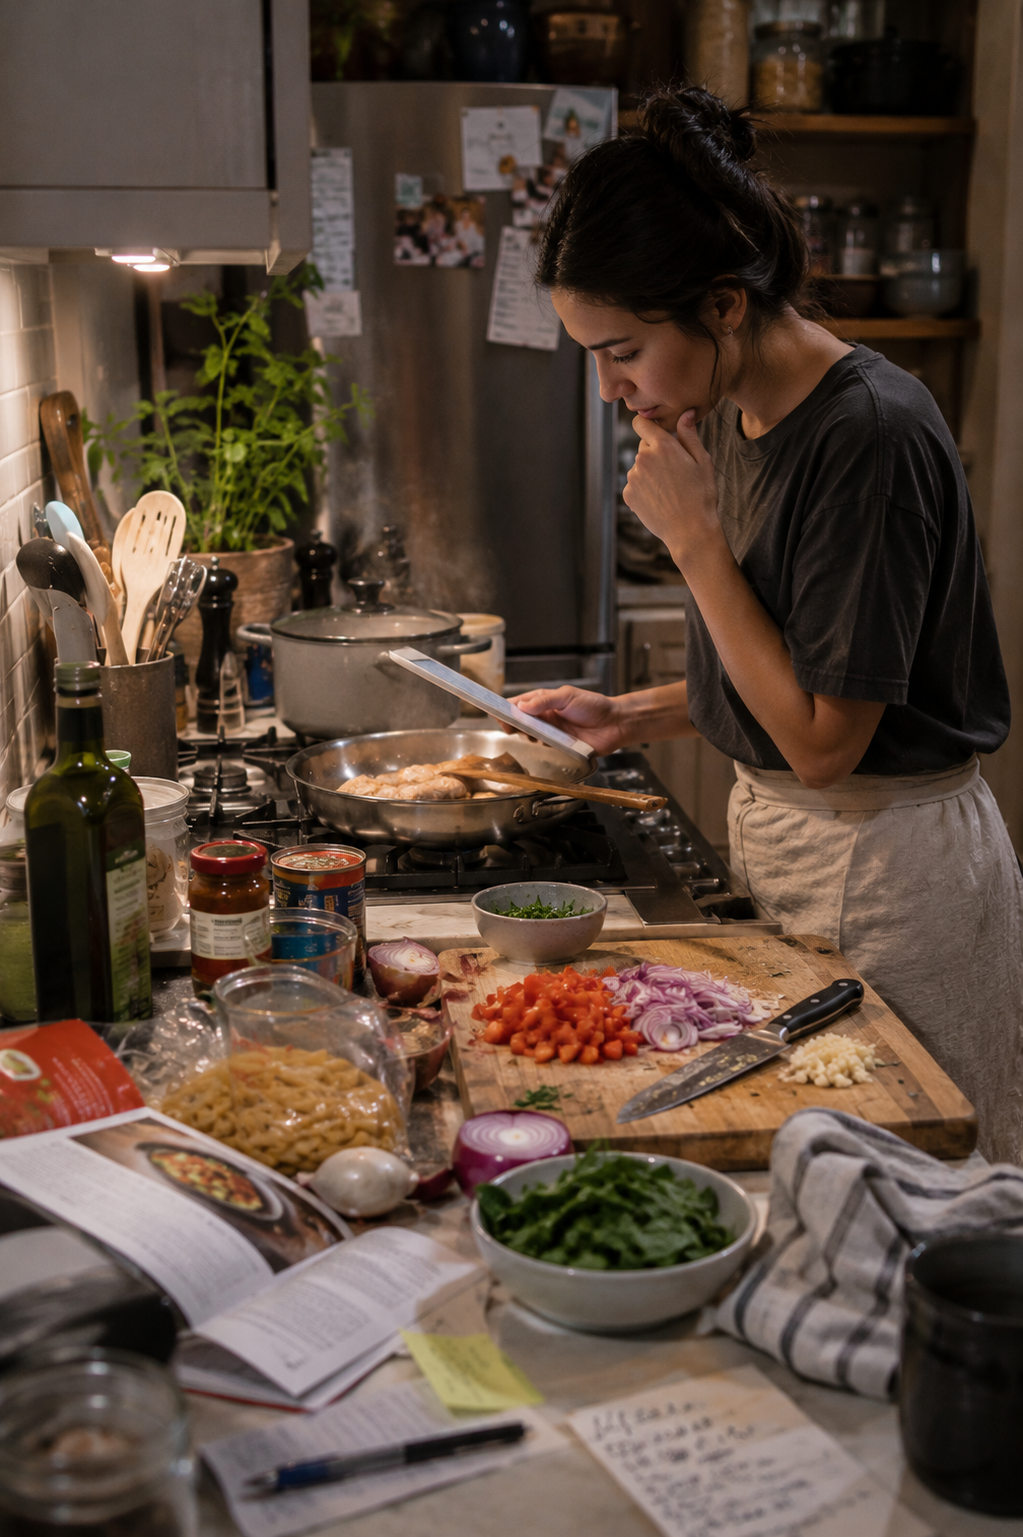
Recipe blogs promise 30-minute meals. You start cooking at 6pm. You sit down to eat at 7:30pm. The recipe lied, you’re slow, or something else is happening. The problem isn’t your cooking speed. The problem is recipe timing that ignores everything except active cooking time. Recipes skip the prep before cooking starts, the transitions between steps, the cleanup that happens during cooking, and the realistic pace of home cooking without professional mise en place. A recipe claiming 30 minutes might involve 30 minutes of actual cooking time. But getting from decision to plated food takes substantially longer when you account for all the steps recipes don’t time. Here’s why quick dinner recipes take longer than advertised, which time costs recipes ignore, and how to actually get dinner done faster without feeling incompetent. Recipe Time Doesn’t Include Deciding What to Cook The timer starts when you begin cooking. It doesn’t count the time spent deciding what to make. Standing in front of the open refrigerator considering options takes five to ten minutes. Scrolling through saved recipes looking for something that matches available ingredients adds more time. Recipe blogs assume you arrived at their recipe through direct intent. Real cooking involves browsing, reconsidering, checking ingredient availability, and settling on an option. This decision time happens before the recipe timeline begins but it’s still part of getting dinner on the table. Meal planning eliminates this time cost by deciding in advance. Without planning, decision time adds 10-15 minutes to dinner preparation that recipes never acknowledge. The “quick” recipe becomes less quick when preceded by 15 minutes of deciding what quick recipe to make. Ingredient Retrieval Isn’t Counted Recipes list ingredients assuming they’re magically assembled. Gathering them from pantry, refrigerator, and freezer takes time. Each ingredient requires opening storage, locating the item among other items, retrieving it, and transporting to the work area. Multiply this by 10-15 ingredients per recipe. Spices particularly add retrieval time. Finding oregano among 30 spice jars, opening it, measuring, and returning it happens separately from other ingredients. Recipes assume instant ingredient availability. Reality involves searching through drawers, moving items blocking other items, and discovering you’re almost out of something requiring substitution decisions. Professional kitchens use mise en place precisely because ingredient retrieval during cooking interrupts workflow. Recipe times assume this pre-gathering happened somehow outside the timeline. Five minutes retrieving ingredients, five more getting tools and pans, and suddenly the 30-minute recipe needs 40 minutes before cooking even begins. Prep Time Estimates Are Fantasy Recipe prep times assume knife skills and efficiency most home cooks don’t possess. “Finely dice one onion” takes a professional cook 60 seconds. It takes a home cook three to five minutes including peeling, halving, and chopping. “Mince three garlic cloves” is 15 seconds for professionals, two minutes for home cooks finding a knife, peeling cloves, and mincing. Recipe writers develop speed through repetition. They’ve made the recipe dozens of times perfecting efficiency. You’re making it once. Prep times listed in recipes reflect idealized professional speed, not realistic home cook pace. The cumulative difference across all prep steps adds 10-15 minutes. Recipes also assume continuous uninterrupted prep. Real home cooking involves answering questions, preventing toddler disasters, or checking messages. These interruptions don’t stop the food from needing attention. The “10 minute prep time” becomes 20-25 minutes accounting for realistic home cook speed and normal household interruptions. Cooking Time Ignores Stove Variations “Bring to a boil” timing depends on your stove’s BTU output. Recipe writers’ stoves aren’t your stove. High-BTU gas ranges boil water in five minutes. Standard electric coils take twelve minutes. The recipe assumes boiling happens quickly without specifying which type of quick. “Sauté until softened” varies by burner output and pan material. What takes five minutes on a strong burner takes ten on a weak one. Recipes tested on professional-grade ranges produce different timing than cooking on standard residential equipment. The gap in equipment capability translates directly to timing differences. Oven temperature accuracy varies wildly. Your oven set to 400°F might actually run at 375°F or 425°F. This changes cooking duration substantially. Without acknowledging equipment variations, recipe times reflect the writer’s specific equipment, not universal cooking times. Add five to ten minutes to cooking times when using standard residential equipment rather than high-output professional ranges. Simultaneous Steps Aren’t Really Simultaneous Recipes instruct “while pasta cooks, prepare sauce” assuming perfect parallel workflow. This requires experience and confidence most home cooks lack. Managing multiple things simultaneously demands attention splitting. You’re monitoring pasta, stirring sauce, and potentially prepping additional components all while tracking timing. Recipe writers perform these tasks smoothly through repetition. First-time cooks focus on one task at a time, completing steps sequentially that professionals would overlap. The sequential approach takes longer but reduces mistakes and stress. Adding sequential buffer time turns the 30-minute recipe into 40 minutes without any cooking errors. Recipes also assume everything goes smoothly. They don’t account for discovering you’re missing an ingredient, something boiling over, or needing to adjust heat mid-cooking. These small pauses and corrections add minutes throughout the cooking process that recipe times ignore. Plating and Serving Add Time Recipe timing ends when food is cooked. Getting from cooked food to eating food requires additional steps. Finding serving dishes, plating food, setting the table, pouring drinks, calling family to dinner, and getting everyone seated takes five to ten minutes. This post-cooking time doesn’t appear in recipe timing but must happen before eating begins. Some recipes require resting time after cooking. “Let rest 5 minutes before slicing” extends the timeline without counting as cooking time. Cleanup that happens before eating also adds time. Wiping major spills, moving hot pans off burners, or creating space to serve all happen post-cooking but pre-eating. The true time from starting the recipe to first bite includes these serving logistics recipes pretend don’t exist. Recipe Familiarity Makes Everything Faster The first time making a recipe takes substantially longer than the fifth time. First-time cooking includes reading instructions, checking measurements, verifying technique, and moving cautiously.

Your Kitchen Is Too Clean (And Why That Slows You Down)

Spotless kitchens look beautiful in magazines. They’re also slower to cook in than kitchens with some working mess. The Instagram-perfect kitchen with empty counters, hidden appliances, and no visible ingredients creates friction at every cooking step. You’re constantly retrieving items from storage, clearing space to work, and putting things away mid-process to maintain the aesthetic. Working kitchens have visible tools, accessible ingredients, and surfaces that tolerate temporary mess during active cooking. This doesn’t mean filth or neglect. It means distinguishing between cooking mess and actual dirt, and understanding which cleanliness standards help cooking versus which ones slow it down. Here’s why excessive tidiness creates inefficiency, which mess is actually productive, and how to maintain a kitchen that’s clean enough without being so pristine it’s dysfunctional. Empty Counters Force Constant Retrieval The design aesthetic of clear counters looks stunning. It’s terrible for cooking efficiency. Countertop appliances stored in cabinets require retrieval before each use. Pulling out the blender, finding the lid, setting it up, and returning it afterward adds five minutes to every smoothie. Multiply this across multiple appliances and meals. Frequently-used items deserve counter space. Coffee maker, toaster, knife block, cutting board, and oil bottle sitting out eliminate dozens of retrieve-and-return cycles weekly. The aesthetic argument prioritizes looking at the kitchen over using the kitchen. If you cook daily, optimize for function over appearance. Guests spend minutes looking at your kitchen. You spend hours working in it. Cabinet storage for everyday items creates decision fatigue. Where did I put the pepper grinder? Which drawer has the spatulas? Visible storage eliminates these micro-decisions dozens of times daily. Different items have different storage thresholds. Stand mixer used weekly deserves counter space. Waffle iron used monthly belongs in the cabinet. The distinction is use frequency, not appearance. Empty counters serve people who cook rarely and photograph often. Working cooks need accessible tools. Cleaning While Cooking Interrupts Workflow The advice to “clean as you go” sounds efficient. It’s actually disruptive to cooking flow. Stopping mid-recipe to wash a bowl breaks concentration and momentum. You’re tracking multiple timings, temperatures, and tasks. Interrupting this mental juggling for cleanup fragments attention. Cooking requires sustained focus through multiple overlapping tasks. Pausing to wipe counters or wash dishes interrupts the cooking rhythm creating missed timings and forgotten steps. Better approach: contain mess during cooking, clean after eating. Stack used bowls in the sink. Wipe major spills that create hazards. Leave everything else until food is plated and served. The clean-as-you-go mandate assumes cooking is linear with natural pauses. Real cooking involves simultaneous management of multiple components. Cleaning interrupts this parallelism. Exception: clean during genuine downtime. While something simmers for twenty minutes, washing a few dishes makes sense. But stopping pasta-making to clean the counter actively harms cooking flow. Your kitchen can tolerate some mess for the hour you’re actively cooking. Prioritize cooking well over maintaining pristine surfaces during the process. Visible Spills Aren’t Dirty Tomato sauce splattered on the stovetop during cooking isn’t dirt. It’s evidence of cooking in progress. The obsession with immediately wiping every drip creates constant interruption. You’re stirring sauce, some splatters, you stop stirring to wipe it. Meanwhile the sauce burns because you’re cleaning instead of cooking. Splatter during cooking is temporary mess, not permanent filth. It wipes easily after cooking finishes. Stopping cooking to clean cooking mess is backwards priority. Distinguish between contamination and clutter. Raw chicken juice needs immediate cleanup preventing cross-contamination. Splattered marinara just needs wiping eventually. Cooking generates temporary mess. This is normal and acceptable. The mess serves as workspace evidence, not failure to maintain standards. Clean the splatter after the meal. While food rests or during post-dinner cleanup, wipe everything down. The splatter isn’t getting worse sitting there for thirty minutes while you finish cooking. Stop interrupting cooking to maintain aesthetics. The kitchen can look messy while you cook. That’s what kitchens do. Dish Washing Mid-Recipe Breaks Focus Recipes often instruct “wash bowl and reuse.” This sounds efficient but fragments the cooking process. Stopping to wash a bowl means leaving the stove, scrubbing the dish, drying it, and returning to cooking. This takes three to five minutes. During those minutes, something on the stove needs attention you’re not providing. Using extra bowls is more efficient than stopping to wash. Yes, you’ll wash more dishes later. But washing five bowls consecutively takes less total time than washing one bowl five separate times with interruptions between. The extra dish argument prioritizes minimal dishwashing over efficient cooking. This backwards priority sacrifices cooking quality to save one bowl. Most kitchens own enough bowls and utensils for one meal without washing mid-recipe. If you’re stopping to wash because you’ve run out of bowls, you need more bowls, not better cleaning habits. Cook first, clean after. Don’t let cleaning interrupt cooking. The dishes wait. The food on the stove doesn’t. Ingredient Containers Stay Out During Cooking Putting ingredients away between uses adds steps without benefit during active cooking. You use olive oil five times during one meal. Retrieving it from the cabinet and returning it five times adds ten trips. Leaving it on the counter during cooking eliminates unnecessary movement. The container sitting out for thirty minutes doesn’t suffer. Oil doesn’t degrade from brief counter exposure. Neither do spices, flour, or other cooking ingredients. After cooking finishes, return everything at once. One trip putting five items away beats five trips putting one item away repeatedly. This applies to tools too. The spatula used for three different cooking steps stays out until the meal completes. Washing and storing between each use is pointless efficiency theater. Kitchen efficiency favors batch actions over constant tidying. Retrieve everything needed at the start, use as needed, return everything at the end. Stop the retrieve-use-return-retrieve cycle mid-cooking. Cutting Board Cleaning Between Tasks Is Excessive Food safety guidelines create excessive cutting board washing requirements for home cooking. The warning against cross-contamination leads to washing the board between every ingredient. This creates constant interruption and generates unnecessary water and soap use. Reasonable approach:

The Cooking Shortcuts That Actually Save Time

The Cooking Shortcuts That Actually Save Time Every cooking blog promises quick weeknight meals and time-saving tips. Most of these shortcuts either don’t actually save time or create more work through cleanup, prep, or disappointing results requiring do-overs. Real time savings come from understanding which steps genuinely matter and which ones are unnecessary tradition. Some shortcuts sacrifice quality. Others eliminate pointless effort without affecting the final dish. The difference between useful shortcuts and false efficiency is whether they create downstream problems. Skipping a step that saves five minutes now but creates fifteen minutes of cleanup later isn’t a shortcut—it’s deferred work. Here’s what actually saves time in the kitchen, what looks efficient but isn’t, and how to distinguish between smart efficiency and corner-cutting that backfires. Pre-Chopped Vegetables Are Worth It (Sometimes) The internet loves mocking pre-cut vegetables as wasteful and expensive. For some vegetables and some situations, they’re actually efficient. Pre-chopped onions save real time. Onions take longer to peel, dice, and clean up after than most vegetables. The time saved multiplies across multiple meals. Pre-diced onions from the store eliminate ten minutes of work including cleanup. Pre-minced garlic makes sense for dishes where garlic cooks long enough that fresh versus jarred doesn’t matter. Garlic mincing is fiddly work producing minimal volume for the time invested. In pasta sauce simmering for an hour, jarred minced garlic tastes identical to fresh. Pre-washed lettuce saves significant time. Washing, drying, and storing lettuce properly takes fifteen minutes. Pre-washed greens eliminate this entirely. The slight quality difference rarely justifies the time investment for everyday salads. Where pre-cut fails: delicate herbs losing flavor quickly, vegetables with short shelf life creating waste, and items where fresh cutting takes thirty seconds anyway. Pre-sliced mushrooms cost three times more to save ninety seconds of knife work. The efficiency question is whether the pre-cut item saves more time than it costs in money and quality. For onions and lettuce, yes. For bell peppers, probably not. One-Pot Meals Create More Work Than Separate Pans One-pot cooking sounds efficient. Everything cooks in one vessel meaning less cleanup. Reality proves otherwise for most dishes. One-pot recipes force sequential cooking instead of parallel cooking. Brown meat, remove it, cook vegetables, add liquid, return meat. This sequential approach takes longer than cooking components simultaneously in separate pans. Temperature compromises in one-pot cooking create mediocre results. Everything cooks at one temperature. Vegetables that need high heat get steamed. Ingredients needing gentle cooking get blasted. The result requires longer cooking time to compensate for wrong temperatures. Cleanup savings are minimal. One large pot plus utensils for removing and returning ingredients creates similar dish load to two smaller pans. The “one pot” often requires more scrubbing than multiple pans because everything browns onto one surface. Better approach: use multiple pans simultaneously. While protein sears, vegetables roast. While pasta boils, sauce simmers. Parallel cooking completes meals faster than sequential one-pot methods. One-pot dishes work for soups, stews, and braises where everything benefits from long combined cooking. For quick dinners, separate pans finish faster despite additional dishes. Mise en Place Wastes Time at Home Professional cooking demands mise en place—everything measured and prepped before cooking starts. Home cooking doesn’t. Restaurant cooks prep once and cook the same dish repeatedly. Mise en place makes sense when preparing fifty orders of the same pasta. Measuring everything beforehand allows fast repetitive execution. Home cooks make one portion once. The time spent measuring ingredients into bowls, washing those bowls, and transferring ingredients adds steps without benefit. Progressive prep during cooking saves time. While onions soften, chop the next vegetable. While vegetables cook, measure spices. This parallel workflow keeps you moving without creating extra dishes. Exception: baking requires accurate ratios so measuring beforehand prevents mistakes. For baking, mise en place makes sense because precision matters. For everyday cooking, skip the prep bowls. Add ingredients directly as you go. The TV cooking show aesthetic of ingredient bowls looks organized but creates extra work. Garlic Presses Are Faster Than Knife Mincing Kitchen snobs hate garlic presses. They’re wrong about efficiency. Knife mincing garlic takes time: peel cloves, mince finely, scrape board, clean knife, wash hands to remove smell. This process takes three to four minutes for multiple cloves. Garlic press takes thirty seconds: peel cloves, squeeze, scrape out garlic, rinse press. The time difference multiplies across meals. Cleanup arguments against presses ignore that knife mincing requires cleaning cutting board, knife, and removing garlic smell from hands. The press requires rinsing one tool. Texture differences between pressed and minced garlic matter only in raw applications like Caesar dressing or garlic bread. In cooked dishes, the difference disappears. Buy a good press. Cheap presses are frustrating and break. Quality presses last years and pay for themselves in time saved. The anti-press argument is aesthetic, not practical. If the goal is saving time, use the press. Batch Cooking Backfires Without Proper Storage Cooking large quantities seems efficient. Make five meals at once, reheat through the week. This works only with proper containers and freezer space. Without adequate storage, batch cooking creates problems. Food in wrong containers dries out, absorbs freezer odors, or takes excessive freezer space. Reheating failures waste the entire batch. Batch cooking requires significant upfront time. The five-hour Sunday cook session feels productive but that’s five hours unavailable for other activities. The time isn’t saved—it’s concentrated. Better approach: double recipes instead of quintupling them. Make two portions instead of five. This provides one extra meal without overwhelming storage or creating food fatigue. Batch cooking works best for components, not complete meals. Cook large batch of rice, roast sheet pans of vegetables, brown ground meat. These components assemble into varied meals throughout the week preventing boredom. The freezer limitations matter. Most home freezers hold three to four complete meals comfortably. Cooking eight meals at once creates storage problems and food quality issues from extended freezing. Batch component cooking saves time. Batch complete meal cooking often doesn’t. Sharp Knives Actually Save Time This seems obvious but bears repeating:

Why Restaurant Pasta Tastes Better (It’s Not the Sauce)

You follow the same recipe restaurants use. You buy quality pasta and good ingredients. Your pasta still tastes flat compared to what restaurants serve. The difference isn’t the sauce recipe or fancy ingredients. It’s the pasta water, the timing, and techniques that happen in the final thirty seconds before plating. Restaurants finish pasta differently than home cooks, and these differences create the gap between good pasta and restaurant pasta. Most home cooks treat pasta like a side dish that happens separately from the sauce. Restaurants treat pasta and sauce as ingredients that finish cooking together. This fundamental difference in approach produces completely different results. Here’s what restaurants do differently with pasta, why it matters, and how to replicate restaurant results without industrial equipment or culinary training. They Salt the Water Like the Ocean Home cooks add a pinch of salt to pasta water. Restaurants add amounts that seem excessive until you taste the results. Properly salted pasta water should taste like seawater. If you wouldn’t want to drink it because it’s too salty, it’s probably right. Most home pasta water could be drinking water—barely salted at all. Undersalted water produces bland pasta that tastes like nothing. The pasta absorbs whatever water surrounds it during cooking. Plain water makes plain-tasting pasta regardless of how good your sauce is. Salt penetrates pasta during cooking in ways that adding salt later can’t replicate. Surface salt and absorbed salt taste different. Pasta cooked in salted water tastes seasoned throughout. Pasta cooked in plain water with salt added after tastes like bland pasta with salty coating. The amount matters. For one pound of pasta in four quarts of water, restaurants use 2-3 tablespoons of salt. Home cooks typically use one teaspoon or less. This isn’t a small difference—it’s a massive difference producing noticeably different results. Salted water also raises the boiling point slightly, though this effect is minimal. The real benefit is flavor absorption, not temperature change. Salt your pasta water generously. It should taste aggressively salty before the pasta goes in. They Undercook the Pasta Intentionally Al dente doesn’t mean “cooked until tender.” It means “cooked until almost done, with a firm bite remaining.” Restaurants pull pasta from water earlier than home cooks think is right. Package cooking times represent fully-cooked pasta. Restaurants subtract 2-3 minutes from package times because the pasta continues cooking in the sauce. This early removal looks wrong. The pasta seems undercooked when drained. It feels too firm, too chewy. But pasta’s final cooking happens in the sauce, not in the water. Overcooked pasta can’t be fixed. Once it goes mushy, it stays mushy. Slightly undercooked pasta finishes perfectly when combined with sauce over heat. The texture difference between properly al dente pasta and fully-cooked pasta is significant. Al dente pasta has structure and chew. Fully-cooked pasta is soft and mushy. Testing doneness by tasting is essential. Start testing 2-3 minutes before package time suggests. When pasta still has firm resistance but no longer tastes raw or chalky in the center, it’s ready to drain. Pull your pasta earlier than feels right. It finishes cooking in the sauce. They Save the Pasta Water (And Actually Use It) Every restaurant kitchen keeps pasta cooking water. Home cooks drain it down the sink, then wonder why their sauce won’t emulsify properly. Pasta water contains starch released from pasta during cooking. This starchy water is a cooking ingredient, not waste water. The starch in pasta water acts as an emulsifier helping oil and water-based sauce components combine into cohesive sauce. Without it, oil and tomatoes separate creating greasy sauce with watery liquid. Restaurant technique involves finishing pasta in sauce with pasta water added gradually. The starchy water thins the sauce to proper consistency while helping it cling to pasta. Adding pasta water also extends cooking time in the sauce. The pasta finishes cooking while absorbing sauce flavors and the sauce reduces to proper consistency. Everything happens simultaneously in the pan. Plain water doesn’t work as substitute. Tap water lacks the starch that makes pasta water functional. Adding plain water just dilutes your sauce without the emulsification benefit. Before draining pasta, scoop out 1-2 cups of pasta water and set aside. You’ll use it during finishing. This one step separates home cooking from restaurant results more than almost anything else. They Finish Pasta in the Sauce Home cooks drain pasta, plate it, and spoon sauce on top. Restaurants combine pasta and sauce in a pan over heat for the final minute of cooking. This finishing step is where restaurant pasta comes together. The pasta absorbs sauce flavor, the sauce reduces to proper consistency, everything becomes cohesive instead of separate components. The technique involves adding drained pasta to sauce in a large pan. Add pasta water by quarter-cups. Toss everything over medium-high heat for 1-2 minutes. During this minute, several things happen simultaneously. The pasta finishes cooking from al dente to perfect. The sauce thickens from the pasta starch. The pasta absorbs sauce flavor instead of just getting coated with it. The water and oil emulsify creating glossy cohesive sauce. Vigorous tossing during finishing distributes sauce evenly. The pasta gets coated completely rather than having sauce sitting on top of plain pasta underneath. Cheese added during finishing melts into the sauce creating creamy consistency. Cheese sprinkled on plated pasta just sits on top without integrating. This finishing process requires a pan large enough to toss pasta and sauce together. A 12-inch skillet works for one pound of pasta. Too-small pans make tossing impossible. The finishing step transforms separate ingredients into unified dish. Skip it and you’re eating pasta topped with sauce. Do it and you’re eating restaurant-quality pasta. They Use More Fat Than You Think Restaurant pasta glistens. Home pasta looks dry. The difference is fat quantity—butter, olive oil, or both. Fat carries flavor. Many pasta flavors are fat-soluble, only releasing when dissolved in fat. Minimal-fat pasta tastes muted even with good ingredients. Fat also creates glossy appearance characteristic of restaurant pasta. The shine

Why Your Kitchen Layout Makes Cooking Harder

You’ve got decent knives, good pans, working appliances. You follow recipes carefully. Yet cooking still feels awkward and inefficient. The problem might not be your skills or equipment. It might be your kitchen layout forcing you to walk too much, reach too far, and interrupt your workflow constantly. Most home kitchens weren’t designed by people who cook seriously. They were designed to look good in real estate photos and maximize cabinet storage. The result is layouts that create unnecessary steps, dangerous reaches, and workflow interruptions. Here’s what makes cooking harder in poorly-designed kitchens, why standard layouts ignore actual cooking needs, and what you can fix without renovating. The Refrigerator Is Too Far From Everything Walk into most kitchens and the refrigerator sits at one end while the stove sits at the opposite end. This creates exhausting back-and-forth trips every time you cook. Think about a typical cooking sequence. Retrieve vegetables from refrigerator, walk to sink to wash them, walk to cutting board to chop them, walk back to refrigerator for protein, walk to stove to cook. You’ve crossed the kitchen five times before cooking even starts. Professional kitchens cluster refrigeration near prep areas. Home cooks walk marathons because refrigerators get placed based on cabinet layouts and electrical outlet locations, not cooking workflow. Each unnecessary trip adds time and disrupts focus. You’re mentally tracking cooking progress while physically retrieving ingredients across the room. This divided attention leads to mistakes like overcooked onions or forgotten ingredients. The refrigerator-to-prep-to-stove triangle should be tight. Ideal distance totals 12-25 feet for all three legs combined. Many home kitchens exceed this by placing refrigerator far from primary work areas. If you can’t move your refrigerator, adapt your workflow. Stage all ingredients on counter near stove before starting to cook, eliminating mid-cooking refrigerator trips. The Sink Isn’t Where You Actually Prep Standard kitchen design puts the sink under a window for aesthetic reasons. This forces you to prep food wherever counter space exists, which often isn’t near the sink. Washing vegetables at the sink then carrying them across the kitchen to cutting board creates dripping mess. Chopping produces scraps that need disposal, requiring trips back to sink or trash. The sink should sit adjacent to your primary prep area, not isolated in its own zone. Professional cooks keep prep within arm’s reach of water and waste disposal. Many kitchens have ample counter space beside the stove but minimal space beside the sink. This backwards priority means you’re prepping far from water source then walking ingredients to heat source. Deep sinks create ergonomic problems too. Reaching into deep basin to wash large items strains your back. Shallow prep sinks or dual-basin configurations work better for actual cooking tasks. Consider adding a cutting board that fits over your sink if counter space beside sink is limited. This creates temporary prep area directly over water and waste disposal. Your Stove Sits in a Corner or Against a Wall Stoves placed in corners or tight against walls limit access and create dangerous reaching angles over active burners. Corner stoves force you to reach across multiple burners to access back burners. This puts your arm over open flames or hot pots every time you stir something cooking at the back. Wall-mounted stoves without adequate side clearance mean you’re reaching from one direction only. Professional ranges have approach space from multiple sides allowing safer access. The range hood’s positioning matters too. Low hoods help ventilation but reduce visibility and access to back burners. You’re cooking half-blind. Inadequate counter space flanking the stove creates nowhere to set hot pans when removing them from burners. You’re carrying hot cookware across the kitchen searching for landing space. Ideally, stoves have 15-18 inches of counter space on at least one side, preferably both sides. This provides pot-setting space and ingredient staging area within arm’s reach while cooking. If your stove lacks side counter space, add a rolling cart positioned beside it during cooking. This temporary surface provides the landing zone and staging area the permanent layout omits. Cabinet Storage Ignores Cooking Frequency Most kitchens dedicate prime real estate to items used rarely while forcing frequently-used items into inconvenient locations. Pots and pans belong near the stove. Yet many kitchens store them in cabinets across the room or in lower cabinets requiring bending and digging. Meanwhile, fancy serving platters used twice annually occupy prime locations. Spices should live near cooking area. Common kitchen layouts put spice storage far from stove, interrupting cooking flow every time you need to season food. Everyday dishes and glasses should be near dishwasher for easy unloading. Storing them far away adds steps to post-cooking cleanup. The “work triangle” concept (sink-stove-refrigerator) addresses appliance placement but ignores storage. You can have a perfect triangle yet still walk unnecessarily if your storage doesn’t support your workflow. Reorganize cabinets based on use frequency rather than matching dish sets or traditional storage conventions. Daily-use items get prime real-estate. Occasional-use items get less convenient storage. Upper cabinets within arm’s reach should hold items you grab while cooking: oils, vinegars, frequently-used spices, go-to pans. Lower cabinets work for items retrieved during prep: mixing bowls, baking sheets, storage containers. Counter Space Isn’t Continuous Broken counter runs interrupted by appliances or sink create workflow problems requiring shifting food and equipment between disconnected surfaces. You need continuous counter space for multi-step tasks. Kneading bread dough, rolling pasta, or arranging ingredients for complex recipes requires uninterrupted work surface. Many kitchens break counter runs with range placement, creating two separate prep zones instead of one continuous surface. This forces choosing which side to work on rather than spreading out naturally. Small counter segments between appliances become dead zones too small for actual work. That 8-inch gap beside the stove holds dish soap but can’t accommodate cutting board or mixing bowl. Island or peninsula additions help only if they’re positioned within the work triangle. Islands far from primary work area become overflow surfaces that don’t integrate into cooking workflow. Minimum useful counter space measures at

The Mise en Place Myth: Why Prep-Everything-First Doesn’t Always Work

Professional chefs prep everything before they start cooking. You’ve seen it on cooking shows—neat little bowls of chopped vegetables, measured spices, prepped proteins all lined up before heat touches pan. Then you try it at home. You spend 45 minutes chopping, measuring, and organizing. Your counter looks like a bowl store exploded. Half your ingredients sit getting warm or oxidizing while you finish prep. And somehow the actual cooking still feels rushed. The problem isn’t your knife skills. The problem is blindly applying restaurant kitchen logic to home cooking without understanding why restaurants work that way or how your kitchen differs. Here’s the truth about mise en place, when complete pre-prep actually helps versus hurts, and how to adapt the concept for home cooking efficiency. Restaurant Kitchens Aren’t Home Kitchens Restaurants prep everything first because they’re cooking the same dishes repeatedly under time pressure for paying customers who expect fast service. Restaurant line cooks work during service rush cooking identical orders back-to-back. Prepping once lets them execute quickly when orders arrive. They make the same pasta dish 50 times per night—complete prep makes sense. Restaurants have prep cooks whose entire job involves chopping vegetables and measuring ingredients. Line cooks receive already-prepped ingredients. The division of labor spreads prep burden across multiple people. Restaurant mise en place prevents mistakes during rush. When cooking under pressure with tickets piling up, having everything measured prevents forgetting ingredients or adding wrong amounts. Restaurants optimize for speed during service, not efficiency of total labor. They accept longer total prep time because it enables faster cooking when customers are waiting. Your home kitchen operates differently. You’re cooking one or two portions, not fifty. You’re the prep cook and line cook. You’re not racing against customer expectations. Different constraints require different strategies. Downtime During Cooking Is Wasted Prep Time Most recipes include natural waiting periods where you’re not actively doing anything—perfect opportunities for prep work without adding total cooking time. Onions take ten minutes to soften properly. You can chop garlic, measure spices, and prep other vegetables during those ten minutes instead of standing watching onions. Water takes time to boil. While waiting for pasta water, you can grate cheese, chop herbs, or prepare sauce ingredients rather than prepping everything before you start. Meat needs time to brown undisturbed. Flipping chicken too early prevents proper browning. Use that hands-off time productively prepping what comes next. Ovens need preheating time. While the oven reaches temperature, prep your ingredients instead of prepping before you turn the oven on. Rice cookers, slow cookers, and other set-it-and-forget-it equipment create prep windows. Use their cooking time for other preparation instead of front-loading everything. Sequential prep during natural downtime means your total time from starting to eating stays roughly the same, but you’re not creating artificial prep time before cooking begins. Some Ingredients Suffer From Early Prep Certain ingredients degrade when prepped too far in advance, making complete mise en place actively harmful to final dish quality. Cut avocados oxidize and brown within minutes. Prep avocado right before using, not at the start of your prep session. Sliced apples and pears discolor quickly. Chop them last to maintain appearance and prevent browning. Minced garlic loses pungency and develops harsh flavors when sitting. Chop garlic right before it hits the pan for best flavor. Fresh herbs wilt and blacken when chopped early. Prep herbs at the last minute to maintain color and aroma. Salad greens get soggy when dressed too early. Keep components separate until serving time. Some vegetables release moisture when salted and chopped. Prepping too early creates watery mess rather than neat mise. Complete advance prep forces you to compromise ingredient quality. Strategic last-minute prep maintains optimal flavor and texture. Partial Mise Works Better for Home Cooks Instead of all-or-nothing approach, prep strategically based on cooking sequence and ingredient needs. Prep long-cooking components first. If recipe starts with onions cooking for 15 minutes, chop those onions before anything else. Prep quick-cooking ingredients during the onion cooking time. Group ingredients by cooking stage. Prep everything for step one together. Prep step two ingredients while step one cooks. Prep step three during step two. Measure dry ingredients in advance. Spices, flour, and shelf-stable items can sit measured without quality loss. Prep these first if it helps organization. Keep proteins refrigerated until needed. Don’t let chicken or fish sit at room temperature for 30 minutes while you prep vegetables. Prep proteins right before cooking. Wash and dry produce in advance but don’t chop until needed. Clean vegetables store better than chopped vegetables. Do the washing early, the cutting strategically. This hybrid approach gives you organization benefits without quality compromises or artificial waiting time. Your Recipe Determines Your Strategy Different recipes require different prep approaches based on cooking intensity and timing demands. Stir-fries need complete mise. When cooking happens in three minutes over high heat, stopping mid-cooking to chop something means burned food. Everything must be prepped and ready. Braises allow progressive prep. When something simmers for two hours, you have abundant time for prep during cooking. Front-loading makes no sense. Baking often requires complete mise. When ratios and techniques are precise, having everything measured prevents mistakes. Measure before mixing. One-pan meals with sequential cooking work well with progressive prep. Brown meat, remove it, prep vegetables while pan cools slightly, continue cooking. The sequence builds in prep time. Recipes with many components benefit from partial advance prep. If making main dish plus two sides, prepping some elements early prevents last-minute chaos. Read your recipe before deciding prep strategy. Let the cooking method and timing dictate your approach. Mise en Place Is About Readiness, Not Bowls The core concept behind mise en place isn’t having pretty bowls, it’s being ready to execute without scrambling or forgetting things. Mental mise matters more than physical mise. Knowing what ingredients you need and what order they’re added prevents mistakes regardless of when you chop them. Reading the recipe through completely before starting provides mental organization. Understanding the flow prevents

One Pan Air Fryer Omelette: The Hands-Off Breakfast Hack

Stovetop omelettes demand attention. You’re standing there, watching heat, tilting the pan, timing the flip perfectly. Miss any step and you’ve got scrambled eggs instead. Air fryer omelettes solve this. Load your ingredients, set the temperature, walk away. The circulating heat cooks everything evenly without flipping, stirring, or hovering over a hot stove. Here’s how to make a fluffy, golden-edged omelette in your air fryer with minimal effort and zero flipping skills required. What You’ll Need Ingredients: Equipment: Step-by-Step Instructions Step 1: Prep Your Pan Grease your small air fryer-safe pan thoroughly with butter or oil. This step matters—properly greased pan means your omelette slides right out when done. Skipping this creates stuck eggs and frustration. Step 2: Layer Your Ingredients Add diced bell pepper, onions (or sprinkle onion powder if using), and chopped sausage directly into the greased pan. Spread ingredients evenly across the bottom creating foundation for your omelette. Step 3: Add the Eggs Crack 3 eggs directly into the pan over your ingredients. The eggs will settle around the vegetables and sausage creating cohesive omelette rather than separated layers. Step 4: Season and Top Season with garlic salt to taste. Top generously with shredded cheese. The cheese melts during cooking creating gooey center. Step 5: Air Fry Place the pan in your air fryer basket. Set temperature to 300°F and cook for 8-12 minutes. Start checking at 8 minutes—cooking time varies based on your specific air fryer model and pan size. The omelette is done when eggs are fully set (no liquid egg visible) and cheese is melted and slightly golden on top. Step 6: Remove and Serve Carefully remove the hot pan from the air fryer. Let cool for one minute, then slide the omelette onto a plate. The well-greased pan should release the omelette easily. Serve immediately while hot. Why Air Fryer Method Works Air fryers circulate hot air around food creating even cooking on all surfaces simultaneously. Unlike stovetop where heat comes only from bottom, air fryer cooks top and bottom at once. This eliminates the flip. Traditional omelettes require careful flipping to cook the top without overcooking the bottom. Air fryer handles both sides automatically. The enclosed cooking environment traps moisture creating fluffy texture. Open stovetop cooking allows moisture to escape. Air fryer keeps it in. Set-it-and-forget-it convenience means you can prep other breakfast items while omelette cooks. Make coffee, toast bread, set the table—no standing guard required. Customization Options This base recipe adapts to whatever ingredients you have available. Protein variations: Swap sausage for bacon, ham, chorizo, or skip meat entirely for vegetarian version. Cooked chicken or turkey works too. Vegetable options: Add mushrooms, spinach, tomatoes, jalapeños, or whatever vegetables need using. Pre-cook dense vegetables like broccoli or potatoes before adding. Cheese choices: Any melting cheese works. Try cheddar, mozzarella, pepper jack, feta, or goat cheese depending on your preference. Seasoning adjustments: Beyond garlic salt, try black pepper, paprika, Italian seasoning, or hot sauce mixed into eggs before cooking. Dairy additions: Whisk one tablespoon milk or cream into eggs before pouring for extra fluffy texture. Common Mistakes to Avoid Overfilling the pan causes spillover. Keep ingredients and eggs within three-quarters of pan depth. Omelette expands slightly during cooking. Skipping the greasing step creates stuck eggs. Even non-stick pans benefit from light butter or oil coating ensuring easy release. Opening air fryer repeatedly during cooking releases heat extending cook time. Check once at 8-minute mark, then again at 10 or 12 if needed. Setting temperature too high cooks eggs too fast creating rubbery texture. The 300°F temperature cooks gently creating tender results. Forgetting pan is hot causes burns. Use oven mitts removing pan from air fryer. Handle stays hot several minutes after cooking. Timing Adjustments Your specific air fryer model affects cooking time. Some run hotter than others requiring less time. Check at 8 minutes for first attempt. If eggs still look wet or liquid, continue cooking checking every 2 minutes until set. Thicker omelettes (more ingredients, larger pan) need closer to 12 minutes. Thinner omelettes (fewer ingredients, shallow pan) finish around 8-9 minutes. Room temperature eggs cook faster than cold eggs straight from refrigerator. Add minute or two if using cold eggs. Watch the Video Tutorial Serving Suggestions Serve this omelette with toast, fresh fruit, or breakfast potatoes for complete meal. Add salsa, sour cream, or hot sauce on top for extra flavor. Pair with coffee or orange juice for classic breakfast combination. Pack leftovers for grab-and-go breakfast. Omelette reheats well in microwave for 30-45 seconds. Air fryer omelettes deliver restaurant-quality results without the technique requirement of stovetop versions. Load ingredients, set timer, walk away. Perfect fluffy omelette every time with zero flipping stress and minimal cleanup. Your air fryer handles the hard part while you handle everything else on your breakfast to-do list.

The Cooking Skills No One Teaches You (But Everyone Assumes You Know)

Recipe instructions operate on the assumption that cooks understand certain fundamental concepts and techniques that often never get explicitly taught or explained. This creates a strange gap where recipes tell you to “sauté until fragrant” or “cook until done” without explaining what fragrant smells like, how you know when something is done, or what you’re actually trying to accomplish at each step. These assumed skills—the things experienced cooks do automatically without conscious thought—rarely appear in recipes because they seem too basic to mention, yet their absence leaves many home cooks guessing and second-guessing throughout the cooking process. The result is uncertainty and inconsistent results not because recipes are being followed incorrectly but because the unstated knowledge between the written steps never got communicated. Understanding these assumed skills bridges the gap between following recipes mechanically and actually cooking with comprehension. When you know what each instruction means in practical terms and what you’re looking for at each stage, cooking becomes less mysterious and results become more reliable. How to Actually Preheat a Pan Recipes say “heat a pan over medium heat” and immediately proceed to the next step as if pan temperature is instantly achieved. The unstated reality is that proper preheating takes time and matters significantly to results. Pans need several minutes to reach temperature evenly. A thin pan might heat in 2-3 minutes while a heavy pan could need 5-7 minutes depending on the material and thickness. Putting food in too early means cooking in a pan that’s still heating up, creating uneven results. Testing pan temperature prevents adding food too soon. For sautéing, water droplets should sizzle and evaporate quickly but not instantly vaporize. For searing, a water droplet should ball up and roll around the pan. These simple tests tell you when the pan is actually ready rather than guessing. Burner size matching pan size affects heating efficiency. A large pan on a small burner heats unevenly with a hot center and cool edges. Matching pan size to burner ensures even heating across the cooking surface. The material matters because stainless steel, cast iron, nonstick, and carbon steel all heat differently and hold heat differently. Cast iron takes longest to heat but holds temperature best. Nonstick heats quickly but doesn’t tolerate high temperatures. Understanding your pan helps you preheat appropriately. Visual cues like shimmer in oil indicate the pan has reached cooking temperature. Oil should flow smoothly and shimmer slightly when the pan is properly heated for most cooking tasks. Nobody tells you this explicitly, but experienced cooks know to wait for the pan rather than rushing to add ingredients. Those few minutes of proper preheating separate good results from disappointing ones. What “Season to Taste” Really Means Recipes end with “season to taste” assuming you understand how to evaluate seasoning and what you’re adjusting for, but this is actually a complex skill involving multiple elements. Salt brightens flavors and balances sweetness but also makes everything taste more like itself. Under-salted food tastes flat and one-dimensional even if all other seasonings are present. Proper salting creates vibrancy and dimension in flavor. Tasting multiple times throughout cooking shows you how flavors develop and concentrate. What tastes properly seasoned at the beginning might taste bland after reducing. Seasoning isn’t one-time but ongoing as liquids evaporate and flavors concentrate. Acid balancing with lemon juice, vinegar, or wine brightens dishes in ways salt alone cannot. When food tastes heavy or dull despite adequate salt, acid is often what’s missing. A squeeze of lemon or splash of vinegar can transform a dish. Adjusting gradually with small additions prevents over-seasoning. Add a small amount, stir, wait a moment, then taste again. You can always add more but cannot remove excess seasoning easily. Temperature affects taste perception—food needs more seasoning when served hot or cold compared to warm. Soup that tastes perfectly seasoned warm will taste bland when served hot. Season slightly more aggressively for foods served very hot or cold. Tasting from a spoon you’ve used to stir provides false feedback because residual flavors on the spoon affect what you taste. Use a clean spoon for each taste test to get accurate seasoning assessment. This “simple” final instruction actually requires understanding salt, acid, balance, and how flavors develop through cooking—none of which the recipe explains. How to Know When Food Is Done “Cook until done” appears in countless recipes without explaining what done looks like, feels like, or how you determine it for different foods. Visual cues vary by food type. Fish becomes opaque and flakes easily. Chicken releases clear juices rather than pink. Vegetables change from raw color to vibrant color when properly cooked. Learning these visual indicators for different foods tells you when cooking is complete. Texture changes signal doneness in ways recipes rarely describe. Properly cooked pasta has slight resistance when bitten. Vegetables should have some tooth while being cooked through. Meat firms up as it cooks with specific texture changes at different temperatures. Internal temperature provides objective measurement removing guesswork. Chicken is safe at 165°F but ideal at 160°F with carryover. Medium-rare steak is 130-135°F. Bread is done when internal temperature reaches 190-200°F. Temperature removes uncertainty. Carryover cooking continues after removing food from heat. Meat temperature rises 5-10°F after leaving the heat source. Removing food slightly before target temperature accounts for carryover and prevents overcooking. Resting allows juices to redistribute and cooking to finish gently. Meat needs resting time equal to roughly half the cooking time. The rest period isn’t wasted time but essential to final results. Timing provides rough guidance but shouldn’t override visual and tactile cues. Every stove differs, every pan differs, every piece of meat differs. Use times as estimates but rely on actual doneness indicators rather than blindly following minutes. Nobody explicitly teaches these evaluation methods, but knowing when food is actually done versus trusting recipe times alone dramatically improves cooking results. What Different Heat Levels Actually Mean “Medium heat” or “medium-high heat” assumes shared understanding of what these terms mean, but heat levels

Why Expensive Ingredients Don’t Make You a Better Cook

The assumption that premium ingredients automatically produce superior results pervades cooking culture, creating the belief that buying better costs more and that budget constraints prevent good cooking. This narrative benefits specialty food retailers and creates aspirational shopping habits, but it misrepresents how cooking actually works and what separates good results from mediocre ones. Technique, timing, and understanding what you’re doing matter far more than ingredient price points for most home cooking situations. Expensive ingredients can enhance dishes when used appropriately, but they cannot compensate for poor execution and often get wasted when cooks don’t understand how to handle them properly. The gap between ingredient cost and cooking results is larger than food marketing suggests. A skilled cook produces better meals with standard ingredients than an inexperienced cook produces with premium ones. Understanding this distinction helps you invest cooking energy where it actually improves results rather than assuming that spending more money solves cooking challenges. Technique Trumps Ingredients in Most Situations Proper cooking methods transform ordinary ingredients into good food while poor technique ruins expensive ingredients just as effectively as cheap ones. Heat control matters more than ingredient quality for most cooking tasks. Knowing when to use high heat versus low heat, understanding how pans retain and distribute heat, recognizing when food is properly seared versus burned—these skills affect results regardless of what you’re cooking. Seasoning appropriately with salt makes more difference to flavor than buying premium ingredients. Under-seasoned expensive steak tastes worse than properly salted standard steak. Salt enhances and balances flavors in everything you cook, making it the most impactful flavor element in your kitchen. Timing doneness correctly prevents ruining good ingredients. Overcooked expensive fish becomes dry and disappointing just like overcooked cheap fish. Knowing when food is done—through temperature, texture, or visual cues—preserves quality regardless of what you paid for ingredients. Understanding cooking processes like browning, deglazing, reducing, and emulsifying creates flavor through technique. These methods develop complexity from basic ingredients without requiring expensive specialty items. Knife skills affect cooking results by ensuring even cooking and proper texture. Uniformly cut vegetables cook evenly while haphazardly chopped ones create texture inconsistencies and uneven doneness regardless of vegetable quality. Building flavors through layering aromatics, acids, fats, and seasonings creates depth that expensive single ingredients cannot provide. Knowing how to develop flavor through cooking process matters more than starting with premium ingredients. The cook who understands these fundamentals produces better food with ordinary ingredients than someone who buys expensive items but doesn’t know how to handle them properly. Expensive Ingredients Often Get Wasted Through Misuse Premium ingredients require appropriate handling and preparation that inexperienced cooks often don’t provide, resulting in wasted money and disappointing results. High-end proteins get overcooked constantly because people don’t understand doneness temperatures or resting periods. A $40 steak cooked to 180°F internal temperature tastes worse than a $12 steak cooked to 135°F and rested properly. Delicate ingredients like fresh herbs, specialty greens, or premium produce deteriorate quickly when stored improperly. Buying expensive ingredients without knowing how to store them means watching them spoil before you use them. Subtle flavor differences in premium ingredients disappear when overwhelmed by heavy sauces or aggressive seasonings. Using truffle oil on heavily seasoned pasta wastes the truffle because you can’t taste it through everything else. Expensive cuts of meat get treated like lesser cuts requiring long cooking times. Cooking tender premium cuts low and slow turns them dry and tough when they should be cooked quickly at high heat. Specialty ingredients get used in inappropriate applications where their unique qualities don’t matter. Using expensive olive oil for high-heat cooking destroys its flavor compounds—you might as well use regular oil. Premium ingredients often shine best with minimal preparation. Buying them then cooking them elaborately can mask rather than highlight what you paid for. The expensive ingredient needed simple treatment, not complex preparation. The waste comes from not understanding how ingredients work rather than from the ingredients themselves being problematic. Standard Ingredients in Good Recipes Outperform Premium Ingredients in Bad Ones Recipe quality and cooking method matter more than ingredient cost for determining final results. Well-developed recipes using ordinary ingredients produce consistent good results. A tested recipe with proper ratios, cooking times, and technique guidance succeeds with standard ingredients. Poor recipes fail regardless of ingredient quality. Using expensive butter in a bad cake recipe still produces bad cake. The recipe’s structural problems—wrong ratios, incorrect technique, poor method—create failure that ingredients cannot fix. Recipe testing and development creates reliability. Recipes from sources that actually test their formulas work better than recipes thrown together without verification, regardless of suggested ingredients. Understanding why recipes work allows substitution of standard ingredients for premium ones. When you know the recipe’s underlying logic, you can adapt ingredient choices while maintaining good results. Traditional recipes evolved using available affordable ingredients. Classic dishes became classics using whatever people had access to, not specialty items. These recipes work because they’re fundamentally sound, not because they require expensive ingredients. Home cooks often achieve better results following reliable recipes with basic ingredients than attempting ambitious recipes with premium ingredients they don’t know how to handle. The recipe quality determines the outcome more than the ingredient quality in most home cooking situations. Ingredient Quality Matters Most Where Ingredients Aren’t Transformed The situations where premium ingredients genuinely improve results involve minimal cooking that showcases the ingredient rather than transforming it. Fresh raw applications like salads, caprese, or crudo highlight ingredient quality because there’s no cooking to develop flavor. When ingredients are eaten raw or barely cooked, their inherent quality matters significantly. Simple preparations with few ingredients put the spotlight on each component. Pasta with garlic and olive oil showcases the olive oil quality. Margherita pizza highlights the tomato and mozzarella. These simple dishes benefit from better ingredients because there’s nowhere to hide. Finishing elements added at the end taste exactly like themselves without transformation. The final drizzle of olive oil, the shaving of Parmesan, the squeeze of lemon—these additions aren’t cooked, so their quality is directly

Cooking Techniques for Different Legumes: A Comprehensive Guide

Legumes are a versatile and nutritious staple in many diets around the world. They come in various types, including beans, lentils, peas, and chickpeas, each requiring unique cooking methods to achieve the best results. Understanding the different techniques for preparing legumes can enhance their texture, flavor, and nutritional value. Here’s a comprehensive guide to cooking various types of legumes. Beans Types: Black beans, kidney beans, pinto beans, navy beans, chickpeas (garbanzo beans), etc. Cooking Techniques: Lentils Types: Green lentils, red lentils, brown lentils, black lentils (Beluga lentils), etc. Cooking Techniques: Peas Types: Green peas, split peas, chickpeas, black-eyed peas, etc. Cooking Techniques: Cooking Tips for All Legumes Mastering the different cooking techniques for legumes ensures you get the most out of their texture, flavor, and nutritional benefits. Whether you’re preparing beans for a hearty stew, lentils for a nutritious salad, or peas for a quick side dish, understanding the right methods can elevate your culinary creations. Experiment with these techniques and enjoy the versatility and health benefits that legumes bring to your table.