Your Kitchen Is Too Clean (And Why That Slows You Down)
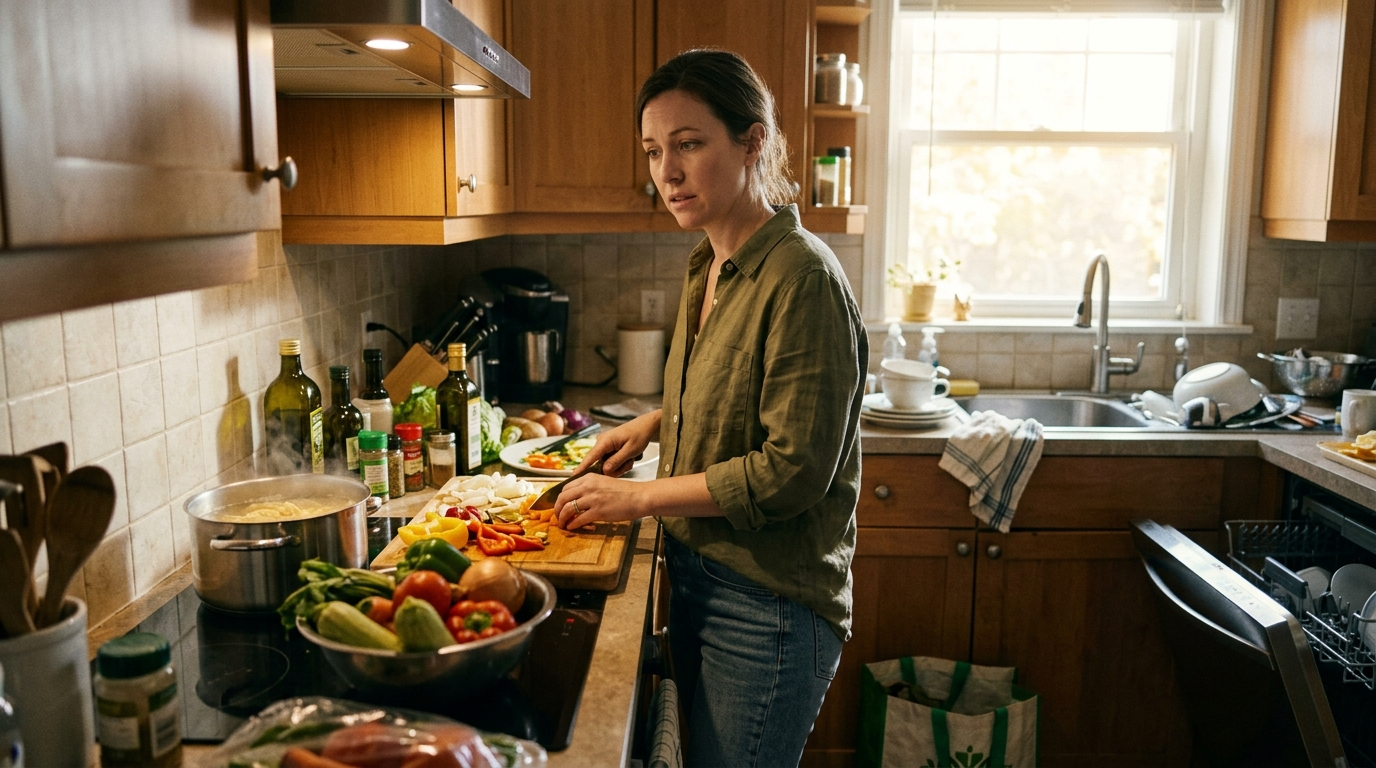
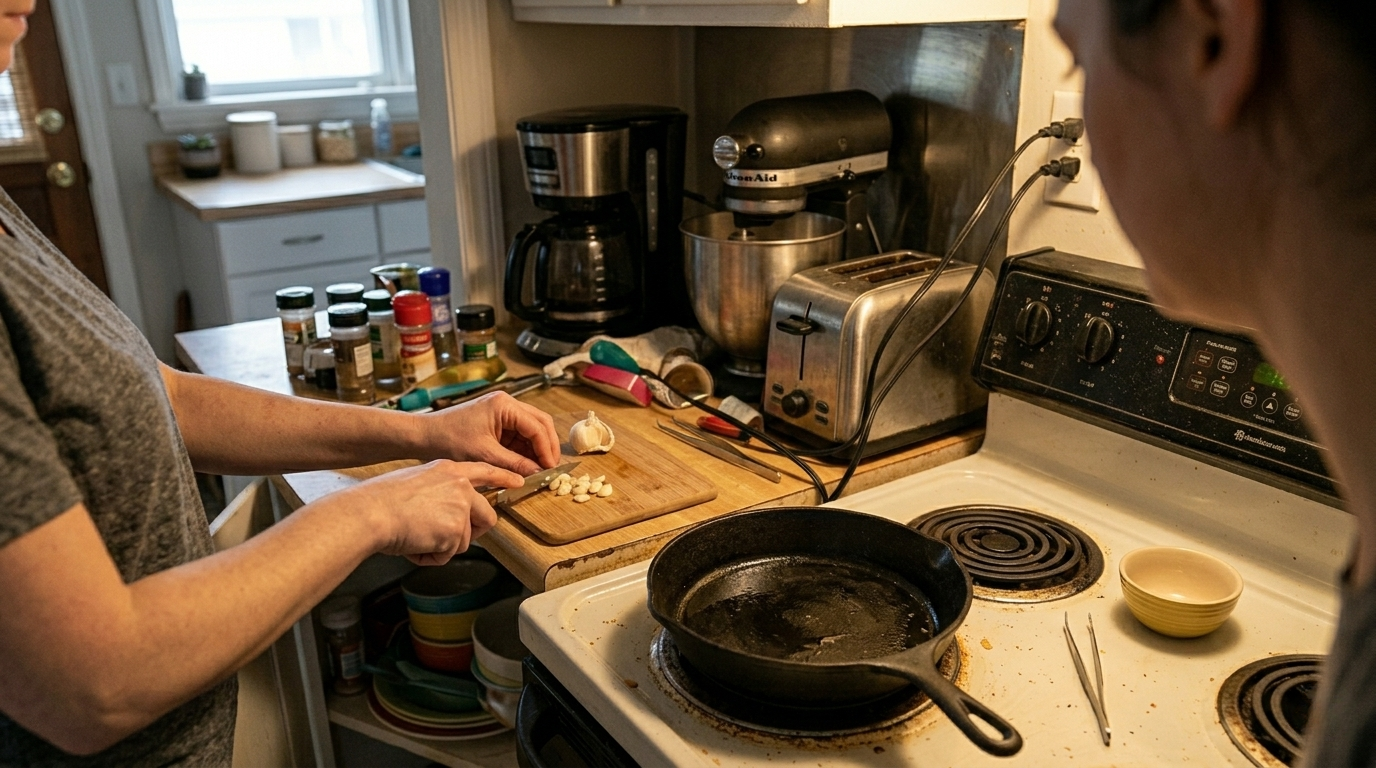
Spotless kitchens look beautiful in magazines. They’re also slower to cook in than kitchens with some working mess. The Instagram-perfect kitchen with empty counters, hidden appliances, and no visible ingredients creates friction at every cooking step. You’re constantly retrieving items from storage, clearing space to work, and putting things away mid-process to maintain the aesthetic. Working kitchens have visible tools, accessible ingredients, and surfaces that tolerate temporary mess during active cooking. This doesn’t mean filth or neglect. It means distinguishing between cooking mess and actual dirt, and understanding which cleanliness standards help cooking versus which ones slow it down. Here’s why excessive tidiness creates inefficiency, which mess is actually productive, and how to maintain a kitchen that’s clean enough without being so pristine it’s dysfunctional. Empty Counters Force Constant Retrieval The design aesthetic of clear counters looks stunning. It’s terrible for cooking efficiency. Countertop appliances stored in cabinets require retrieval before each use. Pulling out the blender, finding the lid, setting it up, and returning it afterward adds five minutes to every smoothie. Multiply this across multiple appliances and meals. Frequently-used items deserve counter space. Coffee maker, toaster, knife block, cutting board, and oil bottle sitting out eliminate dozens of retrieve-and-return cycles weekly. The aesthetic argument prioritizes looking at the kitchen over using the kitchen. If you cook daily, optimize for function over appearance. Guests spend minutes looking at your kitchen. You spend hours working in it. Cabinet storage for everyday items creates decision fatigue. Where did I put the pepper grinder? Which drawer has the spatulas? Visible storage eliminates these micro-decisions dozens of times daily. Different items have different storage thresholds. Stand mixer used weekly deserves counter space. Waffle iron used monthly belongs in the cabinet. The distinction is use frequency, not appearance. Empty counters serve people who cook rarely and photograph often. Working cooks need accessible tools. Cleaning While Cooking Interrupts Workflow The advice to “clean as you go” sounds efficient. It’s actually disruptive to cooking flow. Stopping mid-recipe to wash a bowl breaks concentration and momentum. You’re tracking multiple timings, temperatures, and tasks. Interrupting this mental juggling for cleanup fragments attention. Cooking requires sustained focus through multiple overlapping tasks. Pausing to wipe counters or wash dishes interrupts the cooking rhythm creating missed timings and forgotten steps. Better approach: contain mess during cooking, clean after eating. Stack used bowls in the sink. Wipe major spills that create hazards. Leave everything else until food is plated and served. The clean-as-you-go mandate assumes cooking is linear with natural pauses. Real cooking involves simultaneous management of multiple components. Cleaning interrupts this parallelism. Exception: clean during genuine downtime. While something simmers for twenty minutes, washing a few dishes makes sense. But stopping pasta-making to clean the counter actively harms cooking flow. Your kitchen can tolerate some mess for the hour you’re actively cooking. Prioritize cooking well over maintaining pristine surfaces during the process. Visible Spills Aren’t Dirty Tomato sauce splattered on the stovetop during cooking isn’t dirt. It’s evidence of cooking in progress. The obsession with immediately wiping every drip creates constant interruption. You’re stirring sauce, some splatters, you stop stirring to wipe it. Meanwhile the sauce burns because you’re cleaning instead of cooking. Splatter during cooking is temporary mess, not permanent filth. It wipes easily after cooking finishes. Stopping cooking to clean cooking mess is backwards priority. Distinguish between contamination and clutter. Raw chicken juice needs immediate cleanup preventing cross-contamination. Splattered marinara just needs wiping eventually. Cooking generates temporary mess. This is normal and acceptable. The mess serves as workspace evidence, not failure to maintain standards. Clean the splatter after the meal. While food rests or during post-dinner cleanup, wipe everything down. The splatter isn’t getting worse sitting there for thirty minutes while you finish cooking. Stop interrupting cooking to maintain aesthetics. The kitchen can look messy while you cook. That’s what kitchens do. Dish Washing Mid-Recipe Breaks Focus Recipes often instruct “wash bowl and reuse.” This sounds efficient but fragments the cooking process. Stopping to wash a bowl means leaving the stove, scrubbing the dish, drying it, and returning to cooking. This takes three to five minutes. During those minutes, something on the stove needs attention you’re not providing. Using extra bowls is more efficient than stopping to wash. Yes, you’ll wash more dishes later. But washing five bowls consecutively takes less total time than washing one bowl five separate times with interruptions between. The extra dish argument prioritizes minimal dishwashing over efficient cooking. This backwards priority sacrifices cooking quality to save one bowl. Most kitchens own enough bowls and utensils for one meal without washing mid-recipe. If you’re stopping to wash because you’ve run out of bowls, you need more bowls, not better cleaning habits. Cook first, clean after. Don’t let cleaning interrupt cooking. The dishes wait. The food on the stove doesn’t. Ingredient Containers Stay Out During Cooking Putting ingredients away between uses adds steps without benefit during active cooking. You use olive oil five times during one meal. Retrieving it from the cabinet and returning it five times adds ten trips. Leaving it on the counter during cooking eliminates unnecessary movement. The container sitting out for thirty minutes doesn’t suffer. Oil doesn’t degrade from brief counter exposure. Neither do spices, flour, or other cooking ingredients. After cooking finishes, return everything at once. One trip putting five items away beats five trips putting one item away repeatedly. This applies to tools too. The spatula used for three different cooking steps stays out until the meal completes. Washing and storing between each use is pointless efficiency theater. Kitchen efficiency favors batch actions over constant tidying. Retrieve everything needed at the start, use as needed, return everything at the end. Stop the retrieve-use-return-retrieve cycle mid-cooking. Cutting Board Cleaning Between Tasks Is Excessive Food safety guidelines create excessive cutting board washing requirements for home cooking. The warning against cross-contamination leads to washing the board between every ingredient. This creates constant interruption and generates unnecessary water and soap use. Reasonable approach: